Harvester AutoScale
This guide will walk you through configuring autoscaling for Kasm Workspaces on Harvester. Autoscaling in Kasm Workspaces automatically provisions and destroys agents based on user demand, ensuring optimized resource utilization and cost efficiency.
Prerequisites
- Access to Harvester: Ensure you have admin access to your Harvester environment
- Kasm Workspaces Installed: A basic setup of Kasm Workspaces must already exist
- Understand Key Concepts:
- Zones: Logical groupings of Kasm services for geographical or organizational segmentation
- Pools: Logical groupings of Kasm Docker Agents and Server Pools for load balancing
- Plan Your Configuration:
- Understand your deployment zone requirements
- Configure your Harvester environment:
- Create a namespace for your autoscale deployment
- Create a VM network in the new namespace for your agents to use and attach it to a cluster network
- Create template images in the new namespace for AutoScale to use
Setup your Harvester Environment
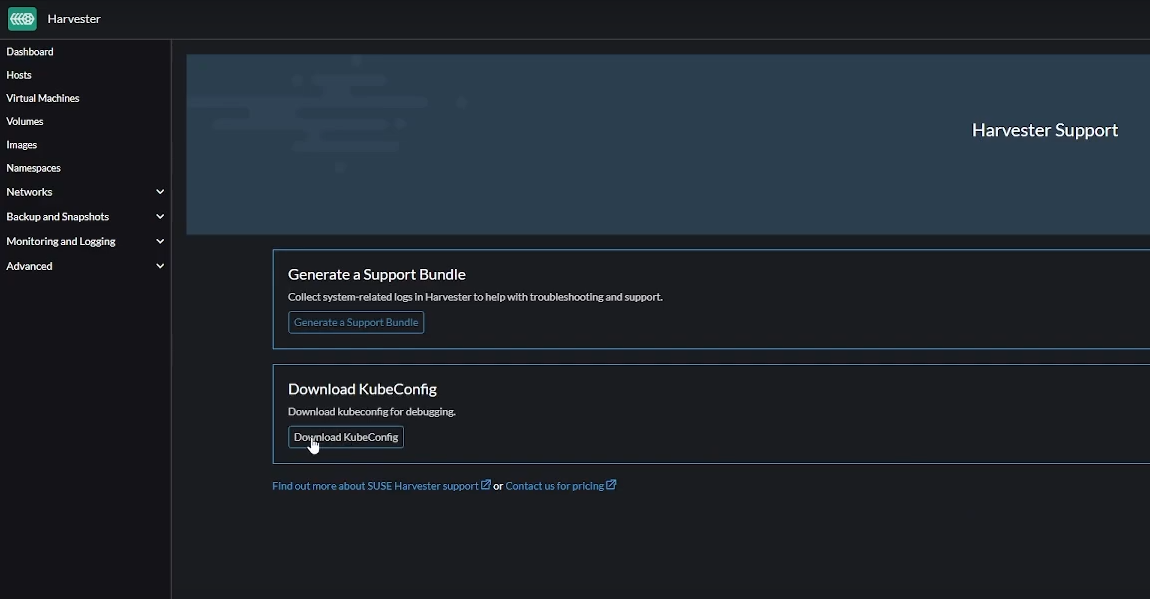
Download KubeConfig
The KubeConfig YAML file can be downloaded from the Support link on the Harvester dashboard and contains key information you will need to configure autoscaling on Kasm.
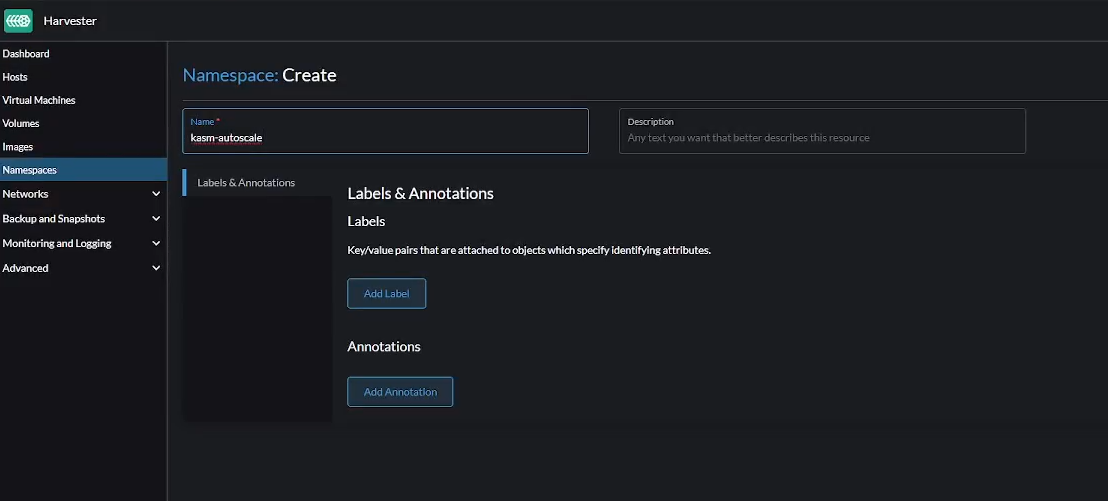
Create Namespace
Go to "Namespaces" -> "Create" to create a new namespace in Harvester. Give it a name like kasm-autoscale
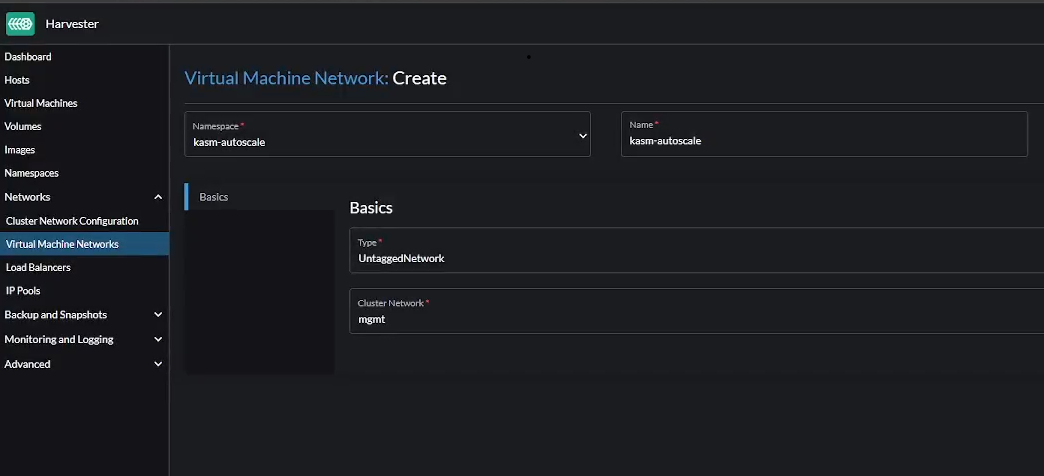
Create Network
Go to "Virtual Machine Networks" -> "Create" to create a new VM network.
- Make sure you select the right namespace
- Give the network a name like
kasm-autoscale - Choose the Type as
Untagged Network - Choose the
mgmtCluster Network
Create VM template
Create the appropriate VM template based on whether you are implementing Server AutoScaling or Docker AutoScaling on Proxmox.
- For Windows AutoScaling, follow the Windows Templating Guide
- For Docker Agent AutoScaling, follow the Linux Templating Guide
Linux Templating
Creating a Linux template in Harvester is pretty straightforward.
- Go to "Images" -> "Create"
- Choose the correct namespace that you created earlier.
- Choose a name for your image (e.g jammy-server-cloudimg-amd64.img). This name needs to be fed to Kasm later.
- Select "URL". You can also choose "File" if you want to upload an ISO file instead. You can either install your Linux distro (make sure you choose from the supported list of operating systems) from scratch with an installation ISO or use a pre-configured ISO like a cloud image. In this demo, we'll use the later.
- Enter the URL from where you want Harvester to download the image (e.g https://cloud-images.ubuntu.com/jammy/current/jammy-server-cloudimg-amd64.img)
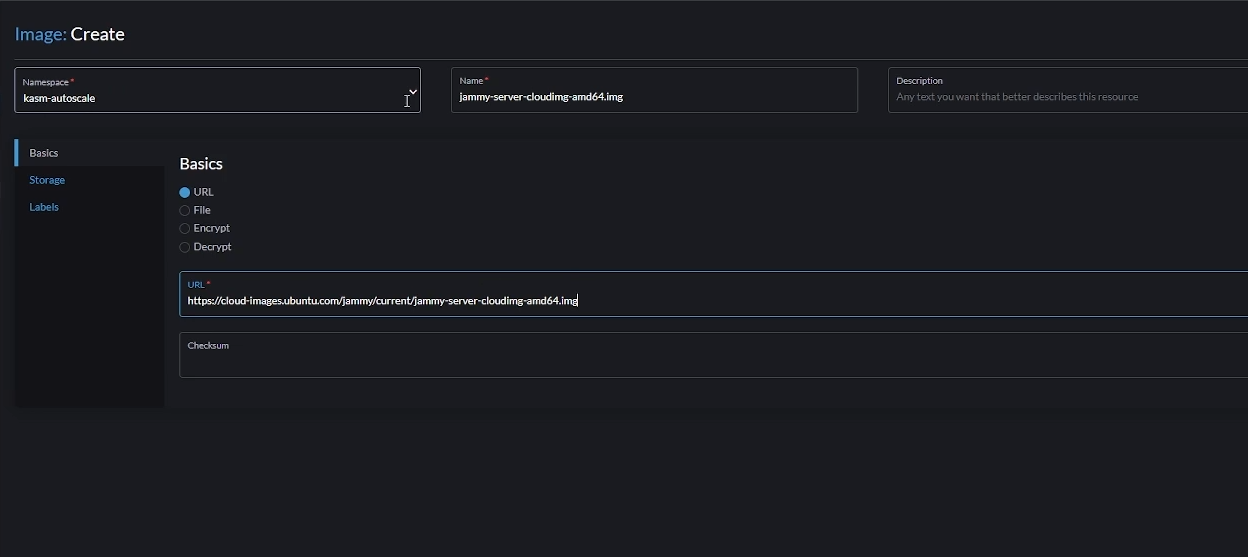
- Click "Create". This will download the VM to Harvester from the provided URL
- Optionally, you can pre-load workspace images on your autoscaled agent VMs so that workspaces launch instantly after provisioning, without waiting for Kasm to pull the necessary Docker images. Read the Pre-load Workspace Images on Agents guide to learn more
- You also need to install the QEMU Guest Agent tools on the agent. Read the section titled "Updated Startup Scripts" on the Pools and Autoscale page for more information; in the provided script, the lines that run the qemu installation will need to be uncommented
Windows Templating
For an overview of Windows templating and its prerequisites, refer to the Windows AutoScale Template Creation Guide.
Creating a Windows Template involves additional steps and is not as straightforward as Linux templating.
- Go to "Images" -> "Create"
- Choose the correct namespace that you created earlier.
- Choose a name for your image (e.g windows-server-2022)
- Choose "File" and click "Upload File" to upload the Windows ISO file. As an example, you can download Windows Server 2022 from here. You can also choose "URL" and input the URL from where the ISO file can be downloaded.
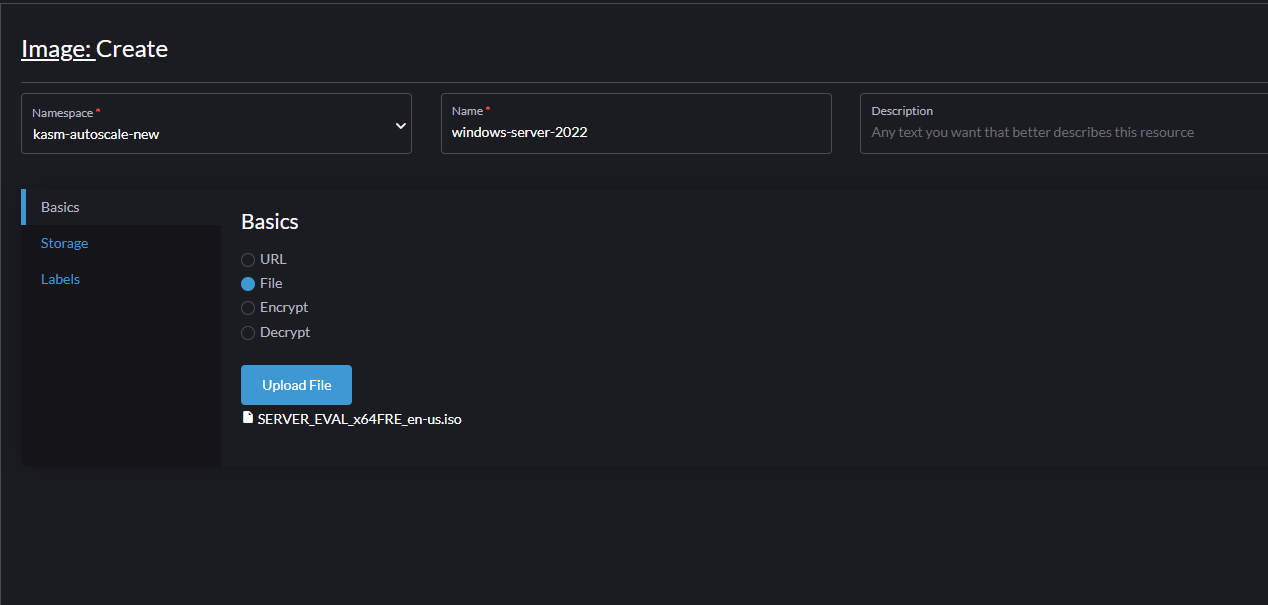
- Wait for the ISO file to be uploaded.
- Similarly, you also need to upload the VirtIO tools image. Go to "Images" -> "Create"
- Select "File" -> "Upload File" to upload the ISO file. You can download the VirtIO files from here
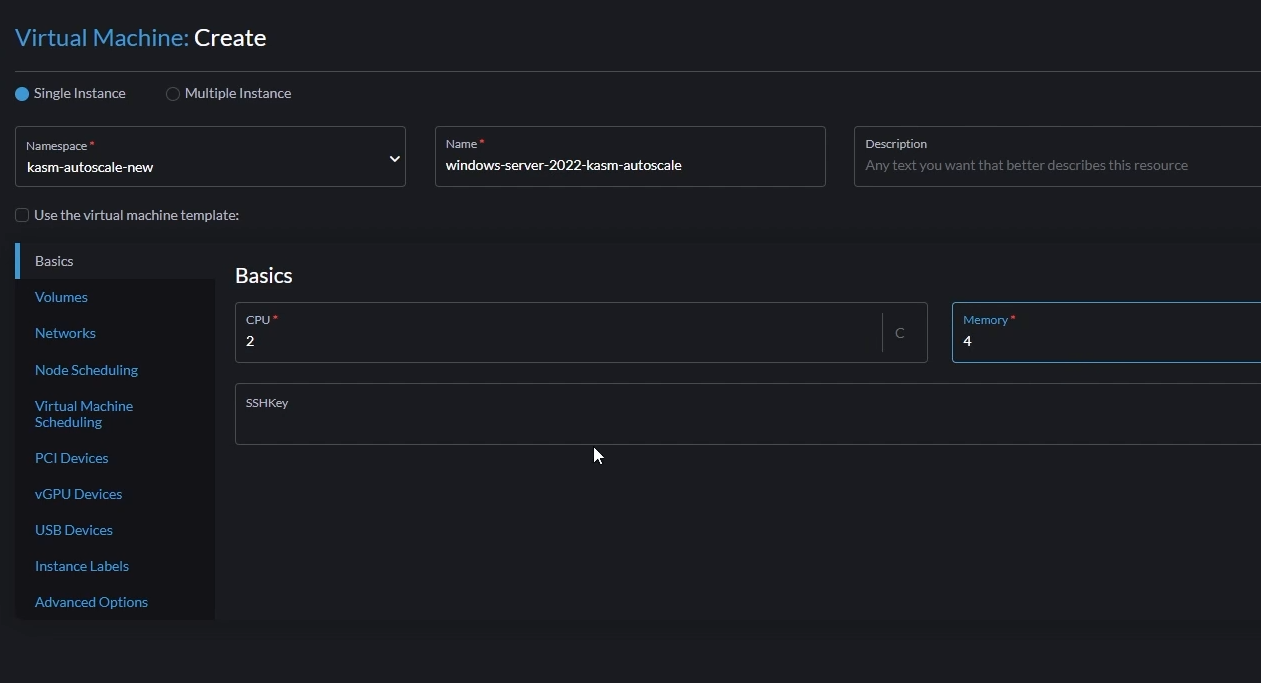
- Go to "Virtual Machines" -> "Create"
- Select the correct namespace
- Give a name for your VM (e.g windows-server-2022-kasm-autoscale)
- Set the number of cores and memory.
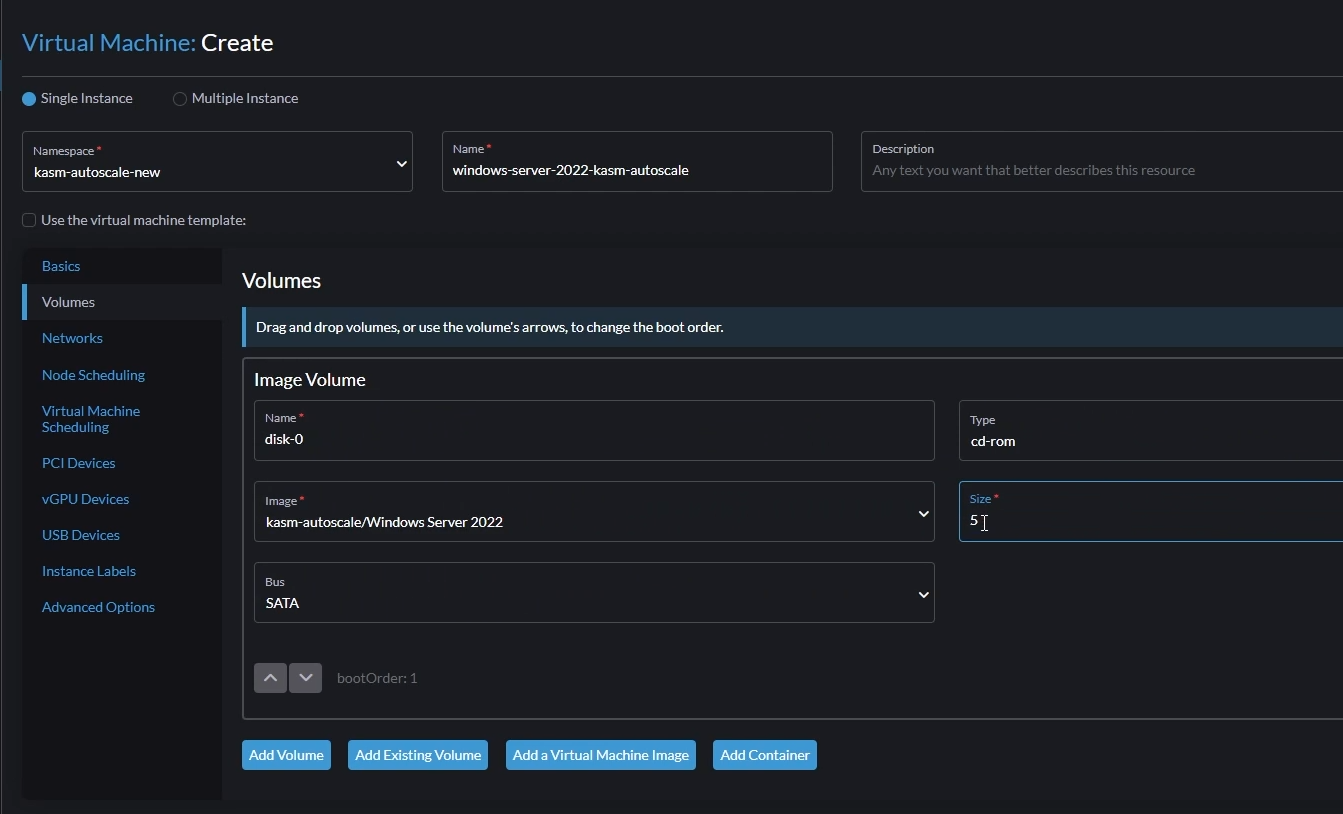
- Go to the "Volumes" tab and add the following volumes:
- Volume 1
- In the default volume, Set "Image" to the Windows ISO you uploaded earlier
- Set "Type" to
cd-rom - Set "Bus" to
SATA
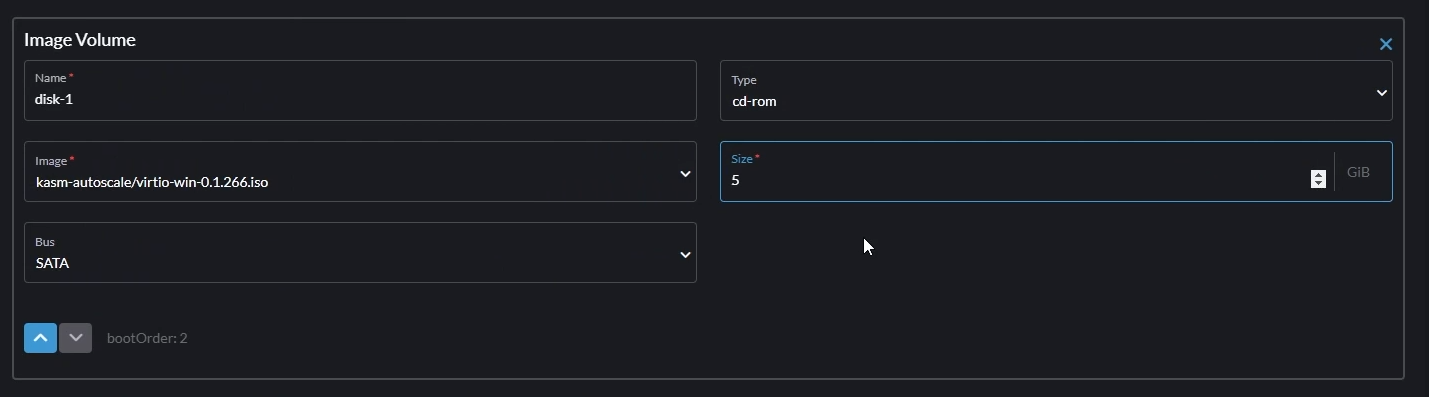
- Volume 1
- Volume 2
- Click "Add a Virtual Machine Image"
- Set the "Image" to the VirtIO ISO you uploaded earlier
- Set "Type" to
cd-rom - Set "Bus" to
SATA
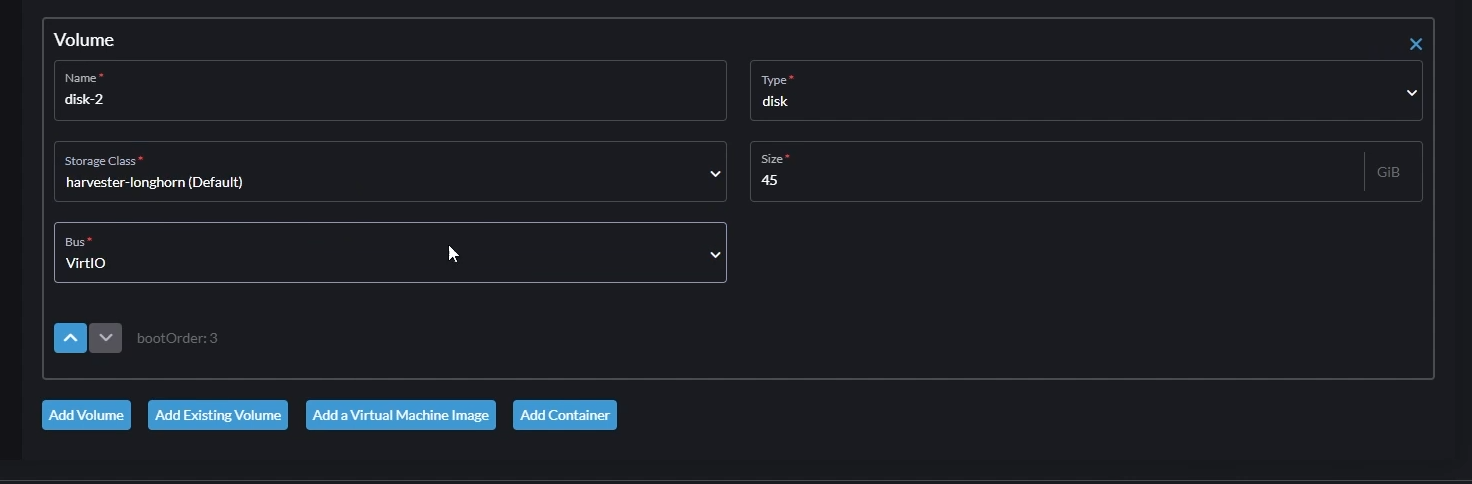
- Volume 3
- Click "Add Volume"
- Set "Type" to
disk - Set "Storage Class" to
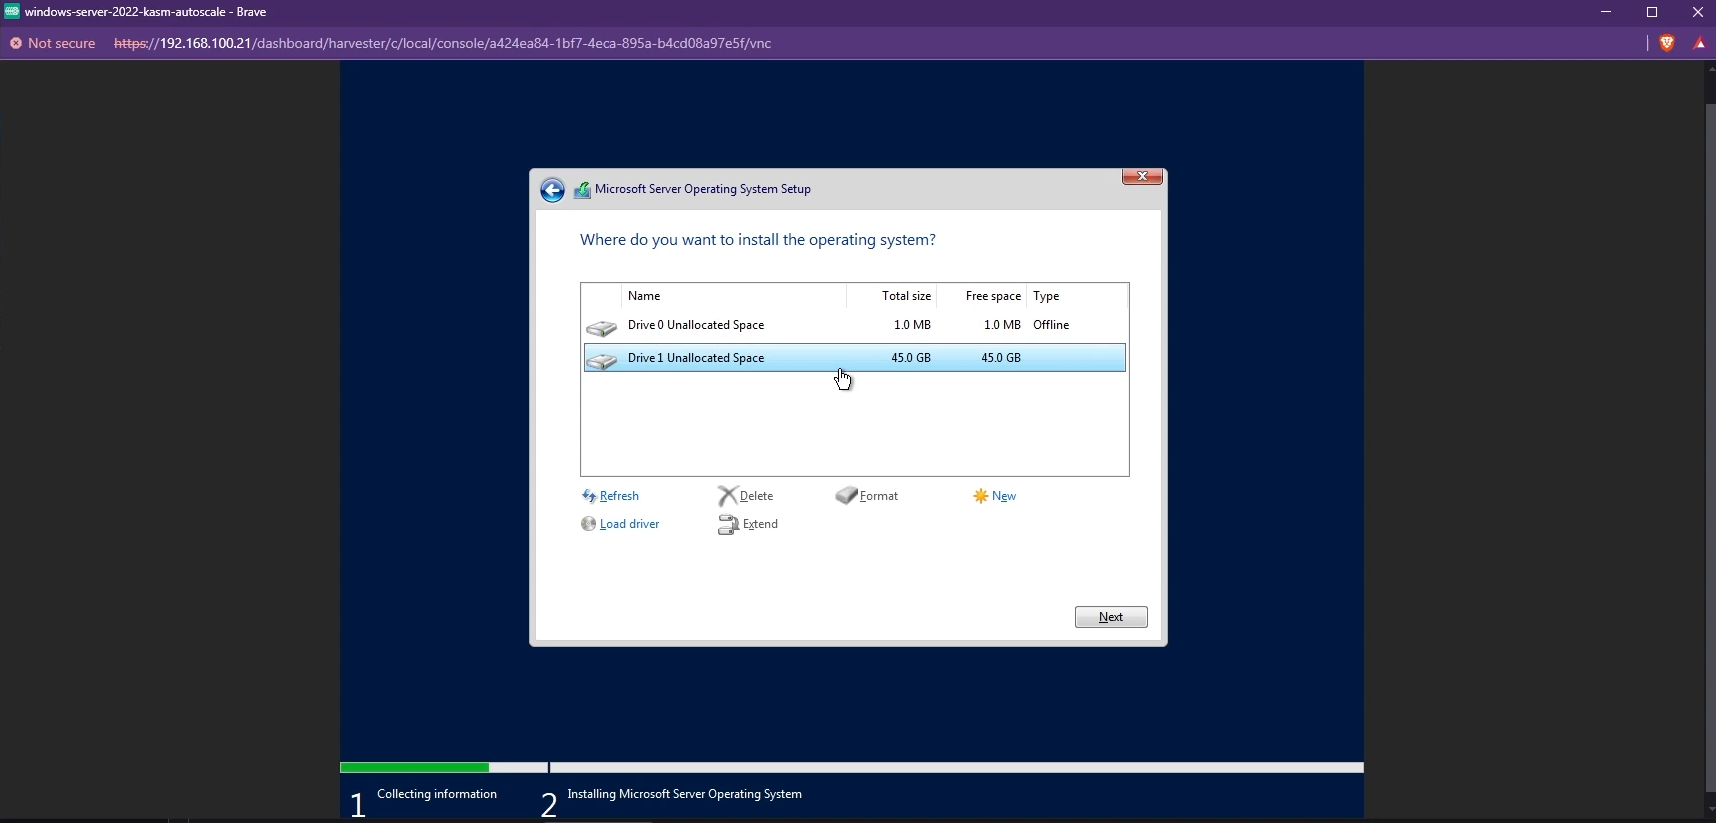
harvester-longhorn (Default) - Set Size to anything more than 40GB. This will be your Windows boot disk.
- Set "Bus" to
VirtIO
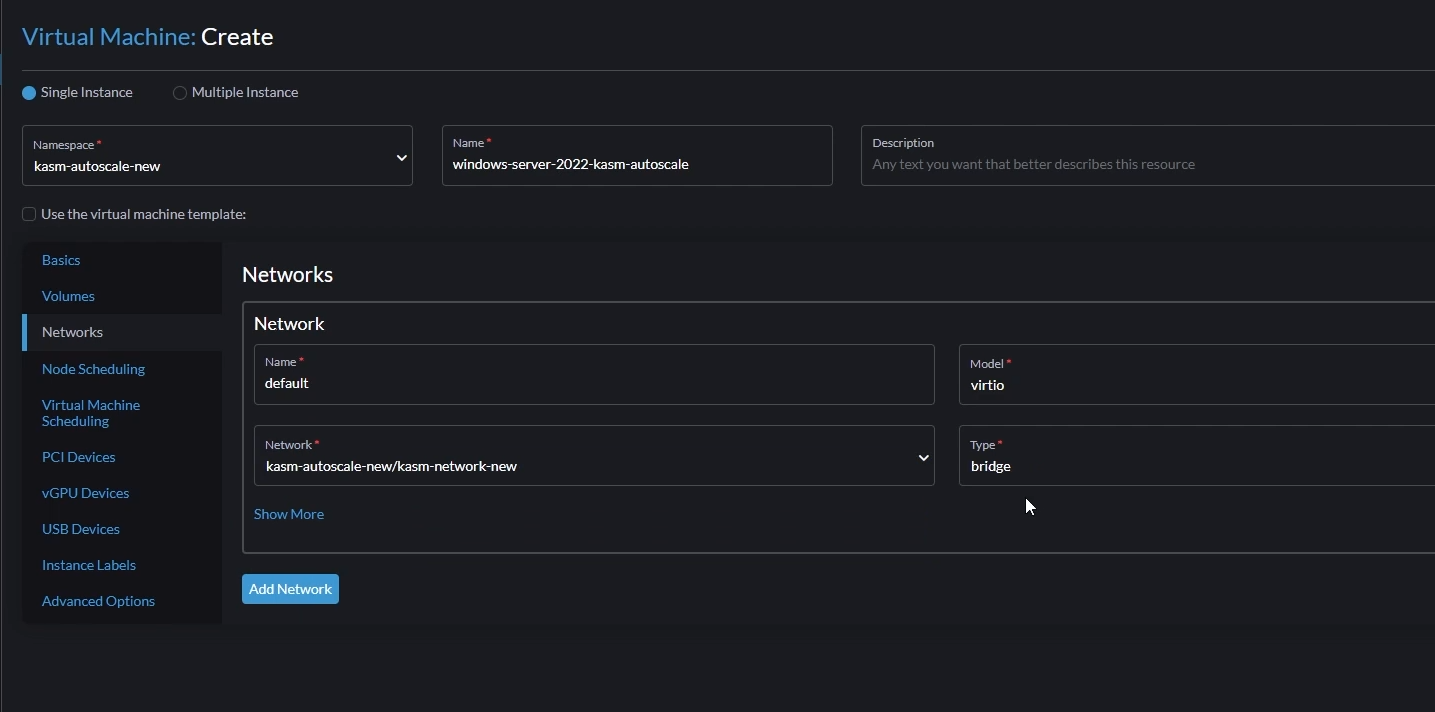
- Go to "Networks"
- Change the default network like this,
- Name: You can let this be
default - Model: Set this to
virtio - Network: Set this to the network you created earlier
- Type: Set to
bridge
- Name: You can let this be
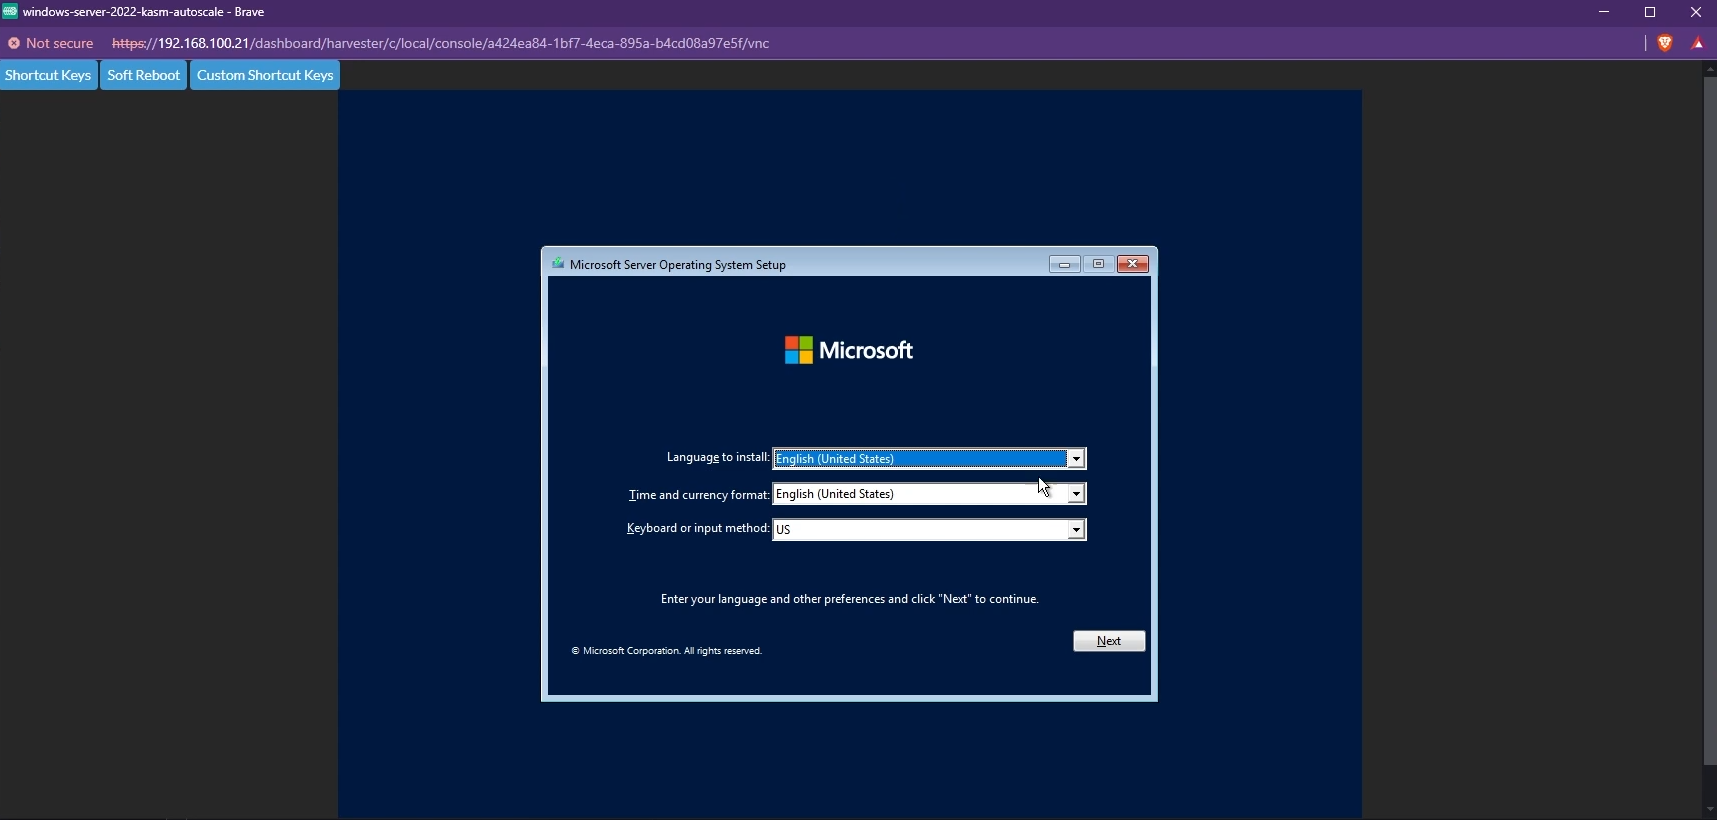
- Once the VM is provisioned, open it in WebVNC
- You will now see the Windows Installation screen. Proceed with the Installation.
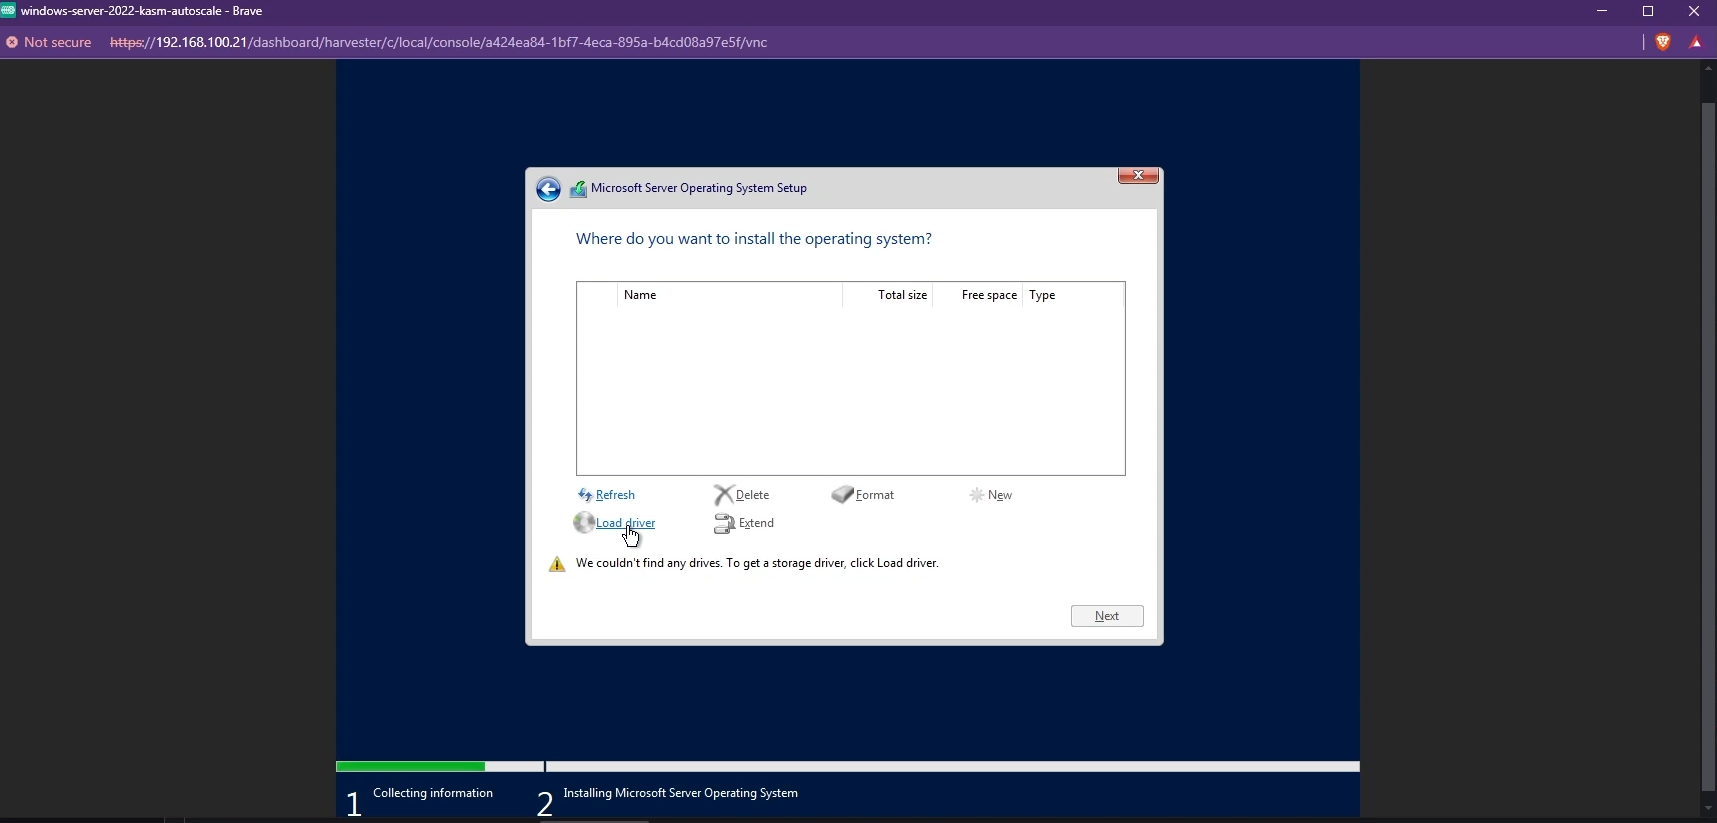
- By default, you may not be able to see the list of available disks to install Windows. To fix this, you need to install the VirtIO SCSI controller. Click "Load driver" and install the appropriate driver.

- The available disks must now be listed and you can choose the Windows boot disk you created to install Windows.
- Once Windows is installed, you need to install the other VirtIO drivers like the Network driver. Simply navigate to your VirtIO disk from your File Explorer and install the drivers by running the installer.
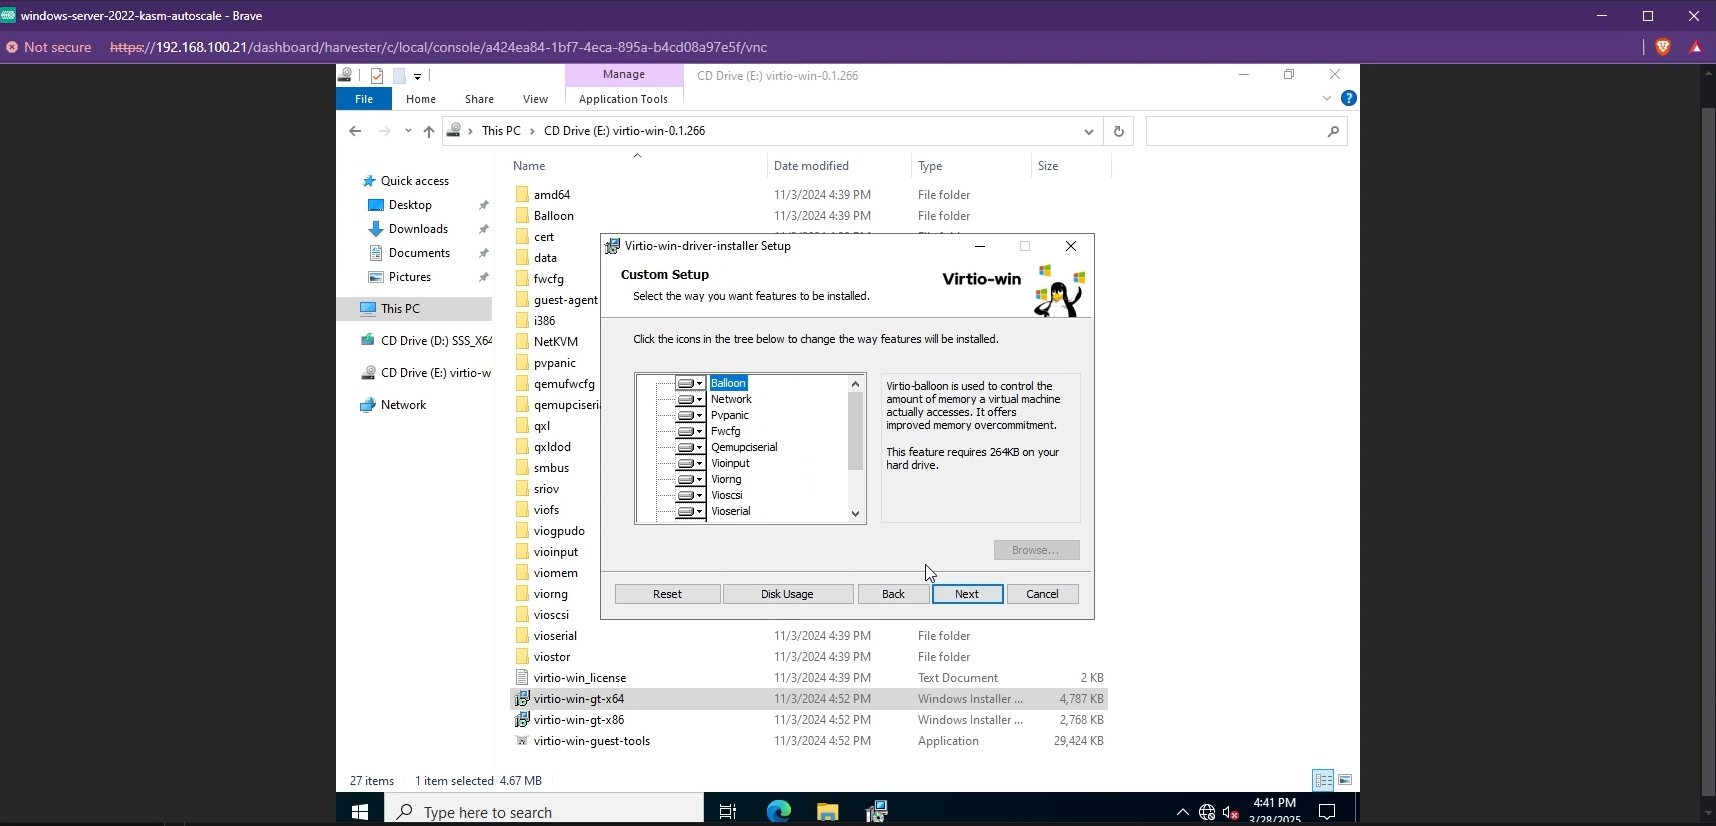
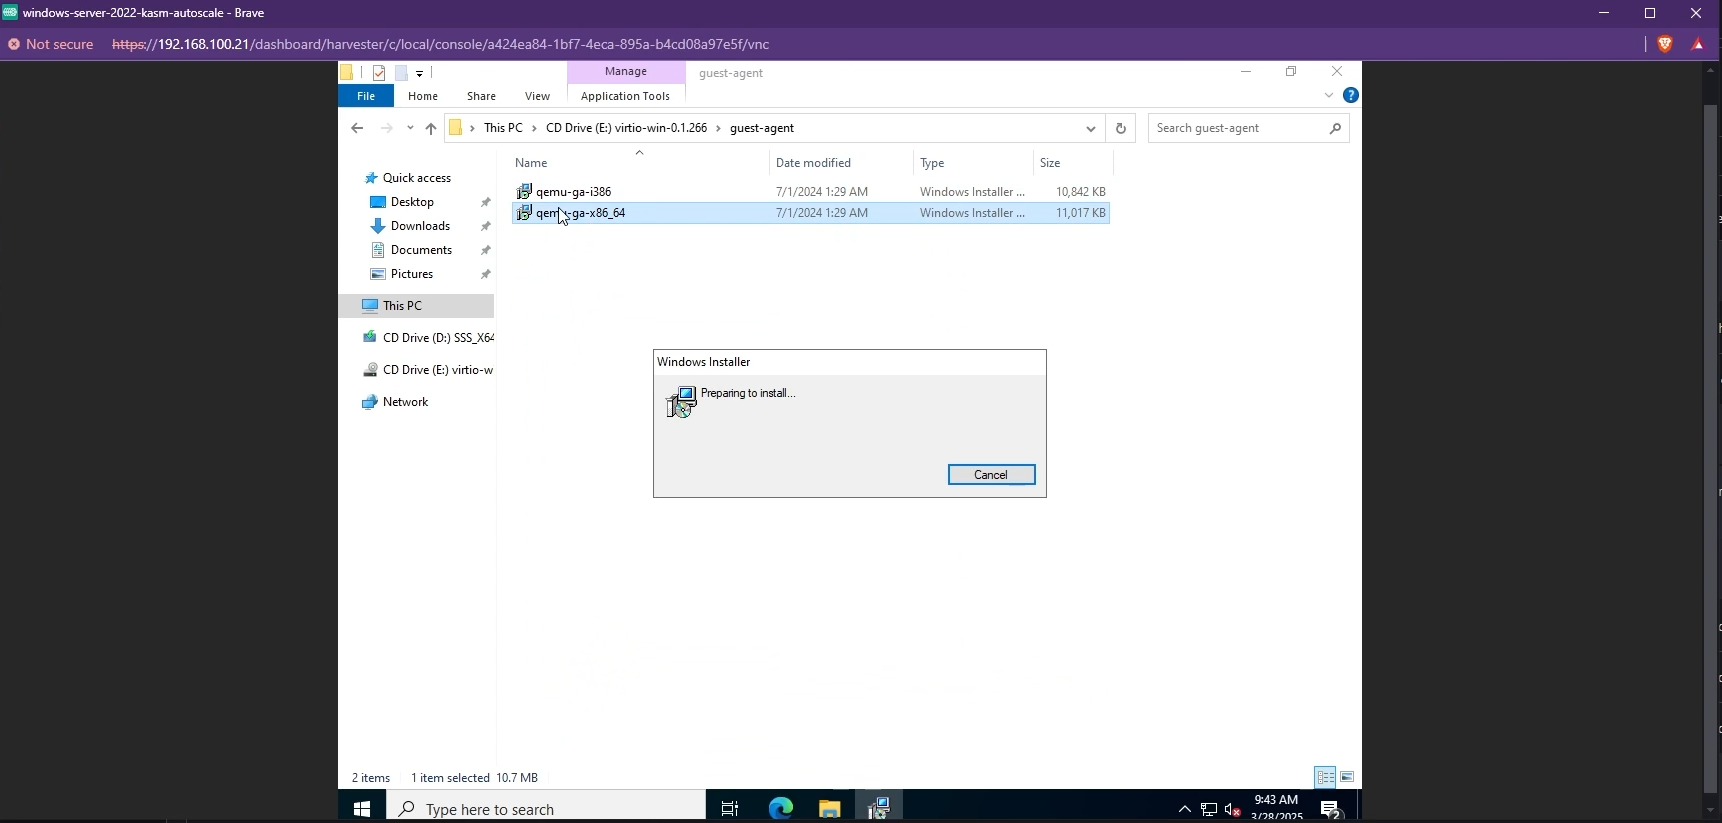
- You also need to install the QEMU Guest Agent tools. These can be found in the same VirtIO drive in the
guest-agentfolder.
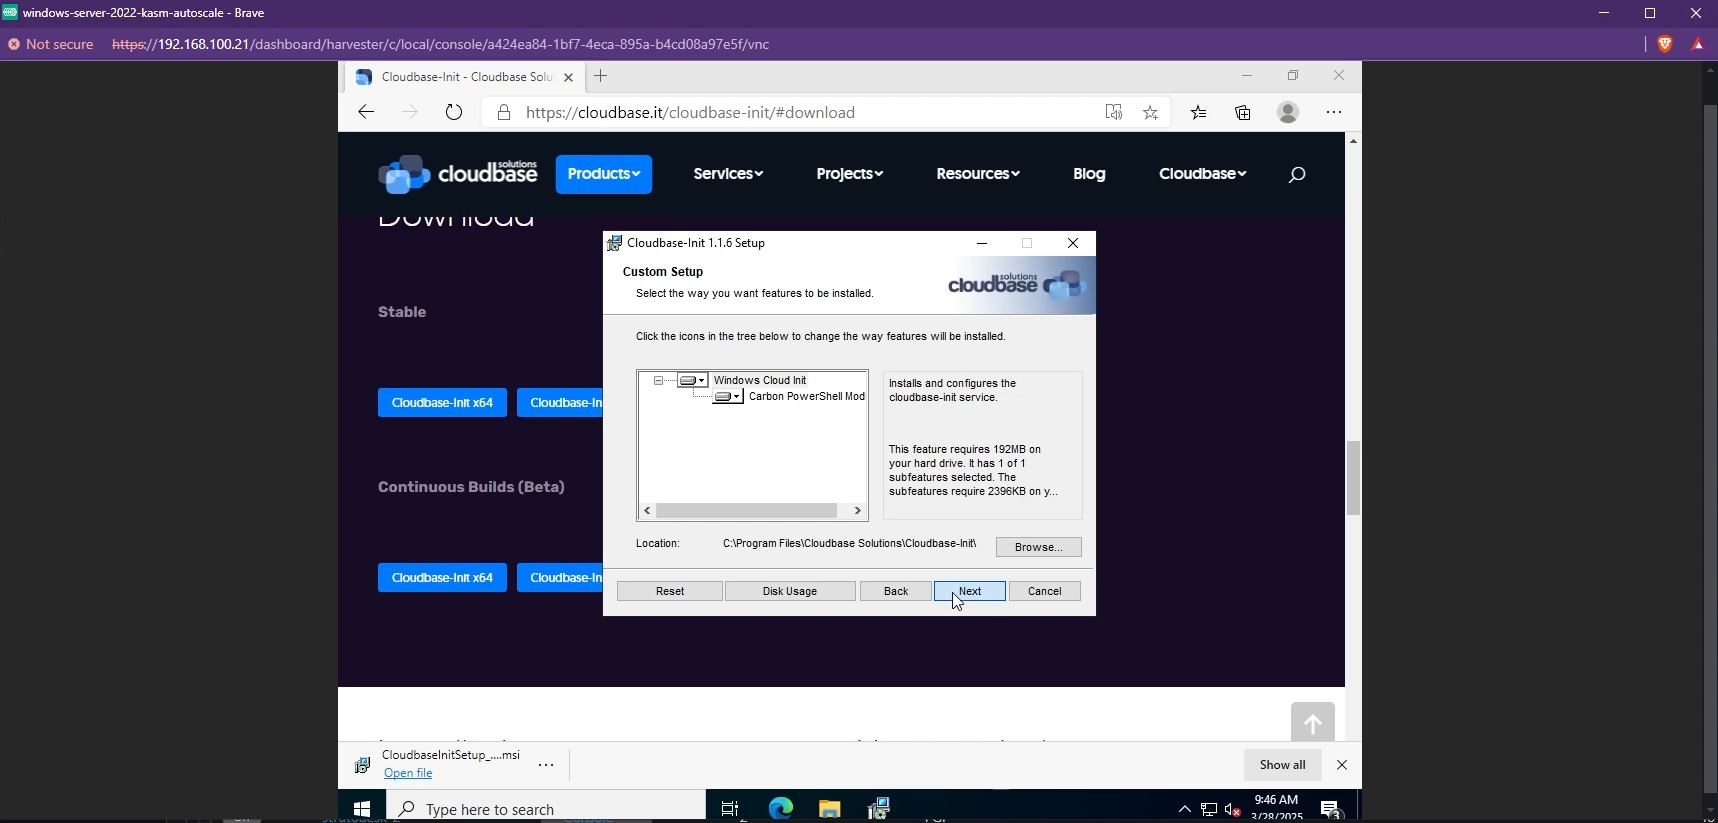
- Cloudbase-Init is also required so Kasm can run the startup script when the Windows VM is provisioned. Simply download the installer and run it to install Cloudbase-init.
- You can now install the tools/software you'd like to have on your VM (e.g Microsoft Office)
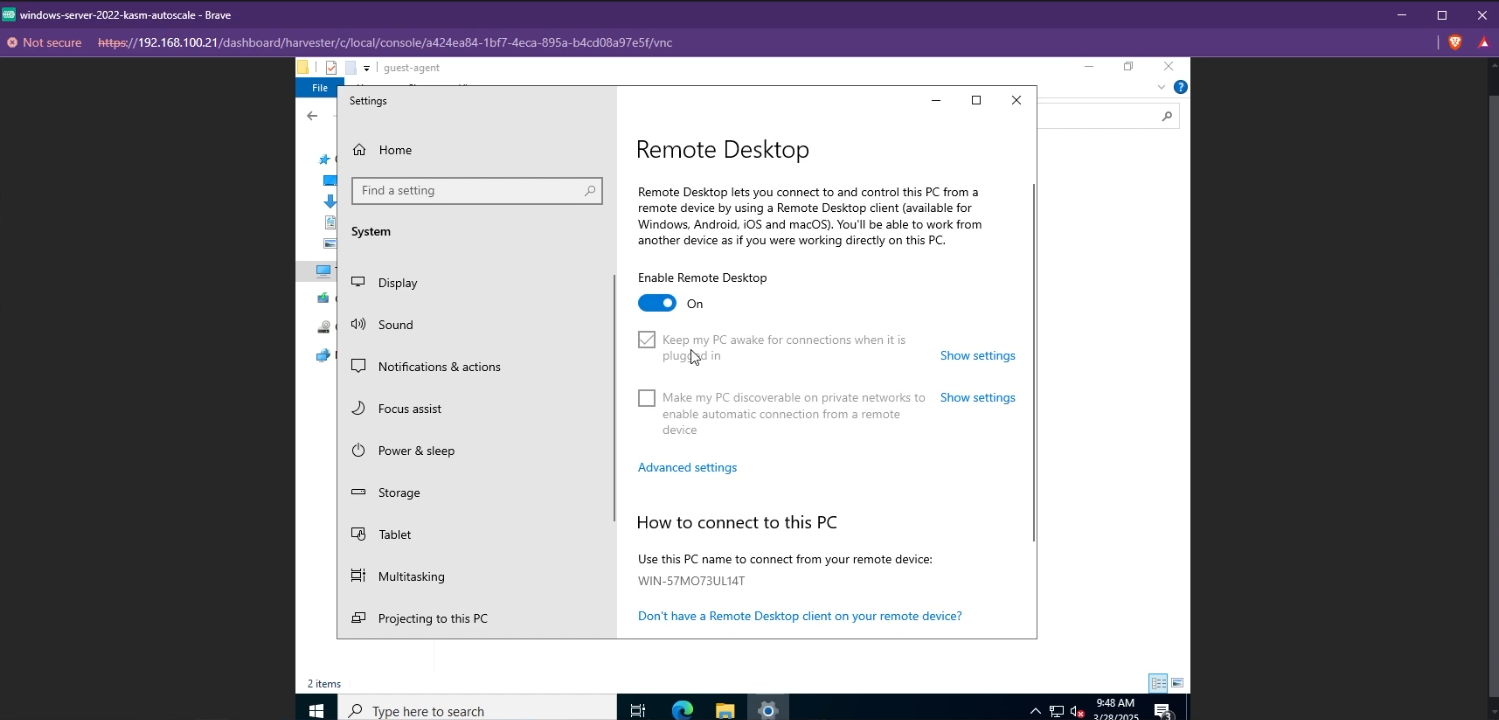
- Finally, you need to enable RDP on your VM. This is required so that Kasm can utilize RDP to create Windows Sessions. Simply search for "Remote Desktop Settings" and enable Remote Desktop
- Shutdown the VM
- Edit the VM config, and go to "Volumes". Remove the attached Windows ISO and VirtIO ISO.
- Now, go back to "Virtual Machines" and generate a template from the created VM.
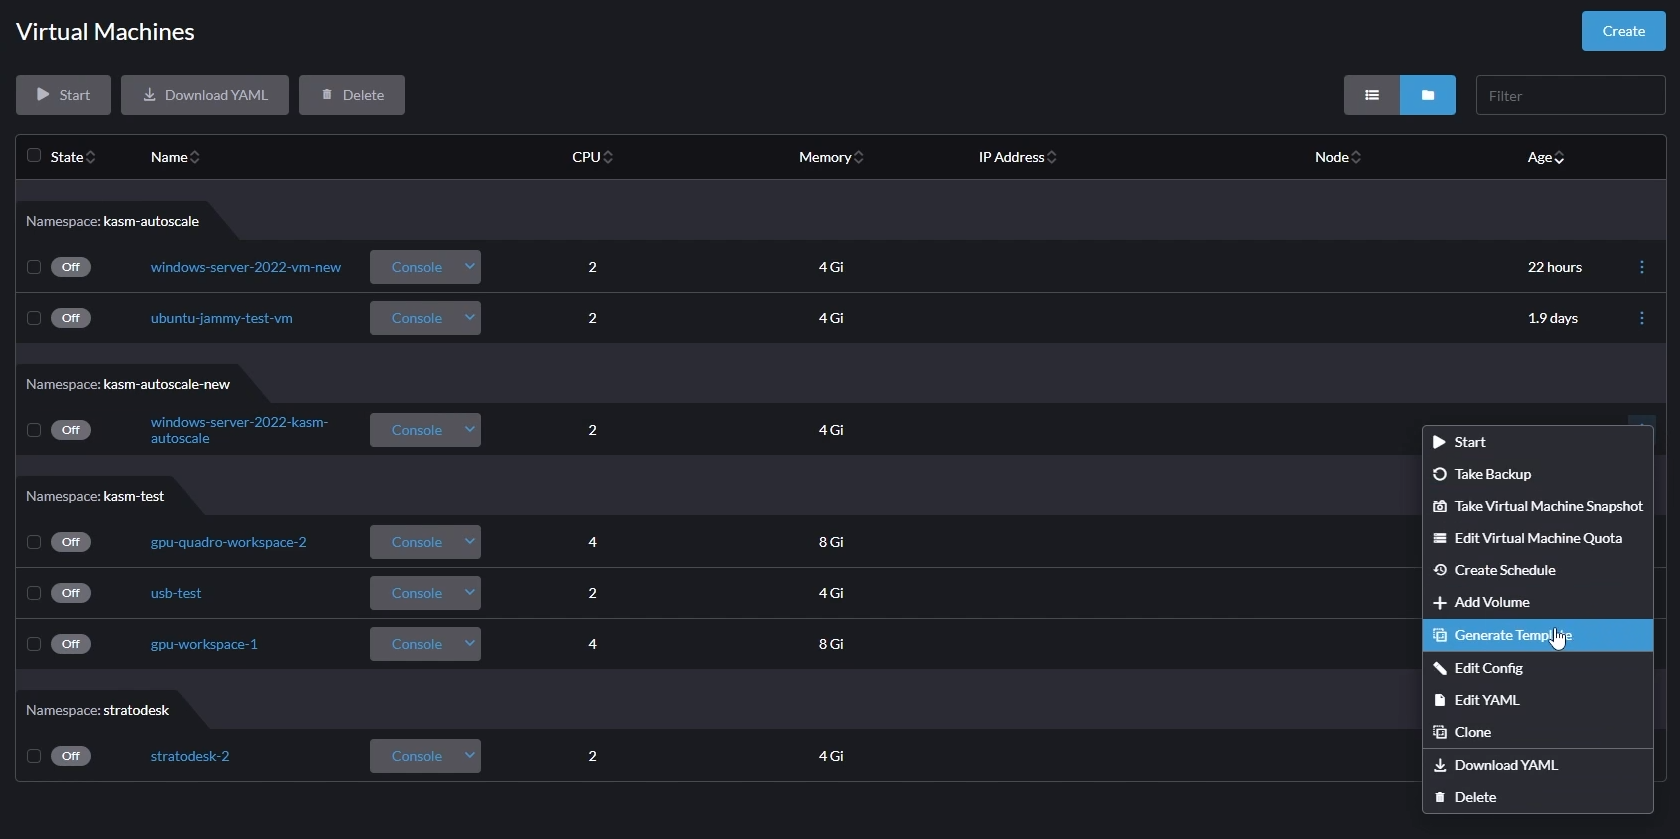
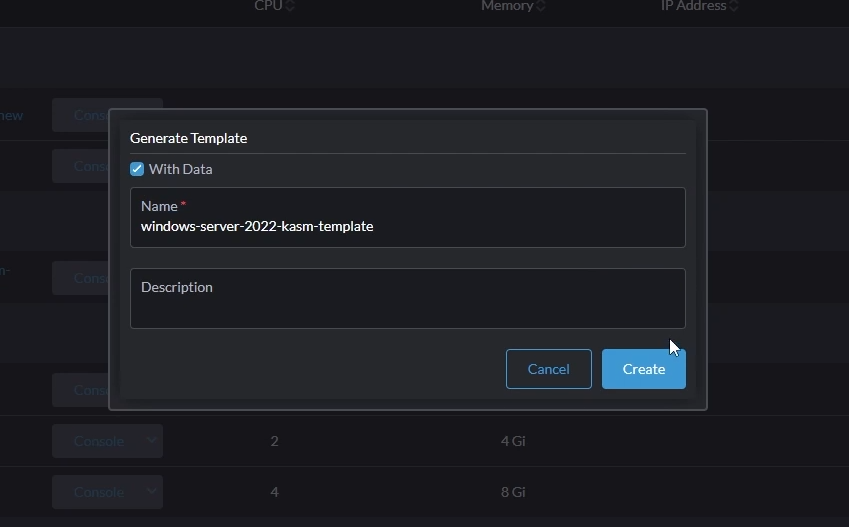
- Give your template a name (e.g windows-server-2022-kasm-template)
- Make sure you select "With Data" and click "Create"
- This will generate the template from your Windows VM.
For more details about Windows Templating, refer to the Windows AutoScale Template Creation Guide
Configure VM Provider Details on Kasm
- Follow AutoScale Settings for Agent Pool or AutoScale Settings for Server Pool to create a new AutoScale config, or select Create New in VM Provider Configs if you already have one.
- Set Provider to Harvester
- Configure the following settings
| Setting | Description |
|---|---|
| Name | An identifying name for this provider configuration e.g. Harvester Docker Agent Autoscale Provider |
| Max Instances* | The maximum number of autoscale instances to be provisioned, regardless of other settings |
| Host | The address of the Harvester instance, from the KubeConfig file (e.g. https://harvester.example.com/k8s/clusters/local) |
| SSL Certificate | The Harvester certificate as a base64 encoded string, from the KubeConfig file |
| API Token | The API token for authentication to Harvester, from the KubeConfig file |
| VM Namespace | The name of the Harvester namespace where the VMs will be provisioned (e.g. kasm-autoscale) |
| VM SSH Public Key | A public key to add to the autoscale agents, this is then provided as {ssh_key} for use in the startup script |
| Cores | The number of CPU cores to configure for the autoscale agents |
| Memory | The amount of memory in GiB for the autoscale agents |
| Disk Image | The name of the Harvester image to use for autoscale agents. See Harvester Disk Image for more details. |
| Disk Size | The size of the disk in GiB to use for autoscale agents |
| Network Type | The network type for the autoscale agents (pod or multus) |
| Interface Type | The interface type for the autoscale agents (masquerade or bridge) |
| Network Name | The name of the network to connect to the autoscale agents to, if the network is not in the default namespace this must be specified as namespace/name (e.g. kasm-autoscale/kasm-network) (multus network type only) |
| Startup Script | cloud-init, Bash, or Powershell script to run after agent creation, typically to install the Kasm Agent and/or any other runtime dependencies you may have. Example scripts can be found on our GitHub repository. Make sure to use the correct script based on the target OS (bash/cloud-init for Linux and Powershell for Windows). |
| Configuration Override | A optional config override that contains a complete YAML manifest file used when provisioning the autoscale agents |
| Enable TPM | Enable TPM for the autoscale agents |
| Enable EFI Boot | Enable the EFI bootloader for the autoscale agents |
| Enable Secure Boot | Enable Secure Boot for the autoscale agents (required EFI Boot to be enabled) |
- Submit the Provider Config
Disk Image
It is important to correctly specify the disk image name so that Kasm can instruct Harvester to provision a VM based on that image.
- If you are not using a custom template and want to use a pre-configured Cloud image directly (typically for Linux VMs), go to "Images" and copy the image name listed under the correct namespace.
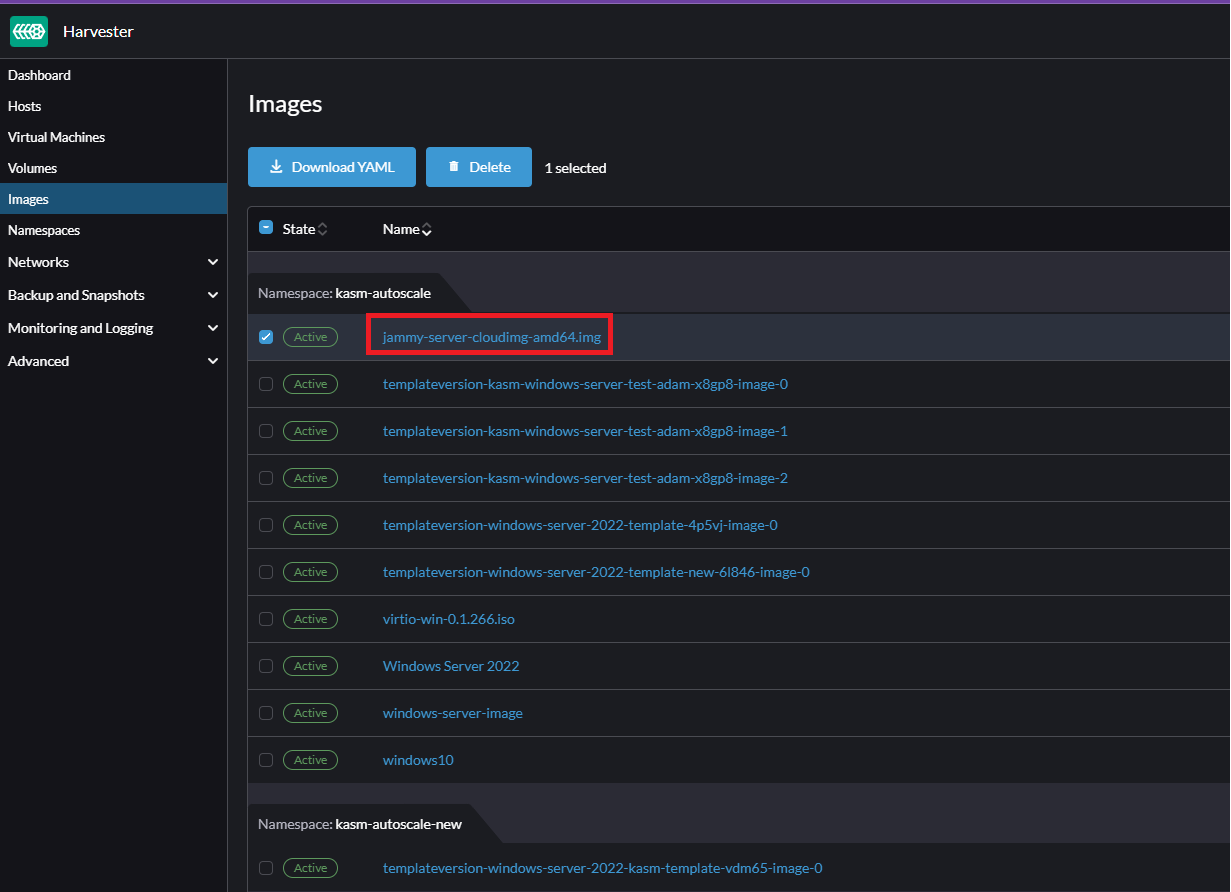
- If you are using a custom template (such as the Windows VM template we created earlier), you need to correctly identify the disk image associated with that template.
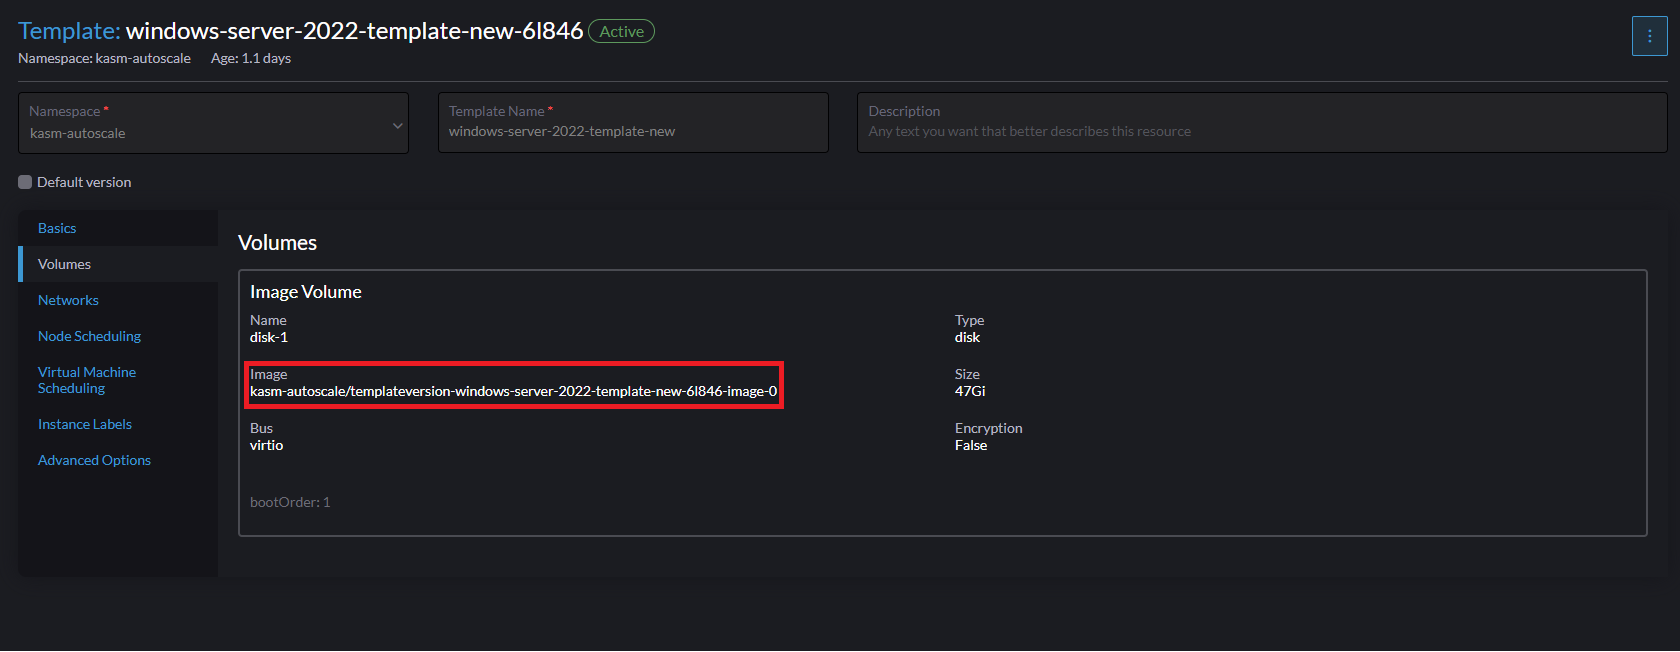
Go to "Advanced" -> "Templates" -> Select the template you want to use, then navigate go to the "Volumes" tab. Here, you can find the image name of the template (no need to include the namespace name). In the screenshot below, the correct disk image to input in Kasm is
templateversion-windows-server-2022-template-new-6l846-image-0
Test your Harvester Autoscaling setup
If you have configured non-zero Standby/Minimum Available Session values agents should start provisioning immediately. Otherwise, try launching multiple workspaces to increase resource utilization, prompting Kasm to autoscale new agents.
- Provision a Workspace
- Go to Workspaces > Registry
- Make multiple workspaces available
- Go to the Workspaces dashboard and launch sufficient workspace sessions to exceed your resource standby thresholds
- Monitor the provisioning of new agents by going to "Infrastructure" -> "Agents"
- Verify new VM instances in Proxmox
- Check Downscaling
- Terminate sessions to reduce resource usage
- Confirm that Kasm removes agents after the back-off period