AWS AutoScale
This guide will walk you through configuring autoscaling for Kasm Workspaces on AWS. Autoscaling in Kasm Workspaces automatically provisions and destroys agents based on user demand, ensuring optimized resource utilization and cost efficiency.
Overview
Prerequisites
- Access to AWS: Ensure you have the appropriate access to your AWS environment
- Kasm Workspaces Installed: A basic setup of Kasm Workspaces must already exist
- Understand Key Concepts:
- Zones: Logical groupings of Kasm services for geographical or organizational segmentation
- Pools: Logical groupings of Kasm Docker Agents and Server Pools for load balancing
- Plan Your Configuration:
- Understand your deployment zone requirements
- Configure your AWS environment
Setup your AWS Environment
- Create User in IAM: An API key for Kasm must be created to use for interfacing with AWS. AWS call these Access Keys, and the example will walk through registering one along with the required permissions.
- Create a user by going to the IAM service in the AWS portal.
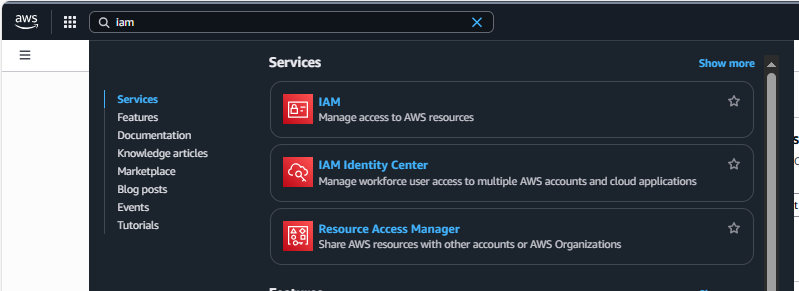
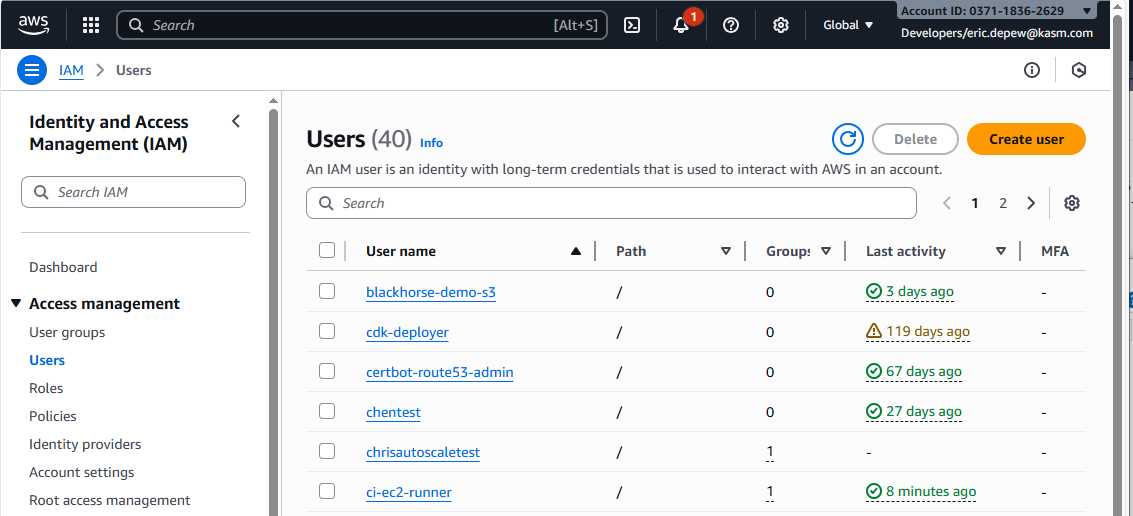
AWS IAM Selection - Select Users under Access Management in the IAM menu along the left. In the upper right, select Create User.
Create User - Give this User a human-readable name such as Kasm Workspaces.
- Select Attach policies directly and select AmazonEC2FullAccess.
- Review the information and create the User.
- Create Access Key: The Access Key is created from the User.
- From the list of Users, click on the newly created User.
- Click Create access key in the right section of the Summary.
- Select the *Third-party service use case and create the access key.
- Copy the Access Key ID and the Secret Access Key for use in Kasm (the Secret Access Key cannot be retrieved later).
- Set up permissions: Certain permissions must be set up in AWS by creating inline policies for IAM Roles.
- In IAM, select Roles under Access Management, then click Create Role.
- Select the AWS Service, with a Use Case of EC2.
- Add the permissions AmazonS3ReadOnlyAccess and AmazonSSMManagedInstanceCore.
- Create a human readable Role name and description and create the role.
- In IAM, select Users under Access Management, then click on the User created earlier.
- In the Permissions Policies section, in the Add Permissions dropdown, select Create Inline Policy.
- Using the Visual Policy Editor, select the IAM service.
- Under Actions Allowed, expand Write and select PassRole.
- Under Resources, with Specific selected, click Add ARNs.
- Leave This Account selected and enter the newly created role name in Resource Role Name with Path.
- Under Request Conditions, click Add Another Condition.
- Select the Condition iam:PassedToService.
- Select the Operator StringEquals.
- Add the value ec2.amazonaws.com and click Add Condition.
- Click Add More Permissions.
- Select the IAM service.
- Under Actions Allowed, expand Read and select GetInstanceProfile and GetRole.
- Under Resources, with Specific selected, for each resource (instance-profile and role) click Add ARNs.
- Leave This Account selected and enter the newly created role name in Resource Role Name with Path.
- Click Next, review, and create the policy.
- Set up a VPC: A Virtual Private Cloud must be set up through VPC to manage networking.
- In VPC, select Your VPCs under Virtual Private Clound, then click Create VPC.
- Select VPC Only and give the VPC a human readable name tag.
- Enter an IPv4 CIDR and click Create VPC.
- Set up a Subnet: A Subnet must be set up through VPC to manage networking.
- In VPC, select Subnets under Virtual Private Clound, then click Create Subnet.
- Select the newly created VPC.
- Give the Subnet a human readable name tag.
- Select the Availability Zone.
- Enter an IPv4 subnet CIDR block and click Create Subnet.
- Set up Security Group: Certain inbound and outbound rules must be set up in AWS by creating a Security Group in EC2.
- In EC2, select Security Groups under Network & Security, then click Create Security Group.
- Give the Security Group a human readable name and description
- Select the newly created VPC.
- Add Inbound Rules based on needs. Common rules would include destination ports 4902 (for the Kasm Manager to send session and file commands), 443 (for the Kasm Manager to reach agents securetly), and 3389 (if RDP access to agents is needed).
- Add Outbound Rule based on needs.
Configure your AWS details on Kasm
- Follow AutoScale Settings for Agent Pool or AutoScale Settings for Server Pool to create a new AutoScale config, or, if you already have an AutoScale Configuration defined, go straight to the All VM Provider Configs page, click Add to and select Add New in VM Provider Configs.
- Configure the following settings based on the instruction that follow:
| Name | Description |
|---|---|
| Name | A name to use to identify the config. |
| AWS Access Key ID | The AWS Access Key used for the AWS API. |
| AWS Secret Access Key | The AWS Secret Access Key used for the AWS API. |
| AWS: Region | The AWS Region the EC2 Nodes should be provisioned in. e.g (us-east-1) |
| AWS: EC2 AMI ID | The AMI ID to use for the provisioned EC2 nodes. This should be an OS that is supported by the Kasm installer. |
| AWS: EC2 Instance Type | The EC2 Instance Type (e.g t3.micro). Note the Cores and Memory override settings don't necessarily have to match the instance configurations. This is to allow for over provisioning. |
| AWS: Max EC2 Nodes | The maximum number of EC2 nodes to provision regardless of the need for available free slots |
| AWS: EC2 Security Group IDs | A Json list containg security group IDs to assign the EC2 nodes. e.g ["sg-065ae66f2d", "sg-02522kdkas"] |
| AWS: EC2 Subnet ID | The subnet ID to place the EC2 nodes in. |
| AWS: EC2 EBS Volume Size (GB) | The size of the root EBS Volume for the EC2 nodes. |
| AWS: EC2 EBS Volume Type | The EBS Volume Type (e.g gp2) |
| AWS: EC2 IAM | The IAM to assign the EC2 Nodes. Administrators may want to assign CloudWatch IAM access. |
| AWS: EC2 Custom Tags | A Json dictionary for custom tags to assigned on auto-scaled Agent EC2 Nodes. e.g {"foo":"bar", "bin":"baz"} |
| AWS: EC2 Startup Script | When the EC2 Nodes are provision this script is executed. The script is responsible for installing and configuring the Kasm Agent. |
| Retrieve Windows VM Password from AWS | When provisioning an AWS Windows VM Kasm can retrieve the password generated by AWS and store it in the Server configuration record created during the autoscale provision. This will only happen if the Connection Password field from the attached Autoscale config is blank. When populated Kasm will use the defined value instead of what is returned from AWS. The Administrator may want to leave this field blank and disable retrieving the password from AWS if they wish the Kasm user to be presented with a login screen to manually enter credentials upon connecting to the Windows Workspace. NOTE: This setting only affects Windows (RDP connection type) AWS instances. |
| SSH Keys | The SSH Key pair to assign the EC2 node |
| AWS Config Override (JSON) | Custom configuration may be added to the provision request for advanced use cases. Instance configuration is overridden in the 'instance_config' configuration block e.g. {"instance_config":{"EbsOptimized": true}} See EC2 Documentation for available options. |
-
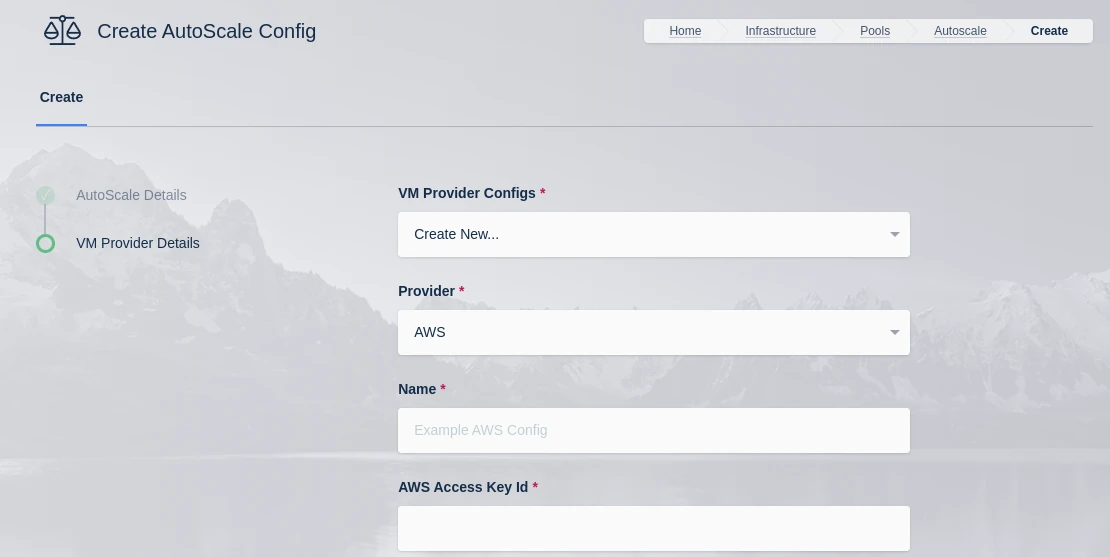
Select AWS from the Provider Drop Down.
-
Provide a name for your configuration.
-
Enter your AWS Access Key Id and AWS Secret Access Key from from the AWS Setup above.
-
Enter the region name, you can use the following AWS CLI command to list available regions, use the RegionName column.
aws ec2 describe-regions --all-regions -
Enter the EC2 AMI Id for the Image from AWS (this can be found in the AMI Catalog of the EC2 service in AWS).
-
Enter the EC2 Instance Type, you can use the following AWS CLI command to list available instance types based on the region selected.
aws ec2 describe-instance-type-offerings \--location-type "availability-zone" \--filters "Name=location,Values=us-east-2a" \--region us-east-2 \--query "InstanceTypeOfferings[*].[InstanceType]" --output text | sort -
Enter the Max EC2 Nodes. This puts an upper limit on the number of EC2 Nodes this auto scale configuration can provision.
-
Enter the EC2 Security Group IDs (created in the AWS Setup above) as a JSON array.
-
Enter the EC2 Subnet ID created in the AWS Setup above.
-
Enter the EC2 EBS Volume Size required.
-
Enter the EC2 EBS Volume Type required.
Volume Type Name gp3 gp2 io2 io1 st1 sc1 standard -
Enter the EC2 IAM, the Role created in the AWS Setup above.
-
Optionally provide additional tags for the VM, use empty
{}brackets if no additional tags are needed. -
Enter a PowerShell startup script. The following example will create a local user account using the Connection Username and Connection Password fields specified on the previous screen. This is only relevant if you are using static credentials and will not work Active Directory integration.
<powershell>$pass = ConvertTo-SecureString -String "{connection_password}" -AsPlainText -ForceNew-LocalUser -Name {connection_username} -Description 'Programatically generated Kasm user account' -Password $pass -PasswordNeverExpires -AccountNeverExpires | Add-LocalGroupMember -Group administrators | Add-LocalGroupMember -Group "Remote Desktop Users"Start-Service -Name "Audiosrv"</powershell> -
Enter a Configuration Override as JSON, use empty
{}brackets if no configuration is needed. -
If it is preferred to use the default Administrator user and password created by AWS, toggle Retrieve Windows VM Password from AWS to true. This requires leaving Connection Password blank on the AutoScale Details, and populating Connection Username with Administrator.
-
Enter a public SSH Private Key, this is required even for Windows systems and can be generated within AWS from EC2 (Key Pairs under Network & Security in the menu on the left).
-
Submit the Provider Config
Test your AWS Autoscaling setup
If you have configured non-zero Minimum Available Session values agents should start provisioning immediately. Otherwise, try launching multiple workspaces to increase resource utilization, prompting Kasm to autoscale new agents.
- Provision a Workspace
- Go to Workspaces > Registry
- Make multiple workspaces available
- Go to the Workspaces dashboard and launch sufficient workspace sessions to exceed your resource standby thresholds
- Monitor the provisioning of new agents by going to "Infrastructure" -> "Agents"
- Verify new VM instances in Microsoft Azure
- Check Downscaling
- Terminate sessions to reduce resource usage
- Confirm that Kasm removes agents after the back-off period