MacOS Workspaces
This step-by-step tutorial will walk you through the process of enabling remote management on MacOS and configuring the server in Kasm Workspaces. By following these instructions, you'll be able to seamlessly access and utilize MacOS systems remotely.
Enabling Remote Management in MacOS
To begin, you need to enable remote management on your MacOS system. Remote management allows you to access and control your MacOS system from a remote location.
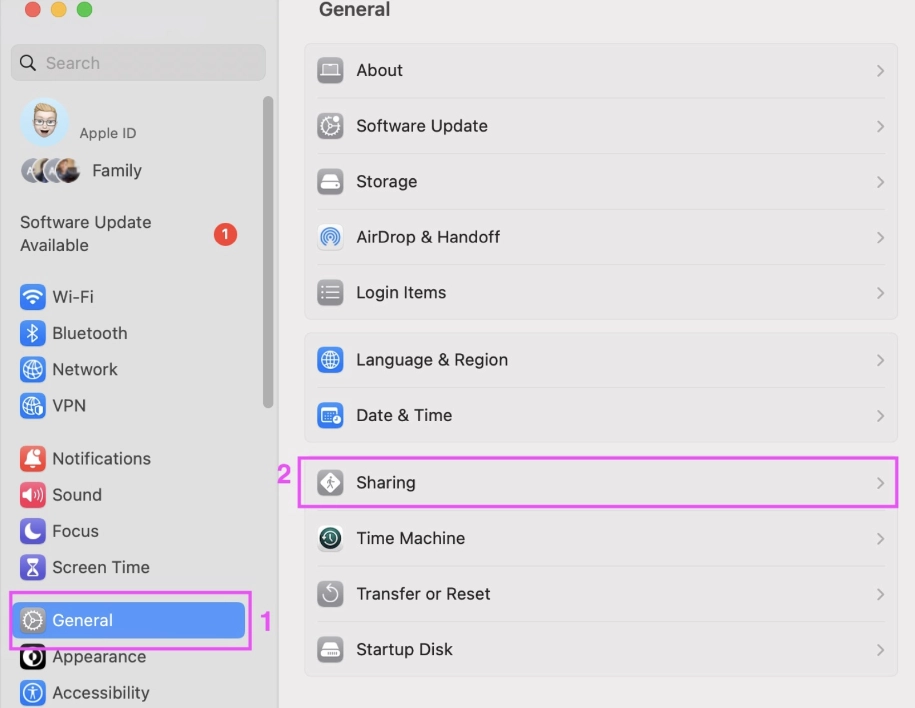
- Open the
Settingsapp on your MacOS system and navigate to theGeneralsection. - Scroll down to locate and click on
Sharing.
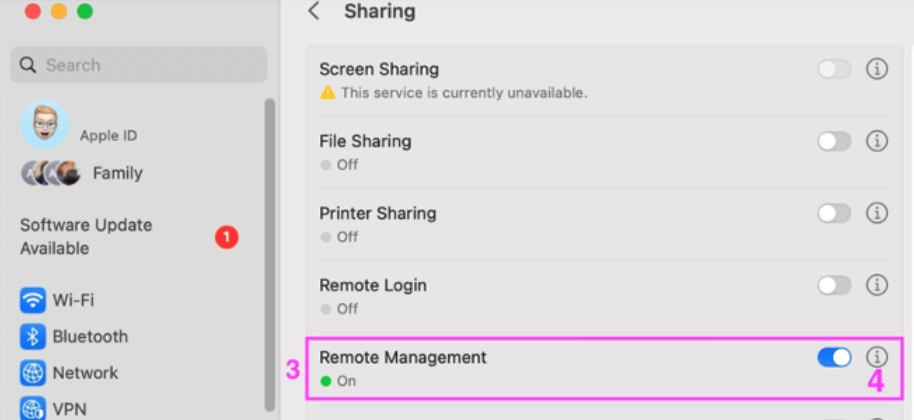
- Within the
Sharingsettings, find the option labeledRemote Managementand enable it. - Click on the
information iconnext to the Remote Management toggle.
- (Optional) If you want to customize the remote management options further, click on the computer settings button. Uncheck all the boxes and click OK.
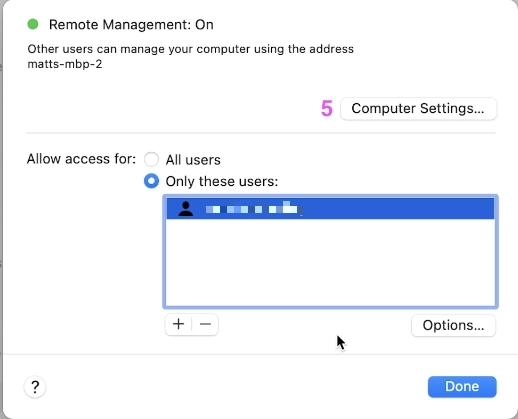
- To refine access permissions, change the option from
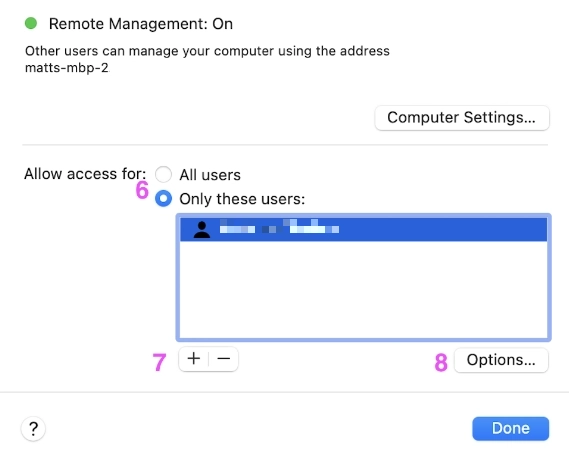
All UserstoOnly these users. - Add your user account to the list of allowed users.
- Click on your user account and select
Options.- Check the
Observecheckbox to enable viewing the MacOS system remotely. - Check the
Controlcheckbox to allow remote control of the MacOS system. - Click
OKto save the settings.
- Check the
By completing these steps, you have successfully enabled remote management on your MacOS system, allowing it to be accessed remotely.
MacOS Server Configuration
Now that remote management is enabled on your MacOS system, it's time to configure it in Kasm Workspaces. Follow the steps below to set up the server:
- Log in to Kasm as an administrator using your credentials.
- In the Kasm dashboard, navigate to the
Infrastructuresection and selectServers. - Locate the
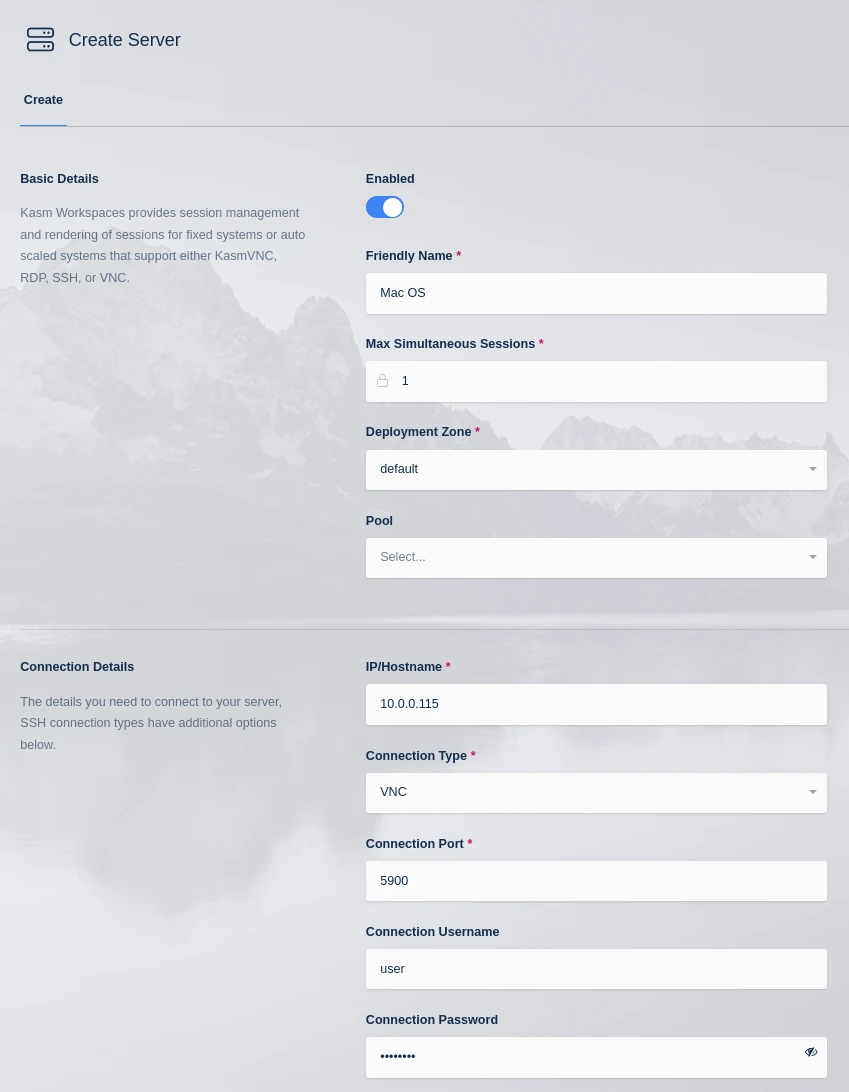
Servers Listand click on theAddbutton. - In the
Create Serverpanel, provide the following information:- Choose a
Friendly namefor your server to easily identify it. - Enter the
IP addressof the MacOS system you want to connect to. - Select
VNCas theConnection Type, which is the remote access protocol used by MacOS. - Set the
Portto5900, the default port for VNC. - Enter your MacOS
UsernameandPasswordto authenticate the connection. - Set the
Max Simultaneous Sessionsto 1, ensuring exclusive access to the server. - Select the desired
deployment zone. - Click
Saveto save the server configuration.
- Choose a
Congratulations! You have successfully configured your MacOS system as a server in Kasm Workspaces.
Create a Workspace
To make the MacOS system accessible to users in Kasm Workspaces, you need to create a workspace. The workspace provides a virtual environment for users to interact with the MacOS system. Follow the steps below to create a workspace:
- Log in to Kasm as an administrator using your credentials.
- In the Kasm dashboard, go to the
Workspaces -> Workspacessection in the Admin UI. - Locate the list of workspaces and click on
Add Workspace. - In the
Create Workspacepanel, provide the required information:- Select
Serveras theWorkspace Typeto connect to the previously configured MacOS server. - Enter a
friendly namefor the workspace, which will be displayed to users. - Provide a
descriptionof the workspace to give users an idea of its purpose.
- Select
This step is optional: If you want to personalize the workspace, you can provide a URL to a thumbnail image that will be displayed as an icon for this workspace.
- Check the
Enablebox to activate the workspace. - From the
serverdropdown, select the server you created in the previous section. - Click the
Savebutton to save the workspace configuration.
By following these steps, you have successfully created a workspace, allowing users to access and utilize the MacOS system remotely through Kasm Workspaces.
Now, users can enjoy the convenience of remotely accessing and interacting with MacOS systems using Kasm Workspaces.