# Kasm Workspaces Documentation
> Reference documentation for Kasm Workspaces 1.19.0 (the latest stable release).
>
> Version: 1.19.0
Complete documentation for Kasm Workspaces 1.19.0 (the latest stable release), with every page inlined in a single document for offline/one-shot ingestion.
## Secure Architecture for DoD & Federal Use
## Architecture
To meet various DoD and NIST guidance, the following architecture guidance should be followed for US Federal and DoD deployments. This architecture is also recommended for clients needing to meet other industry compliance such as [SOC](https://www.aicpa-cima.com/resources/landing/system-and-organization-controls-soc-suite-of-services) or [ISO/IEC 27001](https://www.iso.org/isoiec-27001-information-security.html). The Web App role servers, database servers, and Agent Role servers should each be on different subnets with a firewall between them. The Web App Role servers should be placed in a DMZ, instead of inside the enclave. The agents can be placed in the enclave on-premise or in the cloud where needed. Firewall rules should be used to limit where user traffic from containers can go, according to DoD allow by exception policy.
### Reverse Proxy
The Web App Role servers should not be directly publicly exposed. Instead, there should be a [reverse proxy](../how-to/networking/reverse-proxy.mdx) in front of the servers that meets the various DoD requirements, such as DoS rate limiting, Web Application Firewall (WAF), and other requirements. DoD/Federal networks typically have an F5 or other appliance in the security stack dedicated to providing reverse proxy services to resources inside the network. These appliances are typically capable of providing access to internal resources using different methods and they have vendor specific terminology for those methods. However, the appliance must be configured to act as a standard reverse proxy with WAF features enabled.
### WAF Rules
Web Application Firewalls (WAF) should be used to mitigate various risks. WAFs can induce issues with false positives, so alerts should be investigated and the rules should be tweaked as needed. WAFs generally allow you to specify whether the body of the request should be inspected, or just the request URL and headers. Inspection of just the URL and headers is generally safe with standard OWASP rules. Body inspection can cause issues, especially with user uploads and downloads.
---
## Kasm Connection Proxies: RDP, SSH, and VNC Gateway
## Connection Proxies
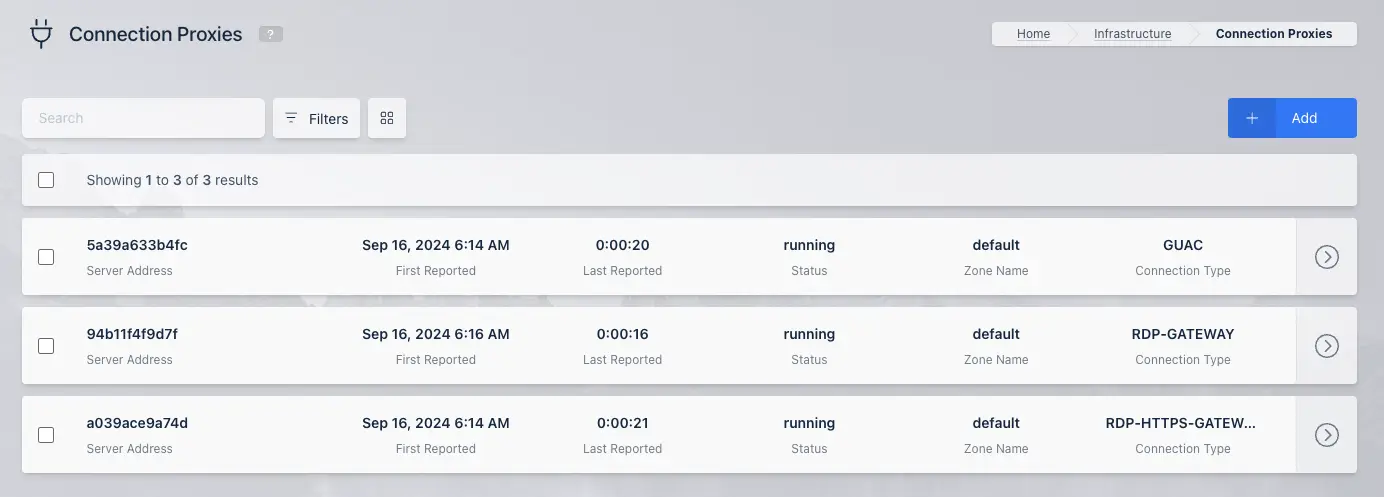
The Connection Proxy component is the gateway between users and resources they want to access that utilize RDP, SSH or traditional VNC. Container based desktops and apps do not utilize the Connection Proxy component. The proxy role is comprised of 3 different containers, which have different responsibilities. Connection proxies are automatically registered with the Kasm deployment when [installing](../tutorials/install/multi-server-install.mdx) the Connection Proxy component on a server. For Kubernetes deployments, Kasm will always show a single instance of each component type.
### Components
#### Guacamole (GUAC)
Kasm utilizes a custom compiled build of Apache guacd in combination with our own micro service for controlling guacd. Guacd is used for web-native connections to backend RDP, VNC, and SSH servers. Kasm spawns 1 guacd service per core on the system and automatically load distributes sessions between the services, providing for better use of system resources on multi-core systems. Administrators can override this default of 1 guacd service per core by using the `--guac-cluster-size N` flag on installation, where N signifies the number of guacd instances you wish to be running on the system.
#### RDP Gateway
Added in Kasm Workspaces 1.16.0, the RDP Gateway provides a proxy capability allowing users to use a client-side RDP thick client to connect to Kasm Windows workspaces.
This provides several features that are not possible with Kasm's web native RDP access method, including smart card, USB, and webcam passthrough from the user's client machine into the Kasm session while maintaining Kasm's DLP protections.
Windows, Linux, ChromeOS, and macOS clients are supported, however the instructions to configure a seamless experience differ by OS. See [Auto-Opening RDP Files](../how-to/workspaces-sessions/server-workspace/auto-open-rdp-file.mdx) for more details.
Kasm Technologies has tested the Microsoft client on Windows and macOS and the XtraLogic client on ChromeOS, however any RDP client software should be compatible. The chosen client must support the desired features; for instance, not all clients support smart card passthrough.
#### RDP HTTPS Gateway
The RDP HTTPS Gateway allows for RDP connections to traverse over HTTPS, primarily used to facilitate connections through enterprise security firewalls and other security devices. The RDP HTTPS Gateway follows the [Microsoft Remote Desktop Gateway Server Protocol](https://learn.microsoft.com/en-us/openspecs/windows_protocols/ms-tsgu/b68cd6a0-999f-46cf-9038-4d4b3afbc7c3). The Kasm RDP HTTPS Gateway does not understand the RDP protocol itself, but rather tunnels the underlying RDP protocol through web based transport. Because this component does not understand RDP, it is used in conjunction with the **RDP Gateway** covered in the above section.
### RDP Native Connections
By default, when a client connects to a Kasm session with an RDP client, it will come first to the **RDP HTTPS Gateway**, then to the **RDP Gateway**, and finally to the destination server. Administrators can disable the **RDP Gateway** or the **RDP HTTPS Gateway** to reduce overhead, however, there are consequences for disabling either. Disabling the **RDP HTTPS Gateway** will mean clients will connect to Kasm using the RDP protocol, which may not be allowed through some firewalls that are not in your control. If this is not an issue in your environment, or the environments where clients will connect from, then this may be a good way of increasing the performance of the connection proxy server and thus improving user experience. Admins can uncheck the **Enable RDP HTTPS Gateway** setting in [Zone Settings](../how-to/infra-autoscale/deployment-zones.mdx#defining-zone-configurations) to achieve this.
Conversely, the **RDP Gateway** can be disabled by the administrator by unchecking the **Enable RDP HTTPS Gateway DLP** option in the [Zone Settings](../how-to/infra-autoscale/deployment-zones.mdx#defining-zone-configurations). RDP traffic will then directly flow from the **RDP HTTPS Gateway** to the destination server, without traversing the **RDP Gateway** component which facilitates DLP and SSO features. Disabling the **RDP Gateway** can significantly reduce bandwidth consumption and improve end-user experience with the following drawbacks:
* [Data Loss Prevention](../how-to/security/data-loss-prevention.mdx) controls will not be enforced by Kasm. These include settings such as allowing clipboard, uploads, and downloads. Many of these settings can also be enforced through Windows Group Policy.
* [SSO](../how-to/workspaces-sessions/server-workspace/windows/authentication.mdx) is only supported when the RDP traffic goes through the **RDP Gateway**. Without the **RDP Gateway** users will get prompted to input credentials. Smartcard authentication into Windows will continue to work with the **RDP HTTPS Gateway DLP** disabled.
* Static credentials assigned to a server in Kasm are not passed through in RDP sessions when the **RDP Gateway** is disabled.
* Microsoft RemoteApp support with the **RDP Gateway** disabled is not a supported configuration.
### Architecture
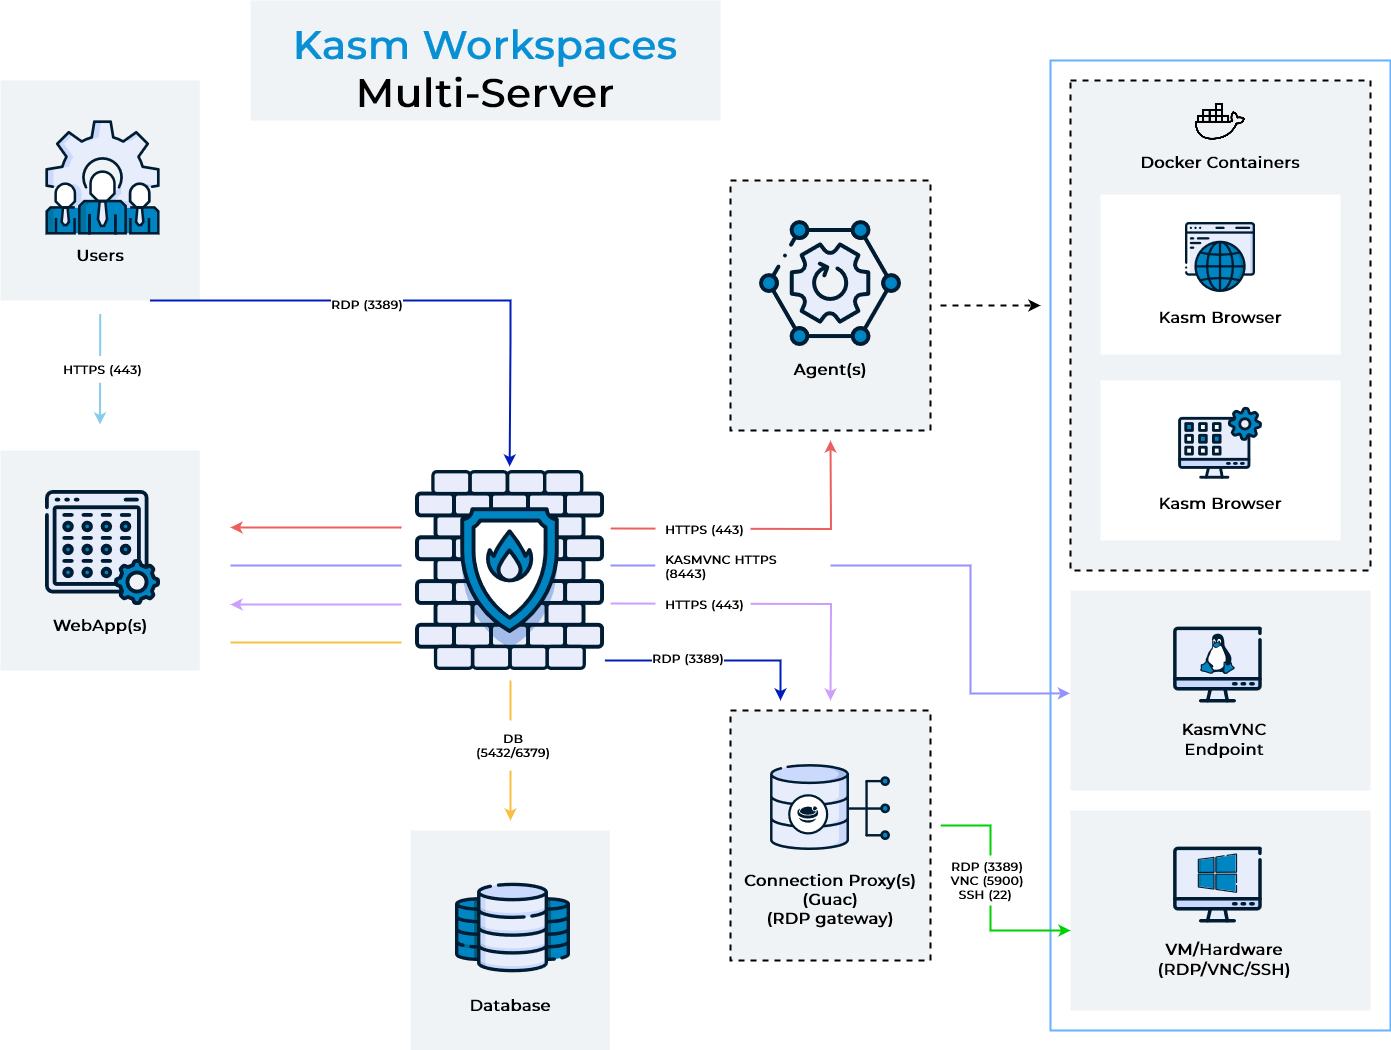
The above diagram shows the architecture and user flow of traffic. For Kasm guac sessions, when a user connection to a remote session comes in, shown in light blue, the request can optionally be load balanced between multiple web app servers. The Web App server queries the database for a list of potential connection proxy servers that are responsible for the Kasm Deployment Zone that the requested server is in. The Web App service goes down the list of connection proxies in random order and performs a health check. The user's HTTPS connection is then proxied to the first connection proxy server \(light purple line\), in the request zone, that succeeds the health check. This sequence of events ensures resiliency in the event of networking or server issues with a single connection proxy.
For Kasm RDP gateway sessions, when a user connection to a remote session comes in, shown in light blue, the request can optionally be load balanced between multiple web app servers. The Web App server queries the database for a list of potential RDP gateway connection proxy servers that are responsible for the Kasm Deployment Zone that the requested server is in. The Web App service goes down the list of RDP gateway connection proxies in random order and performs a health check. When a healthy server is found the Web App server builds an RDP file targeting the selected RDP gateway server and presents it to the user's browser for download. The user's RDP client then makes a connection over HTTPS(443) or 3389, depending on if the RDP HTTPS Gateway is enabled, to the Kasm RDP gateway service \(dark blue line\), which is then proxied to the RDP target. This sequence of events ensures resiliency in the event of networking or server issues with a single RDP gateway connection proxy.
When the connection from the user enters either the RDP gateway or guac connection proxy, it performs an authentication request up to the Web App Role server \(light purple line\) to authenticate the user, authorize that the user has access to the requested server, and to download connection details for the server. The connection proxy then performs an RDP connection to the remove server \(green line\).
Single server deployments have all roles installed on a single server. For multi-server deployments, you should consider deploying at least 2 connection proxy servers per Kasm deployment zone. Kasm will automatically load balance users and provide automatic fail-over should one stop responding.
---
## Kasm Workspaces Kubernetes Deployment Options
## Kubernetes Deployment Options
When deploying Kasm Workspaces on Kubernetes, the Helm chart covers the core services but not everything. Which additional components you need to provision depends on what session types you want to support and how many zones you are running.
---
### Service Roles
Kasm Workspaces is composed of four service roles. Each role can be deployed independently, and larger deployments typically spread them across separate hosts for performance and isolation.
#### App
Includes: NGINX, API, Manager
The App role is the control plane for a zone. It handles authentication, session orchestration, and all administrative UI and API functions. Every zone requires exactly one App instance. The App role should be deployed close to the database, as it is the only role that communicates directly with it.
#### Connection Proxy
Includes: NGINX, Guacamole, RDP Gateway, RDP HTTPS Gateway
The Connection Proxy role routes browser-based RDP, VNC, and SSH connections to external workloads. It is the gateway for any non-Docker session type. For best performance it should be deployed close to the target workloads (Windows VMs, Linux RDP hosts, etc.) it proxies.
#### Dedicated Proxy
Includes: NGINX (kasm_proxy)
The Dedicated Proxy role is a standalone zone-local relay that directs end-users to the correct Kasm Agent for container sessions. Rather than routing KasmVNC session traffic through the App role, a Dedicated Proxy handles that routing locally within the zone, reducing latency.
In standard deployments, session routing for container sessions is handled by the built-in proxy in the App role — no Dedicated Proxy is needed. The standalone Dedicated Proxy (`--role proxy`) is an alternative to that built-in routing, providing a zone-local relay. It is most beneficial when an additional zone is geographically distant from the primary zone.
#### Agent
Includes: Docker runtime, Kasm Agent service, kasm_proxy
The Agent role runs containerized desktop and application sessions. Each Agent also runs a local `kasm_proxy` for routing its own sessions. Agents are always deployed outside of Kubernetes on standard Docker hosts and are never included in the Helm chart. Each zone needs its own Agent pool — Agents are not shared across zones.
---
### What the Helm Chart Deploys
#### Single-Zone Deployment
The Helm chart bundles the **App**, **Connection Proxy**, and **Dedicated Proxy** roles into the cluster. This covers all session routing for the primary zone out of the box.
| Role | Deployed by Helm | Notes |
|---|---|---|
| App | Yes | API, Manager, built-in PostgreSQL |
| Connection Proxy | Yes | Guacamole, RDP Gateway, RDP HTTPS Gateway |
| Dedicated Proxy | Yes | Proxies KasmVNC traffic to Agents |
| Agent | **No** | Must be provisioned separately |
To support container sessions in a single-zone deployment, you only need to add Agents. RDP and VNC sessions work immediately via the bundled Connection Proxy.
#### Multi-Zone Deployment
When you define multiple zones in `my-values.yaml`, the Helm chart deploys the full set of roles for the **primary zone** (first in the list) but only the **App role** for each additional zone. Proxy and Agent components for additional zones must be provisioned externally via the [multi-server installation guide](../tutorials/install/multi-server-install).
| Role | Primary Zone | Additional Zones |
|---|---|---|
| App | Helm (in cluster) | Helm (in cluster, one per zone) |
| Connection Proxy | Helm (in cluster) | **External** — deploy if supporting RDP/VNC |
| Dedicated Proxy | Helm (in cluster) | **External** — deploy for container session performance |
| Agent | **External** | **External** — deploy if supporting container sessions |
---
### Choosing What to Deploy
Use the table below to determine which external components to provision for each additional zone. The primary zone requires no external components unless you are adding Agents.
| Container sessions | RDP / VNC sessions | External components needed (per additional zone) |
|---|---|---|
| No | No | None |
| Yes | No | Agent; Dedicated Proxy *(optional — reduces latency)* |
| No | Yes | Connection Proxy |
| Yes | Yes | Agent, Connection Proxy; Dedicated Proxy *(optional — reduces latency)* |
:::note
Agents are required for any zone that runs container sessions, including the primary zone. The Dedicated Proxy is optional: without it, container session traffic routes through the App role's built-in proxy rather than a zone-local relay — sessions work, but potentially with higher latency. A Dedicated Proxy is most beneficial when additional zones are geographically distant from the primary zone.
:::
---
### Related Resources
- [Install Kasm on Kubernetes](../tutorials/install/kubernetes) — step-by-step Helm installation
- [Multi-Zone Proxies with Kubernetes](../how-to/kubernetes/multi_zone_proxies) — provision Connection and Dedicated Proxies for additional zones
- [Multi-Server Installation Guide](../tutorials/install/multi-server-install) — install individual roles on external VMs
- [Connection Proxies](./connection-proxies) — deeper explanation of how the Connection Proxy role works
---
## Plugin Management: Update, Rollback, Reinstall
## Plugin Management
Kasm utilizes Docker Engine Plugins to provide some of its capabilities. For example, the Kasm Network Plugin drives the sidecar network for [customized workspace egress](../how-to/networking/egress/index.mdx).
Although they are hosted on the same registries as container images, plugins are treated differently by Docker and have different workflows for maintenance.
Notably, the system can't simply **pull** a plugin to update it.
### Automated Updates
Kasm automatically attempts to upgrade Kasm Docker plugins with rolling identifiers in their names (see the "Determining Alias" section below). This will happen every time the Kasm service is started (via `sudo systemctl start kasm`), along with the `pull` for rolling service images.
The script will only update a given plugin if there are no other active system components using it, such as containers or docker networks.
A ledger file is maintained for each plugin modified by this script. The file records information about each installed version.
#### Rollback
If a plugin upgrade needs to be rolled back, it can be accomplished through one of Kasm's provided scripts. The snippet below will reinstall the most recent previous version of the plugin; if you upgraded from version A to version B, rollback would target version A.
Rolling back a plugin will pin the plugin to the rollback version. This removes the rolling tag from the plugin; it will no longer be automatically updated when the Kasm service starts.
```yml
sudo systemctl stop kasm
# Determine the name of the plugin, as seen in the output of
# sudo docker plugin ls
plugin_name=
sudo /opt/kasm/bin/utils/upgrade_plugins --rollback --name "$plugin_name"
```
If the last stable version cannot be determined, the script will not modify the plugin.
In that event, you should browse the plugin's repository and determine which version you would like to install. Use that tag as the `--version` in the "Reinstallation" section below.
### Reinstallation
Kasm provides a script that will install an arbitrary version of a Kasm Docker plugin present on the system.
#### Determining Name
Use `sudo docker plugin ls` to determine the names of Kasm Docker plugins.
#### Determining Version (Tag)
Plugin tags can be viewed on the source registry.
Alternatively, you can use the following script to query for the lastest patch-level tag found on the registry. In the snippet, we query for the plugin used by the sidecar network, for the latest x86_64 version of the 1.2 plugin release.
```yml
sudo /opt/kasm/bin/utils/plugin_helper 'kasmweb/kasm-network-plugin:amd64-1.2' --latest
```
* Use `arm64` for ARM architecture systems
* The tag must provide the architecture, but can specify `Major.Minor` versions (e.g. `1.2`), just Major version (e.g. `1`), or omit the version entirely
#### Determining Alias
Alias is optional. Provide a plugin alias if you want the installed plugin to use a Name different than the registry reference.
The plugin used by the egress feature has an alias of `kasmweb/sidecar:{tag}`
Providing an alias that matches `/-rolling.*$/` will tell kasm to automate updates to this plugin, even if the registry reference isn't a rolling tag. Don't mix and match "rolling"!
#### Script Execution
Basic usage:
```yml
sudo systemctl stop kasm
# Determine the name of the plugin, as seen in the output of
# sudo docker plugin ls
plugin_name=
sudo /opt/kasm/bin/utils/upgrade_plugins --reinstall --name "$plugin_name" --version "$plugin_version" --alias "$plugin_alias"
```
### Force Upgrade
To force upgrade a Kasm Docker plugin to the latest version, use the following script.
```yml
sudo systemctl stop kasm
# Determine the name of the plugin, as seen in the output of
# sudo docker plugin ls
plugin_name=
sudo /opt/kasm/bin/utils/upgrade_plugins --name "$plugin_name"
```
This always pulls down the latest image from the registry, even if it is the same as the currently installed version.
---
## Patterns
---
## Reference Architecture 1: Single Server
## (RA1) Single Server Architecture Explained
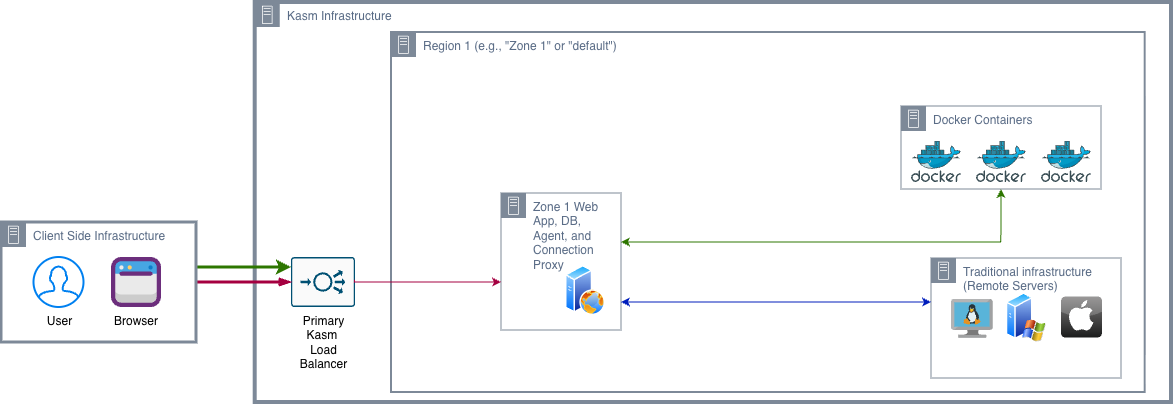
The Single Server architecture, designated **RA1**, is often described as the simplest way to deploy Kasm Workspaces. That description is accurate from an operational perspective. It is misleading from an architectural perspective.
RA1 is not a reduced version of the platform, it is a **collapsed version** of the platform. Every logical role that exists in the most sophisticated multi-region Kasm deployment also exists in RA1. The Web App, the Database, the Agent, the Connection Proxy, and the session delivery infrastructure are all present. What is absent in RA1 is the **separation between those roles**.
Understanding RA1 is therefore less about understanding the diagram, which shows a single server, and more about understanding **what disappears when all roles are collapsed** onto one machine and what the consequences of that collapse are.
---
### Reference Architecture 1
---
### The Primary Load Balancer
Each Kasm Web App role includes an NGINX container `kasm_proxy` that serves as a required front-end to internal services. While this component is integral to system operation, organizations may enhance their security posture by either hardening this configuration or deploying Kasm Workspaces **behind an enterprise-grade reverse proxy or load balancer**.
Enterprise security solutions can provide **advanced protections** such as Web Application Firewall (WAF) capabilities, DDoS mitigation, and Zero Trust access controls. Additionally, SSL/TLS offloading can centralize traffic management and **reduce processing overhead on backend Kasm services**, improving both performance and resource efficiency.
All user interactions, authentication, session initiation, and workspace streaming enter the environment through a single public endpoint, the Primary Load Balancer. This abstraction presents the deployment as **a unified service**, regardless of the underlying architecture.
For production deployments, a **network load balancer** is the recommended approach.
---
### The Defining Characteristic: Role Collapse
In more advanced Kasm architectures, responsibilities are distributed to separate infrastructure tiers. In RA1, all roles run on the same host, **share the same compute resources**, and are **exposed through the same network identity**. This creates a system with:
- **No internal network topology** between roles
- **No trust boundaries** between roles
- **No independent scaling** of any role
The architecture still behaves like Kasm. Sessions are authenticated, workspaces are provisioned, containers are launched, and sessions are streamed. The absence of role separation means that **none of the structural protections** that larger architectures provide are present. A resource spike in the Agent tier, where workspace containers consume CPU and memory, directly affects the Web App tier on the same host. A database failure is simultaneously a **control plane failure**, a **session provisioning failure**, and a **state persistence failure**, because all three functions share the same machine.
---
### The Illusion of Simplicity
RA1 feels simple because there is **one hostname**, **one server**, and **one deployment unit**. Internally, the system is performing:
- **API orchestration**
- **Session scheduling**
- **Container execution**
- **Protocol translation**
- **State persistence**
These functions are not simplified in RA1. They are co-located.
**RA1 reduces deployment complexity, not architectural complexity.**
This distinction matters because it shapes how RA1 should be evaluated. An Enterprise Architect who concludes that Kasm is architecturally simple because RA1 appears simple has misinterpreted what they are looking at. RA1 is the architecture that results when all boundaries are deliberately removed. Its simplicity is a consequence of **collapsed boundaries**, not of an inherently simple system.
---
### Two Session Types, One Control Plane
RA1 supports two fundamentally different session types that share a control plane but **diverge after session creation**.
**Containerized workspaces** are launched on external Docker Agents and delivered as ephemeral containers. These sessions benefit directly from the distributed execution model: capacity for containerized workspaces **scales with the number of Agent nodes** registered to the control plane.
**Remote system access sessions** connect to existing Windows, Linux, and macOS systems via RDP, VNC, or SSH. These sessions are mediated through the Connection Proxy on the control plane server, which **translates legacy protocols** into browser-native streams. The execution target is an existing system, not a container provisioned by Kasm.
Both session types share the **same authentication flow** and the **same control plane**. The difference lies in where execution occurs and what infrastructure hosts it.
---
### The Control Plane and Execution Plane Share a Boundary
In distributed architectures, the **control plane** makes decisions and the **execution plane** carries them out. Separating them allows each to scale, fail, and be maintained independently.
In RA1, the Web App role decides where to run a session, and the Agent role executes that session, but both exist **on the same machine**. There is no network boundary between decision-making and execution. There is no resource isolation between orchestration and workload. The system loses its ability to separate the responsibility for decisions from the capacity to execute them.
This becomes visible under load. As user concurrency increases, workspace containers compete for the same CPU and memory that the Web App API and the database require to function. In a distributed architecture, **Agent load is isolated from control plane load**. In RA1, they are the same load on the same hardware.
---
### The Database: State Without Isolation
Even in RA1, the database remains the **single source of truth** for user sessions, configuration, and authentication state. Its role is not simplified in any architectural sense. It stores exactly the same data it would store in an RA3 or RA4 deployment.
What changes in RA1 is that the database **shares its compute, memory, and failure domain** with every other role on the system. In larger architectures, the database occupies a dedicated, isolated segment. In RA1, **the most critical component in the system has no isolation** from any other component. This is the most significant architectural property of RA1 from a resilience perspective.
:::warning
In RA1, any failure is a total failure. A hardware failure, a kernel panic, an out-of-memory condition, or a network disruption affects every role simultaneously.
:::
---
### DNS and Identity: A Single Point of Truth
RA1 typically uses a **single public hostname**, for example `kasm.example.com`. This hostname represents the Web App, the Proxy, and the session endpoint simultaneously. Because everything is on one server:
- **Browser origin rules** are trivially satisfied
- **TLS configuration** requires only a single certificate for a single hostname
- **No cross-domain considerations** exist
This simplicity makes RA1 the clearest environment in which to observe how Kasm behaves when **identity, transport, and execution share a single domain**. The DNS and TLS requirements that become more complex in distributed architectures are visible here in their simplest possible form. Even at this scale, TLS must match the configured hostname, WebSocket origin must match, and the Proxy Hostname must resolve identically. These requirements **do not relax** in RA1: they are simply easier to satisfy because everything resolves to one address.
---
### What RA1 Reveals About Kasm's Design Philosophy
Despite its limitations as a production architecture, RA1 reveals the **core design philosophy** of the platform clearly:
**The system is inherently multi-role.** Even when collapsed onto a single host, distinct responsibilities exist and are executed by distinct services. The architecture does not disappear in RA1: the boundaries between roles are simply not enforced by physical or network separation.
**The browser is the universal client.** All access is mediated through web-native protocols regardless of the complexity of the underlying execution environment. RA1 makes this particularly clear because there is no complex proxy topology to obscure the basic relationship between browser and platform.
**Sessions are ephemeral workloads.** Workspaces are created and destroyed on demand in RA1 exactly as they are in RA4. The ephemerality of sessions is not a feature of large-scale deployments: it is a property of how the platform works at every scale.
**The control plane governs everything.** All decisions about authentication, session placement, and policy evaluation originate from the Web App role, even when that role is co-located with everything else.
---
### RA1 in the Deployment Progression
RA1 occupies a **specific and intentional position** in the deployment progression. It is the starting point, the baseline for understanding, and the architecture that exposes what must change to achieve resilience.
| **What RA1 Lacks** | **What It Teaches** |
|---|---|
| **Isolation between roles** | Why role separation is the foundation of all resilience improvements |
| **Independent scaling of any tier** | Why statelessness of the Web App role is architecturally significant |
| **Database resilience** | Why the database is the single most critical HA investment |
| **Any partial failure mode** | Why the difference between control plane and session plane failures matters |
RA1 is not an endpoint, it is a point of departure. It demonstrates a complete Kasm system in its most compressed form: control plane, execution plane, transport, and state all co-located, sharing a **single identity**, a **single failure domain**, and a **single boundary**.
From an enterprise perspective, the key realization is this: **RA1 is designed for understanding, not resilience.** Because once you understand what RA1 lacks, you understand exactly why the rest of the architecture exists.
---
*This article is part of the Kasm Workspaces Reference Architecture Explanation Series.*
---
## Reference Architecture 2: External Docker Agents
## (RA2) Single Server Control Plane with External Docker Agents Architecture Explained
The RA2 architecture is frequently described as RA1 with more servers. That description is accurate about the hardware involved. It is misleading about what changes architecturally.
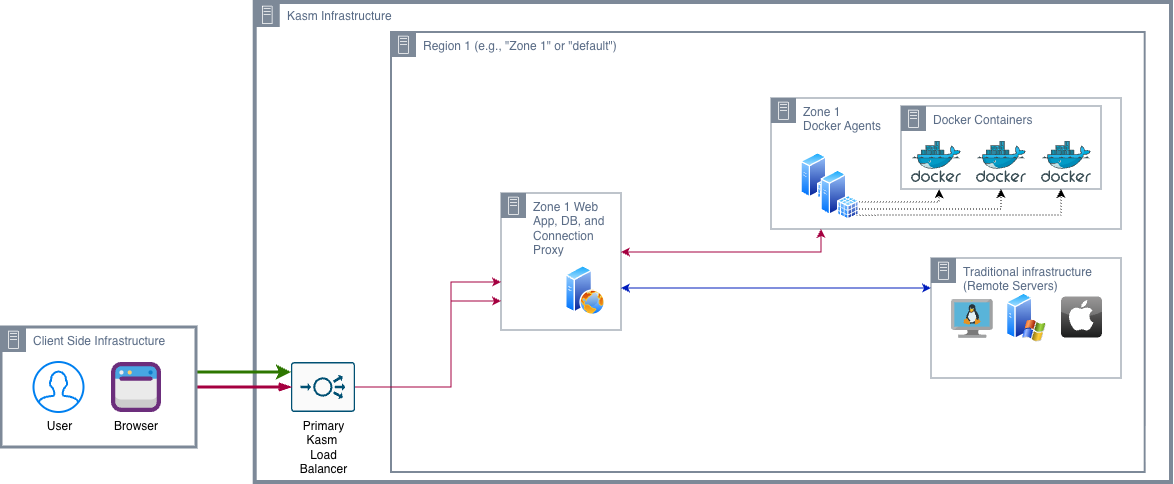
RA2 is the **first meaningful separation of responsibility** in Kasm Workspaces. It introduces the most fundamental structural distinction the platform makes: the separation between **decision-making and execution**. In RA1, the same machine both decides where a session runs and runs it. In RA2, the control plane still decides, but the **execution happens elsewhere**.
This is not a configuration change. It is the beginning of a **distributed system**.
---
### Reference Architecture 2
---
### The Primary Load Balancer
Each Kasm Web App role includes an NGINX container `kasm_proxy` that serves as a required front-end to internal services. While this component is integral to system operation, organizations may enhance their security posture by either hardening this configuration or deploying Kasm Workspaces **behind an enterprise-grade reverse proxy or load balancer**.
Enterprise security solutions can provide **advanced protections** such as Web Application Firewall (WAF) capabilities, DDoS mitigation, and Zero Trust access controls. Additionally, SSL/TLS offloading can centralize traffic management and **reduce processing overhead on backend Kasm services**, improving both performance and resource efficiency.
All user interactions, authentication, session initiation, and workspace streaming enter the environment through a single public endpoint, the Primary Load Balancer. This abstraction presents the deployment as **a unified service**, regardless of the underlying architecture.
For production deployments, a **network load balancer** is the recommended approach.
---
### From Consolidated to Distributed
In RA1, everything happens in one place. In RA2, one change fundamentally alters the system's character: **the Agent function moves to external nodes**.
The **control plane remains centralized**. The single Kasm server in RA2 still contains the Web App, the Database, and the Connection Proxy. It is still the authoritative core of the system, handling authentication, policy evaluation, session scheduling, and state persistence. From the browser's perspective, the entire platform **still appears as a single endpoint** with a single identity.
But the **execution plane has become distributed**. External Docker Agents run on separate infrastructure, host containerized workspace sessions, and provide scalable compute capacity no longer constrained by the resources available on the control plane server.
| **Role** | **RA1 Location** | **RA2 Location** |
|---|---|---|
| **Web App** | Single server | Single server (unchanged) |
| **Database** | Single server | Single server (unchanged) |
| **Connection Proxy** | Single server | Single server (unchanged) |
| **Docker Agent** | Single server | **External Docker Agent nodes** |
The architectural consequence of this separation is that **workloads no longer run where decisions are made**. The system has acquired the most basic property of a distributed architecture: different functions occurring on different machines, coordinated through a defined interface.
---
### Three Traffic Flows Define the Architecture
Reading RA2 correctly requires understanding it as a **system of flows** rather than a collection of components.
The **control plane flow** handles authentication and orchestration. This flow runs between the user's browser and the single Kasm control plane server. The user authenticates, requests a workspace, and receives session connection details. This flow is **entirely contained** within the control plane server.
The **execution flow** handles workload instantiation. When the control plane selects an external Agent for a session, it instructs that Agent to provision a container. This flow runs between the **control plane server and the external Agent nodes** over internal network paths.
The **session plane flow** handles workspace streaming. Once a container is running on an external Agent, the user's browser connects to it through the Connection Proxy on the control plane server. This flow runs from the user's browser, through the **control plane server's proxy**, to the external Agent hosting the container.
Understanding RA2 is understanding how these three flows **diverge after session creation**.
---
### Two Session Types, One Control Plane
RA2 supports two fundamentally different session types that share a control plane but **diverge after session creation**.
**Containerized workspaces** are launched on external Docker Agents and delivered as ephemeral containers. These sessions benefit directly from the distributed execution model: capacity for containerized workspaces **scales with the number of Agent nodes** registered to the control plane.
**Remote system access sessions** connect to existing Windows, Linux, and macOS systems via RDP, VNC, or SSH. These sessions are mediated through the Connection Proxy on the control plane server, which **translates legacy protocols** into browser-native streams. The execution target is an existing system, not a container provisioned by Kasm.
Both session types share the **same authentication flow** and the **same control plane**. The difference lies in where execution occurs and what infrastructure hosts it.
---
### Asymmetrical Failure Behavior
RA2 introduces something RA1 cannot provide: **asymmetrical failure behavior**.
When an **Agent node fails** in RA2, only the sessions running on that specific Agent are interrupted. Users on other healthy Agents continue working unaffected. New sessions are scheduled to remaining healthy Agents automatically.
When the **control plane server fails**, no new sessions can be created, authentication fails for new connections, and the entire management interface becomes unavailable. Existing sessions already streaming between a browser and an Agent may continue briefly, because the session plane is database-independent mid-stream, but they **cannot be re-authenticated** and will eventually terminate.
:::info
**RA2 is partially resilient, not highly available.** Organizations that require control plane fault tolerance need RA3 or higher. RA2 is appropriate for capacity expansion beyond a single server and for environments where control plane downtime during maintenance windows is acceptable. It should **not** be treated as a production-grade HA architecture.
:::
---
### What RA2 Reveals About Kasm's Design Philosophy
RA2 exposes several core principles of the Kasm design that RA1 cannot demonstrate, because RA1 collapses everything into one place.
**Centralized control with distributed execution** is not just a scaling pattern. It is the foundational structure of the platform. The control plane governs everything: it authenticates, authorizes, schedules, and records. **The execution plane does exactly what it is told and nothing more.**
**Zero trust mediation is architecturally enforced**, not configured. Users cannot connect directly to workloads because the architecture does not provide a path for them to do so. The Connection Proxy is the only path, and it validates every connection against the control plane.
**Sessions are disposable and location-independent.** When a container runs on an external Agent in a different part of the data center, the user's experience is identical. The location of execution is an **infrastructure detail that the architecture deliberately abstracts away**.
---
### RA2 in the Architectural Progression
RA2 demonstrates that the execution plane can be distributed without any fundamental change to the control plane. It also reveals what remains unresolved: control plane redundancy, database resilience, and proxy distribution.
For an Enterprise Architect, the key realization RA2 offers is this: **RA2 is where infrastructure stops being a collection of servers and starts becoming a coordinated system of roles.** Once that shift happens, the question that follows naturally is: if the execution plane can be distributed, why not the control plane as well?
---
*This article is part of the Kasm Workspaces Reference Architecture Explanation Series.*
---
## Reference Architecture 3: Single-Zone Multi-Server
## (RA3) Single-Zone Multi-Server Architecture Explained
The RA3 architecture is the point in the Kasm deployment progression where the platform's design philosophy is **fully expressed in a single-region topology**. This completes the role separation that RA2 begins and adds the redundancy mechanisms that transform each separated role from a potential single point of failure into a resilient, independently managed tier.
RA3 is the architecture **most production enterprise deployments should be running**. It is also the foundation that RA4 extends without fundamentally changing. Everything RA4 does is add geographic distribution of the session plane on top of an RA3 control plane. Understanding RA3 means understanding not just the component topology, but the reasoning that produced each architectural decision within it.
---
### Reference Architecture 3
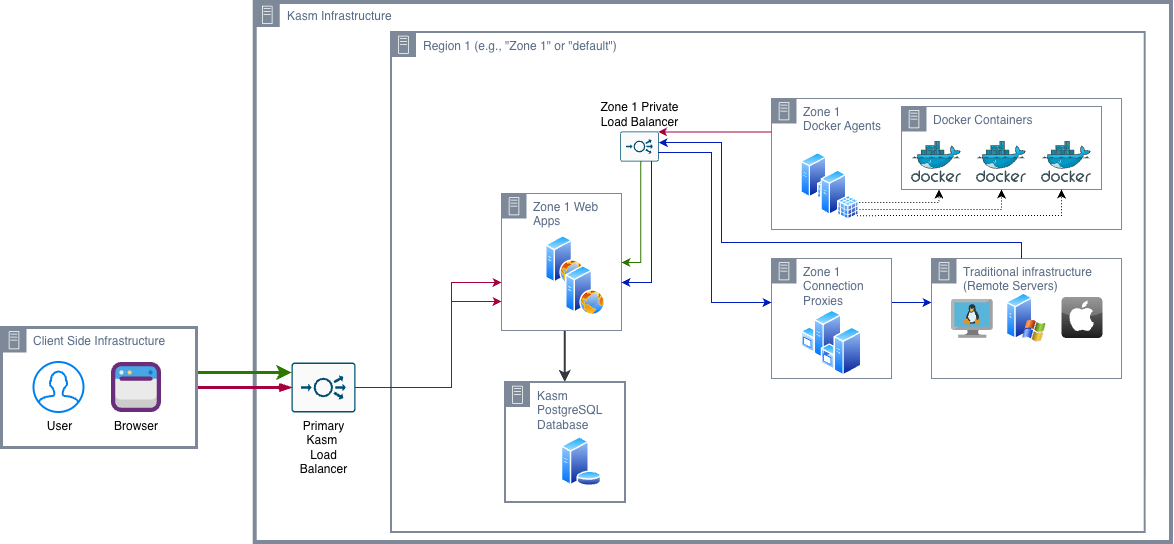
---
### The Primary Load Balancer
Each Kasm Web App role includes an NGINX container `kasm_proxy` that serves as a required front-end to internal services. While this component is integral to system operation, organizations may enhance their security posture by either hardening this configuration or deploying Kasm Workspaces **behind an enterprise-grade reverse proxy or load balancer**.
Enterprise security solutions can provide **advanced protections** such as Web Application Firewall (WAF) capabilities, DDoS mitigation, and Zero Trust access controls. Additionally, SSL/TLS offloading can centralize traffic management and reduce processing overhead on backend Kasm services, improving both performance and resource efficiency.
All user interactions, authentication, session initiation, and workspace streaming enter the environment through a single public endpoint, the Primary Load Balancer. This abstraction presents the deployment as **a unified service**, regardless of the underlying multi-node architecture.
A critical requirement of the Primary Load Balancer is **continuous backend health awareness**. The Kasm Web App exposes a `/api/__healthcheck` endpoint that verifies both application availability and database connectivity. If a Web App instance becomes unable to reach the database, it is automatically marked unhealthy and removed from traffic routing.
For production deployments, a **network load balancer** is the recommended approach. Unlike DNS round-robin, which relies on TTL expiration and may continue routing traffic to failed nodes for 90–300 seconds, a network load balancer performs active health checks and reroutes traffic to healthy instances within seconds, ensuring higher availability and a more reliable user experience.
---
### Private Load Balancer
One of the subtler architectural decisions is the use of a **private load balancer** within each zone. The private load balancer is positioned between the Web App nodes on one side, and the Agent and Connection Proxy nodes on the other.
This design establishes an internal routing path for control-plane traffic, ensuring it remains within the private network. As a result, control traffic does not traverse the external load balancer interface, improving both efficiency and security.
---
### The Web App Tier: Statelessness as an Architectural Superpower
The Web App tier is the **control plane** of the RA3 deployment. Multiple Web App servers run behind the Primary Load Balancer, forming an HA cluster that makes the control plane resilient.
The property that makes horizontal scaling of the Web App tier straightforward is **statelessness**. No session state lives inside the Web App process. Everything is delegated to the database. Any Web App instance can be removed from the cluster at any time **without affecting users** interacting with other instances. A Web App server that needs patching is drained from the load balancer, patched and rebooted, and returned to the cluster with **no user-facing interruption**.
The recommended minimum for production RA3 Web App high availability is **N+1**: one more Web App server than needed to serve peak load. An organization expecting 500 concurrent users might require 2 Web App servers at peak. N+1 means deploying **3**, providing both failure tolerance and maintenance flexibility simultaneously. **Every instance is active and capable of serving any request.** There is no primary or secondary designation, no active-passive relationship.
---
### Database
The database sits in a **dedicated segment, isolated** awar from the internet-facing infrastructure boundary. This placement reflects the database's distinct security requirements and its role as the **only stateful component** in the entire deployment.
When the database is unavailable, the entire platform is **operationally blocked**. No component in the Web App tier can perform its core function without database access. This is the single most consequential availability dependency in the entire deployment, and it is the one that most frequently receives insufficient attention.
| **Redundancy Approach** | **Mechanism** | **Suitable For** |
|---|---|---|
| **AWS RDS Multi-AZ** | Synchronous standby; automatic failover | Cloud deployments on AWS |
| **AWS Aurora PostgreSQL** | Multi-primary compatible clustering | High-throughput cloud deployments |
| **Cloud-provider equivalents** | Varies by provider | Azure, GCP, OCI managed PostgreSQL |
| **Self-managed replication with Patroni** | PostgreSQL streaming replication; automated failover | On-premises and private cloud |
| **Single containerized instance** | None | Small teams, development and proof-of-concept |
> **Warning:** Kasm ingests platform logs into the database by default. At scale with hundreds of concurrent sessions, this log volume can reach **tens of gigabytes** within days under default retention settings. For larger deployments, forwarding logs to an external SIEM and **disabling Kasm's internal log retention** both reduces storage requirements and removes I/O load that competes with operational queries. This is a critical configuration and a **production readiness requirement** at enterprise scale.
---
### Docker Agents
Docker Agents are the compute nodes that provision and host containerized workspace sessions. Agent redundancy follows a straightforward principle: **the more Agents in the zone, the smaller the impact of any single Agent failure**.
When an Agent fails, sessions on that node are interrupted. Users reconnect, receiving a **fresh container on a surviving Agent**. Sessions on other Agents continue unaffected. New sessions are routed to healthy Agents automatically.
> **Warning:** Autoscaling requires that the **Upstream Auth Address** zone setting be correctly configured before autoscaling is enabled. Newly provisioned Agent virtual machines must be able to reach the Web App API to register with the zone. If the Upstream Auth Address points to an internal IP or a **single Web App server hostname** rather than the load balancer, autoscaled Agents may fail to register silently. The virtual machine provider provisions the VM, but **Kasm never sees a successful check-in**, and capacity does not increase when needed. This is the **most common autoscaling failure mode** in enterprise deployments.
---
### The Ephemeral Container Model
The ephemerality of containers is not a tradeoff: it is a **feature of the security model** that also simplifies the HA calculus.
In traditional VDI, a **compromised persistent desktop remains compromised** until discovered and remediated. The compromise may persist for days or weeks while an attacker maintains access. In a Kasm container session, the container is **destroyed at session end**, taking any compromise with it. The next session starts from a **clean, verified image**.
For HA purposes, the ephemerality of containers means there is **no persistent data at risk** when an Agent fails. A failed Agent takes nothing meaningful with it. The recovery operation is a **session restart**, not a virtual machine restoration procedure. **The security benefit and the operational benefit are consequences of the same decision.**
---
### The Connection Proxy Tier: Gateway for Legacy Infrastructure
The Connection Proxy tier in RA3 provides web-native access to existing infrastructure: **Windows servers, Linux systems, macOS machines**, and any endpoint accessible via RDP, VNC, or SSH. It is an **optional** role; deployments that use only containerized workspaces are delivered through the Agent role.
A common enterprise pattern is **hybrid delivery**: containerized browser workspaces for secure web browsing alongside Connection Proxy-mediated **RDP access for Windows line-of-business applications** that require a full Windows environment.
---
### RA3 as a Direct Expression of Zero Trust
RA3's architectural structure is not merely an engineering convenience. It is a **direct expression of Zero Trust principles** at the infrastructure level.
- The **database** sits in an isolated segment with no public interface. Only the Web App tier can reach it.
- The **Docker Agents** sit behind an internal Private Load Balancer with no public exposure. Users reach sessions through the proxy path, **never directly to the container**.
- The **Connection Proxy tier** translates legacy protocols into WebSocket before they reach the user's browser, eliminating the need to expose RDP, VNC, or SSH ports to the public internet.
- The **Primary Load Balancer** is the single controlled entry point where traffic inspection and WAF rules can be applied uniformly.
Each of these is an expression of the same principle: **minimize the attack surface, enforce access through controlled choke points, and ensure that compromise in one component cannot be leveraged to attack another**. The architecture does not trust that users connect from managed endpoints. It does not trust that the network outside the deployment boundary is clean. It trusts **only the session token** that the control plane issues, and it validates that token at every session connection.
This is what distinguishes RA3 from a collection of virtual machines running VDI software: it is an architecture designed around the assumption that **trust must be earned at every boundary, not assumed at the perimeter**.
---
*This article is part of the Kasm Workspaces Reference Architecture Explanation Series.*
---
## Reference Architecture 4: Multi-Zone Multi Server
## (RA4) Multi-Zone Multi-Server Architecture Explained
Every previous architecture in the Kasm progression solves for **resilience within a single region**. RA4 answers a different question: what happens when the users themselves are distributed across the globe?
That question exposes a problem that no amount of single-region redundancy can resolve. **Control plane traffic**, which includes authentication, session provisioning, and policy evaluation, must flow to wherever the Kasm Web App and its database reside. **Session plane traffic**, the live pixel stream that constitutes the user's workspace experience, is sensitive to **round-trip latency** between the user and the infrastructure relaying it.
In a single-region deployment, both types of traffic travel to the same place. For a user on the other side of the world, this is the source of a degraded experience that **no configuration change can fix**, because the underlying problem is the speed of light across fiber.
RA4 resolves this problem by **separating the two planes geographically**. The control plane remains centralized in a primary region. The session plane is distributed to secondary regions physically close to the users they serve. A user in London authenticates through the central control plane and then receives a session stream **from infrastructure in London**. The authentication adds a one-time latency cost. The session itself runs at local speeds.
> **Every component placement, every load balancer, every zone definition, and every DNS record in RA4 is an expression of this single organizing idea: separate the control plane from the session plane so each can be optimized independently.**
---
### Reference Architecture 4
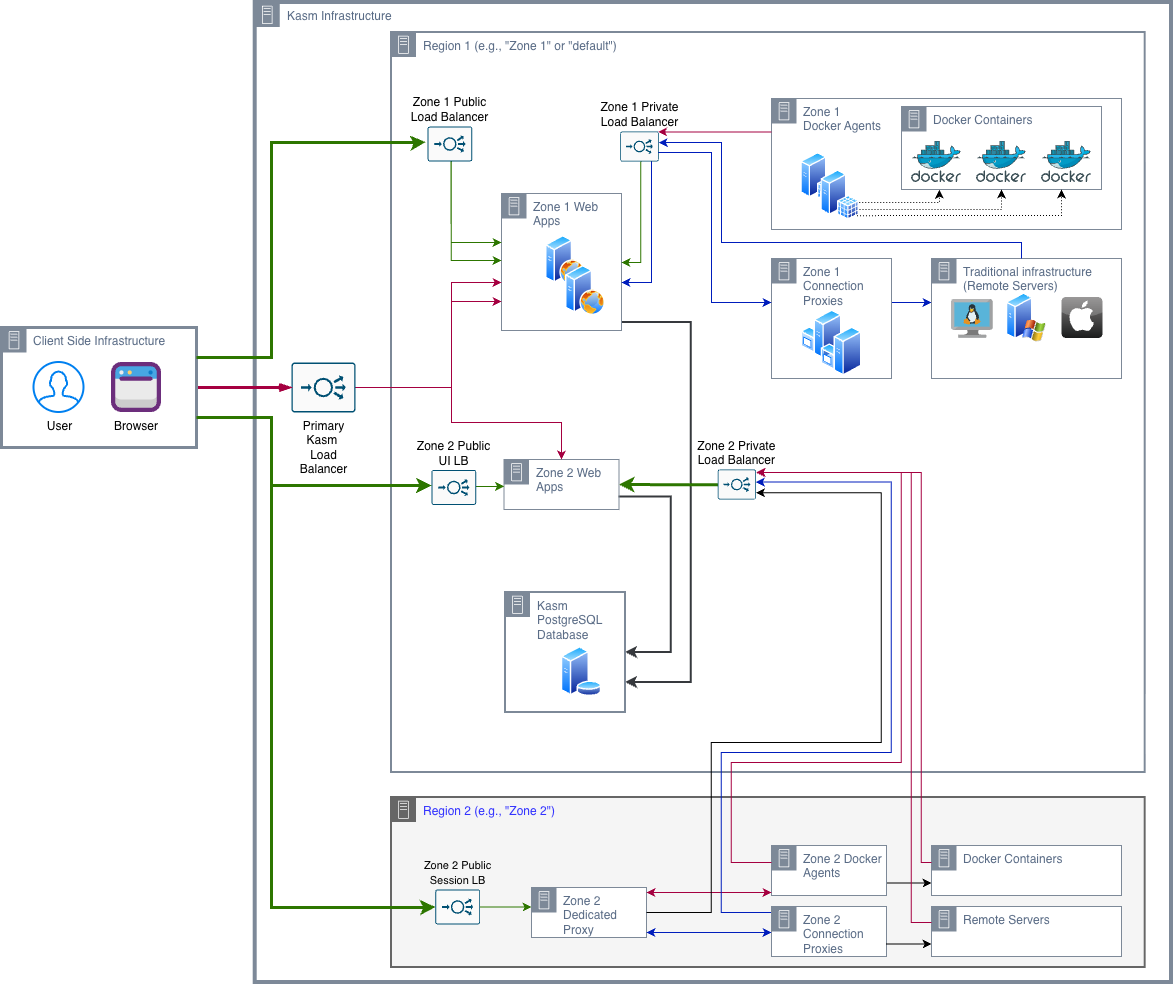
---
### The Primary Load Balancer
Each Kasm Web App role includes an NGINX container `kasm_proxy` that serves as a required front-end to internal services. While this component is integral to system operation, organizations may enhance their security posture by either hardening this configuration or deploying Kasm Workspaces **behind an enterprise-grade reverse proxy or load balancer**.
Enterprise security solutions can provide **advanced protections** such as Web Application Firewall (WAF) capabilities, DDoS mitigation, and Zero Trust access controls. Additionally, SSL/TLS offloading can centralize traffic management and **reduce processing overhead on backend Kasm services**, improving both performance and resource efficiency.
All user interactions, authentication, session initiation, and workspace streaming enter the environment through a single public endpoint, the Primary Load Balancer. This abstraction presents the deployment as **a unified service**, regardless of the underlying multi-node architecture.
A critical requirement of the Primary Load Balancer is **continuous backend health awareness**. The Kasm Web App exposes a `/api/__healthcheck` endpoint that verifies both application availability and database connectivity. If a Web App instance becomes unable to reach the database, it is automatically marked unhealthy and removed from traffic routing.
For production deployments, a **network load balancer** is the recommended approach. Unlike DNS round-robin, which relies on TTL expiration and may continue routing traffic to failed nodes for 90–300 seconds, a network load balancer performs active health checks and reroutes traffic to healthy instances within seconds, ensuring higher availability and a more reliable user experience.
---
### Private Load Balancer
One of the subtler architectural decisions is the use of a **separate private load balancer** within each zone. The private load balancer is positioned between the Web App and Dedicated Proxy nodes on one side, and the Agent and Connection Proxy nodes on the other.
This design establishes an internal routing path for control-plane traffic, ensuring it remains within the private network. As a result, control traffic does not traverse the external load balancer interface, improving both efficiency and security.
---
### The Two-Region Structure
The RA4 diagram shows two distinct geographic regions. Understanding how they differ structurally is the key to understanding the architecture.
**Region 1 is the primary region.** It hosts the control plane for all zones: the Web App nodes for Zone 1 and Zone 2 all reside here, along with the **PostgreSQL database**. Region 1 also hosts Zone 1's session infrastructure, because Zone 1 users are geographically local and do not benefit from session plane distribution.
**Region 2 is the secondary region.** It is structurally identical. It hosts a **Dedicated Zone Proxy**, **Docker Agents**, and **Connection Proxies** for legacy protocol connections. **It does not host a Web App instance or any database infrastructure.**
> **Note:** The placement of all zones' Web App nodes inside Region 1 is one of the most **architecturally significant decisions in RA4**, and one that surprises architects who expect each zone to have its own independent control plane. The reason is the **database dependency**: a Web App instance in Region 2 querying a database in Region 1 would add **80 to 120 milliseconds** to every query, compounding across multiple sequential queries per interaction to produce **multi-second control plane latency**. This is structurally unacceptable regardless of available bandwidth between regions.
---
### Why All Web App Instances Live in Region 1
The Web App role issues **synchronous, blocking database queries** for every user interaction. Authentication requires a database lookup. Session provisioning requires a database write. Policy evaluation requires a database read. **These operations cannot tolerate cross-continental database latency.**
The solution RA4 adopts is to accept the **one-time latency cost of control plane traffic** for users in remote regions, while **eliminating the sustained latency cost of session traffic** by routing it to regional infrastructure. The one-time authentication latency is noticeable but not disruptive. Sustained session latency is directly experienced as **lag in every keystroke and mouse movement**.
---
### The Dedicated Zone Proxy
The Dedicated Zone Proxy is the component that makes RA4 possible. It is a **session relay**; it accepts WebSocket connections from users' browsers and relays the session stream to the appropriate Agent. The Dedicated Proxy does not provision sessions (that is the Web App's job), does not authenticate users (that is the database's job via the Web App), and does not run workspaces (that is the Agent's job). It does exactly one thing: relay the session stream between the user and the Agent, at regional proximity.
:::info What the Dedicated Proxy Does
The Dedicated Proxy’s only responsibility is to relay session traffic between the user and the Agent or Connection Proxy at regional proximity.
:::
The Dedicated Proxy does not provision sessions (that is the Web App's job), does not authenticate users (that is the database's job via the Web App), and does not run workspaces (that is the Agent's job). It does exactly one thing: relay the session stream between the user and the Agent, at regional proximity.
```mermaid
sequenceDiagram
actor U as User (Region 2 - London)
participant Z2_LB as Zone 2 Public UI LB (Region 1)
participant Z2_WA as Zone 2 Web App (Region 1)
participant DB as PostgreSQL (Region 1)
participant Z2_SESS_LB as Zone 2 Session LB (Region 2)
participant Z2_PROXY as Dedicated Zone Proxy (Region 2)
participant Z2_AG as Docker Agent (Region 2)
rect rgb(253, 237, 236)
Note over U,DB: Control Plane - Cross-region (~100ms RTT, one-time)
U->>Z2_LB: HTTPS Login / Workspace request
Z2_LB->>Z2_WA: Route request
Z2_WA->>DB: Validate credentials and provision session
DB-->>Z2_WA: Session token + proxy endpoint
Z2_WA-->>U: Session token + Session LB address
end
rect rgb(213, 245, 227)
Note over U,Z2_AG: Session Plane - Local to Region 2 (~5ms RTT, persistent)
U->>Z2_SESS_LB: WSS connect
Z2_SESS_LB->>Z2_PROXY: Route to proxy
Z2_PROXY->>Z2_WA: Validate session token
Z2_WA-->>Z2_PROXY: Token valid
Z2_PROXY->>Z2_AG: Relay session stream
Z2_AG-->>Z2_PROXY: Pixels, input, audio
Z2_PROXY-->>U: Live session (low latency)
end
Note over Zone 2_Web App: Web App exits data path after token validation.
```
The token validation step, where the Dedicated Proxy contacts the Web App's **Upstream Auth Address** to verify the session token, is the one moment during session streaming where Region 2 touches Region 1. It happens once at session connection time, not continuously during the session. After validation, the session stream runs entirely within Region 2's infrastructure.
This is why the **Upstream Auth Address** zone setting is so critical in RA4. It tells the Dedicated Zone Proxy in Region 2 where to send token validation requests. It must resolve to the Region 1 Web App load balancer's public address — not an internal IP, not a single Web App server hostname. If any Web App instance in the HA cluster fails, the **Upstream Auth Address** should continue resolving to the load balancer, which routes validation requests to remaining healthy instances.
> **Warning:** The **Upstream Auth Address** zone setting is critical in RA4. It must resolve to the **Region 1 Web App load balancer's public address**, not an internal IP and not a single Web App server hostname. If any Web App instance in the HA cluster fails, the **Upstream Auth Address** should continue resolving to the load balancer, which routes validation requests to **remaining healthy instances**.
---
### Search Alternate Zones and Regional Failure
The **Search Alternate Zones** setting governs what happens when a regional zone loses capacity entirely. For RA4 deployments where zones represent **geographic preferences**, this means a Region 2 capacity failure results in Region 2 users receiving sessions from Region 1 or Region 3 with higher latency, rather than a hard failure.
For deployments where zones represent **compliance or tenant isolation boundaries**, this setting **must be disabled**. A zone boundary representing a PCI-scoped network segment or a classified enclave must not be crossed during overflow routing. A **capacity error is the correct behavior** when the alternative is a silent boundary violation.
---
#### Database Tier Resilience
A database failure is a global platform failure.
| Approach | RPO | Failover |
|---|---|---|
| Managed HA (RDS Multi-AZ, Azure Flexible HA) | Near-zero | Automatic (~60 seconds) |
| Self-managed Patroni | Near-zero | Automatic |
| Cross-region async replica | Minutes (replication lag) | Manual promotion |
#### Intra-Zone Resilience
Each zone follows the same HA patterns as RA3 component tiers.
| Zone Component | Minimum | Failure Impact |
|---|---|---|
| Dedicated Proxy nodes | 2 behind internal LB | One fails: active sessions on that proxy lost; others continue |
| Agent nodes | 2+ | One fails: sessions on that Agent lost; new sessions use healthy Agents |
| Connection Proxy nodes | 2 | One fails: legacy sessions lost; new sessions route to healthy proxy |
Dedicated Proxy nodes are lightweight (kasm_proxy only, no DB or container runtime) and economical to deploy in pairs.
#### RA4 HA Summary
| Failure Scenario | Impact | Recovery |
|---|---|---|
| One Web App node fails | Brief management disruption; session streams unaffected | Automatic: LB routes around it |
| Database fails (managed HA) | ~60 second platform unavailability | Automatic promotion |
| One zone's Dedicated Proxy fails | Active sessions on that proxy lost; zone remains functional | Automatic: LB routes to remaining proxies |
| Complete zone failure | Zone users lose sessions; all other zones unaffected | Zone users reassignable to another zone if policy permits |
| Central Web App region fails | All zones lose auth and session launch | Requires secondary cluster or recovery from backup |
---
### Operational Complexity
RA4 is the most operationally complex Kasm architecture. Treat these as deployment prerequisites, not post-deployment enhancements.
| Requirement | Why |
|---|---|
| **Centralized observability** with zone-tagged logs and metrics | Zone-specific failures appear as intermittent global problems without zone tagging |
| **Automated certificate management** | A certificate expiry in one zone causes a zone-scoped outage; wildcard certs plus automation prevent this |
| **Per-zone configuration documentation** | Each zone's six settings must be documented and version-controlled independently |
| **Image pre-loading across all zone Agents** | Staggered image cache state causes zone-specific workspace launch failures |
| **WAN path monitoring** | Upstream Auth reliability from each remote zone to the central cluster must be actively monitored |
---
### When to Use RA4
| Requirement | RA4 Capability |
|---|---|
| Users in multiple regions requiring regional session proximity | Zone-specific Dedicated Proxy and Agent nodes deliver regional streaming |
| Data residency: session compute must stay within a geographic boundary | Zone-per-region with Agents restricted to compliant infrastructure |
| Regional failure must not cause a global outage | Zone isolation: zone failure is regional degradation only |
| Single global administrative interface | Central Web App cluster manages all zones from one console |
| Scaling from RA3 with proven multi-server operations | RA4 extends RA3; existing central infrastructure is unchanged |
---
*This document completes the Kasm Workspaces Reference Architecture series. Return to the **Planning and Design Concepts** document for the foundational concepts underlying all four reference architectures.*
---
## Kasm Workspaces: Database and Web App Placement
## Database and Web App Placement Constraint
This principle warrants its own section because it is one of the most overlooked architectural constraints in multi-server Kasm deployments, and violations are typically discovered only after deployment when platform performance is already degraded.
The constraint is simple and absolute:
:::warning Important
Every Web App node must be provisioned as physically and topologically close to the database as possible.
:::
Close means same data center, same availability zone, or same cloud region: any configuration where the round-trip network latency between a Web App node and the database server is measured in **single-digit milliseconds**, not tens or hundreds of milliseconds.
---
### Why the Latency Math Matters
The `kasm_api` and `kasm_manager` services issue many **sequential, blocking database queries** during normal operations. Sequential and blocking are the critical terms here. These are not fire-and-forget asynchronous calls. They are synchronous calls where **each step in a workflow waits for the previous database response** before proceeding.
Consider a user launching a workspace in a deployment where the Web App is in US-East and the database is in APJ-West. The round-trip latency between those regions is approximately **100 to 150 milliseconds**. If a single workspace launch requires ten sequential database queries, the database interaction alone contributes **1,000 to 1,500 milliseconds** of latency to that user's session startup.
At enterprise scale with many concurrent workspace launches, this compounding effect degrades the entire control plane **for all users across all zones simultaneously**. The degradation is not local to the users who are geographically distant from the database: it affects every user whose session creation happens to be processed during a period of high database query load.
:::warning
Control plane latency caused by distant database placement does not manifest as a localized problem affecting specific users. It manifests as systemic platform sluggishness affecting all users simultaneously. Symptoms including slow session launches, slow admin UI responses, and timeout errors can be attributed to many causes. Administrators who observe these symptoms should **verify database round-trip latency** before investigating other causes.
:::
---
### Dedication Proxy Role for Geographic Distribution
The instinctive response to serving remote users is to place Web App nodes closer to those users. This instinct is wrong in the Kasm architecture.
The control plane must remain co-located with the database. The correct architectural response to serving remote users is to place **Dedicated Proxy nodes** in each region.
**Dedicated Proxy nodes** have no database dependency. They run a single service, `kasm_proxy`, which relays session traffic between the user's browser and the Agent. The proxy's only interaction with the control plane is a single Upstream Auth HTTPS call at session connect time to validate the session token. For a trans-continental path, this one-time call adds approximately **100 to 200 milliseconds** at connection establishment. After that single validation, the session streams entirely within the remote region at local latency for the entire duration of the session.
---
### The Practical Implication for Capacity Planning
The database co-location constraint means Web App nodes and the database should be treated as a **single logical unit** from a placement perspective, even when they run on separate physical servers.
In cloud deployments, this means both should be in the **same availability zone** rather than simply the same region:
| **Network Path** | **Typical Round-Trip Latency** |
|---|---|
| **Intra-availability-zone** | Sub-millisecond |
| **Intra-region, cross-availability-zone** | 1 to 5 milliseconds |
| **Cross-region** (even nearby regions) | **Tens of milliseconds or higher** |
Single-digit millisecond round-trip latency between the Web App and the database is not an aspiration. It is the operating condition **the control plane was designed for**. Deployments that operate outside this condition will experience control plane performance that degrades predictably with load, in a way that cannot be remediated by adding more Web App nodes or increasing database resources.
The database co-location constraint is one of the most reliable **leading indicators of production success** in enterprise Kasm deployments. Organizations that plan for it before deployment avoid a class of performance problems that are expensive to diagnose and require infrastructure changes to resolve.
---
*This article is part of the Kasm Workspaces Reference Architecture Explanation Series.*
---
## Kasm Workspaces: Deployment Zones
## Understanding Deployment Zones
Architects encountering Kasm Workspaces Deployment Zones for the first time often treat zone configuration as a **late-stage** administrative task, something to revisit after the platform is running. That approach leads to a predictable class of problems, sessions routing to the wrong geographic tier, RDP connections failing through firewalls, cookie-scoped authentication breaking in portal integrations, and load balancing decisions that work **against user experience** rather than for it.
Zones are not an administrative overlay. They are the mechanism through which Kasm's control plane and session plane separation **is expressed in a global deployment**. Every zone setting is a direct statement about how those two planes relate to each other and to the users they serve.
---
### What a Zone Actually Represents
A Zone is a **logical boundary** that groups Kasm services sharing a common network context. That context might be geographic, organizational, or regulatory. The zone mechanism is neutral about which concern drives its definition, but it is not neutral about the architectural implications that follow.
| **Zone Use Case** | **Zone Purpose** |
|---|---|
| **Geographic distribution** | Route users to Agents closer to them for lower latency |
| **Security enclave separation** | Isolate workloads by classification level or tenant |
| **Network segment isolation** | Scope sessions to permitted egress paths per segment |
| **Workspace restriction** | Limit which workspace types are available in which network |
:::warning
Zones are created at Web App installation time and the zone topology must be understood and planned, not improvised after the platform is in production.
:::
---
### The Zone Settings: What Each One Actually Governs
Zone settings are primarily concerned with the **session plane**. Zone configuration is how the session plane is told where it actually lives **from the perspective of the client browser**. The distinction between where infrastructure physically lives and where the browser thinks it lives is the source of **most zone misconfiguration** in enterprise deployments.
---
#### Zone Name and Zone Assignment
The Zone Name setting carries structural weight beyond its appearance as a simple text label. Every Web App service instance **declares its zone membership** through its configuration. Every Kasm node that checks in with a Manager **inherits that Manager's zone assignment automatically**.
**Labels** extend zone assignment with fine-grained targeting. Labels are key-value tags applied to servers and Agents within a zone. Workspaces specify **Include Labels or Exclude Labels** to control which infrastructure their sessions are permitted to use. This is the primary mechanism for **workspace-to-enclave binding**, ensuring that high-sensitivity workspaces only provision on Agents within a specific zone regardless of what capacity other zones have available.
---
#### Search Alternate Zones: Availability vs. Isolation
**Search Alternate Zones** governs what happens when all Agents within the user's current zone are full or unavailable. The decision to enable or disable this setting is a **policy question, not a technical one**.
When zones represent **geographic regions**: enabling is almost always correct. A user whose nearest data center is temporarily at capacity should receive a slightly higher-latency session from an alternate zone rather than **a hard failure**.
When zones represent **security enclaves or regulatory boundaries**: disabling may be architecturally mandatory. If a zone represents a PCI-scoped network segment, allowing session overflow into a general-purpose zone would be a **compliance violation**. The failure mode, a capacity error, is the **correct behavior** when the alternative is a boundary violation.
:::tip
The default is **Enabled**, which encodes an implicit assumption that zones are geographic, not regulatory. Organizations deploying zones for **compliance or tenant isolation** should consciously evaluate whether this default aligns with their security policy before going to production.
:::
---
#### Prioritize Static Agents: Managing Hybrid Compute Pools
**Prioritize Static Agents** governs how the Manager selects between manually registered agents and dynamically provisioned autoscaled agents when both are available in the same zone.
Enabling it ensures **sunk-cost on-premises infrastructure** is consumed before **variable-cost cloud infrastructure** is activated. This is financially rational in most hybrid deployments. Disabling it may be appropriate only when cloud Agents have **superior performance characteristics** that justify preferential use.
---
#### Proxy Hostname: The Most Consequential Zone Setting
**Proxy Hostname** is the FQDN that Kasm embeds in the session connection URL and returns to the client's browser. It is the address the browser will actually attempt to connect to for **WebSocket session traffic**. This is the **single most consequential zone setting** for multi-tier deployments.
The default value `$request_host$` evaluates to the hostname used when the user accessed the Kasm Web App. For single-region deployments where the Web App and Proxy are behind the **same load balancer on the same hostname**, this default works correctly. For **multi-region deployments with separate proxy tiers per zone**, this value must be explicitly overridden with the **zone-specific proxy FQDN**.
:::warning
Leaving Proxy Hostname at its default `$request_host$` in a multi-zone deployment is one of the **most common causes of session delivery failures** in enterprise deployments. The browser will attempt to connect to the Web App's hostname for session streaming rather than the zone-specific proxy hostname. The failure appears as a **session connectivity problem** rather than a configuration problem, which misleads diagnostic efforts.
:::
---
#### Upstream Auth Address: The Control Plane's View of Itself
**Upstream Auth Address** is the address Kasm uses to validate session authentication tokens. The default value `proxy` instructs the proxy to validate tokens against a **co-located API server**, correct for single-server deployments. In any distributed deployment, this value must be overridden with the **address of the Web App tier**.
:::warning
Setting the Upstream Auth Address to the **internal IP of a single Web App server** in a multi-server HA deployment is a common mistake. If that specific server is removed from the pool, proxy token validation fails **even though the overall Web App tier remains healthy**. The correct value in HA deployments is the **load balancer's FQDN**, so that token validation requests are distributed across all healthy Web App instances.
:::
---
#### Allow Origin Domain: The CORS Security Boundary
**Allow Origin Domain** enforces which origins are permitted to initiate WebSocket session connections to Kasm. This implements **browser-level CORS policy** for session traffic, preventing session tokens from being usable from unauthorized web origins.
The default value `$request_host$` is correct for straightforward deployments. When the Web App and the session proxy are on **different hostnames**, this default produces **CORS failures** because the session connection is initiated from the Web App's hostname but the proxy evaluates the origin against its own hostname.
In multi-hostname deployments, Allow Origin Domain must be set to the **Web App's public hostname** from which users actually initiate sessions.
---
#### The Three Settings That Must Be Mutually Consistent
The most important relationship in zone configuration is the one between **Proxy Hostname**, **Upstream Auth Address**, and **Allow Origin Domain**. All three must describe the same deployment from three different perspectives:
- **Allow Origin Domain** is what origin the proxy accepts session connection requests from
- **Upstream Auth Address** is what the proxy calls to validate the session token
- **Proxy Hostname** is what the client's browser connects to for session traffic
When these three are **mutually consistent**, sessions work. When **any one is misaligned**, the failure almost always appears as a session connectivity problem that looks deceptively like an **authentication problem**.
---
### Zone Settings Quick Reference
| **Setting** | **What It Governs** | **When to Override** |
|---|---|---|
| **Zone Name** | Logical deployment boundary | When multiple regions, enclaves, or tenants exist |
| **Allow Origin Domain** | CORS security for session connections | When Web App and proxy are on different hostnames |
| **Upstream Auth Address** | Token validation target | **Any multi-server deployment** |
| **Load Balance Strategy** | Resource consumption policy | Cloud: change to Most Load |
| **Search Alternate Zones** | Overflow to other zones | **Disable** when zones are compliance or security boundaries |
| **Prioritize Static Agents** | Static vs. autoscale preference | Disable only when cloud Agents are preferred for performance |
| **Proxy Hostname** | Client-facing session plane address | **Always** in multi-zone and dedicated proxy deployments |
| **Proxy Port** | Session WebSocket port | When proxy listens on non-443 port |
| **Enable RDP HTTPS Gateway** | Port 443 vs. 3389 for RDP | Enable when clients connect from uncontrolled networks |
| **Enable RDP HTTPS DLP** | DLP enforcement on RDP sessions | Enable when Kasm must be the DLP enforcement point |
| **Restrict RDP Client IP** | Anti-replay for RDP sessions | Enable only when source IP is preserved end-to-end |
---
*This article is part of the Kasm Workspaces Reference Architecture Explanation Series.*
---
## Kasm Workspaces: DNS Design
## Why DNS Is an Architectural Control
In most enterprise environments, DNS is treated as **foundational but passive**: a directory that maps names to IP addresses. It is provisioned early, configured once, and rarely revisited as an architectural concern.
Kasm Workspaces does not inherit this assumption. In a **web-native, Zero Trust platform** where every interaction is mediated through a browser, DNS plays a fundamentally different role. It directly governs whether:
- **Browser security policies** allow session establishment
- **Authentication context** can traverse system components
- **WebSocket-based session streaming** succeeds
In Kasm DNS is much more than just naming, it also affects system enforcement boundaries.
---
### The Browser as an Active Enforcement Engine
The most important mental model shift for Enterprise Architects unfamiliar with web-native systems is recognizing that **modern browsers are not passive clients**. They are active security enforcement engines that apply strict rules around:
- **Same-origin policies**
- **Cookie scoping rules**
- **Cross-origin request validation**
- **TLS certificate trust**
When a user launches a Kasm session, the browser evaluates whether connections are permitted based on **DNS-resolved hostnames**, domain relationships, and TLS certificate validity. If DNS and domain design do not align with these rules, session establishment does not degrade, it fails outright.
:::note
Symptoms of DNS and domain misalignment in Kasm deployments, including WebSocket connections failing, sessions not launching, and inconsistent authentication, **closely resemble firewall issues, routing problems, and load balancer misconfiguration**. Always verify DNS design and domain alignment **before** examining firewall rules or network paths.
:::
---
### Domain Relationships Define Authentication Flow
The relationship between hostnames defines how identity flows through the system.
**The Child Domain Model (Preferred)**
When the Web App is at `kasm.example.com` and the proxy is at `proxy.kasm.example.com`:
- The browser automatically sends cookies scoped to `kasm.example.com` to `proxy.kasm.example.com`
- **Authentication context flows naturally**
- Fewer cross-origin constraints need to be managed
**The Sibling Domain Model (Complex)**
When the Web App is at `kasm.example.com` and the proxy is at `proxy.example.com`:
- The browser **will not automatically send** the `kasm.example.com` cookie to `proxy.example.com`
- Cross-origin validation must be **explicitly configured**
- Every component must agree perfectly on **Allow Origin Domain**, **Upstream Auth Address**, and TLS expectations
| **Model** | **Cookie Sharing** | **Cross-Origin Config Required** | **Failure Surface** |
|---|---|---|---|
| **Child domain (preferred)** | Automatic | Minimal | Narrow |
| **Sibling domain (complex)** | Not automatic | Extensive | **Broad** |
Most enterprise Kasm deployments choose the **child domain approach** because it reduces the configuration surface area and makes failure modes easier to diagnose.
---
### DNS, TLS, and Load Balancers Form a Single System
In Kasm deployments, DNS does not operate independently. It forms a **tightly coupled system** with load balancers and TLS certificates:
- DNS resolves hostnames to **load balancer endpoints**, not individual server nodes
- TLS certificates must be issued for the **public hostnames that browsers use**
- **Internal node names are irrelevant** to the browser, which only trusts what DNS and TLS present
**Wildcard certificates** covering the chosen domain hierarchy, for example `*.kasm.example.com`, are commonly used not as a convenience measure but to maintain **consistency across distributed proxy endpoints** in multi-server and multi-zone deployments.
---
### The Session Chain: Where DNS Participates at Every Step
Every Kasm session depends on an **unbroken chain** of operations where DNS is present at multiple points:
1. Browser resolves the **Web App hostname** via DNS
2. Browser connects to the Web App, establishes HTTPS, and authenticates
3. The API returns a **Proxy Hostname** for session streaming
4. Browser resolves the **Proxy Hostname** via DNS
5. Browser initiates a **WebSocket connection** to the proxy
6. The proxy validates the **session token** via the Web App
At every step, the hostname must resolve correctly, the certificate must match, and the origin must be permitted. **A failure at any link in this chain produces a session failure.**
---
### DNS Significance Across the Reference Architectures
The role DNS plays **scales with the complexity of the deployment**.
| **Architecture** | **DNS Role** | **Complexity** | **Failure Impact** |
|---|---|---|---|
| [**RA1** (Single Server)](architecture-patterns/ra1) | Identity: single hostname defines the entire system boundary | Low | Immediate failure |
| [**RA2** (Single Server Control Plane)](architecture-patterns/ra2) | Identity plus abstraction: single public hostname; Agents are invisible to DNS | Low | Immediate if Proxy Hostname cannot resolve |
| [**RA3** (Single Zone Multi-Server)](architecture-patterns/ra3) | Identity plus scaling: DNS resolves to load balancers; certificates must match public hostnames | Medium | Inconsistent behavior across sessions |
| [**RA4** (Multi-Zone Multi-Server)](architecture-patterns/ra4) | **Identity plus routing plus locality:** DNS enables geographic routing and zone-aware session delivery | High | System-wide session delivery failure |
**In RA4**, DNS becomes the **routing fabric of the session plane**. Each zone has its own proxy hostname that resolves to a zone-specific load balancer in a geographically distributed region. A typical RA4 DNS design:
| **Hostname** | **Purpose** | **Resolves To** |
|---|---|---|
| `kasm.example.com` | Global control plane entry | Region 1 global load balancer |
| `us.kasm.example.com` | US zone session load balancer | Region 1 session load balancer |
| `eu.kasm.example.com` | EU zone session load balancer | Region 2 session load balancer |
Each of these hostnames must **resolve globally**, present a **valid TLS certificate**, be included in **origin validation configuration**, and reach a **functioning proxy**. Any mismatch breaks session delivery for the affected zone.
---
### DNS as a Zero Trust Enabler
Across all reference architectures, DNS supports Zero Trust principles by:
- Forcing all access through **controlled endpoints**
- Defining the **public identity** of each role in the system
- Ensuring traffic flows through **named, managed entry points** rather than implicit network routes
- In RA4 especially, enabling **secure global distribution** without exposing internal topology
The deeper insight: in Kasm Workspaces, **DNS defines who the system is, TLS proves that identity is valid, and the browser enforces whether interaction is permitted**. Naming, security, and connectivity are inseparable. DNS is not just how the system is found. It is **how the system is allowed to exist**.
---
*This article is part of the Kasm Workspaces Reference Architecture Explanation Series.*
---
## Kasm Workspaces: High Availability
## Understanding High Availability
When Enterprise Architects evaluate a new platform for production readiness, the instinct is to ask, "Is this platform highly available?" That question is appropriate for monolithic systems but it is misplaced for Kasm Workspaces.
Kasm is not a monolith. It is a **deliberately decomposed set of service roles**, each with a different function, different state characteristics, and different failure behaviors. High availability in Kasm is not a setting to enable or a tier to select. It is an outcome produced by **independently analyzing each role**.
**The right questions to ask are:**
- What is the **failure mode** of each role?
- What is the **impact** of that failure?
- What **redundancy mechanism** addresses it?
---
### Resilience Is a Role-by-Role Decision, Not a Platform-Wide Switch
Legacy VDI platforms typically run management, session brokering, and delivery functions inside the same process or tier. When that tier fails, everything fails together. Recovery requires the entire system to come back up, and the **blast radius of any single failure touches every user simultaneously**.
Kasm separates these concerns into **five distinct roles**. Because these roles are separated, a failure in one does not automatically cascade into all others:
- An **Agent failure** interrupts only the sessions running on that Agent. Users on healthy Agents continue working.
- An **Connection Proxy (CPX) failure** interrupts only the sessions running through that node. Users on healthy CPX servers continue working.
- A **Web App failure** blocks new session creation but does **not terminate** sessions already streaming through an Agent.
- A **Database failure** is the exception: it is the one role whose failure makes the **entire platform unavailable**, which is precisely why it demands the most serious redundancy investment.
---
### Role-by-Role: Failure Impact and Redundancy
#### The Database Role: The Most Critical HA Decision
The database holds **all persistent state** for the entire deployment. When it is unavailable, the Web App API cannot serve any requests, no session can be created, and no administrative operation can complete.
| **Redundancy Approach** | **Mechanism** | **Suitable For** |
|---|---|---|
| **AWS RDS Multi-AZ** | Synchronous standby; automatic failover | Cloud deployments on AWS |
| **AWS Aurora PostgreSQL** | Multi-primary compatible clustering | High-throughput cloud deployments |
| **Cloud-provider equivalents** | Varies by provider | Azure, GCP, OCI managed PostgreSQL |
| **Self-managed replication with Patroni** | PostgreSQL streaming replication; automated failover | On-premises and private cloud |
| **Single containerized instance** | None | Small teams, development, and Proof-of-Concept |
:::warning
Kasm ingests logs from all platform components into the database by default. For deployments with hundreds of concurrent sessions, this log volume can reach **tens of gigabytes** under default retention settings. Organizations running enterprise-scale deployments should **forward logs to an external SIEM** and reduce Kasm's internal log retention to zero. This both reduces storage requirements and removes I/O load that competes with the operational queries HA depends on.
:::
---
#### The Web App Role: Statelessness as the HA Enabler
The Web App role is the **easiest tier to make redundant** because it was designed to carry **no session state of its own**. Every piece of state lives in the database. Any Web App instance can serve any request from any user, and the load balancer can route traffic to any healthy instance **without coordination between instances**.
The recommended minimum for production Web App HA is **N+1**: one more Web App server than needed to serve peak load. A deployment expecting 200 concurrent sessions requires approximately 2 Web App servers at peak. N+1 means deploying **3**, providing both failure tolerance and maintenance flexibility.
| **Pattern** | **Convergence Speed on Failure** | **Best For** |
|---|---|---|
| **DNS load balancing** | Slow: 90 to 300 seconds for TTL expiry | Outermost redundancy tier |
| **Network load balancer** | Fast: seconds via active health checks | Production HA where fast failover is required |
The health check endpoint at `/api/__healthcheck` is the correct target for both DNS health monitors and load balancer health probes. It validates that the Web App process can **successfully reach the database**, making it a meaningful **end-to-end health signal** rather than a shallow process check.
---
#### The Agent Role: Horizontal Distribution as Fault Isolation
Agent nodes are where workspace sessions execute. An Agent failure directly interrupts sessions on **that specific node only**. Several properties make this failure mode less catastrophic than it might appear:
**Ephemerality:** Containers are destroyed at session end. A failed Agent takes **no persistent user data** with it. Users reconnect and receive a fresh container on a healthy Agent.
**Automatic rerouting:** The Manager's health monitoring continuously tracks Agent check-ins. When an Agent stops responding, the Manager stops routing new sessions to it and **schedules them to remaining healthy Agents** automatically.
**AutoScaling:** In cloud environments, the Manager can provision new Agent virtual machines when existing Agents reach capacity or when a node fails.
:::warning
AutoScaling requires the **Upstream Auth Address** to be explicitly configured **before** AutoScaling is enabled. New Agent virtual machines must be able to reach the Web App API to register. If the Upstream Auth Address is misconfigured, autoscaled Agents **silently fail to join the pool**, and capacity does not increase when needed. This is the **most common AutoScaling failure mode** in enterprise deployments.
:::
---
#### The Connection Proxy Role: Selective Redundancy
The Connection Proxy is required only when Kasm serves as a web-native gateway to **existing RDP, VNC, or SSH endpoints**. Containerized workspace sessions always use the **Agent role**.
For organizations where Windows, Linux, and macOS access is a primary delivery mode, Connection Proxy redundancy follows the same **stateless horizontal scaling model** as the Web App tier: multiple instances behind a load balancer, with health checks routing traffic away from failed instances.
---
### Failure Domain Isolation Through Zone Design
The **Zone model** is Kasm's primary mechanism for geographic failure domain isolation, keeping a failure in one region from cascading into another.
The **Search Alternate Zones** setting determines whether Kasm will route session requests to Agents in a different zone when the assigned zone has no available capacity.
| **Zone Boundary Type** | **Search Alternate Zones** | **Rationale** |
|---|---|---|
| **Geographic preference only** | Enable | Users benefit from fallback; no security boundary is crossed |
| **Security enclave** (classification, tenant separation) | **Disable** | Cross-zone fallback would **violate the policy** the zone boundary enforces |
:::tip
The **default is Enabled**, which encodes an implicit assumption that zones are geographic, not regulatory. Organizations deploying zones for **compliance or tenant isolation** reasons should consciously evaluate whether this default aligns with their security policy before going to production.
:::
---
### HA Decision Summary by Role
| **Role** | **Redundancy Mechanism** | **Minimum for Production HA** | **Key Failure Mode Without HA** |
|---|---|---|---|
| **Database** | Managed service with auto-failover or streaming replication with Patroni | Automatic failover required | Entire platform unavailable |
| **Web App** | N+1 behind DNS or network load balancer | 2+ recommended | New session creation blocked; admin UI down |
| **Agent** | Multiple per zone; AutoScaling in cloud | 2+ Agents per zone | Capacity reduction; sessions on failed Agent interrupted |
| **Connection Proxy** | Multiple instances behind load balancer | Required only for RDP, VNC, SSH workspaces | Legacy protocol sessions terminated |
| **Dedicated Proxy** | Multiple instances per zone behind load balancer | Required for multi-zone regional delivery | Sessions in affected zone interrupted |
---
### Why Ephemeral Sessions Fundamentally Simplify HA
In legacy VDI, a failed host takes **persistent state** with it. Virtual machines accumulate data, configuration, and user work over weeks or months. HA requires shared storage, live migration, or backup and restore workflows that trade **data-loss risk against infrastructure cost**.
In Kasm, a **failed Agent takes nothing meaningful with it**. Containers are ephemeral: they are created for a session and destroyed at session end. A failed Agent interrupts the session but cannot take persistent user data with it, because there is no persistent user data to take. The HA problem for Agents reduces to: provision enough Agents that losing one does not exhaust capacity, and provision them quickly enough through AutoScaling that sustained failures do not keep capacity depleted.
The ephemeral state that eliminates persistence-based attacks also eliminates persistence-based HA complexity. Both benefits are consequences of the same architectural decision.
---
*This article is part of the Kasm Workspaces Reference Architecture Explanation Series.*
---
## Reference Architecture
---
## Kasm Workspaces: Logical Architecture
## Understanding the System as a Flow of Responsibility
Kasm’s logical architecture is best understood as a lifecycle of intent.
1. A user initiates a session via a browser
2. The system authenticates and interprets that intent
3. A decision is made about where to run the session
4. A workload is instantiated on an available resource
5. The session is streamed back via web-native protocols
Each step maps to a role. These roles represent **responsibilities in a distributed system**, not just deployable services.
---
### The Five Kasm Roles
#### 1\. Web App Role (Control Plane and Orchestration Engine)
**The Brain and System Boundary**The Web App role combines user interaction and orchestration into a unified control plane.
* Hosts the web UI and API endpoints
* Authenticates users and captures session requests
* Maintains awareness of system state and capacity
* Determines workload placement and execution strategy
**Architectural meaning:**
* Centralized control plane
* Combines broker, scheduler, and API gateway
**Mental model:**
> This is where **intent is translated into action**.
---
#### 2\. Agent Role (Optional, Container Execution Plane)
**The Distributed Runtime Fabric**
Agents are responsible for executing user's container workloads.
* Launch containerized workspaces
* Provide compute resources (CPU, memory, GPU)
* Report health and capacity back to the control plane
**Architectural meaning:**
* Vertically and horizontally scalable execution nodes
* Fully decoupled from orchestration
**Mental model:**
> Agents are **ephemeral workload hosts**, not persistent desktops.
---
#### 3\. Connection Proxy Role (Optional, Unified Transport and Legacy Protocol Layer)
**The Engine of Web-Native Session Delivery**
The Connection Proxy enables Kasm’s core capability to deliver fully interactive workspace sessions to traditional endpoints (Windows, Linux, macOS) directly through a web browser.
> The Connection Proxy is a **customized Guacamole-based connection handler** that encodes and proxies RDP, VNC, and SSH into WebSocket streams usable by modern browsers.
Each Kasm Deployment Zone requires at least one Connection Proxy when supporting RDP, VNC, or SSH workloads. Rather than a single service, this role is composed of four tightly integrated components:
---
##### kasm\_guac
**Protocol Translation Core**
* Built on a custom-compiled Apache guacd
* Converts RDP, VNC, and SSH into web-native streams
* Spawns **one guacd process per CPU core by default**
* Automatically load-balances sessions across processes
This design ensures efficient utilization of multi-core systems.
**Interpretation:**
> This is the **rendering and encoding engine** that makes remote systems browser accessible.
---
##### kasm\_proxy
**Session Routing and Broker Layer**
* Routes client connections to the correct component
* Acts as the reverse proxy for session traffic
**Interpretation:**
> This is the **traffic director**, ensuring sessions reach the correct execution endpoint.
---
##### kasm\_rdp\_gateway
**Feature-Enforcing RDP Mediation Layer**
* Enables native RDP client access to Kasm sessions
* Enforces:
* Data Loss Prevention (clipboard, uploads, downloads)
* Single Sign-On (SSO)
* Credential injection
* Supports advanced device redirection:
* Smart cards
* USB
* Webcam
**Interpretation:**
> This layer adds **policy enforcement and enterprise-grade control** to RDP sessions.
---
##### kasm\_rdp\_https\_gateway
**Transport Compatibility Layer**
* Tunnels RDP traffic over HTTPS
* Enables traversal through restrictive firewalls
* Implements Microsoft RD Gateway protocol
Important distinction:
* Does **not interpret RDP traffic**
* Acts purely as a **secure transport wrapper**
**Interpretation:**
> This layer ensures **connectivity in constrained network environments**.
---
##### How these components work together
For browser-based sessions:
` Client → kasm_proxy → kasm_guac → Target Session `
For native RDP sessions (default path):
` Client → kasm_RDP_HTTPS_Gateway → kasm_RDP_Gateway → Target Session `
This layered design allows Kasm to:
* Support both **web-native and thick-client access**
* Balance **security, compatibility, and performance**
---
##### Architectural meaning of the Connection Proxy role
* Protocol abstraction layer
* Session routing and delivery mechanism
* Security enforcement boundary
* Web-native translation engine
**Mental model:**
> The Connection Proxy transforms **any remote interaction into a controlled, browser-delivered experience**.
---
#### 4\. Dedicated Proxy Role (Optional, Geo-Distributed Edge Layer)
**Separating User Proximity from Control Plane Location**
In standard deployments, proxy functionality resides with the Web App. At scale, this can be externalized.
* Deploys proxies across geographic regions
* Routes sessions through the nearest proxy to the user
* Reduces latency while maintaining centralized control
* Uses the Web App for authentication and orchestration
**Architectural meaning:**
* Edge-distributed access layer
* Enables global scale without duplicating control logic
**Mental model:**
> The Dedicated Proxy moves the **workspace experience closer to the user**, not the control plane.
---
#### 5\. Database Role (Persistence and Coordination)
**The System Memory**
* Stores users, configuration, sessions, and metadata
* Enables stateless control plane operation
* Coordinates distributed roles
**Architectural meaning:**
* Foundation for system consistency
**Mental model:**
> This is what allows a distributed system to behave consistently over time.
---
### Zero Trust Through Architectural Design
Kasm enforces zero trust principles inherently:
* All access is mediated through proxy layers
* No direct connectivity to backend systems
* Sessions are isolated and ephemeral
* Control and execution planes are separated
With Dedicated Proxies:
* Access becomes **geo-distributed without expanding trust boundaries**
---
### Closing
Kasm Workspaces redefines VDI by dissolving the dependency on persistent desktops and replacing it with:
* A centralized control plane (Web App Role)
* A distributed execution fabric (Agents)
* A unified protocol and transport layer (Connection Proxy)
* A globally scalable edge access model (Dedicated Proxy)
* A persistent coordination layer (Database)
Together, these roles form a system where:
> **User intent is transformed into a secure, isolated, browser-delivered session, instantiated dynamically, governed centrally, and delivered globally.**
---
## Reference Architecture: Planning and Design
## Planning and Design Concepts
> **About This Article**
> This series of explanation articles is written for Enterprise Architects evaluating or planning Kasm Workspaces deployments. Each article is understanding oriented: the goal is to build a durable mental model of how and why the architecture is structured the way it is. These articles are not deployment guides, configuration references, or operational runbooks.
---
### Zero Trust Workspace Delivery for the Modern Enterprise
If your background includes **Citrix Virtual Apps and Desktops**, **Omnissa Horizon**, **Azure Virtual Desktop**, or **Amazon WorkSpaces**, most of what you already know about workspace architecture still applies here. Concepts like session brokering, connection gateways, and resource pools all have a counterpart in Kasm Workspaces. What differs is where the platform draws its security boundary, and that difference is worth understanding before you map your existing design patterns onto it.
This article builds the conceptual foundation that makes every later architecture decision easier to reason about. Understanding why the platform is structured this way will make the configuration decisions in later articles more straightforward.
---
### The Problem Kasm Was Built to Solve
Kasm Workspaces extends familiar workspace delivery concepts to address a specific, well documented enterprise problem: providing secure, reliable access to applications and desktops for users connecting from any device, on any network, while containing the risk that comes with that flexibility. It does this using standard, well established web technologies rather than a proprietary client stack:
* **HTTPS**-based session delivery
* **High-performance** WebSocket streaming
* **Browser-native** authentication and access control
* **All execution** is performed in secure infrastructure, not on endpoints
* **Pixel rendering** is performed client-side in the browser
* **No proprietary client software** or endpoint agent required
---
### Why Legacy VDI and VPN Models Reach Their Limits
Traditional workspace delivery platforms were designed around assumptions that were reasonable at the time but have become harder to satisfy in most modern enterprises:
* Users connect from **trusted networks or managed corporate endpoints**
* Security enforcement occurs at the **network perimeter**
* **VPN-based access** is an acceptable mechanism for remote workers
Each of these assumptions is harder to guarantee in environments that support hybrid workforces, third-party contractors, unmanaged devices, or data subject to Data Loss Prevention (DLP) requirements. VPN-based access extends the internal network to the endpoint, which increases the blast radius of an endpoint compromise and creates a path for lateral movement. Legacy VDI reduces some of this risk, but it still typically depends on proprietary client software, persistent desktops that accumulate state across sessions, and trust models that treat network location as a proxy for legitimacy.
Kasm Workspaces was built to close this gap: to give architects a workspace delivery model that holds up under a Zero Trust standard, where every access request is validated on its own merits regardless of where it originates, without requiring a wholesale replacement of existing identity, security, and infrastructure investments.
---
### The Architectural Principle: Execution Stays in Infrastructure
The organizing principle behind Kasm Workspaces can be stated directly:
> **Workloads execute in secure infrastructure environments, not on user devices.**
In conventional VDI, the virtual machine is a full, persistent environment, and client software on the endpoint renders its output. The endpoint remains a meaningful participant: it can hold client certificates, run a proprietary protocol stack, and retain session data.
In Kasm Workspaces, the endpoint functions as a display device. Its role is limited to rendering a pixel stream delivered from infrastructure the organization controls. The endpoint does not execute the application, does not touch the underlying data directly, and does not retain session state once the session ends.
| **Architectural Advantage** | **What It Means in Practice** |
|---|---|
| **Reduced endpoint attack surface** | A compromised endpoint cannot compromise the workspace, because execution happens entirely in infrastructure |
| **Isolation of untrusted content** | Code, files, and browser activity run inside an ephemeral container that is destroyed at session end |
| **Centralized execution control** | Policy is enforced in infrastructure, independent of endpoint state or management enrollment |
| **Elimination of persistent state** | Sessions are disposable by design, removing the kind of persistent foothold that Advanced Persistent Threats (APTs) rely on |
---
### Web-Native, Standards-Based Delivery
Web-native has a precise meaning here. It does not describe a product with a web interface layered on top of a proprietary protocol stack. It describes a delivery architecture where every component, from session origin to browser rendering, runs on standard, open web technologies, with no proprietary protocol in the user-facing path. That distinction matters operationally: it is what keeps firewall rules simple and keeps the platform interoperable with the identity, logging, and security tooling you already run.
When a user authenticates to Kasm Workspaces, the entire session lifecycle runs over **HTTPS** and **WebSocket**:
| **Step** | **What Happens** | **Technology** |
|---|---|---|
| **1** | User navigates to the Kasm URL in any modern browser | HTTPS |
| **2** | Browser authenticates against `kasm_api` via identity provider | HTTPS REST, SAML, or OIDC |
| **3** | `kasm_manager` schedules a container on an available Agent node | Internal API |
| **4** | Browser opens a WebSocket stream via `kasm_proxy` to the container | WebSocket over HTTPS |
| **5** | Session is rendered client-side inside the browser tab | HTML5 Canvas |
| **6** | Session ends; container is destroyed; no persistent state remains | Docker lifecycle |
The practical result is a simple, auditable network requirement: the complete user-facing firewall rule is a single outbound allow on port 443. There is no VPN client to install, no persistent tunnel to maintain, and no proprietary protocol handshake to support. The browser's native security sandbox becomes part of the session security boundary by design.
The single-port requirement applies to traffic between end users and the Kasm platform. Internal component networking uses standard protocol ports: **TCP 5432** for PostgreSQL, **TCP 3389** for RDP to legacy targets, **TCP 22** for SSH, and **TCP 5900** for VNC. These are intra-infrastructure paths, not user-facing firewall requirements.
For legacy protocols such as RDP, VNC, and SSH, Kasm does not stream those protocols directly to the browser. The Connection Proxy role translates them server-side into a browser-renderable WebSocket stream before delivery. From the browser's perspective, every session arrives over the same HTTPS and WebSocket path, which means existing network monitoring and inspection tools continue to work as expected.
---
### Zero Trust Alignment: Architecture as Security Policy
Zero Trust is an architectural approach built on one foundational assumption: breach is possible, so containment matters as much as prevention. Kasm Workspaces is designed at the architecture level to support the controls a Zero Trust standard requires, rather than adding those controls on top of an existing design.
| **Zero Trust Control** | **How Kasm Implements It** |
|---|---|
| **Least Privilege Access** | Users receive a session, not network access. Access is scoped to the specific workspace policy assigned to them |
| **Micro-segmentation** | Each session container has its own Linux kernel namespace. Sessions cannot communicate with each other at the network layer |
| **Elimination of Implicit Trust** | Each session is individually authenticated and authorized. There is no persistent authenticated tunnel that carries over between sessions |
| **Attack Surface Reduction** | The session container is destroyed on logout, removing all residual state. The browser sandbox is the outermost boundary |
| **Embedded DLP** | Clipboard access, file upload, and file download are configurable per workspace policy, enforced at the session boundary regardless of endpoint state |
In many traditional VDI environments, DLP is added on top of the system through endpoint agents, network inspection appliances, and after-the-fact monitoring. All of these approaches share the same dependency: they rely on the endpoint and network being in a known, trusted state. In Kasm Workspaces, DLP is a property of how sessions are delivered, applied uniformly across managed and unmanaged devices alike.
---
### The Two Traffic Planes
One of the most useful distinctions to internalize in Kasm Workspaces is the separation between two different types of traffic. Every topology and placement decision in this reference architecture series traces back to this separation.
| **Characteristic** | **Control Plane** | **Session Plane** |
|---|---|---|
| **Content** | Authentication, policy evaluation, session orchestration, workspace lifecycle | Live pixel stream, keyboard and mouse input, clipboard events, file transfer |
| **Bandwidth profile** | Low: primarily API call volume | High: approximately 5 to 15 Mbps per active session |
| **Latency sensitivity** | Database query latency: slow queries degrade launch times for all users at once | Network round-trip between the proxy and the user's browser: high latency produces visible display lag |
| **Database dependency** | **Yes**: multiple sequential, blocking queries per operation | **None**: zero database interaction during an active session stream |
| **Handled by** | Web App role | Kasm Agent role or Connection Proxy role |
These two planes pull infrastructure in opposite directions in any distributed deployment:
* **Control plane traffic** anchors the Web App role near the database. Placing the Web App role far from the database introduces latency that degrades the experience for every user in every zone at once.
* **Session plane traffic** benefits from proxy nodes placed as close as possible to end users. A Kasm Dedicated Proxy node can sit in a geographically remote region with no control plane penalty, because it has zero database dependency.
This distinction is the practical justification for the Dedicated Proxy role, and the reason a multi-zone deployment can support global geographic distribution without needing a full control plane replica in every region.
---
### The Five Service Roles and Their Responsibilities
Kasm Workspaces uses a role-based architecture. A role is a collection of services with a defined responsibility boundary. Roles can be co-located on a single server, as in a single-server deployment, or distributed across many servers, as in larger multi-server deployments. The same role definitions apply either way.
| **Role** | **Key Services** | **TCP Port** | **Zone-Assigned** | **Database Dependency** |
|---|---|---|---|---|
| **Web App** | `kasm_api`, `kasm_manager`, `kasm_proxy` | 443 | Yes | **Critical** |
| **Database** | `kasm_db` (PostgreSQL) | 5432 | No | N/A |
| **Agent** | `kasm_agent`, `kasm_proxy`, container runtime | 443 | Yes | **None** |
| **Connection Proxy** | `kasm_guac`, `kasm_rdp_gateway`, `kasm_rdp_https_gateway`, `kasm_proxy` | 22, 443, 3389, 5900 | Yes | **None** |
| **Dedicated Proxy** | `kasm_proxy` | 443 | Yes | **None** |
Understanding these roles as a system, rather than as individual services, is the key to reading any Kasm reference architecture diagram correctly.
---
### The Deployment Patterns
Kasm architectures grow through progressive separation of concerns. Each stage adds resilience, scalability, and architectural clarity. This is not a forced upgrade path: each stage is appropriate for a specific scale and fault-tolerance requirement, and many organizations run successfully at an earlier stage indefinitely.
| **Architecture** | **DB Proximity** | **Zone Count** | **Fault Tolerance** | **Primary Use Case** |
|---|---|---|---|---|
| [**RA1:** Single Server](architecture-patterns/ra1) | Automatic (same host) | 1 | None | POC, dev/test, small teams, edge sites |
| [**RA2:** Single Server Control Plane + External Agents](architecture-patterns/ra2) | Automatic (co-located) | 1 | Agent tier only | Capacity expansion, legacy access in remote networks |
| [**RA3:** Single Zone Multi-Server](architecture-patterns/ra3) | Deliberate (same DC or region) | 1 | All roles | Enterprise: Single region |
| [**RA4:** Multi-Zone Multi-Server](architecture-patterns/ra4) | Deliberate (same DC or region) | 1 per region | All roles + zone isolation | Enterprise: Global multi-region |
The transitions between stages are additive rather than a replacement. Moving from RA2 to RA3 means separating the database onto a dedicated server and adding a second Web App node behind a load balancer. Moving from RA3 to RA4 means defining additional zones with region-specific infrastructure, while keeping the Web App role and database anchored at the central site.
Architecture selection is driven by session concurrency, fault tolerance, and geographic distribution requirements. The choice of hypervisor or cloud provider does not determine which reference architecture to select.
---
### What This Means for Your Evaluation
None of the roles, planes, or deployment patterns above require you to set aside your existing standards. Kasm Workspaces is designed to integrate with the identity providers, logging systems, and infrastructure platforms your organization already runs, and to scale from a single-server proof of concept to a global, multi-region deployment using the same underlying architecture. Each reference architecture in this series documents a proven, supportable pattern used in production today, so you can select the stage that matches your current requirements and grow into the next one when you need it, without redesigning the platform from scratch.
*Proceed to the following sections that build on these foundations.*
---
## Kasm Workspaces Sizing and Deployment Guide
## Sizing and Deployment Guide
This guide covers sizing requirements and deployment guidance for the Kasm Workspaces platform and assumes a distributed architecture with separate API, database, and agent components. For single server deployments, use the guidance provided in the agent sizing section.
For all componenets, maximum concurrent Kasm sessions is the metric that should be used when sizing. Some use cases will have lots of total users with a small number of concurrent users while others will have more concurrent sessions than total users (more than 1 session per user). In all cases, the maximum concurrent session count should be the metric used when considering sizing requirements.
### Web App Role
The web app server role is comprised of several containerized services: API, Manager, Share, and proxy. The API server is responsible for taking API calls from users and potentially external services using the developer API. The manager service is responsible for managing clusters of agents and auto scaling new agents in the cloud if configured. The web app server role is both vertically scalable (adding more CPUs and RAM) and horizontally scalable (adding more web app servers).
#### Redundancy
For large deployments, it is recommended to have N+1 redundancy for the web app servers. This ensures ease of maintenance, allowing administrators to bring down a server for patching, without effecting users.
#### Sizing
Concurrent sessions are used for deployment size recommendations, so while you may be using a named user license, you still need to understand your concurrent session requirements in order to size your deployment appropriately. There are two deployment architectures that can be used, which have drastically different sizing requirements for the Web App Server role, Standard and Direct-to-Agent. The standard deployment architecture has all traffic traverse the web app servers that are responsible for each respective zone. The Direct-to-Agent workflow has client API calls going to the Web App servers while the desktop rendering goes directly to the server hosting the application container. Direct-to-agent is only applicable to containerized desktop/app sessions and does not apply to Servers connected to via RDP.
| Deployment | Server Specifications | Concurrent Sessions |
|-----------------|---------------------------|---------------------|
| Standard | 4 CPUs, 4GB RAM, 80 GB HD | 70 to 150 |
| Direct-to-Agent | 4 CPUs, 4GB RAM, 80 GB HD | 300 to 500 |
The range of concurrent sessions a single server can support is highly dependent on the use case. Administrators supporting an online gaming service would be on the low end of the spectrum while more moderate uses like remote work or browser isolation could expect to be near the high end of the spectrum.
An administrator expecting to support up to 200 concurrent sessions for a remote work use case, in a standard deployment architecture, would need 3 servers using the N+1 redundancy recommendation. With 3 API servers, the administrator could expect to support up to 450 concurrent users. If the administrator needs to remove one for maintenance, the deployment would still be able to support up to 300 concurrent sessions, still within the desired capacity.
#### Load Balancing
Load distribution to different deployed web app servers can be accomplished via DNS load balancing or using a network load balancer such as an F5 or cloud load balancer.
##### DNS Load Balancing
With DNS load balancing, there is an A record for the same domain name pointing to each web app servers. Health checks can be used to automatically remove the DNS entry should the corresponding web app server become unresponsive.
DNS load balancing offers a simple solution that requires no additional components between users and the backend servers. This simplifies the architecture and significantly reduces the cost of providing resilient services.
There are many services and physical devices on premise that can provide DNS load balancing with health checks. AWS Route 53 is one example. You don’t need to host Kasm in AWS to use Route 53. Route 53 can provide public DNS services for resources on-premise or even in other cloud providers.
The disadvantage to using DNS based load balancing is slow convergence on failure. Even with the most aggressive settings of10 seconds between health checks and 3 consecutive failures, will result in at least 30 seconds to recognize the failure. At this point the DNS record is removed, however, clients will not get the update until the TTL has expired. A typical TTL in AWS is 5 minutes, however, it can be set as low as 60 seconds. Therefore, the best case scenario is that on failure some clients will be down for at least 90 seconds.
##### Network Load Balancer
Another option is to use a network load balancer, either a physical on-premise load balancer such as an F5 or a cloud based load balancer. In either case, the load balancer is placed between the users and the web app servers and distributes the load between all the web app servers. Load balancers typically use health checks to determine if an upstream server is offline. These health checks can be passive, such as looking at the TCP sessions or HTTP return codes of traffic. Active health checks can also be used, which actively make HTTP calls to a specific path and expect a configured HTTP status code.
Network load balancers have the advantage of providing convergence within seconds after a failure. They can also try multiple upstream web app servers for a single request, meaning users typically wouldn’t notice a web app server going down. The disadvantage is that it complicates the architecture with additional components between the end users and the backend servers. The load balancers can also go down and require maintenance as well. Which usually means maintaining N+1 redundancy and using DNS load balancing to balance the traffic to the load balancers.
Network load balancers may be required for some organizations as they provide many other potential benefits:
\* Single entry point for all publicly served websites for the organization
\* Web Application Firewall (WAF)
\* SSL inspection
\* Data Loss Prevention
\* Anti-virus
\* Logging of all traffic at the enterprise level
\* Other advanced security features
##### Health Checks
Wether using DNS load balancing, network load balancers, or both, health checks are imperative to ensuring failover and alerting. Kasm has a built in health check located at /api/\_\_healthcheck, which checks the operational status of the API server and the API server’s access to the database. If the API returns a non HTTP 200 series status code, the health check failed. AWS Route 53 can be configured with email alerts on failure, in addition to removing the associated A record. When the health check starts returning healthy, the A record will be re-enabled. For network load balancers the premise is the same, upstream servers will automatically be removed/added as their health check changes.
#### Maintenance
It is recommended to have a scheduled maintenance window, however, Web App servers can be gracefully taken offline without affecting users. This would require removing the selected server from the load balancing mechanism. For DNS load balancing, that would mean removing the A record. For network load balancers that would mean removing the selected server from the upstream list of servers and applying the configuration change, to each load balancer. After the server has been patched and rebooted, the DNS record or upstream change can be reverted. For DNS load balancing, it can take a while for users requests to stop coming into the server. The amount of time needed is determined by the TTL of the DNS record and potentially DNS architecture at the user's site which cache DNS records for longer than the configured TTL. Therefore, if DNS load balancing is used, it is recommended to monitor the traffic going through the API server before starting maintenance activities.
### Database Role
By default, Kasm uses a Postgres container on the database role server.
#### PostgreSQL
Kasm utilizes the latest version of Postgres 16.x and uses a simple containerized version in the default installation. Larger deployments may choose to use an external PostgreSQL database. The minimum requirements for PostgreSQL in general are minimal, however, we recommend at least 2 CPUs and 4 GB of RAM. These minimum requirements will handle deployments into the hundreds of concurrent users. The database server can be vertically scaled to increase performance of larger deployments.
Disk space requirements are more complicated. Kasm collects logs from all components and by default keeps debug logs for 4 hours and all other logs 7 days. These logs are ingested into the database and used by the dashboard and logging panels of the UI. For larger installations it is highly recommended to configure Kasm to forward logs to an Enterprise class SIEM solution, such as Splunk and set the Kasm log retention period to 0, effectively disabling database logs. With the default log retention settings, the database will use between 250 to 550MB for a single server install. Deployments with hundreds of concurrent users can easily use several tens of gigabytes of storage with default log retention settings. Smaller deployments with less than around 50 concurrent sessions can rely on Kasm’s built-in logging mechanisms, with a healthy database volume of around 150GB on the higher end of the spectrum. Deployments larger than this should use an external SIEM solution and set log retention to 0. If disabling the built in logging is not an option, monthly database maintenance should be performed to ensure AUTO VACUUMs are being performed and the space is being released back to the operating system.
##### Postgres Compatible Databases
Kasm supports using [AWS RDS](https://aws.amazon.com/rds/) and [AWS Aurora](https://aws.amazon.com/rds/aurora/postgresql-features/) Postgres database. Other Postgres compatible solutions, such as CockroachDB may work but are not officially supported by Kasm Technologies. Solutions such as AWS RDS provide added benefits of ease of maintenance, scalability, redundancy/failover, and automated backups.
##### Redundancy and Backups
Due to the criticality of the database to Kasm operations, it is important to carefully consider database redundancy and backups. At a minimum, regular backups of the database should be performed. See the Kasm documentation on performing [backups](../how-to/infra-autoscale/database.mdx) and [restorations](../how-to/infra-autoscale/database.mdx) of the database. The simplest form of redundancy is automated scheduled backups using a cron job, which are transferred to a remote location (NFS/S3,etc) and are able to be restored on a standby server in case of a failure of the primary database. For a solution that provides high availability, see the [PostgreSQL documentation](https://www.postgresql.org/docs/16/high-availability.html) for HA deployments.
##### Sizing
The following sizing recommendation is for sizing a the system backing the Postgres database. The standard Kasm deployment uses a single database server, however, RDS and other Postgres compatible PaaS deployments are supported.
| Server Specifications | Concurrent Sessions |
|---------------------------|---------------------|
| 4 CPUs, 4GB RAM, 80 GB HD | 50 to 200 |
| 4 CPUs, 8GB RAM, 100 GB HD | 200 to 500 |
| 8 CPUs, 8GB RAM, 150 GB HD | 500 to 1000 |
### Agent Role
The agent servers are responsible for hosting containers for user desktops/apps. These servers have high CPU, RAM, and disk requirements that are heavily dependent on the specific use case.
#### Redundancy
User sessions are automatically spread to available agents. When an agent goes offline or does not respond, new sessions are directed to healthy agents within the same zone that meet the requirements needed to fullfil the requested Workspace. Existing sessions may be interrupted until the agent is brought back online.
#### Sizing
Concurrent sessions are used for deployment size recommendations, so while you may be using a named user license, you still need to understand your concurrent session requirements in order to size your deployment appropriately. Agents only support container based Workspace sessions, so ensure you are sizing only for expected container based Workspaces sessions. The number of user sessions each agent can run depends on the Workspaces being deployed on that agent and the [Agent Settings](../how-to/infra-autoscale/docker-agent.mdx). The Agent Settings allow the administrator to override how many CPUs and RAM that Kasm uses to calculate how many sessions an agent can take. This allows the administrator to oversubscribe the agents. Each Workspace definition can be configured with a different CPU count and RAM amount. The below table assumes each Workspace running on the agent has the identical specifications configured.
| Workspace Specs | Agent Size | Agent Overrides | Concurrent Sessions |
|------------------|--------------------|---------------------|---------------------|
| 2 CPUs, 4 GB RAM | 16 CPUs, 64GB RAM | N/A | 8 |
| 4 CPUs, 4 GB RAM | 16 CPUs, 64GB RAM | 96 CPUs, 80GB RAM | 20 |
| 4 CPUs, 4 GB RAM | 32 CPUs, 128GB RAM | 192 CPUs, 192GB RAM | 48 |
For container workspaces that will have session recording enabled, one additional CPU should be assigned to the workspace to handle the session recording encoding workload.
In the first example, there is no agent override configured. For each session on the agent, there are 2 CPUs subtracted from the available resources. Since the agent physically has 16 CPUs, that means only 8 sessions could be established. This is not optimal because system still has more RAM available, and could potentially handle twice as many sessions if the CPUs were overridden to 32. The amount of overriding the CPU and RAM is dependent on how large the agent is and what the use case is. For game streaming use case, users will be using most of their resources at all times. For standard use cases, however, overriding is generally safe but requires the administrator monitor the environment and understand the baseline usage. The subsequent two rows show two more scenarios of overriding. The more sessions a single system can take, generally the more you can override, because there are more sessions on the system, each of which has RAM and CPU not being fully utilized. The final example is very aggressive and is achievable depending on the use case. It is critical that actual RAM utilization on the agents is never allowed to get near full capacity. Getting the right override requires careful monitoring of your deployment in real world usage. Use the Kasm Workspaces Admin dashboard to view RAM utilization over time, on each agent.
##### Disk Space
The amount of disk space required will depend on the number of concurrent users the agent is expected to host and how much data each user is expected to accumulate during their session. When a new session is created, nearly no additional space is required on the agent to provision the session. As the user adds files or uses applications like Chrome, changes to the containers file system will accumulate space. The amount of disk space that each user session will consume can vary greatly based on your use case.
In addition, when session recording is enabled, each session running on the agent where the user is part of a group with session recording enabled will need additional space to store the recording while it is being encoded and uploaded to S3 buckets.
**It is recommended to use a separate volume for /var/lib/docker that uses the XFS file system.** The /var/lib/docker volume should have at least 80GB of disk space as a baseline plus the number of users times the amount of space expected per user (80GB + (Users * space_per_user)). The following table provides the calculations for several scenarios. If persistent profiles are enabled and use a remote file system such as NFS, the persistent profile does not reside on the agent and thus does not count when figuring out the expected size per user. You can utilize the command `sudo docker system df -v` to see the amount of disk space utilized by each container.
| Base Size | Concurrent Sessions | Max Size Per User | Total Volume Size |
|-----------|---------------------|-------------------|-------------------|
| 80GB | 8 | 5GB | 120 GB |
| 80GB | 20 | 10GB | 280 GB |
| 80GB | 48 | 12GB | 656 GB |
###### Limiting Disk Usage
It is possible to place size and speed restrictions on disk usage of containers. See the [Docker Reference Docs](https://docs.docker.com/engine/reference/commandline/run/#storage-opt) for more details. If using the default overlay2 storage driver, the backing file system must be XFS for the size and speed restrictions to work. The following JSON can be placed in the Workspace definition in the Docker Run Override field. With the example in place, the user's session would be capped at 10GB of disk space. This does not include the base desktop environment or installed applications, only changes the user invokes within their environment.
**Restricting space used by a user's session.**
```json
{"storage_opt":{"size":"10g"}}
```
**Restricting Disk I/O with read/write bps.**
```json
{"device_read_bps":[{"Path":"/dev/vda","Rate":1000000}]}
```
**Restricting Disk I/) with [relative weights](https://docs.docker.com/engine/reference/run/#block-io-bandwidth-blkio-constraint).**
```json
{"blkio_weight":200}
```
#### CPU Allocation Method
Workspaces supports provisioning session containers with one of two methods, **Quotas**
(`--cpus`) or **Shares** (`--cpu-shares`).
See [Docker Resource Contraints](https://docs.docker.com/config/containers/resource_constraints/#cpu) for more details
on how Docker utilizes these flags.
The default method is **Shares** and is governed by the
[Global Setting](../reference/settings.mdx) **Default CPU Allocation Method**. The allocation method can also be updated
on the Workspace configuration by changing the **CPU Allocation Method** in the Workspace Settings. By
default, the Workspace setting is configured to **Inherit**, which means to use the Global Setting.
##### Shares
CPU and Cores are used interchangably is this section. Ultimately, what is being referenced is the number of
Logical Processors that are presented to the system. This will vary depending on the physical processor, such as those
that are multi-core or support hyper-threading. It may also vary depending on the operating enviroment
(e.g Virtual Machines / Cloud Environments).
When the Shares CPU Allocation Method is used, session containers are provisioned with the Docker equivalent
of `--cpu-shares=`. For example, if the **Cores** setting on the Workspace is set to 2, the container
would be provisioned with `--cpu-shares=2048`.
When a container utilizes shares, the amount of CPU resources the container can use is weighted against
other containers and their share value. Most notably, **the container is only throttled if there is CPU contention.**
If there is no contention, the container can use as much as it needs.
For example, on an 8 CPU machine, if the **Cores** Workspace setting is configured at 4, this will result in the container
created with `--cpu-shares=4096`.
- If no CPU contention exists, the container can use all 8 CPUs.
- If there are 2 containers both with `--cpu-shares=4096` each with be able to us the full CPU resources if no contention
exists.
- If contention exists, each container will be allowed up to 50% of the CPU resources because their shares
(weights) are equal.
The **Shares** method is useful for maximizing the usage of CPU resources, as all containers can use as much as needed
when there is no contention. For bursty workloads, this will likely result in a better overall user experience when
compared to the **Quotas** method. However, user experience may not be as consistent depending on the CPU activity of
other containers.
##### Quotas
When the **Quotas** CPU Allocation Method is used, session containers get provisioned with the Docker equivalent
of `--cpus=X`. The value used is based on the **Cores** setting defined on the Workspace. This sets a ceiling for the amount
of CPU resources the container can use. For example, on an 8 CPU system with the Workspace configured at 2 cores,
the container will only be allowed to use up to 25% of the CPUs.
This strategy may be more helpful if the desire is to provide a more consistent performance profile. It may also be
helpful if Kasm is running on systems with additional applications and utilizing all available CPU resources at times
is not appropriate.
#### Cloud Auto-Scaling Sizing
Kasm can automatically scale agents in a number of cloud service providers. The instance size of the VM to use for auto scaled agents is configured in the [VM Provider Config](../how-to/infra-autoscale/autoscale/vm-providers.mdx). Administrators can choose to use an instance size that would allow a single Kasm session to be provisioned or an instance size that would allow for many instances to be provisioned per agent. Using larger instance sizes allows for CPU and RAM oversubscribing, however, using smaller instance sizes allows for resources to be released faster as user sessions end. Administrators will need to monitor the use of the system and select a strategy that maximizes cost savings and performance for there specific use-case. For example, Kasm Technologies currently uses an instance size that can accommodate two sessions per instance for the personal SaaS product.
#### Redundancy
When a user creates a new session, the manager API service will select an agent and attempt to provision the container there. If the provision failed, the manger will move on to the next available agent. This ensures redundancy for creating new sessions. The manager can only use agents that have the Docker image and Docker network (if specified in the Workspace settings) available and are assigned to the correct zone. If a central container image registry is used, agents will automatically pull images down. Agents will only pull images that can be provisioned on that agent. If a Kasm Workspace is defined that is assigned a specific Docker network and that network does not exist on an agent, the agent will not pull that specific Docker image. It is recommended to reduce differences between agents within a Zone and treat all agents in a Zone as a cluster of identically configured servers. This ensures Kasm will provision new user containers evenly across the cluster of agents.
For cloud deployments that auto scale, capacity is managed by Kasm. For deployments with static agents, however, capacity planning is needed. For large deployments with static agents, it is recommended to keep the number of agents at N+2. In other words, ensure the number of agents is enough to handle peek capacity if you were to loose 2 agents. This allows for both maintenance and for the loss of 1 agent. If an agent were to go offline or be disabled by an administrator, Kasm will automatically send new sessions to the remaining agents.
For existing sessions, it is not possible to provide redundancy if the system they are on goes down. However, there are additional resiliencies built in. The agent service can go down and user containers will continue to operate un-interrupted. Similarly, the agent can be disabled in the Kasm admin UI and existing sessions will continue to operate.
#### Maintenance
For systems in the cloud with auto scaling, the AMI ID defined in the [VM Provider Config](../how-to/infra-autoscale/autoscale/vm-providers.mdx) can be updated to start using an updated AMI. It is recommended to have a testing zone or a testing Kasm deployment to test updating to a new AMI before applying to production.
For deployments with static agents it is recommended to keep 1 agent disabled in rotation, for system patching. For example, if the deployment had 6 agents, the administrator would disable one, wait for all user sessions to close on that agent, then perform system patching and restart the agent. Once the agent was back up and ready, the admin would enable the agent in the Kasm UI. This process would be repeated on the next agent. This allows for administrators to keep Kasm agents updated continuously, without the need for scheduled downtime. This is the reason that N+2 redundancy for agents is recommended for larger deployments.
### Connection Proxy
The connection proxy service is a customized [Guacamole](https://guacamole.apache.org/) connection handler. This encodes and
proxies standard RDP, VNC, and SSH connections to a websocket format usable by a modern web browser. Each [Zone](../how-to/infra-autoscale/deployment-zones.mdx)
in Kasm requires at least one connection proxy, if the zone will have servers with RDP/VNC/SSH connections.
#### Redundancy and Load Balancing
Kasm will automatically load balance user sessions across multiple connection proxies and it is recommended to have at least two for redundancy.
Kasm checks that a connection proxy is actively working prior to directing a user session to one. This ensures automatic failover while also
load balancing sessions across any number of servers per Zone.
#### Maintenance
When connection proxies are taken offline, either by a reboot or by shutting down the service, Kasm will stop sending sessions through the
down server. This is done automatically without admin intervention, however, any user sessions currently flowing through the connection proxy
will be disconnected. The clients will automatically reconnect to their session and flow through a different connection proxy. It is recommended
to perform maintenance on connection proxy servers during a scheduled maintenance window, however, it is not strictly required. It is important
to test your maintenance procedures in your own environment in order to understand the operational impact to users.
#### Sizing
The required size of the connection proxy will vary highly on the exact user usage of systems. For example, if all users are watching
full screen videos within their remote Windows desktop, the connection proxy will consume approximately 1.25 CPU cores per user, without
[session recording](../how-to/workspaces-sessions/sessions/session-recording.mdx) enabled. Typically, users are not all watching full screen videos or playing
video games all at the same time and in fact you may find that 60% of your users are not actively engaged with a session at
any given time. Users may be reading an email or document, with little to no interaction. The larger your deployment,
the more slack you have to play the law of averages. Some Kasm deployments with several hundred users easily accommodate
all users with two servers with 16 cores each. These deployments are business customers, where users are typically interacting with documents
and emails. Your mileage will vary, it is important to monitor your own deployment's resource utilization to understand your
user base's real world usage and adjust accordingly. Memory requirements for the connection proxy are modest with 4 GB of RAM
being a minimum.
With [session recording](../how-to/workspaces-sessions/sessions/session-recording.mdx) enabled, additional resources are required. Sessions are initially recorded in a
raw format that consumes a lot of local disk space. The video segments are then encoded in a compressed video format and uploaded. The
[Session Recording Queue Length](../reference/settings.mdx) global setting defines how many video clips are processed concurrently.
This setting should be increased when scaling up the number of concurrent sessions each connection proxy is sized to handle. It is
recommended to set the `Session Recording Queue Length` to half that of the number of cores a system has. So if a system has 16 cores, set
the `Session Recording Queue Length` to 8. This setting will ensure half the resources of a single server are dedicated to recording and
reserves the other 8 cores for session streaming. Session recording is enabled as a [Group Setting](../how-to/security/users-groups-mgmt/groups.mdx#group-settings),
therefore, session recording may not be enabled on all user sessions, depending on your configuration. Monitor the real world usage
of your environment and adjust as needed.
All connection proxies should be identical in size, this is even more important when session recording is enabled.
Disk usage is minimal, without session recording. With session recording enabled, you should plan for at least 1GB or disk space per
concurrent session. Additionally, disk I/O can become a bottleneck with higher capacities. For cloud based deployments, check your
cloud provider documentation on how to increase disk I/O if needed.
**Example Specifications**
The following table provides a starting point, each environment will have different requirements based on several real world factors,
such as actual user desktop activity, CPU architecture and class, cloud provider, and more.
| Deployment | Server Specifications | Concurrent Sessions |
|---------------------------|-----------------------------|---------------------|
| Without Session Recording | 8 CPUs, 4GB RAM, 80 GB HD | 32 |
| With Session Recording | 16 CPUs, 8GB RAM, 112 GB HD | 32 |
---
## Architecture: Services, Agents & Sessions
## System Architecture
The following system roles make up the Kasm Architecture:
**API Service (container: kasmweb/kasm_api)**
This service contains the API endpoints used by the web application. The web application content is automatically installed as part of this service.
**Manager Service (container: kasmweb/kasm_manager)**
This service is responsible for monitoring the status of Agents and user sessions. Agents report to this service via an automatic check in process.
**Agent Service (container: kasmweb/agent)**
The agent is responsible for provisioning instances of end user session containers when requested via the web application.
The Agent reports the available system resources to the manager. These Agents are represented in the Servers tab in the
Administration tab of the web application. This service automatically downloads all Kasm Images defined within the application so they are available to provision new sessions on demand.
**Proxy Service (container: kasm_proxy)**
This container, based on nginx, is used to forward traffic to the correct service container. This container is required to be run in tandem with any of the following services:
- **API Service**
- **Manager Service**
- **Agent Service**
- **Database Services (container: kasmweb/kasm_db, kasmweb)**
> Houses the postgresql Kasm application databases
**Connection Proxy (container: kasmweb/kasm_guac)**
This service is a custom [Guacamole](https://guacamole.apache.org/) connection handler. This encodes and proxies standard RDP, VNC, and SSH connections to a websocket format usable by a modern web browser.
**Sessions – End User Sessions/Containers (container: e.g kasmweb/firefox)**
End users request to create sessions that are on-demand instances of Images registered in the application. These instances are provisioned by and on the Agent. These containers house the desktop or application presented to the end user via the web application.
**Workspaces**
A Workspace is full desktop, single application, or a direct web link made available to users based on their group membership.
In the case of desktops and applications these can be containerized workloads that are spun up on demand or direct connections to KasmVNC/RDP/VNC/SSH endpoints.
Any number of Workspaces can be registered via the web application and can be customized by the administrator to add
additional software and configurations. The administrator can also configure the CPU, memory and network resources
available to each Workspace via the [Workspaces Settings](../how-to/workspaces-sessions/container-workspace/workspaces.mdx). By default, several Workspaces are
installed and registered.
---
## Installation Requirements & Compatibility
## Kasm Workspaces Requirements
Kasm Workspaces can be installed in a [single server](../tutorials/install/single-server-install.mdx) or [multi server](../tutorials/install/multi-server-install.mdx) setup.
### Operating System
Kasm Services and end user sessions are [docker](../reference/glossary.mdx#docker) containers. Access to the Docker registry is required for
installation.
Kasm Workspaces can be installed on a Virtual Machine or directly on bare metal. We do not recommend running Kasm in LXC or WSL/WSL2.
Installation is supported on the following operating systems:
| |
| --- |
| Ubuntu 22.04 / 24.04 (amd64/arm64) |
| Debian 11 / 12 / 13 (amd64/arm64) |
| Oracle Linux 8 / 9 (amd64/arm64) |
| Red Hat Enterprise Linux 8 / 9 / 10 (amd64/arm64) |
| Raspberry Pi OS (Debian) 11 / 12 / 13 (arm64) |
| AlmaLinux 8 / 9 (amd64/arm64) |
| Rocky Linux 8 / 9 (amd64/arm64) |
| [Other](../tutorials/install/other-operating-systems.mdx) |
Not all published Workspaces Docker Images are available on all architectures. Please see [Default Images](../how-to/workspaces-sessions/container-workspace/custom-images.mdx) for the support matrix.
The WireGuard kernel module is not available as a prebuilt package for EL8 aarch64. ELRepo's
`kmod-wireguard` is x86_64 only, and `kernel-modules-extra` does not include `wireguard.ko` on
RHEL / Rocky / AlmaLinux 8 aarch64.
**Affected feature:** Egress (WireGuard) will not be available on these platforms.
To enable WireGuard, install `wireguard-dkms` from EPEL after ensuring `kernel-devel` is present.
Note: RHEL / Rocky / AlmaLinux 9 aarch64 ships WireGuard in the stock kernel and does not have
this limitation.
### Resource Requirements
Minimum Requirements
| | |
| :----- | :-------- |
| **CPU** | 2 cores |
| **Memory** | 4GB |
| **Storage**| 75GB (SSD) |
Kasm provides a [Sizing and Deployment Guide](sizing-operations.mdx) to aid in determining hardware specifications for large scale deployments.
Although the requirements for the Kasm services are quite modest, provisioning each end-user session
requires additional compute resources as specified in the [workspace](../reference/glossary.mdx#workspace) configuration. The default Kasm
Workspaces are [configured](../how-to/workspaces-sessions/container-workspace/workspaces.mdx) to require 2768MB of memory and 2 cores. Sessions will not be
provisioned if the minimum resources requirements on the [agent](../reference/glossary.mdx#agent) are not met.
Storage requirements are related directly to using the default set of Workspaces optionally downloaded during installation.
Kasm can only assess the available storage space within the volume where the default docker directory (/var/lib/docker) exists. If you have unallocated free space in a different volume and want to use it for Kasm, you can extend your root volume to incorporate this unallocated space. If not enough space is available in Docker's storage directory (default /var/lib/docker) this can potentially block the entire installation and lead to undesired behavior. Please review the partition layout for the host operating system and ensure this requirement is met. When using a custom set of Workspaces this storage requirement can vary.
### Swap Partition
Administrators can configure sessions to provision with any amount of cpu or memory allocations by editing the in the
[Kasm Workspace Settings](../how-to/workspaces-sessions/container-workspace/workspaces.mdx). However, even a host with more than enough system memory can run
into stability issues without enabling a swap partition. For this reason, the Kasm installation recommends a swap
partition to be present.
Install Swap partition for best stability of end user sessions. For additional details on docker resource constraints
see the following link:
[Docker Resource Constraints](https://docs.docker.com/config/containers/resource_constraints/)
#### Creating a Swap Partition
During installation users will be prompted to create a swap partition if none are present. Following this menu a swap partition of any size can be defined depending on the needs of the deployment.
To skip this check pass the `--no-swap-check` installation flag. To automate this process the `--swap-size` installation flag can be passed with a number in megabytes for the resulting swap partition. Example:
```
sudo bash kasm_release/install.sh --accept-eula --swap-size 8192
```
This will create an 8 gigabyte swap partition during Kasm Workspaces installation and assuming the installation is unattended bypass the License prompt.
For general information on swap partitions check out the
[Ubuntu Documentation](https://help.ubuntu.com/community/SwapFaq)
### Docker and Docker Compose
Installation of Kasm will fail if `docker` exists on the machine with a version unsupported by Kasm. However, if `docker-compose` exists with an unsupported version, it will be automatically replaced by the installer with a compatible version.
It is recommended that you install Kasm on a single-purpose machine and let the installer install the `docker` and
`docker compose` programs. Below are the minimum requirements.
Minimum Version Requirements
| | |
| :----------------- | :--------- |
| **docker** | \>= 28.5.2 |
| **docker compose** | \>= 2.40.2 |
Run the following commands to check the versions of the programs if installed.
```bash
sudo docker --version
sudo docker info | grep "Docker Compose"
```
### End User Requirements
End-users access the Kasm Workspaces via the web ui. Most modern browsers are supported.
| **Browsers** |
| --- |
| Chrome 92+ |
| Edge 92+ |
| Firefox 95+ |
| Safari 15.4+ |
**Caveats**
- Audio is not supported on mobile browsers.
- Seamless Clipboard ( Copying and Pasting without using the control panel ) is only supported on Chrome and Chromium-based client browsers.
---
## Custom Branding in Kasm Workspaces: Application & Session
## Custom Branding
Administrators may choose to add custom branding to their Kasm deployment.
### Application Branding
Kasm allows administrators to define multiple branding configurations that are chosen by the system based on the URL
hostname the users accesses the system with.
Changes to branding may take up to 90 seconds to be apply since certain requests are cached by the system.
When regularly changing and testing branding settings it is best to use the following steps to observe the changes:
- Wait 90 seconds after the configuration change is made.
- Logout of the Kasm UI.
- Navigate the browser to the login page, and do a hard refesh of the page (Typcially CTRL+F5) or clear the browser cache.
- Login and verify changes.
This feature is available in Kasm Workspaces Enterprise.
**Branding Configs** can be defined in the UI by an administrator under **Settings** -> **Branding**.
| **Name** | **Description** |
| :--------------------------------- | :------------------------------------------------------------------------------------------------------------------------------------------- |
| **Name** | The name for the configuration. |
| **Hostname** | The hostname of the URL used to access the Kasm deployment is used to map the appropriate branding config. |
| **Favicon Logo URL** | URL for the favicon logo image, this image is also used for the global PWA icon, icons must be square for the PWA to be installable. |
| **Admin Dashboard Logo URL** | URL for the logo shown in the sidebar on the admin pages. |
| **User Dashboard Logo URL** | URL for the logo shown on the user dashboard, this is often the same as the admin dashboard logo, but doesn't have to be. |
| **Launcher Background URL** | URL for the background image for the Workspaces launcher. See [Default Backgrounds](branding.mdx#default-backgrounds) for a list of available default images. |
| **HTML Title** | HTML document title, this is also set as the global PWA title. |
| **Login Caption** | Caption displayed under the login logo. |
| **Login Logo URL** | URL for the login logo image. If a custom logo is used, the phrase "Powered By Kasm" will be displayed under the new logo. |
| **Login Splash Background URL** | URL for the login splash background image. |
| **Username Input Label** | Label for the username input field on the login page. |
| **Loading Session Text** | The text to display while the user is connecting to a session. |
| **Joining Session Text** | The text to display while the user is joining a shared session. |
| **Destroying Session Text** | The text to display when the session is being destroyed. |
| **Default** | If the configuration is set to Default, this system will use this configuration if the URL hostname does not match another config. |
### Session Branding
The default background used within a session container can be adjusted by [Building a Custom Image](../workspaces-sessions/container-workspace/customization/building-images.mdx)
or [Using File Mapping to Change the Default Background of a Workspace](../workspaces-sessions/file-mappings.mdx#using-file-mapping-to-change-the-default-background-of-a-workspace).
**Background**
The background can be changed by replacing the following file. Recommended resolution: 1920x1080 px.
```Bash
/usr/share/backgrounds/bg_default.png
```
**Casting Branding**
It's also possible to set the background on casting links by changing the **Launcher Background URL** on the [casting](../workspaces-sessions/sessions/session-casting.mdx) page.
### Default Backgrounds
Workspaces includes a number of default backgrounds by default. Below is a preview of the images and the relative urls
that can be used in the configurations.
---
## System Export Configuration
## Exporting System Configurations
The export interface provides four distinct export modes, each suited to different use cases. All exports produce a password-protected AES256 ZIP file containing an `export_data.yaml` file with the exported configuration data.
To access the export interface:
1. Log into the Workspace UI as an administrator.
2. From the Admin panel, select **Diagnostics** -> **System Info** from the menu.
3. Navigate to the **Import/Export Config** tab.
4. Select "Export Configuration"
### Export Modes
#### Complete Data Set
A full system backup containing all configuration tables. Use this mode for disaster recovery or system restore.
* **Import behavior:** Replaces ALL existing data. This is a destructive operation.
* Supports [UUID tokenization](#uuid-tokenization) (optional).
* Exports all configuration tables (excluding logs and license data).
#### Partial Data Set
A selective export allowing you to choose specific database tables. Use this mode for targeted operations where only certain configuration data is needed.
* **Import behavior:** Data is merged additively with existing system data.
* Supports [UUID tokenization](#uuid-tokenization) (optional).
* Includes [table selection](#table-selection) to choose which tables to export.
##### Table Selection
Click "Show" to expand the list of exported tables. By default, all tables are exported.
The table selection interface will automatically select or deselect secondary tables as you interact with it. This behavior maintains required relationships between tables, ensuring that the data is valid for import into a Kasm system as-is.
#### Autoscale Configs
Exports autoscale configurations along with their referenced zones and LDAP configurations. Use this mode for sharing or copying autoscale setups between deployments.
* **Import behavior:** Data is merged with existing system data. Name conflicts are resolved through automatic renaming. Zone and LDAP mapping is available during import.
* Automatically includes dependent zones and LDAP configurations referenced by the autoscale configs.
* See [Autoscale Config Import](./import-configuration.mdx#autoscale-config-import) for details on the import workflow including zone/LDAP mappings and conflict resolution.
#### Deployment Configuration
A full deployment migration mode that exports all configuration data while excluding ephemeral runtime state. Use this mode when migrating a deployment to new infrastructure or creating a replica for A/B Deployments.
* **Import behavior:** Replaces existing non-ephemeral data. Options are available to preserve manager tokens and API key pairs.
* **Excludes** runtime state: sessions, ephemeral servers, agents, and connection proxies.
* See [Deployment Configuration Import](./import-configuration.mdx#deployment-configuration-import) for details on the import options.
### UUID Tokenization
UUID tokenization is available when using the Complete Data Set or Partial Data Set export modes. The Autoscale Configs and Deployment Configuration modes handle UUID management automatically.
This feature modifies exported UUIDs to indicate that new ones should be created when the data is imported into Kasm. The original UUIDs are present in the exported data, for ease of troubleshooting.
* UUIDs prefixed with `&` will be regenerated upon import. The UUID following the `&` symbol is the original UUID from the export system.
* UUIDs prefixed with `*` refer to the same UUID prefixed with `&` in the export. These will be replaced with the respective newly generated UUID on import.
Certain tables never have their primary UUIDs included in tokenization, either because they are static components or because tokenization is not appropriate:
* connection_proxies
* kasms
* managers
* servers
* session_tokens
Additionally, the "All Users" group ID tokenization is ignored on import, as the group has a static UUID.
Records in the `accounting` table only have their `accounting_id` UUIDs modified. Other UUIDs are left unchanged, as they
do not have Foreign Key relationships to other tables and represent historical data about sessions.
#### AutoscaleConfig Tokenization
By default in the "Complete Data Set" and "Partial Data Set" modes, the Autoscale Configurations are not tokenized when UUID tokenization is enabled. On import, the system gains an exact copy of the state of each Autoscale Configuration as it exists in the export system, including provisioned resources.
This means that the import system will begin operating on the Autoscale Configurations; if the export system is still operational, the two systems will compete for control and conflict.
**If you plan to use exported AutoscaleConfiguration data as a template rather than system restore, select the "Tokenize Autoscale Configuration UUIDs" option.**
This causes the import to generate new AutoscaleConfigurations that are separate from the ones owned by the export system. In this mode, provisioned cloud resources like Servers are not exported, since the importing system will create its own. An example of when to use this mode is when creating side-by-side deployments, such as for a blue/green deployment strategy.
If you are specifically looking to export and import autoscale configurations, consider using the dedicated **Autoscale Configs** export mode instead, which provides a streamlined workflow with zone/LDAP mapping and automatic conflict resolution on import.
Tokenizing Autoscale Configuration UUIDs means that the import system will not have control over the old configurations and associated resources. Ensure that the old system maintains or tears down the original configurations, otherwise the original cloud resources will be orphaned.
### Export File Format
All exports are downloaded as a password-protected ZIP file utilizing AES256 encryption. A utility such as 7zip is needed to extract the data, as many zip utilities built into operating systems like Windows and MacOS do not support AES256 for zip files. A file named `export_data.yaml` resides inside and contains the configurations.
Below is a short example snippet of the yaml based configuration export.
```yaml title="Exported Configuration Snippet"
alembic_version: 52136dd39702
export_metadata:
export_mode: complete
images:
- allow_network_selection: false
available: false
categories:
- Development
cores: 2.0
cpu_allocation_method: Inherit
description: The Collaboration Platform for API Development.
docker_registry: https://index.docker.io/v1/
docker_token: null
docker_user: null
enabled: false
exec_config: {}
filter_policy_force_disabled: false
filter_policy_id: null
friendly_name: Postman
gpu_count: 0
hash: null
hidden: false
image_id: 2ba504c975654fd18c554905478fc5a1
image_src: img/thumbnails/postman.png
image_type: Container
link_url: null
memory: 2768000000
name: kasmweb/postman:develop
notes: null
persistent_profile_path: null
require_gpu: false
restrict_network_names: []
restrict_to_network: false
restrict_to_server: false
restrict_to_zone: false
run_config: {}
server_id: null
server_pool_id: null
session_time_limit: null
volume_mappings: {}
x_res: 800
y_res: 600
zone_id: null
```
### Example: Complete Data Set Export
1. Log into the Workspace UI as an administrator.
2. From the Admin panel, select **Diagnostics** -> **System Info** from the menu.
3. Navigate to the **Import/Export Config** tab.
4. Select **Complete Data Set** as the export mode.
5. Enter the password you would like the export zip file to utilize.
6. (Optional) Enable **Tokenize UUIDs** if you plan to use this export as a template rather than a direct restore. See [UUID Tokenization](#uuid-tokenization) for details.
7. Click **Export**. The configuration will be downloaded as a password-protected zip file.
### Example: Autoscale Configuration Export
This example assumes that the Kasm system has one or more preexisting Autoscale Configurations.
1. Log into the Workspace UI as an administrator.
2. From the Admin panel, select **Diagnostics** -> **System Info** from the menu.
3. Navigate to the **Import/Export Config** tab.
4. Select **Autoscale Configs** as the export mode.
5. Enter the password you would like the export zip file to utilize.
6. Click **Export**.
The export will automatically include all autoscale configurations and their dependent zones and LDAP configurations. No manual table selection is needed.
### Example: Deployment Configuration Export
1. Log into the Workspace UI as an administrator.
2. From the Admin panel, select **Diagnostics** -> **System Info** from the menu.
3. Navigate to the **Import/Export Config** tab.
4. Select **Deployment Configuration** as the export mode.
5. Enter the password you would like the export zip file to utilize.
6. Click **Export**.
The export will include all deployment configuration data while automatically excluding runtime state such as active sessions, ephemeral servers, agents, and connection proxies.
---
## Export Schema
## Exporting Configuration Schema
Administrators are also able to export the system configuration schema ( data structure ).
This may be helpful when constructing a custom yaml configuration and is analogous to a database schema dump. Like
the import and export files, this will include a matching [Configuration Schema Versioning and Details](schema-versioning.mdx)
1. Log into the Workspace UI as an administrator.
2. From the Admin panel, select **Diagnostics** -> **System Info** from the menu.
3. Navigate to the **Import/Export Config** tab and Click the **Export Schema** button.
4. The configuration schema will be downloaded as a yaml file.
Below is a short example snippet of the yaml based configuration schema export.
```yaml title="Exported Configuration Schema Snippet"
alembic_version: 52136dd39702
images:
allow_network_selection:
required: false
type: BOOLEAN
available:
required: false
type: BOOLEAN
categories:
required: false
type: JSON
cores:
required: false
type: FLOAT
cpu_allocation_method:
required: false
type: VARCHAR
description:
required: false
type: VARCHAR
docker_registry:
required: false
type: VARCHAR
docker_token:
required: false
type: VARCHAR
docker_user:
required: false
type: VARCHAR(255)
enabled:
required: false
type: BOOLEAN
exec_config:
required: false
type: JSON
filter_policy_force_disabled:
required: false
type: BOOLEAN
filter_policy_id:
foreign_key: filter_policies.filter_policy_id
required: false
type: UUID
friendly_name:
required: false
type: VARCHAR(255)
gpu_count:
required: false
type: INTEGER
hash:
required: false
type: VARCHAR(255)
hidden:
required: false
type: BOOLEAN
image_id:
required: false
type: UUID
image_src:
required: false
type: VARCHAR(255)
image_type:
required: false
type: VARCHAR
link_url:
required: false
type: VARCHAR
memory:
required: false
type: BIGINT
name:
required: false
type: VARCHAR(255)
notes:
required: false
type: VARCHAR
persistent_profile_path:
required: false
type: VARCHAR
require_gpu:
required: false
type: BOOLEAN
restrict_network_names:
required: false
type: JSON
restrict_to_network:
required: false
type: BOOLEAN
restrict_to_server:
required: false
type: BOOLEAN
restrict_to_zone:
required: false
type: BOOLEAN
run_config:
required: false
type: JSON
server_id:
foreign_key: servers.server_id
required: false
type: UUID
server_pool_id:
foreign_key: server_pools.server_pool_id
required: false
type: UUID
session_time_limit:
required: false
type: INTEGER
volume_mappings:
required: false
type: JSON
x_res:
required: false
type: INTEGER
y_res:
required: false
type: INTEGER
zone_id:
foreign_key: zones.zone_id
required: false
type: UUID
```
---
## Import Configuration
## Importing System Configurations
Administrators can import system configuration data through a two-step workflow. The import interface expects a password-protected ZIP
package that contains a file named `export_data.yaml`, which contains system configuration data in YAML format.
This is the same output format provided by the configuration export. See [Exporting System Configurations](export-configuration.mdx) for more details.
Only tables from the same application/database version are compatible. Please see [Configuration Schema Versioning and Details](schema-versioning.mdx) for more info.
### Import Workflow
#### Step 1: Upload and Decrypt
1. Navigate to the **Import/Export Config** tab under **Diagnostics** -> **System Info**.
2. Click **Import Configuration**.
3. Select the export ZIP file.
4. Enter the encryption password used during export.
5. Click **Next** to proceed to the preview.
#### Step 2: Preview and Configure
The system decrypts and analyzes the import file, then displays:
* The **detected export mode** (Complete Data Set, Partial Data Set, Autoscale Configs, or Deployment Configuration).
* A **description** of what will happen when the import is applied.
* **Mode-specific configuration options**, detailed in the sections below.
Review the preview carefully before clicking **Import** to apply the changes.
If the import is unsuccessful, no changes are applied to the system.
If the error was permanent, i.e. due to bad data or a server-side error, it will be shown in the dialog. Retryable errors (e.g. request timeout) will trigger a notification, but the import form will allow you to re-attempt the import action.
Additional information from the Kasm API may be available in the body of the network request.
### Import Behavior by Export Mode
#### Complete Data Set Import
Importing a Complete Data Set **replaces ALL existing system configuration data**. This is a destructive operation.
All previous configurations will be removed and replaced with those in the provided import data. This may cause the admin to be logged out.
A Complete Data Set import reflects the database as it was at export time, including any active sessions, servers, and agents recorded at that moment. If imported onto a different deployment, the UI may show sessions, servers, or agents that do not actually exist on the new system. These stale records may need to be manually cleaned up after the import completes. If preserving runtime state is a concern, consider using the [Deployment Configuration](./export-configuration.mdx#deployment-configuration) export mode instead, which is designed for migration scenarios and handles servers and agents separately.
If the export contained [tokenized UUIDs](./export-configuration.mdx#uuid-tokenization), new UUIDs will be generated for all tokenized entries during import.
#### Partial Data Set Import
Importing a Partial Data Set **merges the imported data additively** with the current system without modifying preexisting data. If Kasm is unable to import the new data without conflicts, the import will be rolled back without any modifications to the system's data.
See [Conflict Resolution](#conflict-resolution) for details on how duplicate records are handled.
If the export contained [tokenized UUIDs](./export-configuration.mdx#uuid-tokenization), new UUIDs will be generated for all tokenized entries during import.
#### Autoscale Config Import
Importing an Autoscale Configs export **merges the imported data** with the existing system. The import preview provides additional configuration options:
##### Zone Mappings
Imported autoscale configurations reference specific zones. During import, the system presents a mapping interface where you can:
* **Accept auto-matched zones** -- zones from the import that match existing zones by name are automatically pre-selected.
* **Map to a different zone** -- select a different existing zone as the target.
* **Create a new zone** -- if there is no name conflict with an existing zone, you can choose to create a new one from the import data. When a name conflict exists, the imported reference must be mapped to an existing zone.
##### LDAP Config Mappings
Similarly, imported autoscale configurations that reference LDAP configurations present a mapping interface where you can:
* **Accept auto-matched LDAP configs** -- LDAP configs from the import that match by name are automatically pre-selected.
* **Map to a different LDAP config** -- select a different existing LDAP config.
* **Create a new LDAP config** -- if there is no name conflict with an existing LDAP config, you can create a new one from the import data. When a name conflict exists, the imported reference must be mapped to an existing LDAP config or skipped.
* **Skip** -- choose not to import the LDAP config reference.
##### Enabled State on Import
For **Autoscale Configs** and **Deployment Configuration** imports that contain autoscale configurations, the import preview exposes an **Imported Autoscale Configs** setting:
* **Import as disabled (default)** -- all imported autoscale configurations are forced to `enabled = false` regardless of their state in the export. Administrators can review and re-enable them individually after the import completes.
* **Keep original enabled state** -- each imported autoscale configuration preserves the `enabled` value from the export.
The default avoids unexpected provisioning activity when a large number of active configurations are imported onto a new deployment. Use *Keep original enabled state* when performing a backup restore or blue/green cutover where the imported deployment should begin servicing traffic immediately.
**Complete** and **Partial** imports do not expose this setting; any autoscale configurations they contain always retain their original `enabled` value from the export.
##### Name Conflict Resolution
When imported resources have names that conflict with existing resources, the import preview displays a collapsible warning showing:
* The **total number of conflicts** detected.
* A **detailed breakdown grouped by resource type** (Server Pools, Autoscale Configs, Provider Configs, DNS Provider Configs).
* The **original name** and the **new name** that will be assigned on import.
Conflicting resources are automatically renamed with a datetime-stamped suffix, for example: `MyConfig (Imported 2026-03-20 14:30Z)`.
#### Deployment Configuration Import
Importing a Deployment Configuration **replaces existing non-ephemeral data** while preserving runtime state. The import preview provides two additional toggle options:
* **Overwrite Manager Token** -- When enabled, replaces the current manager authentication token with the one from the export. When disabled (default), the current manager token is preserved. Disable this to avoid disrupting manager authentication during migration.
* **Overwrite API Private and Public Key Pair** -- When enabled, replaces the current API key pair with the one from the export. When disabled, the current keys are preserved. Disable this to avoid disrupting API authentication during migration.
Existing users are deleted before import. All users, including the Administrator, will need to log in using their imported passwords or authentication methods.
Non-Autoscaled Agents are preserved during Deployment Configuration import. All servers are replaced by the import data.
### Tokenized Exports
The import feature will generate new UUIDs for any tokenized UUIDs in the import data. If the tokenization data is incomplete,
the import will be rolled back without making any changes to the existing system data. Refer to [the section on UUID tokenization](export-configuration.mdx#uuid-tokenization) for more details.
### Conflict Resolution
Conflict resolution behavior depends on the export mode of the imported data.
#### Partial Data Set Conflict Resolution
For Partial Data Set imports, the system provides simple deduplication and conflict resolution for the following tables:
Records affected by the following logic will be removed from the import data; they will not be merged into the existing data.
| Resource | Table | Notes |
| :----- | :----- | :----- |
| System Settings | settings | Records for system settings that are already configured will be dropped from import data. |
| Groups | groups | Groups conflicting by name will be dropped from import data. Other import records will be pointed to the existing group. |
| Group Settings | group_settings | Records for group settings that are already configured will be dropped from import data. |
| Group Permissions | group_permissions | Duplicates of existing Group Permissions will be dropped from import data. |
| Users | users | Users conflicting by username will be dropped from import data. Other import records will be pointed to the existing user. |
| Group Membership | user_groups | Import will skip assigning an existing user to an existing group of which it is already a member. |
| Zones | zones | Zones conflicting by zone_name will be dropped from import data. Other import records will be pointed to the existing zone. |
#### Autoscale Config Conflict Resolution
For Autoscale Config imports, conflicting resources are automatically renamed rather than dropped. The renaming uses a datetime-stamped suffix:
* Format: `ResourceName (Imported YYYY-MM-DD HH:MMZ)` (UTC time, `Z` denotes Zulu/UTC)
* If that name is also taken, a counter is appended: `ResourceName (Imported YYYY-MM-DD HH:MMZ) 2`
* Applies to: Server Pools, Autoscale Configs, Provider Configs, and DNS Provider Configs.
Conflicts and their proposed renames are displayed in the [import preview](#name-conflict-resolution) before the import is applied.
#### Complete Data Set and Deployment Configuration
Conflict resolution is not applicable for these modes, as existing data is replaced during import.
### Example: Complete System Restore
This example assumes that the ZIP file provided for import contains a complete Kasm system configuration export.
See [the corresponding export example for more information](export-configuration.mdx#example-complete-data-set-export).
This type of import will destroy the existing Kasm system configuration data.
1. Log into the Workspace UI as an administrator.
2. From the Admin panel, select **Diagnostics** -> **System Info** from the menu.
3. Navigate to the **Import/Export Config** tab and click **Import Configuration**.
4. **Step 1:** Select the complete export ZIP file and enter the password. Click **Next**.
5. **Step 2:** The preview shows **Complete Data Set** mode and warns that all existing data will be replaced. Review the preview.
6. Click **Import**.
If successful, all previous configurations will be removed and replaced with those in the provided import data. This may
cause the admin to be logged out.
### Example: Import Autoscale Configurations
This example assumes that the ZIP file provided for import was exported using the **Autoscale Configs** export mode.
See [the corresponding export example for more information](export-configuration.mdx#example-autoscale-configuration-export).
1. Log into the Workspace UI as an administrator.
2. From the Admin panel, select **Diagnostics** -> **System Info** from the menu.
3. Navigate to the **Import/Export Config** tab and click **Import Configuration**.
4. **Step 1:** Select the autoscale export ZIP file and enter the password. Click **Next**.
5. **Step 2:** The preview shows **Autoscale Configs** mode. Review and configure:
* Verify **zone mappings** -- adjust if the auto-matched zones are not correct.
* Verify **LDAP config mappings** -- adjust or skip as needed.
* Review any **name conflicts** in the collapsible details section.
6. Click **Import**.
If successful, new autoscale configurations and related resources will be created. Conflicting names will be auto-renamed as shown in the preview. Other system configuration data remains unmodified.
### Example: Deployment Migration Import
This example assumes that the ZIP file provided for import was exported using the **Deployment Configuration** export mode.
See [the corresponding export example for more information](./export-configuration.mdx#example-deployment-configuration-export).
1. Log into the Workspace UI as an administrator.
2. From the Admin panel, select **Diagnostics** -> **System Info** from the menu.
3. Navigate to the **Import/Export Config** tab and click **Import Configuration**.
4. **Step 1:** Select the deployment configuration export ZIP file and enter the password. Click **Next**.
5. **Step 2:** The preview shows **Deployment Configuration** mode. Configure:
* **Overwrite Manager Token** -- disable if you want to preserve the current manager authentication token.
* **Overwrite API Private and Public Key Pair** -- disable if you want to preserve the current API keys.
6. Click **Import**.
If successful, the deployment configuration will be updated while preserving runtime state such as active sessions and host servers.
---
## Configuration Import/Export for System Administration
## Configuration Import / Export
Workspaces allows administrators to export and import the configuration of the system via the user interface.
The system provides four export modes to support different use cases:
* **[Complete Data Set](./export-configuration.mdx#complete-data-set)** -- Full system backup for disaster recovery or restoration. Replaces all existing data on import.
* **[Partial Data Set](./export-configuration.mdx#partial-data-set)** -- Selective table export for targeted operations. Merges additively on import.
* **[Autoscale Configs](./export-configuration.mdx#autoscale-configs)** -- Export autoscale configurations with dependent zones and LDAP configs. Supports zone/LDAP mapping and conflict resolution on import.
* **[Deployment Configuration](./export-configuration.mdx#deployment-configuration)** -- Full deployment migration excluding runtime state. Replaces non-ephemeral data on import.
This may be helpful for configuration management, backup/restore, deployment migration, and facilitating testing and automated deployments.
Importing / exporting license information is not supported via this mechanism.
Administrators will need to re-apply activation/license keys after executing an import operation.
See [Adding A License](../../../reference/license.mdx#adding-a-license) for more details on manually applying keys via the UI or during installation.
---
## Schema Versioning
## Configuration Schema Versioning and Details
#### Alembic Version
The `default_properties.yaml` as well as the schema and configurations exports will include an `alembic_version` property.
The value is a unique hash that indicates the schema revision of the database and thus the format and properties that make
up and import/export file.
This version typically changes with each build of the application.
The system will only allow imports and seeding of files that match it's internal `alembic_version`. This means that
Administrators are not able to automatically export configurations from an older build of Workspaces and import it in
a newer version - only between like versions.
#### All Users Group ID
The **All Users** group has special significance within the application and must be defined in the schema
with group_id `68d557ac-4cac-42cc-a9f3-1c7c853de0f3`
#### Default Global Settings
The `default_properties.yaml` that ships with each build of workspaces will have a list of
[Global Settings](../../../reference/settings.mdx) (`settings:`). Administrators are welcome to adjust the default
values, but they should not add or remove settings as the system is expecting these exact settings to be defined.
Below is an example of a few global settings. The full configuration will have dozens. It is ok to adjust the values,
but none of the entries should be removed, or other properties altered.
**Global Settings**
```yaml
settings:
- category: logging
description: The logging protocol used, allowed values are internal, https, splunk, and elasticsearch
name: log_protocol
sanitize: false
services_restart: manager,api
title: Log Protocol
// highlight-next-line
value: internal
value_type: string
- category: logging
description: The port to use for logging communication.
name: log_port
sanitize: false
services_restart: manager,api
title: Log Port
// highlight-next-line
value: "443"
value_type: int
```
#### Default Group Settings
The `default_properties.yaml` that ships with each build of workspaces will have a list default [Group Settings](../../security/users-groups-mgmt/groups.mdx).
The system defaults are those that have no `group_id assigned`. Administrators should not add/remove or adjust the defaults.
However, Administrators can assign additional group settings to existing groups, such as the **All Users** group,
to change default behaviors for users.
Do not adjust the Default Group Settings - those that don't have `group_id`'s assigned.
```yaml
group_settings:
- description: Allow audio streaming for a Kasm.
// highlight-next-line
group_id: 68d557ac-4cac-42cc-a9f3-1c7c853de0f3
group_setting_id: "${uuid:group_setting_id:1001}"
name: allow_kasm_audio
value: "True"
value_type: bool
```
---
## Slipstream Install
## Slip-Stream Install Configurations
Administrators may wish to install an instance of Workspaces preloaded with desired configurations. This may be helpful
for CI/CD or other programmatically deployed environments such as augmenting terraform projects.
This can be accomplished by swapping out the
`default_properties.yaml` file found in the standard installation package after it is extracted
and before `install.sh` is called.
The format of the `default_properties.yaml` file, is the same as one generated from the [Exporting System Configurations](export-configuration.mdx) mechanism,
allowing administrators to more easily restore an existing deployment to another system.
```bash
cd /tmp
curl -O [[storage_url]]kasm_release_[[release]].tar.gz
tar -xf kasm_release_[[release]].tar.gz
# Replace default_properties.yaml
cp kasm_release/conf/database/seed_data/default_properties.yaml
sudo bash kasm_release/install.sh
```
This feature is primarly intended for partners and system integrators that have advanced understanding and experience
using Kasm Workspaces. Workspaces contains thousands of interconnected configuration items, many of which are
internal-facing elements and thus not fully documented.
Please see [Configuration Schema Versioning and Details](schema-versioning.mdx) for important implementation concerns.
#### Default Properties Pre-Processing
When the installer ingests the `default_properites.yaml`, it will first pre-process the file to allow values
to be templated with special variables. This may be helpful when constructing references between objects via uuids,
or templating values that should be randomized between deployments. It is recommended to inspect the
`default_properites.yaml` that is provided with the install package for example usage as it represents the standard
configurations for the default install.
UUIDs can be templated by using the string `${uuid:}` e.g `${uuid:example1}`. If the same variable is used
multiple times in the yaml, it will be replaced with the same UUID.
**Templated Config**
```yaml
group_settings:
- description: Allows users to see and edit all attributes of the Kasm application.
// highlight-next-line
group_id: "${uuid:group:1}"
// highlight-next-line
group_setting_id: "${uuid:group_setting_id:1}"
name: administrator
value: 'False'
value_type: bool
- description: Allow audio streaming for a Kasm.
// highlight-next-line
group_id: "${uuid:group:1}"
// highlight-next-line
group_setting_id: "${uuid:group_setting_id:2}"
name: allow_kasm_audio
value: 'False'
value_type: bool
groups:
- description: null
// highlight-next-line
group_id: "${uuid:group:1}"
is_system: false
name: Internal Administrators
priority: 1000
program_data: null
```
**Resultant Config**
```yaml
group_settings:
- description: Allows users to see and edit all attributes of the Kasm application.
// highlight-next-line
group_id: "e2fd5c8e-82c2-4841-8ef0-824e30f16055"
// highlight-next-line
group_setting_id: "e7173013-fad7-4de8-860b-94ee5a70dcbf"
name: administrator
value: 'False'
value_type: bool
- description: Allow audio streaming for a Kasm.
// highlight-next-line
group_id: "e2fd5c8e-82c2-4841-8ef0-824e30f16055"
// highlight-next-line
group_setting_id: "b1c4efbe-ddc4-4ebc-839b-483b2e190873"
name: allow_kasm_audio
value: 'False'
value_type: bool
groups:
- description: null
// highlight-next-line
group_id: "e2fd5c8e-82c2-4841-8ef0-824e30f16055"
is_system: false
name: Internal Administrators
priority: 1000
program_data: null
```
Datetime objects can be generated for the current time using the `${datetime:utcnow}` variable.
```yaml
users:
// highlight-next-line
- created: '2023-02-05 02:41:43.729155'
// highlight-next-line
password_set_date: '2023-02-05 02:41:43.729155'
pw_hash: e3b0c44298fc1c149afbf4c8996fb92427ae41e4649b934ca495991b7852b855
realm: local
salt: 6614c4ba-6c49-4f50-8d9a-ce82de5ac852
user_id: 11bf8e0a-e08c-4c1b-81ad-518447d75b49
username: admin@kasm.local
```
Random string tokens can be be generated using a variable `${random_token:}`. E.g `${random_token:manager_token}`
**Templated Config**
```yaml
settings:
- category: manager
description: An authentication token used in the communication between Kasm Agents and the Manager API server.
name: token
sanitize: false
services_restart: manager
title: Token
// highlight-next-line
value: "${random_token:manager_token}"
value_type: password
```
**Resultant Config**
```yaml
settings:
- category: manager
description: An authentication token used in the communication between Kasm Agents and the Manager API server.
name: token
sanitize: false
services_restart: manager
title: Token
// highlight-next-line
value: "2RZGPY1LUPOph4fmU1kU"
value_type: password
```
RSA public and private keys can be be generated using variables: `${rsa::private}` and `${rsa::public}`
**Templated Config**
```yaml
settings:
- category: auth
description: Private Key used to sign request between Kasm components.
name: api_private_key
sanitize: true
services_restart: null
title: API Private Key
// highlight-next-line
value: "${rsa:1:private}"
value_type: multiline_string
- category: auth
description: Public key used by Kasm components to validate internal API calls.
name: api_public_cert
sanitize: false
services_restart: null
title: API Public Cert
// highlight-next-line
value: "${rsa:1:public}"
value_type: multiline_string
```
**Resultant Config**
```yaml
settings:
- category: auth
description: Private Key used to sign request between Kasm components.
name: api_private_key
sanitize: true
services_restart: null
title: API Private Key
// highlight-start
value: "-----BEGIN PRIVATE KEY-----
MIIJRAIBADANBgkqhkiG9w0BAQEFAASCCS4wggkqAgEAAoICAQDPS/VMFDiHcmYc
...
F0QQggEL0azu+RPZkg2KV2ZqawkFbGeGdhnPbluvmFUZHS0qzs1xbefludeVe9aR
568UxTAiTOowDRY45zwugW52VdBFASdc3w6z/DzPgD2FfI46ZQPzJD4ariJOMlSY
ZszdhrNDulOoIsp0Adm/nKtXrT8JJca5
-----END PRIVATE KEY-----"
// highlight-end
value_type: multiline_string
- category: auth
description: Public key used by Kasm components to validate internal API calls.
name: api_public_cert
sanitize: false
services_restart: null
title: API Public Cert
// highlight-start
value: "-----BEGIN PUBLIC KEY-----
MIICIjANBgkqhkiG9w0BAQEFAAOCAg8AMIICCgKCAgEAoQu+DCpu6IMVRJBlrxn5
/SLIzggFi72fkLTuXTi7gGPCtGMV/5QLJnRjcAAYo9zJoFhob268qcK69FMRD3B
nJ//C3zSW5pWvzh5HdRINrjmdZKgCpudEeXYpd/KpIulHzoWLJuiizEM/jlFpJcB
...
89c22kgSOtyQGFJXQLQeFIqyak3fQ2guJ/ZbdJP6CeNJfjLdKFm9RE4bHuuqr2Bt
/deSoQfXUXUUZbWf40jqprYTIuaidwBHus8KirY5LAxlDz9RVHvGQHrYq3hRMHcD
XLnh226+sKxRSxxdXLwFLyMCAwEAAQ==
-----END PUBLIC KEY-----"
// highlight-end
value_type: multiline_string
```
---
## Workspaces Platform Administration Guide
## Administration
The Workspaces platform is a powerful and flexible system. It is highly recommended to watch this quick start administration guide, which configures Workspaces from a fresh install for common use cases and walks through many of the advanced features of the platform.
---
## Kasm Workspaces Autoscale Backup Warning: User Permissions
Starting in version 1.17.0, the destination directory for the backup file needs to be readable and writable by the `kasm_db` user, which uses ID 70.
---
## Kasm Workspaces: Autoscale Backups & User Permissions (v1.17.0+)
Starting in version 1.17.0, the destination directory for the backup file needs to be readable and writable by the `kasm_db` user, which uses ID 70.
---
## Host Guides
## Host Configuration Guides
This section explains some host considerations when configuring storage to be used for persistent data. This only applies to [volume map profiles](persistent-profiles.mdx#volume-mount-profiles).
##### Using NFS
For any [multi server deployment](../../tutorials/install/multi-server-install.mdx) we recommend using NFS for all Persistent data. Without a central file share across all Kasm Agents in the deployment each individual Kasm Agent would have different data stored. The user would get different data depending on which Kasm Agent they were launched to.
###### NFS Server Setup
- Install an NFS server on this host.
**Ubuntu/Debian**
```Bash
sudo apt-get update
sudo apt-get install -y nfs-kernel-server
```
**RHEL/Oracle**
```Bash
sudo yum install -y nfs-utils
sudo systemctl enable rpcbind
sudo systemctl enable nfs-server
sudo service rpcbind start
sudo service nfs-server start
```
- Create the folder to host the share.
```Bash
sudo mkdir /kasmdata
sudo chown -R 1000:1000 /kasmdata/
```
- Add the entry to `/etc/exports`. In this example the IP of the NFS Client is `192.168.1.3`.
Note the use of `all_squash`, `anonuid`, and `anongid` settings
to ensure that all files are accessed and written as the default Kasm session UID 1000.
See [https://linux.die.net/man/5/exports](https://linux.die.net/man/5/exports) for more details.
```Bash
/kasmdata 192.168.1.3(rw,sync,all_squash,anonuid=1000,anongid=1000,no_subtree_check)
```
- Expose the new additions defined in the exports.
```Bash
sudo exportfs -ar
```
###### NFS Client Setup
- Install an NFS client on this host.
**Ubuntu/Debian**
```Bash
sudo apt-get update
sudo apt-get install -y nfs-common
```
**RHEL/Oracle**
```Bash
sudo yum install -y nfs-utils
```
- Create a directory for the mount.
```Bash
sudo mkdir -p /mnt/kasm-nfs
```
- Add an entry to `` `/etc/fstab `` for the NFS mount. In this example the IP of the NFS Server is `192.168.1.2`
```Bash
192.168.1.2:/kasmdata /mnt/kasm-nfs nfs defaults 0 0
```
- Mount the share.
```Bash
sudo mount /mnt/kasm-nfs
```
- Test creating a file.
```Bash
sudo touch /mnt/kasm-nfs/example.txt
```
- Inspect the file from the NFS Server to ensure the permissions are UID/GID 1000.
```Bash
ls -la /kasmdata/
total 8
drwxr-xr-x 2 1000 1000 4096 Feb 24 08:39 .
drwxr-xr-x 20 root root 4096 Feb 23 16:00 ..
-rw-r--r-- 1 1000 1000 0 Feb 24 08:39 example.txt
```
- You can now reference the NFS share in volume mappings or persistent profile configurations. In this example we are configuring a shared directory for all users that have access to this Workspace available at the path `/share` to them using a volume mapping. Please see the [Volume Mapping Documentation](volume-mapping.mdx) for more information.
```JSON
{
"/mnt/kasm-nfs":{
"bind":"/share",
"mode":"rw",
"uid": 1000,
"gid": 1000,
"required": true,
"skip_check": false
}
}
```
##### File Permissions and Isolation
By default users inside of Kasm Workspaces sessions will run under the Linux UID and GID of 1000. What this means is that when creating persistent data paths it is important to understand that if exposed one user will have the same access to the other users files and vice versa. This becomes particularly important when using volume mappings. If mapping in a non user scoped directory IE `/mnt/kasm/` and continuing to use that path for user scoped directories IE `/mnt/kasm/desktop/{username}` anyone with access to the Workspace with the initial `/mnt/kasm` volume mapping will also have read and write access to all of the other users storage in `/mnt/kasm/desktop/`.
Also because of this one user design it means that Administrators can limit access to specific files by modifying their owner and file permissions host level.
In this example we will create a read only folder inside of the volume mapping. Lets say you would like to have a universal share folder where users can save/load/delete files in this directory this directory host level is `/mnt/kasm_docs_share` mounted into the launched Workspaces sessions as `/share/`. On the host with access to `/mnt/kasm_docs_share` we create the folder we want to be read only and place files/folder into it.
```
mkdir /mnt/kasm_docs_share/read_only_documents
cp -ax /my_data/documents/* /mnt/kasm_docs_share/read_only_documents/
```
Then we modify the user that owns this directory and the permissions: (in this example we use root but any user outside of 1000:1000 will work)
```
sudo chown root:root /mnt/kasm_docs_share/read_only_documents/
sudo chmod -R 664 /mnt/kasm_docs_share/read_only_documents/
```
The user will be able to open and copy the files in this directory, but will not be able to make modifications from inside their Workspaces session:
```
default:~$ rm /share/read_only_documents/test.doc
rm: remove write-protected regular empty file '/share/read_only_documents/test.doc'? y
rm: cannot remove '/share/read_only_documents/test.doc': Permission denied
default:~$ cp /share/read_only_documents/test.doc /home/kasm-user/Desktop/
default:~$ ls -l /home/kasm-user/Desktop/test.doc
-rw-r--r-- 1 kasm-user kasm-user 0 Jan 26 20:49 /home/kasm-user/Desktop/test.doc
```
This is just a simple example Linux user and file permissions are a bit more complex than that. In this case we are setting the owner to root and then telling the filesystem:
* First Number 6- Anyone that is the root user has read and write access.
* Second Number 6- Anyone that belongs to the group root has read and write access.
* Third Number 4- Anyone else only has read access.
Please review this infographic for a better explanation:
---
## Persistent Data: Profiles & Volume Mappings
## Persistent Data
By default, Kasm Workspaces spins up containerized sessions that are ephemeral in nature. However, some use cases require that certain data or configurations persist between sessions. There are two main ways to achieve this: **Persistent Profiles** and **Volume Mappings**.
**Persistent Profiles** automate the process of mounting a host directory into the Workspace as the users home directory. These are analogous to Roaming Profiles found in other platforms. When configured, users may select whether to use their persistent profile when launching a session, disable it (making the session ephemeral) it, reset the profile - (clearing the contents and starting a fresh profile).
**Volume Mappings** are a more generic feature that can be used to map host-level directories into the session. They may also be used to share folders across multiple users/workspaces and thus are more appropriate to simulate an organizational share.
Volume mapping can be configured at a group level or individual Workspace level.
**(Cloud) Storage Mappings** are flexible solution aimed at giving end users the ability to attach their cloud storage
accounts directly into the file-systems of container-based sessions. Administrators configure supported
**Storage Providers** (e.g Google Drive, Dropbox, OneDrive, Nextcloud, S3). Admins can then configure mappings to
those providers at a User, Group or Workspace level. End users can enroll their own accounts for the configured
providers via their profile.
---
## Configure Persistent User Profiles
## Persistent Profiles
Administrators may desire to give each user a personal persistent profile that is restored during each session. This can be achieved in one of three ways: volume mounted profiles, storage mapping based profiles and S3 based profiles.
### Storage Mapping Based Profiles
This feature is in [Preview](../../reference/experimental-features/feature-index.mdx#current--past-experimental-features) and not currently recommended for production use.
The [Storage Mapping](storage-mappings/index.mdx) provides a way to attach external storage to sessions. Kasm's Storage Mapping supports many
different backend storage providers, such as Google Drive, Dropbox, S3, and others. The issue with many of these providers is that they cannot
be used for a user's home profile in Linux. To alleviate this issue, Kasm has developed its own storage provider, `Kasm Profile Sync`. The Kasm
Profile Sync storage provider supports AWS S3 storage with support for more storage solutions coming. While it has not been tested on all
S3 compatible storage solutions, it is known to work on services that are S3 compatible, such as Oracle object storage, GCP, and Wasabi.
The **Kasm Profile Sync** storage provider is meant to replace the [S3 Based Profiles](#s3-based-profiles) and provides many advantages over this
legacy solution.
* SSE-C is used so that each user's profile has a different encryption key managed by Kasm.
* Support for unlimited file and profile sizes. The legacy version is limited in both the maximum file size and the total profile size.
* Centralized logging of profile sync operations.
* S3 credentials are managed per Storage Mapping configuration, instead of globally, allowing for multi-tenancy usage.
* Supports for AWS STS credentials, ensuring profile sync uses short-lived limited credentials.
* Easier to configure details of profile sync in the admin UI.
AWS as of April 2026 blocks SSE-C customer encryption keys by default. Please ensure this security control is disabled when using an s3 bucket for Kasm Profile Sync. See [https://docs.aws.amazon.com/AmazonS3/latest/userguide/default-s3-c-encryption-setting-faq.html](https://docs.aws.amazon.com/AmazonS3/latest/userguide/default-s3-c-encryption-setting-faq.html) for more details.
If both Storage Mapping based profiles are configured alongside Volume Mount profiles or the legacy S3 based profiles, the Storage Mapping based
profile configuration takes precedence. Any existing data will be migrated to the Storage Mapping profiles, allowing admins to easily migrate to
this new solution.
While persistent profiles may work on S3 compatible solutions, Kasm cannot provide support for 3rd party products that claim to be S3 compatible.
The first step in configuring Storage Mapping based profiles using the **Kasm Profile Sync** provider is to create a Storage Provider configuration.
#### Storage Provider Configuration
1. Log into the Kasm UI as an administrator.
2. Select **Settings** -> **Storage** -> **Add**.
3. Provide a name and configure the Volume Config json field.
```json
{
"backend_storage" : "s3",
"log_level" : "info",
"filter" : "Downloads/*",
"storage_limit" : "20g",
"sts" : true
}
```
| Field | Description |
|-------|-------------|
| backend_storage | The type of storage to use on the backend, currently only `s3` is supported. |
| log_level | The logging level, expected values of `debug`, `info`, `warning`, and `error`. |
| filter | Comma-delimited list of directories or files within the user's home profile to ignore, supports Linux globbing format. **Any whitespace will be interpreted literally; do not insert spaces between entries.**|
| storage_limit | Sets a maximum storage size limit. Users will get pop up notifications within the desktop when the profile size has exceeded 90% of the limit. Use the labels `m` or `g` to specify MegaBytes or GigaBytes respectively. A value of `0g` or `0m` disables storage limits. |
| sts | Determines if AWS STS will be used for authentication by the profile-sync binary running inside the user's container. This provides additional security by ensuring that temporary limited use tokens are used by endpoints for authentication to S3. This is only supported for AWS S3, other S3 compatible solutions will not work with STS enabled. |
After the **Storage Provider** details are configured, the storage provider can be used to create **Storage Mappings** on each desired Workspaces Image.
#### Storage Mapping Configuration
1. Log into the Kasm UI as an administrator.
2. Select **Workspaces** -> **Workspaces**
3. Edit the desired Workspace Image
4. Click the **Storage Mapping** tab
5. Click the **Add** button
6. From the **Type** drop down, select the provider you created in the previous section.
7. Enter the S3 Access Key ID, S3 Secret Access Key, and the bucket.
#### AWS IAM Role
To use an IAM Role assigned to EC2 instances instead of an AWS Access Key and Access Key Secret, use the value `{IAM}` in the **S3 Access Key ID**
field and use any value for the **S3 Secret Access Key** field on the Storage Mapping configuration. An IAM role with the polices covered in the below
section needs to exist on all Kasm Agents and all Kasm WebApp EC2 instances. Additionally, the [Storage Provider](#storage-provider-configuration)
configuration needs to disable `sts`.
#### S3 Endpoints
You can force Kasm to use a specific endpoint by using this format in the Bucket name field of the Storage Mapping defined on the Workspace.
This can be used to ensure all requests go directly to the region the bucket resides in, it can be used to send requests to an VNC S3 endpoint,
or it can be used to specify an S3 compatible service.
`@`
For example: **my-bucket@s3.eu-central-1.amazonaws.com**
#### S3 Compatible Solutions
There are many object storage solutions out there that claim to be compatible with AWS S3 clients, such as GCP, OCI, and MinIO object storage. No AWS S3 compatible service is
100% compatible and Kasm Technologies cannot feasibly support all providers that claim to be compatible, however, this section documents what we do know that might help
our clients configure Kasm to work on these type of services.
* You must set `sts` to `false` in the **Storage Provider** configuration. This disables sts tokens for authentication, which is not supported by AWS compatible services.
* You must specify an endpoint in the bucket name of the Storage Mapping configuration.
AWS S3 now chunks all upload operations and not all "S3 Compatible" services support this. There is a work around for the following providers known not to support chunked uploads.
This list may not be all inclusive, if you are having issues with your S3 Compatible service you may try this work around.
* OCI
To work around the lack of support for chunked uploads for the above list of S3 Compatible services, you must set two environmental variables on the Workspace Image settings.
The following example json would go in the **Docker Run Configuration Override** field in the Workspace Image settings.
```json
{
"environment": {
"AWS_REQUEST_CHECKSUM_CALCULATION": "WHEN_REQUIRED",
"AWS_RESPONSE_CHECKSUM_VALIDATION": "WHEN_REQUIRED"
}
}
```
### Volume Mount Profiles
This is achieved by mounting in a host level directory into the container meaning the top level folders used for this setting should exist on the host beforehand.
When configured, the user's home directory will be stored at the specified location and mapped in each time the user loads that Workspace.
Administrators must use the `{username}` or `{user_id}` variables in the mapping to ensure they are unique per user.
`{image_id}` may also be used as a variable.
Persistent profiles are configured on a per Workspace basis and should be isolated in their pathing IE if you have a Chrome and Firefox image on your Workspaces deployment and the users are **user@kasm.local** and **admin@kasm.local** the directory structure would look like:
It is important that each workspace's profile path is unique. There are some use cases where you would want the profile for different workspaces to be identical. One example would be cloned workspaces. However, even in this scenario it is highly recommended that workspaces have unique profile paths to prevent the files from one workspace conflicting with the files in another. This can happen because most applications will attempt to store their session configuration data at the same file location, however when using shared profile paths this file already exist with a possibly incompatible setting such as a resource lock. The easiest way to ensure unique profile paths is to use a format similar to "`/mnt/kasm_profiles/{username}/{image_id}`" or "`/mnt/kasm_profiles/{user_id}/{image_id}`".
```
/mnt/kasm_profiles/
├── admin@kasm.local
│ ├── chrome
│ └── firefox
└── user@kasm.local
├── chrome
└── firefox
```
The only folder the administrator needs to create is `/mnt/kasm_profiles/` and the rest will be generated on Workspace launch.
### S3 Based Profiles
AWS S3 object storage can be used for persistent profiles. The advantages of using S3 for persistent profiles are:
- Redundancy
- Data management policies in S3
- Globally distributed
- Security
The user's session container does not have direct authenticated access to S3. When the container starts, it makes an API call to the Kasm API service to request the profile manifest. The Kasm API returns a manifest that contains presigned URLs for each layer of the profile. The S3 presigned URLs are only authorized for each object they are signed for and only for a limited amount of time. This architecture ensures that a single S3 bucket can be securely used for all users in the system.
The administrator needs to define the AWS Access Key ID and Access Secret in the [Server Settings](../../reference/settings.mdx#storage). The access key should be defined on a user that only has access to the specific bucket in question, with no other permissions. The user should be able to read and write to the bucket, and create pre-signed URLs. Kasm API services need to be restarted after changing/setting the AWS Access Key ID or Access Key Secret.
Finally, the administrator will need to specify the S3 URL path in the Workspace settings, in the format of `s3://bucket-name/folder/{username}/`. Replace bucket-name with the target S3 bucket name. Each Workspace in Kasm should have its own folder, if the folder does not exist, it will be created. Use the `{username}` or `{user_id}` token in the path, to ensure each user has their own directory. Administrators can use different buckets for different Workspaces, as long as the AWS Access Key used in the global settings has the required access to all configured buckets.
#### S3 Policy Configurations
This feature utilizes pre-signed URLs to facilitate uploading artifacts to S3.
The minimum S3 bucket policy required to use this feature is:
```json
{
"Version": "2012-10-17",
"Statement": [
{
"Sid": "PolicyForAllowKasmS3UserReadWrite",
"Effect": "Allow",
"Principal": {
"AWS": ""
},
"Action": [
"s3:GetObject",
"s3:PutObject",
"s3:ListBucket",
"s3:DeleteObject"
],
"Resource": [
"",
"/*"
]
},
{
"Sid": "PolicyForAllowKasmS3UserListLocate",
"Effect": "Allow",
"Principal": {
"AWS": ""
},
"Action": [
"s3:ListBucket",
"s3:GetBucketLocation"
],
"Resource": ""
}
]
}
```
The minimum IAM policy for the S3 credentials used in Kasm are:
```json
{
"Statement": [
{
"Action": [
"s3:GetObject",
"s3:PutObject",
"s3:ListBucket",
"s3:DeleteObject"
],
"Effect": "Allow",
"Resource": [
"",
"/*"
]
},
{
"Action": [
"s3:ListBucket",
"s3:GetBucketLocation"
],
"Effect": "Allow",
"Resource": ""
}
],
"Version": "2012-10-17"
}
```
#### S3 Endpoints
By default, the endpoint used for S3 access is `s3.amazonaws.com`. Administrators may desire to specify a custom endpoint in order to support the following use cases.
- A private VPC Endpoint
- AWS Gov Cloud end-points
- Region specific end-points
- AWS S3 Accelerated Endpoints
- S3 Compatible Solutions
While persistent profiles may work on S3 compatible solutions, Kasm cannot provide support for 3rd party products that claim to be S3 compatible. Kasm utilizes pre-signed S3 URLs and only supports version 4 signatures.
To specify a custom endpoint, in the Workspaces settings, format the Persistent Profile path in the following format:
```text
s3://bucket-name@endpoint/folder/{username}/
```
The following example configures Kasm to use Wasabi (an S3 compliant cloud storage provider) for a persistent profile, where `kasm` is the bucket name, `wasabisys.com` is the endpoint name, and the remaining is the path with `{username}` replaced by the Kasm username.
```text
s3://kasm@s3.wasabisys.com/ubuntu2/{username}/
```
#### Adding a persistent profile to a Workspace
To add a persistent profile path to a Workspace from the administrator menu first click on Workspaces -> Workspaces and edit your desired Workspace:
#### How to configure a persistent profile in a workspace
- Configure the persistent profile path on the [workspace](../../reference/glossary.mdx#workspace).
Variables can be used for the Image ID and User ID so that the persistent profile path is uniform across all images:
```
/mnt/kasm_profiles/{image_id}/{user_id}
```
Alternatively, if the paths should be human-readable the image name can be specified in the path and the Username as a variable:
```
/mnt/kasm_profiles/firefox/{username}
```
If Kasm is installed in a multi-server deployment path should reference a
shared data storage solution (e.g NFS, HDFS, GFS, SMB, SSHFS) to ensure data continuity. Administrators must ensure
this path is accessible from the hosts of all Agent services. Kasm will create the directory if it does not exist.
#### Limiting group access to persistent profiles
It may be necessary to limit which users can access the persistent profile feature, this can be achieved with a group setting. **See [Group Setting](../security/users-groups-mgmt/groups.mdx#group-settings) for more details.**
From the administrator menu first click on Access Management -> Groups and click Edit on your desired group:
Under **Settings** find the `allow_persistent_profile` group setting and click edit:
This is a Boolean value, set it to true to enable access and false to disable access for this particular group.
#### Utilize a persistent profile with creating a Kasm
When creating a Kasm, the user will now be presented with a **Persistent Profile** Option. Multiple Settings are available.
> - **Enabled**
> - The persistent profile path defined on the workspace will be loaded during creation.
> - **Disabled**
> - The persistent profile will **NOT** be loaded on creation.
> - **Reset**
> - The existing persistent profile will be deleted and re-created. The is useful if the user desires to clear old profile data and start fresh.
#### Size Limits
Administrators can place a size limit on S3-based persistent profiles and a size warning for volume mapped profiles. When a
user's home profile exceeds the limit, the user will get a warning message within the Workspace desktop session. For S3-based
profiles, the user's changes will not be saved between sessions until they reduce the size of their profile. The size limit can be
set using the environmental variable **KASM_PROFILE_SIZE_LIMIT**, specified in KB. To specify a persistent profile size limit of
2GB, you would set a value of 2000000. To set the environmental variable, use the [Docker Run Override](../workspaces-sessions/container-workspace/workspaces.mdx#docker-run-config)
setting in the Workspace definition. By default, there is no limit.
#### Filters
S3-based persistent profiles support filters that will ignore files and/or directories. The filter is a comma separated list of file
or directory names, relative from the user's home profile path.
The default filter is.
```bash
.cache,.vnc,Downloads,Uploads
```
This default filter ignores the .cache, .vnc, Downloads, and Uploads directories within the user's home profile. This default filter
can be overridden by setting the **KASM_PROFILE_FILTER** environmental variable. To set the environmental variable, use the
[Docker Run Override](../workspaces-sessions/container-workspace/workspaces.mdx#docker-run-config) setting in the Workspace definition.
Globing is supported, such as `Documents/*.docx`, to mean any file ending in '.docx' or `Documents/**.docx`,
meaning any file ending in '.docx' in the Documents directory or any child directory within.
#### Video Example
This video shows an example of configuring persistent profiles.
---
## Custom
## Custom Storage Provider Setup
Custom storage providers give administrators the ability to create free-form configurations that create docker volumes
and then map them into containers.
Configuration is largely instrumented through the **Volume Config** and **Mount Config** options in accordance with any
desired docker volume plugin and driver options.
Unlike the other providers, Storage Mappings for Custom Storage Providers may only be configured by administrators. No
settings are exposed on the Storage Mappings for Custom Storage Providers, so they only service as an association by the admin
to a Workspace, Group, or User.
- **S3 Example**
In this example, we take advantage of the [Variable Substitution](index.mdx#variable-substitution) in order for each user to get their own storage location.
Name
Custom Provider
Storage Provider Type
Custom
Enabled
checked
Default Target
/custom-{username}
Volume Config (S3 Example)
```json
{
"driver": "rclone",
"driver_opts": {
"type": "s3",
"path": "bucket-name/folder/{user_id}",
"vfs-cache-mode": "off",
"dir-cache-time": "10s",
"s3-provider": "AWS",
"s3-env-auth": "false",
"s3-access-key-id": "--redacted--",
"s3-secret-access-key": "--redacted--",
"s3-region": "us-east-1",
"uid": "1000",
"gid": "1000",
"allow_other": "true"
}
}
```
Mount Config
{}
- **S3 + File Based Encryption Example**
In this example, we leverage the rclone storage driver's ability to utilize [Crypt Remote](https://rclone.org/crypt/) as a wrapper around the S3 example from above. This builds
on the previous example by implementing file based encryption on each user's files. Files are transparently encrypted/decrypted when utilized in the
Kasm session. Files are obfuscated and encrypted when viewed from the S3 console.

Name
Custom Provider
Storage Provider Type
Custom
Enabled
checked
Default Target
/custom-{username}
Volume Config (S3 Example)
```json
{
"driver": "rclone",
"driver_opts": {
"type": "crypt",
"vfs-cache-mode": "off",
"dir-cache-time": "10s",
"crypt-filename-encryption": "standard",
"crypt-password": "{user_crypt_password}",
"crypt-password2": "{user_crypt_salt}",
"crypt-remote": ":s3,provider=AWS,env_auth=false,access_key_id=--redacted--,secret_access_key=--redacted--,region=us-east-1:bucket-name/folder/{user_id}",
"uid": "1000",
"gid": "1000",
"allow_other": "true"
}
}
```
Mount Config
{}
- **Azure Blob Example**
- The Azure Blob Storage Account Name and Key can be found in the **Security + networking** -> **Access keys** section.
More info on the Azure Blob paremeters can be found in the [Rclone Azure blob documentation](https://rclone.org/azureblob/)
Name
Custom Provider
Storage Provider Type
Custom
Enabled
checked
Default Target
/custom
Volume Config (Azure Blob Example)
```json
{
"driver": "rclone",
"driver_opts": {
"type": "azureblob",
"path": "container-name",
"azureblob-account": "storage-account-name",
"azureblob-key": "storage-key",
"uid": "1000",
"gid": "1000",
"allow_other": "true"
}
}
```
Mount Config
{}
- **SMB/CIFS Example**
- More info on the SMB parameters can be found in the [Rclone SMB documentation](https://rclone.org/smb/)
- The `smb-pass` option needs to be obscured value produced via the [Rclone Obscure](https://rclone.org/commands/rclone_obscure/) utility. Install the latest version of
rclone on a separate system and utilize the `rlone obscure` utility to generate the obscured password to use in the configuration.
Name
Custom Provider
Storage Provider Type
Custom
Enabled
checked
Default Target
/custom
Volume Config (SMB Example)
```json
{
"driver": "rclone",
"driver_opts": {
"type": "smb",
"path": "optional/share/path",
"smb-host": "192.168.1.2",
"smb-user": "username",
"smb-pass": "--obscured-pass-with-rclone-obscure--",
"smb-domain": "WORKGROUP",
"uid": "1000",
"gid": "1000",
"allow_other": "true"
}
}
```
Mount Config
{}
:::note
Many of the storage provider examples include default storage driver options used by Rclone. These options work well with Kasm in its default configuration, and administrators can adjust them as needed. The available options often vary by provider plugin, for example Google Drive compared with OneDrive.
The Rclone Docker plugin is installed by default as part of the standard Workspace install. For more information about Rclone driver options, see [the Rclone Docker documentation](https://rclone.org/docker/).
:::
- **Digital Ocean Spaces Example**
Name
Custom Provider
Storage Provider Type
Custom
Enabled
checked
Default Target
/custom
Volume Config (S3 Example)
```json
{
"driver": "rclone",
"driver_opts": {
"type": "s3",
"path": "bucket-name/folder/",
"vfs-cache-mode": "off",
"dir-cache-time": "10s",
"s3-provider": "DigitalOcean",
"s3-env-auth": "false",
"s3-access-key-id": "--redacted--",
"s3-secret-access-key": "--redacted--",
"s3-endpoint": "fra1.digitaloceanspaces.com",
"uid": "1000",
"gid": "1000",
"allow_other": "true"
}
}
```
Mount Config
{}
- **Google Cloud Storage Example**
Name
Custom Provider
Storage Provider Type
Custom
Enabled
checked
Default Target
/custom
Volume Config (S3 Example)
```json
{
"driver": "rclone",
"driver_opts": {
"type": "s3",
"path": "bucket-name/folder/",
"vfs-cache-mode": "off",
"dir-cache-time": "10s",
"s3-provider": "GCS",
"s3-env-auth": "false",
"s3-access-key-id": "--redacted--",
"s3-secret-access-key": "--redacted--",
"s3-endpoint": "https://storage.googleapis.com",
"uid": "1000",
"gid": "1000",
"allow_other": "true"
}
}
```
Mount Config
{}
#### Create Storage Mapping
Storage Mappings for Custom Storage Providers can only be configured by Administrators.
1. From the Workspaces app , select the desired Workspace, User or Group to associate with the Storage Mapping.
2. Select **Storage Mapping** tab and select **Add Storage Mapping**.
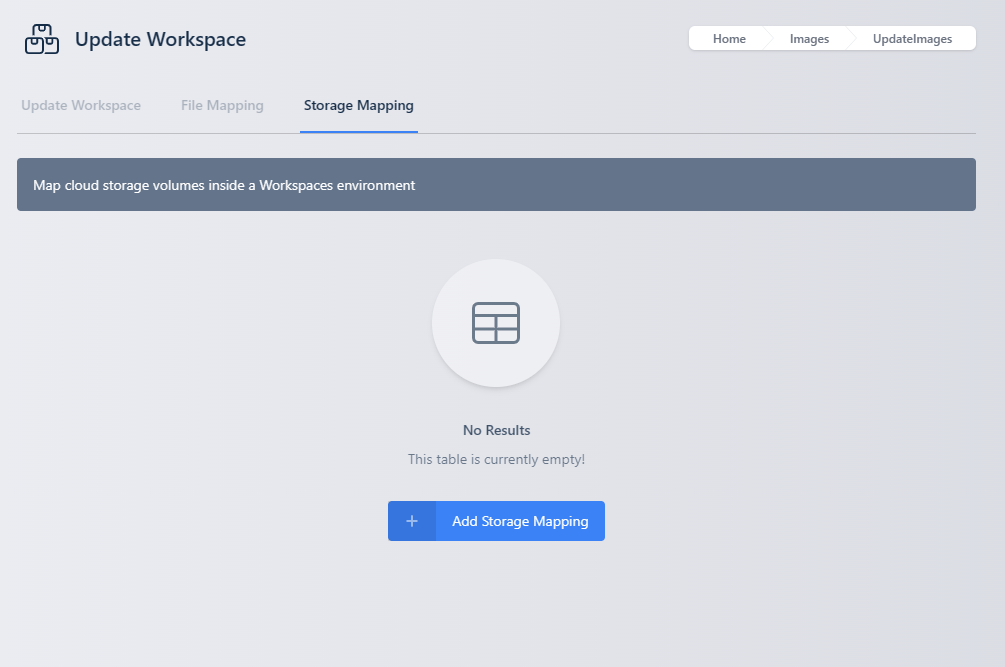
3. Select the Custom Storage Provider from the **Type** dropdown and select **Next**
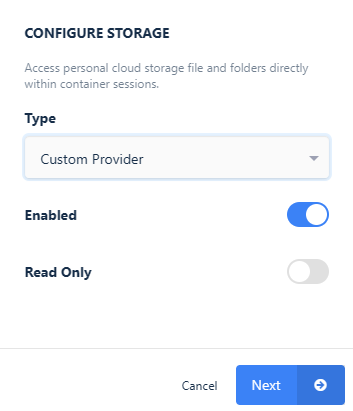
4. Launch a new container-based session. Verify the Custom storage is mapped inside the session at the `/custom` location.
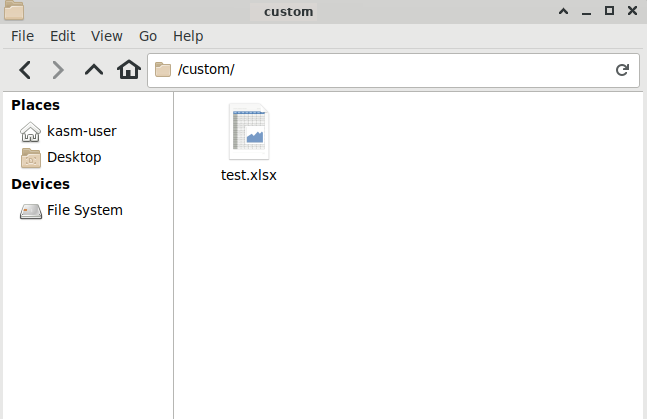
---
## Dropbox
## Dropbox Storage Provider Setup
The [Dropbox](https://www.dropbox.com/) Storage Provider allows end-users to map in their OneDrive storage into
container-based sessions. Access is provided via [Dropbox's OAuth interface](https://www.dropbox.com/apps) and
leveraging the [Rclone](https://rclone.org) Docker volume plugin.
Reference Docs:
- [https://rclone.org/dropbox/](https://rclone.org/dropbox/)
#### Creating a Dropbox OAuth App
1. Login to the Dropbox App Console: [https://www.dropbox.com/developers/apps/create](https://www.dropbox.com/developers/apps/create) .
2. Select **Scoped Access**, **Full Dropbox**, give the app a name (e.g `Kasm-Example`), then click **Create app**.
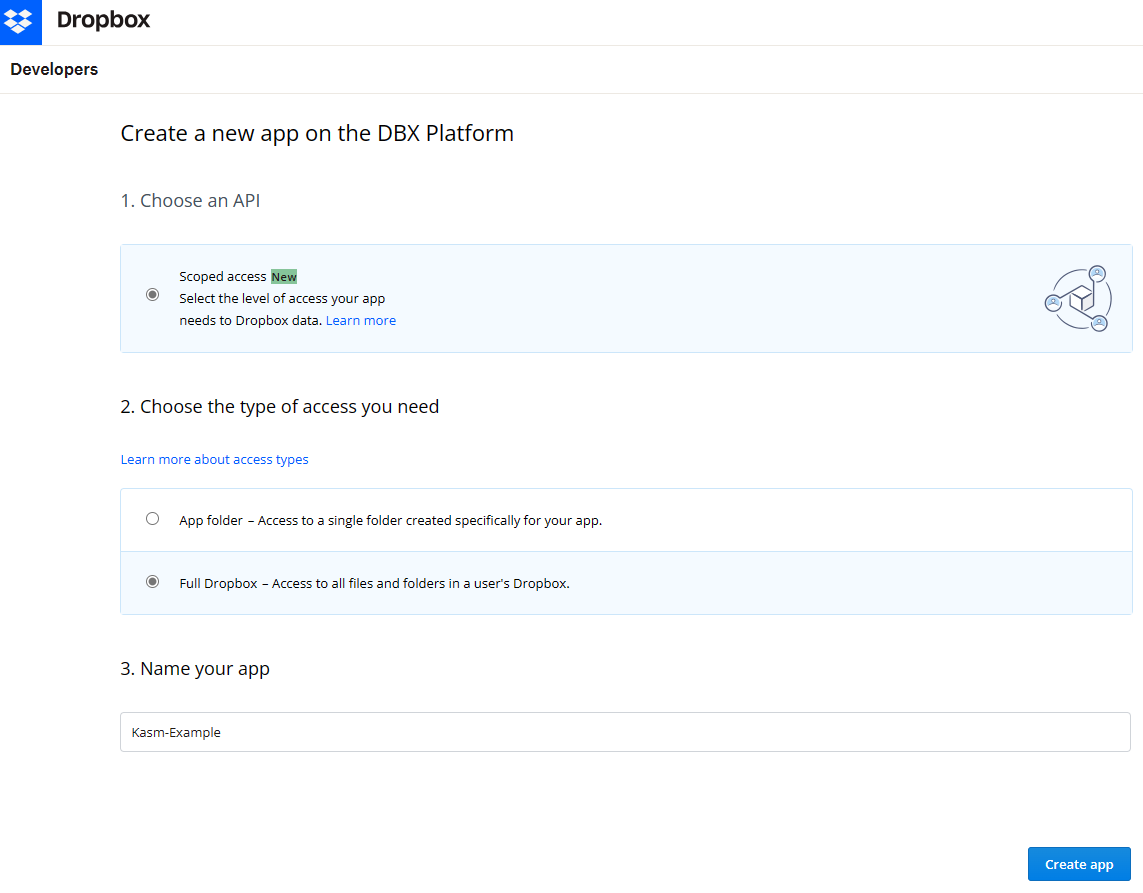
3. On the next screen take note of the **App key** and **App Secret** , these will be used as the **Client ID** and
**Client Secret** in the Storage Provider Configuration.
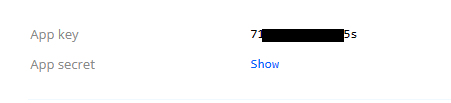
4. In the **Development users** section, click **Enable additional users** to allow additional accounts to use this app.

5. In the OAuth 2 section, enter the following URL for **Redirect URI** , substituting the hostname of the Kasm
deployment `https://kasm.example.com/api/cloud_storage_callback` , then click *Add*.
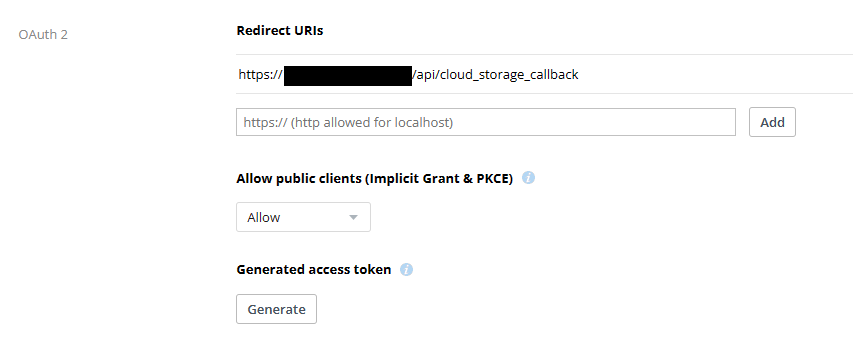
6. Select the **Permissions** tab and ensure the following permissions are selected, then click **Submit**.
```text
account_info.read
files.metadata.read
files.metadata.write
files.content.write
files.content.read
sharing.read
sharing.write
```
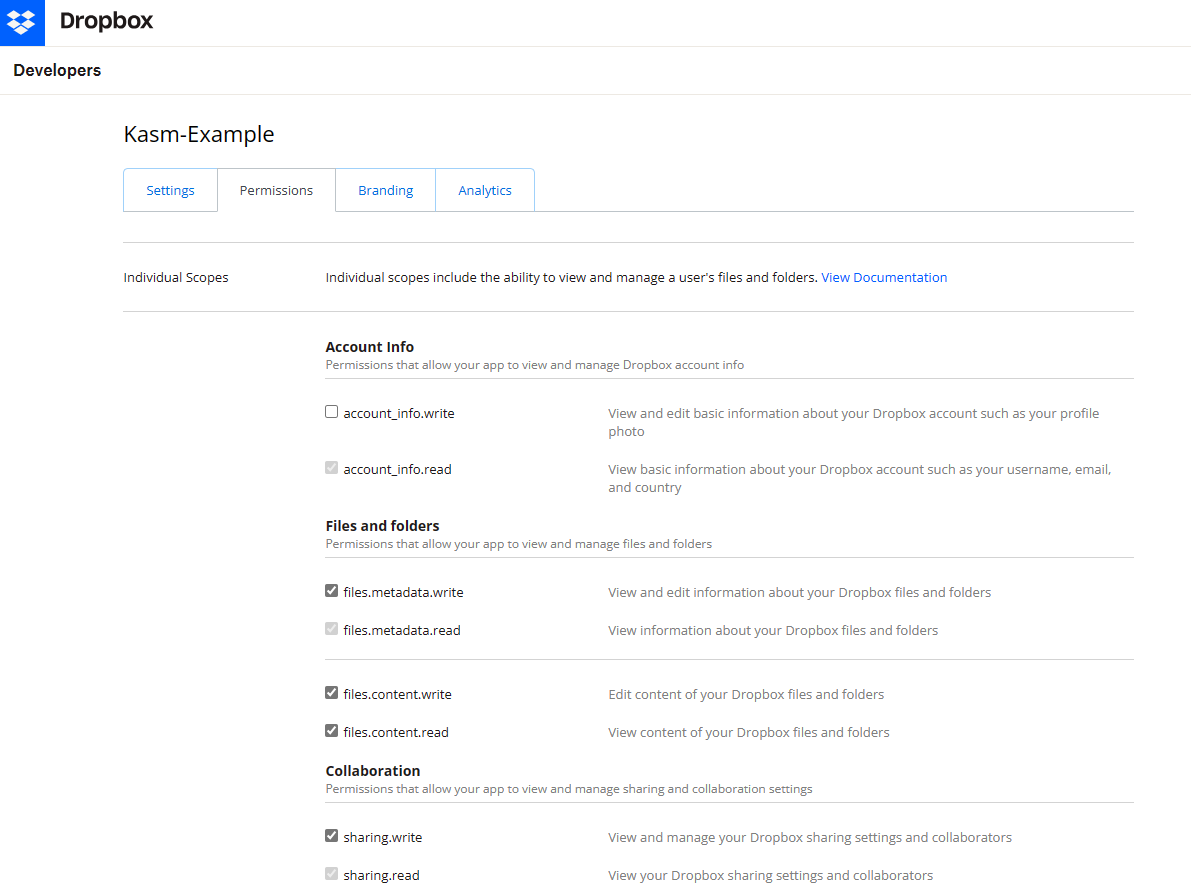
#### Kasm Storage Provider Config
1. Log into the Kasm UI as an administrator.
2. Select **Settings** -> **Storage** -> **Add**.
3. Update the form with the following entries, using the **Client ID** and **Client Secret** gathered
in the previous section.
| Name | `Dropbox` |
| --- | --- |
| Storage Provider Type | `Dropbox` |
| Enabled | `checked` |
| Client ID | `` |
| Client Secret | `` |
| Authorization URL | `https://www.dropbox.com/1/oauth2/authorize` |
| Authorization URL Options | `{"include_granted_scopes" : "user", "access_type" : "offline", "token_access_type" : "offline"}` |
| Token URL | `https://api.dropboxapi.com/1/oauth2/token` |
| Redirect URL | `https:///api/cloud_storage_callback` |
| Scope | .. code-block:: text files.metadata.read files.metadata.write files.content.read files.content.write sharing.read sharing.write account_info.read |
| Default Target | `/dropbox` |
| Volume Config | `{ "driver" : "rclone", "driver_opts" : { "type" : "dropbox", "uid" : "1000", "gid" : "1000", "allow_other" : "true" } }` |
| Mount Config | `{}` |
4. Click **Save** to save the changes.
#### Dropbox storage mapping configuration
1. From any page, select the profile icon at the top right.
2. Select the **Cloud Storage** section, then **Add Storage Mapping**.
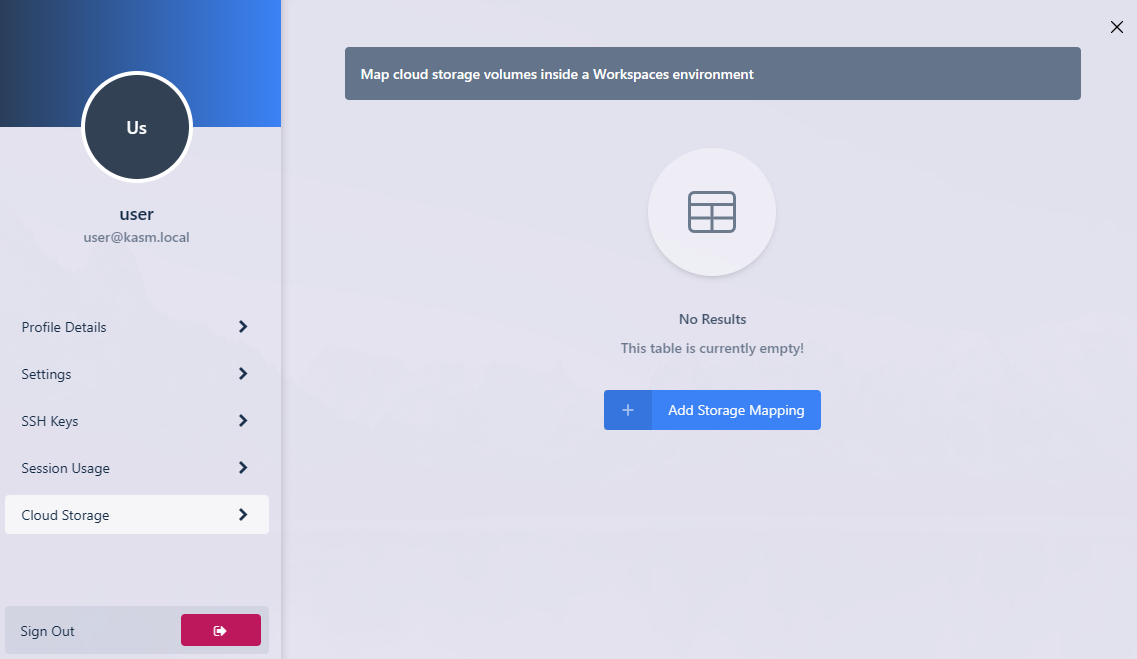
3. Select **Dropbox** from the drop-down, then select **Next**.
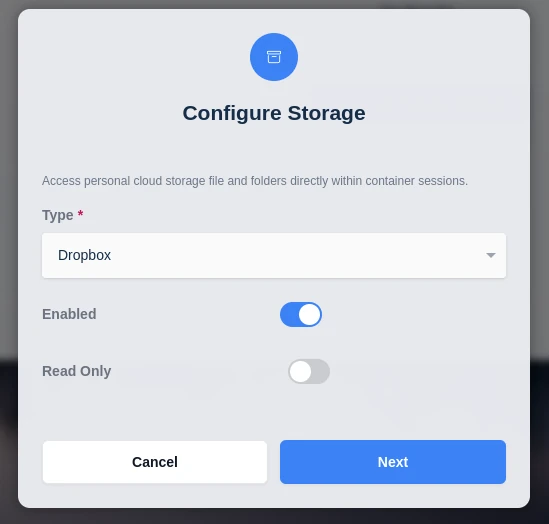
4. The Dropbox login page appears. Log in with the desired account.
5. Dropbox asks for consent to provide access to the account. Approve the request.
6. On success, Kasm redirects you to the Workspaces dashboard. The new storage mapping appears in the Cloud Storage section of the profile.
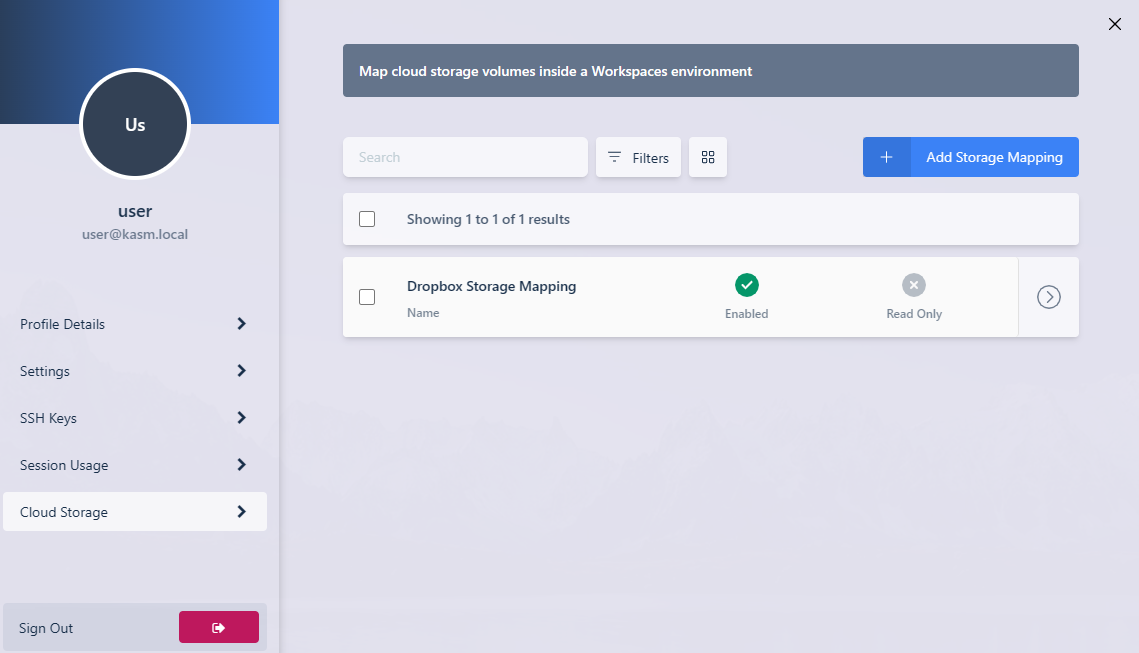
7. Launch a new container-based session. Confirm that Dropbox is mapped inside the session at the `/dropbox` location.
---
## GDrive
## Google Drive Storage Provider Setup
The [Google Drive](https://www.google.com/drive/) Storage Provider allows end-users to map in their Google Drive
storage into container-based sessions. Access is provided via Googles Drive's OAuth interface and leveraging
the [Rclone](https://rclone.org) Docker volume plugin.
Reference Docs:
- [https://developers.google.com/identity/protocols/oauth2](https://developers.google.com/identity/protocols/oauth2)
- [https://rclone.org/drive/](https://rclone.org/drive/)
#### Creating a Google OAuth App
1. Login to the Google Developer Console: [https://console.developers.google.com](https://console.developers.google.com).
2. From the **APIs & Services menu**, Select **OAuth consent screen**.
3. Select **External** then click **Create**.
In this example, we walk through creating an integration where any Google user can auth with the Google Drive
Storage Provider. This is ideal for a public facing deployment. Choose **Internal** if only users from your Google
Workspace corporate account should be allowed to authenticate.
Extenal types will need to go through a validation process before being used in production systems.
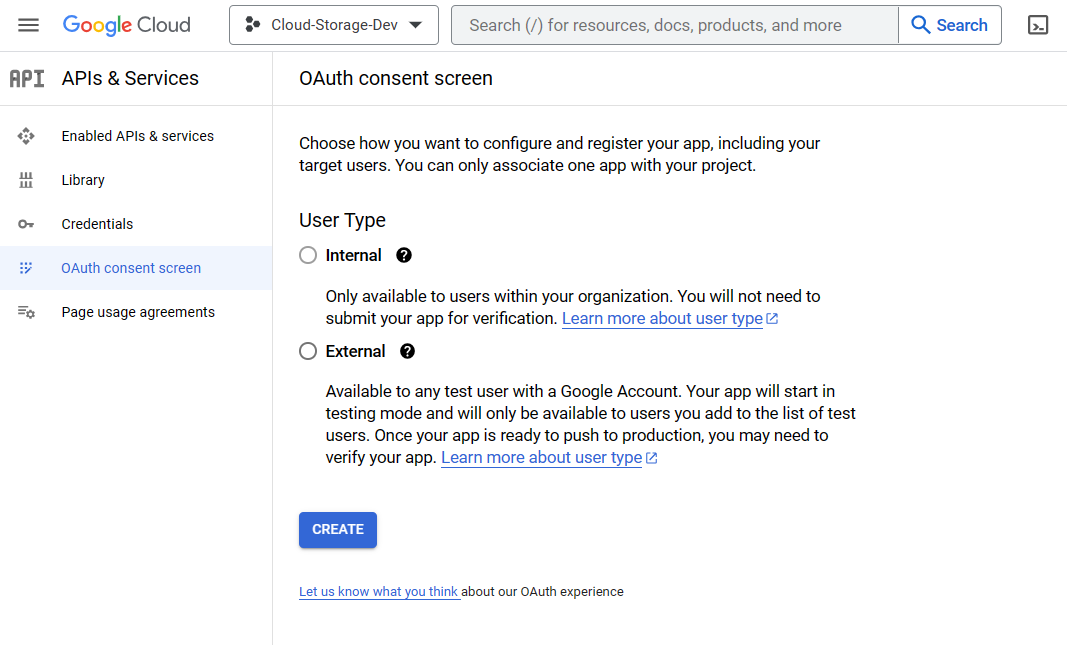
4. Provide values for the **App Name** , **User support email**, and **Developer Contact email**.
5. In the **Authorized Domains** section, enter the Workspaces deployment's top private domain (e.g `example.com`).
6. Click **Save and Continue**.
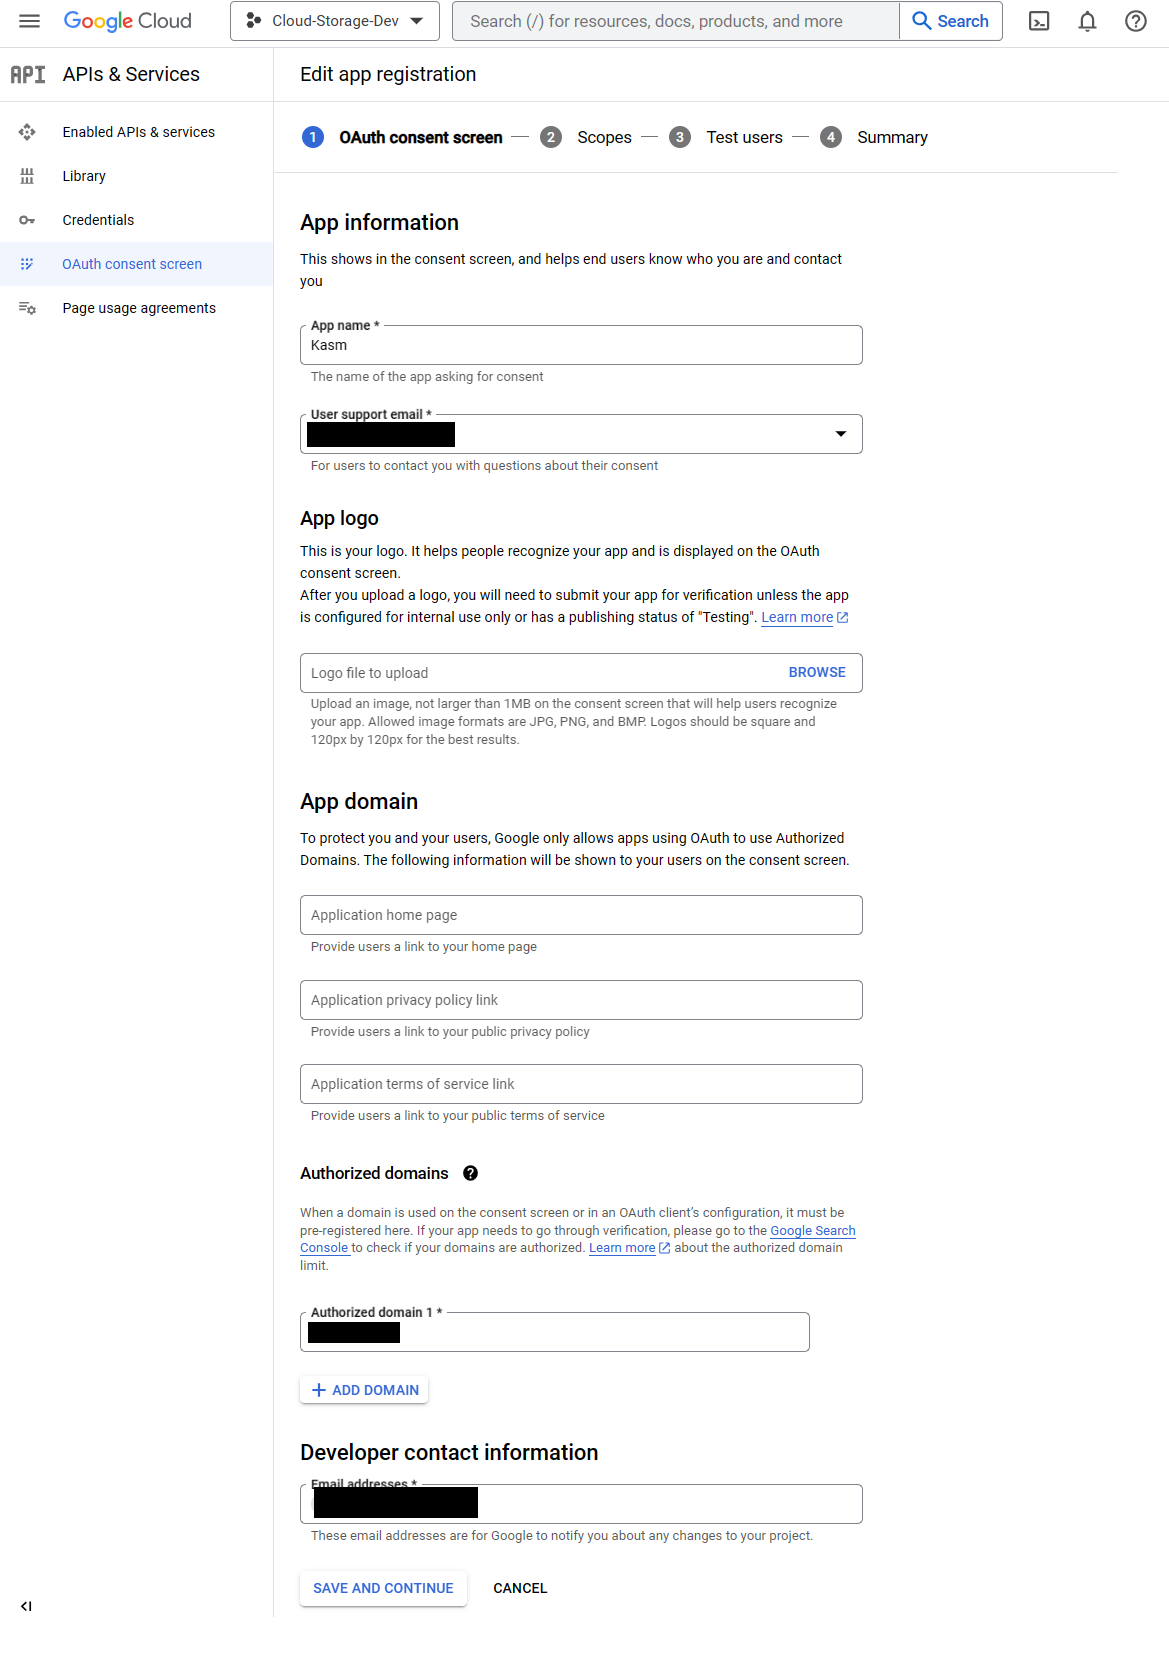
7. Click **Add or Remove Scopes**.
8. In the **Update Selected Scopes** window check `.../auth/drive` , then click Update.
If the option is not available, add `https://www.googleapis.com/auth/drive` to the **Manually add scope** field
and click **Add To Table**.
09. Click **Save and Continue**.
10. Until the app is fully verified and published it can only be used to auth specific test accounts.
Click **Add Users** to authorize several test google accounts.
11. Click **Save and Continue**.
12. In the **APIs & Services** menu, select **Credentials**.
13. Select **Create Credentials**, then **OAuth client ID**.
14. Select `Web Application` as the **Application type**, then give the client a name (e.g `Kasm`).
15. Click **Add URI** in the **Authorized redirect URIs** section, and
enter `https:///api/cloud_storage_callback`.
16. Click **Create**.
17. A dialogue will display with a **Client ID** and **Client Secret**. Save these values for the next configuration
steps. The JSON download will also include URLs needed for the next configuration steps.
18. From the main menu of the Google Cloud Console , search for "Google Drive API". Navigate to the selected page,
then click "Enable" if the option is available. No action is needed if the status is currently enabled.
#### Kasm Storage Provider Config
1. Log into the Kasm UI as an administrator.
2. Select **Settings** -> **Storage** -> **Add**.
3. Update the form with the following entries, using the **Client ID** and **Client Secret** gathered in the
previous section.
| Name | `Google Drive` |
| --- | --- |
| Storage Provider Type | `Google Drive` |
| Enabled | `checked` |
| Client ID | `` |
| Client Secret | `` |
| Authorization URL | `https://accounts.google.com/o/oauth2/auth` |
| Authorization URL Options | `{"include_granted_scopes" : "true", "prompt" : "select_account consent", "access_type" : "offline"}` |
| Token URL | `https://oauth2.googleapis.com/token` |
| Redirect URL | `https:///api/cloud_storage_callback` |
| Scope | `https://www.googleapis.com/auth/drive` |
| Default Target | `/gdrive` |
| Volume Config | `{ "driver" : "rclone", "driver_opts" : { "type" : "drive", "uid" : "1000", "gid" : "1000", "allow_other" : "true" } }` |
| Mount Config | `{}` |
4. Click **Save** to save the changes.
#### Google Drive storage mapping configuration
1. From any page, select the profile icon at the top right.

2. Select the **Cloud Storage** section, then **Add Storage Mapping**.

3. Select **Google Drive** from the drop-down, then select **Next**.
4. The Google login page appears. Log in with the desired account. This account must be a test user from the OAuth app creation process.
5. When the Google OAuth app is not yet approved, a warning appears. Click **Continue**.
6. On success, Kasm redirects you to the Workspaces dashboard. The new storage mapping appears in the Cloud Storage section of the profile.
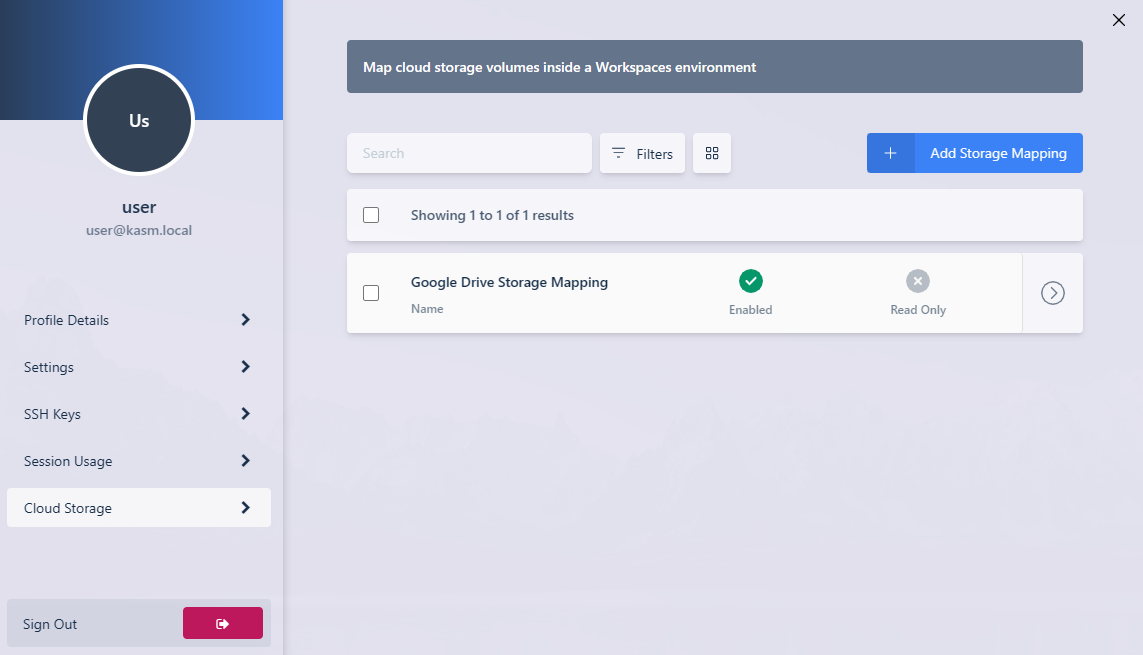
7. Launch a new container-based session. Confirm that Google Drive is mapped inside the session at the `/gdrive` location.
---
## Storage Mappings
Storage Mappings allow administrators to create and attach custom and ephemeral docker volumes in Kasm Workspace Containers.
This feature can also be used to allow end users to map popular [ Cloud Storage](../../../tutorials/user-guide/profile.mdx#cloud-storage) services like Google Drive,
Dropbox, NextCloud, and Onedrive.
In order to use Storage Mappings, administrators must first create **Storage Providers**, which contain the volume and
mount configurations, in addition to applicable settings for supported cloud storage providers.
The process is as follows:
1. The Administrator configures a **Storage Provider** (e.g Google Drive)
2. The Administrator may now create **Storage Mappings** that leverage the Storage Provider. The mappings may be placed on a User, Group or Workspace object.
3. The Administrator can allow end-users to create their own **Storage Mappings** by configuring the following group settings:
- `allow_user_storage_mapping`: When enabled the user is allowed to configure their own **Storage Mappings** via their profile. When disabled, new user configuration will not be allowed, nor will using any previously configured mappings be allowed when new sessions are created.
- `max_user_storage_mappings`: The maximum number of Storage Mappings a user is allowed to have registered to their account.
- `read_only_user_storage_mappings`: When enabled, any storage mappings configured on the user account will be forced to read-only.
4. If allowed via group settings, end-users can configure Storage Mappings to the registered Providers via the [Cloud Storage](../../../tutorials/user-guide/profile.mdx#cloud-storage) section of the profile widget.
5. When a container-based Workspaces session is created, a docker volume is created on the Agent and mounted inside the session based on the Storage Provider and Storage Mapping configurations. The remote files become available for use within the session.
6. When the session is destroyed, the previously created docker volume is also destroyed.
### Storage Providers
| Name | A custom name given to the Storage Provider |
|-----------------------|-----------------------------------------------------------------------------------------------------------------------------------------------------------------------------------------------------------------------------------------------------------------------------------------------------------------------------------------------------------------------------------------------------------------------|
| Storage Provider Type | Workspaces supports a number of Cloud Storage Provider types including **(Dropbox, Google Drive, NextCloud OneDrive, S3, and Kasm Profile Sync)**. Many of these implementations leverage the [Rclone](https://rclone.org/) docker volume plugin which is automatically installed as part of Workspaces. A **Custom** type may be used to give administrators the ability to create additional interfaces as desired. |
| Enabled | If disabled, any Storage Mappings referencing this Storage Provider will not be utilize when creating new sessions. |
| Default Target | The folder path where any Storage Mappings created with this provider will be mounted to inside the Kasm session. This should be an absolute path (e.g `/dropbox`) |
| Volume Config | A json structure representing the volume to be created during a session. See [Volume Config](rclone.mdx) for more details. |
| Mount Config | A json structure representing how the volume is mounted into a session. See [Mount Config](rclone.mdx) for more details. |
| Client ID | The Client ID for OAuth based Storage Provider types (e.g Google Drive). |
| Client Secret | The Client Secret for OAuth based Storage Provider types (e.g Google Drive). |
| Authorization URL | The Authorization URL for OAuth based Storage Provider types (e.g Google Drive). |
| Token URL | The Token URL for OAuth based Storage Provider types (e.g Google Drive). |
| Redirect URL | The URL an OAuth provider will use to redirect the user back to Workspace. The URL should be in the following format. `https:///api/cloud_storage_callback` |
| Scopes | The Scopes to request for OAuth based Storage Providers. Enter one entry per line. |
| Webdav URL | (Nextcloud Only). The base Webdav URL for the Nextcloud deployment (e.g `https://:/remote.php/dav/file/` |
| Root Drive URL | (OneDrive Only). The OAuth URL used to query the Onedrive user's root drive. (e.g `https://graph.microsoft.com/v1.0/me/drive/root` |
In Windows, the Target directory is relative to the user's Desktop within their profile. Therefore, /dropbox would get placed on C:\Users\kasm-user\Desktop\dropbox
for the user kasm-user.
Storage mappings on VM based sessions are only applied when the server is configured with User SSO enabled. This is because storage mappings are applied per-user at the OS level. When User SSO is active, Kasm users are mapped to corresponding user accounts, allowing the service to correctly scope mappings to each user's file system.
To enable this, set the **Connection Credential Type** to **SSO User Accounts** in the [server configuration](../../infra-autoscale/servers.mdx#create-server), which sets `user_sso` to `true` in the Kasm Desktop Service configuration file. This value is automatically synchronized when the service checks in and does not require manual changes. If needed, `user_sso` can be manually overridden in the service configuration file after registration — see the [Linux service configuration](../../workspaces-sessions/server-workspace/linux/linux-service.mdx#configuration) and [Windows service configuration](../../workspaces-sessions/server-workspace/windows/kds-windows-service.mdx#configuration) for details. Without proper user isolation, storage mappings may be applied incorrectly or insecurely across sessions.
#### Volume Config
The volume config, is a JSON structure that represents how the docker volume is to be created. The available options
are defined by the Docker SDK for python [create_volume](https://docker-py.readthedocs.io/en/stable/api.html#docker.api.volume.VolumeApiMixin.create_volume)
```json
{
"driver" : "rclone",
"driver_opts" : {
"type" : "s3",
"s3-provider" : "AWS",
"s3-env-auth" : "false",
"s3-region" : "us-east-1",
"uid" : "1000",
"gid" : "1000",
"allow_other" : "true"
}
}
```
#### Mount Config
The mount config, is a JSON structure that represents how the docker volume mounted (aka mapped) to the container session.
The available options are defined by the Docker SDK for Python: [Mount](https://docker-py.readthedocs.io/en/stable/api.html#docker.types.Mount)
Kasm will automatically assign the only two required parameters `target` and `source` since they will reference
the **Default Target** , and the volume created by the **Volume Config**, so in most cases this can be set to an empty dict unless
other advanced needs are required.
#### Variable Substitution
The following variables can be templated into the storage mapping `Default Target` and `Volume Config` properties to support additional use-cases.
Note: Variable substitution is not compatible with [Session Staging](../../workspaces-sessions/sessions/session-staging.mdx).
- `{username}` - The username of the user provisioning the session. e.g `user@kasm.local`
- `{user_id}` - The user_id of the user provisioning the session . e.g `6c0535dc02eb49c4a556cae9816a585d`
- `{image_id}` - The image ,aka workspace, id used for the session. eg. `9de4ea298f064e6999c5b9b164e2c04c`
- `{user_crypt_password}` - A cryptographic key used when leveraging [Rclone's crypt provider](https://rclone.org/crypt/). Used in place of the `--crypt-password` attribute.
- `{user_crypt_salt}`- A cryptographic key used when leveraging [Rclone's crypt provider](https://rclone.org/crypt/). Used in place of the `--crypt-password2` attribute.
#### Configuration Examples
- [Dropbox Storage Provider Setup](dropbox.mdx)
- [Google Drive Storage Provider Setup](gdrive.mdx)
- [Nextcloud Storage Provider Setup](nextcloud.mdx)
- [OneDrive Storage Provider Setup](onedrive.mdx)
- [S3 Storage Provider Setup](s3.mdx)
- [Custom Storage Provider Setup](custom.mdx)
#### Troubleshooting
##### Failures to Provision Sessions
If something goes wrong with the storage mapping during the creation of a session, a user will get typically get
an "Unexpected Error" message.
Administrators should review the application logs for errors either via the application dashboard, or tailing the `kasm_api` and `kasm_agent`
containers while reproducing the errors
```bash
sudo docker logs -f kasm_agent
sudo docker logs -f kasm_api
```
In this case, there was an improper configuration for a driver options in the **Volume Config**.
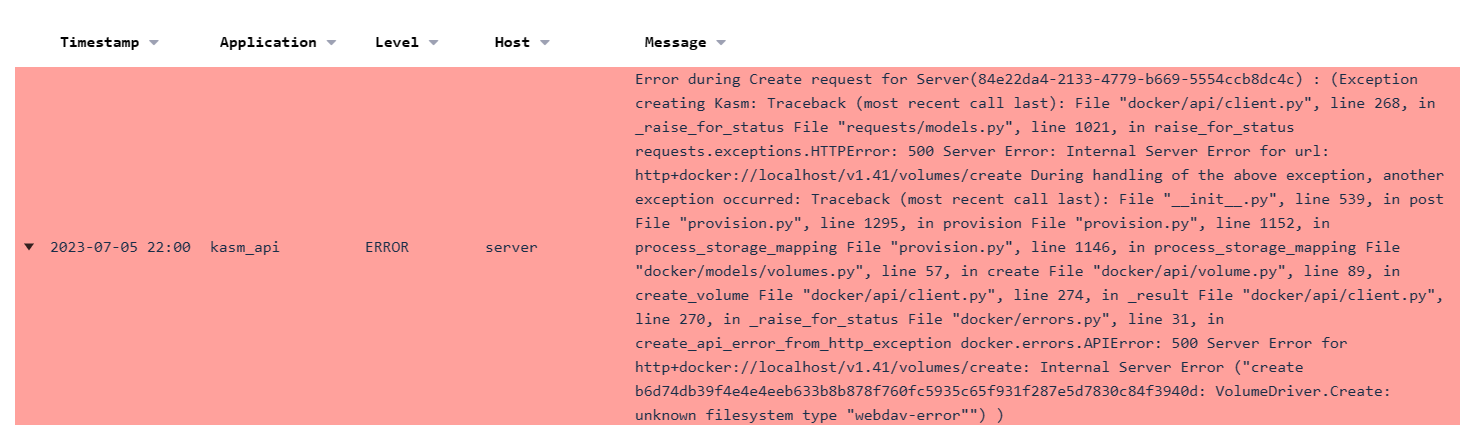
#### File Browser shortcuts (Bookmarks)
Kasm Workspaces images support setting file browser shortcuts in Thunar via the environment variable `CLOUD_MOUNTS` in the format:
```
CLOUD_MOUNTS="|,|"
```
By default, Workspaces will automatically create the `CLOUD_MOUNTS` environment variable according to the storage mappings configured.
If desired, the administrator can override this behavior by manually defining the `CLOUD_MOUNTS` environment variable
via [docker-run-config](../../workspaces-sessions/container-workspace/workspaces.mdx).
This environment variable is a comma and pipe seperated list of mounts and their accompanying type. The type sets an emblem icon on the folder shortcut for easier identification with the supported types:
* s3
* nextcloud
* onedrive
* gdrive
* dropbox
* kasm (placeholder emblem if Kasm Workspaces logo is preferred)
To configure this in Kasm Workspaces navigate to Admin > Workspaces > Edit > "Docker Run Config Override (JSON)", in this example we will be configuring a shortcut for every storage mapping type:
```JSON
{
"environment": {
"CLOUD_MOUNTS" : "/s3|s3,/nextcloud|nextcloud,/onedrive|onedrive,/gdrive|gdrive,/dropbox|dropbox"
}
}
```
If using the examples provided above this environment variable can be passed as is to most Workspaces images and it will only show paths that are available in the Workspace on startup.
If using the Kasm provided browser images (e.g `kasmweb/chrome`, `kasmweb/firefox`) administrators will need to
disable the restricted file chooser in order for users to access the cloud mounts by manually defining the
`KASM_RESTRICTED_FILE_CHOOSER` environment variable via [Docker Run Config](../../workspaces-sessions/container-workspace/workspaces.mdx). Setting the value to `0` will disable
the restrictions, so the user can have access to cloud mounts and the rest of the file system.
```JSON
{
"environment": {
"KASM_RESTRICTED_FILE_CHOOSER" : "0"
}
}
```
---
## Nextcloud
## Nextcloud Storage Provider Setup
The [Nextcloud](https://nextcloud.com/) Storage Provider can be used to allow users to map in their Nextcloud files into their container-based
Kasm Session. Access is provided via Nextcloud's WebDAV interface via the [Rclone](https://rclone.org) Docker volume plugin.
Reference Docs:
- [https://docs.nextcloud.com/server/latest/user_manual/en/files/access_webdav.html](https://docs.nextcloud.com/server/latest/user_manual/en/files/access_webdav.html)
- [https://rclone.org/webdav/](https://rclone.org/webdav/)
The storage provider configuration is as follows:
| Name | `Nextcloud` |
| --- | --- |
| Storage Provider Type | `Nextcloud` |
| Enabled | `checked` |
| Webdav URL | `https://:/remote.php/dav/files/` |
| Default Target | `/nextcloud` |
| Volume Config | `{ "driver" : "rclone", "driver_opts" : { "type" : "webdav", "webdav-vendor" : "nextcloud", "uid" : "1000", "gid" : "1000", "allow_other" : "true" } }` |
| Mount Config | `{}` |
:::note
Many of the storage provider examples include default storage driver options used by Rclone. These options work well with Kasm in its default configuration, and administrators can adjust them as needed. The available options often vary by provider plugin, for example Google Drive compared with OneDrive.
The Rclone Docker plugin is installed by default as part of the standard Workspace install. For more information about Rclone driver options, see [the Rclone Docker documentation](https://rclone.org/docker/).
:::
#### Nextcloud storage mapping configuration
1. From any page, select the profile icon at the top right.

2. Select the **Cloud Storage** section, then **Add Storage Mapping**.

3. Select **Nextcloud** from the drop-down. Enter the **Nextcloud Username** and **Nextcloud Password**, then select **Next**.
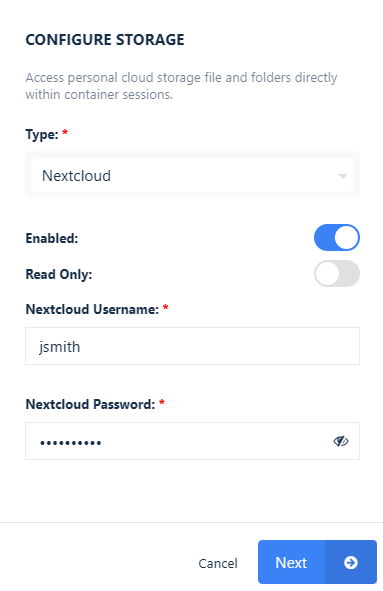
4. The new storage mapping appears in the Cloud Storage section of the profile.
5. Launch a new container-based session. Confirm that the Nextcloud files are mapped inside the session at the `/nextcloud` location.
---
## Onedrive
## OneDrive Storage Provider Setup
The [OneDrive](https://www.microsoft.com/en-us/microsoft-365/onedrive/online-cloud-storage) Storage Provider allows
end-users to map in their OneDrive storage into container-based sessions. Access is provided via Microsoft's OAuth
interface using the [Rclone](https://rclone.org) Docker volume plugin.
Reference Docs:
- [https://rclone.org/onedrive/](https://rclone.org/onedrive/)
- [https://docs.microsoft.com/en-us/azure/active-directory/develop/quickstart-register-app](https://docs.microsoft.com/en-us/azure/active-directory/develop/quickstart-register-app)
- [https://docs.microsoft.com/en-us/azure/active-directory/develop/active-directory-v2-protocols](https://docs.microsoft.com/en-us/azure/active-directory/develop/active-directory-v2-protocols)
#### Creating a Microsoft OAuth App
1. Login to the Microsoft Azure Portal: [https://portal.azure.com/](https://portal.azure.com/)/
2. Select **Azure Active Directory**.
3. Select **App Registrations**.
4. Select **New Registration**.
5. Give the app a Name (e.g `Kasm OneDrive Example`).
6. In the **Supported account types** select **Accounts in any organizational directory
(Any Azure AD directory - Multitenant) and personal Microsoft accounts (e.g. Skype, Xbox)**.
7. In the Redirect URI, select Web, then enter the following URL , substituting the hostname of the Kasm
deployment `https://kasm.example.com/api/cloud_storage_callback`
In this example, we walk through creating an integration where any Microsoft user can auth with the Kasm app.
This is ideal for a public facing deployment. Other options are available for single-tenant and multi-tenant
configurations.
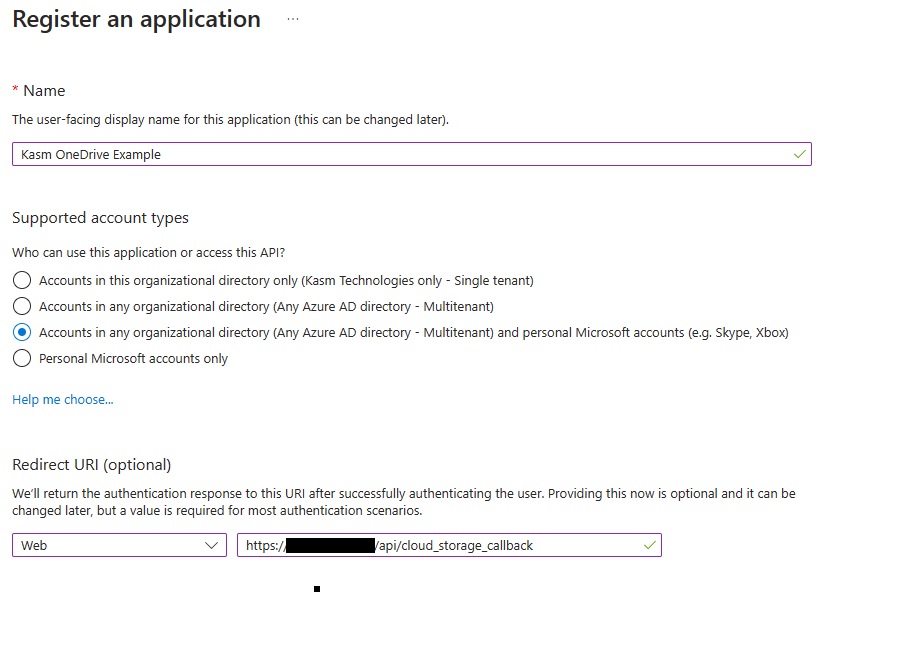
8. On the next page, the **Application (client) ID** is shown, save this value as the Client ID to be used in the
next section.
9. Select **Add a certificate or secret** next to **Client credentials**.
10. Select the **Client secrets** tab, then slick **New client secret**.
11. Enter a description and expiration then click **Add**.
12. The credentials are shown, save the **Value** as the **Client Secret** to be used in the next section.
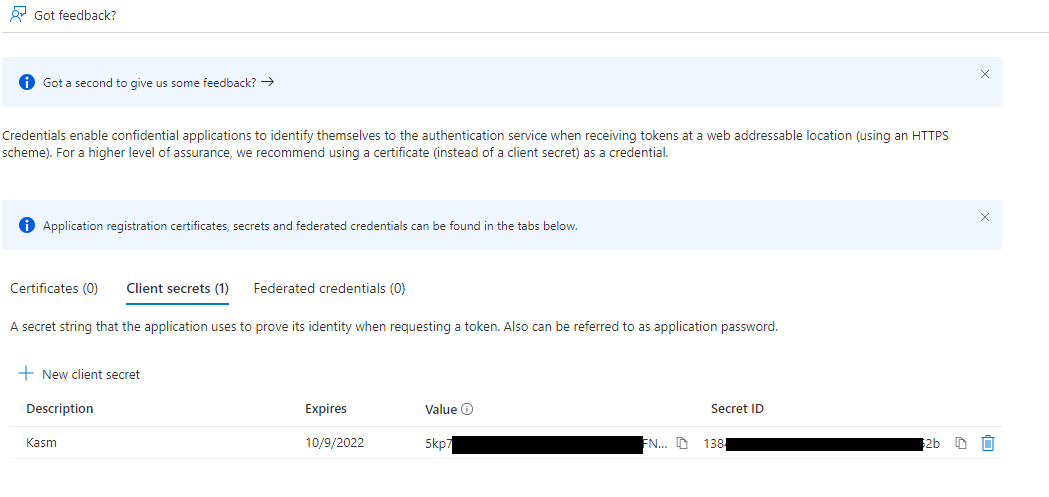
13. From the **Manage** menu on the left hand side, select **API Permissions**.
14. Select **Add a Permission**.
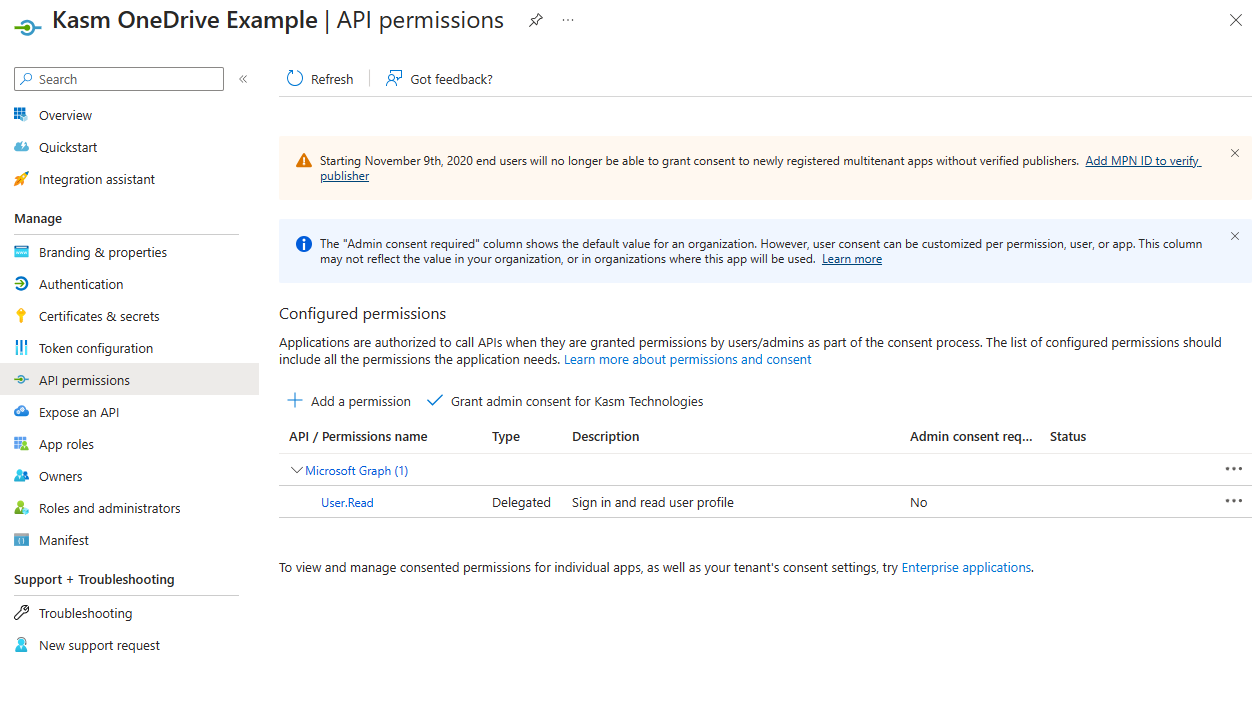
15. In the new window Select **Microsoft Graph**, then **Delegated permissions**.
16. Add all of the following permissions.
```text
Files.Read
Files.Read.All
Files.ReadWrite
Files.ReadWrite.All
offline_access
Sites.Read.All
User.Read
```
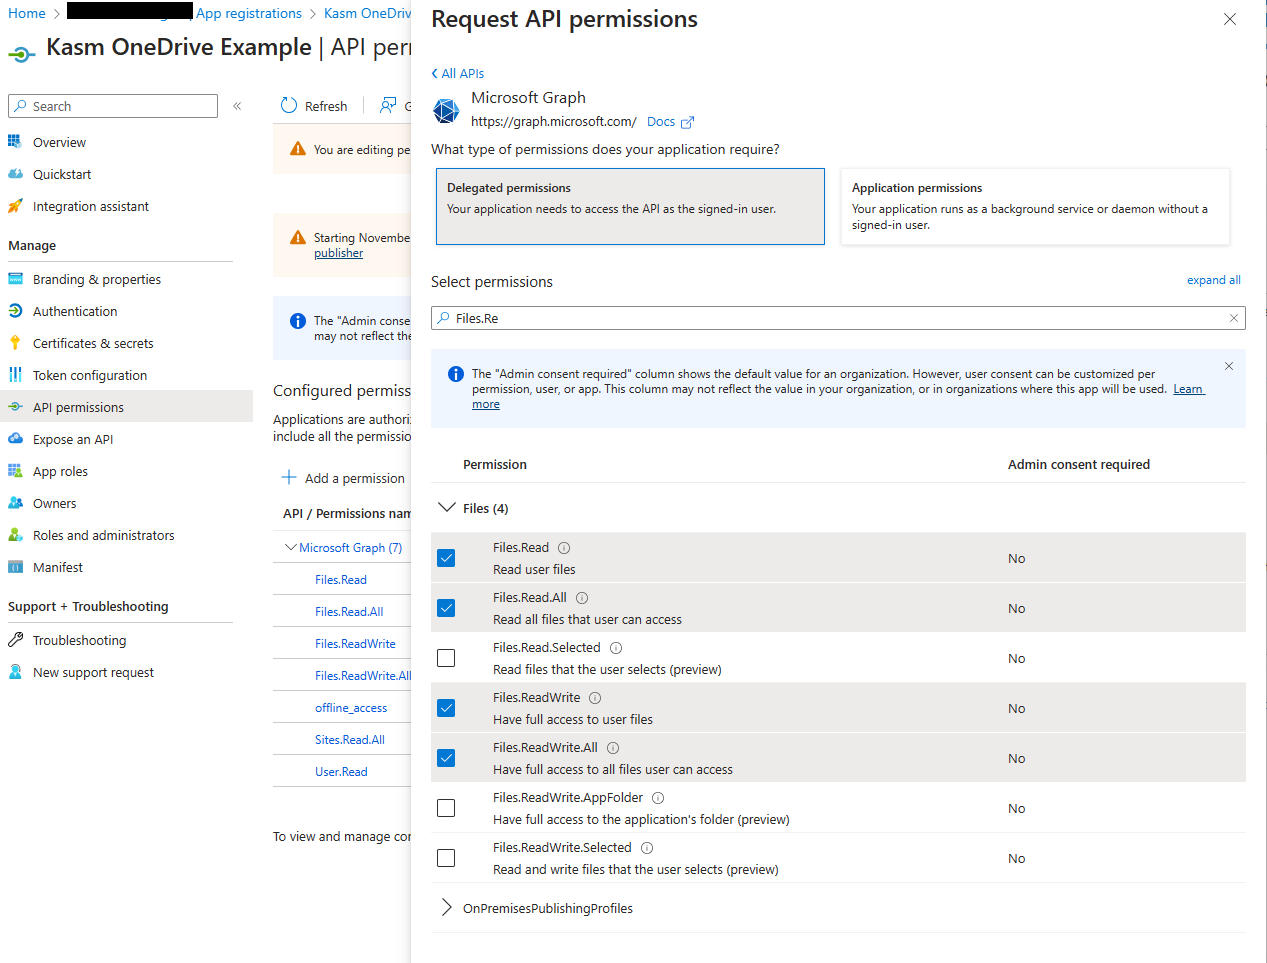
17. Select the **Overview** section of the Azure app, then Select **Endpoints**. Note the
`OAuth 2.0 authorization endpoint (v2)` and `OAuth 2.0 token endpoint (v2)` values for use in the next steps.
Note: these will differ depending on the type of App created in the prior section (Internal vs Public vs Multi-Tenant)

#### Kasm Storage Provider Config
1. Log into the Kasm UI as an administrator.
2. Select **Settings** -> **Storage** -> **Add**.
3. Update the form with the following entries, using the **Client ID** and **Client Secret** gathered in the
previous section.
| Name | `OneDrive` |
| --- | --- |
| Storage Provider Type | `OneDrive` |
| Enabled | `checked` |
| Client ID | `` |
| Client Secret | `` |
| Authorization URL | `` |
| Authorization URL Options | `{"prompt" : "consent"}` |
| Token URL | `` |
| Redirect URL | `https:///api/cloud_storage_callback` |
| Scope | .. code-block:: text Files.Read Files.ReadWrite Files.Read.All Files.ReadWrite.All Sites.Read.All offline_access openid email profile |
| Root Drive URL | `https://graph.microsoft.com/v1.0/me/drive/root` |
| Default Target | `/onedrive` |
| Volume Config | `{ "driver" : "rclone", "driver_opts" : { "type" : "onedrive", "uid" : "1000", "gid" : "1000", "allow_other" : "true" } }` |
| Mount Config | `{}` |
4. Click **Save** to save the changes.
#### OneDrive storage mapping configuration
1. From any page, select the profile icon at the top right.

2. Select the **Cloud Storage** section, then **Add Storage Mapping**.

3. Select **OneDrive** from the drop-down, then select **Next**.
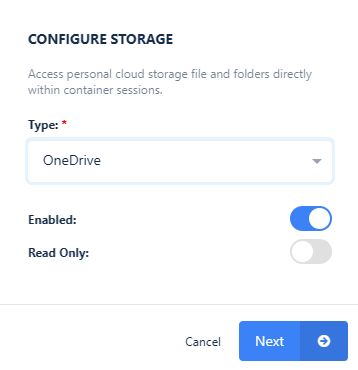
4. The Microsoft login page appears. Log in with the desired account.
5. A consent screen appears that requests the permissions needed to access OneDrive. Approve the request.
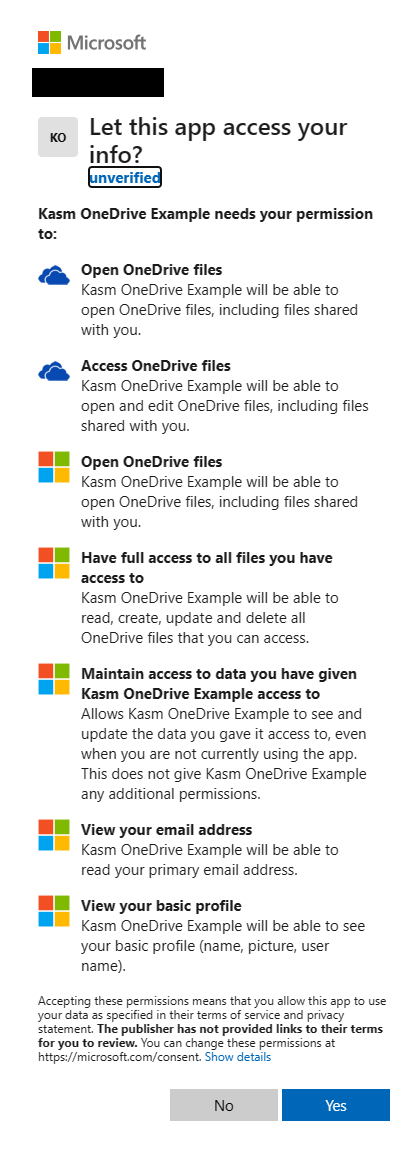
6. Kasm redirects you to the Workspaces dashboard. The new storage mapping appears in the Cloud Storage section of the profile.
7. Launch a new container-based session. Confirm that OneDrive is mapped inside the session at the `/onedrive` location.
---
## Rclone
:::note
Many of the storage provider examples include default storage driver options used by Rclone. These options work well with Kasm in its default configuration, and administrators can adjust them as needed. The available options often vary by provider plugin, for example Google Drive compared with OneDrive.
The Rclone Docker plugin is installed by default as part of the standard Workspace install. For more information about Rclone driver options, see [the Rclone Docker documentation](https://rclone.org/docker/).
:::
---
## S3
## S3 Storage Provider Setup
The [S3](https://aws.amazon.com/s3/) Storage Provider can be used to allow users to map in their S3 buckets into their container-based
Kasm Session. Access is provided via the [Rclone](https://rclone.org) Docker volume plugin.
Reference Docs:
- [https://rclone.org/s3/](https://rclone.org/s3/)
#### Kasm Storage Provider Config
1. Log into the Kasm UI as an administrator.
2. Select **Settings** -> **Storage** -> **Add**.
3. Update the form with the following entries
| Name | `S3` |
| --- | --- |
| Storage Provider Type | `S3` |
| Enabled | `checked` |
| Default Target | `/s3` |
| Volume Config | `{ "driver" : "rclone", "driver_opts" : { "type" : "s3", "s3-provider" : "AWS", "s3-env-auth" : "false", "s3-region" : "us-east-1", "uid" : "1000", "gid" : "1000", "allow_other" : "true" } }` |
| Mount Config | `{}` |
:::note
Many of the storage provider examples include default storage driver options used by Rclone. These options work well with Kasm in its default configuration, and administrators can adjust them as needed. The available options often vary by provider plugin, for example Google Drive compared with OneDrive.
The Rclone Docker plugin is installed by default as part of the standard Workspace install. For more information about Rclone driver options, see [the Rclone Docker documentation](https://rclone.org/docker/).
:::
4. Click **Save** to save the changes.
#### S3 storage mapping configuration
1. From any page, select the profile icon at the top right.

2. Select the **Cloud Storage** section, then **Add Storage Mapping**.

3. Select **S3** from the drop-down. Enter the **S3 Access Key ID**, **S3 Secret Access Key**, and **S3 Bucket**, then select **Next**.
4. On success, Kasm redirects you to the Workspaces dashboard. The new storage mapping appears in the Cloud Storage section of the profile.
5. Launch a new container-based session. Confirm that the S3 buckets are mapped inside the session at the `/s3` location.
---
## Volume Mapping
#### Configuration Example
Kasm Workspaces allows administrators to configure folders to be mapped inside a Kasm each
time it is provisioned. This is done by configuring the **Volume Mappings** field on the
[Kasm Workspace](../workspaces-sessions/container-workspace/workspaces.mdx).
In this guide we will configure a folder on the host `/mnt/kasm_user_share` to be mapped inside the Kasm Desktop
workspace to a folder named `/share`. This effectively will act as a file share. All users's who have access to provision
the workspace will have access to this folder.
##### Create Host Directory
On the Kasm Workspaces server, create the directory and change the ownership to user and group **1000**.
If Kasm is installed in a multi-server deployment, `/mnt/kasm_user_share` in this example should reference a
shared data storage solution (e.g NFS, HDFS, GFS, SMB, SSHFS) to ensure data continuity. Administrators must ensure
this path is accessible from the hosts of all Agent services. Please see [Using NFS](./host-guides.mdx#using-nfs) for configuration.
**Create Host Directory Example**
```Bash
sudo mkdir -p /mnt/kasm_user_share
sudo echo "test" | tee /mnt/kasm_user_share/test.txt
sudo chown -R 1000:1000 /mnt/kasm_user_share/
```
##### Workspace Volume Mapping Settings
From the administrator dashboard click on Workspaces -> Workspaces and select a Workspace to edit:
Scroll down to **Volume Mappings (JSON)** and use the following configuration:
```
{
"/mnt/kasm_user_share":{
"bind":"/share",
"mode":"rw",
"uid": 1000,
"gid": 1000,
"required": true,
"skip_check": false
}
}
```
Click save and the `/share` directory will be available on any user that launches this Workspace.
Although this guide demonstrate mapping a single volume, multiple volume mappings can be defined.
> ```JSON
> {
> "/mnt/kasm_user_share1":{
> "bind":"/share1",
> "mode":"rw",
> "uid": 1000,
> "gid": 1000,
> "required": true
> },
> "/mnt/kasm_user_share2":{
> "bind":"/share2",
> "mode":"rw",
> "uid": 1000,
> "gid": 1000,
> "required": true
> }
> }
> ```
##### Verify Functionality
- Launch the Workspace the volume mapping was added to
- Verify the user can read and write to the `/share` location.
#### User and Image Tokens
The volume mapping config supports the use of the following user and image based tokens in the mapping
name and bind attribute. This allows the administrator to create unique share locations per user.
- `{username}` - The username of the user provisioning the session. e.g `user@kasm.local`
- `{user_id}` - The user_id of the user provisioning the session . e.g `6c0535dc02eb49c4a556cae9816a585d`
- `{custom_attribute_1}` - The custom attribute 1 value from the user.
- `{custom_attribute_2}` - The custom attribute 2 value from the user.
- `{custom_attribute_3}` - The custom attribute 3 value from the user.
- `{image_id}` - The image ,aka workspace, id used for the session. eg. `9de4ea298f064e6999c5b9b164e2c04c`
> ```JSON
> {
> "/mnt/kasm_user_share/{image_id}/{user_id}":{
> "bind":"/share/{username}",
> "mode":"rw",
> "uid": 1000,
> "gid": 1000,
> "required": true,
> "skip_check": false
> }
> }
> ```
#### Volume Mapping Configuration options
> - **bind**
> - The path inside the Kasm where the volume will be mounted.
> - **mode**
> - `rw` for Read-Write , `ro` for Read-Only.
> - **uid**
> - The linux user id ownership that should be given to the volume. This permission is applied to the folder on the host.
> The uid must be `1000` in order for the Kasm container use to access the files.
> - **gid**
> - The linux group id ownership that should be given to the volume. This permission is applied to the folder on the
> host. The gid must be `1000` in order for the Kasm container use to access the files.
> - **required**
> - If `true` the volume must be accessible in order to provision the Kasm when requested. If `false` the
> system will allow the Kasm to be provision even if connectivity to the volume cannot be established. If not specified
> the default is `true`.
> - **timeout**
> - When a Kasm is provisioned , the system will attempt to establish connectivity to the volume specified. The system
> will wait the specified number of seconds before deeming the connectivity has failed. If not specified the default is
> `10` seconds
> - **skip_check (optional)**
> - When a Kasm is provisioned , the system will attempt to establish connectivity to the volume specified and ensure
> the ownership of that directory matches the uid:gid specified with a :code:'chown'. On some filesystems such as
> those mounted as read only, this check will fail or error. The administrator may choose to set this
> value to `true` so the system will skip the check. The default is `false` if not specified.
#### Configure Volume Mapping at a Group Level
Volume Mappings may also be applied as a [Group Setting](../security/users-groups-mgmt/groups.mdx#group-settings) . This may be useful
if a certain set of users should have the mapping. When applied at the group level, all sessions created by members of this
group will have the mapping applied.
From the administrator menu first click on Access Management -> Groups and click Edit on your desired group:
Select the **Settings** tab and click on **Add Settings**, select **volume_mapping** from the dropdown.
Enter this example to mount `/mnt/kasm_user_share` from the host to `/share` in all containers launched by this group.
```
{
"/mnt/kasm_user_share":{
"bind":"/share",
"mode":"rw",
"uid": 1000,
"gid": 1000,
"required": true,
"skip_check": false
}
}
```
And click Submit:
Now all sessions created by members of this group will have the mapping applied.
#### Video Example
This video shows an example of using Volume Mapping to create an organizational share.
---
## AWS AutoScale (Windows)
## AWS
The following instructions utilize the AWS CLI as a convenience, you can use the AWS Web Console to obtain the required information.
The next step in the AutoScale Configuration is the VM Provider Details page.
1. Select **AWS** from the Provider Drop Down.
2. Provide a name for your configuration.
3. Enter the **AWS Access Key ID** and the **AWS Secret Access Key**, follow [this guide](#aws-iam-user) to create a AWS IAM user and credentials.
4. Enter the **AWS Region**. For a list of available regions, use the following AWS CLI command, use the value `RegionName` field
```bash
aws account list-regions
```
5. Enter the **EC2 AMI ID**. You can find the latest AMI ID for an Image by going to the AWS Web Console and starting the workflow to create a new EC2 Instance. When you select an image, its AMI ID will be shown in the web console. Alternatively, you can use the AWS CLI. The following is an example that lists AMIs, filtering by name and sorting so that the latest version is on the top of the list.
```bash
aws ec2 describe-images --filter "Name=name,Values=Windows_Server-2022-English-Full-Base*" --query "sort_by(Images, &CreationDate)" | jq -r '.[] | [.Name, .ImageId] | @tsv'
Windows_Server-2022-English-Full-Base-2023.01.11 ami-085d15593174f2582
Windows_Server-2022-English-Full-Base-2023.01.19 ami-03cf1a25c0360a382
Windows_Server-2022-English-Full-Base-2023.02.15 ami-0c2b0d3fb02824d92
Windows_Server-2022-English-Full-Base-2023.03.15 ami-0e38fa17744b2f6a5
Windows_Server-2022-English-Full-Base-2023.04.12 ami-0bde1eb2c18cb2abe
```
**Example:** ami-085d15593174f2582
6. Enter the desired **EC2 Instance Type**, check the [AWS Instance Types](https://aws.amazon.com/ec2/instance-types/) page for a full list. Use the `Instance Size` referenced in AWS's documentation. Not all instance types are available in all regions. A Windows server will likely require a non-bursting instance type with at least 4GB of RAM, see the minimum system requirements for the version of Windows you are using.
**Example:** c5.xlarge
7. Enter the maximum number of instances. Kasm will not provision more VMs once this maximum number is reached.
**Example:** 5
8. Enter a list of **EC2 Security Group IDs** in JSON format. The security groups listed will be applied to the VM. From the AWS Web Console, you can navigate to EC2->Security Groups, use the `Security group ID` column from the table. The following AWS CLI command can be used to display a list of security groups.
```bash
aws ec2 describe-security-groups --query "SecurityGroups[*].[GroupName,GroupId,Description]" --output text
```
**Example:** ```[ "sg-fdfd9a504533e9df9"]```
9. Enter the target **EC2 Subnet ID**. From the AWS Web Console, you can navigate to VPC->Subnets, use the `Subnet ID` column's value for the target subnet. The following AWS CLI command can be used to display a list of subnets.
```bash
aws ec2 describe-subnets --query "Subnets[*].[SubnetId,VpcId,CidrBlock,AvailabilityZone]" --output text
```
**Example:** subnet-24582b68
10. Enter an **EBS Volume Size** in Gigabytes, it must the same size or larger than the source AMI.
**Example:** 128
11. Enter an **EBS Volume Type**. The following values are supported.
- gp2 (recommended)
- st1
- standard
**Example:** gp2
12. Enter an **EC2 IAM** role to be applied to your VM. Enter a space to bypass this requirement. An IAM Role allows the EC2 instance to access AWS resources. [This example](https://www.wellarchitectedlabs.com/cost/200_labs/200_aws_resource_optimization/2_create_iamrole/) uses an IAM role to allow the EC2 instance to send logs to CloudWatch.
**Example:** MyCustomRoleName
13. Enter any additional **EC2 Custom Tags** to add to the instance.
**Example:**
```json
{ "department": "engineering" }
```
14. Enter an EC2 Startup Script. For Windows it is a PowerShell script that is wrapped in XML. The following example is maintained on this [open-source project](https://github.com/kasmtech/workspaces-autoscale-startup-scripts/blob/develop/latest/windows_vms/aws_local_account.txt).
This example creates a local user account with the **Connection Username** and **Connection Password** specified on the previous page. This is only relevant if you are using static credentials and will not work [Active Directory](../../../../workspaces-sessions/server-workspace/windows/authentication.mdx) integration.
```yml
$pass = ConvertTo-SecureString -String "{connection_password}" -AsPlainText -Force
New-LocalUser -Name {connection_username} -Description 'Programatically generated Kasm user account' -Password $pass -PasswordNeverExpires -AccountNeverExpires | Add-LocalGroupMember -Group administrators | Add-LocalGroupMember -Group "Remote Desktop Users"
Start-Service -Name "Audiosrv"
```
This example installs the [Kasm Desktop Service](../../../../workspaces-sessions/server-workspace/windows/kds-windows-service.mdx) and registers it with the deployment. With this service installed, Kasm can [manage local Windows user accounts](../../../../workspaces-sessions/server-workspace/windows/authentication.mdx#single-sign-on-with-dynamic-local-accounts) automatically.
```yml
New-EventLog -LogName Application -Source kasm_startup_script
Write-EventLog -LogName "Application" -Source "kasm_startup_script" -EventID 1000 -EntryType Information -Message "Downloading Windows Service"
# Download and install the Kasm Service
Invoke-Webrequest -URI https://kasm-static-content.s3.amazonaws.com/kasm_windows_service_installer_x86_64_1.1.2b3f26b.exe -OutFile C:\Users\Public\Downloads\kasm_service_installer.exe
Write-EventLog -LogName "Application" -Source "kasm_startup_script" -EventID 1000 -EntryType Information -Message "Installing Windows Service"
C:\Users\Public\Downloads\kasm_service_installer.exe /S
for ($i = 1; $i -le 20; $i++) {{
Start-Sleep -s 3
$service = Get-Service -Name W32Time -ErrorAction SilentlyContinue
if ($service.Length -gt 0 -And (Test-Path -Path "C:\Users\Public\Downloads\kasm_service_installer.exe" -PathType Leaf)) {{
# Register the Kasm Service with the deployment
Write-EventLog -LogName "Application" -Source "kasm_startup_script" -EventID 1000 -EntryType Information -Message "Registering the Desktop Service with the Kasm deployment at {upstream_auth_address}"
net stop kasm
cd "C:\Program Files\Kasm"
.\agent.exe --register-host {upstream_auth_address} --register-port 443 --server-id {server_id} --register-token {registration_token}
if ($?) {{
net start kasm
Start-Service -Name "Audiosrv"
Write-EventLog -LogName "Application" -Source "kasm_startup_script" -EventID 1000 -EntryType Information -Message "Successfully installed and registered agent"
Exit 0
}} else {{
Write-EventLog -LogName "Application" -Source "kasm_startup_script" -EventID 1000 -EntryType Error -Message "Registration of Agent failed: Check log output of kasm_service in EventViewer"
Exit 1
}}
}} else {{
Write-EventLog -LogName "Application" -Source "kasm_startup_script" -EventID 1000 -EntryType Information -Message "Service not found, trying again..."
}}
}}
Write-EventLog -LogName "Application" -Source "kasm_startup_script" -EventID 1000 -EntryType Error -Message "Timed out waiting for Kasm Desktop Service to be registered."
Exit 1
```
15. The **Retrieve Windows VM Password from AWS** option allows Kasm to retrieve the random password generated by AWS for the administrator account. If this checkbox is checked and the **Connection Password** field on the previous page is left empty, Kasm will use the SSH key (covered next) to retrieve and decrypt the password. The password will then be used by users connecting to the server. You do not need to check this box if using the example script in step 14 or if you are using SSO with Active Directory integration.
16. Click the Upload New Key Pair button, paste in an RSA PEM formatted private SSH Key and optionally provide a passphrase for the key.
17. Click Finish
It can take a minute or two for the first server to show up in the Servers list for the Pool and a few minutes for the server to become accessible. You can see all servers by going to Compute->Servers in the Kasm Admin Dashboard. You can see only the Servers in the Pool you created for AWS by going to Compute->Pools and selected Edit on the desired Pool.
Next [create a Workspace](../../../../workspaces-sessions/server-workspace/auto-scaled-servers.mdx#workspace) to allow access to the Servers in this Pool.
#### AWS IAM User ###
Kasm uses programmatic access keys to manage resources. These programmatic access keys are associated with an IAM user. Follow this process to create a user with minimal permissions and no access to the AWS Web Console.
1. Create an AWS IAM User for Kasm.
- In the AWS Web Console, navigate to IAM->Users.
- Click Add User.
- Provide a User name. **Example:** kasm-auto-scaling
- On the permissions options page, click Attach Policies Directly
- Search for AmazonEC2FullAccess, check the box next to it and Click Next
- On the final page click Create User
2. Create AWS Access Keys for the Kasm User in AWS.
- In the AWS Web Console, navigate to IAM->Users.
- Find the user created in step 3 and click the username to edit.
- Click the Security Credentials Tab.
- Scroll down to Access Keys and click Create Access Keys.
- On the next screen select Third Party Service
- Check the box indicating you understand the recommendation and click Next.
- Optionally add tags on the next step and then click Create access key.
- On the final screen you will be shown the Access Key and Secret access key. This will be the only opportunity you will have to get the secret access key. Save both of them in a secure place.
---
## AWS AutoScale
This guide will walk you through configuring autoscaling for Kasm Workspaces on AWS. Autoscaling in Kasm Workspaces automatically provisions and destroys agents based on user demand, ensuring optimized resource utilization and cost efficiency.
### Overview
#### Prerequisites
* Access to AWS: Ensure you have the appropriate access to your AWS environment
* Kasm Workspaces Installed: A basic setup of Kasm Workspaces must already exist
* Understand Key Concepts:
* **Zones**: Logical groupings of Kasm services for geographical or organizational segmentation
* **Pools**: Logical groupings of Kasm Docker Agents and Server Pools for load balancing
* Plan Your Configuration:
* Understand your deployment zone requirements
* Configure your AWS environment
#### Setup your AWS Environment
- **Create User in IAM**: An API key for Kasm must be created to use for interfacing with AWS. AWS call these Access Keys, and the example will walk through registering one along with the required permissions.
* Create a user by going to the IAM service in the AWS portal.
* Select Users under Access Management in the IAM menu along the left. In the upper right, select **Create User**.
* Give this User a human-readable name such as **Kasm Workspaces**.
* Select Attach policies directly and select **AmazonEC2FullAccess**.
* Review the information and create the User.
- **Create Access Key**: The Access Key is created from the User.
* From the list of Users, click on the newly created User.
* Click **Create access key** in the right section of the **Summary**.
* Select the **Third-party service* use case and create the access key.
* Copy the Access Key ID and the Secret Access Key for use in Kasm (the Secret Access Key cannot be retrieved later).
- **Set up permissions**: Certain permissions must be set up in AWS by creating inline policies for IAM Roles.
* In IAM, select Roles under Access Management, then click **Create Role**.
* Select the **AWS Service**, with a Use Case of **EC2**.
* Add the permissions **AmazonS3ReadOnlyAccess** and **AmazonSSMManagedInstanceCore**.
* Create a human readable Role name and description and create the role.
* In IAM, select Users under Access Management, then click on the User created earlier.
* In the Permissions Policies section, in the Add Permissions dropdown, select **Create Inline Policy**.
* Using the **Visual** Policy Editor, select the **IAM** service.
* Under Actions Allowed, expand Write and select **PassRole**.
* Under Resources, with Specific selected, click **Add ARNs**.
* Leave **This Account** selected and enter the newly created role name in **Resource Role Name with Path**.
* Under Request Conditions, click **Add Another Condition**.
* Select the Condition **iam:PassedToService**.
* Select the Operator **StringEquals**.
* Add the value **ec2.amazonaws.com** and click **Add Condition**.
* Click **Add More Permissions**.
* Select the IAM service.
* Under Actions Allowed, expand Read and select **GetInstanceProfile** and **GetRole**.
* Under Resources, with Specific selected, for each resource (instance-profile and role) click **Add ARNs**.
* Leave **This Account** selected and enter the newly created role name in **Resource Role Name with Path**.
* Click **Next**, review, and create the policy.
- **Set up a VPC**: A Virtual Private Cloud must be set up through VPC to manage networking.
* In VPC, select **Your VPCs** under Virtual Private Clound, then click **Create VPC**.
* Select **VPC Only** and give the VPC a human readable name tag.
* Enter an IPv4 CIDR and click **Create VPC**.
- **Set up a Subnet**: A Subnet must be set up through VPC to manage networking.
* In VPC, select **Subnets** under Virtual Private Clound, then click **Create Subnet**.
* Select the newly created VPC.
* Give the Subnet a human readable name tag.
* Select the Availability Zone.
* Enter an IPv4 subnet CIDR block and click **Create Subnet**.
- **Set up Security Group**: Certain inbound and outbound rules must be set up in AWS by creating a Security Group in EC2.
* In EC2, select Security Groups under Network & Security, then click **Create Security Group**.
* Give the Security Group a human readable name and description
* Select the newly created VPC.
* Add Inbound Rules based on needs. Common rules would include destination ports 4902 (for the Kasm Manager to send session and file commands), 443 (for the Kasm Manager to reach agents securetly), and 3389 (if RDP access to agents is needed).
* Add Outbound Rule based on needs.
### Configure your AWS details on Kasm
* Follow [AutoScale Settings for Agent Pool](../../infrastructure-components/autoscale-config-docker-agent.mdx#autoscale-settings-for-agent-pool) or [AutoScale Settings for Server Pool](../../infrastructure-components/autoscale-config-server.mdx#autoscale-settings-for-server-pool) to create a new AutoScale config, or, if you already have an AutoScale Configuration defined, go straight to the All VM Provider Configs page, click Add to and select **Add New** in **VM Provider Configs**.
* Configure the following settings based on the instruction that follow:
| **Name** | **Description** |
| --- | --- |
| **Name** | A name to use to identify the config. |
| **AWS Access Key ID** | The AWS Access Key used for the AWS API. |
| **AWS Secret Access Key** | The AWS Secret Access Key used for the AWS API. |
| **AWS: Region** | The AWS Region the EC2 Nodes should be provisioned in. e.g (us-east-1) |
| **AWS: EC2 AMI ID** | The AMI ID to use for the provisioned EC2 nodes. This should be an OS that is supported by the Kasm installer. |
| **AWS: EC2 Instance Type** | The EC2 Instance Type (e.g t3.micro). Note the Cores and Memory override settings don't necessarily have to match the instance configurations. This is to allow for over provisioning. |
| **AWS: Max EC2 Nodes** | The maximum number of EC2 nodes to provision regardless of the need for available free slots |
| **AWS: EC2 Security Group IDs** | A Json list containg security group IDs to assign the EC2 nodes. e.g `["sg-065ae66f2d", "sg-02522kdkas"]` |
| **AWS: EC2 Subnet ID** | The subnet ID to place the EC2 nodes in. |
| **AWS: EC2 EBS Volume Size** | Select the root EBS volume size for the EC2 nodes. The admin console accepts Bytes/GiB and stores the value as bytes (`aws_ec2_ebs_volume_size_bytes`). API integrations must submit the number of bytes using whole GiB (2^30) increments. |
| **AWS: EC2 EBS Volume Type** | The EBS Volume Type (e.g gp2) |
| **AWS: EC2 IAM** | The IAM to assign the EC2 Nodes. Administrators may want to assign CloudWatch IAM access. |
| **AWS: EC2 Custom Tags** | A Json dictionary for custom tags to assigned on auto-scaled Agent EC2 Nodes. e.g `{"foo":"bar", "bin":"baz"}` |
| **AWS: EC2 Startup Script** | When the EC2 Nodes are provision this script is executed. The script is responsible for installing and configuring the Kasm Agent. |
| **Retrieve Windows VM Password from AWS** | When provisioning an AWS Windows VM Kasm can retrieve the password generated by AWS and store it in the Server configuration record created during the AutoScale provision. This will only happen if the **Connection Password** field from the attached AutoScale config is blank. When populated Kasm will use the defined value instead of what is returned from AWS. The Administrator may want to leave this field blank and disable retrieving the password from AWS if they wish the Kasm user to be presented with a login screen to manually enter credentials upon connecting to the Windows Workspace. NOTE: This setting only affects Windows (RDP connection type) AWS instances. |
| **SSH Keys** | The SSH Key pair to assign the EC2 node |
| **AWS Config Override (JSON)** | Custom configuration may be added to the provision request for advanced use cases. Instance configuration is overridden in the 'instance_config' configuration block e.g. `{"instance_config":{"EbsOptimized": true}}` [See EC2 Documentation for available options.](https://boto3.amazonaws.com/v1/documentation/api/latest/reference/services/ec2/client/run_instances.html) |
* Select **AWS** from the Provider Drop Down.
* Provide a name for your configuration.
* Enter your AWS Access Key Id and AWS Secret Access Key from from the AWS Setup above.
* Enter the region name, you can use the following AWS CLI command to list available regions, use the RegionName column.
```bash
aws ec2 describe-regions --all-regions
```
* Enter the EC2 AMI Id for the Image from AWS (this can be found in the AMI Catalog of the EC2 service in AWS).
* Enter the EC2 Instance Type, you can use the following AWS CLI command to list available instance types based on the region selected.
```bash
aws ec2 describe-instance-type-offerings \
--location-type "availability-zone" \
--filters "Name=location,Values=us-east-2a" \
--region us-east-2 \
--query "InstanceTypeOfferings[*].[InstanceType]" --output text | sort
```
* Enter the **Max EC2 Nodes**. This puts an upper limit on the number of EC2 Nodes this auto scale configuration can provision.
* Enter the **EC2 Security Group IDs** (created in the AWS Setup above) as a JSON array.
* Enter the **EC2 Subnet ID** created in the AWS Setup above.
* Enter the **EC2 EBS Volume Size** required.
* Enter the **EC2 EBS Volume Type** required.
| Volume Type Name |
|-------------------|
| gp3 |
| gp2 |
| io2 |
| io1 |
| st1 |
| sc1 |
| standard |
* Enter the **EC2 IAM**, the Role created in the AWS Setup above.
* Optionally provide additional tags for the VM, use empty `{}` brackets if no additional tags are needed.
* Enter a PowerShell startup script. The following example will create a local user account using the **Connection Username** and **Connection Password** fields specified on the previous screen. This is only relevant if you are using static credentials and will not work [Active Directory](../../../../workspaces-sessions/server-workspace/windows/authentication.mdx) integration.
```powershell
$pass = ConvertTo-SecureString -String "{connection_password}" -AsPlainText -Force
New-LocalUser -Name {connection_username} -Description 'Programatically generated Kasm user account' -Password $pass -PasswordNeverExpires -AccountNeverExpires | Add-LocalGroupMember -Group administrators | Add-LocalGroupMember -Group "Remote Desktop Users"
Start-Service -Name "Audiosrv"
```
* Enter a **Configuration Override** as JSON, use empty `{}` brackets if no configuration is needed.
* If it is preferred to use the default Administrator user and password created by AWS, toggle **Retrieve Windows VM Password from AWS** to true. This requires leaving **Connection Password** blank on the AutoScale Details, and populating **Connection Username** with **Administrator**.
* Enter a public SSH Private Key, this is required even for Windows systems and can be generated within AWS from EC2 (**Key Pairs** under **Network & Security** in the menu on the left).
* Submit the Provider Config
### Test your AWS Autoscaling setup
If you have configured non-zero Minimum Available Session values agents should start provisioning immediately. Otherwise, try launching multiple workspaces to increase resource utilization, prompting Kasm to autoscale new agents.
* Provision a Workspace
* Go to Workspaces > Registry
* Make multiple workspaces available
* Go to the Workspaces dashboard and launch sufficient workspace sessions to exceed your resource standby thresholds
* Monitor the provisioning of new agents by going to "Infrastructure" -> "Agents"
* Verify new VM instances in AWS
* Check Downscaling
* Terminate sessions to reduce resource usage
* Confirm that Kasm removes agents after the back-off period
---
## Microsoft Azure AutoScale (Windows)
##### Azure
The following instructions utilize the Azure CLI. You can open the CLI in the Azure web portal and run these commands directly. See Microsoft's [instructions](https://learn.microsoft.com/en-us/azure/cloud-shell/quickstart?source=recommendations&tabs=azurecli) for basic usage of the Azure Cloud Shell environment.
The next step in the AutoScale Configuration is the VM Provider Details page.
1. Select **Azure** from the Provider Drop Down.
2. Provide a name for your configuration.
3. Enter a Subscription ID, Resource Group, and Tenant ID.
4. Enter the Client ID and Client Secret created by following the [Azure App Registration](../../vm-providers.mdx#register-azure-app) instructions.
5. Select the Azure Authority from the drop down. Most users will select **Azure Public Cloud**.
6. Enter the region name, you can use the following Azure CLI command to list available regions, use the Name column.
```bash
az account list-locations -o table
```
7. Enter the **Maximum Instances**. This puts an upper limit on the number of VMs this auto scale configuration can create.
8. Enter a VM Size by name. Use the following Azure CLI command to list all VM sizes available in the desired region.
```bash
az vm list-sizes --location "westus"
```
9. Enter the OS [Disk Type](https://learn.microsoft.com/en-us/azure/virtual-machines/disks-types), using the [Azure Disk Type SKU](https://learn.microsoft.com/en-us/rest/api/storagerp/srp_sku_types). The following is the current list of available type names. Not all disk SKUs are compatible with all VM size types.
| Disk Type Name |
|-----------------|
| Standard_LRS |
| Standard_GRS |
| Standard_RAGRS |
| Standard_ZRS |
| Premium_LRS |
| Premium_ZRS |
| Standard_GZRS |
| Standard_RAGZRS |
10. Enter the **OS Disk Size**, in gigabytes. The size need to be at least the size of the target OS Image Reference, defined in the next field.
11. Enter the **OS Image Reference** JSON. Use the following Azure CLI command to list images in the JSON format expected by Kasm. Note that these are default Azure provided images, however, you will most likely need to create a [Custom Image](#custom-image).
```bash
# List Windows Server Editions using the offline list (faster)
az vm image list --architecture x64 --location westus --offer WindowsServer
# Search the full Marketplace for Desktop versions of Windows
az vm image list --architecture x64 --location westus --all --publisher MicrosoftWindowsDesktop
```
Here is an example of an OS Image Reference JSON value returned by one of the above queries that can be used.
```json
{
"architecture": "x64",
"offer": "windows-ent-cpc",
"publisher": "MicrosoftWindowsDesktop",
"sku": "win11-22h2-ent-cpc-os",
"urn": "MicrosoftWindowsDesktop:windows-ent-cpc:win11-22h2-ent-cpc-os:22621.963.221213",
"version": "22621.963.221213"
}
```
12. Check the **Image is Windows** checkbox.
13. Enter the target **Network Security Group**. In the Azure portal, find your Network Security Group, go to Properties, and find the Resource ID field.
14. Enter the target **Subnet**. In the Azure portal, find your subnet, go to Properties, and find the Resource ID field.
15. Check the **Assign Public IP** box if you desire your VMs to have public IP addresses. It is more secure to not have public IP addresses assigned. Kasm will provide a secure way to provide access to private systems and therefore, it is not strictly necessary to have a public IP.
16. Optionally provide additional tags for the VM, use empty `{}` brackets if no additional tags are needed.
17. Enter a public SSH Key, this is required even for Windows systems.
18. Enter a PowerShell startup script. Azure does not automatically run this script on startup like other cloud providers. You will need to create [Custom Image](#custom-image) in order for the startup script to execute on boot. The following example will create a local user account using the **Connection Username** and **Connection Password** fields specified on the previous screen. This is only relevant if you are using static credentials and will not work [Active Directory](../../../../workspaces-sessions/server-workspace/windows/authentication.mdx) integration.
```powershell
$pass = ConvertTo-SecureString -String "{connection_password}" -AsPlainText -Force
New-LocalUser -Name {connection_username} -Description 'Programatically generated Kasm user account' -Password $pass -PasswordNeverExpires -AccountNeverExpires | Add-LocalGroupMember -Group administrators | Add-LocalGroupMember -Group "Remote Desktop Users"
Start-Service -Name "Audiosrv"
```
19. Enter a **Config Override** as JSON. This the Image Reference (VERSION_ID from Custom Image Step 13 below) be provided. Additionally, in the example we used Windows 11, which requires SecureBoot to be enabled and the securityType to be set to TrustedLaunch. This is not required for older versions of Windows such as Windows 10 and therefore it is not required to provide override settings for those cases. Finally, some plans in Azure require that the Plan object be included as well. Below are examples for a Windows 10 image, without securityType, and for a Windows 11 image with securityType. Both include the Plan object, but that object may be left out for some plans.
```json
{
"virtual_machine": {
"plan": {
"name": SKU,
"product": OFFER,
"publisher": PUBLISHER
},
"properties": {
"storageProfile": {
"imageReference": {
"id": VERSION_ID
}
}
}
}
}
```
```json
{
"virtual_machine": {
"plan": {
"name": SKU,
"product": OFFER,
"publisher": PUBLISHER
},
"properties": {
"securityProfile": {
"securityType": "TrustedLaunch",
"uefiSettings": {
"secureBootEnabled": true,
"vTpmEnabled": true
}
},
"storageProfile": {
"imageReference": {
"id": VERSION_ID
}
}
}
}
}
```
#### Custom Image ###
Unlike most other cloud providers, Azure does not automatically execute the startup script on boot. You need to create a custom image and implement your own method of executing that script on boot. The following method has been tested by Kasm, but is by no means the only method that can be used. **These procedures are only necessary if you want to utilize Kasm's startup script injection and perform custom actions on boot of the VMs.**
1. Manually create a VM using the appropriate base image, such as Windows 11 Enterprise
2. Install the required software and configure the OS as appropriate for your environment
3. Create a file with the following contents at C:\AzureData\startup.cmd
```
schtasks /Delete /TN "DomainJoin" /F
cd C:\AzureData
setlocal EnableExtensions EnableDelayedExpansion
set tries=0
:CheckForFile
IF EXIST CustomData.bin GOTO FoundIt
set /a tries+=1
IF !tries! GEQ 40 GOTO Timeout
TIMEOUT /T 15 >nul
GOTO CheckForFile
:FoundIt
ren CustomData.bin CustomData.ps1
PowerShell -Command "Set-ExecutionPolicy Unrestricted"
PowerShell -file C:\AzureData\CustomData.ps1
GOTO End
:Timeout
REM Timed out waiting for CustomData.bin (40 x 15s)
echo ERROR: Timed out waiting for CustomData.bin after %tries% attempts (about 10 minutes).
:End
```
4. Open a Windows Command Prompt as an Administrator and execute the following command.
```
schtasks /create /tn "DomainJoin" /sc onstart /rl highest /ru system /tr "cmd /c C:\AzureData\startup.cmd > C:\AzureData\startup.log 2>&1"
```
5. Run sysprep on the VM and shut it down. Run the following in an elevated command prompt.
```
cd %windir%\system32\sysprep
sysprep.exe /oobe /generalize /mode:vm /shutdown
```
You may get an error message when running the above command on a Windows 11 system using the default Azure provided image. Look at the log file indicated by the error message. If you see an error message near the bottom of the logs indicating OneDriveSync was installed for the user but not provisioned for all users, remove the software from an elevated PowerShell session with the following command. **Try sysprep again after running this command**.
```
get-appxpackage -allusers -name "microsoft.Onedrivesync" | Remove-appxpackage
```
6. Open a Cloud Shell in Azure and run the following command to get a list of VMs and find the VM that you just ran sysprep on.
```
az vm list -otable
```
7. The table provided by the above command will contain the VM name and its resource group name. Plug in your VM name and resource group name into the below command in order to generalize the VM.
```
az vm generalize -g RESOURCE_GROUP_NAME -n VM_NAME
```
8. Create a Gallery, if one is not already available for the location of the Custom Image VM, which is how images are shared and organized in Azure. Plug in your resource group name and your desired Gallery name.
```
az sig create --resource-group RESOURCE_GROUP_NAME --gallery-name GALLERY_NAME
```
9. Obtain the full ID of the VM you want to create an image from. Plug in your resource group name and VM name into the below command.
```
az vm get-instance-view -g RESOURCE_GROUP_NAME -n VM_NAME --query id
```
The output should look similar to the following and will be used in step 11.
```
"/subscriptions//resourceGroups//providers/Microsoft.Compute/virtualMachines/"
```
10. From the Azure portal search bar, search for 'Azure compute galleries' and find the Gallery you created on step 8. Click into that gallery. Click the drop down on the Add button and select 'VM Image Definition'. Provide a VM image definition name and select Windows as the OS Type. The Security Type and VM generation may differ based on what base image you started from. For Windows 11, select Trusted Launch for the Security Type, which will lock you into VM generation 2. The Publisher, Offer, and SKU can all be found in the Azure Portal on the VM page, under Source Image Details. After creating the image definition, take note of the name for the subsequent steps.
11. Create a Managed Image using the below command for your desired MANAGED_IMAGE_NAME and appropriate os-type and hyper-v-generation depending on what was selected in Step 10 (using Windows and V2 for the example below).
```
az image create --resource-group RESOURCE_GROUP_NAME --name MANAGED_IMAGE_NAME --source "VM_ID" --os-type Windows --hyper-v-generation V2 --location "eastus"
```
12. Create an Image version. Plug in your resource group name, gallery name, image definition, desired version number, location, and target regions into the following Azure CLI command. For the managed-image field, use the managed image name you created in step 11. Target regions must include both the region your image is in and the region your resource group is in, if different.
```
az sig image-version create \
--resource-group RESOURCE_GROUP_NAME \
--gallery-name GALLERY_NAME \
--gallery-image-definition IMAGE_DEFINITION_NAME \
--gallery-image-version 1.0.0 \
--location "eastus"
--target-regions "eastus" \
--replica-count 2 \
--managed-image MANAGED_IMAGE_NAME
```
Make note of the ID returned from the above command for the next step.
13. In the VM Provider configuration, Step 11 and Step 19, put the ID returned by the previous step into the **OS Image Reference** and **Config Override** fields. The following is an example.
```json
{
"id": "/subscriptions//resourceGroups//providers/Microsoft.Compute/galleries//img/IMAGE_DEFINITION_NAME/versions/1.0.0"
}
```
---
## Microsoft Azure AutoScale
This guide will walk you through configuring autoscaling for Kasm Workspaces on Microsoft Azure. Autoscaling in Kasm Workspaces automatically provisions and destroys agents based on user demand, ensuring optimized resource utilization and cost efficiency.
### Overview
#### Prerequisites
* Access to Microsoft Azure: Ensure you have the appropriate access to your Azure environment
* Kasm Workspaces Installed: A basic setup of Kasm Workspaces must already exist
* Understand Key Concepts:
* **Zones**: Logical groupings of Kasm services for geographical or organizational segmentation
* **Pools**: Logical groupings of Kasm Docker Agents and Server Pools for load balancing
* Plan Your Configuration:
* Understand your deployment zone requirements
* Configure your Azure environment
#### Setup your Microsoft Azure Environment
- **Register Azure app**: An API key for Kasm must be created to use for interfacing with Azure. Azure call these apps, and the example will walk through registering one along with the required permissions.
* Register an app by going to the Microsoft Entra ID service in the Azure portal.
* From the **Add** dropdown select **App Registration**.
* Give this app a human-readable name such as **Kasm Workspaces**.
* Note the Client ID (Application ID) and Tenant ID (Directory ID) from your App Registration page for use later.
- **Create Client Secret**: The Client Secret is created from the App Registration.
* Click **Add a certificate or secret** to the right of **Client credentials**.
* Click **New client secret* under the *Client secrets** table.
* Fill in the Description and Expires fields and click **Add**.
* Note the Value (not the Secret ID) for use later. This cannot be copied again afterwards, so save it now.
- **Set up permissions**: Certain permissions must be set up in Azure by adding role assignments.
* Go to **Resource Groups** and select the **Resource Group** that Kasm will autoscale in.
* Select **Access Control (IAM)**.
* From the **Add** drop down select **Add role assignment**.
* The app created in Azure will need two roles, first select the *Virtual Machine Contributor* role, then on the next page select the app by typing in the name e.g. **Kasm Workspaces**.
* Go through this process again to add the *Network Contributor* and the *DNS Zone Contributor* and the *Compute Gallery Image Reader* roles.
### Configure your Microsoft Azure details on Kasm
* Follow [AutoScale Settings for Agent Pool](../../infrastructure-components/autoscale-config-docker-agent.mdx#autoscale-settings-for-agent-pool) or [AutoScale Settings for Server Pool](../../infrastructure-components/autoscale-config-server.mdx#autoscale-settings-for-server-pool) to create a new AutoScale config, or, if you already have an AutoScale Configuration defined, go straight to the All VM Provider Configs page, click Add to and select **Add New** in **VM Provider Configs**.
* Configure the following settings based on the instruction that follow:
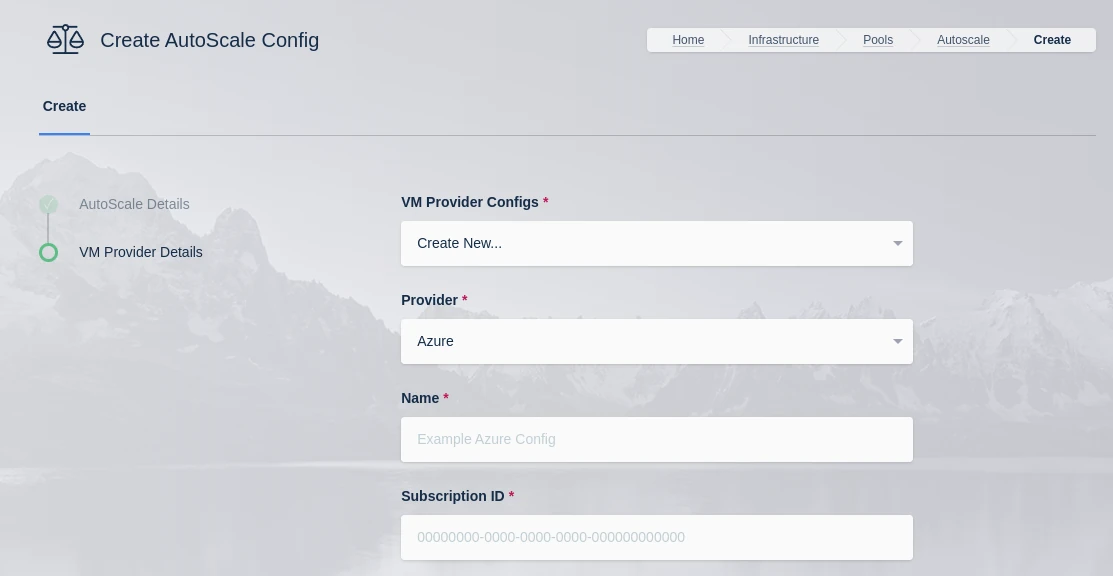
| **Name** | **Description** |
| --- | --- |
| **Name** | A name to use to identify the config. |
| **Subscription ID** | The Subscription ID for the Azure Account. This can be found in the Azure portal by searching for Subscriptions in the search bar in Azure home then selecting the subscription to use. (e.g `00000000-0000-0000-0000-000000000000`) |
| **Resource Group** | The Resource Group the DNS Zone and/or Virtual Machines belong to (e.g `dev`) |
| **Tenant ID** | The Tenant ID for the Azure Account. This can be found in the Azure portal by going to Microsoft Entra ID using the search bar in Azure home. (e.g `00000000-0000-0000-0000-000000000000`) |
| **Client ID** | The Client ID credential used to auth to the Azure Account. Client ID can be obtained by registering an application within Microsoft Entra ID. (e.g `00000000-0000-0000-0000-000000000000`) |
| **Client Secret** | The Client Secret credential created with the registered application in Microsoft Entra ID. (e.g `abc123`) |
| **Azure Authority** | Which Azure authority to use, there are four, Azure Public Cloud, Azure Government, Azure China and Azure Germany. |
| **Region** | The Azure region where the Agents will be provisioned. (e.g `eastus`) |
| **Max Instances** | The maximum number of Azure VMs to provision regardless of the need for additional resources. |
| **VM Size** | The size configuration of the Azure VM to provision (e.g `Standard_D2s_v3`) |
| **OS Disk Type** | The disk type to use for the Azure VM. (e.g `Premium_LRS`) |
| **OS Disk Size** | Select the boot volume size to assign the compute instance. The admin console accepts Bytes/GiB and stores the value as bytes (`azure_os_disk_size_bytes`). API integrations must submit the number of bytes in whole GiB (2^30) increments. |
| **OS Image Reference (JSON)** | The OS Image Reference configuration for the Azure VMs (e.g `{"publisher":"canonical","offer":"0001-com-ubuntu-server-jammy","sku":"22_04-lts-gen2","version":"latest"}` or `{"id":"/subscriptions/000.../resourceGroups/dev/providers/Microsoft.Compute/galleries/development-gallery/img/ubuntu-22.04-custom"}`) |
| **Image is Windows** | Is this a windows VM being created |
| **Plan Name** | Plan Name for the VM image. This is optional, and is only required for images from the marketplace or custom images derived from a marketplace image. |
| **Plan Product** | Plan Product for the VM image. This is optional, and is only required for images from the marketplace or custom images derived from a marketplace image. |
| **Plan Publisher** | Plan Publisher for the VM image. This is optional, and is only required for images from the marketplace or custom images derived from a marketplace image. |
| **Security Type** | Which features used (if any) to security the VM. This is optional, but may be required for certain Windows VMs such as Windows 10 and Windows 11. |
| **Secure Boot Enabled** | Whether or not Secure Boot is enabled for the VM. This is not enabled by default, but may be required for certain Windows VMs such as Windows 11. |
| **TPM Enabled** | Whether or not TPM is enabled for the VM. This is not enabled by default, but may be required for certain Windows VMs such as Windows 11. |
| **Network Security Group** | The network security group to attach to the VM (e.g `/subscriptions/000.../resourcegroups/dev/providers/Microsoft.Network/networkSecurityGroups/example-nsg`) |
| **Subnet** | The subnet to attach the VM to (e.g `/subscriptions/000.../resourceGroups/dev/providers/Microsoft.Network/virtualNetworks/development-vnet/subnets/default`) |
| **Assign Public IP** | If checked, the VM will be assigned a public IP. If no public ip IP is assigned the VM must ne attached to a standard load balancer of the subnet must have a NAT Gateway or user-defined route (UDR). If a public IP is used, the subnet must not also include a NAT Gateway. [Reference](https://docs.microsoft.com/en-us/azure/virtual-network/ip-services/default-outbound-access) |
| **Tags (JSON)** | A JSON dictionary of custom tags to assign to the VMs (e.g `{"foo":"bar", "bin": "baz"}` ) |
| **OS Username** | The login username to assign to the new VM (e.g `testuser`) |
| **OS Password** | The login password to assign to the new VM. Note: Password authentication is disabled for SSH by default |
| **SSH Public Key** | The SSH public key to install on the VM for the defined user: (e.g `ssh-rsa AAAAAAA....`) |
| **Agent Startup Script** | When instances are provisioned, this script is executed and is responsible for installing and configuring the Kasm Agent. |
| **Config Override (JSON)** | Custom configuration may be added to the provision request for advanced use cases. The emitted json structure is visible by clicking **JSON View** when inspecting the VM in the Azure console. The keys in this configuration can be used to update top level keys within the emitted json config (e.g `{"location":"eastus"}`). Nested items can be updated by using dot notation in the key (e.g `{"hardware_profile.vm_size":"Standard_D4s_v3"}`) Exiting array elements can be updated by specifying the index in the dot notation (e.g `{"os_profile.linux_configuration.ssh.public_keys.0.path":"/home/ubuntu/.ssh/authorized_keys"}`) |
The following instructions utilize the Azure CLI. You can open the CLI in the Azure web portal and run these commands directly. See Microsoft's [instructions](https://learn.microsoft.com/en-us/azure/cloud-shell/quickstart?source=recommendations&tabs=azurecli) for basic usage of the Azure Cloud Shell environment.
* Select **Azure** from the Provider Drop Down.
* Provide a name for your configuration.
* Enter your Subscription ID, Resource Group, and Tenant ID from the Azure Setup above.
* Enter the Client ID and Client Secret created during Azure Setup above.
* Select the Azure Authority from the drop down. Most users will select **Azure Public Cloud**.
* Enter the region name, you can use the following Azure CLI command to list available regions, use the Name column.
```bash
az account list-locations -o table
```
* Enter the **Maximum Instances**. This puts an upper limit on the number of VMs this auto scale configuration can create.
* Enter a VM Size by name. Use the following Azure CLI command to list all VM sizes available in the desired region.
```bash
az vm list-sizes --location "westus"
```
* Enter the OS [Disk Type](https://learn.microsoft.com/en-us/azure/virtual-machines/disks-types), using the [Azure Disk Type SKU](https://learn.microsoft.com/en-us/rest/api/storagerp/srp_sku_types). The following is the current list of available type names. Not all disk SKUs are compatible with all VM size types.
| Disk Type Name |
|-----------------|
| Standard_LRS |
| Standard_GRS |
| Standard_RAGRS |
| Standard_ZRS |
| Premium_LRS |
| Premium_ZRS |
| Standard_GZRS |
| Standard_RAGZRS |
* Enter the **OS Disk Size**, in gigabytes. The size need to be at least the size of the target OS Image Reference, defined in the next field.
* Enter the **OS Image Reference** JSON. Use the following Azure CLI command to list images in the JSON format expected by Kasm. Note that these are default Azure provided images, however, you will most likely need to create a [Custom Image](#custom-image).
```bash
# List Windows Server Editions using the offline list (faster)
az vm image list --architecture x64 --location westus --offer WindowsServer
# Search the full Marketplace for Desktop versions of Windows
az vm image list --architecture x64 --location westus --all --publisher MicrosoftWindowsDesktop
```
Here is an example of an OS Image Reference JSON value returned by one of the above queries that can be used.
```json
{
"architecture": "x64",
"offer": "windows-ent-cpc",
"publisher": "MicrosoftWindowsDesktop",
"sku": "win11-22h2-ent-cpc-os",
"urn": "MicrosoftWindowsDesktop:windows-ent-cpc:win11-22h2-ent-cpc-os:22621.963.221213",
"version": "22621.963.221213"
}
```
* Check the **Image is Windows** checkbox.
* Optionally provide the **Plan Name** for the VM image. This is is only required for images from the marketplace or custom images derived from a marketplace image.
* Optionally provide the **Plan Product** for the VM image. This is is only required for images from the marketplace or custom images derived from a marketplace image.
* Optionally provide the **Plan Publisher** for the VM image. This is is only required for images from the marketplace or custom images derived from a marketplace image.
* Select which features are used (if any) to secure the VM. This is optional, but may be required for certain Windows VMs such as Windows 10 and Windows 11.
* Check the **Enable Secure Boot** box to enable Secure Boot for your VM. This is not enabled by default, but may be required for certain Windows VMs such as Windows 11.
* Check the **Enable TPM** box to enable TPM for your VM. This is not enabled by default, but may be required for certain Windows VMs such as Windows 11.
* Enter the target **Network Security Group**. In the Azure portal, find your Network Security Group, go to Properties, and find the Resource ID field.
* Enter the target **Subnet**. In the Azure portal, find your subnet, go to Properties, and find the Resource ID field.
* Check the **Assign Public IP** box if you desire your VMs to have public IP addresses. It is more secure to not have public IP addresses assigned. Kasm will provide a secure way to provide access to private systems and therefore, it is not strictly necessary to have a public IP.
* Optionally provide additional tags for the VM, use empty `{}` brackets if no additional tags are needed.
* Enter a public SSH Key, this is required even for Windows systems.
* Enter a PowerShell startup script. Azure does not automatically run this script on startup like other cloud providers. You will need to create a [Custom Image](#custom-image) in order for the startup script to execute on boot. The following example will create a local user account using the **Connection Username** and **Connection Password** fields specified on the previous screen. This is only relevant if you are using static credentials and will not work [Active Directory](../../../../workspaces-sessions/server-workspace/windows/authentication.mdx) integration.
```powershell
$pass = ConvertTo-SecureString -String "{connection_password}" -AsPlainText -Force
New-LocalUser -Name {connection_username} -Description 'Programatically generated Kasm user account' -Password $pass -PasswordNeverExpires -AccountNeverExpires | Add-LocalGroupMember -Group administrators | Add-LocalGroupMember -Group "Remote Desktop Users"
Start-Service -Name "Audiosrv"
```
* Optionally enter a **Config Override** as JSON.
* Submit the Provider Config
#### Custom Image ###
Unlike most other cloud providers, Azure does not automatically execute the startup script on boot. You need to create a custom image and implement your own method of executing that script on boot. The following method has been tested by Kasm, but is by no means the only method that can be used. **These procedures are only necessary if you want to utilize Kasm's startup script injection and perform custom actions on boot of the VMs.**
* Manually create a VM using the appropriate base image, such as Windows 11 Enterprise.
* Install the required software and configure the OS as appropriate for your environment.
* Create a file with the following contents at C:\AzureData\startup.cmd.
```
schtasks /Delete /TN "DomainJoin" /F
cd C:\AzureData
setlocal EnableExtensions EnableDelayedExpansion
set tries=0
:CheckForFile
IF EXIST CustomData.bin GOTO FoundIt
set /a tries+=1
IF !tries! GEQ 40 GOTO Timeout
TIMEOUT /T 15 >nul
GOTO CheckForFile
:FoundIt
ren CustomData.bin CustomData.ps1
PowerShell -Command "Set-ExecutionPolicy Unrestricted"
PowerShell -file C:\AzureData\CustomData.ps1
GOTO End
:Timeout
REM Timed out waiting for CustomData.bin (40 x 15s)
:End
```
* Open a Windows Command Prompt as an Administrator and execute the following command.
```
schtasks /create /tn "DomainJoin" /sc onstart /rl highest /ru system /tr "cmd /c C:\AzureData\startup.cmd > C:\AzureData\startup.log 2>&1"
```
* Run sysprep on the VM and shut it down. Run the following in an elevated command prompt.
```
cd %windir%\system32\sysprep
sysprep.exe /oobe /generalize /mode:vm /shutdown
```
You may get an error message when running the above command on a Windows 11 system using the default Azure provided image. Look at the log file indicated by the error message. If you see an error message near the bottom of the logs indicating OneDriveSync was installed for the user but not provisioned for all users, remove the software from an elevated PowerShell session with the following command. **Try sysprep again after running this command**.
```
get-appxpackage -allusers -name "microsoft.Onedrivesync" | Remove-appxpackage
```
* Open a Cloud Shell in Azure and run the following command to get a list of VMs and find the VM that you just ran sysprep on.
```
az vm list -otable
```
* The table provided by the above command will contain the VM name and its resource group name. Plug in your VM name and resource group name into the below command in order to generalize the VM.
```
az vm generalize -g RESOURCE_GROUP_NAME -n VM_NAME
```
* Create a Gallery, if one is not already available for the location of the Custom Image VM, which is how images are shared and organized in Azure. Plug in your resource group name and your desired Gallery name.
```
az sig create --resource-group RESOURCE_GROUP_NAME --gallery-name GALLERY_NAME
```
* Obtain the full ID of the VM you want to create an image from. Plug in your resource group name and VM name into the below command.
```
az vm get-instance-view -g RESOURCE_GROUP_NAME -n VM_NAME --query id
```
The output should look similar to the following and will be used in step 11.
```
"/subscriptions//resourceGroups//providers/Microsoft.Compute/virtualMachines/"
```
* From the Azure portal search bar, search for 'Azure compute galleries' and find the Gallery you created on step 8. Click into that gallery. Click the drop down on the Add button and select 'VM Image Definition'. Provide a VM image definition name and select Windows as the OS Type. The Security Type and VM generation may differ based on what base image you started from. For Windows 11, select Trusted Launch for the Security Type, which will lock you into VM generation 2. The Publisher, Offer, and SKU can all be found in the Azure Portal on the VM page, under Source Image Details. After creating the image definition, take note of the name for the subsequent steps.
* Create a Managed Image using the below command for your desired MANAGED_IMAGE_NAME and appropriate os-type and hyper-v-generation depending on what was selected in Step 10 (using Windows and V2 for the example below).
```
az image create --resource-group RESOURCE_GROUP_NAME --name MANAGED_IMAGE_NAME --source "VM_ID" --os-type Windows --hyper-v-generation V2 --location "eastus"
```
* Create an Image version. Plug in your resource group name, gallery name, image definition, desired version number, location, and target regions into the following Azure CLI command. For the managed-image field, use the managed image name you created in step 11. Target regions must include both the region your image is in and the region your resource group is in, if different.
```
az sig image-version create \
--resource-group RESOURCE_GROUP_NAME \
--gallery-name GALLERY_NAME \
--gallery-image-definition IMAGE_DEFINITION_NAME \
--gallery-image-version 1.0.0 \
--location "eastus"
--target-regions "eastus" \
--replica-count 2 \
--managed-image MANAGED_IMAGE_NAME
```
Make note of the ID returned from the above command for the next step.
* In the VM Provider configuration, Step 11, put the ID returned by the previous step into the **OS Image Reference** field. The following is an example.
```json
{
"id": "/subscriptions//resourceGroups//providers/Microsoft.Compute/galleries//img/IMAGE_DEFINITION_NAME/versions/1.0.0"
}
```
### Test your Microsoft Azure Autoscaling setup
If you have configured non-zero Standby/Minimum Available Session values agents should start provisioning immediately. Otherwise, try launching multiple workspaces to increase resource utilization, prompting Kasm to autoscale new agents.
* Provision a Workspace.
* Go to Workspaces > Registry.
* Make multiple workspaces available.
* Go to the Workspaces dashboard and launch sufficient workspace sessions to exceed your resource standby thresholds.
* Monitor the provisioning of new agents by going to "Infrastructure" -> "Agents".
* Verify new VM instances in Microsoft Azure.
* Check Downscaling.
* Terminate sessions to reduce resource usage.
* Confirm that Kasm removes agents after the back-off period.
---
## DigitalOcean Autoscaling Configuration
## DigitalOcean AutoScale
This guide will walk you through configuring autoscaling for Kasm Workspaces on DigitalOcean. Autoscaling in Kasm Workspaces automatically provisions and destroys agents based on user demand, ensuring optimized resource utilization and cost efficiency.
### Overview
#### Prerequisites
* Access to Digital Ocean: Ensure you have the appropriate access to your Digital Ocean environment
* Kasm Workspaces Installed: A basic setup of Kasm Workspaces must already exist
* Understand Key Concepts:
* **Zones**: Logical groupings of Kasm services for geographical or organizational segmentation
* **Pools**: Logical groupings of Kasm Docker Agents and Server Pools for load balancing
* Plan Your Configuration:
* Understand your deployment zone requirements
* Configure your Digital Ocean environment
#### Setup your Digital Ocean Environment
* **Create an API Token**: Go to your Digital Ocean dashboard -> "API" -> "Personal Access Tokens" -> "Generate New Token"
* Token Name: Give a name (e.g Kasm AutoScale)
* Expiration: Set an expiration for your token (e.g 30 days)
* Scopes: Choose "Custom Scopes" and give access to the following resources:
* actions
* certificate
* database (remove view credentials)
* domain
* droplet (remove admin)
* firewall
* image
* load\_balancer
* project
* regions
* sizes
* snapshot
* ssh\_key
* tag
* vpc
* Generate Token
* Save your token securely as you won't be able to see it again.
* **Add SSH Key**: You need to assign an SSH key to your newly provisioned droplets.
* Go to your Digital Ocean dashboard -> "Settings" -> "Security" -> "Add SSH Key"
* Follow the on-screen instructions from Digital Ocean to generate an SSH key pair and paste your Public Key and choose a Key Name.
### Configure Digital Ocean Details on Kasm
* Follow [AutoScale Settings for Agent Pool](../infrastructure-components/autoscale-config-docker-agent.mdx#autoscale-settings-for-agent-pool) or [AutoScale Settings for Server Pool](../infrastructure-components/autoscale-config-server.mdx#autoscale-settings-for-server-pool) to create a new AutoScale config, or select **Create New** in **VM Provider Configs** if you already have one.
* Set Provider to Digital Ocean
* Configure the following settings:
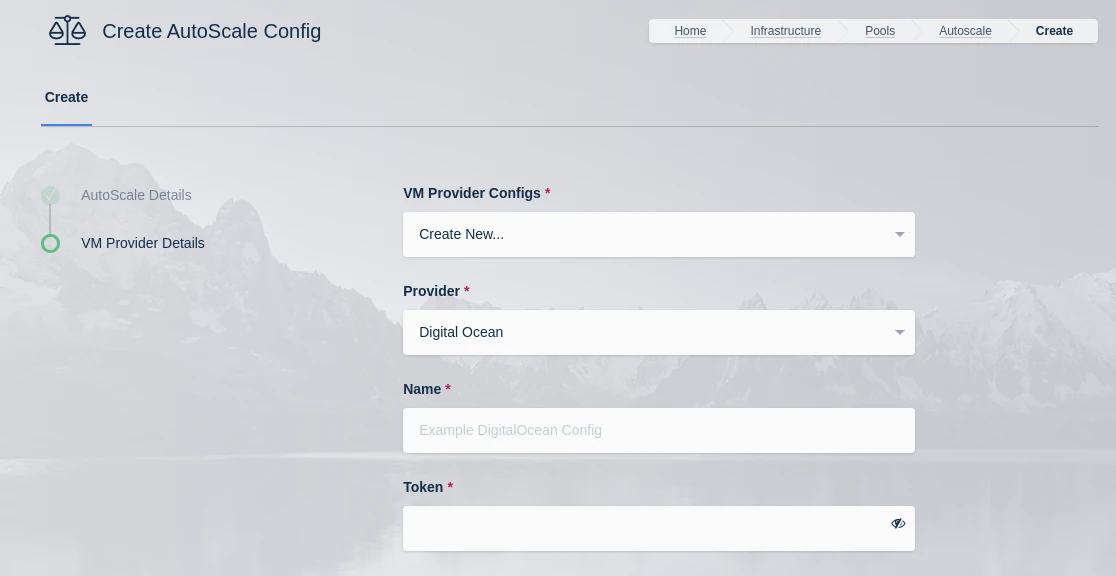
| Name | Description |
| --- | --- |
| **Name** | A name to use to identify the config. |
| **Token** | The token to use to connect to this VM |
| **Max Droplets** | The maximum number of Digital Ocean droplets to provision , regardless of whether more are needed to fulfill user demand. |
| **Region** | The Digital Ocean Region where droplets should be provisioned. (e.g nyc3) |
| **Image** | The Image to use when creating droplets. (e.g docker-24-04). See [Digital Ocean documentation](https://docs.digitalocean.com/products/droplets/details/images/) for more details. |
| **Droplet Size** | The droplet size configuration (e.g c-2). See [https://slugs.do-api.dev](https://slugs.do-api.dev/) for more details |
| **Tags** | A tag(s) to assign the droplet when it is created. This should be a comma separated list of tags. |
| **SSH Key Name** | The SSH Key to assign to the newly created droplets. The SSH Key must already exist in the Digital Ocean Account. |
| **Firewall Name** | The name of the Firewall to apply to the newly created droplets. This Firewall must already exist in the Digital Ocean Account. Go to your Digital Ocean dashboard -> "Networking" -> "Firewalls" to view existing firewalls or create a new firewall |
| **Startup Script** | When droplets are provisioned this script is executed. The script is responsible for installing and configuring the Kasm Agent. Example scripts can be found on our [GitHub repository](https://github.com/kasmtech/workspaces-autoscale-startup-scripts) |
* Submit the Provider Config
#### "Tag Does Not Exist" Error
Upon first testing AutoScaling with Digital Ocean, an error similar to the following may be presented:
```
Future generated an exception: tag zone:abc123 does not exist
traceback:
..
File "digitalocean/Firewall.py", line 225, in add_tags
File "digitalocean/baseapi.py", line 196, in get_data
digitalocean.DataReadError: tag zone:abc123 does not exist
process: manager_api_server
```
This error occurs when Kasm Workspaces tries to assign a unique tag based on the Zone Id to the Digital Ocean Firewall. If that tag does not already exist in Digital Ocean, the operation will fail and present the error. To workaround the issue, manually create a tag matching the one specified in the error (e.g zone:abc123) via the Digital Ocean console. This can be done via API, or simply creating the tag on a temporary Droplet.
### Test your Digital Ocean Autoscaling setup
If you have configured non-zero Standby/Minimum Available Session values agents should start provisioning immediately. Otherwise, try launching multiple workspaces to increase resource utilization, prompting Kasm to autoscale new agents.
* Provision a Workspace
* Go to Workspaces > Registry
* Make multiple workspaces available
* Go to the Workspaces dashboard and launch sufficient workspace sessions to exceed your resource standby thresholds
* Monitor the provisioning of new agents by going to "Infrastructure" -> "Agents"
* Verify new VM instances in Digital Ocean
* Check Downscaling
* Terminate sessions to reduce resource usage
* Confirm that Kasm removes agents after the back-off period
---
## Autoscaling Kasm Workspaces on Google Cloud (GCP)
## Google Cloud (GCP) AutoScale
This guide will walk you through configuring autoscaling for Kasm Workspaces on Google Cloud (GCP). Autoscaling in Kasm Workspaces automatically provisions and destroys agents based on user demand, ensuring optimized resource utilization and cost efficiency.
### Overview
#### Prerequisites
* Access to Google Cloud (GCP): Ensure you have admin access to your Google Cloud (GCP) environment
* Kasm Workspaces Installed: A basic setup of Kasm Workspaces must already exist
* Understand Key Concepts:
* **Zones**: Logical groupings of Kasm services for geographical or organizational segmentation
* **Pools**: Logical groupings of Kasm Docker Agents and Server Pools for load balancing
* Plan Your Configuration:
* Understand your deployment zone requirements
* Have access to your Google Cloud (GCP) details; target regions, networks, etc.
* Create template images for your autoscale agents, if you require customizations baked into the images
#### Setup your GCP environment
- **Create service account**: Go to "IAM" -> "Service Accounts" and create a new service account for use with Kasm AutoScaling. Also, make sure to give it the **Compute Admin** role.
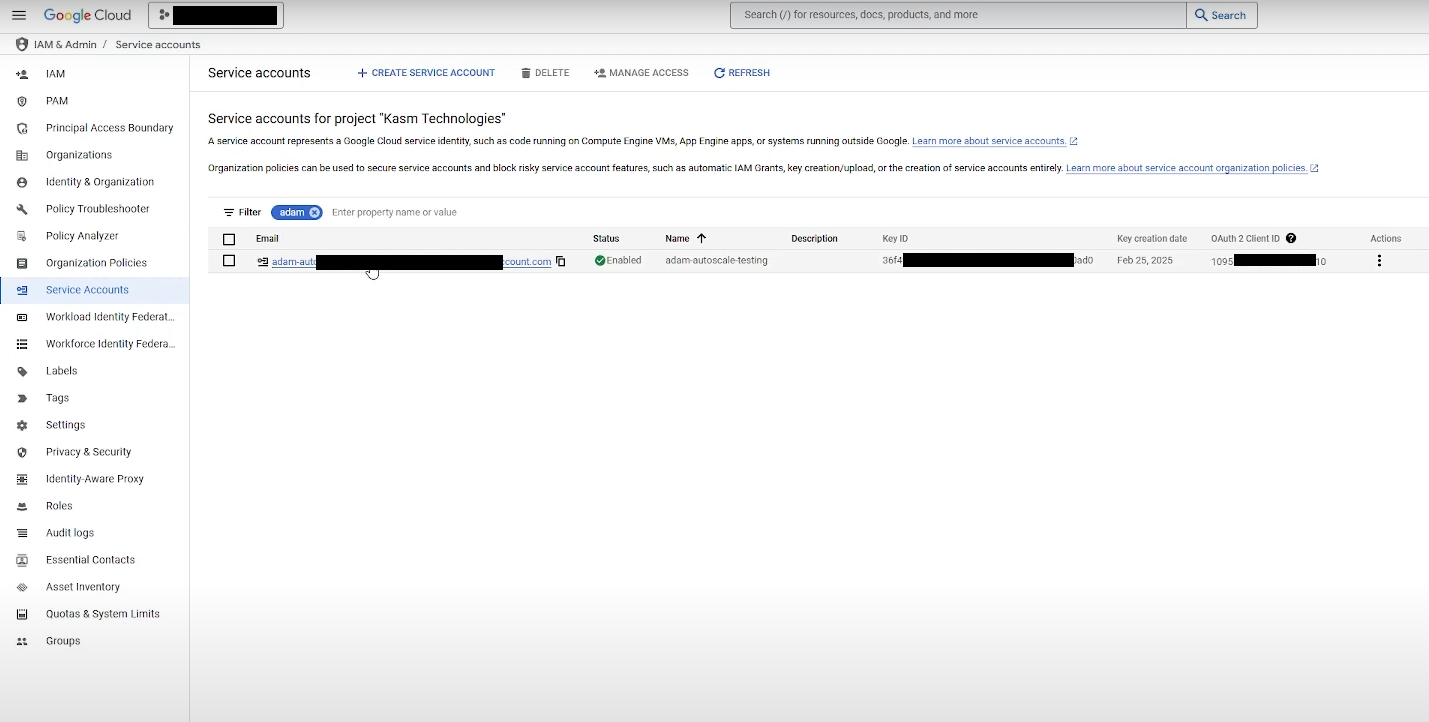
- **Create Key**: Click on the created service account, and go to "Keys". Click "Add Key" -> Select key type as JSON -> "Create". This will generate a JSON file for you to download that contains all the authentication information required to configure AutoScaling on Kasm.
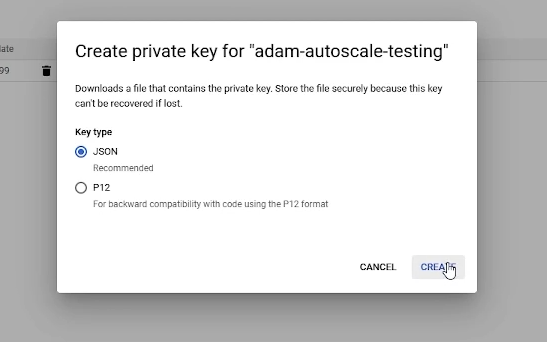
### Configure VM Provider Details on Kasm
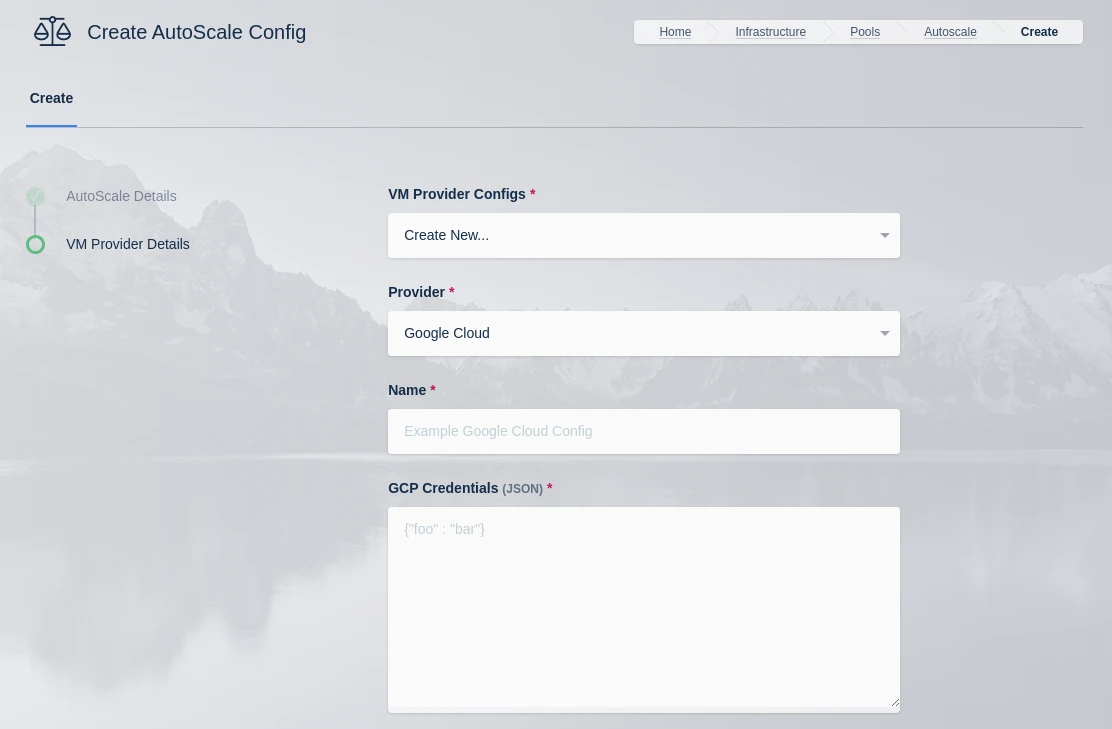
| Name | Description |
| --- | --- |
| **Name** | An identifying name for this provider configuration e.g. Google Cloud (GCP) Docker Agent AutoScale Provider |
| **GCP Credentials** | The JSON formatted credentials for the service account used to authenticate with GCP: [Ref](https://cloud.google.com/iam/docs/creating-managing-service-account-keys#iam-service-account-keys-create-console) |
| **Max Instances** | The maximum number of GCP compute instances to provision regardless of the need for additional resources. |
| **Project ID** | The Google Cloud Project ID (e.g pensive-voice-547511) |
| **Region** | The region to provision the new compute instances. (e.g us-east4) |
| **Zone** | The zone the new compute instance will be provisioned in (e.g us-east4-b) |
| **Machine Type** | The Machine type for the GCP compute instances. (e.g e2-standard-2) |
| **Machine Image** | The Machine Image to use for the new compute instance. (e.g projects/ubuntu-os-cloud/global/img/ubuntu-2204-lts) |
| **Boot Volume Size** | Select the boot volume size to assign the compute instance. The admin console accepts Bytes/GB and stores the value as bytes (`gcp_boot_volume_bytes`). API integrations must submit the number of bytes in whole GB (10^9) increments. |
| **Disk Type** | The disk type for the new instance. (e.g pd-ssd, pd-standard, etc.) |
| **Customer Managed Encryption** **Key (CMEK)** | The optional path to the Customer Managaged Encryption Key (CMEK) (e.g projects/pensive-voice-547511/locations/global/keyRings/my-keyring/cryptoKeys/my-key |
| **Network** | The path of the Network to attach the new instance. (e.g projects/pensive-voice-547511/global/networks/default) |
| **Sub Network** | The path of the Sub Network to attach the new instance.(e.g projects/pensive-voice-547511/regions/us-east4/subnetworks/default) |
| **Public IP** | If checked, a public IP will be assigned to the new instances |
| **Network Tags (JSON)** | A JSON list of the Network Tags to assign the new instance. (e.g `["https-server", "foo", "bar"]`) |
| **Custom Labels (JSON)** | A JSON dictionary of Custom Labels to assign the new instance (e.g `{"foo": "bar", "bin":"baz"}`) |
| **Metadata (JSON)** | A JSON list of metadata objects to add to the instance. (e.g `[{"key": "ssh-keys", "value":"user1:ssh-rsa user1"}]`) [Reference](https://cloud.google.com/compute/docs/connect/add-ssh-keys#add_ssh_keys_to_instance_metadata) |
| **Service Account (JSON)** | A JSON dictionary representing for a service account to attach to the instance. (e.g `{"email": "service-account@example.com", "scopes":["https://www.googleapis.com/auth/cloud-platform"]}`) [Reference](https://cloud.google.com/iam/docs/creating-managing-service-account-keys#iam-service-account-keys-create-gcloud) |
| **Guest Accelerators (JSON)** | A JSON list representing the guest accelerators (e. GPUs) to attach to the instance. (e.g `[{"acceleratorType":"projects//zones//acceleratorTypes/nvidia-tesla-t4","acceleratorCount":1}]`) [Reference](https://cloud.google.com/compute/docs/reference/rest/v1/instances/insert) |
| **GCP Config Override (JSON)** | A JSON dictionary that can be used to customize attributes of the VM request. The only attributes that cannot be overridden are `name` and `labels` (e.g `{"shieldedInstanceConfig":{"enableIntegrityMonitoring":true,"enableSecureBoot":true,"enableVtpm":true}}` [Reference](https://cloud.google.com/compute/docs/reference/rest/v1/instances/insert) |
| **VM Installed OS Type** | The family of the OS installed on the VM (e.g. linux or windows). |
| **Startup Script Type** | The type of startup script to execute, this determines the key used when creating the GCP startup script metadata. [Windows Startup Scripts](https://cloud.google.com/compute/docs/instances/startup-scripts/windows) [Linux Startup Scripts](https://cloud.google.com/compute/docs/instances/startup-scripts/linux) |
| **Startup Script** | When instances are provisioned, this script is executed and is responsible for installing and configuring the Kasm Agent. Bash is supported on Linux instances and Powershell for Windows instance. Example scripts can be found on our [Github repo](https://github.com/kasmtech/workspaces-autoscale-startup-scripts) |
* Submit the Provider Config
### Test Autoscaling
* If you have configured non-zero Standby/Minimum Available Session values agents should start provisioning immediately, otherwise...
* Provision a Workspace
* Go to Workspaces > Registry
* Make multiple workspaces available
* Go to the Workspaces dashboard and launch sufficient workspace sessions to exceed your resource standby thresholds
* Monitor the provisioning of new agents in the Docker Agents section
* Verify new VM instances in Google Cloud (GCP)
* Check Downscaling
* Terminate sessions to reduce resource usage
* Confirm that Kasm removes agents after the back-off period
---
## Harvester Autoscaling Configuration
## Harvester AutoScale
This guide will walk you through configuring autoscaling for Kasm Workspaces on Harvester. Autoscaling in Kasm Workspaces automatically provisions and destroys agents based on user demand, ensuring optimized resource utilization and cost efficiency.
### Prerequisites
* Access to Harvester: Ensure you have admin access to your Harvester environment
* Kasm Workspaces Installed: A basic setup of Kasm Workspaces must already exist
* Understand Key Concepts:
* **Zones**: Logical groupings of Kasm services for geographical or organizational segmentation
* **Pools**: Logical groupings of Kasm Docker Agents and Server Pools for load balancing
* Plan Your Configuration:
* Understand your deployment zone requirements
* Configure your Harvester environment:
* Create a namespace for your autoscale deployment
* Create a VM network in the new namespace for your agents to use and attach it to a cluster network
* Create template images in the new namespace for AutoScale to use
### Setup your Harvester Environment
#### Download KubeConfig
The KubeConfig YAML file can be downloaded from the Support link on the Harvester dashboard and contains key information you will need to configure autoscaling on Kasm.
#### Create Namespace
Go to "Namespaces" -> "Create" to create a new namespace in Harvester. Give it a name like `kasm-autoscale`
#### Create Network
Go to "Virtual Machine Networks" -> "Create" to create a new VM network.
- Make sure you select the right namespace
- Give the network a name like `kasm-autoscale`
- Choose the Type as `Untagged Network`
- Choose the `mgmt` Cluster Network
#### Create VM template
Create the appropriate VM template based on whether you are implementing Server AutoScaling or Docker AutoScaling on Harvester.
* For Windows AutoScaling, follow the [Windows Templating Guide](#windows-templating)
* For Docker Agent AutoScaling, follow the [Linux Templating Guide](#linux-templating)
##### Linux Templating
Creating a Linux template in Harvester is pretty straightforward.
- Go to "Images" -> "Create"
- Choose the correct namespace that you created earlier.
- Choose a name for your image (e.g jammy-server-cloudimg-amd64.img). This name needs to be fed to Kasm later.
- Select "URL". You can also choose "File" if you want to upload an ISO file instead. You can either install your Linux distro (make sure you choose from the [supported list of operating systems](../../../../explanations/system-requirements.mdx#operating-system)) from scratch with an installation ISO or use a pre-configured ISO like a cloud image. In this demo, we'll use the later.
- Enter the URL from where you want Harvester to download the image (e.g https://cloud-images.ubuntu.com/jammy/current/jammy-server-cloudimg-amd64.img)
- Click "Create". This will download the VM to Harvester from the provided URL
- Optionally, you can pre-load workspace images on your autoscaled agent VMs so that workspaces launch instantly after provisioning, without waiting for Kasm to pull the necessary Docker images. Read the [Pre-load Workspace Images on Agents guide](../../preload-images-on-agents.mdx) to learn more
- You also need to install the QEMU Guest Agent tools on the agent. Read the section titled "Updated Startup Scripts" on [the Pools and Autoscale page](../../pools.mdx) for more information; in the provided script, the lines that run the qemu installation will need to be uncommented
##### Windows Templating
For an overview of Windows templating and its prerequisites, refer to the [Windows AutoScale Template Creation Guide](../windows-autoscale-templates.mdx).
Creating a Windows Template involves additional steps and is not as straightforward as Linux templating.
- Go to "Images" -> "Create"
- Choose the correct namespace that you created earlier.
- Choose a name for your image (e.g windows-server-2022)
- Choose "File" and click "Upload File" to upload the Windows ISO file. As an example, you can download Windows Server 2022 from [here](https://www.microsoft.com/en-us/evalcenter/download-windows-server-2022). You can also choose "URL" and input the URL from where the ISO file can be downloaded.
- Wait for the ISO file to be uploaded.
- Similarly, you also need to upload the VirtIO tools image. Go to "Images" -> "Create"
- Select "File" -> "Upload File" to upload the ISO file. You can download the VirtIO files from [here](https://fedorapeople.org/groups/virt/virtio-win/direct-downloads/archive-virtio/virtio-win-0.1.266-1/)
- Go to "Virtual Machines" -> "Create"
- Select the correct namespace
- Give a name for your VM (e.g windows-server-2022-kasm-autoscale)
- Set the number of cores and memory.
- Go to the "Volumes" tab and add the following volumes:
* **Volume 1**
* In the default volume, Set "Image" to the Windows ISO you uploaded earlier
* Set "Type" to `cd-rom`
* Set "Bus" to `SATA`
* **Volume 2**
* Click "Add a Virtual Machine Image"
* Set the "Image" to the VirtIO ISO you uploaded earlier
* Set "Type" to `cd-rom`
* Set "Bus" to `SATA`
* **Volume 3**
* Click "Add Volume"
* Set "Type" to `disk`
* Set "Storage Class" to `harvester-longhorn (Default)`
* Set Size to anything more than 40GB. This will be your Windows boot disk.
* Set "Bus" to `VirtIO`
- Go to "Networks"
- Change the default network like this,
* Name: You can let this be `default`
* Model: Set this to `virtio`
* Network: Set this to the network you created earlier
* Type: Set to `bridge`
- Once the VM is provisioned, open it in WebVNC
- You will now see the Windows Installation screen. Proceed with the Installation.
- By default, you may not be able to see the list of available disks to install Windows. To fix this, you need to install the VirtIO SCSI controller. Click "Load driver" and install the appropriate driver.
- The available disks must now be listed and you can choose the Windows boot disk you created to install Windows.
- Once Windows is installed, you need to install the other VirtIO drivers like the Network driver. Simply navigate to your VirtIO disk from your File Explorer and install the drivers by running the installer.
- You also need to install the QEMU Guest Agent tools. These can be found in the same VirtIO drive in the `guest-agent` folder.
- [Cloudbase-Init](https://cloudbase.it/cloudbase-init/#download) is also required so Kasm can run the startup script when the Windows VM is provisioned. Simply download the [installer](https://cloudbase.it/cloudbase-init/#download) and run it to install Cloudbase-init.
- You can now install the tools/software you'd like to have on your VM (e.g Microsoft Office)
- Finally, you need to enable RDP on your VM. This is required so that Kasm can utilize RDP to create Windows Sessions. Simply search for "Remote Desktop Settings" and enable Remote Desktop
- Shutdown the VM
- Edit the VM config, and go to "Volumes". Remove the attached Windows ISO and VirtIO ISO.
- Now, go back to "Virtual Machines" and generate a template from the created VM.
- Give your template a name (e.g windows-server-2022-kasm-template)
- Make sure you select "With Data" and click "Create"
- This will generate the template from your Windows VM.
For more details about Windows Templating, refer to the [Windows AutoScale Template Creation Guide](../windows-autoscale-templates.mdx)
### Configure VM Provider Details on Kasm
* Follow [AutoScale Settings for Agent Pool](../infrastructure-components/autoscale-config-docker-agent.mdx) or [AutoScale Settings for Server Pool](../infrastructure-components/autoscale-config-server.mdx) to create a new AutoScale config, or select **Create New** in **VM Provider Configs** if you already have one.
* Set Provider to Harvester
* Configure the following settings
| **Setting** | **Description** |
| --- | --- |
| Name | An identifying name for this provider configuration e.g. Harvester Docker Agent AutoScale Provider |
| Max Instances* | The maximum number of autoscale instances to be provisioned, regardless of other settings |
| Host | The address of the Harvester instance, from the KubeConfig file (e.g. https://harvester.example.com/k8s/clusters/local) |
| SSL Certificate | The Harvester certificate as a base64 encoded string, from the KubeConfig file |
| API Token | The API token for authentication to Harvester, from the KubeConfig file |
| VM Namespace | The name of the Harvester namespace where the VMs will be provisioned (e.g. kasm-autoscale) |
| VM SSH Public Key | A public key to add to the autoscale agents, this is then provided as `{ssh_key}` for use in the startup script |
| Cores | The number of CPU cores to configure for the autoscale agents |
| Memory | The amount of memory to assign to the autoscale agents. The admin console accepts Bytes/MiB/GiB and stores the value as bytes (`memory_bytes`). API integrations must submit the number of bytes. |
| Disk Image | The name of the Harvester image to use for autoscale agents. See Harvester Disk Image for more details. |
| Disk Size | The size of the disk to use for autoscale agents. The admin console accepts Bytes/MB/MiB/GB/GiB and stores the value as bytes (`disk_size_bytes`). API integrations must submit the number of bytes. |
| Network Type | The network type for the autoscale agents (pod or multus) |
| Interface Type | The interface type for the autoscale agents (masquerade or bridge) |
| Network Name | The name of the network to connect to the autoscale agents to, if the network is not in the default namespace this must be specified as namespace/name (e.g. kasm-autoscale/kasm-network) (multus network type only) |
| Startup Script | cloud-init, Bash, or Powershell script to run after agent creation, typically to install the Kasm Agent and/or any other runtime dependencies you may have. Example scripts can be found on our [GitHub repository.](https://github.com/kasmtech/workspaces-autoscale-startup-scripts) Make sure to use the correct script based on the target OS (bash/cloud-init for Linux and Powershell for Windows). |
| Configuration Override | A optional config override that contains a complete YAML manifest file used when provisioning the autoscale agents |
| Enable TPM | Enable TPM for the autoscale agents |
| Enable EFI Boot | Enable the EFI bootloader for the autoscale agents |
| Enable Secure Boot | Enable Secure Boot for the autoscale agents (required EFI Boot to be enabled) |
* Submit the Provider Config
#### Disk Image
It is important to correctly specify the disk image name so that Kasm can instruct Harvester to provision a VM based on that image.
- If you are not using a custom template and want to use a pre-configured Cloud image directly (typically for Linux VMs), go to "Images" and copy the image name listed under the correct namespace.
- If you are using a custom template (such as the Windows VM template we created earlier), you need to correctly identify the disk image associated with that template.
Go to "Advanced" -> "Templates" -> Select the template you want to use, then navigate go to the "Volumes" tab. Here, you can find the image name of the template (no need to include the namespace name). In the screenshot below, the correct disk image to input in Kasm is `templateversion-windows-server-2022-template-new-6l846-image-0`
### Test your Harvester Autoscaling setup
If you have configured non-zero Standby/Minimum Available Session values agents should start provisioning immediately. Otherwise, try launching multiple workspaces to increase resource utilization, prompting Kasm to autoscale new agents.
* Provision a Workspace
* Go to Workspaces > Registry
* Make multiple workspaces available
* Go to the Workspaces dashboard and launch sufficient workspace sessions to exceed your resource standby thresholds
* Monitor the provisioning of new agents by going to "Infrastructure" -> "Agents"
* Verify new VM instances in Harvester
* Check Downscaling
* Terminate sessions to reduce resource usage
* Confirm that Kasm removes agents after the back-off period
---
## Nutanix Autoscaling Configuration
## Nutanix AutoScale
This guide will walk you through configuring autoscaling for Kasm Workspaces on Nutanix. Autoscaling in Kasm Workspaces automatically provisions and destroys agents based on user demand, ensuring optimized resource utilization and cost efficiency.
### Overview
#### Prerequisites
* Access to Nutanix:
* Ensure you have admin access to your Nutanix environment
* Ensure you have a directory service or identity provider configured
* Ensure you have two users, one to administer the project and create VMs, one to access the Nutanix APIs.
* Kasm Workspaces Installed: A basic setup of Kasm Workspaces must already exist
* Understand Key Concepts:
* **Zones**: Logical groupings of Kasm services for geographical or organizational segmentation
* **Pools**: Logical groupings of Kasm Docker Agents and Server Pools for load balancing
* Plan Your Configuration:
* Understand your deployment zone requirements
* Have access to your Nutanix server details; target clusters, projects, storage, networks, etc.
* Create VMs in the project you have designated for your autoscale VMs
#### Setup your Nutanix environment
##### Create a new Nutanix Role
1. Log into your Nutanix Prism Central UI as an administrator.
2. Navigate to the **Admin Center** dashboard.
3. Select **IAM** -> **Roles** -> **Create Role** -> **New role**.
4. Enter a value for the **Role Name** field (e.g. kasm-role).
5. Add all the **operations** from the [list of required permissions](#required-permissions) corresponding to the Nutanix API version you plan to use, ensure that any related operations are also added.
6. Click **Save**.
##### Create a new Nutanix Project
1. Log into your Nutanix Prism Central UI as an administrator.
2. Navigate to the **Admin Center** dashboard.
3. Select **Projects** -> **Create Project**.
4. Enter a value for the **Project Name** field (e.g. kasm-autoscale).
5. Select **Add Users** -> **Add/Edit Users & Groups**.
6. Click **Add User**.
7. Enter the name of a valid user in the **Name** field. This user will administer the project, create Virtual Machine templates, upload images, etc.
8. From the **Role** drop-down menu, select the default **Project Admin** role.
9. Click **Add User**.
10. Enter the name of a valid user in the **Name** field. This user will be configured in the Kasm Provider to access the Nutanix APIs.
11. From the **Role** drop-down menu, select the new role created above (e.g. kasm-role).
12. Ensure **Allow Collaboration** is enabled.
13. Click **Save Users and Project**.
14. Select **Add Infrastructure** -> **Add Infrastructure**.
15. From the drop-down menu, select the **Infrastructure Endpoint** that will be used to provision Kasm autoscale resources.
16. Click **Configure Resources**.
17. From the drop-down menu, select the **Cluster**.
18. Click **Select VLANs**.
19. Click the checkbox next to the VLAN that will be used to provide network access for Kasm autoscale resources.
20. Click **Confirm and Select Default**.
21. Click **Confirm**.
22. Click **Save**.
### Configure VM Provider Details on Kasm
* Follow [AutoScale Settings for Agent Pool](../infrastructure-components/autoscale-config-docker-agent.mdx#autoscale-settings-for-agent-pool) or [AutoScale Settings for Server Pool](../infrastructure-components/autoscale-config-server.mdx#autoscale-settings-for-server-pool) to create a new AutoScale config, or select **Create New** in **VM Provider Configs** if you already have one.
* Set Provider to Nutanix
* Configure the following settings:
| **Setting** | **Description** |
| --- | --- |
| Name | An identifying name for this provider configuration e.g. Nutanix Docker Agent AutoScale Provider |
| Max Instances | The maximum number of autoscale instances to be provisioned, regardless of other settings |
| Host | The IP or FQDN of the Nutanix Prism Central server (e.g. 192.168.100.40 or nutanix.example.com) |
| Port | The listening port to the Nutanix Prism Central server. This is usually 9440 |
| Username | The name of the user that Kasm will use to access the Nutanix Prism Central server |
| Password | The Password of the user that Kasm will use to authenticate against the Nutanix Prism Central server |
| Verify SSL | Whether to validate SSL certificates. Set to False to enable self-signed certificates. Defaults to True |
| API Version | The API version used to communicate with Prism Central. v3 is recommended, v4 compatibility is currently in Preview |
| VM Candidate Name | The name of the VM used to clone new autoscaled VMs |
| VM Cores | The number of CPU cores to provision on the new autoscaled VMs |
| VM Memory | The amount of memory to provision on the new autoscaled VMs. The admin console accepts Bytes/MiB/GiB and stores the value as bytes (`memory_bytes`). API integrations must submit the number of bytes. |
| Startup Script | When VMs are provisioned, this script is executed and is responsible for installing and configuring the Kasm Agent for Docker Agent roles, or the Kasm Desktop Service for Windows VMs if desired. Bash scripts and cloud-config yaml formats are supported on a Linux host and Powershell scripts on Windows hosts Example scripts are available on our [GitHub repository](https://github.com/kasmtech/workspaces-autoscale-startup-scripts) |
* Submit the Provider Config.
Support for Nutanix API Version 4 is in Preview.
### Test your Nutanix Autoscaling setup
If you have configured non-zero Standby/Minimum Available Session values agents should start provisioning immediately. Otherwise, try launching multiple workspaces to increase resource utilization, prompting Kasm to autoscale new agents.
* Provision a Workspace
* Go to Workspaces > Registry
* Make multiple workspaces available
* Go to the Workspaces dashboard and launch sufficient workspace sessions to exceed your resource standby thresholds
* Monitor the provisioning of new agents by going to "Infrastructure" -> "Agents"
* Verify new VM instances in Nutanix
* Check Downscaling
* Terminate sessions to reduce resource usage
* Confirm that Kasm removes agents after the back-off period
### How to create an Ubuntu 24LTS VM
#### Create Nutanix Ubuntu installation image
1. Log into your Nutanix Prism Central UI as an administrator.
2. Navigate to the **Infrastructure Center** dashboard.
3. Select **Images** -> **Add Image**.
4. From the **Image Source** options list, select the **URL** option.
5. Enter the URL for a valid Ubuntu24 LTS ISO in the **Image URL** field (e.g. [ref](https://releases.ubuntu.com/24.04.2/ubuntu-24.04.2-live-server-amd64.iso)).
6. Click **Add URL**.
7. Enter the name for the ISO in the **Name** field (e.g. kasm-ubuntu-iso).
8. Ensure that **ISO** is selected from the **Type** drop-down menu.
9. Click **Next**.
10. Click **Save**.
11. Wait for the upload to complete.
#### Create Nutanix Ubuntu VM
1. Log into your Nutanix Prism Central UI as an administrator.
2. Navigate to the **Infrastructure Center** dashboard.
3. Select **VMs** -> **Create VM**.
4. Enter a value for the **Name** field (e.g. kasm-ubuntu-template).
5. From the **Project** drop-down menu, select the Nutanix Project that was just created (e.g. kasm-autoscale).
6. From the **Cluster** drop-down menu, select the Nutanix Cluster that will be used to provision Kasm autoscale resources.
7. In the **Cores Per CPU** section, enter the number of cores to provision for this VM (e.g. 4).
8. In the **Memory** section, enter the amount of memory to provision for this VM (e.g. 4).
9. Click **Next**.
10. Click **Attach Disk**.
11. Ensure that **Disk** is selected from the **Type** drop-down menu.
12. Ensure that **Allocate from Storage Container** is selected from the **Operation** drop-down menu.
13. From the **Storage Container** drop-down menu, select the Nutanix Storage Container to use when provisioning this VM.
14. In the **Capacity** section, enter the amount of storage to provision for this VM (e.g. 150).
15. Ensure that **SCSI** is selected from the **Bus Type** drop-down menu.
16. Click **Save**.
17. Click **Attach Disk**.
18. Ensure that **CD-ROM** is selected from the **Type** drop-down menu.
19. Ensure that **Clone from Image** is selected from the **Operation** drop-down menu.
20. From the **Image** drop-down, select the Ubuntu installation image you uploaded previously.
21. Ensure that **SATA** is selected from the **Bus Type** drop-down menu.
22. Click **Save**.
23. Click **Attach to Subnet**.
24. From the **subnet** drop-down, select the Nutanix Subnet to use when provisioning this VM.
25. Ensure that **Connected** is selected from the **Network Connection State** drop-down menu.
26. Click **Save**.
27. Click **Next**.
28. Click **Next**.
29. Click **Create VM**.
30. From the list of VMs, right-click the newly created VM, select **Power Operations** and then select **Power On**.
31. Install the OS.
32. From the list of VMs, right-click the newly created VM, select **Update**.
33. Click **Next**.
34. In the list of **Disks**, click the **delete** icon next to the CD-ROM containing the installation ISO image.
35. Click **Save**.
36. SSH into the newly created VM with the credentials created during OS installation.
37. Run the following cleanup commands to prepare this VM as a reusable template:
```bash
sudo truncate -s 0 /etc/machine-id
sudo truncate -s 0 /var/lib/dbus/machine-id
sudo cloud-init clean --logs
```
38. Shutdown your VM
```
sudo shutdown -P now
```
### How to create a Windows 2025 Server VM
#### Create Nutanix Windows installation image
1. Log into your Nutanix Prism Central UI as an administrator.
2. Navigate to the **Infrastructure Center** dashboard.
3. Select **Images** -> **Add Image**.
4. Click **Add File**.
5. Select a valid Windows 2025 Server ISO from the **File Upload** window.
6. Click **Open**.
7. Enter the name for the ISO in the **Name** field (e.g. kasm-windows-iso).
8. Ensure that **ISO** is selected from the **Type** drop-down menu.
9. Click **Next**.
10. Click **Save**.
11. Wait for the upload to complete.
#### Create Nutanix VirtIO driver image
1. Log into your Nutanix Prism Central UI as an administrator.
2. Navigate to the **Infrastructure Center** dashboard.
3. Select **Images** -> **Add Image**.
4. From the **Image Source** options list, select the **URL** option.
5. Enter the URL for a valid VirtIO Driver ISO in the **Image URL** field (e.g. [ref](https://fedorapeople.org/groups/virt/virtio-win/direct-downloads/stable)).
6. Click **Add URL**.
7. Ensure that **ISO** is selected from the **Type** drop-down menu.
8. Click **Next**.
9. Click **Save**.
10. Wait for the upload to complete.
#### Create Nutanix Windows VM
1. Log into your Nutanix Prism Central UI as an administrator.
2. Navigate to the **Infrastructure Center** dashboard.
3. Select **VMs** -> **Create VM**.
4. Enter a value for the **Name** field (e.g. kasm-windows-template).
5. From the **Project** drop-down menu, select the Nutanix Project that was just created (e.g. kasm-autoscale).
6. From the **Cluster** drop-down menu, select the Nutanix Cluster that will be used to provision Kasm autoscale resources.
7. In the **Cores Per CPU** section, enter the number of cores to provision for this VM (e.g. 4).
8. In the **Memory** section, enter the amount of memory to provision for this VM (e.g. 4).
9. Click **Next**.
10. Click **Attach Disk**.
11. Ensure that **Disk** is selected from the **Type** drop-down menu.
12. Ensure that **Allocate from Storage Container** is selected from the **Operation** drop-down menu.
13. From the **Storage Container** drop-down menu, select the Nutanix Storage Container to use when provisioning this VM.
14. In the **Capacity** section, enter the amount of storage to provision for this VM (e.g. 150).
15. Ensure that **SCSI** is selected from the **Bus Type** drop-down menu.
16. Click **Save**.
17. Click **Attach Disk**.
18. Ensure that **CD-ROM** is selected from the **Type** drop-down menu.
19. Ensure that **Clone from Image** is selected from the **Operation** drop-down menu.
20. From the **Image** drop-down, select the Windows installation image you uploaded previously.
21. Ensure that **SATA** is selected from the **Bus Type** drop-down menu.
22. Click **Save**.
23. Click **Attach Disk**.
24. Ensure that **CD-ROM** is selected from the **Type** drop-down menu.
25. Ensure that **Clone from Image** is selected from the **Operation** drop-down menu.
26. From the **Image** drop-down, select the VirtIO driver image you uploaded previously.
27. Ensure that **SATA** is selected from the **Bus Type** drop-down menu.
28. Click **Save**.
29. Click **Attach to Subnet**.
30. From the **subnet** drop-down, select the Nutanix Subnet to use when provisioning this VM.
31. Ensure that **Connected** is selected from the **Network Connection State** drop-down menu.
32. Click **Save**.
33. Ensure that **Secure Boot** is enabled.
34. Ensure that **Attach vTPM** is enabled.
35. Click **Next**.
36. Click **Next**.
37. Click **Create VM**.
38. From the list of VMs, right-click the newly created VM, select **Power Operations** and then select **Power On**.
39. From the list of VMs, right-click the newly created VM, select **Launch Console**.
40. Click a button to **Press any key to boot from CD or DVD**.
41. Click **Next**.
42. Click **Next**.
43. Click the checkbox that starts with **I agree**.
44. Click **Next**.
45. Select **Window Server 2025 Standard Evaluation (Desktop Experience)**.
46. Click **Next**.
47. Click **Accept** to agree to the Applicable notices and license terms.
48. Click **Load Driver**.
49. Click **Browse**.
50. Expand the CD Drive containing the VirtIO drivers.
51. Navigate to the **vioscsi/2k25/amd64** folder.
52. Click **Ok**.
53. Select **Red Hat VirtIO SCSI pass-through controller**.
54. Click **Install**.
55. Click **Next**.
56. Click **Install**.
57. Enter a valid password for the built-in Administrator.
58. Confirm the password.
59. Click **Finish**.
60. Click the Ctrl-Alt-Del icon in the console menu to **send Ctrl-Alt-Del**.
61. Enter the Administrator password.
62. Click **Accept**.
63. Launch **File Explorer**.
64. Navigate to the CD Drive containing the VirtIO drivers.
65. Launch the **virtio-win-gt-x64** installer.
66. Click **Next**.
67. Click the checkbox starting with **I accept**.
68. Click **Next**.
69. Click **Next**.
70. Click **Install**.
71. Click **Finish**.
72. Download a valid Windows Cloudinit installer ([ref](https://cloudbase.it/cloudbase-init/)).
73. Launch the installer.
74. Click **Next**.
75. Click the checkbox starting with **I accept**.
76. Click **Next**.
77. Click **Next**.
78. Ensure that **Run Cloudbase-init service as LocalSystem** is enabled.
79. Click **Next**.
80. Click **Install**
81. Allow any Windows User Account Control pop-ups that request changes to the system.
82. Click **Finish**.
83. Select **Local Server** from the **Server Manager**.
84. Click on the **Disabled** link next to **Remote Desktop**.
85. Click **Allow remote connections to this computer**.
86. Click **Ok**.
87. Click **Ok**.
88. Open the Start Menu
89. Enter the value **powershell** into the search field.
90. Click **Run as administrator** from the **Windows PowerShell** application menu.
91. Execute the following command in the PowerShell console:
```powershell
Set-ExecutionPolicy Unrestricted
```
92. Shut down Windows.
93. From the list of VMs, right-click the newly created VM, select **Update**.
94. Click **Next**.
95. In the list of **Disks**, click the **delete** icon next to the **CD-ROM** containing the Windows installation image.
96. In the list of **Disks**, click the **delete** icon next to the **CD-ROM** containing the VirtIO driver image.
97. Click **Save**.
### Required Permissions
#### API v3
* AHV VM
* Clone Virtual Machine
* Delete Virtual Machine
* Update Virtual Machine Categories
* Update Virtual Machine Power State
* View Virtual Machine
* Category
* Create Or Update Name Category
* Create Or Update Value Category
* Delete Name Category
* Delete Value Category
* View Name Category
* View Value Category
* Cluster
* View Cluster
* Image
* View Image
* Marketplace Item
* View Marketplace Item
* Project
* View Project
* Subnet
* View Subnet
* VPC
* View VPC
#### API v4
* AHV VM
* Associate Virtual Machine Categories
* Clone Existing Virtual Machine
* Delete Existing Virtual Machine
* Power On Virtual Machine
* View Existing Virtual Machine
* View Virtual Machine Disk
* Category
* Create Category
* Delete Category
* View Category
* Cluster
* View Cluster
* Image
* View Image
* Marketplace Item
* View Marketplace Item
* Project
* View Project
* Subnet
* View Subnet
* Storage Container
* View Storage Container
* Volume Group
* Attach Volume Group To AHV VM
* Detach Volume Group From AHV VM
* VPC
* View VPC
---
## Oracle Cloud (OCI) AutoScale
This guide will walk you through configuring autoscaling for Kasm Workspaces on Oracle Cloud. Autoscaling in Kasm Workspaces automatically provisions and destroys agents based on user demand, ensuring optimized resource utilization and cost efficiency.
### Overview
#### Prerequisites
* Access to Oracle Cloud (OCI): Ensure you have the appropriate access to your Oracle environment
* Kasm Workspaces Installed: A basic setup of Kasm Workspaces must already exist
* Understand Key Concepts:
* **Zones**: Logical groupings of Kasm services for geographical or organizational segmentation
* **Pools**: Logical groupings of Kasm Docker Agents and Server Pools for load balancing
* Plan Your Configuration:
* Understand your deployment zone requirements
* Configure your OCI environment
#### Setup your Oracle Cloud Environment
- **Create an API Key on OCI**: You need to create an API key so that Kasm can use it to talk to OCI on your behalf.
* Generate a key pair with OpenSSL
```
# create a directory for storing your key pair
mkdir -p ~/.oci
# create private key
openssl genrsa -out ~/.oci/oci_api_key.pem 2048
# create public key
openssl rsa -pubout -in ~/.oci/oci_api_key.pem -out ~/.oci/oci_api_key_public.pem
```
* Copy your public key
* Go to your OCI dashboard -> Click on your Profile -> "User Settings" -> "My Profile" -> "Tokens and Keys" -> "Add API Key"
* Select "Paste a public key" and paste your public key here and click "Add"
* This will generate the "Public Key Fingerprint". Make a note of it as this value needs to be fed into Kasm later.
### Configure your Oracle Cloud details on Kasm
* Follow [AutoScale Settings for Agent Pool](../infrastructure-components/autoscale-config-docker-agent.mdx#autoscale-settings-for-agent-pool) or [AutoScale Settings for Server Pool](../infrastructure-components/autoscale-config-server.mdx#autoscale-settings-for-server-pool) to create a new AutoScale config, or select **Create New** in **VM Provider Configs** if you already have one.
* Set Provider to Oracle Cloud
* Configure the following settings:
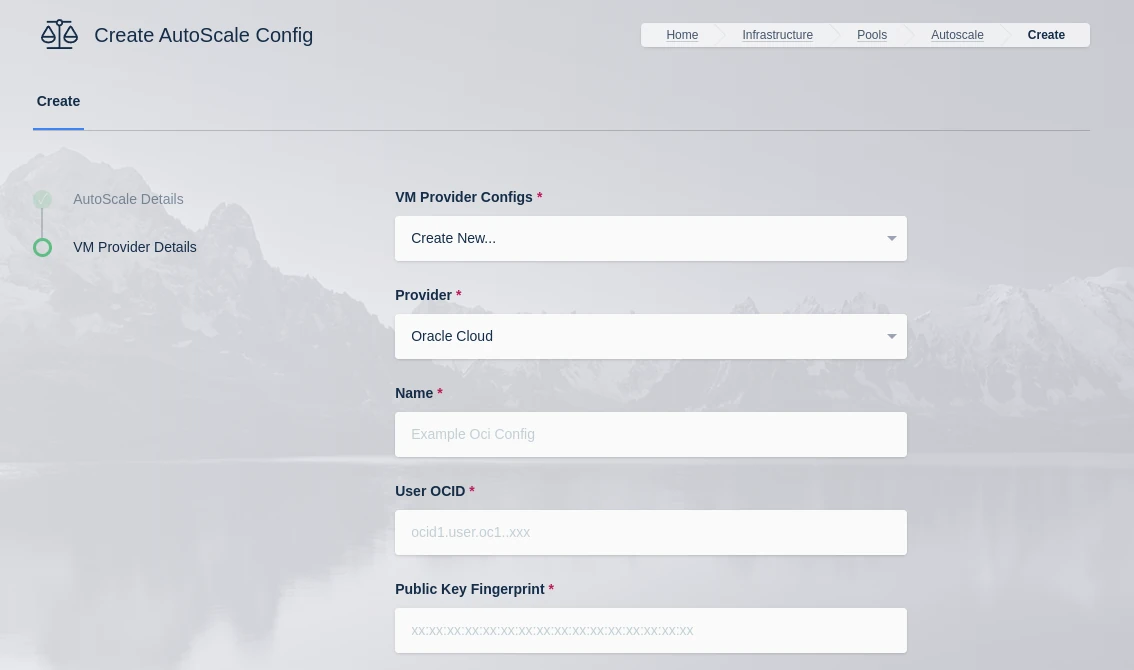
| Name | Description |
| --- | --- |
| **Name** | A name to use to identify the config. |
| **User OCID** | The OCID of the user to authenticate with the OCI API. (e.g ocid1.user.oc1..xyz). You can find this by going to your OCI dashboard -> Click on your Profile -> You can find your user OCID here. |
| **Public Key Fingerprint** | The public key fingerprint of the authenticated API user created in OCI. (e.g xx:yy:zz:11:22:33) |
| **Private Key** | The private key (PEM format) of the authenticated API user created in OCI. |
| **Region** | The OCI Region name. (e.g us-ashburn-1). See [Regions](https://docs.oracle.com/en-us/iaas/Content/General/Concepts/regions.htm) for the list |
| **Tenancy OCID** | The Tenancy OCID for the OCI account. (e.g ocid1.tenancy.oc1..xyz) |
| **Compartment OCID** | The Compartment OCID where the auto-scaled agents will be placed. (e.g ocid1.compartment.oc1..xyx) |
| **Network Security Group OCIDs** **(JSON)** | A JSON list of Security Group OCIDs that will be assigned to the auto-scaled agents. (e.g `["ocid1.networksecuritygroup.oc1.iad.xxx","ocid1.networksecuritygroup.oc1.iad.yyy"]`). To create or find existing Network Security Groups, go to your OCI dashboard -> "Network Security Groups". See [Network Security Groups](https://docs.oracle.com/en-us/iaas/Content/Network/Concepts/networksecuritygroups.htm) for more details |
| **Max Instances** | The maximum number of OCI compute instances to provision regardless of the need for available free slots. |
| **Availability Domains (JSON)** | A JSON list of availability domains where the OCI compute instances may be placed. (e.g `["BEol:US-ASHBURN-AD-1", "BEol:US-ASHBURN-AD-2"]`). See [Availability Domains](https://docs.oracle.com/en-us/iaas/Content/General/Concepts/regions.htm) for more details |
| **Image OCID** | The OCID of the Image to use when creating the compute instances. (e.g ocid1.image.oc1.iad.xyz) See [OCI Image Families](https://docs.oracle.com/en-us/iaas/img/) for the list |
| **Shape** | The name of the shape used for the created compute instances. (e.g VM.Standard.E4.Flex) See [OCI Compute Shapes](https://docs.oracle.com/en-us/iaas/Content/Compute/References/computeshapes.htm) for the list |
| **Flex CPUs** | The number of OCPUs to assign the compute instance. This is only applicable when a Flex shape is used. |
| **Burstable Base CPU** **Utilization** | The baseline percentage of a CPU Core that can be use continuously on a burstable instance (Select 100% to use a non-burstable instance). [Reference](https://docs.oracle.com/en-us/iaas/Content/Compute/References/burstable-instances.htm). |
| **Flex Memory** | The amount of memory to assign the compute instance. This is only applicable when a Flex shape is used. The admin console accepts Bytes/MiB/GiB and stores the value as bytes (`oci_flex_memory_bytes`). API integrations must submit the number of bytes in whole GiB (2^30) increments. |
| **Boot Volume Size** | The size of the boot volume to assign the compute instance. The admin console accepts Bytes/GB and stores the value as bytes (`oci_boot_volume_bytes`). API integrations must submit the number of bytes in whole GB (10^9) increments. |
| **Boot Volume VPUs Per GB** | The Volume Performance Units (VPUs) to assign to the boot volume. Values between 10 and 120 in mulitples of 10 are acceptable. 10 is the default and represents the `Balanced` profile. The higher the VPUs, the higher the volume performance and cost. [Reference](https://docs.oracle.com/en-us/iaas/Content/Block/Concepts/blockvolumeperformance.htm#Block_Volume_Performance). |
| **Custom Tags (JSON)** | A Json dictionary of custom freeform tags to assigned the auto-scaled instances. e.g `{"foo":"bar", "bin":"baz"}` |
| **Subnet OCID** | The OCID of the Subnet where the auto-scaled instances will be placed. (e.g ocid1.subnet.oc1.iad.xyz) To create or find existing subnets, go to your OCI dashboard -> "Networking" -> "Virtual Cloud Networks" -> "Subnets" |
| **SSH Public Key** | The SSH public key to insert into the compute instances if you want to SSH into your instances. (e.g ssh-rsa XYABC) |
| **Startup Script** | When instances are provisioned, this script is executed and is responsible for installing and configuring the Kasm Agent. Example scripts can be found on our [GitHub repository](https://github.com/kasmtech/workspaces-autoscale-startup-scripts) |
| **OCI Config Override** | A JSON dictionary that can be used to customize attributes of the VM request. An OCI Model can be specified with the "OCI_MODEL_NAME" key. Reference: [OCI Python Docs](https://docs.oracle.com/en-us/iaas/api/#/en/iaas/20160918/Instance/LaunchInstance) and [Kasm Examples](#oci-config-override-examples). |
* Submit the Provider Config
#### OCI Config Override Examples
Below are some OCI autoscale configurations that utilize the OCI Config Override.
Disables instance metadata service v2 for additional security.
```json
{
"launch_instance_details": {
"instance_options": {
"OCI_MODEL_NAME": "InstanceOptions",
"are_legacy_imds_endpoints_disabled": true
}
}
}
```
A list of available plugins can be retrieved by navigating to an existing instance's "Oracle Cloud Agent" config page.
This example enables the "Vulnerability Scanning" plugin.
```json
{
"launch_instance_details": {
"agent_config": {
"OCI_MODEL_NAME": "LaunchInstanceAgentConfigDetails",
"is_monitoring_disabled": false,
"is_management_disabled": false,
"are_all_plugins_disabled": false,
"plugins_config": [{
"OCI_MODEL_NAME": "InstanceAgentPluginConfigDetails",
"name": "Vulnerability Scanning",
"desired_state": "ENABLED"
}]
}
}
}
```
### Test your Oracle Cloud Autoscaling setup
If you have configured non-zero Standby/Minimum Available Session values agents should start provisioning immediately. Otherwise, try launching multiple workspaces to increase resource utilization, prompting Kasm to autoscale new agents.
* Provision a Workspace
* Go to Workspaces > Registry
* Make multiple workspaces available
* Go to the Workspaces dashboard and launch sufficient workspace sessions to exceed your resource standby thresholds
* Monitor the provisioning of new agents by going to "Infrastructure" -> "Agents"
* Verify new VM instances in OCI
* Check Downscaling
* Terminate sessions to reduce resource usage
* Confirm that Kasm removes agents after the back-off period
---
## Kasm AutoScale Providers: AWS, Azure, GCP, VMware & More
### Provider Specific Settings
Kasm supports AutoScaling on a variety of providers. Each provider has unique configurations that must be set up correctly for optimal performance. Select your provider to learn more:
- [AWS](../vm-providers.mdx#aws-settings)
- [Azure](../vm-providers.mdx#azure-settings)
- [Digital Ocean](digitalocean.mdx)
- [GCP](gcp.mdx)
- [Harvester](harvester.mdx)
- [KubeVirt](../vm-providers.mdx#kubevirt-enabled-providers)
- [Nutanix](nutanix.mdx)
- [OpenStack](../vm-providers.mdx#openstack-settings)
- [Oracle Cloud (OCI)](oci.mdx)
- [Proxmox](proxmox.mdx)
- [VMWare vSphere](vmware.mdx)
---
## Proxmox Autoscale Configuration
## Proxmox AutoScale
This guide will walk you through configuring autoscaling for Kasm Workspaces on Proxmox. Autoscaling in Kasm Workspaces automatically provisions and destroys agents based on user demand, ensuring optimized resource utilization and cost efficiency.
### Prerequisites
* Access to Proxmox: Ensure you have admin access to your Proxmox environment
* Kasm Workspaces Installed: A basic setup of Kasm Workspaces must already exist
* Understand Key Concepts:
* **Zones**: Logical groupings of Kasm services for geographical or organizational segmentation
* **Pools**: Logical groupings of Kasm Docker Agents and Server Pools for load balancing
* Plan Your Configuration:
* Understand your deployment zone requirements
* Have access to your Proxmox server details; target clusters, resource pool, storage, networks, etc.
* Create template images in the resource pool you have designated for your autoscale agents, must include the qemu guest tools
### Setup your Proxmox environment
#### Create Proxmox Pool
In your Proxmox dashboard, go to "Permissions" -> "Pools" -> "Create" to create a new `kasm-autoscale` pool.
#### Create Proxmox user
Go to "Permissions" -> "Users" -> "Add" to create a new user. You don't have to create a new account for autoscaling but we strongly recommend it.
#### Create API Token
Go to "Permissions" -> "API Tokens" -> "Add" to create a new Proxmox API token to use with Kasm. If you're using an existing Proxmox account, we recommend you leave "Privilege Separation" enabled. If you're using a dedicated Proxmox account, you can disable "Privilege Separation". Make sure you save your generated Token ID and Secret securely as you cannot see them again.
#### Create Role
To create a Role, go to "Permissions" -> "Roles" -> "Create". You need the following privileges for Kasm autoscaling to function properly.
Proxmox v8:
* Datastore.AllocateSpace
* Pool.Audit
* SDN.Use
* VM.Allocate
* VM.Audit
* VM.Clone
* VM.Config.CDROM
* VM.Config.CPU
* VM.Config.Disk
* VM.Config.HWType
* VM.Config.Memory
* VM.Config.Network
* VM.Config.Options
* VM.Monitor
* VM.PowerMgmt
Proxmox v9:
* Datastore.AllocateSpace
* Pool.Audit
* SDN.Use
* VM.Allocate
* VM.Audit
* VM.Clone
* VM.Config.CDROM
* VM.Config.CPU
* VM.Config.Disk
* VM.Config.HWType
* VM.Config.Memory
* VM.Config.Network
* VM.Config.Options
* VM.GuestAgent.Unrestricted
* VM.PowerMgmt
#### Assign Permissions
Finally, assign appropriate permissions to your user by going to "Permissions" -> "Add" -> "User Permission". Select the appropriate user and role, and assign the following permissions
* /sdn/zones/\
* /storage/\
* /pool/KasmPool
If you are using an existing account and have privilege separation enabled, you need to set these permissions from "Permissions" -> "Add" -> "API Token Permission"
#### Create a VM template
Create the appropriate VM template based on whether you are implementing Server AutoScaling or Docker AutoScaling on Proxmox.
* For Windows AutoScaling, follow the [Windows Templating Guide](../windows-autoscale-templates.mdx)
* For Docker Agent AutoScaling, follow the [Linux Templating Guide](#linux-templating)
##### Linux Templating
- Go to your cluster -> local storage (e.g local (pve)) -> "Upload"
- Upload your Linux installation ISO file (you can download Ubuntu Server from [here](https://ubuntu.com/download/server)). If you prefer a different distro, ensure it's a [supported operating system](../../../../explanations/system-requirements.mdx#operating-system). Alternatively, If you have a pre-built or pre-configured linux template (like a cloud image), you can use that instead of installing the OS from scratch.
- Click "Create VM" from the top right corner
* General Settings
* Name: Give your template a name (e.g `ubuntu-server-template`)
* Resource Pool: Set it to the resource pool you created earlier
* Click "Next"
* OS Settings
* Select `Use CD/DVD disc image file (iso)`
* Storage: Select your local storage to which you uploaded your ISO file
* ISO Image: Select the Linux ISO image you uploaded
* Guest OS Type: Set to Linux
* Click "Next"
* System Settings
* Machine: Select `q35`
* SCSI controller: Select `VirtIO SCSI single`
* Enable `Qemu Agent`
* Click "Next"
* Disk Settings
* Bus/Device: Select `VirtIO Block`
* Disk Size: Choose the amount of size you want to allocate to your VM (e.g 45GB)
* Click "Next"
* CPU Settings
* Cores: Set to the number of cores you want to allocate to your VM (e.g 4)
* Type: Select `host`
* Click "Next"
* Memory Settings
* Memory: Set to the amount of memory you want to allocate to your VM in MiB (e.g 4096)
* Click "Next"
* Network Settings
* Model: Select `VirtIO (paravirtualized)`
* Click "Next"
* Confirm your settings and click "Finish"
- Right-click your created VM and select "Start". Then double-click to open the noVNC window.
- Follow the on-screen instructions to install Ubuntu Server
- Select "Install OpenSSH server" to be able to SSH into your autoscaled agents.
- Once the installation is finished, click "Reboot Now"
- Go back to your VM settings on Proxmox -> "Hardware" -> Double-click the `CD/DVD Drive` and select "Do not use any media" to remove the Linux installation media.
- You can now SSH into your VM with your credentials instead of using noVNC for ease-of-access
- Install and enable `qemu-guest-agent` on your VM
```bash
sudo apt update
sudo apt install qemu-guest-agent -y
sudo systemctl start qemu-guest-agent
sudo systemctl enable qemu-guest-agent
sudo reboot
```
- Reset your Machine IDs to make your VM suitable for templating
```bash
sudo truncate -s 0 /etc/machine-id
sudo truncate -s 0 /var/lib/dbus/machine-id
```
- Optionally, you can pre-load workspace images on your autoscaled agent VMs so that workspaces launch instantly after provisioning, without waiting for Kasm to pull the necessary Docker images. Read the [Pre-load Workspace Images on Agents guide](../../preload-images-on-agents.mdx) to learn more
- Shutdown your VM
- Once the VM is powered off, right-click and select "Convert to template"
##### Windows Templating
For an overview of Windows templating and its prerequisites, refer to the [Windows AutoScale Template Creation Guide](../windows-autoscale-templates.mdx).
- Go to your cluster -> local storage (e.g local (pve)) -> "Upload"
- Upload your Windows installation ISO file (you can download Windows Server 2022 from [here](https://www.microsoft.com/en-us/evalcenter/download-windows-server-2022))
- Also upload the VirtIO drivers ISO file (you can download VirtIO tools from [here](https://fedorapeople.org/groups/virt/virtio-win/direct-downloads/archive-virtio/virtio-win-0.1.266-1/))
- Click "Create VM" from the top right corner
* General Settings
* Name: Give your template a name (e.g `windows-server-2022-template`)
* Resource Pool: Set it to the resource pool you created earlier
* Click "Next"
* OS Settings
* Select `Use CD/DVD disc image file (iso)`
* Storage: Select your local storage to which you uploaded your ISO file
* ISO Image: Select the Windows Server ISO image you uploaded
* Guest OS Type: Set to `Microsoft Windows`
* Select `Add additional drive for VirtIO drivers`
* ISO Image: Select the VirtIO ISO image you uploaded
* Click "Next"
* System Settings
* Machine: Select `q35`
* SCSI controller: Select `VirtIO SCSI single`
* Enable `Qemu Agent`
* Disable `Add EFI Disk`
* Disable `Add TPM`
* Click "Next"
* Disk Settings
* Bus/Device: Select `SCSI`
* Cache: Select `Write back`
* Disk Size: Choose the amount of size you want to allocate to your VM (e.g 45GB)
* Click "Next"
* CPU Settings
* Cores: Set to the number of cores you want to allocate to your VM (e.g 4)
* Type: Select `host`
* Click "Next"
* Memory Settings
* Memory: Set to the amount of memory you want to allocate to your VM in MiB (e.g 4096)
* Click "Next"
* Network Settings
* Model: Select `VirtIO (paravirtualized)`
* Click "Next"
* Confirm your settings and click "Finish"
- Right-click your created VM and select "Start". Then, double-click to open the noVNC window.
- Press any key to boot from the attached Windows Installation media
- You will now see the Windows Installation screen. Proceed with the Installation.
- By default, you may not be able to see the list of available disks to install Windows. To fix this, you need to install the VirtIO SCSI controller. Click "Load driver" to list all the compatible VirtIO SCSI controllers and install the appropriate driver.
- The available disks must now be listed and you can choose the Windows boot disk you created to install Windows.
- Once Windows is installed, you need to install the other VirtIO drivers like the Network driver. Simply navigate to your VirtIO disk from your File Explorer and install the drivers by running the installer.
- You also need to install the QEMU Guest Agent tools. These can be found in the same VirtIO drive in the `guest-agent` folder.
- Reboot your VM
- Open a PowerShell window as administrator and set the `ExecutionPolicy` to `Unrestricted` so that Kasm can run the startup script when a VM is provisioned
```powershell
Set-ExecutionPolicy Unrestricted
```
- Search for "Remote Desktop Settings" and enable "Remote Desktop" on your VM
- Now, you can install any custom software that you'd like to have on your VM (e.g Microsoft Office)
- Shutdown your VM
- Once the VM is powered off, right-click on it and select "Convert to template"
- Go to your created template -> "Hardware" -> Remove the attached Windows ISO and VirtIO ISO disks
### Configure VM Provider Details on Kasm
* Follow [Autoscale Config (Docker)](../infrastructure-components/autoscale-config-docker-agent.mdx)
or [Autoscale Config (Server)](../infrastructure-components/autoscale-config-server.mdx) to create a new AutoScale config, or select **Create New** in **VM Provider Configs** if you already have one.
* Set Provider to Proxmox
* Configure the following settings:
| **Setting** | **Description** |
| --- | --- |
| Name | An identifying name for this provider configuration e.g. Proxmox Docker Agent AutoScale Provider |
| Max Instances | The maximum number of autoscale instances to be provisioned, regardless of other settings |
| Host | The hostname or IP and port of your Proxmox instance (e.g. 192.168.100.40:8006) |
| Username | The name of the autoscale user in Proxmox, including the auth realm (e.g. KasmUser@pve) |
| Token Name | The name of the API token associated with the user (e.g. kasm_token and not KasmUser@pve!kasm_token) |
| Token Value | The secret value of the API token associated with the user |
| Verify SSL | Whether or not to verify the SSL certs in the Proxmox environment. Disable if you are using self-signed certs |
| VMID Range Lower | The start of the VMID range for Kasm to use for autoscale agents. Must not overlap with any other Proxmox autoscale providers configured in Kasm |
| VMID Range Upper | The end of the VMID range for Kasm to use for autoscale agents. Must not overlap with any other Proxmox autoscale providers configured in Kasm |
| Full Clone | If enabled performs a full clone rather than a linked clone. A linked clone is faster to provision but will have reduced performance compared to a full clone |
| Template Name | The name of the VM template to use when cloning new autoscale agents |
| Cluster Node Name | The name of the Proxmox node containing the VM template |
| Resource Pool Name | Specify the resource pool to use for cloning the new autoscale agents |
| Storage Pool Name | Optionally specify a storage pool to use for cloning the new autoscale agents. This requires Full Clone to be enabled |
| Target Node Name | Optionally specify a cluster node to provision new autoscale agents on (defaults to the Cluster Node Name) |
| VM Cores | The number of CPU cores to configure for the autoscale agents |
| VM Memory | The amount of memory for the autoscale agents. The admin console accepts Bytes/MiB/GiB and stores the value as bytes (`memory_bytes`). API integrations must submit the number of bytes. |
| Installed OS Type | Linux or Windows |
| Startup Script Path | The absolute path to where the startup script will be uploaded and run from, typically `/tmp` for Linux or `C:\windows\temp` for Windows. The path must exist on the template. |
| Startup Script | Bash (Linux) or Powershell (Windows) startup script to run after agent creation, typically to install the Kasm Agent and/or any other runtime dependencies. Example scripts are available on our [GitHub repository](https://github.com/kasmtech/workspaces-autoscale-startup-scripts) |
* Submit the Provider Config
### Test your Proxmox Autoscaling setup
If you have configured non-zero Standby/Minimum Available Session values agents should start provisioning immediately. Otherwise, try launching multiple workspaces to increase resource utilization, prompting Kasm to autoscale new agents.
* Provision a Workspace
* Go to Workspaces > Registry
* Make multiple workspaces available
* Go to the Workspaces dashboard and launch sufficient workspace sessions to exceed your resource standby thresholds
* Monitor the provisioning of new agents by going to "Infrastructure" -> "Agents"
* Verify new VM instances in Proxmox
* Check Downscaling
* Terminate sessions to reduce resource usage
* Confirm that Kasm removes agents after the back-off period
---
## VMware vSphere Autoscaling Configuration
## VMware vSphere AutoScale
**Table of Contents**
This guide will walk you through configuring autoscaling for Kasm Workspaces on VMware vSphere. Autoscaling in Kasm Workspaces automatically provisions and destroys agents based on user demand, ensuring optimized resource utilization and cost efficiency.
### Prerequisites
* Access to VCenter: Ensure you have admin access to your VCenter environment
* Kasm Workspaces Installed: A basic setup of Kasm Workspaces must already exist
* Understand Key Concepts:
* **Zones**: Logical groupings of Kasm services for geographical or organizational segmentation
* **Pools**: Logical groupings of Kasm Docker Agents and Server Pools for load balancing
* Plan Your Configuration:
* Understand your deployment zone requirements
* Have access to your Vcenter server details; target clusters, datastores, networks, etc.
* Create template images for AutoScale to use
### Set up your vSphere environment
#### Create an account
We recommend creating a dedicated VCenter user for use with Kasm AutoScale.
* Go to "Administration" -> "Single Sign On" -> "Users and Groups"
* Choose the correct domain (e.g vsphere.local)
* Click "Add"
* Choose a username for your Kasm autoscale account (e.g kasm-autoscale)
* Choose a password for your account
* Click "Add" to create the account
#### Create a Kasm AutoScale role
* Go to "Administration" -> "Access Control" -> "Roles"
* Click "New"
* Name your autoscale role (e.g "Kasm Autoscale")
* Assign these necessary permissions to your role
* **Datastore**
* Allocate space
* Browse datastore
* **Global**
* Cancel task
* **Network**
* Assign network
* **Resource**
* Assign virtual machine to resource pool
* **Virtual machine**
* Change Configuration
* Advanced configuration **_(required for Cloud-Init startup script method)_**
* Change CPU count
* Change Memory
* Set annotation
* Edit Inventory
* Create from existing
* Create new
* Remove
* Unregister
* Guest operations
* Guest operation modifications
* Guest operation program execution
* Guest operation queries
* Interaction
* Power off
* Power on
* Provisioning
* Deploy template
* Click "Create" to create your new role
#### Assign Role to User
* Go to "Administration" -> "Access Control" -> "Global Permissions"
* Click "Add"
* Domain: Choose the right domain (e.g vsphere.local)
* User/Group: Choose the Kasm Autoscale user that you just created
* Role: Choose the Kasm Autoscale role that you just created
* Enable "Propagate to Children"
* Click "OK"
#### Choose a clone type
Create the appropriate VM template based on whether you are implementing Server AutoScaling or Docker AutoScaling on vSphere.
* For Windows AutoScaling, follow the [Windows Templating Guide](vmware.mdx#windows-vm-preparation)
* For Docker Agent AutoScaling, follow the [Linux Templating Guide](vmware.mdx#linux-vm-preparation)
##### Understanding Clone Types
Kasm supports three methods for cloning VMs in vSphere:
**Full Clone (Template)**
- Creates a completely independent copy of the source template
- Each clone has its own dedicated storage (full copy of all virtual disks)
- Clones are independent of the source template after creation
- Best for: Production environments where VM independence is critical
**Linked Clone (VM Snapshot)**
- Creates VMs using delta disks that reference a parent snapshot
- Only changes from the snapshot are stored, significantly reducing storage requirements
- Faster provisioning since only delta disks need to be created
- Best for: Development/test environments, rapid provisioning scenarios, or when storage is limited
- The source must be a **VM with a snapshot**, not a template
- The source VM and snapshot must remain available—do not delete them while linked clones exist
- Review [VMware's linked clone documentation](https://techdocs.broadcom.com/us/en/vmware-cis/vsphere/vsphere-sdks-tools/8-0/web-services-sdk-programming-guide/virtual-machine-management/linked-virtual-machines.html) for additional limitations (e.g., HA cluster behavior, storage considerations)
- The vSphere role requires additional permissions beyond those listed in [Create a Kasm AutoScale role](#create-a-kasm-autoscale-role):
- **Virtual machine → Change Configuration**: Advanced configuration, Change Settings
- **Virtual machine → Provisioning**: Allow disk access, Allow file access, Clone virtual machine
**Instant Clone (Frozen VM)**
- Creates VMs by forking a frozen parent VM's memory and CPU state (vmFork)
- Sub-second cloning—the clone is already running when created, no OS boot required
- vSphere assigns a new MAC address to the clone; Kasm hot-swaps the NIC (full remove + re-add) to force the kernel to read the correct MAC and trigger DHCP
- CPU and memory are inherited from the parent VM and cannot be overridden
- Startup script is always executed via VMware Guest Operations (cloud-init cannot work since there is no boot sequence)
- Best for: Environments requiring the fastest possible provisioning with identical VM configurations
- The parent VM must be **powered on and frozen** (admin-managed freeze via `vmware-rpctool "instantclone.freeze"`)
- **DHCP is required**—vSphere assigns a new MAC address to the clone, and the guest OS must obtain a new IP via DHCP
- **Guest OS credentials** are required for startup script execution via VMware Guest Operations
- Cloud-init and guest customization (Sysprep/LinuxPrep) are **not supported**—there is no boot sequence
- The vSphere role requires additional permissions beyond those listed in [Create a Kasm AutoScale role](#create-a-kasm-autoscale-role):
- **Virtual machine → Change Configuration**: Advanced configuration, Change Settings, Add or remove device
- **Virtual machine → Interaction**: Connect devices
- **Virtual machine → Provisioning**: Clone virtual machine
#### Prepare your VM source
Create the appropriate VM template based on whether you are implementing Server AutoScaling or Docker AutoScaling on vSphere.
* For Windows AutoScaling, follow the [Windows VM preparation Guide](./vmware.mdx#windows-vm-preparation)
* For Docker Agent AutoScaling, follow the [Linux VM preparation Guide](./vmware.mdx#linux-vm-preparation)
##### Linux VM preparation
* On your vSphere dashboard, go to your datastore and upload an ISO file of your Linux Image (you can create a new dedicated folder for storing ISO files). In this demo, we'll use the [Ubuntu Server 24.04.2 LTS](https://ubuntu.com/download/server) image. If you prefer a different distribution, ensure it's a [supported operating system](../../../../explanations/system-requirements.mdx#operating-system). Alternatively, if you have a pre-configured Linux template like a Cloud Image, feel free to use it instead.
* Go back to your Datacenter view, right-click on the datacenter where you want to create a VM and select "New Virtual Machine"
* **Select a creation type**
* Choose "Create a new virtual machine" and click "Next"
* **Select a name and folder**
* Virtual machine name: Choose a name for your Virtual Machine (e.g ubuntu-server-kasm-template)
* Choose the location where you want to provision this VM.
* Click "Next"
* **Select a compute resource**
* Select the destination compute resource for creating this VM
* Click "Next"
* **Select storage**
* Choose the datastore you want to use for this VM (e.g datastore1)
* Click "Next"
* **Select compatibility**
* Select the appropriate compatibility for your VM (e.g ESXi 8.0 U2 and later)
* Click "Next"
* **Select a guest OS**
* Guest OS Family: Set to "Linux"
* Guest OS Version: Set to "Ubuntu Linux (64-bit)"
* Click "Next"
* **Customize hardware**
* CPU: Set to the number of cores you want to allocate to your VM (e.g 4)
* Memory: Set to the amount of memory you want to allocate to your VM (e.g 8 GB)
* New Hard disk: Set to the amount of disk size you want to allocate to your hard disk. This depends on how many workspace images you plan on hosting on your agents. The more images, the more disk space you'll need.
* New CD/DVD Drive: Choose "Datastore ISO File" and then select the Linux ISO file you uploaded.
* Enable "Connect At Power On"
* Click "Next"
* **Read to complete**
* Verify all your settings and click "Finish" to create your VM.
* Power On your VM
* Launch a Web Console to interact with your VM and install Ubuntu on it
* Follow the On-Screen instructions to install Ubuntu Server on your VM
* PRO TIP: Enable "Install OpenSSH Server" while installing Ubuntu so that you can connect to your VM easily with SSH later.
* Once Ubuntu is installed, reboot your VM and while your VM reboots, go back to your VM settings and remove the "CD/DVD drive 1" to remove the installation ISO image from your VM.
* You can now SSH into your VM and proceed with the next steps
```bash
ssh @
```
* Install `open-vm-tools` if not already installed
```
sudo apt update
sudo apt -y install open-vm-tools
```
* Reboot your VM
* Configure the root password for your VM. You will need to input your root credentials to Kasm later so that Kasm can run startup scripts when your autoscaled VMs are provisioned.
```bash
sudo passwd root
```
* Optionally, you can pre-load workspace images on your autoscaled agent VMs so that workspaces launch instantly after provisioning, without waiting for Kasm to pull the necessary Docker images. Read the [Pre-load Workspace Images on Agents guide](../../preload-images-on-agents.mdx) to learn more
* Power-Off your VM
* Once the VM is powered off, right-click on your VM, go to "Template" -> "Convert to Template" **(Full Clone only)**
If you plan to use linked clones instead, do **not** convert the VM to a template. Instead, take a snapshot of the powered-off VM as described in [Finish for Linked Clone](#finish-for-linked-clone).
##### Windows VM preparation
For an overview of Windows templating and its prerequisites, refer to the [Windows AutoScale Template Creation Guide](../windows-autoscale-templates.mdx).
* On your vSphere dashboard, go to your datastore and upload an ISO file of your Windows Image (you can create a new dedicated folder for storing ISO files). In this demo, we'll use the [Windows Server 2022](https://www.microsoft.com/en-us/evalcenter/download-windows-server-2022) installation ISO. If you have a pre-configured Windows template that you'd like to use, upload it instead.
* Go back to your Datacenter, right-click on the datacenter where you want to create a VM and select "New Virtual Machine"
* **Select a creation type**
* Choose "Create a new virtual machine" and click "Next"
* **Select a name and folder**
* Virtual machine name: Choose a name for your Virtual Machine (e.g Win-Server-2022-Template)
* Choose the location where you want to provision this VM.
* Click "Next"
* **Select a compute resource**
* Select the destination compute resource for creating this VM
* Click "Next"
* **Select storage**
* Choose the datastore you want to use for this VM (e.g datastore1)
* Click "Next"
* **Select compatibility**
* Select the appropriate compatibility for your VM (e.g ESXi 8.0 U2 and later)
* Click "Next"
* **Select a guest OS**
* Guest OS Family: Set to "Windows"
* Guest OS Version: Set to "Microsoft Windows Server 2022 (64-bit)"
* Click "Next"
* **Customize hardware**
* CPU: Set to the number of cores you want to allocate to your VM (e.g 2)
* Memory: Set to the amount of memory you want to allocate to your VM (e.g 8 GB)
* New Hard disk: Set to the amount of disk size you want to allocate to your hard disk.
* New CD/DVD Drive: Choose "Datastore ISO File" and then select the Windows ISO file you uploaded.
* Enable "Connect At Power On"
* Click "Next"
* **Read to complete**
* Verify all your settings and click "Finish" to create your VM.
* Power On your VM
* Launch a Remote Console to interact with your VM and install Windows on it
* Follow the On-Screen instructions to install Windows Server on your VM
* Select "Desktop Experience" so that your users will be able to use the Desktop environment
* Choose the drive where you want to install Windows.
* Once Windows is installed, reboot your VM and while your VM reboots, go back to your VM settings and detach the "CD/DVD drive 1" to remove the installation ISO image from your VM.
* Launch a Remote or Web Console again to access your VM
* Choose an Administrator password for your Windows VM
* Login to your Windows VM
* Install VMWare tools on your Windows VM from vSphere.
* Reboot your VM
* After rebooting, search for "Remote Desktop Settings" and enable "Remote Desktop"
* You can now install any software/tools that you would like on your VM (e.g Microsoft Office)
* Shutdown your VM
* Once the VM is in powered off state, right-click on it and select "Template" -> "Convert to Template" **(Full Clone only)**
If you plan to use linked clones instead, do **not** convert the VM to a template. Instead, take a snapshot of the powered-off VM as described in [Finish for Linked Clone](#finish-for-linked-clone).
##### Finish for Linked Clone
After completing the OS preparation above, take a snapshot of the powered-off VM to use as the linked clone source:
1. Ensure the VM is powered off
2. Right-click the VM, select "Snapshots" → "Take Snapshot"
3. Name the snapshot (e.g., "kasm-base-v1") and **uncheck** "Include virtual machine's memory"
4. Click "OK" to create the snapshot
5. Note the **VM name** and **snapshot name** for use in the Kasm provider configuration
If your Kasm startup script performs package operations on Ubuntu or another Debian-based system, add these exports at the top of the script. They prevent `needrestart` from interrupting service restarts mid-script and suppress interactive `apt` prompts. They are not needed on RHEL-family distributions or Windows.
```bash
export NEEDRESTART_MODE=l
export NEEDRESTART_SUSPEND=1
export DEBIAN_FRONTEND=noninteractive
```
##### Finish for Instant Clone
After completing the OS preparation above, follow these additional steps to prepare the parent VM for instant cloning:
1. Ensure **VMware Tools** is installed and running in the guest OS
2. Power on the VM and verify it is fully booted and functional
3. Ensure the network interface is configured for DHCP—instant clones receive a new MAC address and must obtain a fresh IP.
Most distributions (Ubuntu, Debian, etc.) use DHCP by default and require no changes. On **RHEL-family systems** (RHEL 8/9, Oracle Linux, Rocky Linux, AlmaLinux), however, NetworkManager binds profiles to MAC address by default, which prevents DHCP from working after the NIC hot-swap. To fix this, configure the profile to match by interface name instead (use `nmcli con show` to find the profile name):
```bash
# RHEL 8 / CentOS 8 (profile typically named "System ens33")
nmcli con mod "System ens33" 802-3-ethernet.mac-address ""
nmcli con mod "System ens33" connection.autoconnect yes
nmcli con mod "System ens33" match.interface-name ens33
# RHEL 9+ / Oracle Linux 9+ (profile typically named "ens33")
nmcli con mod ens33 802-3-ethernet.mac-address ""
nmcli con mod ens33 connection.autoconnect yes
nmcli con mod ens33 match.interface-name ens33
```
4. **(Linux only)** Clear the machine ID so each clone receives a unique identity. The machine ID is used by the DHCP client to identify itself to the DHCP server—if all clones share the parent's ID, they may receive the same IP address. Clearing it immediately before freezing ensures each clone generates a fresh ID on wake-up:
```bash
echo -n > /etc/machine-id
```
5. Freeze the VM by running the following command **inside the guest OS**:
**Linux:**
```bash
vmware-rpctool "instantclone.freeze"
```
**Windows:**
```powershell
& "C:\Program Files\VMware\VMware Tools\rpctool.exe" "instantclone.freeze"
```
6. The VM will appear as powered on in vSphere but its guest OS is frozen. Note the **VM name** for use in the Kasm provider configuration
- vSphere 6.7+ required
- The frozen parent VM must remain powered on—do not power it off or delete it while instant clones may be created. If the VM is accidentally reset and the frozen state is lost, repeat the freeze step above to restore it.
- To update the golden image, reset the frozen VM, boot normally, make your changes, then re-freeze.
- The startup script requires OS-specific additions: on Ubuntu and other Debian-based systems, see the tip above about suppressing `needrestart` and `apt` prompts. On all Linux distros, restart Docker to rebuild networking after the NIC hot-swap. See the example instant clone scripts on [GitHub](https://github.com/kasmtech/workspaces-autoscale-startup-scripts)
### Configure VM Provider Details on Kasm
* Follow [AutoScale Settings for Agent Pool](../infrastructure-components/autoscale-config-docker-agent.mdx#autoscale-settings-for-agent-pool) or [AutoScale Settings for Server Pool](../infrastructure-components/autoscale-config-server.mdx#autoscale-settings-for-server-pool) to create a new AutoScale config, or select **Create New** in **VM Provider Configs** if you already have one.
* Set Provider to "VMWare Vsphere"
* Configure the following settings:
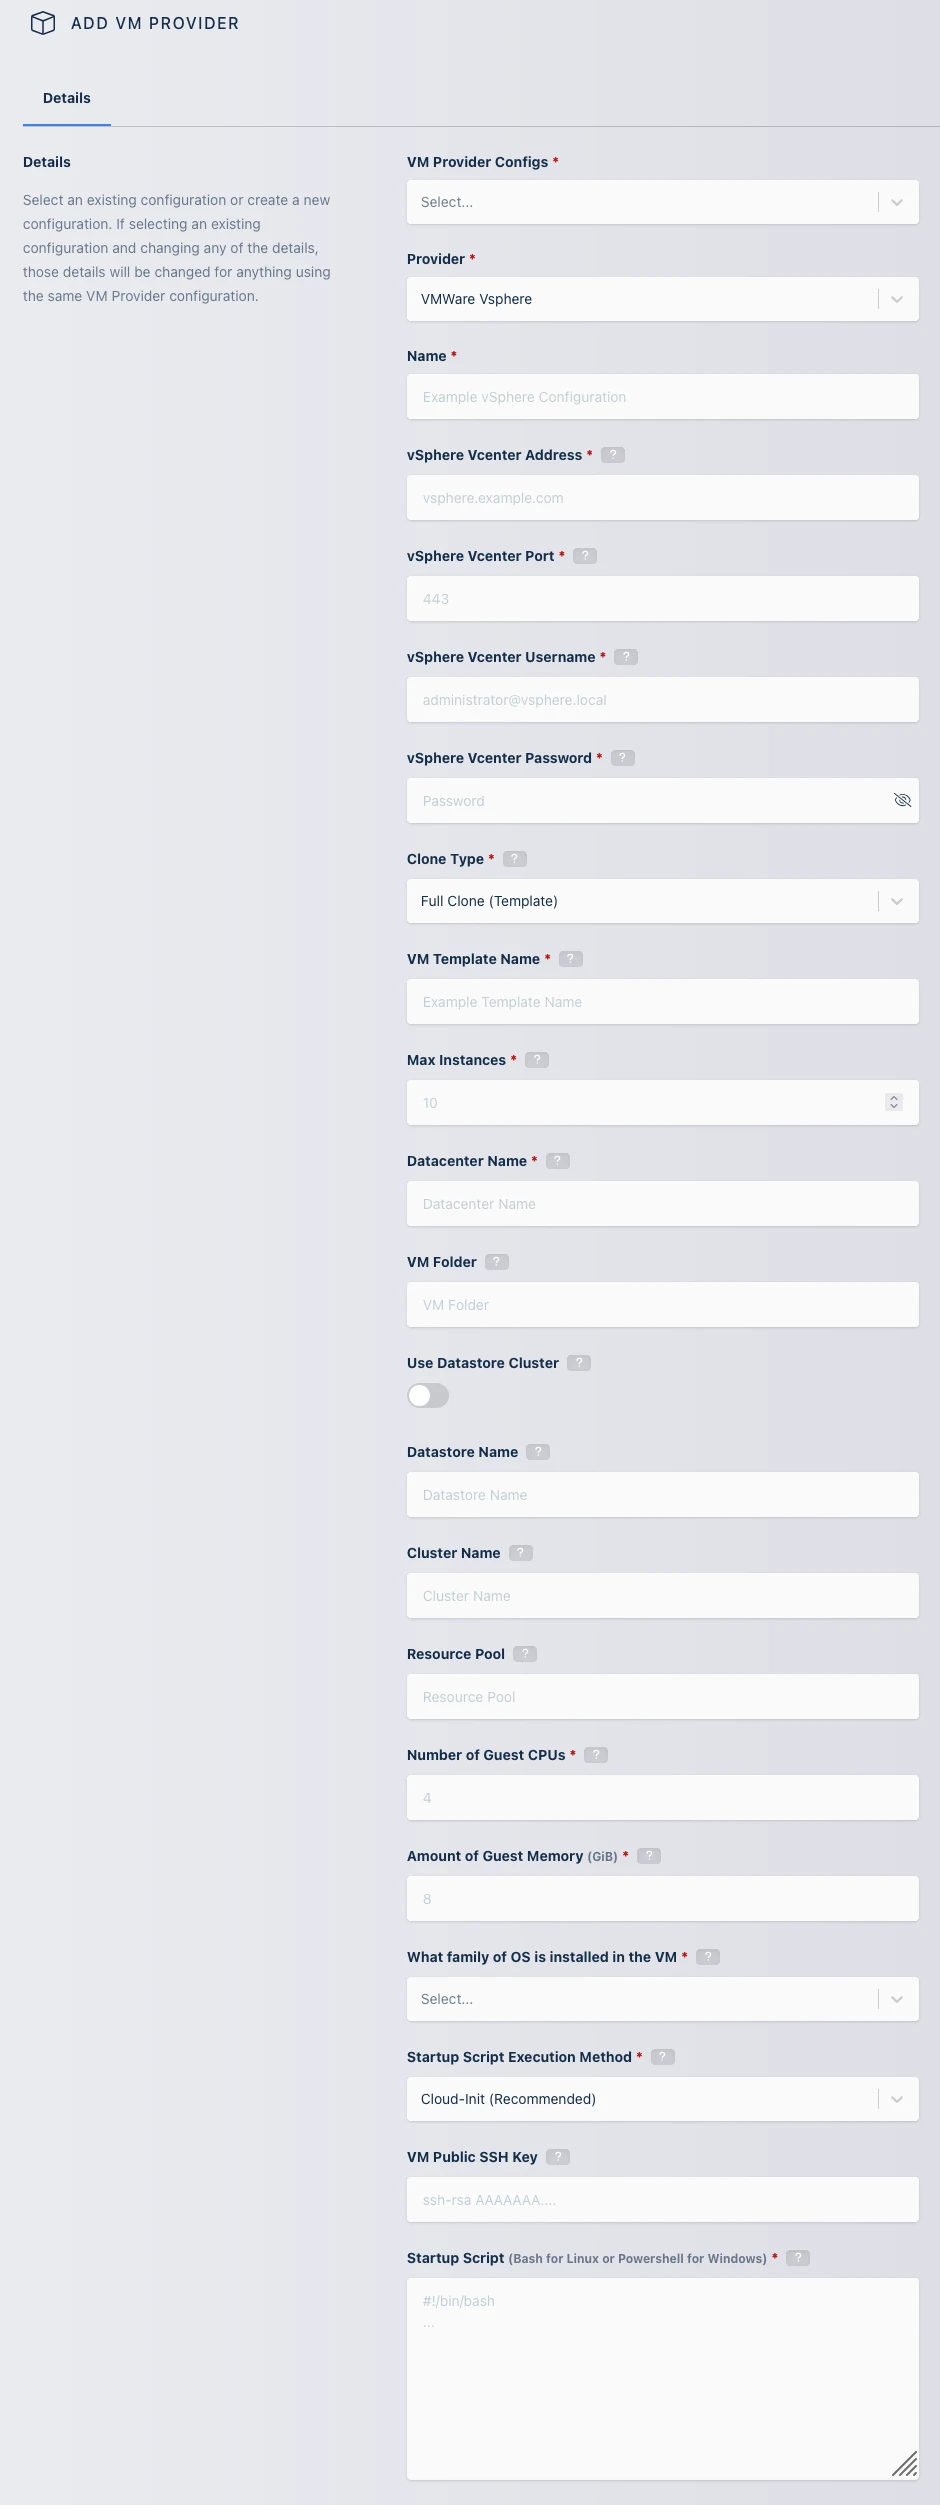
| Setting | Description |
| --- | --- |
| **Name** | An identifying name for this provider configuration. |
| **vSphere vCenter Address** | The IP or FQDN of the VMware vSphere vCenter server to use. |
| **vSphere vCenter Port** | The management port of your Vcenter instance (typically 443) |
| **vSphere vCenter Username** | The username to use when authenticating with the vSphere vCenter server (e.g kasm-autoscale) |
| **vSphere vCenter Password** | The password to use when authenticating with the vSphere vCenter server. |
| **Clone Type** | Select the cloning method: **Full Clone (Template)** creates independent VMs from a template with dedicated storage, **Linked Clone (VM Snapshot)** creates VMs using delta disks from a snapshot for faster provisioning and reduced storage, and **Instant Clone (Frozen VM)** creates VMs by forking a frozen parent VM's memory/CPU state for sub-second cloning. |
| **VM Template Name** | (Full Clone only) The name of the template VM to use when cloning new autoscaled VMs. |
| **Linked Clone VM Name** | (Linked Clone only) The name of the source VM (not template) to use for linked clones. This VM must have a snapshot available. |
| **Linked Clone Snapshot Name** | (Linked Clone only) The name of the snapshot on the source VM to clone from. |
| **Frozen VM Name** | (Instant Clone only) The name of the frozen parent VM to use for instant clones. This VM must be powered on and frozen. |
| **Max Instances** | The maximum number of vSphere VM instances to provision regardless of the need for available free slots. |
| **Datacenter Name** | The datacenter to use for cloning the new vSphere VM instances. |
| **VM Folder** | The VM folder to use for cloning the new vSphere VM instances. This field is optional, if left blank the VM folder of the template is used. |
| **Use Datastore Cluster** | (Full Clone only) When enabled, the **Datastore Name** field is treated as a Datastore Cluster name and vSphere will recommend the optimal datastore for each clone. If the recommendation fails, the clone falls back to the source VM's datastore. Not available for linked clones. |
| **Datastore Name** | The datastore (or datastore cluster, when **Use Datastore Cluster** is enabled) to use for cloning new vSphere VM instances. This field is optional; if left blank, the datastore of the source VM is used. |
| **Cluster Name** | The cluster to use for cloning the new vSphere VM instances. This field is optional, if left blank the cluster of the template is used. |
| **Resource Pool** | The resource pool to use for cloning the new vSphere VM instances. This field is optional, if left blank the resource pool of the template is used. |
| **Number of Guest CPUs** | (Full Clone and Linked Clone only) The number of CPUs to configure on new vSphere VM instances. This option is not dependent on the number of CPUs configured on the template. Instant clones inherit the CPU configuration of the frozen parent VM. |
| **Amount of Guest Memory** | (Full Clone and Linked Clone only) The amount of memory to configure on new vSphere VM instances. This option is not dependent on the amount of memory configured on the template. Instant clones inherit the memory configuration of the frozen parent VM. The admin console accepts Bytes/MiB and stores the value as bytes (`vsphere_memory_bytes`). API integrations must submit the number of bytes in whole MiB (2^20) increments. |
| **What family of OS is installed** **in the VM** | Whether the template OS is Linux or Windows. This is needed to ensure proper execution of the startup script. |
| **Startup Script Execution Method** | (Full Clone and Linked Clone only) Choose how the startup script is executed: **Cloud-Init (Recommended)** - Injects the script via cloud-init/cloudbase-init for first-boot execution. Requires cloud-init (Linux) or cloudbase-init (Windows) to be installed in the template (**_Additional permissions required_**). **VMware Guest Operations (Legacy)** - Executes the script directly via VMware Tools Guest Operations API after the VM boots. Requires VMware Tools and valid OS credentials. Instant clones always use VMware Guest Operations (no boot sequence). |
| **Guest VM Username** | (Required for VMware Guest Operations method and Instant Clone) The username to use for running the startup script on the new vSphere VM instance. This account should have sufficient privileges to execute all commands in the startup script. |
| **Guest VM Password** | (Required for VMware Guest Operations method and Instant Clone) The password for the **Guest VM Username** account. |
| **Startup Script** | When instances are provisioned, this script is executed and is responsible for installing and configuring the Kasm Agent. Scripts are run as bash scripts on a Linux host and Powershell scripts on a Windows host. Example scripts are available on our [GitHub repository](https://github.com/kasmtech/workspaces-autoscale-startup-scripts) Additional troubleshooting steps can be found in the VMware vSphere section of the AutoScale documentation. |
| **VM SSH Public Key** | A public key to add to the autoscale agents, this is then provided as `{ssh_key}` for use in the startup script. |
* Submit the Provider Config
When configuring VMware vSphere with Kasm Workspaces, one important item to keep in mind is datastore storage. When clones are created VMware will attempt to satisfy the clone operation if the datastore runs out of space, any VMs that are running on that datastore will be paused until space is available.
Kasm Workspaces recommends that critical management VMs such as the vCenter server VM and cluster management VMs are on separate datastores that are not used for Kasm autoscaling.
To update a linked clone source: power on the VM, apply updates, power off, take a new snapshot, then update the **Linked Clone Snapshot Name** in Kasm. Existing clones continue running but won't receive updates. Only delete old snapshots after all clones based on them are destroyed.
### Test your VMWare vSphere Autoscaling setup
If you have configured non-zero Standby/Minimum Available Session values agents should start provisioning immediately. Otherwise, try launching multiple workspaces to increase resource utilization, prompting Kasm to autoscale new agents.
* Provision a Workspace
* Go to Workspaces > Registry
* Make multiple workspaces available
* Go to the Workspaces dashboard and launch sufficient workspace sessions to exceed your resource standby thresholds
* Monitor the provisioning of new agents by going to "Infrastructure" -> "Agents"
* Verify new VM instances in vSphere
* Check Downscaling
* Terminate sessions to reduce resource usage
* Confirm that Kasm removes agents after the back-off period
---
## AutoScale Scheduling: Optimize Kasm Compute Costs
## AutoScale Scheduling
Kasm AutoScaling configurations have the capability of being scheduled for active times. This capability allows customers to save compute costs by turning off Kasm AutoScaling when that extra compute is not needed.
AutoScale schedules are available as a tab when editing an AutoScale configuration. If no schedule is defined then the AutoScale configuration is considered active unless disabled. Kasm will not scale down a server that has active sessions on it, so the administrator can be assured they will not disrupt any existing Kasm sessions when the schedule becomes inactive.
When an AutoScale configuration for **Docker Agents** is inactive any unused staged sessions will be removed and no new sessions (staged or user created) will be assigned to any **Docker Agents** that are part of the inactive AutoScale configuration.
Since an AutoScale configuration with an inactive schedule will not provision any compute resources, the administrator may want two AutoScale configurations: one that has minimal standby compute available to minimize compute costs and one that has more substantial resources configured. This will allow users to always get a session even if it takes extra time on off hours.
The administrator can even configure 0 for the standby cpu/memory/gpu during the off hours and allow session resource provisioning to be fulfilled fully on demand.
Click on **Add Schedule** to create a new schedule for the AutoScaling configuration. On the **Add Schedule** screen there are fields for what days of the week this schedule should be active as well as both a start time, end time, and a timezone. Kasm will convert the time from the Kasm database to match the timezone specified when determining if a schedule is active or not.
Multiple schedules can be defined for each AutoScale configuration.
### Example AutoScale Schedules
Here are a few examples of how AutoScale schedules can be leveraged.
This example is for a business whose core hours are 8 a.m. to 5 p.m., Monday through Friday. Each weekday, this configuration turns on autoscaling at 7 a.m. and turns it off at 6 p.m. This way, all compute is available well before the 8 a.m. start time and costs are reduced overnight and over the weekend, when there is no business need for the compute.
The **Add Schedule** screen would look similar to this:
A more complicated example would be if an Administrator wanted compute resources to come online at 3 p.m. Wednesday, and stay on until 11 a.m. Friday. For this the administrator would create three separate schedules on the autoscale config which would provide the desired functionality.
The first schedule the administrator would select only wednesday, start time 3:00 p.m., and end time 11:59 p.m.
The second schedule the administrator would select Thursday, with start time 12:00 a.m. and end time 11:59 p.m.
The third schedule the administrator would select Friday, with start time 12:00 a.m. and end time 11:00 a.m.
Here is an example of an overnight schedule where the start time is later than the end time. This will result in an overnight schedule. It will become active on the start time on the day(s) of the week selected, and will become inactive at the end time of the following day. In the following example the Autoscale configuration will become active on Tuesday and Thursday at 9:00 p.m. and will deactivate on Wednesday and Friday at 5:00 a.m.
By using multiple schedules it is possible to configure multiple active times within a single day. Here morning shift is configured from 8:00 a.m. until 12:00 p.m. on Monday, Wednesday and Friday.
The afternoon shift is configured from 2:00 p.m. until 6:00 p.m. on the same days.
---
## AutoScale: Dynamic Resource Management
## AutoScale Overview
**AutoScaling** is a powerful feature that dynamically provisions and destroys the number of available virtual machines (VMs) within a Pool based on a predefined schedule or real-time user demand. Kasm Workspaces offers **AutoScale** capabilities for both full-stack virtual machines (VMs) and containerized environments. It can dynamically provision and integrate full-stack VMs into a **Server Pool** to support **RDP, KasmVNC, VNC, and SSH** sessions. Additionally, Kasm can AutoScale **Docker Agent VMs** to efficiently manage and deploy container-based workspaces, ensuring optimal resource utilization and scalability.
This feature is available in both the Community and Enterprise editions. If you're using an Enterprise edition, please contact a Kasm Technologies representative for details.
#### Agents
Agents are the compute resources that store workspace images and initiate sessions upon request. Kasm can autoscale agents based on a predefined schedule or real-time user demand. See [Docker Agents](../docker-agent.mdx) for more information.
#### Servers
Servers are the compute resources that support remote access to environments via protocols such as RDP, KasmVNC, VNC, and SSH. Similar to agents, Kasm can also autoscale servers based on a predefined schedule or real-time user demand. See [Servers](../servers.mdx) for more information.
#### Startup Scripts
Startup scripts install the Kasm components that a provisioned VM needs, such as the Kasm Agent role and the Kasm Desktop Service. Customize the scripts in the [AutoScale startup scripts GitHub repository](https://github.com/kasmtech/workspaces-autoscale-startup-scripts). The scripts support Debian-based and RPM-based Linux VMs, including Oracle Linux and RHEL, as well as Windows VMs.
Some cloud providers enforce strict limits on startup script (user data) size. For example, AWS EC2 allows only 16 KB of Base64-encoded user data, which is roughly 12-13 KB of actual script content. If you customize the autoscale startup scripts, verify that the result stays within your provider's limit. If your script exceeds the limit, consider hosting it externally (e.g., in an object storage bucket) and having the user data fetch and execute it at boot.
#### Zones
A strategic organizational grouping of Kasm services that enables advanced resource management, geographic distribution, and logical segmentation. Zones are strongly tied to the Kasm manager role. Once a manager is assigned to a zone, it is responsible for the Kasm resources and operations of the workspaces within that zone. Learn more about [Deployment Zones in Kasm.](../deployment-zones.mdx)
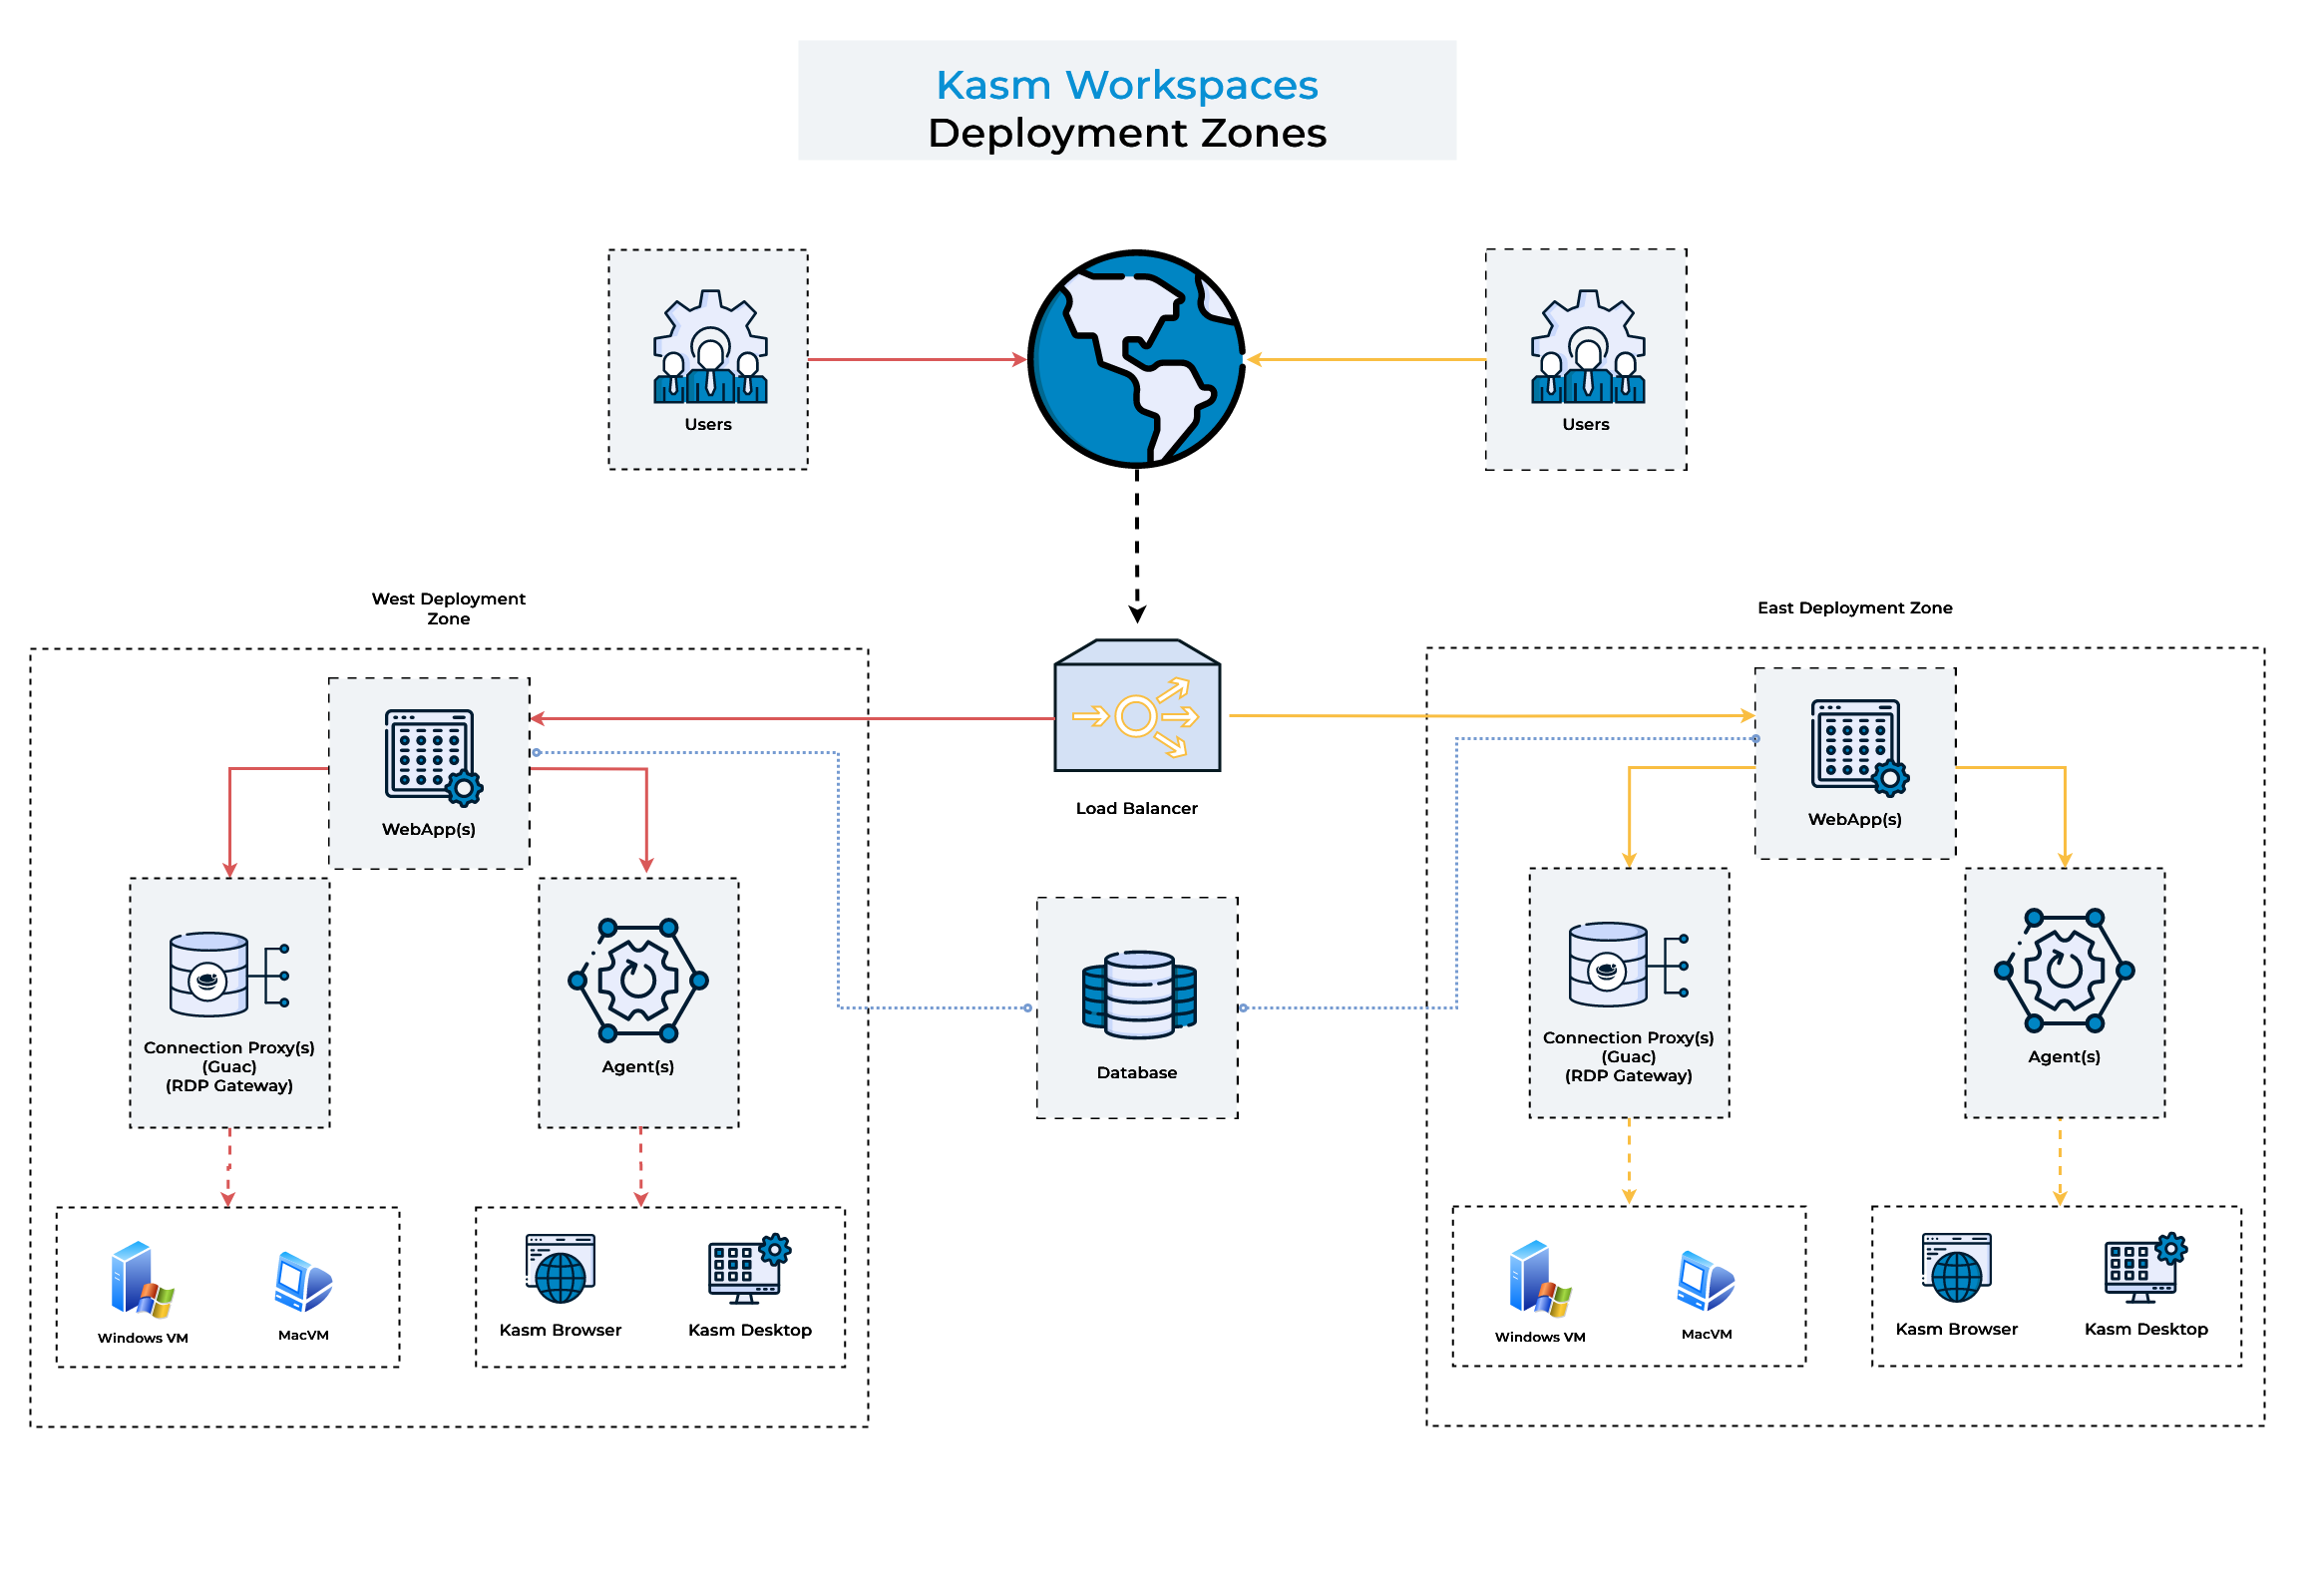
#### Upstream Auth Address
This is the endpoint used to authenticate connections to Kasm sessions. It must be correctly set to the address of the resource hosting the Kasm API server. Ensuring proper configuration is essential for newly provisioned VMs to authenticate within the designated Zone. Incorrect settings may result in authentication failures or potential security risks, such as unauthorized access. See [Update Zones](../../networking/reverse-proxy.mdx#update-zones) for more information.
- In a **single-server architecture**, this address is set to `proxy` by default which refers to the local proxy. When configuring the Autoscaling feature, the default value must be changed to the actual IP/FQDN of your Kasm server so that the autoscaled agents can report back to your Kasm deployment.
- For a **multi-server architecture**, the Web App server's IP/FQDN, or the load balancer's IP/FQDN servicing the Web App servers must be specified for the corresponding Zone.
#### Network Communication Requirements
**Manager-to-Agent**: Kasm Managers must reach agents on **port 443** (or custom configured port) for provisioning and management. Ensure firewalls/security groups allow this outbound connection.
**Agent-to-Manager**: Agents communicate back via the Upstream Auth Address configured in Zone settings on **port 443** (or custom configured port).
Ensure your network security groups, firewalls, and routing configurations allow communication **on the required Ports**.
Without this connectivity, agents will fail to provision correctly and appear as unreachable in the system.
### Pools
Pools can be used to group a set of similar fixed systems together, so they can be treated as a single Workspace for user access.
Users will see a single Workspace icon on their dashboard, but their session will get distributed to an available server in the pool.
Each server in the pool can be set to support 1 or more concurrent sessions. Kasm automatically distributes the sessions
evenly over the servers.
You can create two different types of pools in Kasm:
* **Docker Agent Pools:** These pools contain Linux-based VMs running a Docker engine. They're designed for hosting Linux-based workspaces. Each VM within a Docker Agent pool can run multiple workspace containers.
* **Server Pools:** These pools contain Windows-based VMs. They're designed for hosting Windows-based workspaces. Each VM in a Server pool typically provides a single Windows desktop experience, often accessed via RDP.
AutoScaling is available in the Community and Enterprise editions only. If applicable, the administrator will have 3 links underneath the table for **All AutoScale Configs**, **All VM Provider Configs** and **All DNS Provider Configs**.
These allow the administrator to see all of the configs available and make changes, but the recommended approach is to use the **Edit** option on a specific pool.
### Create Pool
- Click the **Infrastructure** item in the navigation menu.
- Select the **Pools** option in the dropdown menu.
- Select **Add** from the top right of the **Pools** table.
- Provide a name for the server pool.
- Choose the pool type. It can be either Docker Agent or Server.
### AutoScale Configuration
Kasm has the ability to automatically provision and destroy [Servers](../../../reference/glossary.mdx#server) and Docker [Agents](../../../reference/glossary.mdx#agent) based on user demand.
The AutoScale configuration differs slightly between Servers and Agents.
There are two ways to create an Autoscale config:
* **Method 1**: Go to "Infrastructure" -> "Pools" -> Edit your Pool -> "AutoScale Configurations" tab -> "Add". The AutoScale type and Pool will be auto-populated based on your selected Pool.
* **Method 2**: Go to "Infrastructure" -> "Pools" -> "All AutoScale Configs" -> "Add". Then choose the correct Autoscale Type and Pool.
AutoScale configurations differ between Docker Agent Pools and Server Pools.
* Docker Agents: Designed for **Linux VMs** with the Docker Engine installed. These VMs dynamically provision and manage container-based workspaces to optimize resource utilization.
* Servers: Designed for compute resources (**Windows and Linux**) that support RDP, KasmVNC, VNC, and SSH connections, allowing remote access to full desktop environments or specific applications.
Select the appropriate configuration guide based on your deployment needs:
* [Autoscale Configuration (Docker Pool)](infrastructure-components/autoscale-config-docker-agent.mdx)
* [Autoscale Configuration (Server Pool)](infrastructure-components/autoscale-config-server.mdx)
### AutoScale Scheduling
AutoScale Scheduling in Kasm Workspaces allows administrators to define specific active periods for AutoScaling, optimizing resource usage and reducing costs. By setting schedules, AutoScaling can automatically provision or scale down compute resources based on predefined times.
* **Benefits**: Saves compute costs by deactivating AutoScaling when resources are not needed.
* **How It Works**: Administrators can configure schedules per AutoScale configuration, defining active days, start/end times, and time zones.
* **Flexibility**: Supports different scheduling strategies, including business-hour scaling, overnight schedules, and multi-day configurations.
* **Key Considerations**: Servers with active sessions will not be scaled down, ensuring uninterrupted user access.
To learn more about configuring AutoScale Scheduling, refer to the **[AutoScale Scheduling Documentation](autoscale-scheduling.mdx)**.
### Provider Specific Settings
Kasm supports AutoScaling on a variety of providers. Each provider has unique configurations that must be set up correctly for optimal performance. Select your provider to learn more:
- AWS
- Azure
- Digital Ocean
- GCP
- Harvester
- KubeVirt
- Nutanix
- OpenStack
- Oracle Cloud (OCI)
- Proxmox
- VMWare vSphere
---
## AutoScale Config: Docker Agent Pools
## AutoScale Configuration (Docker Agent Pool)
This section covers the AutoScale configuration for Pools of type "Docker Agent".
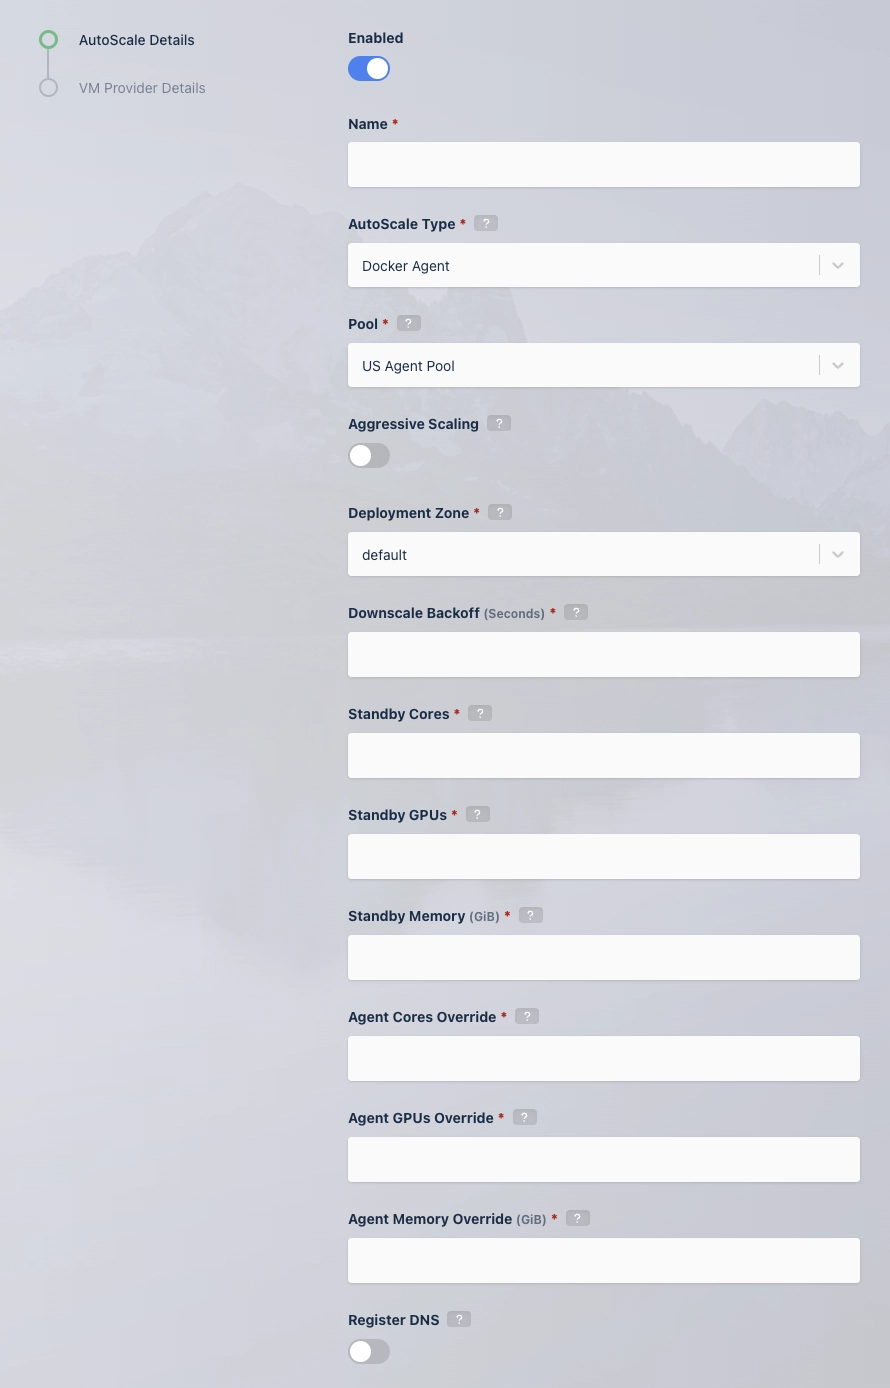
### AutoScale Settings for Agent Pool
Many of the settings below apply to the agents that are created during autoscaling. When changing these settings on an autoscale config they are not automatically applied to existing agents and they must be manually updated on existing agents that were created from that autoscale config.
* Configure the following settings in your Kasm deployment.
| Name | Description |
| :------------------------------ | :-------------------------------------------------------------------------------------------------------------------------------------------------------------------------------------------------------------------------------------------------------------------------------------------------------------------------------------------------------------------------------------------------------------- |
| **Enabled** | Whether to enable this config or not. If disabled, autoscaled agents from this config **cannot be manually deleted**. Re-enable the config to remove them. |
| **Name** | Name for the AutoScale config . |
| **AutoScale Type** | The type of AutoScale confog this is, either a Docker Agent or a Server. |
| **Pool** | Which pool this AutoScale config is attached to. |
| **Aggressive Scaling** | When enabled, the system may take more expedient measures to provision raw compute resources for on-demand session requests. See [Aggressive Scaling](autoscale-config-server#aggressive-scaling) for more details. | |
| **Deployment Zone** | Which zone this AutoScale config applies to. |
| **Downscale Backoff (Seconds)** | This setting prevents prevents the system from downscaling (deleting Agents) for this amount of time (in seconds) when needed. This is useful for preventing the system from thrashing up and down if the available resource hover around an interval that would typically trigger autoscaling. |
| **Standby Cores** | The number of standby cores that the system should try to keep "always available" at any given time in addition to any that is needed to satisfy the Staging Config requirements. If the number of available cores falls below this number, more Agents are created. If the number of available cores rises above this number, Agents are deleted as long as it wont result in the number of available cores falling below this number. A value of 0 indicates no additional standby compute is created. The AutoScaler will only provision enough compute according to the Staging Config requirements. |
| **Standby GPUs** | The number of standby GPUs that the system should try to keep "always available" at any given time in addition to any that is needed to satisfy the Staging Config requirements. If the number of available GPUs falls below this number, more Agents are created. If the number of available GPUs rises above this number, Agents are deleted as long as it wont result in the number of available GPUs falling below this number. A value of 0 indicates no additional standby compute is created. The AutoScaler will only provision enough compute according to the Staging Config requirements. |
| **Standby Memory** | The amount of memory that the system should try to keep "always available" at any given time in addition to any that is needed to satisfy the Staging Config requirements. If the amount of available memory falls below this number, more Agents are created. If the amount of available memory rises above this number, Agents are deleted as long as it wont result in available amount falling below this number. Values entered in the UI are stored as bytes (`standby_memory_bytes`) and the unit selector supports Bytes/MiB/GiB. When using the Admin API, supply the number of bytes. A value of 0 indicates no additional standby compute is created. The AutoScaler will only provision enough compute according to the Staging Config requirements. |
| **Agent Cores Override** | When an Agent is created, the compute resource (e.g AWS EC2 / Digital Ocean Droplet) will have a set amount of CPU and Ram as defined by the cloud provider's instance type. This setting should typically be set to match the instance type but can be set to a preferred value. |
| **Agent GPUs Override** | When an Agent is created, the compute resource (e.g AWS EC2 / Digital Ocean Droplet) will have a set number of GPUs as defined by the cloud provider's instance type. This setting should typically be set to match the instance type but can be set to a higher number to allow oversubscribing. |
| **Agent Memory Override** | When an Agent is created, the compute resource (e.g AWS EC2 / Digital Ocean Droplet) will have a set amount of CPU and RAM as defined by the cloud provider's instance type. This setting should typically be set to match the instance type but can be set to a preferred value. The UI stores the value as bytes (`agent_memory_override_bytes`) and exposes a unit selector (Bytes/MiB/GiB) for convenience. API clients must send the number of bytes. |
| **Rotate Agent in (Days)** | The number of days until Agents are Drained and replaced with new Agents. This sets the "Drain Time" of the agent when it is created. A value of "0" disables this function. **Note:** Existing agents will not be updated when this field is changed. To apply new rotation settings to existing agents, each existing agent must be manually updated. |
| **Pre Warm Rotated Agent Replacements for (Minutes)** | The number of minutes before the Agent's "Drain Time" that Kasm will begin provisioning a replacement Agent. This allows time for a replacement Agent to be installed before the old agent is rotated out. A value of "0" disables this function. |
| **Register DNS** | If enabled, the Agent's IP will be registered in DNS. |
| **Base Domain Name** | Define a base name for the automatic DNS registration for the Agent. The system will create a full name using ``.\. If the Base Domain Name is "agents.kasm.example.com", the full DNS name generated will be ``.agents.kasm.example.com (e.g 123abcd.agents.kasm.example.com). This Base Domain Name, must already be a registered DNS zone within the cloud provider's DNS system. |
* Click "Next" and you will now be prompted to enter your [provider-specific details](../autoscale-providers/oci.mdx).
### Pre-load Workspace Images on Agents
Pre-loading workspace images on your provisioned agents helps eliminate delays caused by image downloads after the VMs are brought online. Follow the [Pre-load Workspace Images on Agents guide](../../preload-images-on-agents.mdx) to learn how to fetch workspace images using the Kasm API and bake them into your VM templates for faster and more efficient autoscaling.
### Provider Specific Settings
Kasm supports AutoScaling on a variety of providers. Each provider has unique configurations that must be set up correctly for optimal performance. Select your provider to learn more:
- AWS
- Azure
- Digital Ocean
- GCP
- Harvester
- KubeVirt
- Nutanix
- OpenStack
- Oracle Cloud (OCI)
- Proxmox
- VMWare vSphere
---
## AutoScale Configuration: Server Pools
## AutoScale Configuration (Server Pool)
This section covers the AutoScale configuration step of the Wizard for Pools of type "Server".
### AutoScale Settings for Server Pool
Many of the settings below apply to the servers that are created during autoscaling. When changing these settings on an autoscale config they are not automatically applied to existing servers and must be manually updated on existing servers that were created from that autoscale config.
* Configure the following settings in your Kasm deployment.
| Name | Description |
| :------------------------------------------ | :------------------------------------------------------------------------------------------------------------------------------------------------------------------ |
| **Enabled** | Whether to enable this config or not. If disabled, autoscaled agents from this config **cannot be manually deleted**. Re-enable the config to remove them. |
| **Name** | Name for the AutoScale config. |
| **AutoScale Type** | The type of AutoScale config this is, either a Docker Agent or a Server. |
| **Pool** | Which pool this AutoScale config is attached to. |
| **Aggressive Scaling** | When enabled, the system may take more expedient measures to provision raw compute resources for on-demand session requests. See [Aggressive Scaling](#aggressive-scaling) for more details. |
| **Deployment Zone** | Which zone this AutoScale config applies to. |
| **Downscale Backoff (Seconds)** | This setting prevents prevents the system from downscaling (deleting Servers) for this amount of time (in seconds) when needed. This is useful for preventing the system from thrashing up and down if the available resource hover around an interval that would typically trigger autoscaling. |
| **Require Checkin** | When enabled, the system will wait to receive a callback from the newly created server to set its status to Running. The callback may come from the Kasm Windows Service or by calling the `set_server_status` API. See [require_checkin](#require-checkin) for more details. |
| **Kasm Desktop Service Installed** | When enabled, the sytem will assume the Kasm Desktop Service is installed, enabling workflows that require the agent. |
| **Connection Type** | Whether to use KasmVNC or RDP, VNC, or SSH. |
| **Connection Port** | Which port to connect on. |
| **Connection Credential Type** | Which type of credentials are used for this server. Options are Static Credentials, Dynamic User Accounts, SSO User Accounts, and Authenticate with Smartcard. See [sso_windows_ldap](../windows-autoscale-templates.mdx), [ssh_authentication_options](#authentication-options-when-connecting-to-an-ssh-server) |
| **SSO Domain** | The domain to use for SSO User Accounts **Connection Credential Type**. A blank entry will pass the username to Windows exactly as it is in Kasm. A value of localhost will instruct Kasm to drop any domain part from the Kasm username i.e. john_smith@example.com becomes john_smith when passed to Windows. |
| **Connection Username** | Which username to connect to the server with. Only visible with Static Credentials **Connection Credential Type**. |
| **Connection Password** | Which password to connect to the server with. Only visible with Static Credentials **Connection Credential Type**. |
| **Use User SSH Key** | Whether to use the SSH keys assigned to a Kasm user. (Only applicable to SSH connection type) |
| **Connection Private Key** | The private key to authenticate against the SSH server with. (Only applicable to SSH connection type) |
| **Connection Private Key Passphrase** | The passphrase encrypting the specified private key. (Only applicable to SSH connection type) |
| **Connection Info (JSON)** | Any extra connection info. |
| **Create Active Directory Computer Record** | Whether to create an active directory record or not. See [ad_computer_record](#create-active-directory-computer-record) |
| **Reusable** | Whether the connection reusable. |
| **Minimum Available Sessions** | The minimum available sessions that should be free. Auto scale more resources if under this threshold. |
| **Max Simultaneous Sessions Per Server** | Max sessions per server allowed. See [max_simultaneous_sessions_per_server](autoscale-config-server.mdx#max-simultaneous-sessions-per-server) |
| **Max Simultaneous Users** | For RDP/SSH servers, the number of concurrently connected users per server. |
| **Expire Servers in (Days)** | The number of days until autoscaled servers are placed into "Draining" mode and replaced with new servers. This sets each server's "Drain Time" when it is created. A value of "0" disables this function. **Note:** Existing autoscaled servers are not updated when this field is changed. To apply new rotation settings to existing servers, update each server manually. |
| **Pre Warm Rotated Server Replacements for (Minutes)** | The number of minutes before the Server's "Drain Time" that Kasm will begin provisioning a replacement Server. This allows time for a replacement Server to be provisioned before the old Server is rotated out. A value of "0" disables this function. |
* Click "Next" and you will now be prompted to enter your [provider-specific details](../autoscale-providers/oci.mdx).
#### Max Simultaneous Sessions Per Server
For RDP and SSH servers, the `Max Simultaneous Session Per Server` and `Max Simultaneous Users` work together. SSH and RDP
support multiple sessions per user per server. For RDP this is typically found in RemoteApp use cases. For SSH and RemoteApp servers
you may want 1 server to handle just 2 concurrent users but up to 10 concurrent sessions each. These settings are used for two
purposes, auto-scaling and deciding where to assign new sessions to.
For auto scaling, Kasm periodically checks to see that it has resource availability to create `Minimum Available Sessions` on
the existing servers in the pool. It checks how many sessions and how many new users each server can handle, it uses the
lower of those two values to determine how many new sessions each existing server can likely handle. If the total from all
servers is less than the `Minimum Available Sessions`, new servers are created until it reaches the desired capacity.
Kasm will not allow a single user to provision multiple RDP desktops per server. Only RemoteApps are allowed to be assigned to the
same server for a single user. Kasm will allow one desktop and multiple RemoteApps on the same server for a user.
#### Require Checkin
The **Require Checkin** flag can be used to ensure the system waits until a newly created server is fully ready before
allowing a users session to connect. Administrators may use the autoscale startup script to ensure the desired configurations
and services are properly initialized (e.g RDP is enabled and running).
If using Windows sessions, administrators may use the [Kasm Desktop Service](../../../workspaces-sessions/server-workspace/windows/kds-windows-service.mdx).
All systems may use the `set_server_status` API.
```md
POST /api/set_server_status?token={checkin_jwt}
```
**Example request**:
**json**
```json
{
"status": "running",
"status_message": "Initialization Complete",
"status_progress": "100"
}
```
**bash**
```bash
curl -k -X POST -H "Content-Type: application/json" -d '{{"status": "running", "status_message": "Initialization Complete", "status_progress": "100"}}' https://{upstream_auth_address}/api/set_server_status?token={checkin_jwt}
```
Additional examples are available in the
[workspaces-autoscale-startup-scripts](https://github.com/kasmtech/workspaces-autoscale-startup-scripts/) repo.
#### Create Active Directory Computer Record
As covered in the above table, the AutoScaling configuration for a Server Pool allows the administrator to automatically join new VMs to an active directory domain. If the checkbox for **Create Active Directory Computer Record** is checked two additional fields will be shown, **LDAP Config** and **Active Directory Computer OU DN**.
Kasm Workspaces creates the AD Computer record, but it **does not join the computer to the domain**, this needs to be done on the system itself. When Kasm creates the AD record, a temporary randomly generated password is created which can be used on the target VM to join it to Active Directory. Kasm can inject this password in a PowerShell script on the VM. That PowerShell script needs to be executed when the VM starts up, in order to complete the process of adding the VM to Active Directory. Below is an example PowerShell script, the special tags `{ad_join_credential}` and `{domain}` will be replaced by Kasm with the randomly generated password and domain name respectively. This script is placed in the [VM Provider](../vm-providers.mdx) configuration in the Startup Script field.
```powershell
$joinCred = New-Object pscredential -ArgumentList ([pscustomobject]@{{ UserName = $null; Password = (ConvertTo-SecureString -String '{ad_join_credential}' -AsPlainText -Force)[0] }})
Add-Computer -Domain "{domain}" -Options UnsecuredJoin,PasswordPass -Credential $joinCred -Force -Restart
```
Some cloud providers will automatically execute this startup script when the VM boots, making it easy to get auto AD joining working end-to-end. Other cloud providers, such as Azure, do not automatically execute this script. See the details of each [VM Config Provider](../vm-providers.mdx).
**LDAP Config**
The LDAP Config drop down allows the administrator to select which [LDAP configuration](../../../security/users-groups-mgmt/ldap.mdx) to use to add the computer record to Active Directory. The LDAP Configuration does not have to be enabled, this allows the administrator to use one LDAP configuration for Authentication and another for AD Computer record creation. If using LDAP for end-user authentication to Kasm Workspaces, the administrator can also configure single-sign on to the Windows systems.
**Active Directory Computer OU DN**
This is the DN of the Active Directory Computer OU that the administrator would like the computer records placed in.
The LDAP config must be using an SSL secured LDAPS connection or the LDAP server will not permit Kasm to create the AD Computer record.
#### Single Sign-On to Windows Systems via LDAP
When users login to Kasm via [LDAP Authentication](../../../security/users-groups-mgmt/ldap.mdx), they are able to create sessions to Windows systems that are joined to the same Active Directory domain and are configured for SSO credential pass-through. In the above table covering the Auto Scale configuration fields for Server Pools is the **Connection Credential Type** field. Select the value *SSO User Accounts* in the Auto Scale configuration for the Server Pool. This requires that all users accessing servers in this Server Pool are authenticated to Kasm using LDAP authentication. See our Windows Deployment Guide video for a walk through of this topic and more.
#### Authentication Options When Connecting to an SSH Server
Kasm Workspaces has the ability to connect to arbitrary SSH servers. It can use SSH key or password authentication. There are a few combinations of options on the Autoscale Config edit screen that can be selected.
The Autoscale Config can be configured to use:
- Username/password authentication
- Username and select the `Use User SSH Key` to send the username and private key stored with the Kasm user.
- Username and a pasted in private key, optionally you can include a passphrase if the key has one.
Select the value *SSO User Accounts* in the **Connection Credential Type** field and check the **Use User SSH Key** checkbox and Kasm Workspaces will send the user's Kasm Workspaces username along with the user's Kasm Workspaces SSH key allowing easy multiple user support on SSH servers.
There are some restrictions on the ssh keys supported that are enforced by the connection proxy library used for the ssh server connections:
The SSH key can be in either OpenSSH format (beginning with `-----BEGIN OPENSSH PRIVATE KEY-----`) or RSA PKCS1 format (beginning with `-----BEGIN RSA PRIVATE KEY-----` or `-----BEGIN PRIVATE KEY-----`) with a key size of 2048.
When using RSA keys with some newer Linux distributions such as Ubuntu 22.04 LTS, you may need to edit the `/etc/ssh/sshd_config` file on the target server and add these two lines to the config:
```bash
HostKeyAlgorithms +ssh-rsa
PubkeyAcceptedKeyTypes +ssh-rsa
```
#### Aggressive Scaling
Starting in Workspaces 1.14.0, administrators can choose to leverage fully on-demand compute resources for container
and server/server pool based sessions. When users requests a session, and no compute is available, the system will
queue the request, provision the resources according to the autoscale configs, then fulfill the request. This will
prevent the user from receiving a No Resources error. Instead, the user will be presented with a status indicator while
the request is fulfilled, which may take several minutes. This can be used alongside the existing standby and staging
mechanism to give the administrator more options to balance compute costs with session delivery times.
Enabling **Aggressive Scaling** in the Autoscale Config, instructs the system to make more opportunistic choices when
requesting resources, with the goal of reducing the users wait time. This mode may result in compute resources being
utilized in less cost-efficient ways, since users may end up on separate machines instead of pooled together depending
on the circumstance. This mode may also result in the system scaling slightly beyond the max instances defined on
the associated VM Provider due to the potential concurrent nature of resource provisioning.
### Provider Specific Settings
Kasm supports AutoScaling on a variety of providers. Each provider has unique configurations that must be set up correctly for optimal performance. Select your provider to learn more:
- AWS
- Azure
- Digital Ocean
- GCP
- Harvester
- KubeVirt
- Nutanix
- OpenStack
- Oracle Cloud (OCI)
- Proxmox
- VMWare vSphere
### Windows Templating
To AutoScale Windows resources in Kasm Workspaces, you must first create Windows templates that will serve as the base images for provisioning new instances. These templates should include necessary configurations such as licensing considerations, required drivers, guest agents, sysprep, domain join settings, and any additional software required for your deployment. Properly prepared templates ensure seamless AutoScaling and optimal resource utilization.
For more details about Windows templates, refer to the [Windows AutoScale Template Creation Guide](../windows-autoscale-templates.mdx)
---
## Kasm Workspaces: Compute VM Provider Configuration & Auto Scaling
## VM Providers
### VM provider configs
:::note
AutoScaling is available in the Community and Enterprise editions only. For more information on licensing, visit [Licensing](../reference/license.mdx).
:::
| **Name** | **Description** |
| :----------------------- | :---------------------------------------------------------------------------------------------------------------------------------------------------------------------------------------------------------------------------------------------- |
| **VM Provider Configs** | Select an existing config or create a new config. When you change the details of an existing config, those details change for everything that uses the same VM provider config. |
| **Provider** | Select a provider from AWS, Azure, Digital Ocean, Google Cloud, or Oracle Cloud. When you select an existing provider, Kasm selects this automatically. |
### AWS settings
A number of settings are required to use this functionality. The AWS settings appear in the Pool configuration when the feature is licensed.

| **Name** | **Description** |
| --- | --- |
| **Name** | A name to use to identify the config. |
| **AWS Access Key ID** | The AWS Access Key used for the AWS API. |
| **AWS Secret Access Key** | The AWS Secret Access Key used for the AWS API. |
| **AWS: Region** | The AWS Region the EC2 Nodes should be provisioned in. e.g (us-east-1) |
| **AWS: EC2 AMI ID** | The AMI ID to use for the provisioned EC2 nodes. This should be an OS that is supported by the Kasm installer. |
| **AWS: EC2 Instance Type** | The EC2 Instance Type (e.g t3.micro). Note the Cores and Memory override settings don't necessarily have to match the instance configurations. This is to allow for over provisioning. |
| **AWS: Max EC2 Nodes** | The maximum number of EC2 nodes to provision regardless of the need for available free slots |
| **AWS: EC2 Security Group IDs** | A Json list containg security group IDs to assign the EC2 nodes. e.g `["sg-065ae66f2d", "sg-02522kdkas"]` |
| **AWS: EC2 Subnet ID** | The subnet ID to place the EC2 nodes in. |
| **AWS: EC2 EBS Volume Size** | Select the root EBS volume size for the EC2 nodes. The admin console accepts Bytes/GiB and stores the value as bytes (`aws_ec2_ebs_volume_size_bytes`). API integrations must submit the number of bytes using whole GiB (2^30) increments. |
| **AWS: EC2 EBS Volume Type** | The EBS Volume Type (e.g gp2) |
| **AWS: EC2 IAM** | The IAM to assign the EC2 Nodes. Administrators may want to assign CloudWatch IAM access. |
| **AWS: EC2 Custom Tags** | A Json dictionary for custom tags to assigned on auto-scaled Agent EC2 Nodes. e.g `{"foo":"bar", "bin":"baz"}` |
| **AWS: EC2 Startup Script** | When the EC2 Nodes are provision this script is executed. The script is responsible for installing and configuring the Kasm Agent. |
| **Retrieve Windows VM Password from AWS** | When provisioning an AWS Windows VM Kasm can retrieve the password generated by AWS and store it in the Server configuration record created during the AutoScale provision. This will only happen if the **Connection Password** field from the attached AutoScale config is blank. When populated Kasm will use the defined value instead of what is returned from AWS. The Administrator may want to leave this field blank and disable retrieving the password from AWS if they wish the Kasm user to be presented with a login screen to manually enter credentials upon connecting to the Windows Workspace. NOTE: This setting only affects Windows (RDP connection type) AWS instances. |
| **SSH Keys** | The SSH Key pair to assign the EC2 node |
| **AWS Config Override (JSON)** | Custom configuration may be added to the provision request for advanced use cases. Instance configuration is overridden in the 'instance_config' configuration block e.g. `{"instance_config":{"EbsOptimized": true}}` [See EC2 Documentation for available options.](https://boto3.amazonaws.com/v1/documentation/api/latest/reference/services/ec2/client/run_instances.html) |
### Azure settings
A number of settings are required to use this functionality. The Azure settings appear in the Pool configuration when the feature is licensed.
### Register Azure app
Kasm requires an API key to interface with Azure. Azure calls these keys apps. The example walks through registering one along with the required permissions.
1. Register an app by going to the Microsoft Entra ID service in the Azure portal.
2. From the **Add** dropdown select **App Registration**
3. Give this app a human-readable name such as **Kasm Workspaces**
4. Go to **Resource Groups** and select the **Resource Group** that Kasm uses for AutoScaling.
5. Select **Access Control (IAM)**
6. From the **Add** drop down select **Add role assignment**
7. The app created in Azure needs four roles. First, select the *Virtual Machine Contributor* role. On the next page, select the app by typing in the name, for example **Kasm Workspaces**.
8. Repeat this process to add the *Network Contributor*, *DNS Zone Contributor*, and *Compute Gallery Image Reader* roles.
### Azure VM settings
A number of settings are required to use this functionality. The Azure settings appear in the Pool configuration when the feature is licensed.

| **Name** | **Description** |
| --- | --- |
| **Name** | A name to use to identify the config. |
| **Subscription ID** | The Subscription ID for the Azure Account. This can be found in the Azure portal by searching for Subscriptions in the search bar in Azure home then selecting the subscription to use. (e.g `00000000-0000-0000-0000-000000000000`) |
| **Resource Group** | The Resource Group the DNS Zone and/or Virtual Machines belong to (e.g `dev`) |
| **Tenant ID** | The Tenant ID for the Azure Account. This can be found in the Azure portal by going to Microsoft Entra ID using the search bar in Azure home. (e.g `00000000-0000-0000-0000-000000000000`) |
| **Client ID** | The Client ID credential used to auth to the Azure Account. Client ID can be obtained by registering an application within Microsoft Entra ID. (e.g `00000000-0000-0000-0000-000000000000`) |
| **Client Secret** | The Client Secret credential created with the registered application in Microsoft Entra ID. (e.g `abc123`) |
| **Azure Authority** | Which Azure authority to use, there are four, Azure Public Cloud, Azure Government, Azure China and Azure Germany. |
| **Region** | The Azure region where the Agents will be provisioned. (e.g `eastus`) |
| **Max Instances** | The maximum number of Azure VMs to provision regardless of the need for additional resources. |
| **VM Size** | The size configuration of the Azure VM to provision (e.g `Standard_D2s_v3`) |
| **OS Disk Type** | The disk type to use for the Azure VM. (e.g `Premium_LRS`) |
| **OS Disk Size** | Select the boot volume size to assign the compute instance. The admin console accepts Bytes/GiB and stores the value as bytes (`azure_os_disk_size_bytes`). API integrations must submit the number of bytes in whole GiB (2^30) increments. |
| **OS Image Reference (JSON)** | The OS Image Reference configuration for the Azure VMs (e.g `{"publisher":"canonical","offer":"0001-com-ubuntu-server-jammy","sku":"22_04-lts-gen2","version":"latest"}` or `{"id":"/subscriptions/000.../resourceGroups/dev/providers/Microsoft.Compute/galleries/development-gallery/img/ubuntu-22.04-custom"}`) |
| **Image is Windows** | Is this a windows VM being created |
| **Plan Name** | Plan Name for the VM image. This is optional, and is only required for images from the marketplace or custom images derived from a marketplace image. |
| **Plan Product** | Plan Product for the VM image. This is optional, and is only required for images from the marketplace or custom images derived from a marketplace image. |
| **Plan Publisher** | Plan Publisher for the VM image. This is optional, and is only required for images from the marketplace or custom images derived from a marketplace image. |
| **Security Type** | Which features used (if any) to security the VM. This is optional, but may be required for certain Windows VMs such as Windows 10 and Windows 11. |
| **Secure Boot Enabled** | Whether or not Secure Boot is enabled for the VM. This is not enabled by default, but may be required for certain Windows VMs such as Windows 11. |
| **TPM Enabled** | Whether or not TPM is enabled for the VM. This is not enabled by default, but may be required for certain Windows VMs such as Windows 11. |
| **Network Security Group** | The network security group to attach to the VM (e.g `/subscriptions/000.../resourcegroups/dev/providers/Microsoft.Network/networkSecurityGroups/example-nsg`) |
| **Subnet** | The subnet to attach the VM to (e.g `/subscriptions/000.../resourceGroups/dev/providers/Microsoft.Network/virtualNetworks/development-vnet/subnets/default`) |
| **Assign Public IP** | If checked, the VM will be assigned a public IP. If no public ip IP is assigned the VM must ne attached to a standard load balancer of the subnet must have a NAT Gateway or user-defined route (UDR). If a public IP is used, the subnet must not also include a NAT Gateway. [Reference](https://docs.microsoft.com/en-us/azure/virtual-network/ip-services/default-outbound-access) |
| **Tags (JSON)** | A JSON dictionary of custom tags to assign to the VMs (e.g `{"foo":"bar", "bin": "baz"}` ) |
| **OS Username** | The login username to assign to the new VM (e.g `testuser`) |
| **OS Password** | The login password to assign to the new VM. Note: Password authentication is disabled for SSH by default |
| **SSH Public Key** | The SSH public key to install on the VM for the defined user: (e.g `ssh-rsa AAAAAAA....`) |
| **Agent Startup Script** | When instances are provisioned, this script is executed and is responsible for installing and configuring the Kasm Agent. |
| **Config Override (JSON)** | Custom configuration may be added to the provision request for advanced use cases. The emitted json structure is visible by clicking **JSON View** when inspecting the VM in the Azure console. The keys in this configuration can be used to update top level keys within the emitted json config (e.g `{"location":"eastus"}`). Nested items can be updated by using dot notation in the key (e.g `{"hardware_profile.vm_size":"Standard_D4s_v3"}`) Exiting array elements can be updated by specifying the index in the dot notation (e.g `{"os_profile.linux_configuration.ssh.public_keys.0.path":"/home/ubuntu/.ssh/authorized_keys"}`) |
### Digital Ocean settings
:::note
A detailed guide on Digital Ocean AutoScale configuration is available here.
:::
:::warning
Review [Tag Does Not Exist Error](#tag-does-not-exist-error) for known issues and workarounds.
:::

| Name | Description |
| --- | --- |
| **Name** | A name to use to identify the config. |
| **Token** | The token to use to connect to this VM |
| **Max Droplets** | The maximum number of Digital Ocean droplets to provision , regardless of whether more are needed to fulfill user demand. |
| **Region** | The Digital Ocean Region where droplets should be provisioned. (e.g nyc3) |
| **Image** | The Image to use when creating droplets. (e.g docker-24-04). See [Digital Ocean documentation](https://docs.digitalocean.com/products/droplets/details/images/) for more details. |
| **Droplet Size** | The droplet size configuration (e.g c-2). See [https://slugs.do-api.dev](https://slugs.do-api.dev/) for more details |
| **Tags** | A tag(s) to assign the droplet when it is created. This should be a comma separated list of tags. |
| **SSH Key Name** | The SSH Key to assign to the newly created droplets. The SSH Key must already exist in the Digital Ocean Account. |
| **Firewall Name** | The name of the Firewall to apply to the newly created droplets. This Firewall must already exist in the Digital Ocean Account. Go to your Digital Ocean dashboard -> "Networking" -> "Firewalls" to view existing firewalls or create a new firewall |
| **Startup Script** | When droplets are provisioned this script is executed. The script is responsible for installing and configuring the Kasm Agent. Example scripts can be found on our [GitHub repository](https://github.com/kasmtech/workspaces-autoscale-startup-scripts) |
#### Tag does not exist error
When you first test AutoScaling with Digital Ocean, an error similar to the following may appear:
```yml
// highlight-next-line
Future generated an exception: tag zone:abc123 does not exist
traceback:
..
File "digitalocean/Firewall.py", line 225, in add_tags
File "digitalocean/baseapi.py", line 196, in get_data
digitalocean.DataReadError: tag zone:abc123 does not exist
process: manager_api_server
```
This error occurs when Kasm Workspaces tries to assign a unique tag based on the Zone ID to the Digital Ocean Firewall. When that tag does not already exist in Digital Ocean, the operation fails and presents the error. To work around the issue, manually create a tag matching the one specified in the error, for example `zone:abc123`, through the Digital Ocean console. Create the tag through the API or by adding it to a temporary Droplet.
### Google Cloud (GCP) settings
:::note
A detailed guide on GCP AutoScale configuration is available here.
:::

| Name | Description |
| --- | --- |
| **Name** | An identifying name for this provider configuration e.g. Google Cloud (GCP) Docker Agent AutoScale Provider |
| **GCP Credentials** | The JSON formatted credentials for the service account used to authenticate with GCP: [Ref](https://cloud.google.com/iam/docs/creating-managing-service-account-keys#iam-service-account-keys-create-console) |
| **Max Instances** | The maximum number of GCP compute instances to provision regardless of the need for additional resources. |
| **Project ID** | The Google Cloud Project ID (e.g pensive-voice-547511) |
| **Region** | The region to provision the new compute instances. (e.g us-east4) |
| **Zone** | The zone the new compute instance will be provisioned in (e.g us-east4-b) |
| **Machine Type** | The Machine type for the GCP compute instances. (e.g e2-standard-2) |
| **Machine Image** | The Machine Image to use for the new compute instance. (e.g projects/ubuntu-os-cloud/global/img/ubuntu-2204-lts) |
| **Boot Volume Size** | Select the boot volume size to assign the compute instance. The admin console accepts Bytes/GB and stores the value as bytes (`gcp_boot_volume_bytes`). API integrations must submit the number of bytes in whole GB (10^9) increments. |
| **Disk Type** | The disk type for the new instance. (e.g pd-ssd, pd-standard, etc.) |
| **Customer Managed Encryption** **Key (CMEK)** | The optional path to the Customer Managaged Encryption Key (CMEK) (e.g projects/pensive-voice-547511/locations/global/keyRings/my-keyring/cryptoKeys/my-key |
| **Network** | The path of the Network to attach the new instance. (e.g projects/pensive-voice-547511/global/networks/default) |
| **Sub Network** | The path of the Sub Network to attach the new instance.(e.g projects/pensive-voice-547511/regions/us-east4/subnetworks/default) |
| **Public IP** | If checked, a public IP will be assigned to the new instances |
| **Network Tags (JSON)** | A JSON list of the Network Tags to assign the new instance. (e.g `["https-server", "foo", "bar"]`) |
| **Custom Labels (JSON)** | A JSON dictionary of Custom Labels to assign the new instance (e.g `{"foo": "bar", "bin":"baz"}`) |
| **Metadata (JSON)** | A JSON list of metadata objects to add to the instance. (e.g `[{"key": "ssh-keys", "value":"user1:ssh-rsa user1"}]`) [Reference](https://cloud.google.com/compute/docs/connect/add-ssh-keys#add_ssh_keys_to_instance_metadata) |
| **Service Account (JSON)** | A JSON dictionary representing for a service account to attach to the instance. (e.g `{"email": "service-account@example.com", "scopes":["https://www.googleapis.com/auth/cloud-platform"]}`) [Reference](https://cloud.google.com/iam/docs/creating-managing-service-account-keys#iam-service-account-keys-create-gcloud) |
| **Guest Accelerators (JSON)** | A JSON list representing the guest accelerators (e. GPUs) to attach to the instance. (e.g `[{"acceleratorType":"projects//zones//acceleratorTypes/nvidia-tesla-t4","acceleratorCount":1}]`) [Reference](https://cloud.google.com/compute/docs/reference/rest/v1/instances/insert) |
| **GCP Config Override (JSON)** | A JSON dictionary that can be used to customize attributes of the VM request. The only attributes that cannot be overridden are `name` and `labels` (e.g `{"shieldedInstanceConfig":{"enableIntegrityMonitoring":true,"enableSecureBoot":true,"enableVtpm":true}}` [Reference](https://cloud.google.com/compute/docs/reference/rest/v1/instances/insert) |
| **VM Installed OS Type** | The family of the OS installed on the VM (e.g. linux or windows). |
| **Startup Script Type** | The type of startup script to execute, this determines the key used when creating the GCP startup script metadata. [Windows Startup Scripts](https://cloud.google.com/compute/docs/instances/startup-scripts/windows) [Linux Startup Scripts](https://cloud.google.com/compute/docs/instances/startup-scripts/linux) |
| **Startup Script** | When instances are provisioned, this script is executed and is responsible for installing and configuring the Kasm Agent. Bash is supported on Linux instances and Powershell for Windows instance. Example scripts can be found on our [Github repo](https://github.com/kasmtech/workspaces-autoscale-startup-scripts) |
#### Note on updating existing Google Cloud Providers (GCP)
Review the settings for all existing Google Cloud Providers (GCP). Two new fields were added: `VM Installed OS Type`, which defaults to `Linux`, and `Startup Script Type`, which defaults to `Bash Script`. A provider configured with a Windows VM does not launch the startup script successfully without changing these values.
### Harvester settings
:::note
A detailed guide on Harvester AutoScale configuration is available here.
:::
| **Setting** | **Description** |
| --- | --- |
| Name | An identifying name for this provider configuration e.g. Harvester Docker Agent AutoScale Provider |
| Max Instances* | The maximum number of autoscale instances to be provisioned, regardless of other settings |
| Host | The address of the Harvester instance, from the KubeConfig file (e.g. https://harvester.example.com/k8s/clusters/local) |
| SSL Certificate | The Harvester certificate as a base64 encoded string, from the KubeConfig file |
| API Token | The API token for authentication to Harvester, from the KubeConfig file |
| VM Namespace | The name of the Harvester namespace where the VMs will be provisioned (e.g. kasm-autoscale) |
| VM SSH Public Key | A public key to add to the autoscale agents, this is then provided as `{ssh_key}` for use in the startup script |
| Cores | The number of CPU cores to configure for the autoscale agents |
| Memory | The amount of memory to assign to the autoscale agents. The admin console accepts Bytes/MiB/GiB and stores the value as bytes (`memory_bytes`). API integrations must submit the number of bytes. |
| Disk Image | The name of the Harvester image to use for autoscale agents. See Harvester Disk Image for more details. |
| Disk Size | The size of the disk to use for autoscale agents. The admin console accepts Bytes/MB/MiB/GB/GiB and stores the value as bytes (`disk_size_bytes`). API integrations must submit the number of bytes. |
| Network Type | The network type for the autoscale agents (pod or multus) |
| Interface Type | The interface type for the autoscale agents (masquerade or bridge) |
| Network Name | The name of the network to connect to the autoscale agents to, if the network is not in the default namespace this must be specified as namespace/name (e.g. kasm-autoscale/kasm-network) (multus network type only) |
| Startup Script | cloud-init, Bash, or Powershell script to run after agent creation, typically to install the Kasm Agent and/or any other runtime dependencies you may have. Example scripts can be found on our [GitHub repository.](https://github.com/kasmtech/workspaces-autoscale-startup-scripts) Make sure to use the correct script based on the target OS (bash/cloud-init for Linux and Powershell for Windows). |
| Configuration Override | A optional config override that contains a complete YAML manifest file used when provisioning the autoscale agents |
| Enable TPM | Enable TPM for the autoscale agents |
| Enable EFI Boot | Enable the EFI bootloader for the autoscale agents |
| Enable Secure Boot | Enable Secure Boot for the autoscale agents (required EFI Boot to be enabled) |
### Oracle Cloud (OCI) settings
:::note
A detailed guide on OCI AutoScale configuration is available here.
:::

| Name | Description |
| --- | --- |
| **Name** | A name to use to identify the config. |
| **User OCID** | The OCID of the user to authenticate with the OCI API. (e.g ocid1.user.oc1..xyz). You can find this by going to your OCI dashboard -> Click on your Profile -> You can find your user OCID here. |
| **Public Key Fingerprint** | The public key fingerprint of the authenticated API user created in OCI. (e.g xx:yy:zz:11:22:33) |
| **Private Key** | The private key (PEM format) of the authenticated API user created in OCI. |
| **Region** | The OCI Region name. (e.g us-ashburn-1). See [Regions](https://docs.oracle.com/en-us/iaas/Content/General/Concepts/regions.htm) for the list |
| **Tenancy OCID** | The Tenancy OCID for the OCI account. (e.g ocid1.tenancy.oc1..xyz) |
| **Compartment OCID** | The Compartment OCID where the auto-scaled agents will be placed. (e.g ocid1.compartment.oc1..xyx) |
| **Network Security Group OCIDs** **(JSON)** | A JSON list of Security Group OCIDs that will be assigned to the auto-scaled agents. (e.g `["ocid1.networksecuritygroup.oc1.iad.xxx","ocid1.networksecuritygroup.oc1.iad.yyy"]`). To create or find existing Network Security Groups, go to your OCI dashboard -> "Network Security Groups". See [Network Security Groups](https://docs.oracle.com/en-us/iaas/Content/Network/Concepts/networksecuritygroups.htm) for more details |
| **Max Instances** | The maximum number of OCI compute instances to provision regardless of the need for available free slots. |
| **Availability Domains (JSON)** | A JSON list of availability domains where the OCI compute instances may be placed. (e.g `["BEol:US-ASHBURN-AD-1", "BEol:US-ASHBURN-AD-2"]`). See [Availability Domains](https://docs.oracle.com/en-us/iaas/Content/General/Concepts/regions.htm) for more details |
| **Image OCID** | The OCID of the Image to use when creating the compute instances. (e.g ocid1.image.oc1.iad.xyz) See [OCI Image Families](https://docs.oracle.com/en-us/iaas/img/) for the list |
| **Shape** | The name of the shape used for the created compute instances. (e.g VM.Standard.E4.Flex) See [OCI Compute Shapes](https://docs.oracle.com/en-us/iaas/Content/Compute/References/computeshapes.htm) for the list |
| **Flex CPUs** | The number of OCPUs to assign the compute instance. This is only applicable when a Flex shape is used. |
| **Burstable Base CPU** **Utilization** | The baseline percentage of a CPU Core that can be use continuously on a burstable instance (Select 100% to use a non-burstable instance). [Reference](https://docs.oracle.com/en-us/iaas/Content/Compute/References/burstable-instances.htm). |
| **Flex Memory** | The amount of memory to assign the compute instance. This is only applicable when a Flex shape is used. The admin console accepts Bytes/MiB/GiB and stores the value as bytes (`oci_flex_memory_bytes`). API integrations must submit the number of bytes in whole GiB (2^30) increments. |
| **Boot Volume Size** | The size of the boot volume to assign the compute instance. The admin console accepts Bytes/GB and stores the value as bytes (`oci_boot_volume_bytes`). API integrations must submit the number of bytes in whole GB (10^9) increments. |
| **Boot Volume VPUs Per GB** | The Volume Performance Units (VPUs) to assign to the boot volume. Values between 10 and 120 in mulitples of 10 are acceptable. 10 is the default and represents the `Balanced` profile. The higher the VPUs, the higher the volume performance and cost. [Reference](https://docs.oracle.com/en-us/iaas/Content/Block/Concepts/blockvolumeperformance.htm#Block_Volume_Performance). |
| **Custom Tags (JSON)** | A Json dictionary of custom freeform tags to assigned the auto-scaled instances. e.g `{"foo":"bar", "bin":"baz"}` |
| **Subnet OCID** | The OCID of the Subnet where the auto-scaled instances will be placed. (e.g ocid1.subnet.oc1.iad.xyz) To create or find existing subnets, go to your OCI dashboard -> "Networking" -> "Virtual Cloud Networks" -> "Subnets" |
| **SSH Public Key** | The SSH public key to insert into the compute instances if you want to SSH into your instances. (e.g ssh-rsa XYABC) |
| **Startup Script** | When instances are provisioned, this script is executed and is responsible for installing and configuring the Kasm Agent. Example scripts can be found on our [GitHub repository](https://github.com/kasmtech/workspaces-autoscale-startup-scripts) |
| **OCI Config Override** | A JSON dictionary that can be used to customize attributes of the VM request. An OCI Model can be specified with the "OCI_MODEL_NAME" key. Reference: [OCI Python Docs](https://docs.oracle.com/en-us/iaas/api/#/en/iaas/20160918/Instance/LaunchInstance) and [Kasm Examples](#oci-config-override-examples). |
Find the OCI Image ID for the desired operating system version and region by navigating the [OCI Image page](https://docs.oracle.com/en-us/iaas/img/).
#### OCI config override examples
The following OCI AutoScale configurations use the OCI Config Override.
Disables instance metadata service v2 for additional security.
```json
{
"launch_instance_details": {
"instance_options": {
"OCI_MODEL_NAME": "InstanceOptions",
"are_legacy_imds_endpoints_disabled": true
}
}
}
```
A list of available plugins can be retrieved by navigating to an existing instance's "Oracle Cloud Agent" config page.
This example enables the "Vulnerability Scanning" plugin.
```json
{
"launch_instance_details": {
"agent_config": {
"OCI_MODEL_NAME": "LaunchInstanceAgentConfigDetails",
"is_monitoring_disabled": false,
"is_management_disabled": false,
"are_all_plugins_disabled": false,
"plugins_config": [{
"OCI_MODEL_NAME": "InstanceAgentPluginConfigDetails",
"name": "Vulnerability Scanning",
"desired_state": "ENABLED"
}]
}
}
}
```
### Nutanix settings
:::note
A detailed guide on Nutanix AutoScale configuration is available here.
:::
| **Setting** | **Description** |
| --- | --- |
| Name | An identifying name for this provider configuration e.g. Nutanix Docker Agent AutoScale Provider |
| Max Instances | The maximum number of autoscale instances to be provisioned, regardless of other settings |
| Host | The IP or FQDN of the Nutanix Prism Central server (e.g. 192.168.100.40 or nutanix.example.com) |
| Port | The listening port to the Nutanix Prism Central server. This is usually 9440 |
| Username | The name of the user that Kasm will use to access the Nutanix Prism Central server |
| Password | The Password of the user that Kasm will use to authenticate against the Nutanix Prism Central server |
| Verify SSL | Whether to validate SSL certificates. Set to False to enable self-signed certificates. Defaults to True |
| API Version | The API version used to communicate with Prism Central. v3 is recommended, v4 compatibility is currently in Preview |
| VM Candidate Name | The name of the VM used to clone new autoscaled VMs |
| VM Cores | The number of CPU cores to provision on the new autoscaled VMs |
| VM Memory | The amount of memory to provision on the new autoscaled VMs. The admin console accepts Bytes/MiB/GiB and stores the value as bytes (`memory_bytes`). API integrations must submit the number of bytes. |
| Startup Script | When VMs are provisioned, this script is executed and is responsible for installing and configuring the Kasm Agent for Docker Agent roles, or the Kasm Desktop Service for Windows VMs if desired. Bash scripts and cloud-config yaml formats are supported on a Linux host and Powershell scripts on Windows hosts Example scripts are available on our [GitHub repository](https://github.com/kasmtech/workspaces-autoscale-startup-scripts) |
### Proxmox settings
:::note
A detailed guide on Proxmox AutoScale configuration is available here.
:::
| **Setting** | **Description** |
| --- | --- |
| Name | An identifying name for this provider configuration e.g. Proxmox Docker Agent AutoScale Provider |
| Max Instances | The maximum number of autoscale instances to be provisioned, regardless of other settings |
| Host | The hostname or IP and port of your Proxmox instance (e.g. 192.168.100.40:8006) |
| Username | The name of the autoscale user in Proxmox, including the auth realm (e.g. KasmUser@pve) |
| Token Name | The name of the API token associated with the user (e.g. kasm_token and not KasmUser@pve!kasm_token) |
| Token Value | The secret value of the API token associated with the user |
| Verify SSL | Whether or not to verify the SSL certs in the Proxmox environment. Disable if you are using self-signed certs |
| VMID Range Lower | The start of the VMID range for Kasm to use for autoscale agents. Must not overlap with any other Proxmox autoscale providers configured in Kasm |
| VMID Range Upper | The end of the VMID range for Kasm to use for autoscale agents. Must not overlap with any other Proxmox autoscale providers configured in Kasm |
| Full Clone | If enabled performs a full clone rather than a linked clone. A linked clone is faster to provision but will have reduced performance compared to a full clone |
| Template Name | The name of the VM template to use when cloning new autoscale agents |
| Cluster Node Name | The name of the Proxmox node containing the VM template |
| Resource Pool Name | Specify the resource pool to use for cloning the new autoscale agents |
| Storage Pool Name | Optionally specify a storage pool to use for cloning the new autoscale agents. This requires Full Clone to be enabled |
| Target Node Name | Optionally specify a cluster node to provision new autoscale agents on (defaults to the Cluster Node Name) |
| VM Cores | The number of CPU cores to configure for the autoscale agents |
| VM Memory | The amount of memory for the autoscale agents. The admin console accepts Bytes/MiB/GiB and stores the value as bytes (`memory_bytes`). API integrations must submit the number of bytes. |
| Installed OS Type | Linux or Windows |
| Startup Script Path | The absolute path to where the startup script will be uploaded and run from, typically `/tmp` for Linux or `C:\windows\temp` for Windows. The path must exist on the template. |
| Startup Script | Bash (Linux) or Powershell (Windows) startup script to run after agent creation, typically to install the Kasm Agent and/or any other runtime dependencies. Example scripts are available on our [GitHub repository](https://github.com/kasmtech/workspaces-autoscale-startup-scripts) |
### VMware vSphere settings
:::note
A detailed guide on vSphere AutoScale configuration is available here.
:::

| Setting | Description |
| --- | --- |
| **Name** | An identifying name for this provider configuration. |
| **vSphere vCenter Address** | The IP or FQDN of the VMware vSphere vCenter server to use. |
| **vSphere vCenter Port** | The management port of your Vcenter instance (typically 443) |
| **vSphere vCenter Username** | The username to use when authenticating with the vSphere vCenter server (e.g kasm-autoscale) |
| **vSphere vCenter Password** | The password to use when authenticating with the vSphere vCenter server. |
| **Clone Type** | Select the cloning method: **Full Clone (Template)** creates independent VMs from a template with dedicated storage, **Linked Clone (VM Snapshot)** creates VMs using delta disks from a snapshot for faster provisioning and reduced storage, and **Instant Clone (Frozen VM)** creates VMs by forking a frozen parent VM's memory/CPU state for sub-second cloning. |
| **VM Template Name** | (Full Clone only) The name of the template VM to use when cloning new autoscaled VMs. |
| **Linked Clone VM Name** | (Linked Clone only) The name of the source VM (not template) to use for linked clones. This VM must have a snapshot available. |
| **Linked Clone Snapshot Name** | (Linked Clone only) The name of the snapshot on the source VM to clone from. |
| **Frozen VM Name** | (Instant Clone only) The name of the frozen parent VM to use for instant clones. This VM must be powered on and frozen. |
| **Max Instances** | The maximum number of vSphere VM instances to provision regardless of the need for available free slots. |
| **Datacenter Name** | The datacenter to use for cloning the new vSphere VM instances. |
| **VM Folder** | The VM folder to use for cloning the new vSphere VM instances. This field is optional, if left blank the VM folder of the template is used. |
| **Use Datastore Cluster** | (Full Clone only) When enabled, the **Datastore Name** field is treated as a Datastore Cluster name and vSphere will recommend the optimal datastore for each clone. If the recommendation fails, the clone falls back to the source VM's datastore. Not available for linked clones. |
| **Datastore Name** | The datastore (or datastore cluster, when **Use Datastore Cluster** is enabled) to use for cloning new vSphere VM instances. This field is optional; if left blank, the datastore of the source VM is used. |
| **Cluster Name** | The cluster to use for cloning the new vSphere VM instances. This field is optional, if left blank the cluster of the template is used. |
| **Resource Pool** | The resource pool to use for cloning the new vSphere VM instances. This field is optional, if left blank the resource pool of the template is used. |
| **Number of Guest CPUs** | (Full Clone and Linked Clone only) The number of CPUs to configure on new vSphere VM instances. This option is not dependent on the number of CPUs configured on the template. Instant clones inherit the CPU configuration of the frozen parent VM. |
| **Amount of Guest Memory** | (Full Clone and Linked Clone only) The amount of memory to configure on new vSphere VM instances. This option is not dependent on the amount of memory configured on the template. Instant clones inherit the memory configuration of the frozen parent VM. The admin console accepts Bytes/MiB and stores the value as bytes (`vsphere_memory_bytes`). API integrations must submit the number of bytes in whole MiB (2^20) increments. |
| **What family of OS is installed** **in the VM** | Whether the template OS is Linux or Windows. This is needed to ensure proper execution of the startup script. |
| **Startup Script Execution Method** | (Full Clone and Linked Clone only) Choose how the startup script is executed: **Cloud-Init (Recommended)** - Injects the script via cloud-init/cloudbase-init for first-boot execution. Requires cloud-init (Linux) or cloudbase-init (Windows) to be installed in the template (**_Additional permissions required_**). **VMware Guest Operations (Legacy)** - Executes the script directly via VMware Tools Guest Operations API after the VM boots. Requires VMware Tools and valid OS credentials. Instant clones always use VMware Guest Operations (no boot sequence). |
| **Guest VM Username** | (Required for VMware Guest Operations method and Instant Clone) The username to use for running the startup script on the new vSphere VM instance. This account should have sufficient privileges to execute all commands in the startup script. |
| **Guest VM Password** | (Required for VMware Guest Operations method and Instant Clone) The password for the **Guest VM Username** account. |
| **Startup Script** | When instances are provisioned, this script is executed and is responsible for installing and configuring the Kasm Agent. Scripts are run as bash scripts on a Linux host and Powershell scripts on a Windows host. Example scripts are available on our [GitHub repository](https://github.com/kasmtech/workspaces-autoscale-startup-scripts) Additional troubleshooting steps can be found in the VMware vSphere section of the AutoScale documentation. |
| **VM SSH Public Key** | A public key to add to the autoscale agents, this is then provided as `{ssh_key}` for use in the startup script. |
#### Permissions for vCenter service account
These are the minimum permissions that your service account requires in vCenter for a default configuration. The account might require additional privileges depending on the features and configurations you have in place. Kasm advises creating a dedicated service account for Kasm Workspaces AutoScaling with these permissions to enhance security and minimize potential risks.
* Datastore
* Allocate space
* Browse datastore
* Global
* Cancel task
* Network
* Assign network
* Resource
* Assign virtual machine to resource pool
* Virtual machine
* Change Configuration
* Change CPU count
* Change Memory
* Set annotation
* Edit Inventory
* Create from existing
* Create new
* Remove
* Unregister
* Guest operations
* Guest operation modifications
* Guest operation program execution
* Guest operation queries
* Interaction
* Power off
* Power on
* Provisioning
* Deploy template
#### Network connectivity
The agent startup scripts use VMware guest script execution through VMware Tools. This functionality requires direct HTTPS connectivity between the Kasm Workspaces Manager and the ESXi hosts running the agent VMs.
#### Notes on vSphere datastore storage
When you configure VMware vSphere with Kasm Workspaces, keep datastore storage in mind. When clones are created, VMware attempts to satisfy the clone operation. When the datastore runs out of space, any VMs running on that datastore are paused until space is available. Kasm Workspaces recommends placing critical management VMs, such as the vCenter server VM and cluster management VMs, on separate datastores that are not used for Kasm AutoScaling.
### OpenStack settings
A number of settings are required to use this functionality. The OpenStack settings appear in the Pool configuration when the feature is licensed.
Find the appropriate OpenStack configuration options on the "API Access" page of the OpenStack UI by downloading the "OpenStack RC File".
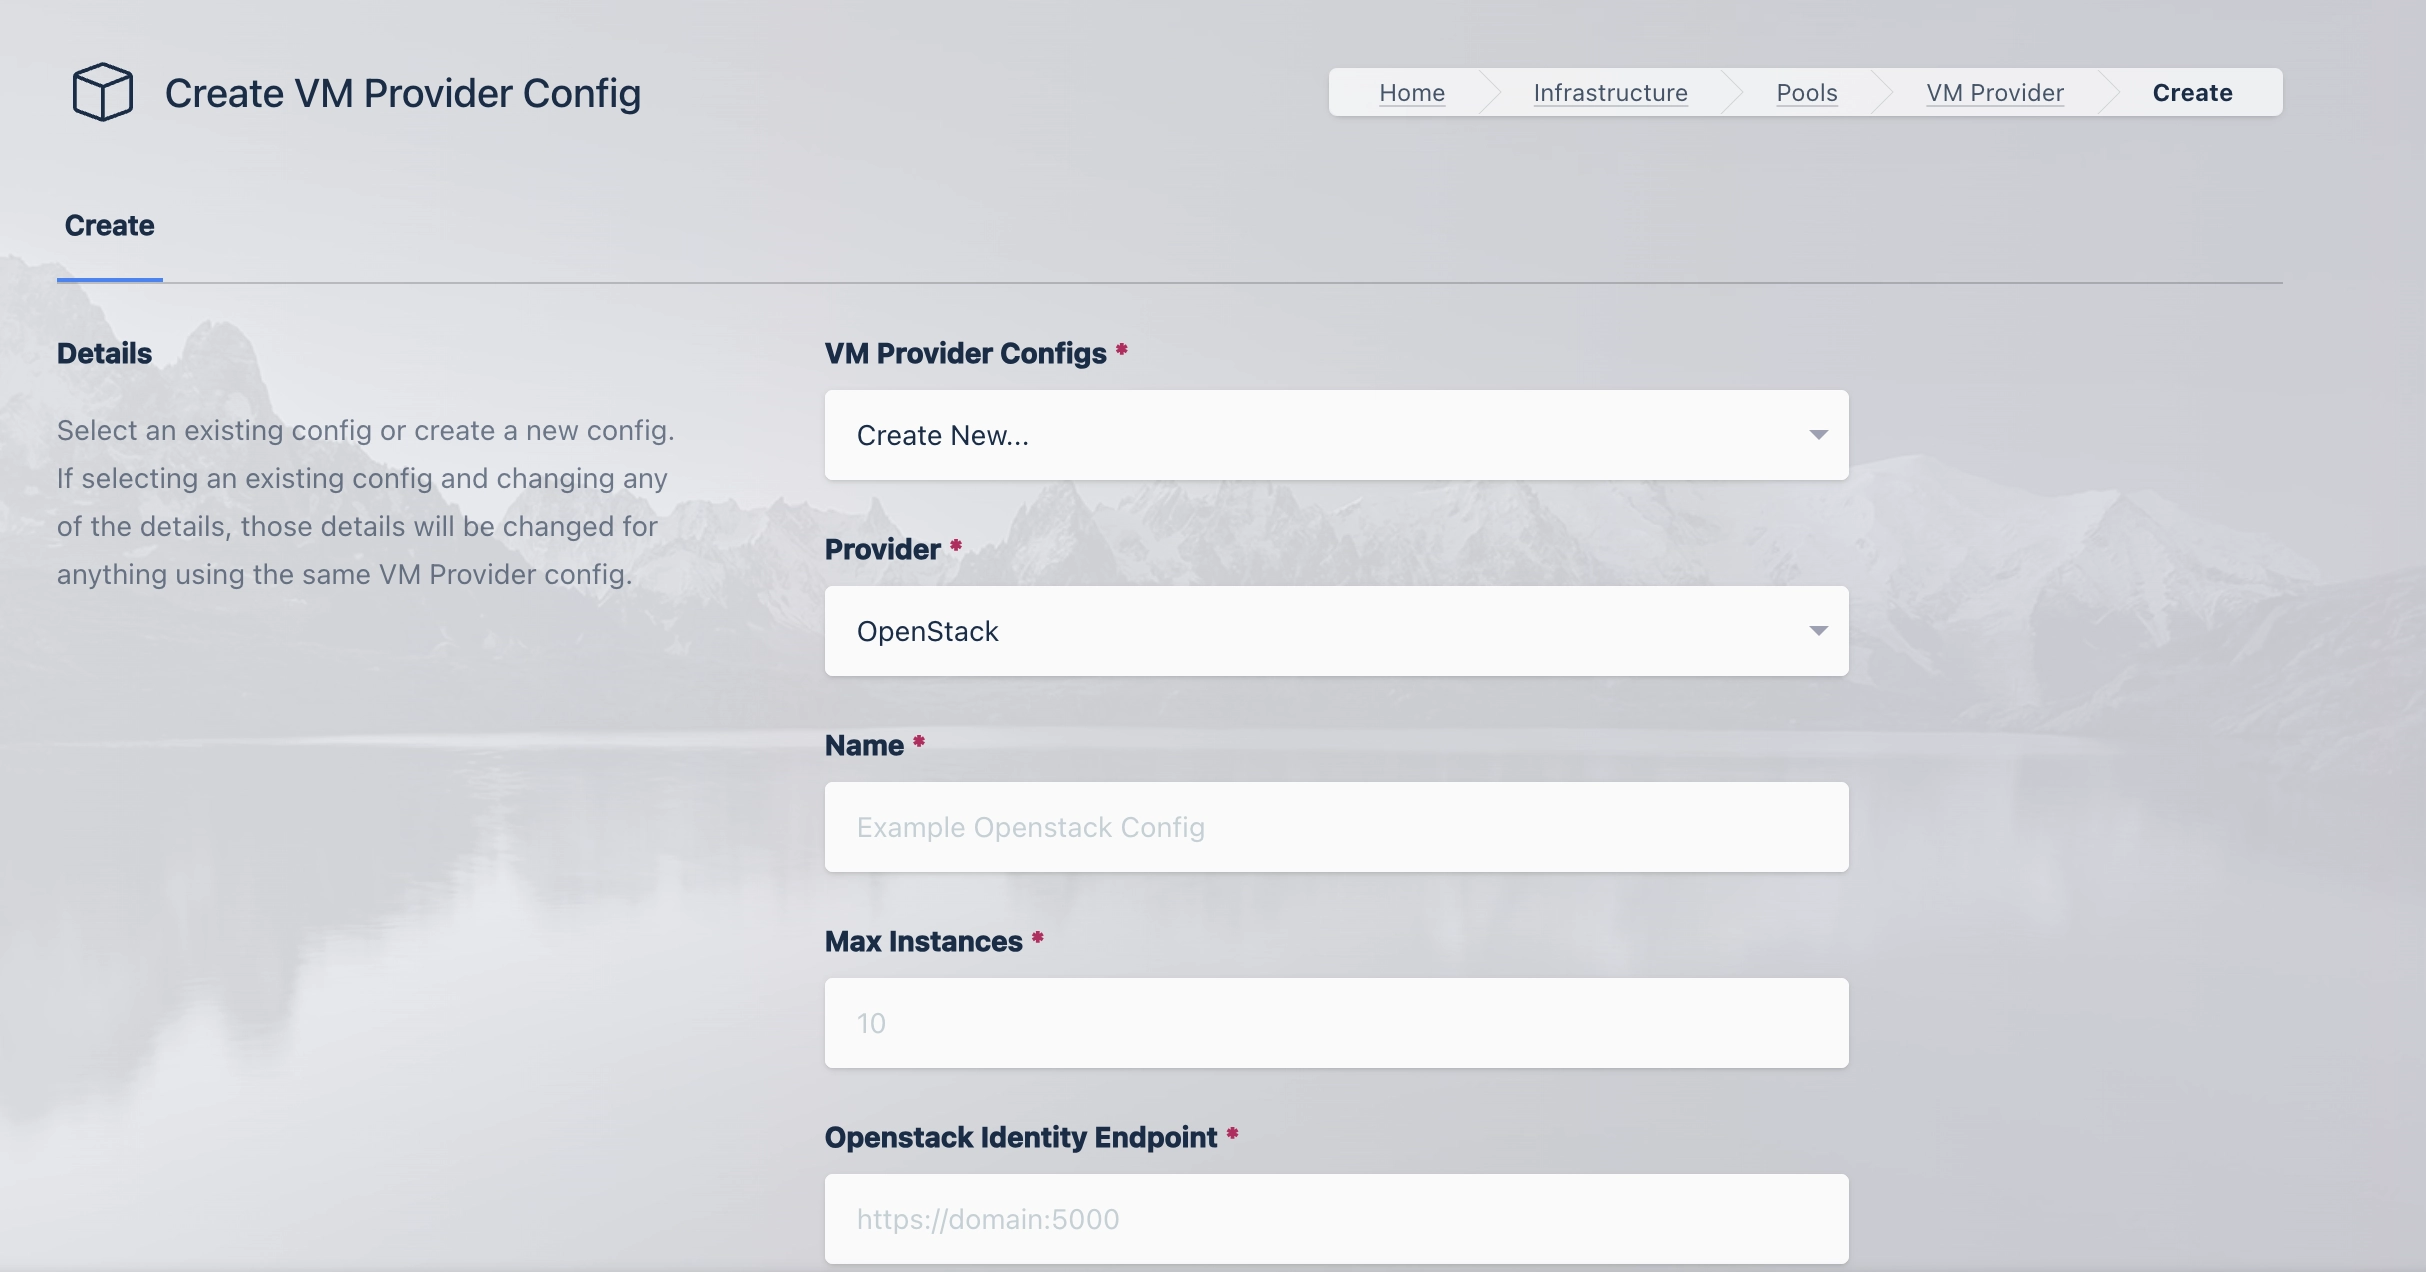
| Name | Description |
| --- | --- |
| **Name** | A name to use to identify the config. |
| **Max Instances** | The maximum number of OpenStack compute instances to provision regardless of the need for additional resources. |
| **OpenStack Identity Endpoint** | The endpoint address of the OpenStack Keystone endpoint (e.g. `https://openstack.domain:5000`) |
| **OpenStack Nova Endpoint** | The endpoint address of the OpenStack Nova (Compute) endpoint (e.g. `https://openstack.domain:8774/v2/`) |
| **OpenStack Nova Version** | The version to use with the OpenStack Nova (Compute) endpoint (e.g. `2.90`) |
| **OpenStack Glance Endpoint** | The endpoint address of the OpenStack Glance (Image) endpoint (e.g. `https://openstack.domain:9292`) |
| **OpenStack Glance Version** | The version to use with the OpenStack Glance (Image) endpoint (e.g. `2`) |
| **OpenStack Cinder Endpoint** | The endpoint address of the OpenStack Cinder (Volume) endpoint. **Note: The address contains the OpenStack Project ID** (e.g. `https://openstack.domain:8776/v3/383a0dad105e460ab5a863ea0a45932b`) |
| **OpenStack Cinder Version** | The version to use with the OpenStack Cinder (Volume) endpoint. (e.g. `3`) |
| **Project Name** | The name of the OpenStack Project where VMs will be provisioned. |
| **Authentication Method** | The authentication method used to authenticate against the OpenStack Identity (Keystone) service. Supported options are **Application Credential** or **User**. See the **Known Issue** below regarding Application Credential authentication. |
| **Application Credential ID** | The Credential ID of the OpenStack Application Credential. |
| **Application Credential Secret** | The OpenStack Application Credential secret. |
| **Project Domain Name** | The domain that the OpenStack Project belongs to. This value is typically obtained from the OpenStack RC file (`OS_PROJECT_DOMAIN_NAME`). If `OS_PROJECT_DOMAIN_NAME` is not present, use `OS_PROJECT_DOMAIN_ID` if supported by your OpenStack deployment. For many deployments, such as OpenMetal, the value is `Default`. |
| **User Domain Name** | The domain that the OpenStack User belongs to. This value is typically obtained from the OpenStack RC file (`OS_USER_DOMAIN_NAME`) (e.g. `Default`). |
| **Username** | The OpenStack username used to authenticate. This value is available in the OpenStack RC file as `OS_USERNAME` and is typically the same username used to sign in to the OpenStack Horizon dashboard. |
| **Password** | The password for the OpenStack user account used to authenticate. This is the same password used to sign in to the OpenStack Horizon dashboard. The password is not stored in the OpenStack RC file and must be entered separately. |
| **Metadata** | A Json Dictionary containing the metadata tags applied to the OpenStack VMs (e.g. `{"my_tag": "my_value"}`) |
| **Image ID** | The ID of the Image used to provision OpenStack VMs. |
| **Flavor** | The name of the desired Flavor for the OpenStack VM (e.g. `gen.medium`) |
| **Create Volume** | Enable to create a new Block storage (Cinder) volume for the OpenStack VM. (When disabled, ephemeral Compute (Nova) storage is used.) |
| **Volume Size** | Select the size of the VM volume when "Create Volume" is enabled. The admin console accepts Bytes/GiB and stores the value as bytes (`openstack_volume_size_bytes`). API integrations must submit the number of bytes using whole GiB (2^30) increments. |
| **Volume Type** | The type of volume to use for the new OpenStack VM Volume (e.g. `__DEFAULT__`) |
| **Startup Script** | When OpenStack VMs are provision this script is executed. The script is responsible for installing and configuring the Kasm Agent. |
| **Security Groups** | A list containing the security groups applied to the OpenStack VM (e.g. `["sg1", "sg2"]`) |
| **Network ID** | The ID of the network that the OpenStack VMs will be connected to. |
| **Key Name** | The name of the SSH Key used to connect to the instance. |
| **Availability Zone** | The Name of the Availability Zone that the OpenStack VM will be placed into. |
| **Config Override** | A JSON dictionary that can be used to customize attributes of the VM request |
:::warning Known Issue
The OpenStack provider supports both **Application Credential** and **User** authentication methods.
However, **Application Credential** authentication may not work with newer OpenStack deployments and can result in a **401 Unauthorized** response from the OpenStack Identity (Keystone) service.
Until this issue is resolved, use **User** authentication when configuring the OpenStack provider.
:::
:::tip OpenStack RC File
Many of the OpenStack provider configuration values can be obtained from the OpenStack RC file provided by your OpenStack deployment.
To download the OpenStack RC file:
1. Sign in to the OpenStack Horizon dashboard.
2. Navigate to **Project** → **API Access**.
3. Click **Download OpenStack RC File**.
The RC file contains values that can be used to populate several OpenStack provider fields.
Example values from an OpenStack RC file:
```bash
export OS_AUTH_URL=https://openstack.domain:5000
export OS_PROJECT_NAME="admin"
export OS_USER_DOMAIN_NAME="Default"
export OS_PROJECT_DOMAIN_ID="default"
export OS_USERNAME="admin"
```
| Kasm Field | OpenStack RC Variable / Source |
|------------|--------------------------------|
| OpenStack Identity Endpoint | `OS_AUTH_URL` |
| Project Name | `OS_PROJECT_NAME` |
| Project Domain Name | `OS_PROJECT_DOMAIN_NAME` or `OS_PROJECT_DOMAIN_ID` |
| User Domain Name | `OS_USER_DOMAIN_NAME` |
| Username | `OS_USERNAME` |
| OpenStack Nova Endpoint | Obtained from the Compute (Nova) service endpoint. |
| OpenStack Glance Endpoint | Obtained from the Image (Glance) service endpoint. |
| OpenStack Cinder Endpoint | Obtained from the Block Storage (Cinder) service endpoint. The endpoint includes the Project ID. |
The OpenStack RC file does **not** contain the user's password. You will be prompted to enter it when sourcing the RC file.
:::
### User Credentials
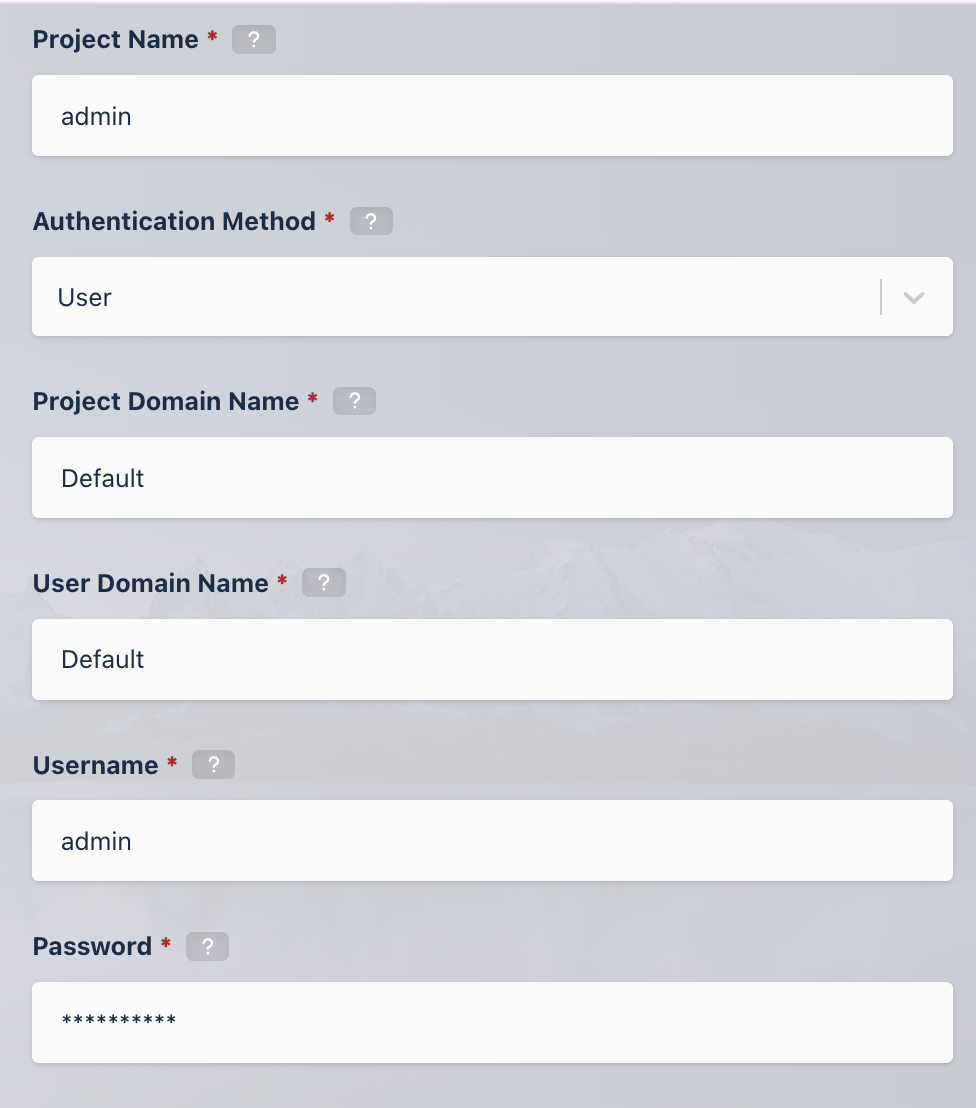
Application Credentials remain available in the product. However, due to the known issue described above, we recommend using **User** authentication. If **Application Credential** authentication results in a **401 Unauthorized** error, switch to **User** authentication.
#### OpenStack notes
The OpenStack provider requires OpenStack endpoints to present trusted, signed TLS certificates. Configure this through an API gateway that presents a valid certificate or by configuring valid certificates on each individual service (reference: [OpenStack Docs](https://docs.openstack.org/charm-guide/latest/admin/security/tls.html)).
The OpenStack provider requires that OpenStack endpoints present trusted, signed TLS certificates. This can be done through an API gateway that presents a valid certificate or
through configuring valid certificates on each individual service [Openstack Docs](https://docs.openstack.org/charm-guide/latest/admin/security/tls.html).
```yaml
- service: volumev3
method: POST
path: /v3/*/volumes
- service: volumev3
method: DELETE
path: /v3/*/volumes/*
- service: volumev3
method: GET
path: /v3/*/volumes
- service: volumev3
method: GET
path: /v3/*/volumes/*
- service: volumev3
method: GET
path: /v3/*/volumes/detail
- service: compute
method: GET
path: /v2.1/servers/detail
- service: compute
method: GET
path: /v2.1/servers
- service: compute
method: GET
path: /v2.1/flavors
- service: compute
method: GET
path: /v2.1/flavors/*
- service: compute
method: GET
path: /v2.1/servers/*/os-volume_attachments
- service: compute
method: GET
path: /v2.1/servers/*
- service: compute
method: GET
path: /v2.1/servers/*/os-interface
- service: compute
method: POST
path: /v2.1/servers
- service: compute
method: DELETE
path: /v2.1/servers/*
- service: image
method: GET
path: /v2/img/*
- service: image
method: GET
path: /v2/schemas/image
```
### KubeVirt enabled providers
#### Overview
Kasm supports AutoScaling in Kubernetes environments running KubeVirt. Supported environments include generic k8s installations as well as GKE and Harvester deployments.
#### Updated startup scripts
Kasm has released updated startup scripts to include KubeVirt support. The most important change is the inclusion of the qemu-agent.
```
https://github.com/kasmtech/workspaces-autoscale-startup-scripts/blob/develop/latest/docker_agents/ubuntu.sh
```
The qemu-agent installation snippet is commented out by default in the startup script. To use it with KubeVirt, first uncomment it.
#### Config overrides
Kasm generates VMs using a Kubernetes YAML manifest described by this API specification:
```
https://kubevirt.io/api-reference/main/definitions.html#_v1_virtualmachine
```
When Kasm providers do not expose a required feature, you can override the provider configuration. To do this, store the entire manifest in the provider `config_override`. Kasm parses the manifest and attempts to update certain fields. The `metadata` is updated so that the `name` field contains a unique name, the `namespace` matches the namespace in the provider config, and the `labels` contain various labels required for AutoScale functionality. All other values are preserved. The `runStrategy` is set to `Always` and the `hostname` is set to match the unique name. To support startup scripts, a `disk` with the following settings is appended to the `disks`:
```
- name: config-drive-disk
cdrom:
bus: sata
readonly: true
```
This points to a `volume` that is appended to the `volumes` with the following settings:
```
- name: config-drive-disk
cloudInitConfigDrive:
secretRef:
name: f'{name}-secret'
```
The manifest spawns multiple VMs, so unique names for certain resources such as PVCs are necessary. To support this, the provider replaces any instance of `$KASM_NAME` with a unique name. To use this for multiple different types of resources, append to the name as in this suggested PVC example:
```
volumes:
- name: disk-0
persistentVolumeClaim:
claimName: $KASM_NAME-pvc
```
Because the manifest spawns multiple VMs, use a disk cloning method such as the `dataVolume` feature of the Containerized Data Importer interface created by KubeVirt.
#### Caveats
The k8s namespace for Kasm resources is configured on the provider and must not be updated while the provider is in use. Updating it can result in unpredictable behavior and orphaned resources. To change the k8s namespace, create a new AutoScale and provider with the new namespace. Update the old AutoScale configuration, setting the standby cores, GPUs, and memory to 0. This allows new resources to transition to the new provider.
Orphaned k8s objects can exist for various reasons, such as power loss of the Kasm server during VM creation. Currently, you must clean up these objects manually. The k8s objects that Kasm creates are virtualmachines, secrets, and PVCs.
The Kasm KubeVirt provider does not work out of the box with the following Kubernetes deployments:
- KIND. The default KIND deployment uses local-path-provisioning for storage, which does not support CDI cloning.
#### KubeVirt settings
A number of settings are required to use this functionality. The KubeVirt settings appear in the Pool configuration when the feature is licensed.
Find the appropriate Kubernetes configuration options by downloading the KubeConfig file provided by your Kubernetes installation.
| Name | Description |
| --- | --- |
| **Name** | A name to use to identify the config. |
| **Max Instances** | The maximum number of KubeVirt compute instances to provision regardless of the need for additional resources. |
| **Kubernetes Host** | The address of the kubernetes cluster (e.g. `https://kubevirt.domain:5000`). |
| **Kubernetes SSL Certificate** | The kubernetes cluster certificate as a base64 encoded string of a PEM file. |
| **Kubernetes API Token** | The bearer token for authentication to the kubernetes cluster. |
| **VM Namespace** | The name of the Kubernetes namespace where the VMs will be provisioned (e.g. kasm-autoscale). |
| **VM SSH Public Key** | The Public SSL Certificate used to access the VM. |
| **VM Cores** | The nubmer of CPU cores to configure for the VM. |
| **VM Memory** | The amount of memory to configure for the VM. The admin console accepts Bytes/MiB/GiB and stores the value as bytes (`memory_bytes`). API integrations must submit the number of bytes. |
| **VM Disk Size** | The size of the disk to configure for the VM. The admin console accepts Bytes/MB/MiB/GB/GiB and stores the value as bytes (`disk_size_bytes`). API integrations must submit the number of bytes. |
| **VM Disk Source** | The name of the source PVC containing a cloud ready disk image used to clone a new disk volume |
| **VM Interface Type** | The interface type for the VM (e.g. masquerade or bridge). |
| **VM Network Name** | The name of the network interface. If using a multus network, it should match the name of that network. If the network is not in the default namespace, it should be specified as namespace/name (e.g. kasm-autoscale/kasm-network). |
| **VM Network Type** | The network type for the VM (e.g. pod or multus). |
| **VM Startup Script** | When VMs are provisioned, this script is executed and is responsible for installing and configuring the Kasm Agent. Scripts are ran as bash scripts on a Linux host and Powershell scripts on a Windows host. Additional troublshooting steps can be found in the VMWare vSphere section of the Autoscale documentation. |
| **Configuration Override** | A config override that contains a complete YAML manifest file used when provisioning the VM. |
| **Enable TPM** | Enable TPM for VM. |
| **Enable EFI Boot** | Enable the EFI boot loader for the VM. |
| **Enable Secure Boot** | Enable secure boot for the VM (requires EFI boot to be enabled). |
#### KubeVirt GKE setup example
This example assumes you have a GKE account, a Linux development environment, and an existing Kasm deployment (ref).
The example will assume the following variables:
- cluster name `kasm`
- zone `us-central1`
- region `us-central1-c`
- machine-type `c3-standard-8`
- namespace `kasm`
- storage class name `kasm-storage`
- pvc name `kasm-ubuntu-jammy`
- pvc size `25GiB`
- pvc image `jammy-server-cloudimg-amd64.img`
These should be replaced with values more appropriate to your installation.
##### Ensure GKE is configured
- Install the gcloud console ([ref](https://cloud.google.com/sdk/docs/install)):
```Bash
curl -O https://dl.google.com/dl/cloudsdk/channels/rapid/downloads/google-cloud-cli-linux-x86_64.tar.gz
tar -xf google-cloud-cli-linux-x86_64.tar.gz
./google-cloud-sdk/install.sh -q --path-update true --command-completion true
. ~/.profile
```
- Initialize the gcloud console ([ref](https://cloud.google.com/sdk/docs/initializing)):
```Bash
gcloud init --no-launch-browser
gcloud config set compute/region us-central1
gcloud config set compute/zone us-central1-c
```
- Enable the GKE engine API ([ref](https://cloud.google.com/kubernetes-engine/docs/how-to/nested-virtualization#before_you_begin)):
```Bash
gcloud services enable container.googleapis.com
```
- Create a cluster with nested virtualization support ([ref](https://cloud.google.com/kubernetes-engine/docs/how-to/nested-virtualization#enable-nested-virt)):
```Bash
gcloud container clusters create kasm \
--enable-nested-virtualization \
--node-labels=nested-virtualization=enabled \
--machine-type=c3-standard-8
```
- Install the kubectl gcloud component ([ref](https://cloud.google.com/kubernetes-engine/docs/how-to/cluster-access-for-kubectl#install_kubectl)):
```Bash
gcloud components install kubectl
```
- Configure GKE kubectl authentication ([ref](https://cloud.google.com/kubernetes-engine/docs/how-to/cluster-access-for-kubectl#install_plugin)):
```Bash
gcloud components install gke-gcloud-auth-plugin
gcloud container clusters get-credentials kasm \
--region=us-central1-c
```
- Create the Kasm namespace:
```Bash
kubectl create namespace kasm
```
##### Install KubeVirt
Note: The current v1.3 release of KubeVirt introduced a bug preventing GKE support. You must install the v1.2.2 release.
- Install KubeVirt ([ref](https://kubevirt.io/user-guide/cluster_admin/installation/)):
```yml
#export RELEASE=$(curl https://storage.googleapis.com/kubevirt-prow/release/kubevirt/kubevirt/stable.txt)
export RELEASE=v1.2.2
kubectl apply -f https://github.com/kubevirt/kubevirt/releases/download/${RELEASE}/kubevirt-operator.yaml
kubectl apply -f https://github.com/kubevirt/kubevirt/releases/download/${RELEASE}/kubevirt-cr.yaml
```
- Wait for it to be ready. This may time out multiple (2-3) times before returning successfully:
```Bash
kubectl -n kubevirt wait kv kubevirt --for condition=Available
```
##### Install the Containerized Data Importer extension
In order to support efficient cloning KubeVirt requires the Containerized Data Importer extension ([ref](https://github.com/kubevirt/containerized-data-importer)).
- Install the CDI extension:
```Bash
export VERSION=$(curl -s https://api.github.com/repos/kubevirt/containerized-data-importer/releases/latest | grep '"tag_name":' | sed -E 's/.*"([^"]+)".*/\1/')
kubectl create -f https://github.com/kubevirt/containerized-data-importer/releases/download/$VERSION/cdi-operator.yaml
kubectl create -f https://github.com/kubevirt/containerized-data-importer/releases/download/$VERSION/cdi-cr.yaml
```
- Create a new storage class that uses the GKE CSI driver and has the `Immediate` volume binding mode:
```Bash
kubectl apply -f - < tmp.deploy.ca.crt
touch $HOME/local.cfg
export KUBECONFIG=$HOME/local.cfg
kubectl config set-cluster local --server=https://$KUBE_API_EP --certificate-authority=tmp.deploy.ca.crt --embed-certs=true
kubectl config set-credentials $KUBE_SA_NAME --token=$KUBE_API_TOKEN
kubectl config set-context local --cluster local --user $KUBE_SA_NAME
kubectl config use-context local
```
- Validate your kubeconfig works
```Bash
kubectl version
```
This should display both the client and server versions. If it does not, retrieve the current config used by kubectl to ensure it uses the correct config:
```Bash
kubectl config view
```
Ensure that it is using the local settings you generated and not an existing GKE configuration.
##### Upload a PVC
Use the `virtctl` tool to upload a VM image. Both the `raw` and `qcow2` formats are supported. The image should be cloud-ready, with cloud-init configured.
- Download and install the `virtctl` tool:
```Bash
VERSION=$(kubectl get kubevirt.kubevirt.io/kubevirt -n kubevirt -o=jsonpath="{.status.observedKubeVirtVersion}")
ARCH=$(uname -s | tr A-Z a-z)-$(uname -m | sed 's/x86_64/amd64/') || windows-amd64.exe
echo ${ARCH}
curl -L -o virtctl https://github.com/kubevirt/kubevirt/releases/download/${VERSION}/virtctl-${VERSION}-${ARCH}
chmod +x virtctl
sudo install virtctl /usr/local/bin
```
- Expose the CDI Upload Proxy by executing the following command in another terminal:
```Bash
kubectl -n cdi port-forward service/cdi-uploadproxy 8443:443
```
- Use the `virtctl` tool to upload the VM image:
```Bash
virtctl image-upload pvc kasm-ubuntu-jammy --uploadproxy-url=https://localhost:8443 --size=25Gi --image-path=./jammy-server-cloudimg-amd64.img --insecure -n kasm
```
##### Ensure Kasm is configured
- Configure Kasm
- Add a license
- Set the default zone upstream address to the address of the Kasm host
- Add a Pool
- `Name` KubeVirt Pool
- `Type` Docker Agent
- Add an Auto-Scale config
- `Name` KubeVirt AutoScale
- `AutoScale Type` Docker Agent
- `Pool` KubeVirt Pool
- `Deployment Zone` default
- `Standby Cores` 4
- `Standby GPUs` 1
- `Standby Memory` 4 GiB (select GiB in the unit selector)
- `Downscale Backoff` 600
- `Agent Cores Override` 4
- `Agent GPUs Override` 1
- `Agent Memory Override` 4 GiB (select GiB in the unit selector)
- Create a new VM Provider
- `Provider` KubeVirt
- `Name` KubeVirt Provider
- `Max Instances` 10
- `Host` paste server URI from kubeconfig
- `SSL Certificate` paste certiciate-authority-data from kubeconfig
- `API Token` paste token from kubeconfig
- `VM Namespace` kasm
- `VM Public SSH Key` paste user public ssh key
- `Cores` 4
- `Memory` 4 GiB (select GiB in the unit selector)
- `Disk Source` kasm-ubuntu-jammy
- `Disk Size` 30 GiB (select GiB in the unit selector)
- `Interface Type` bridge
- `Network Name` default
- `Network Type` pod
- `Startup Script` paste ubuntu docker agent startup script
---
## Windows Autoscale Templates
## Windows AutoScale Template Creation
### Overview
Kasm Workspaces can AutoScale Windows VMs in supported Cloud Providers/Hypervisors. Servers AutoScaled by Kasm should be seen as individual servers connected to via RDP. Kasm Workspaces provides session handling and ensures users a distributed to the pool of servers. Kasm auto-scaling is not supported as a way to scale RDS deployments. Autoscaling of Windows servers requires one or more Windows template images to deploy from.
#### Prerequisites
##### Licensing
> Any stated or implied licensing restrictions with respect to Microsoft products and services are to the best of our knowledge and may not represent the current state and may not be an accurate summarization of what are complicated licensing restrictions. Ensure to consult with Microsoft to fully understand your rights as a licensee of their products and services.
First, it’s important to note that Microsoft has specific licensing requirements for accessing their software applications through remote desktop services (RDS) and virtual desktop infrastructure (VDI) solutions. These licensing requirements can be complex and may vary depending on the specific scenario and product being used.
In general, if you are using Kasm Workspaces as an RDP connection to an RDP application or RDS Session host, you will need to ensure that you have the appropriate Microsoft licenses for the software being accessed. This may include licenses for Windows Server, Remote Desktop Services (RDS) Client Access Licenses (CALs), and/or Microsoft Office.
Kasm Workspaces provides the ability to connect to RDP applications and RDS Session hosts using the internal Connection Proxy service, which allows for secure remote access to Windows-based applications and desktops from any device or browser.
If the Windows VMs are in the cloud, you have the option to use pay-as-you-go (PAYG) licensing or bring-your-own-licensing (BYOL). When using PAYG licensing, the Windows licensing costs are built into your cloud costs. Some cloud providers charge the Microsoft licensing fee separately, so it may not be included directly in the estimated instance pricing. See your cloud provider for details on Microsoft licensing. If you decide to use the BYOL approach, you will be responsible for either manually licensing your servers or automating the licensing process of Windows servers. Kasm does not provide support or assistance with licensing Microsoft products.
The following Microsoft licensing restrictions should be evaluated when selecting an architecture and/or cloud provider.
* Microsoft explicitly disallows running versions of Office later than 2019 on a VM in any cloud provider other than Microsoft Azure.
* Microsoft explicitly does not support Windows 10/11 multi-session images running in any cloud provider other than Microsoft Azure. The result is that running Windows 10/11 in any cloud provider, other than Azure, will require 1 VM per user, which will have profound licensing cost implications.
* Running of Windows 10/11 in a cloud provider other than Azure is heavily restricted by Microsoft. While you will not find Windows 10/11 images in any cloud provider’s image marketplace, you can still create custom images on your own and handle licensing of the operating system yourself. Kasm does not provide support for licensing of Microsoft products.
#### Image Creation
##### Additional Drivers
Depending on your target VM environment you may need to install additional drivers, such as the [VirtIO](https://fedorapeople.org/groups/virt/virtio-win/direct-downloads/stable-virtio/virtio-win.iso) SCSI drivers, as part of the Windows template install process. These drivers should be mounted as an additional drive at install time so that they are available to the Windows installer.
##### Guest Agents
Ensure that you install the required guest tools for your target VM environment, such as VMware Tools or the QEMU Guest Agent, as well as any necessary additional boot-time services such Cloudbase-Init.
##### Sysprep
[Sysprep](https://learn.microsoft.com/en-us/windows-hardware/manufacture/desktop/sysprep--generalize--a-windows-installation) is a Microsoft tool to generalise Windows installs for image deployments. While Kasm does not require Windows templates to be generalised, there are some scenarios where it is required. If you are deploying to Azure then running sysprep is required. If you are joining your Windows AutoScale VMs to Active Directory then running sysprep is recommended. Generalised images may require additional first run tasks to be performed by your AutoScale startup scripts to configure them for your use.
##### Multi-User Environments
If you intend to support multi-user environments on your Windows AutoScale VMs then you should ensure that the default user profile on the template has been configured to meet your requirements. You will also need to install the Kasm Desktop Service as part of your AutoScale startup script.
##### Audio Services
The Windows Audio (`Audiosrv`) service is not started by default on Windows Server and so if audio support is required this should be handled by your startup script or, if not using sysprep, by setting the service to Automatic startup on your template.
##### Additional Software
To improve the speed at which your Windows AutoScale VMs can be provisioned it is recommended where possible to install any required software onto the template, rather than installing at runtime. In scenarios where license keys or product activation is required, you may be able to install the unlicensed software onto the template and configure licensing at runtime. We recommend regularly rebuilding your templates to keep your software up to date and secure.
##### Domain Join
AutoScaled servers can be configured to automatically join Active Directory. This is a two step process which involves Kasm first creating a Computer Object in Active Directory, within a specified AD container. When the Computer Object is created, a random single use password is created, which can only be used to join the computer to the domain. The final step of joining the computer to the domain must be done from the Windows server itself. This is facilitated through the startup script of the VM Provider configuration. The Powershell startup script can then join the computer to the domain using the single use random password that was created by Kasm.
* Create an LDAP Configuration that will be used for user authentication to Kasm.
* Create an LDAP Configuration that will be used to create computer objects in AD. The service account used by this LDAP configuration must have permissions to create and remove computers from the domain. You can use the same LDAP configuration that is used to authenticate users or you can create a different LDAP configuration used specifically for joining and removing systems. If you use a separate LDAP configuration, leave it disabled so that it cannot be used for authentication purposes.
* In the AutoScale Configuration, select `SSO User Accounts` for the Connection Credential Type.
* In the AutoScale Configuration, check the Create Active Directory Computer Record box.
* In the LDAP Config select the LDAP configuration created in step 2.
* In the Active Directory Computer OU DN, enter the AD OU Distinguished Name. Example: `OU=Computers,DC=example,DC=local`
* Enable Recursively Cleanup Active Directory Computer Record if you anticipate the Computer objects having child objects. This can prevent `notAllowedOnNonLeaf` errors when cleaning Azure VMs.
* Click Next to save the AutoScale configuration.
* The next page is the VM Provider configuration. Scroll down to the startup script and provide one which includes a domain join command, such as:
```powershell
$joinCred = New-Object pscredential -ArgumentList ([pscustomobject]@{{ UserName = $null; Password = (ConvertTo-SecureString -String '{ad_join_credential}' -AsPlainText -Force)[0] }})
Add-Computer -Domain "{domain}" -Options UnsecuredJoin,PasswordPass -Credential $joinCred -Force -Restart
```
> If your script uses curly brackets, aside from Kasm variables, you must escape them by doubling them up.
##### Startup Scripts
Each VM Provider has special caveats around how their startup scripts are handled, see the VM Provider page for your target environment for more details. While each VM Provider may behave a bit differently or expect a slightly different format, they all support PowerShell scripts and that script will have access to Kasm managed variables. We provide some examples in our [AutoScale start scripts Github repo](https://github.com/kasmtech/workspaces-autoscale-startup-scripts). The following table lists variables that are accessible from the startup PowerShell script.
> For VMware, due to the way VMware Tools operates, Kasm requires a direct network connection to the ESX host running a Windows VM in order to execute the startup script. All other AutoScale activities occur via connection to vCenter.
###### Startup Script Variables
| Variable Name | Description |
| :-------------------- | :----------------------------------------------------------------------------------------------------------------------------------------------------------------------------------------------------------------------------------------------------------------------------------- |
| connection_username | If the AutoScale configuration is set to use a static username for Kasm user sessions, the username will be contained in this variable. |
| connection_password | If the AutoScale configuration is set to use a static password for Kasm user sessions, this variable will contain the password. |
| ad_join_credential | If the AutoScale configuration is set to join the VM to an Active Directory domain, Kasm creates the AD record and sets a random password that can only be used for joining the VM to the domain. This can then be used in a Powershell startup script to complete the process of joining the system to the domain. |
| domain | If the AutoScale configuration is set to join the VM to an Active Directory domain, this variable will contain the name of the domain. |
##### Kasm Desktop Service
The Kasm Desktop Service is a Windows service that provides additional capabilities to users that are connected to the desktop through Kasm Workspaces:
* Upload files to the remote desktop
* Download files from the remote desktop
* See a preview screenshot of the desktop in the Kasm Workspaces dashboard
* Run PowerShell scripts on session start, session end, or service start
* Kasm managed local Windows users and credentials
* File Mapping
* Supports multiple concurrent users on the same Windows system
users and credentials
* File Mapping
* Supports multiple concurrent users on the same Windows system
rs and credentials
* File Mapping
* Supports multiple concurrent users on the same Windows system
rs and credentials
* File Mapping
* Supports multiple concurrent users on the same Windows system
rs and credentials
* File Mapping
* Supports multiple concurrent users on the same Windows system
ers and credentials
* File Mapping
* Supports multiple concurrent users on the same Windows system
We recommend that you always install the Kasm Desktop Service as part of your AutoScale startup script. The example scripts in our [AutoScale start scripts Github repo](https://github.com/kasmtech/workspaces-autoscale-startup-scripts) demonstrate the unattended install process.
The Kasm Desktop Service uses HTTPS/SSL to communicate with the rest of the Kasm Workspace services. The service installer will open the Windows firewall for TCP port 4902, ensure that firewalls and/or cloud security groups allow inbound TCP port 4902 coming from Kasm API server and Connection Proxy servers. The Kasm Desktop Service will talk outbound to the API Server on the port your deployment utilizes, TCP port 443 by default. Ensure security groups and our firewall rules allow this communication.
TCP port 443 by default. Ensure security groups and our firewall rules allow this communication.
---
## Database Admin: Backup, Restore & Passwords
## Database
### PostgreSQL Database
Kasm uses Postgres as the backend database. This section covers backup and restoration of the Kasm database.
#### Backups
The following script will backup the Postgres data and all conf files to a single file.
```yml
# this will place the back at /tmp/backup.tar
sudo docker exec kasm_db pg_dump -U kasmapp -F t kasm > /tmp/backup.tar
```
This can be scripted out in a cron job, for example daily, with the date in the filename of the tar file for historical backups. Change the /tmp to a directory that is using an NFS mount so the files are stored off the server.
#### Restore
The following script will restore the database from backup. This example assumes the server is just the database role, however, this process will work just as well on a system where all roles are installed.
```bash
# download the same version of kasm that is on the primary database server and unpack it
cd /tmp
curl -O [[storage_url]]kasm_release_[[release]].tar.gz
tar -xf kasm_release*.tar.gz
# install just the database component
sudo bash kasm_release/install.sh -b
# copy the backup.tar into the kasm_db container
sudo docker cp backup.tar kasm_db:/tmp/backup.tar
# restore the database
sudo docker exec kasm_db pg_restore -d kasm /tmp/backup.tar -c -U kasmapp
```
If you restore to a different server you will need to change the database IP or hostname that is referenced by all API and Manager systems. You can avoid this using several methods. Use a hostname and change the IP address in your DNS record. This may take up to an hour to propogate depending on the TTL setting of the DNS record. Use a 5 minute TTL if possible. The other method is to use a virtual IP address if you have a router or firewall inbetween your database servers and the manager/api components. Finally, you can use NGINX with layer 4 load balancing. You can back one backend server as back in the upstream definition in nginx.
#### Change Database Password
Administrators may wish to change the password Kasm API service uses to connect to the database. The following will change the password for the kasmapp user in the PostgreSQL database
and the password that the Kasm API is configured to use when attempting to connect to the PostgreSQL database.
Changing the Postgres password involves restarting Kasm services and will result in an interruption in service.
Login to the server with the Database role and run the following to change the database password. Replace 'new_password' with your desired password, ensuring it does not contain any `$`, `'` or `"` characters.
```Bash
sudo docker exec -it kasm_db psql -U kasmapp -d kasm -c "ALTER ROLE kasmapp WITH PASSWORD 'new_password';"
```
Login to the server with the Web App role and stop the Kasm Services.
```Bash
sudo systemctl stop kasm
```
Edit the API app config, replacing the value on the line starting with 'password: ' with your new desired password.
```Bash
sudo vi /opt/kasm/current/conf/app/api/api.app.config.yaml
```
Start Kasm Services on Web App server.
```Bash
sudo systemctl start kasm
```
---
## Kasm Deployment Zones: Configuration and Management
## Deployment Zones
Deployment Zones are created to enable logical grouping of Kasm services. In large or distributed deployments, it may
be desirable to route users to Kasm services that are closer geographically to improve the user experience. In other
use cases, Deployment Zones might be defined for special network segments representing different tenants or security
enclaves. Administrators can then leverage standard routing, DNS, load balancing, or other networking techniques
to direct user traffic to a desired Zone.

#### Capabilities
Utilizing multiple deployment zones allows administrators to:
- Prefer end-user sessions are provisioned in the Deployment Zone the user is connected to.
- When a user connects to the Kasm UI, the server will attempt to provision the Kasm on Agents in the same Zone, only falling back to other Agent's in other Zone's if all Agents in the current zone are full or unavailable.
- Restrict certain [Workspaces](../../reference/glossary.mdx#workspace) to only provision on Agent's within a given Deployment Zone.
See [Add/Edit Kasm Workspace](../workspaces-sessions/container-workspace/workspaces.mdx#add--edit-workspaces)
- This option is most useful if the Deployment Zones represent special network enclaves that only certain Workspaces and perhaps certain Users should be allowed to access.
#### Configuring Deployment Zones
##### Defining Zone Configurations
Existing Deployment Zones can be updated in the UI by an administrator.
Deployment Zones can only be created at Web App installation time. See [the instructions](../../tutorials/install/multi-server-install.mdx#install-web-app-role) for more information.
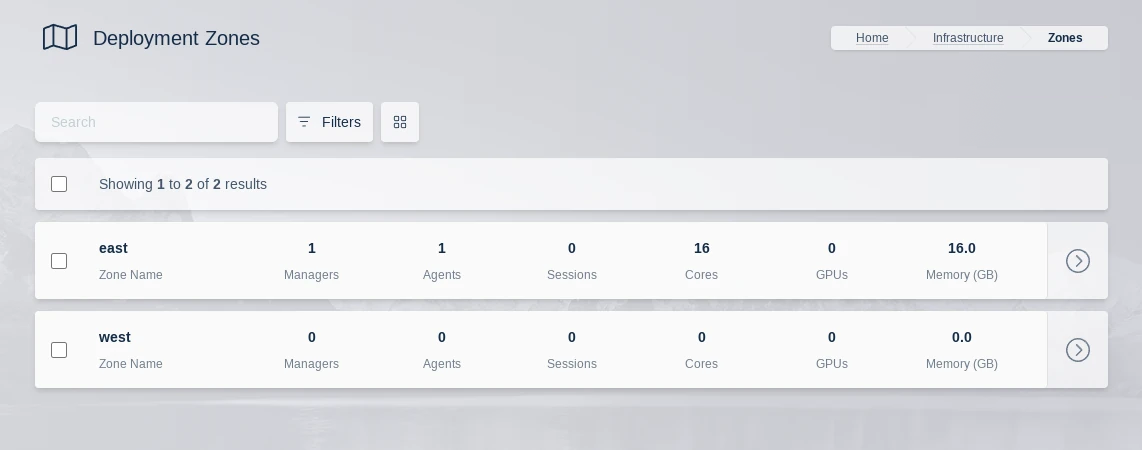
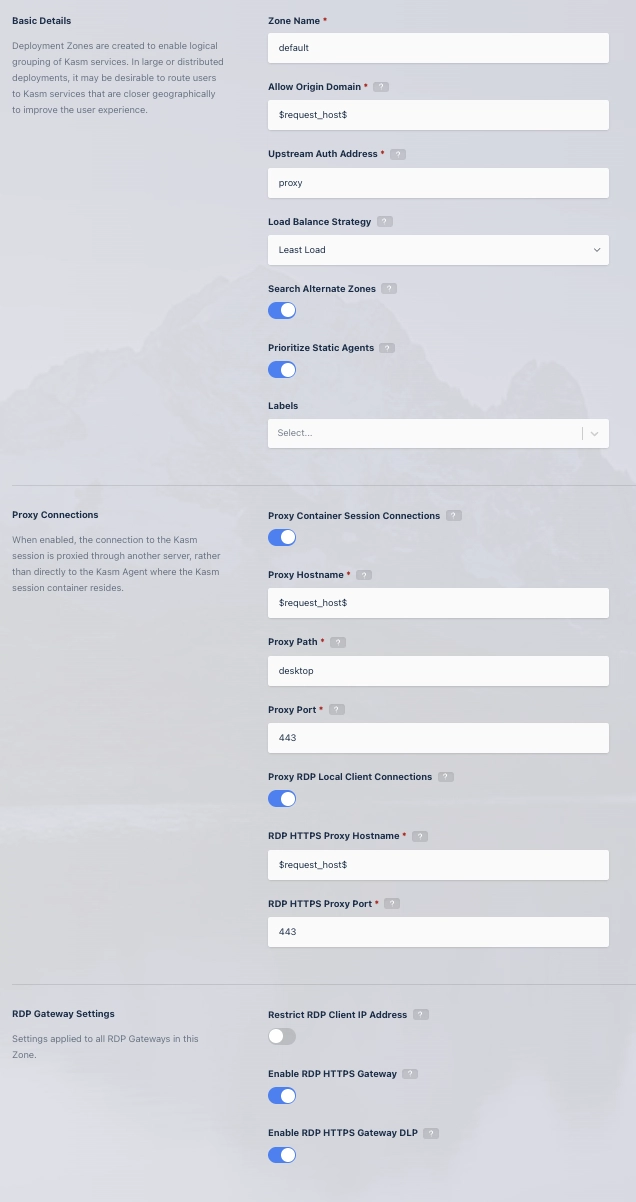
Zone Configuration Options
| **Field** | **Description** | **Default Value** |
|----------------------------------|----------------------------------------------------------------------------------------------------------------------------------------------------------------------------------------------------------------------------------------------------------------------------------------------------------------------------------------------------------------------------------------------------------------------------------------------------------------------------------------------------------|--------------------------|
| **Zone Name** | The name given to the Zone. | |
| **Allow Origin Domain** | Connections to Kasm sessions are restricted to authorized Origins. This value is the authorized origin domain. | `"$request_host$"` |
| **Upstream Auth Address** | Connections to Kasm sessions are authenticated against a Kasm API server. This value is the address of the server. | `"proxy"` |
| **Load Balance Strategy** | Determines how the system prioritizes Agents when a user requests a new Kasm session: • **Least Load**: Prioritizes Agents with the least consumed CPU/Memory. • **Most Load**: Prioritizes Agents with the most consumed CPU/Memory. • **Least Kasms**: Prioritizes Agents with the fewest active sessions. • **Most Kasms**: Prioritizes Agents with the most active sessions. *For Server Pools of type "Server", load is based on session count vs. configured supportable sessions.* *For SSH, RDP, and RemoteApp sessions, a server the user already has an active session on is preferred over this strategy, provided that server has not reached its configured session capacity.* | **Least Load** |
| **Search Alternate Zones** | Allows the system to search for resources in alternate Zones if the same-Zone Agents cannot satisfy the session request. Same-Zone Agents are always preferred. | **Enabled** |
| **Prioritize Static Agents** | Prefers using fixed Agents before utilizing auto-scaled [Docker Agents](docker-agent.mdx). | **Enabled** |
| **Labels** | Labels assigned to all servers and agents in this zone. These labels can be used to control where [Workspace](../workspaces-sessions/container-workspace/workspaces.mdx#add--edit-workspaces) sessions are launched. You can specify these labels in a Workspace's "Include Labels" or "Exclude Labels" settings to ensure sessions run only on certain servers or agents. | **None** |
| **Proxy Connections** | When **enabled**, the user connects to the Kasm session via a proxy server. When **disabled**, connections go directly to the Kasm Agent hosting the session. | **Enabled** |
| **Proxy Hostname** | Hostname of the proxy server used when Proxy Connections are enabled. | `"$request_host$"` |
| **Proxy Path** | The base path appended to the Kasm connection URL when using Proxy Connections. | `"/desktop"` |
| **Proxy Port** | The port used for the proxy server. If set to `0`, Kasm Workspaces will try to detect the correct port from `window.location.port`. | `"0"` |
| **Proxy RDP Local Client Connections** | When **enabled**, RDP connections from native RDP clients are proxied through Kasm Web App servers to the RDP Gateway, allowing use of a single domain. When **disabled**, clients connect directly to the Guac role, which requires public IP and DNS. This setting applies only if **Enable RDP HTTPS Gateway** is also enabled. | **Enabled** |
| **RDP HTTPS Proxy Hostname** | Hostname/IP of the load balancer or proxy in front of the HTTPS-based RDP Gateway. | `"$request_host$"` |
| **RDP HTTPS Proxy Port** | Port number of the load balancer or proxy for the HTTPS-based RDP Gateway. | `"443"` |
| **Restrict RDP Client IP Address** | Enforces that the client's IP for the RDP connection matches the IP of the API call that initiated the session. Not compatible with changing IPs (e.g., via load balancers, proxies, or tunnels like Cloudflare). | **Disabled** |
| **Enable RDP HTTPS Gateway** | When **enabled**, uses HTTPS RDP Gateway protocol. When **disabled**, standard RDP over port 3389 is used. | **Disabled** |
| **Enable RDP HTTPS Gateway DLP** | Sends HTTPS RDP connections through Data Loss Prevention (DLP). This may affect performance/scalability. Disabling DLP disables some Kasm data protection features and breaks single sign-on. Applies only if **Enable RDP HTTPS Gateway** is enabled. | **Disabled** |
**\$request_host\$** referenced as the default for several settings above can be used to automatically reference the domain/host used in the URL to access the Kasm deployment.
For example if users accesses Kasm via `https://east.kasm.server` , **\$request_host\$** will be `east.kasm.server`.
##### Assigning Zone Configurations
[agents](../../reference/glossary.mdx#agent) are assigned the Zone of whichever manager they are currently checked in to.
Once defined, the Kasm services need to be configured to be members of the given Zone.
The Deployment Zone setting for API Servers (kasm_api, kasm_manager) is set their configuration file. The default
zone is **default**
```bash
grep zone_name /opt/kasm/current/conf/app/api/api.app.config.yaml
zone_name: east
```
- Ensure all Kasm services are stopped
```Bash
sudo systemctl stop kasm
```
- Edit the **zone_name** property in api.app.config.yaml
```Bash
vi /opt/kasm/current/conf/app/api/api.app.config.yaml
```
- Restart the Kasm Services
```Bash
sudo systemctl start kasm
```
---
## Direct to Agent Configuration in Kasm Workspaces
## Direct To Agent
### Overview
By default, connections to Kasm session are proxied through the Web App role to the Agent role. This works well
in most situations, and reduces complexity.
In some situations it may be desired have users make connections directly through the agent instead of being proxied
through the Web App.
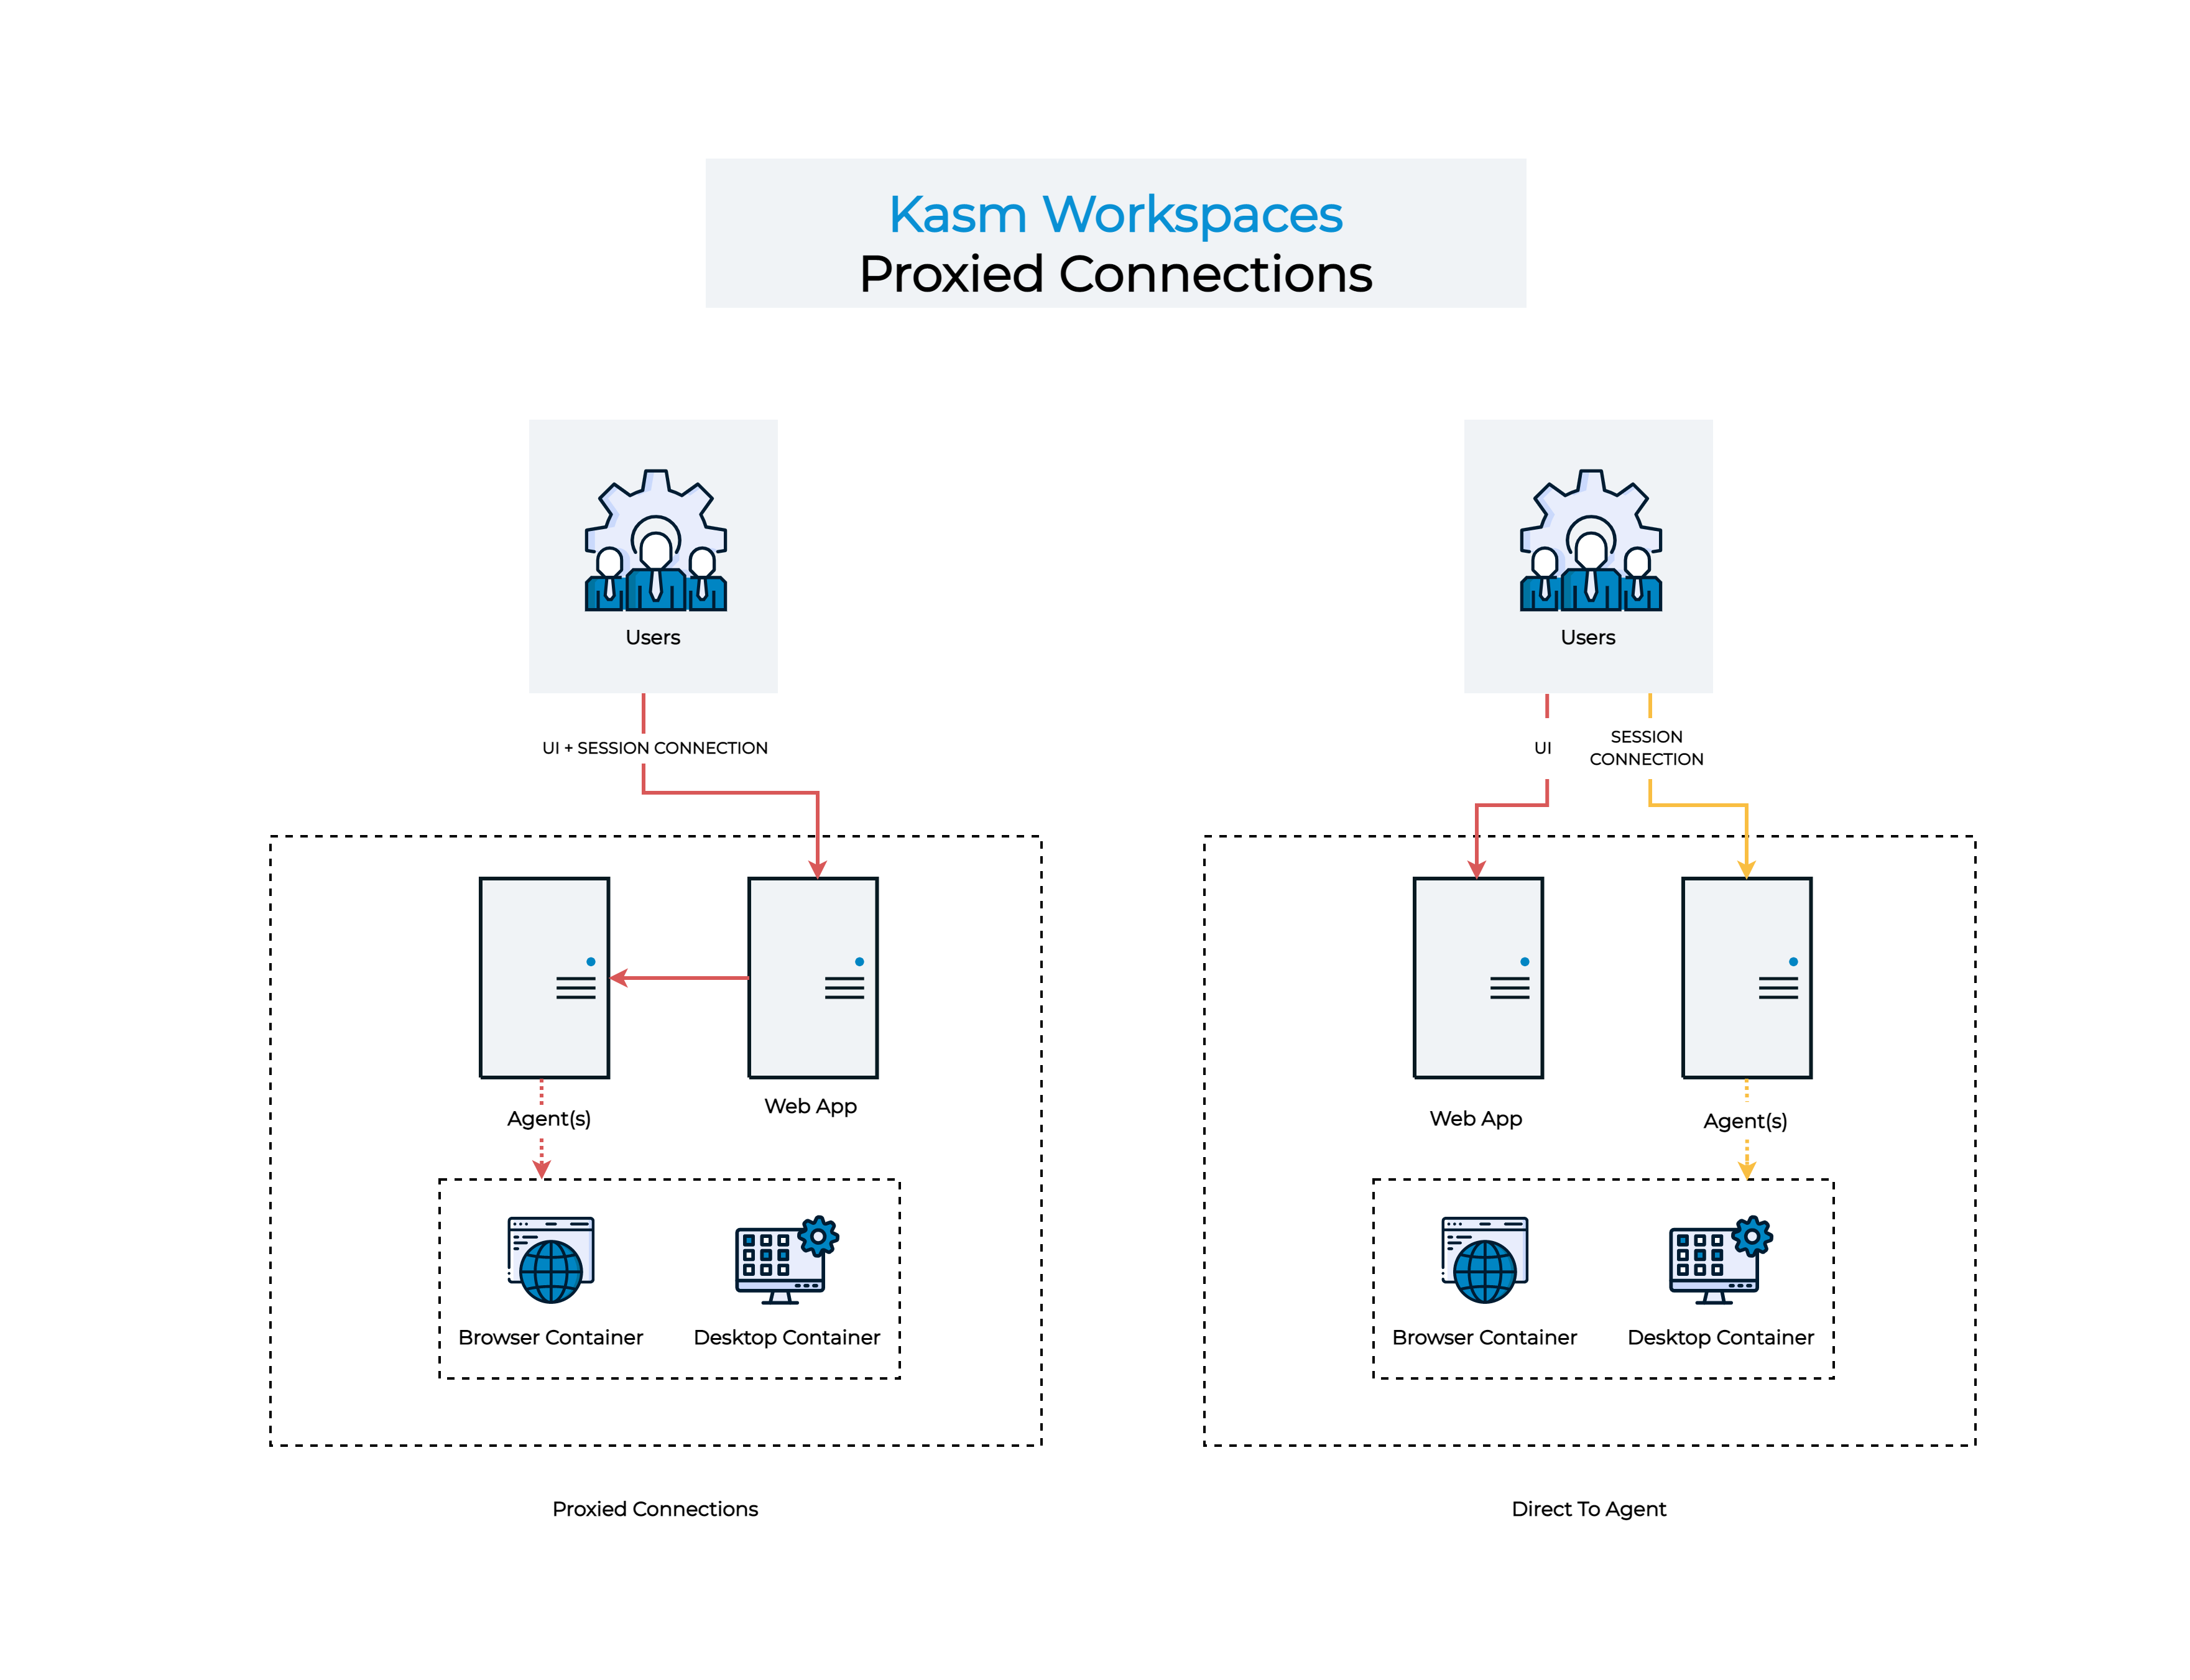
In order to utilize the Direct to Agent workflow, the following requirements must be met.
- Kasm Workspaces is installed in a multi-server configuration.
- All Web App and Agent servers must be resolvable via DNS by clients and all Kasm role servers and must be registered within the same domain
eg. `app-1.kasm.example.com` `agent-1.kasm.example.com`.
- Clients and Kasm role servers must be able to connect to the Agent and Web App addresses (as resolved by DNS) via HTTPS.
- All Web App and Agent servers must have valid certificates trusted by the clients. See [Certificates](../networking/replace-certificates.mdx) for configuration
details.
These instructions assumes starting from a working multi-server install.
### Agent Update
In this section we will configure the Agent's to utilize their DNS name when registering to the Workspaces system.
- Stop the services on the Agent
```Bash
sudo systemctl stop kasm
```
- Update the `public_hostname` value in `/opt/kasm/current/conf/app/agent/agent.app.config.yaml` the the public DNS
name of the Agent eg `agent-1.kasm.example.com`
```Bash
vi /opt/kasm/current/conf/app/agent/agent.app.config.yaml
```
- Start the services on the Agent
```Bash
sudo systemctl start kasm
```
- Log into the Workspaces UI as administrator. Select **Infrastructure** -> **Docker Agents**. Verify the Agent is checking in as the proper DNS name.
- Repeat these steps for all Agents.
### Application Settings
- Log into the Workspaces UI as an administrator
- Select **Infrastructure** -> **Zones** then select **Edit** next to the applicable Zone.
- Uncheck **Proxy Connections**. Click Save.
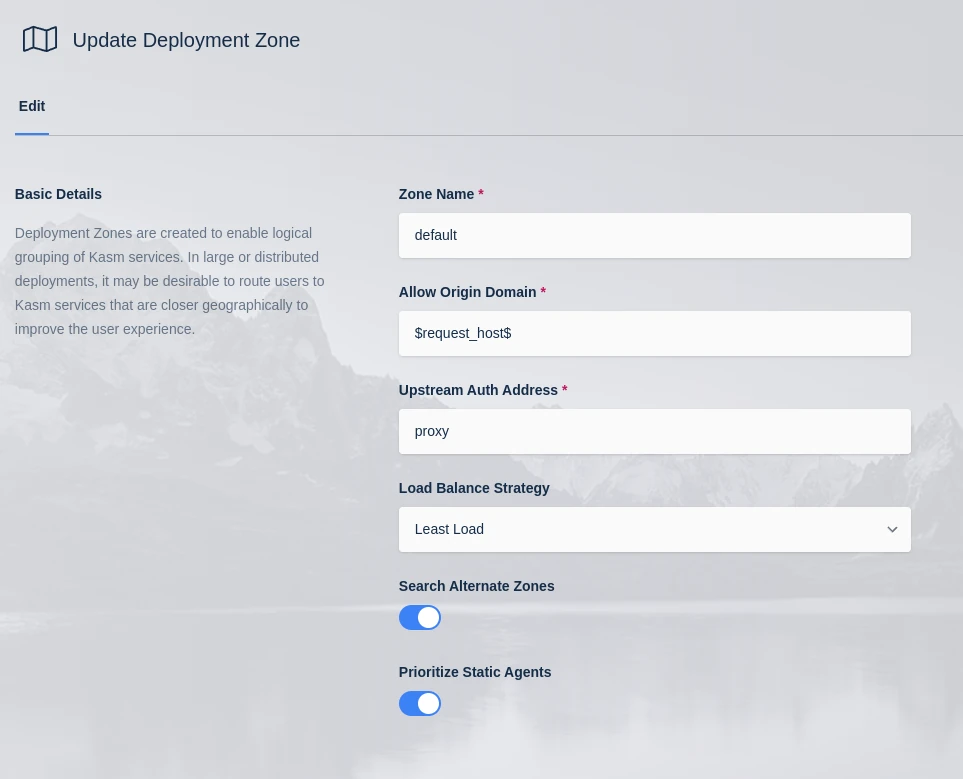
- From the Admin panel select **Settings** -> **Global**
- Set **Kasm Authorization Domain** to the parent domain of the Web App and Agent servers. eg `kasm.example.com`.
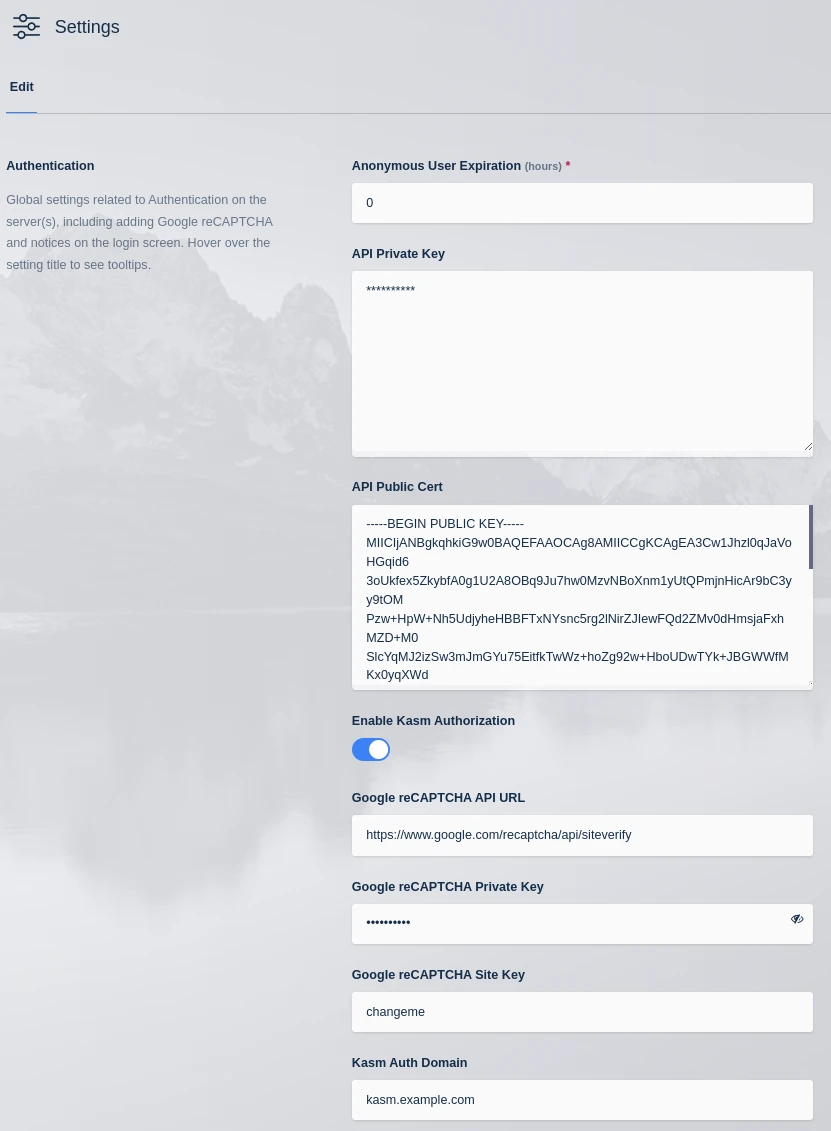
- Restart the services on all Web App servers
```Bash
sudo systemctl restart kasm
```
### Testing
- Log out of the Workspaces UI.
- In a new Incognito browser window log into the Workspaces UI.
- Open the browser developer tools and navigate to the Network tab. Enter `vnc.html` into the filter.
- Launch a new session. The Url in developer tools should have the Agent's address as the domain
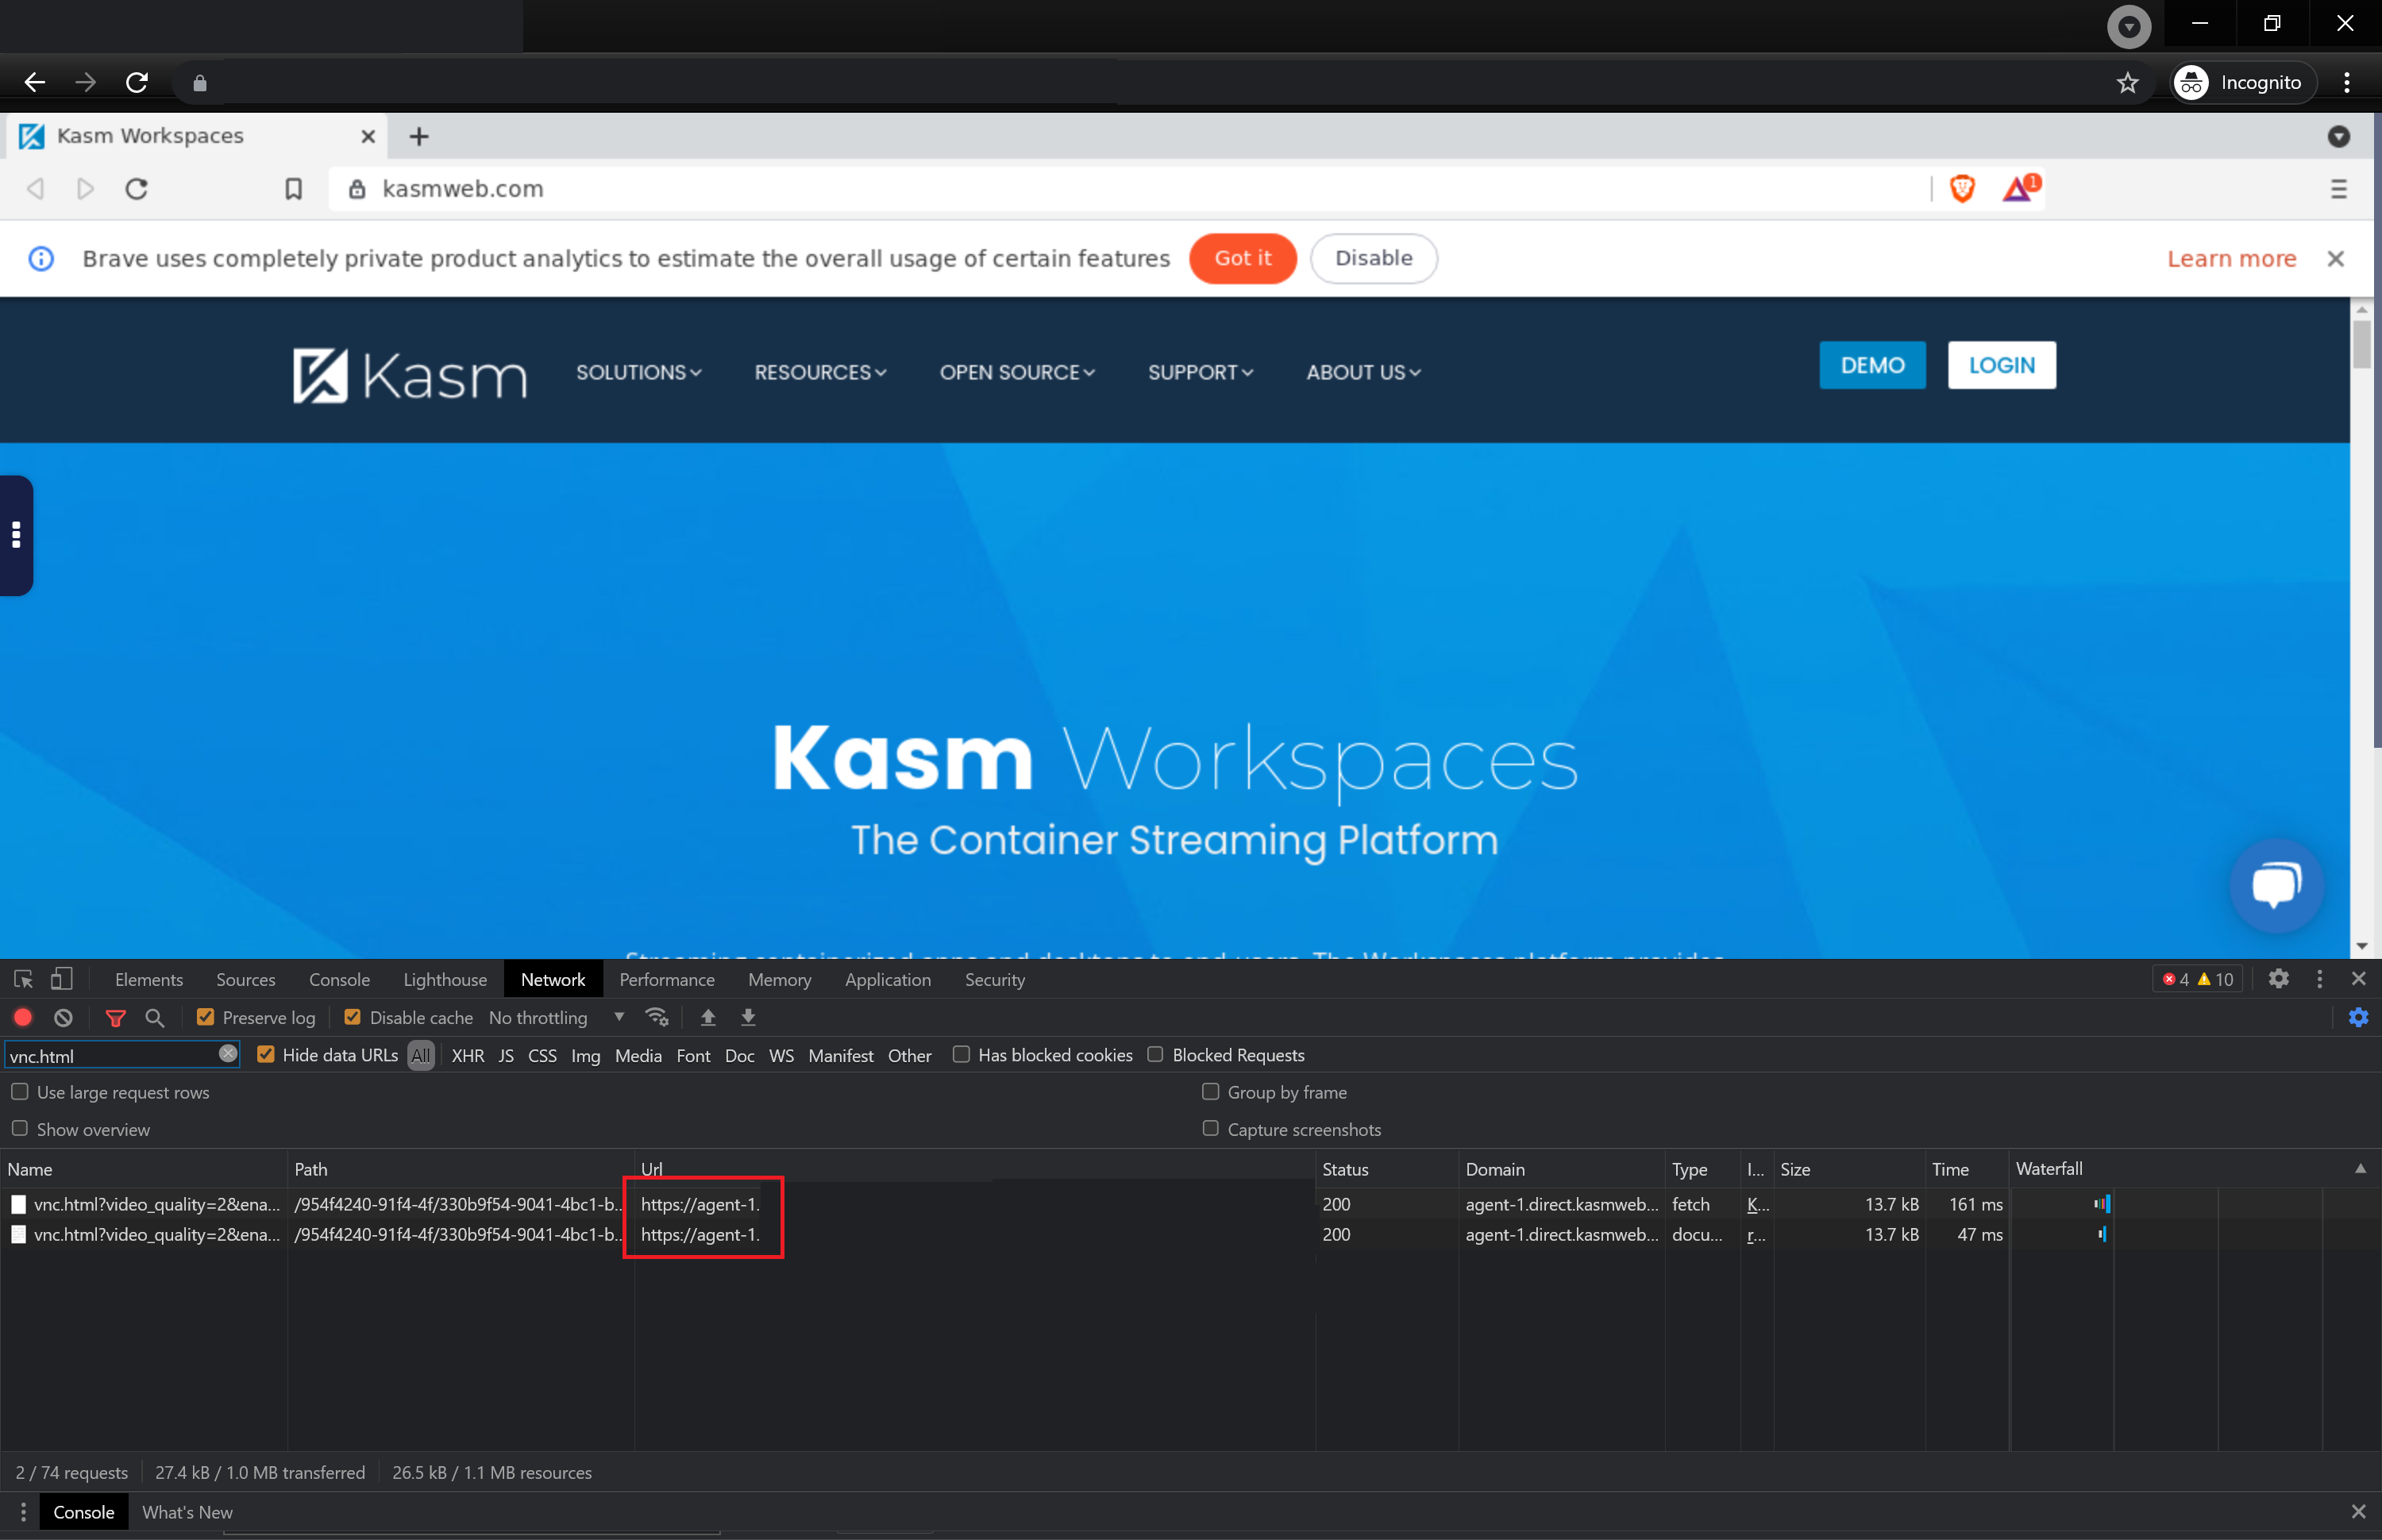
---
## Kasm Workspaces: DNS Provider Configs
##
## DNS Provider Configs
This feature requires a special license. Please contact your Kasm Technologies representative for details.
| **Name** | **Description** |
| --- | --- |
| **DNS Provider Configs** | Select an existing config or create a new config. If you select an existing config and change any of the details, those details will be changed for anything using the same DNS Provider config. |
| **Provider** | Select a provider from AWS, Azure, Digital Ocean, Google Cloud or Oracle Cloud. If you select an existing provider this will be selected automatically. |
### AWS DNS Provider Settings
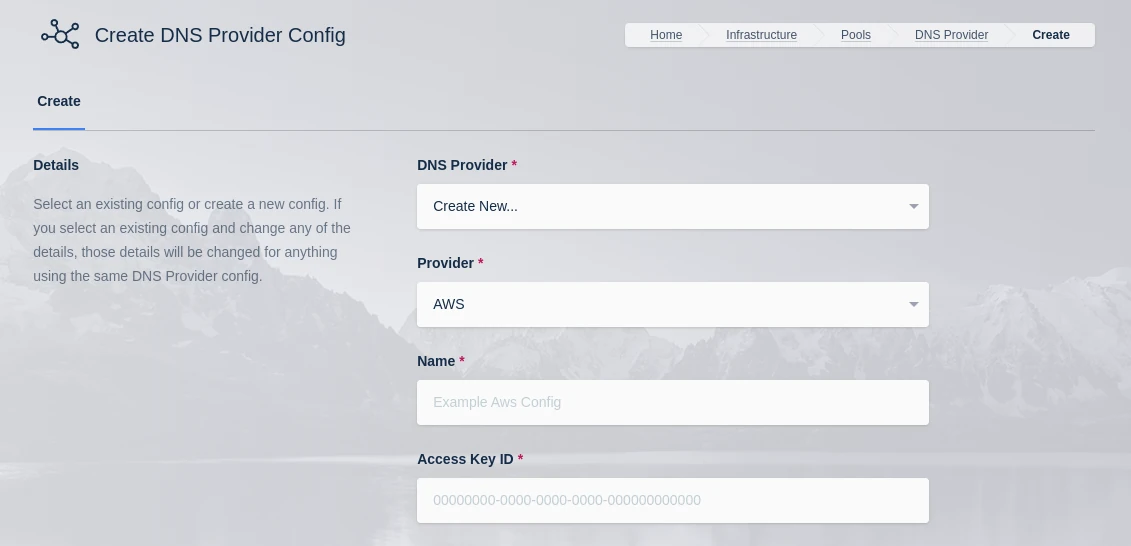
| **Name** | **Description** |
| --- | --- |
| **Name** | A name to use to identify the config. |
| **Access Key ID** | The AWS Access Key used for the AWS API. |
| **Access Key Secret** | The AWS Secret Access Key used for the AWS API. |
### Azure DNS Provider Settings
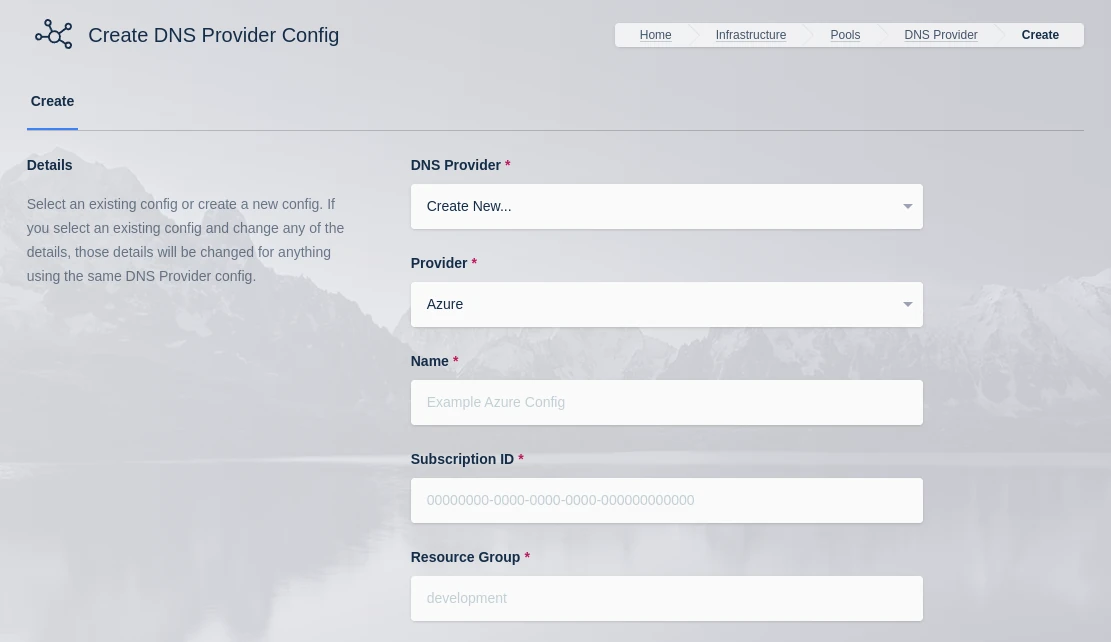
| **Name** | **Description** |
| --- | --- |
| **Name** | A name to use to identify the config. |
| **Subscription ID** | The Subscription ID for the Azure Account. This can be found in the Azure portal by searching for Subscriptions in the search bar in Azure home then selecting the subscription you want to use. (e.g `00000000-0000-0000-0000-000000000000`) |
| **Resource Group** | The Resource Group the DNS Zone and/or Virtual Machines belong to (e.g `dev`) |
| **Tenant ID** | The Tenant ID for the Azure Account. This can be found in the Azure portal by going to Microsoft Entra ID using the search bar in Azure home. (e.g `00000000-0000-0000-0000-000000000000`) |
| **Client ID** | The Client ID credential used to auth to the Azure Account. Client ID can be obtained by registering an application within Microsoft Entra ID. (e.g `00000000-0000-0000-0000-000000000000`) |
| **Client Secret** | The Client Secret credential created with the registered application in Microsoft Entra ID. (e.g `abc123`) |
| **Azure Authority** | Which Azure authority to use, there are four, Azure Public Cloud, Azure Government, Azure China and Azure Germany. |
| **Region** | The Azure region where the Agents will be provisioned. (e.g `eastus`) |
### Digital Ocean DNS Provider Settings
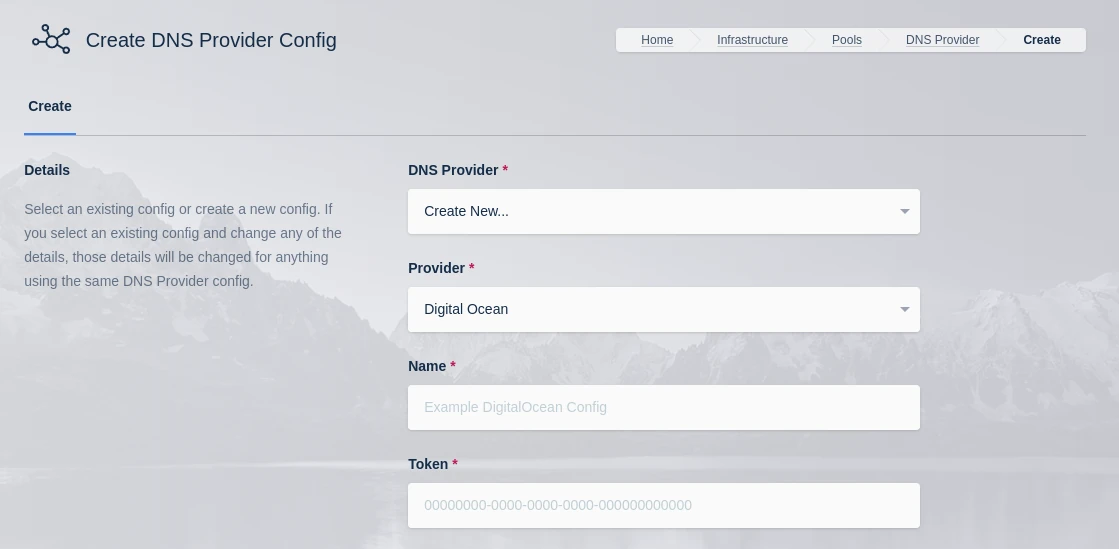
| Name | Description |
| --- | --- |
| **Name** | A name to use to identify the config. |
| **Token** | The token to use to connect to this VM |
### Google Cloud (GCP) DNS Provider Settings
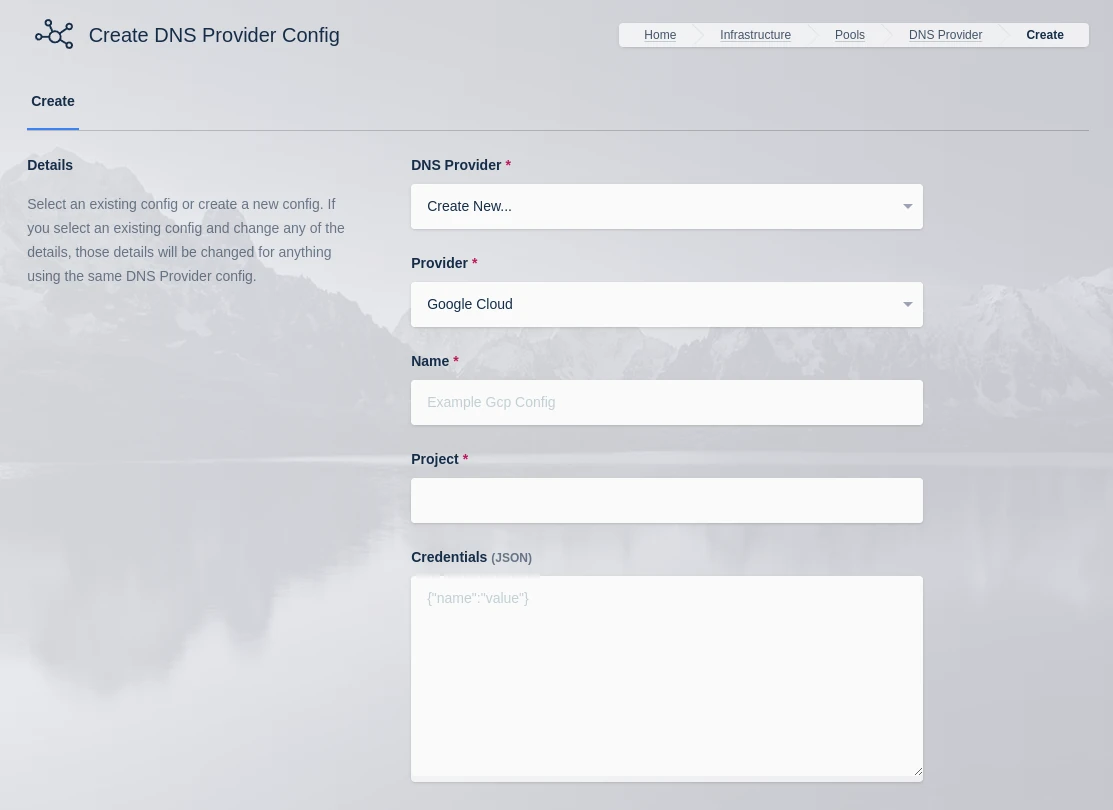
| Name | Description |
| --- | --- |
| **Name** | A name to use to identify the config. |
| **Project** | The Google Cloud Project ID (e.g pensive-voice-547511) |
| **Credentials** | The JSON formatted credentials for the service account used to authenticate with GCP: [Ref](https://cloud.google.com/iam/docs/creating-managing-service-account-keys#iam-service-account-keys-create-console) |
### Oracle Cloud (OCI) DNS Provider Settings
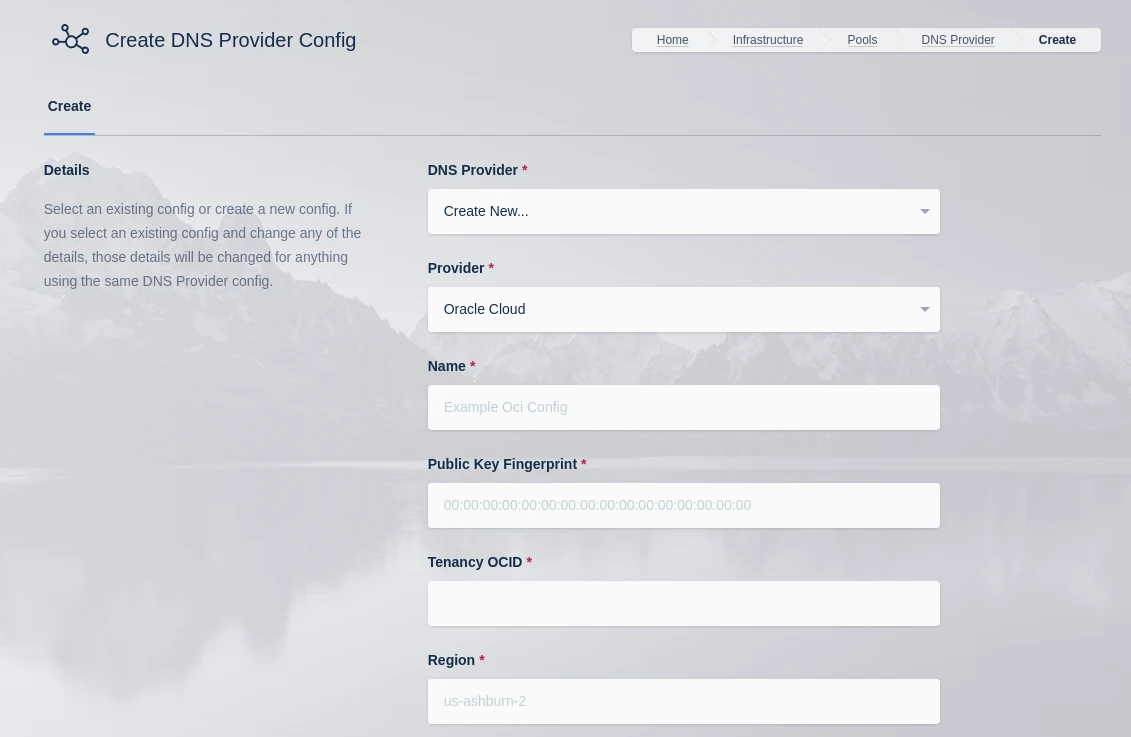
| Name | Description |
| --- | --- |
| **Name** | A name to use to identify the config. |
| **Fingerprint** | The public key fingerprint of the authenticated API user. (e.g xx:yy:zz:11:22:33) |
| **Tenancy OCID** | The Tenancy OCID for the OCI account. (e.g ocid1.tenancy.oc1..xyz) |
| **Region** | The OCI Region name. (e.g us-ashburn-1) |
| **Compartment OCID** | The Compartment OCID where the auto-scaled agents will be placed. (ocid1.compartment.oc1..xyx) |
| **User OCID** | The OCID of the user to authenticate with the OCI API. (e.g ocid1.user.oc1..xyz) |
| **Private Key** | The private key (PEM format) of the authenticated API user. |
---
## Docker Agents: Management & Configuration
## Docker Agents
An Agent is any compute resource where a user's containerized [Workspace](../workspaces-sessions/container-workspace/workspaces.mdx) can be provisioned. The compute resource
needs the [Kasm Agent role](../../explanations/system-architecture.mdx) installed.
### View Agents
View a list of Agents by selecting **Infrastructure** -> **Docker Agents** from the Kasm UI.

#### Agent Actions
Clicking the arrow for the session will present a list of potential actions:
- **Edit** - Edit and view details for the selected Agent.
- **Delete Sessions** - Mark all sessions on the Agent as "deleting". The Sessions will be deleted in a few moments.
Sessions resumed from a stopped state will have the previous files intact, but previously running programs will need to be restarted.
- **Delete** - Delete the Agent from the Kasm Deployment.
- **Drain** - Mark the Agent as "Draining". An Agent in Draining mode will not allow new sessions to be created. Once all existing sessions on the Agent are closed, the agent will be Deleted.
(This Option is only Applicable to Agents created from an Autoscale Pool)
#### Agent Details
More details about an individual Agent can be seen by clicking the **Edit** (pencil) icon under the **Details** and **Usage** tabs.
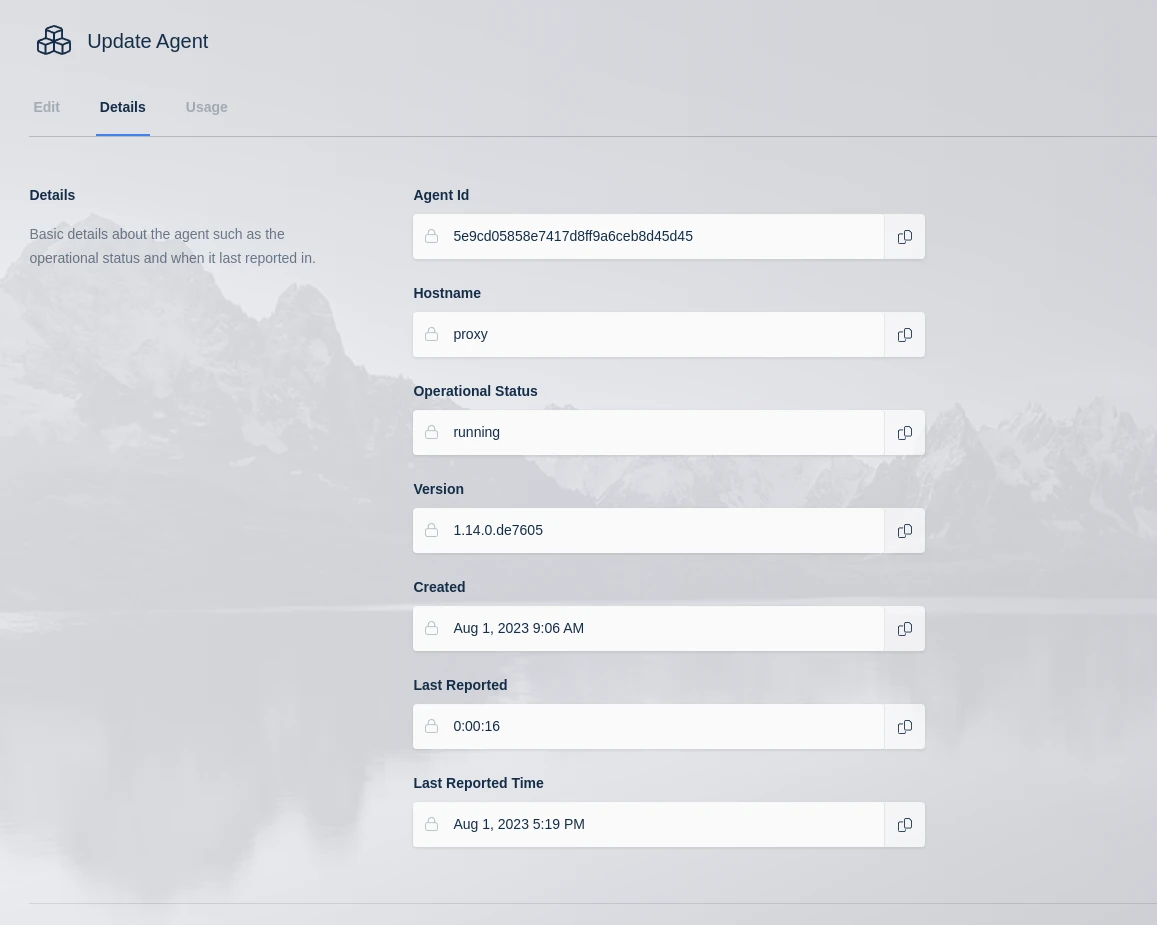
The bar chart shows two different stats for RAM and CPU respectively. It shows how much RAM/CPU is currently being utilized
and it shows how much is currently allocated. If you have an agent that has 6 CPUs, is overriden to 12 CPUs, and
has two desktops allocated, 1 at 2 CPUs and 1 at 3 CPUs, it will show 5 of 12 CPUs are allocated. It will also
show what the current CPU utilization was during the last checkin.
### Agent Chart
Historical CPU, Memory, and disk utilization can be tracked for an Agent by viewing the **Dashboard** in the Kasm UI.
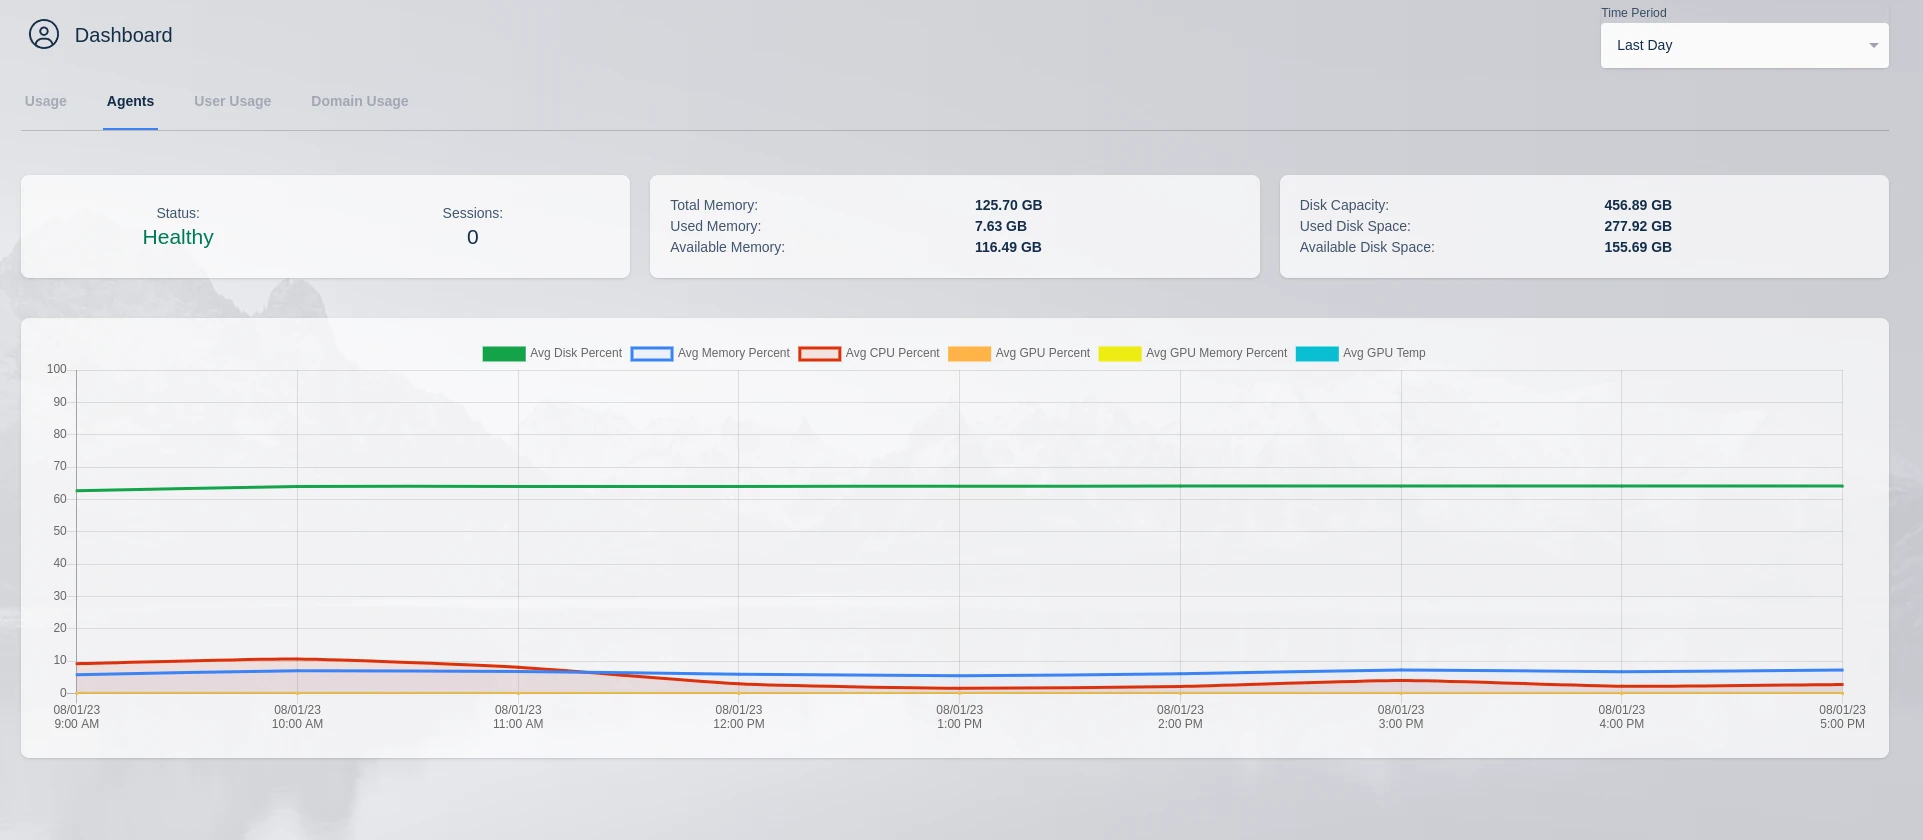
### Agent Settings
Agent settings may be configured from the Kasm UI by selecting **Infrastructure** -> **Agents** -> **Edit** (Pencil Icon)
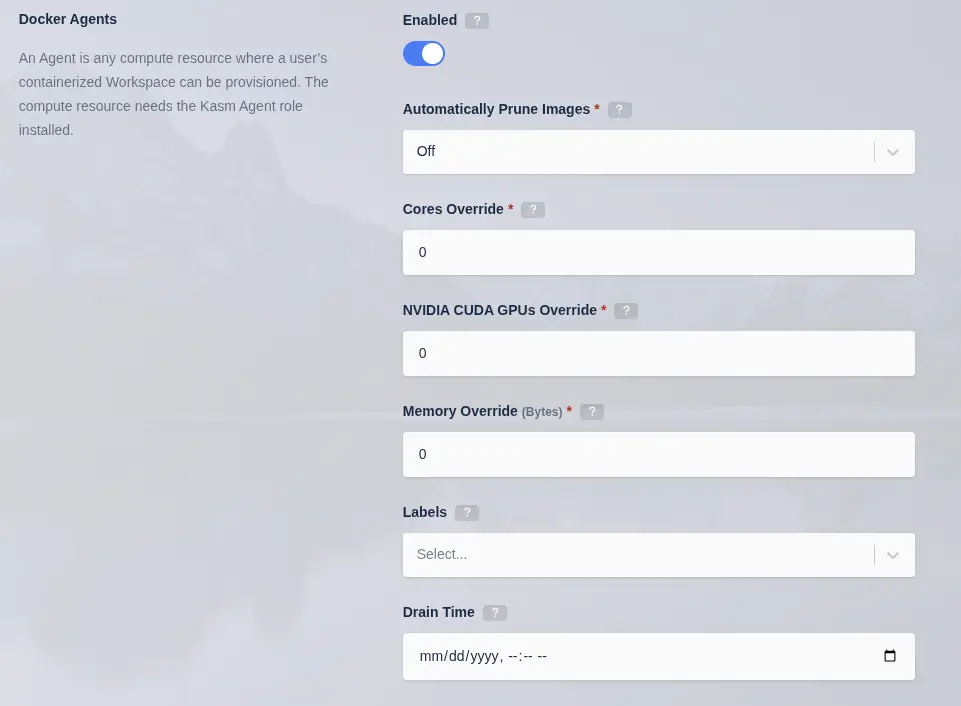
| **Field** | **Description** |
| --- | --- |
| Enabled | When checked, the Agent will service requests to create sessions. When disabled, the Agent will not be considered for requests to create more sessions. This is useful to "drain" sessions from an agent prior to maintenance. |
| Automatically Prune Images | Instruct the Agent to automatically delete (prune) unneeded images. Only Kasm Workspaces images are pruned. **Off** - Pruning is disabled. **Normal** - Prune untagged (dangling) images. **Aggressive** Prune untagged images and any image that is no longer defined in the application. |
| Cores Override | Instruct the system to treat the Agent as if it has this number of CPU Cores. This is useful to tactically oversubscribe the Agent. 0 indicates no-override. The system will use the actual CPU Cores of the system. |
| NVIDIA CUDA GPUs Override | Instruct the system to treat the Agent as if it has this number of NVIDIA CUDA GPUs. This is useful to tactically oversubscribe the Agent. 0 indicates no-override. The system will use the actual number of GPUs for the system. |
| Memory Override | Instruct the system to treat the Agent as if it has this amount of Memory (in bytes). This is useful to tactically oversubscribe the Agent. 0 indicates no-override. The system will use the actual memory of the system. |
| Drain Time | The time when this Agent switches to "Draining" mode. In Draining mode, the Agent will not accept any new sessions and once all active sessions have ended, the Agent will be automatically deleted. |
| Labels | Labels assigned to this Agent. These labels can be used to control where [Workspace](../workspaces-sessions/container-workspace/workspaces.mdx#add--edit-workspaces) sessions are launched. You can specify these labels in a Workspace's "Include Labels" or "Exclude Labels" settings to ensure sessions run only on certain agents. |
#### CPU / Memory / GPU Override
An Agent reports how much RAM, CPU cores, and GPU resources are available on the system. If an Agent has 6 CPU cores
and 6 GB of RAM and all Images are set to 1 CPU and 1 GB of RAM, only 6 sessions can be provisioned on the Agent at one time.
You can, however, override CPU, RAM, and GPU resources to allow for oversubscribing.
Here you are able to override the CPU, GPU, and RAM. A value of 0 means no override. If an agent server has 6 CPUs, you
can, for example, configure an override of 12 CPUs. This would allow you to provision 12 instances of a user
desktop, if each image was set to 1 CPU. The agent would still need 12 GB of RAM to provision 12 users if
each image was set to 1GB of RAM. You can also override RAM in the same manner as CPUs. It is important to ensure
your servers have a SWAP partition adequate in size to overcome over utilization of RAM. Not having a swap file
can result in user desktops being destroyed when RAM is over subscribed. Overriding the GPU count allows the agent to assign more user sessions to a one or more GPUs. The system must
have at least one physical GPU to override.
For both CPU and GPU override, the setting allows administrators to oversubscribe resources. However, it does not allow
administrators to provide more resources to a single session than a system has. For example, if a system has 1 GPU and
the GPU override was set to 10, that would allow 10 sessions requiring 1 GPU each to be created. The system, however,
will not allow an image set to 10 GPUs to be assigned to an agent that has only 1 physical GPU, even of an override
of 10 GPUs is used.
### GPU Support
In the Update Agent form, there is a **GPU Hardware** section, this allows you to see the GPUs detected on the system
and what features that GPU supports. From here you can enable and disable features on each GPU. In the example screenshot
below, the NVIDIA GPU supports video encoding acceleration, but the administrator has disabled it. Disabling a feature
will ensure that GPU is not assigned to containers for the selected feature.

The following video demonstrates detecting, monitoring, and configuring GPU hardware from the Docker Agent interface.
Workspaces supports passing through NVIDIA based GPUs to streaming containers. Workspaces utilizes the NVIDIA
container toolkit. For a full list of supported GPUs and operating systems see
[https://docs.nvidia.com/datacenter/cloud-native/gpu-operator/platform-support.html](https://docs.nvidia.com/datacenter/cloud-native/gpu-operator/platform-support.html).
The [NVIDIA drivers and container toolkit](../../tutorials/install/gpu.mdx)
must be installed on all Workspaces Agent servers with GPUs intended to pass through to
containers. GPUs can be used within a streaming container for a number of purposes, to include graphics, gaming,
running applications that use CUDA, and developing with GPU accelerated frameworks such as Pytorch or
Tensorflow. Using Workspaces allows organizations to easily manage and provide access to GPU backed resources.
Follow the [GPU How-To](../../tutorials/install/gpu.mdx) for a detailed walk through of a deployment.
Workspaces allows administrators to see how many GPUs an agent has. The number displayed only includes NVIDIA
CUDA GPUs as seen by the NVIDIA container runtime. Other GPUs can be seen in the Agent details view.
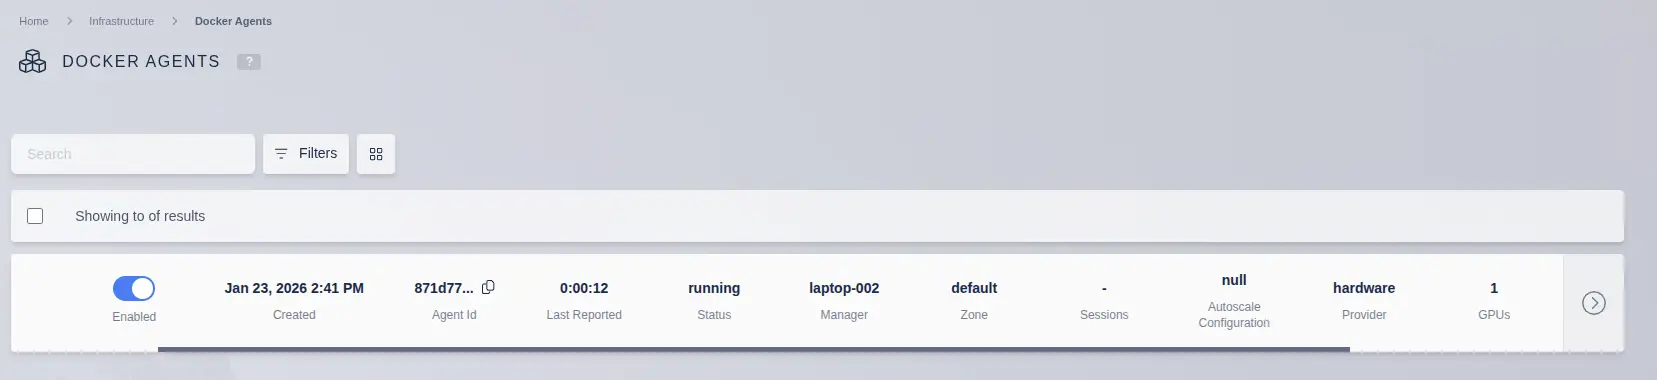
Administrators can view all GPU details of an agent in the Update GPU form, Usage tab. NVIDIA CUDA hardware is displayed
in the middle section with usage statistics. All GPUs are shown in the button GPU section along with what features
that GPU supports. In this example screenshot, the NVIDIA GPU supports NVENC, however, it has been disabled by the
administrator. Features can be enabled/disabled in the Details tab of the same view.
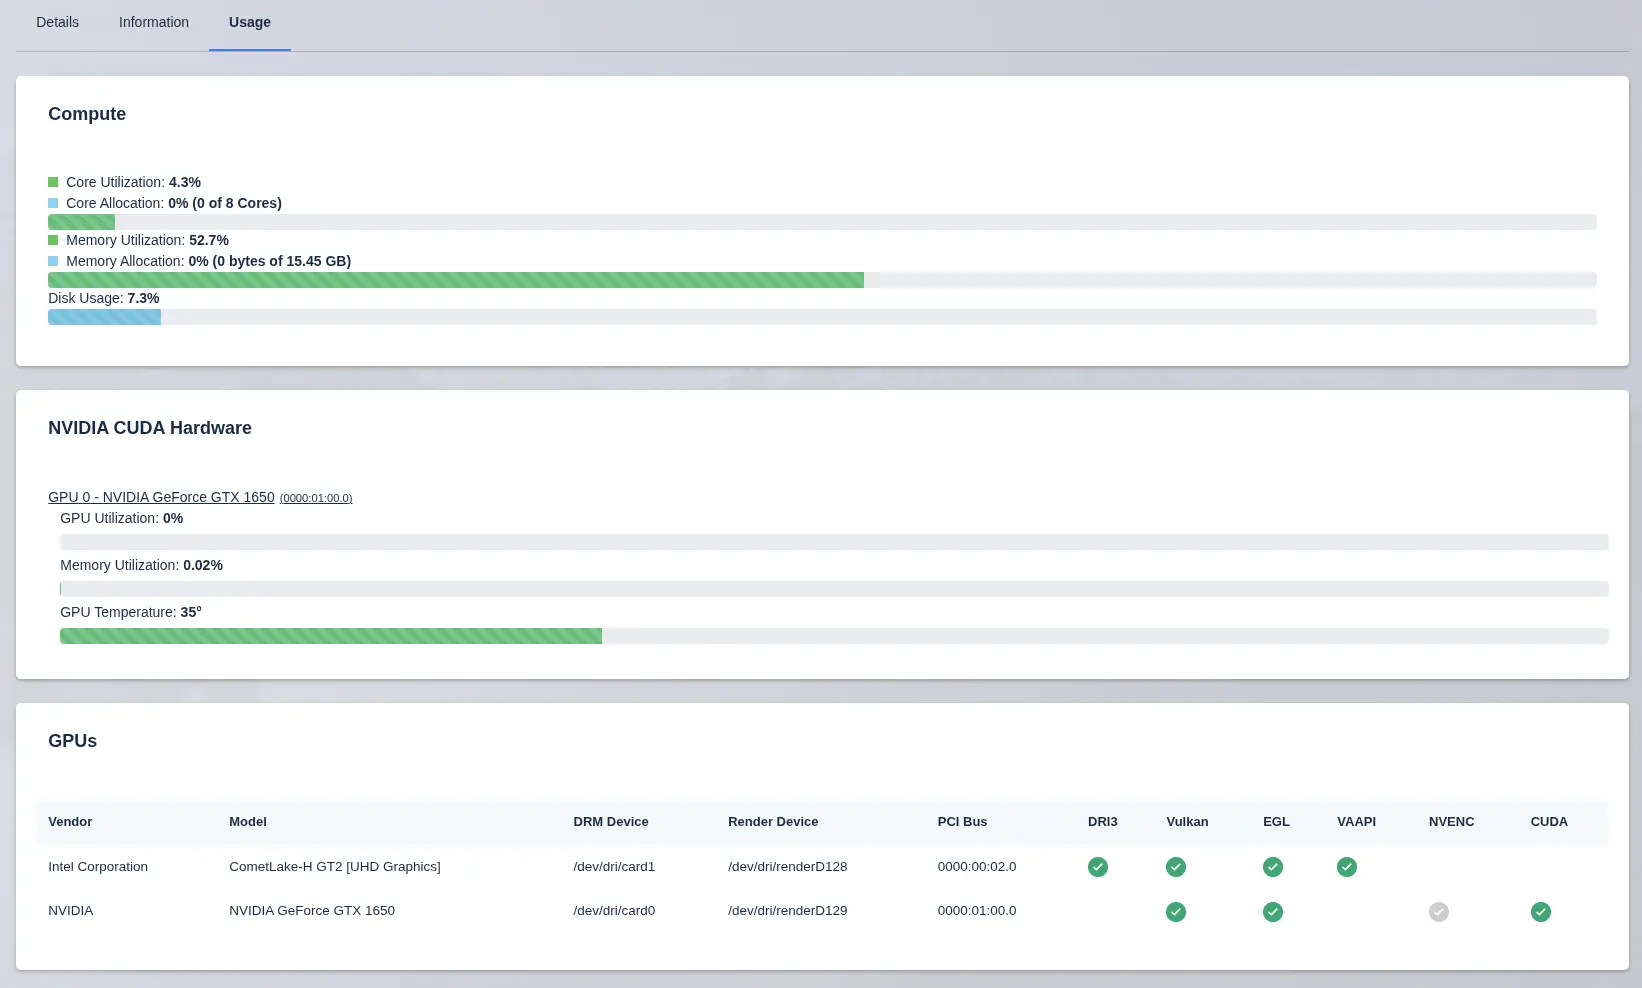
Workspaces images allow defining GPU requirements. Set the number of GPUs this container should be assigned and/or
what graphics and video acceleration methods are required.
A requested session using this image will only be provisioned on an agent that has the number of selected CUDA GPUs or
a GPU with the requested features. Only NVIDIA GPUs are explicitly passed through and have a count defined. Other GPUs
are automatically passed through based on what features are needed, for example VAAPI video acceleration.
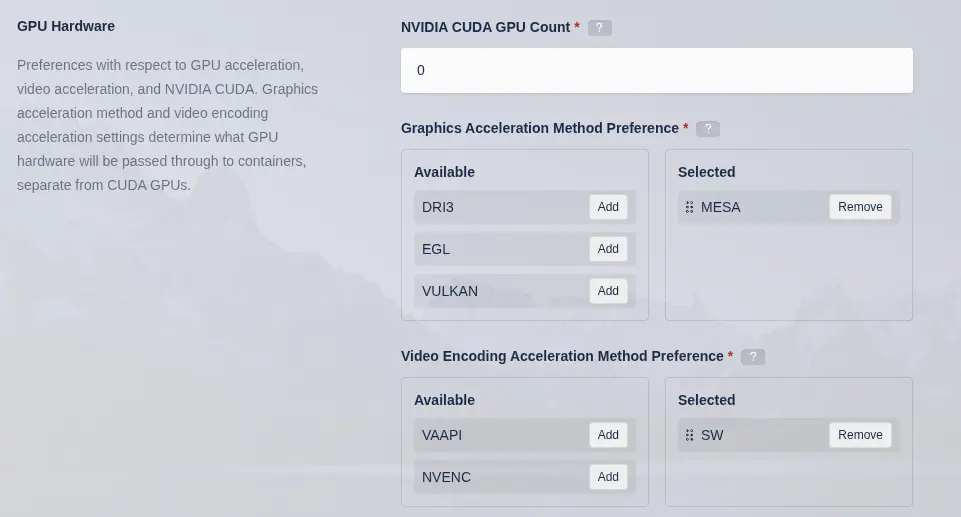
#### GPU Accelerated Graphics
Kasm Workspaces Images may support DRI3, EGL, and/or VULKAN for GPU acceleration. The Workspace Image settings
allow you to specify which to use. DRI3 is natively supported by KasmVNC and is the preferred method, however,
DRI3 is not supported by NVIDIA. Intel and AMD GPUs generally support DRI3. NVIDIA GPUs generally support EGL
and VULKAN, with the exception of enterprise grade GPUs that may not have DRM devices exposed. EGL is supported
with the use of VirtualGL while Vulkan is supported through the use of Zink. Virtual GL is generally pre-installed
on Kasm maintained Workspace image that are based on Ubuntu. Zink is generally included in the MESA package that
is installed on all Kasm maintained Workspaces images. Testing with your specific application and desktop
environment is needed to know which graphics acceleration method is the right choice for you. You must be using
an image that is based on a Kasm Workspaces image version 1.19.0 or higher. See our [Workspace Images](../workspaces-sessions/container-workspace/workspaces.mdx#workspace-image-gpu-support)
documentation for details on which core images support which GPU features.
The security of multi-tenant container GPU acceleration is not well established. This feature should be used
with caution and with full understanding of the potential security implications. These features are being
provided for by the GPU manufacturer and are merely being orchestrated by Kasm Workspaces.
Kasm Technologies Inc provides no warranty of the security of such features provided by GPU vendors.
Kasm Technologies recommends that GPUs not be shared between different security contexts and/or boundaries.
NVIDIA provides the MIG feature on enterprise grade GPUs for creating smaller instances from a single GPU,
which Kasm supports.
#### GPU Video Acceleration
Kasm detects support for VAAPI and NVENC hardware based video encoding/decoding acceleration. You can enable
these features on Workspaces Image settings and the appropriate DRM devices will be passed through to any
resulting containers. KasmVNC currently supports VAAPI for h.264 and h.265 encoding and will automatically
use the hardware when detected.
#### NVIDIA MIG Support
NVIDIA Multi-Instance GPU (MIG) is a feature available on select NVIDIA data center GPUs (such as the A100 and H100)
that allows a single physical GPU to be partitioned into multiple isolated GPU instances. Each MIG instance functions
as an independent GPU slice with dedicated compute, memory, and bandwidth resources. MIG enables more efficient and secure GPU
utilization by allowing multiple Workspaces or user sessions to securely share the same GPU hardware without
contention or interference.
Kasm automatically disables the physical GPU from being used by Kasm sessions when MIG instances are detected,
as seen in this screenshot. MIG instances will be listed under the physical GPU, indented slightly as shown here.
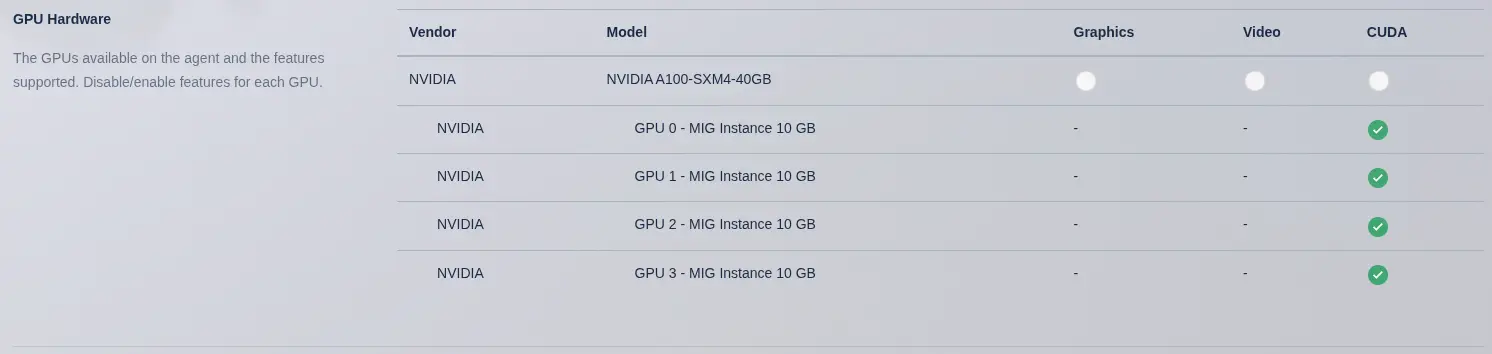
##### Enabling MIG on supported NVIDIA GPUs
1. Use `nvidia-smi` command to list GPUs and get the GPU index for the target GPU. Each GPU has a unique index, usually starting at 0. For this demonstration below, we will use `0`.
2. Check if your GPU supports the MIG feature, change your `-i 0` to reference your GPU index if not 0.
```Bash
# This GPU supports MIG but it is current disabled.
nvidia-smi -i 0 --query-gpu=pci.bus_id,mig.mode.current --format=csv
pci.bus_id, mig.mode.current
00000000:00:04.0, Disabled
# This GPU does not support the MIG feature
nvidia-smi -i 0 --query-gpu=pci.bus_id,mig.mode.current --format=csv
pci.bus_id, mig.mode.current
00000000:21:00.0, [N/A]
```
2. Enable MIG
```Bash
sudo nvidia-smi -i 0 -mig 1
Warning: MIG mode is in pending enable state for GPU 00000000:00:04.0:Not Supported
Reboot the system or try nvidia-smi --gpu-reset to make MIG mode effective on GPU 00000000:00:04.0
All done.
```
3. Reboot the system.
4. List available MIG .
```Bash
nvidia-smi mig -lgip
+-------------------------------------------------------------------------------+
| GPU instance profiles: |
| GPU Name ID Instances Memory P2P SM DEC ENC |
| Free/Total GiB CE JPEG OFA |
|===============================================================================|
| 0 MIG 1g.5gb 19 7/7 4.75 No 14 0 0 |
| 1 0 0 |
+-------------------------------------------------------------------------------+
| 0 MIG 1g.5gb+me 20 1/1 4.75 No 14 1 0 |
| 1 1 1 |
+-------------------------------------------------------------------------------+
| 0 MIG 1g.10gb 15 4/4 9.75 No 14 1 0 |
| 1 0 0 |
+-------------------------------------------------------------------------------+
| 0 MIG 2g.10gb 14 3/3 9.75 No 28 1 0 |
| 2 0 0 |
+-------------------------------------------------------------------------------+
| 0 MIG 3g.20gb 9 2/2 19.62 No 42 2 0 |
| 3 0 0 |
+-------------------------------------------------------------------------------+
| 0 MIG 4g.20gb 5 1/1 19.62 No 56 2 0 |
| 4 0 0 |
+-------------------------------------------------------------------------------+
| 0 MIG 7g.40gb 0 1/1 39.38 No 98 5 0 |
| 7 1 1 |
+-------------------------------------------------------------------------------+
```
5. Create MIG instances. In this example, I chose the 1g.10gb profile to create 4 instances, each with 10GB of VRAM.
```Bash
sudo nvidia-smi mig -cgi 1g.10gb,1g.10gb,1g.10gb,1g.10gb -C
Successfully created GPU instance ID 4 on GPU 0 using profile MIG 1g.10gb (ID 15)
Successfully created compute instance ID 0 on GPU 0 GPU instance ID 4 using profile MIG 1g.10gb (ID 0)
Successfully created GPU instance ID 3 on GPU 0 using profile MIG 1g.10gb (ID 15)
Successfully created compute instance ID 0 on GPU 0 GPU instance ID 3 using profile MIG 1g.10gb (ID 0)
Successfully created GPU instance ID 5 on GPU 0 using profile MIG 1g.10gb (ID 15)
Successfully created compute instance ID 0 on GPU 0 GPU instance ID 5 using profile MIG 1g.10gb (ID 0)
Successfully created GPU instance ID 6 on GPU 0 using profile MIG 1g.10gb (ID 15)
Successfully created compute instance ID 0 on GPU 0 GPU instance ID 6 using profile MIG 1g.10gb (ID 0)
```
6. Verify that `nvidia-smi` shows the newly created instances.
```Bash
nvidia-smi
Tue Mar 31 13:13:13 2026
+-----------------------------------------------------------------------------------------+
| NVIDIA-SMI 590.48.01 Driver Version: 590.48.01 CUDA Version: 13.1 |
+-----------------------------------------+------------------------+----------------------+
| GPU Name Persistence-M | Bus-Id Disp.A | Volatile Uncorr. ECC |
| Fan Temp Perf Pwr:Usage/Cap | Memory-Usage | GPU-Util Compute M. |
| | | MIG M. |
|=========================================+========================+======================|
| 0 NVIDIA A100-SXM4-40GB Off | 00000000:00:04.0 Off | On |
| N/A 33C P0 44W / 400W | 119MiB / 40960MiB | N/A Default |
| | | Enabled |
+-----------------------------------------+------------------------+----------------------+
+-----------------------------------------------------------------------------------------+
| MIG devices: |
+------------------+----------------------------------+-----------+-----------------------+
| GPU GI CI MIG | Shared Memory-Usage | Vol| Shared |
| ID ID Dev | Shared BAR1-Usage | SM Unc| CE ENC DEC OFA JPG |
| | | ECC| |
|==================+==================================+===========+=======================|
| 0 3 0 0 | 30MiB / 9984MiB | 14 0 | 1 0 1 0 0 |
| | 0MiB / 6105MiB | | |
+------------------+----------------------------------+-----------+-----------------------+
| 0 4 0 1 | 30MiB / 9984MiB | 14 0 | 1 0 1 0 0 |
| | 0MiB / 6105MiB | | |
+------------------+----------------------------------+-----------+-----------------------+
| 0 5 0 2 | 30MiB / 9984MiB | 14 0 | 1 0 1 0 0 |
| | 0MiB / 6105MiB | | |
+------------------+----------------------------------+-----------+-----------------------+
| 0 6 0 3 | 30MiB / 9984MiB | 14 0 | 1 0 1 0 0 |
| | 0MiB / 6105MiB | | |
+------------------+----------------------------------+-----------+-----------------------+
+-----------------------------------------------------------------------------------------+
| Processes: |
| GPU GI CI PID Type Process name GPU Memory |
| ID ID Usage |
|=========================================================================================|
| No running processes found |
+-----------------------------------------------------------------------------------------+
```
The following video demonstrates enabling MIG mode, creating instances with `nvidia-smi`, and assigning them to Kasm Workspaces.
### Changing Manager Token
An administrator may wish to change the token that Agents use to check into the manager.
The steps outlined below will change the token on each of the agents and on the manager.
Changing the Manager token involves restarting Kasm services and will result in an interruption in service.
First, enter the Kasm Admin UI -> Settings -> Global and change the value of "Token" in the manager settings to your new desired token.
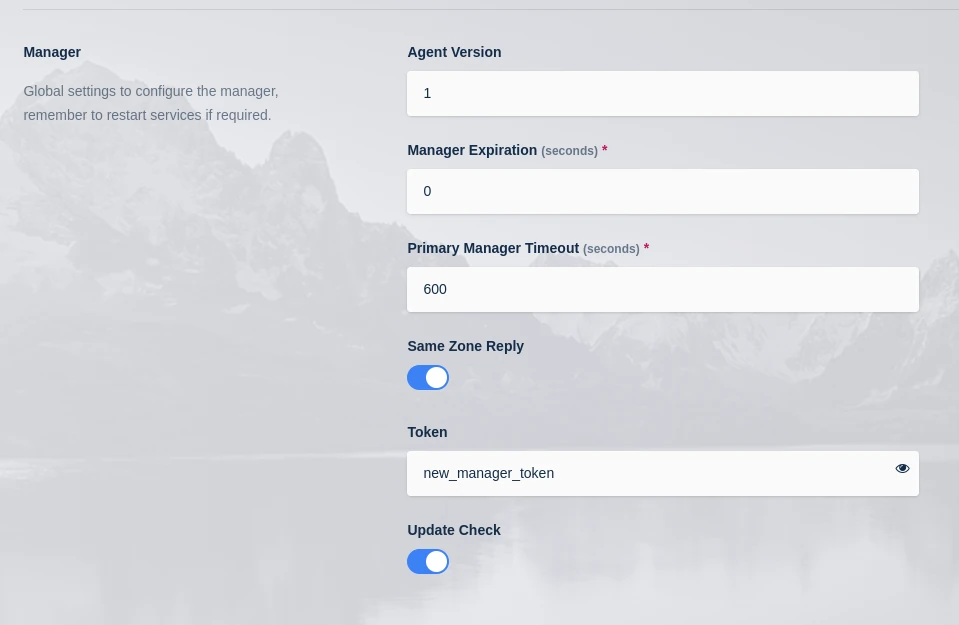
**Login to each server with the agent role and complete the following steps:**
Stop the Agent Services
```Bash
sudo systemctl stop kasm
```
Replace the value of 'token' in the agent config with the new manager token.
```Bash
sudo vi /opt/kasm/current/conf/app/agent/agent.app.config.yaml
```
Start the Agent Services
```Bash
sudo systemctl start kasm
```
After one minute the Agents should all be checked back into the Manager as shown in the "Infrastructure" -> "Agents" page in the Kasm Admin UI.
---
## Manager Service: Overview and Enable or Disable
## Managers
### Overview
The **Manager Service** (`kasm_manager`) is the coordination layer between the Kasm API and the Agent fleet. Every Agent
periodically checks in with a Manager to report available resources and receive instructions. Managers in turn track
session state, monitor Agent health, and elect a **Primary Manager** per zone to handle time-sensitive tasks such as
promoting Agents and reconciling session counts.
In a multi-server deployment, multiple Managers can run within the same [Deployment Zone](./deployment-zones.mdx). At
any given time, exactly one Manager per zone holds the Primary Manager role. If the current Primary Manager becomes
unavailable, another Manager in the zone automatically assumes the role.
### View Managers
Navigate to **Infrastructure** -> **Managers** in the Kasm admin UI to see a list of all registered Managers and their
current state.
Each Manager entry shows:
| Column | Description |
|---|---|
| **Instance ID** | Unique identifier for the Manager container instance. |
| **Enabled** | Whether the Manager is currently active and accepting Agent connections. |
| **First Reported Time** | Timestamp when the Manager first registered with the deployment. |
| **Last Reported Time** | Time elapsed since the Manager last sent a heartbeat. |
| **Zone** | The Deployment Zone this Manager belongs to. |
| **Status** | Current operational status (`running`, `unknown`). |
| **Primary Manager** | Indicates which Manager holds the primary role in its zone. |
### Enable / Disable a Manager
Managers can be **disabled without stopping or restarting the container**. This is useful for taking a Manager out of
rotation for maintenance, debugging, or rolling updates while keeping the Agent fleet operational.
At least one Manager per zone must remain enabled at all times. The UI will display an error and prevent the action
if disabling a Manager would leave a zone with no enabled Managers.
#### How it works
When a Manager's `enabled` flag is set to `false` in the database:
1. **Sentinel file created** : The Manager process writes a sentinel file at
`/tmp/kasm_manager_draining` inside the container (mapped to
`/opt/kasm/current/tmp/manager/` on the host).
2. **Nginx stops serving the Manager** : The `kasm_proxy` nginx container checks for the sentinel
file on every incoming request. When present, nginx returns `503 Service Unavailable` with a
`Retry-After: 30` header on `/health` and stops proxying `/manager_api/` requests — both
behaviors triggered independently by the same sentinel check.
4. **Work suspended** : The Manager's internal guardian loop skips all work when
`enabled=false`, preventing a disabled Manager from promoting itself to Primary or modifying
shared resources.
5. **Container stays healthy** : Docker's container health reporting is patched to distinguish
between "disabled" and "unhealthy", so a disabled Manager continues to report `healthy` to
Docker and will **not** trigger an automatic restart.
When the Manager is re-enabled:
- The sentinel file is removed.
- Nginx resumes proxying requests normally and returns `200 OK`.
- The guardian loop resumes, and the Manager can eventually re-acquire the Primary role if appropriate.
#### Primary Manager failover
If you disable the current Primary Manager, another enabled Manager in the same zone automatically
promotes itself to Primary. All Agents in the zone re-register with the new Primary Manager. This
promotion happens within a few minutes as part of the regular guardian loop cycle.
After re-enabling a Manager, allow up to a minute for it to return to `running` status. The
guardian loop processes state on a fixed interval, so the transition is not instantaneous.
### Verifying Manager State
The following commands can be run on the host where the Manager container is running to confirm
expected behavior after a state change.
**Check the healthcheck endpoint response:**
The Manager exposes two health endpoints serving different purposes:
| Endpoint | Used by | Disabled response |
|---|---|---|
| `/__healthcheck` | Docker internal healthcheck | `503` — remapped to `healthy` by the healthcheck script to prevent container restart |
| `/health` | `kasm_proxy` nginx | `503` — nginx stops proxying requests to the Manager |
To inspect the Manager process directly (bypassing nginx):
```bash
docker exec -it kasm_manager curl -i http://localhost:8181/__healthcheck
```
- `200 OK` — Manager is enabled and healthy.
- `503` with `{"ok": false, "status": "disabled", "enabled": false}` body — Manager is
intentionally disabled. Docker's healthcheck script maps this to `healthy` so the container
is **not** restarted.
- `500` — Manager process is unhealthy (missed heartbeat or timeout).
**Confirm Docker still considers the container healthy:**
```bash
docker inspect --format='{{.State.Health.Status}}' kasm_manager
```
This should report `healthy` even when the Manager is disabled. A `unhealthy` result would
indicate the container is at risk of being restarted.
**Verify Agent routing after disabling (Diagnosis logs):**
After disabling a Manager, check the **Diagnostics** section in the admin UI for `503` responses in
the Manager request logs. Agents should stop routing to the disabled Manager within one check-in
interval.
---
## Compute Pool Administration & Auto Scaling
## Pools
Pools can be used to group a set of similar fixed systems together, so they can be treated as a single Workspace for user access.
Users will see a single Workspace icon on their dashboard, but their session will get distributed to an available server in the pool.
Each server in the pool can be set to support 1 or more concurrent sessions. Kasm automatically distributes the sessions
evenly over the servers.
Pools can also be used to auto scale servers using a supported [VM provider](autoscale/vm-providers.mdx). Auto scaling can be used to
automatically provision [Servers](servers.mdx) or [Docker Agents](docker-agent.mdx).
AutoScaling is available in the Community and Enterprise editions only. If applicable, the administrator will have 3 links underneath the table for **All AutoScale Configs**, **All VM Provider Configs** and **All DNS Provider Configs**.
These allow the administrator to see all of the configs available and make changes, but the recommended approach is to use the **Edit** option on a specific pool.
### Create Pool
- Click the **Infrastructure** item in the navigation menu.
- Select the **Pools** option in the dropdown menu.
- Select **Add** from the top right of the **Pools** table.
**Pool Configuration Options**
| **Field** | **Description** |
| --- | --- |
| **Name** | The name given to the Pool. |
| **Type** | The type of Server Pool. Can either be [Docker Agent](docker-agent.mdx) or [Server](servers.mdx). |
| **Server Assignment** | (Only Server pools) Whether the pool will allow [User-Server assignment](../workspaces-sessions/server-workspace/user-server-assignment.mdx). |
| **Labels** | Labels assigned to all servers and agents in this Server Pool. These labels can be used to control where [Workspace](../workspaces-sessions/container-workspace/workspaces.mdx#add--edit-workspaces) sessions are launched. You can specify these labels in a Workspace's "Include Labels" or "Exclude Labels" settings to ensure sessions run only on certain servers or agents. |
### Servers List
**This list is only shown for Pools of type Server**
This list is almost identical to the [Servers](servers.mdx) list with the exception that only servers that are assigned to this pool are shown.
Use the assign button to assign existing servers to this pool.
### Docker Agents List
**This list is only shown for Pools of type Docker Agent**
This list is almost identical to the [Agents](docker-agent.mdx) list with the exception that only servers that are assigned to this
pool. Use the assign button to assign existing agents to this pool.
### AutoScale
The AutoScale system groups resources using Pools. Refer to [the AutoScale documentation](autoscale/index.mdx) for more information.
---
## Preload Images on Agents for Autoscaling
## Pre-load Workspace Images on Agents
To optimize autoscaling of Docker agents, you can pre-load workspace images on your agents so that you don't have to wait for Kasm to pull your workspace images after the agent is provisioned. You can configure this during the creation of your Linux VM template, irrespective of the VM provider.
If you're using rolling images, keep in mind that the versions pulled during pre-loading reflect the latest available at that moment. Once your agents come online and register with Kasm, they will automatically check for updates. If a newer version of a rolling image is available, Kasm will update it accordingly.
### Create a Kasm API key
- Go to your Kasm Admin Dashboard -> "Settings" -> "Developers"
- Click "Add API Key"
- Give your API key a name
- Enable `Read Only`
- Set an Expiration date for your API key (Optional)
- This will generate your `API KEY` and `API KEY SECRET`. Save them securely as you cannot see these values again
- Next, give your API key the `Images View` permission and click "Submit"
### Fetch and pull your Workspace Images
Run the following bash script that does the following:
- Install Docker CE (based on instructions from [https://docs.docker.com/engine/install/ubuntu](https://docs.docker.com/engine/install/ubuntu))
- Export Kasm Variables (`KASM_HOST`, `API_KEY`, `API_KEY_SECRET`)
- Fetch the Workspaces Images list from your Kasm deployment
- Pull the Workspace Images with `docker pull`
This script assumes you are running Ubuntu OS on your agents as listed [here](https://docs.docker.com/engine/install/ubuntu/#os-requirements). If you are using a different Linux distro, make sure to change the docker installation logic accordingly.
Make sure to replace following variables with the actual values from your Kasm deployment:
- `KASM_HOST`: The IP/FQDN of your Kasm deployment. If you're using a multi-server setup, this is the IP/FQDN of your Kasm Web App role.
- `API_KEY`: The API Key you generated earlier.
- `API_KEY_SECRET`: The API Key Secret you generated earlier.
```yml
# Install Docker on Ubuntu (ref: https://docs.docker.com/engine/install/ubuntu/)
sudo apt-get update
sudo apt-get install ca-certificates curl
sudo install -m 0755 -d /etc/apt/keyrings
sudo curl -fsSL https://download.docker.com/linux/ubuntu/gpg -o /etc/apt/keyrings/docker.asc
sudo chmod a+r /etc/apt/keyrings/docker.asc
echo \
"deb [arch=$(dpkg --print-architecture) signed-by=/etc/apt/keyrings/docker.asc] https://download.docker.com/linux/ubuntu \
$(. /etc/os-release && echo "${UBUNTU_CODENAME:-$VERSION_CODENAME}") stable" | \
sudo tee /etc/apt/sources.list.d/docker.list > /dev/null
sudo apt-get update
sudo apt-get install -y docker-ce
# Kasm API variables
export API_KEY=
export API_KEY_SECRET=
export KASM_HOST=
# Fetch and pull all images
curl -sk -X POST "https://${KASM_HOST}/api/admin/get_images" \
-H "Content-Type: application/json" \
-d "{\"api_key\":\"${API_KEY}\",\"api_key_secret\":\"${API_KEY_SECRET}\"}" \
| jq -r '.images[] | select(.name != null) | .name' \
| while read -r image_name; do
echo "Pulling image: $image_name"
sudo docker pull "$image_name"
done
```
After pulling all the required workspace images, you can shut down the VM and create a template from it. When Kasm triggers autoscaling and provisions new agent VMs from this template, the workspace images will already be pre-loaded. This eliminates the delay caused by image downloads during provisioning, resulting in faster workspace launches.
---
## Kasm Rolling Image Management: Managing Rolling Images
## Rolling Image Management
Rolling Image Management lets you control how and when Kasm images receive updates by choosing rolling or static tags. Rolling tags pull the latest builds on startup to keep security fixes and patches current, while static tags lock to a specific release for change control. Kasm provides a rolling utility to manage rolling images that Kasm uses to run.
The default behavior of the Kasm installer is to use rolling images. To install Kasm using static images, pass in the `-f or --use-static-images` arguments during the installation process.
```Bash
sudo bash kasm_release/install.sh -f
```
The Kasm installer also accepts a specific dated rolling image tag to use during the initial install. To specify a dated rolling image, pass in the `-F or --use-tag` arguments and the dated rolling image tag desired during the installation process. If the `-F or --use-tag` arguments are used without specifying a dated rolling tag, the installer defaults to the dated rolling tag matching its own build date.
```Bash
sudo bash kasm_release/install.sh -F 1.19.0-rolling-2026-05-01
```
Example of rolling images, static images, and dated rolling images:
- Rolling Image: 1.19.0-rolling (updated frequently)
- Static Image: 1.19.0 (Will not be updated)
- Dated Rolling Image: 1.19.0-rolling-2026-05-01 (Will not be updated)
### Find Available Rolling Tags
To list the available dated rolling tags, query the Docker Hub API for one component. All core services share the same dated tags, so querying `api` is enough. This uses `grep` and `sed`, so no extra tooling is required:
```Bash
curl -s "https://hub.docker.com/v2/repositories/kasmweb/api/tags?page_size=100" | grep -o '"name":"[^"]*"' | sed 's/"name":"//;s/"//' | grep '^1\.19\.0-rolling' | sort
```
To see which build your deployment currently runs, so you can compare it against the list, use [**Check Current Image**](#check-current-image):
```Bash
sudo /opt/kasm/bin/utils/rolling_util -d
```
### Update to a Newer Rolling Build
To update to a newer rolling build, first determine whether your deployment is running the default `-rolling` tag or dated `-rolling-` tags. Check the image tags the running Kasm services use:
```Bash
sudo docker ps --format '{{.Image}}' | grep kasmweb
```
**To the latest build, when running rolling images (the default `-rolling` tag):** rolling tags pull the latest build on startup, so restarting Kasm updates the core services to the most recent rolling build.
```Bash
sudo systemctl restart kasm
```
**To a specific dated build (including the newest dated build):** [list the available tags](#find-available-rolling-tags) and choose the one you want. The [**Rollback**](#rollback) capability (`-r `) updates every service to that tag and records the current build as a rollback point; restart Kasm to apply the change.
```Bash
sudo /opt/kasm/bin/utils/rolling_util -r 1.19.0-rolling-2026-07-14
sudo systemctl restart kasm
```
To move a deployment that is pinned to a dated tag back to the auto-updating `-rolling` tag, use [**Switch to latest**](#switch-to-latest).
On a multi-server deployment, perform these steps on each server.
### Update an Offline Deployment
Air-gapped hosts cannot reach Docker Hub, so newer rolling images cannot be pulled directly. There are two ways to update an offline deployment, depending on your environment.
#### Use the offline upgrade bundles
Follow the standard **Offline Upgrade** procedure in the [single-server upgrade guide](../upgrade/single-server-upgrade.mdx) or the [multi-server upgrade guide](../upgrade/multi-server-upgrade.mdx).
#### Manually transfer a specific dated build
To move a specific dated build to an air-gapped deployment, list the available builds on an internet-connected machine, download the images for the build you want, transfer them, and load them on your Kasm servers.
**On an internet-connected machine:**
1. List the available dated rolling tags. All core services share the same dates, so querying one repository (`api`) is enough.
```Bash
curl -s "https://hub.docker.com/v2/repositories/kasmweb/api/tags?page_size=100" | grep -o '"name":"[^"]*"' | sed 's/"name":"//;s/"//' | grep '^1\.19\.0-rolling' | sort
```
2. Choose a tag from the list, set it as `TAG`, and download all Kasm images for that build. Match the architecture of your Kasm servers with `--platform`, because `docker pull` otherwise fetches the variant for the machine you run it on.
```Bash
TAG=1.19.0-rolling-2026-07-14 # the build you chose above
PLATFORM=linux/amd64 # use linux/arm64 for arm servers; must match your Kasm servers
tagged=""
for name in api agent manager proxy postgres kasm-guac rdp-gateway rdp-https-gateway; do
docker pull --platform "$PLATFORM" "kasmweb/${name}:${TAG}"
tagged="${tagged} kasmweb/${name}:${TAG}"
done
docker save $tagged -o "kasm-${TAG}.tar"
```
**Transfer** the resulting `kasm-.tar` archive to each Kasm server.
**On each air-gapped Kasm server**, load the images, pin every service to the tag, and restart. On a multi-server deployment, repeat this on every server.
```Bash
TAG=1.19.0-rolling-2026-07-14
docker load -i "kasm-${TAG}.tar"
sudo /opt/kasm/bin/utils/rolling_util -r "$TAG"
sudo systemctl restart kasm
```
On restart, Kasm attempts to refresh rolling images but tolerates the failure when the server is offline, and starts from the images you loaded.
Match the image architecture to your Kasm servers: an `amd64` image will not run on an `arm64` host, and vice versa.
### Rolling Utility
The Rolling Utility will help manage the rolling images used by Kasm. The utility contains the following capabilities:
- [Rollback](#rollback)
- [Check Current Image](#check-current-image)
- [Switch to Latest](#switch-to-latest)
- [Update Tracked Rolling Image](#update-rolling-tag)
- [Clean Up Rolling Ledger](#clean-up-ledger)
For multi-server installation, run the rolling utility on each server.
This utility will only apply to the core Kasm services.
- API
- Agent
- Manager
- Proxy
- RDP Gateways
- Postgres
#### Rollback
This capability will roll back the image that Kasm uses to run. Since the rolling image is updated frequently, in the event that the latest rolling image is causing a problem with Kasm, you can roll back to an earlier build. Rollback has two forms, both described below: `-r` with no tag rolls back to the previous build by its digest, and `-r ` sets every service to a dated tag you specify. In either case the deployment stays on the rolled-back image until you use the [**switch to latest**](#switch-to-latest) feature.
```Bash
sudo /opt/kasm/bin/utils/rolling_util -r
```
When run without a tag, the utility does not use a tag at all. It reads the previous image's digest (SHA256) from the rolling ledger and pins each service to that digest (for example, `kasmweb/api@sha256:...`). The ledger records the current and previous digest for every image and is refreshed automatically on each restart, so the previous digest is the build the host ran immediately before the current one. If the ledger has no previous digest for an image (for example, right after a fresh install), that image is left unchanged.
Because the ledger tracks digests, it records a new rollback point only when the running image's digest changes — that is, when a genuinely different build is pulled. Changing only the tag does not create a rollback point if both tags resolve to the same image. For example, if you pin to a dated tag and later return to `-rolling` while both point to the same build, a subsequent `-r` without a tag will not reverse that switch; it rolls back to the last build that was actually different, or does nothing. To move to a specific build in that situation, pass the tag explicitly.
You can also pass a specific tag to pin every service to that dated build, whether newer or older than the current one. See [Find Available Rolling Tags](#find-available-rolling-tags) to choose a tag.
```Bash
sudo /opt/kasm/bin/utils/rolling_util -r 1.19.0-rolling-2026-05-01
```
If specifying a tag, please only use tags that contain the current version of Kasm. Do not use an older version (e.g. specifying 1.18.0 tags when Kasm 1.19.0 is installed)
After using this capability, please restart Kasm.
```Bash
sudo systemctl restart kasm
```
If you switch to the latest rolling tag (i.e. with `-l`) from a dated rolling tag (i.e. installed with `-F`) and then attempt to rollback to the previous dated tag using `-r` without a specified value, verify the resulting tags in your docker compose file to ensure that the images have switched to using a SHA.
It is possible that the latest rolling tag and your dated rolling tag were pointing to the same image SHA, which would cause the rolling util to leave the rolling tag on the images.
If this is the case, you will need to rollback again and provide the dated rolling tag from before. E.g. `-r 1.19.0-rolling-2026-05-01`
#### Check Current Image
This capability will output the creation date of the image currently being used by Kasm, as well as the creation date of the previously used image. This information is helpful when troubleshooting potential problems. If contacting the Kasm team for assistance, please include this information.
```Bash
sudo /opt/kasm/bin/utils/rolling_util -d
```
#### Switch to latest
During a rollback, Kasm pins the rollback version, effectively making Kasm behave as if using static images. This capability will switch Kasm back to using the latest rolling image.
```Bash
sudo /opt/kasm/bin/utils/rolling_util -l
```
After using this capability, please restart Kasm.
```Bash
sudo systemctl restart kasm
```
#### Update Rolling Tag
This capability will update the Rolling Ledger to track the current and previous running image.
The Rolling Ledger will be updated automatically after every restart. Normally, you will not need to use this capability manually.
```Bash
sudo /opt/kasm/bin/utils/rolling_util -u
```
#### Clean Up Ledger
This capability removes tracking entries from the rolling ledger for images that are no longer present on the host. It cleans up only the ledger's bookkeeping; it does not delete any Docker images or tags, so it does not reclaim disk space from old dated rolling images.
Since image information can be useful in troubleshooting, please do not use this capability without being directed by the Kasm Team.
A rollback with `-r` (no tag) restores the previous image by its digest, so old Kasm images on the host are your rollback targets. Avoid manually deleting old Kasm images (for example, with `docker image prune`) unless you are sure you will not need to roll back to them.
```Bash
sudo /opt/kasm/bin/utils/rolling_util -c
```
---
## Kasm Workspaces: Managing Compute Servers (VNC, RDP, SSH)
## Servers
Kasm Workspaces provides session management and rendering of sessions for fixed systems or auto scaled systems that
support either KasmVNC, RDP, SSH, or VNC. [Workspaces](../workspaces-sessions/container-workspace/workspaces.mdx) can be created and assigned to [Groups](../security/users-groups-mgmt/groups.mdx),
providing users access to the servers from their dashboard.
### Create Server
To create a new server, navigate to Infrastructure->Servers->Servers and click Add. Fill in the required information about the server.
In order for the server to be accessible to users, a [Workspace](../workspaces-sessions/container-workspace/workspaces.mdx) must be created and then add the
Workspace to a [Group](../security/users-groups-mgmt/groups.mdx).
### Server Configuration
The following fields appear when creating and/or updating a Server.
| Property | Description |
| :--------------------------- | :---------------------------------------------------------------------------------------------------------------------------------------------------------------------------------------------------------------------------------------------------------------------------------------------------------------------------------------------------------------------------------------------------------------------------------------------------------------------------------------------------------------------------------------------------------------------------------------------------------------------------------------------------------------------------------------------------------------------- |
| Enabled | Show and allow connections to this server. |
| Friendly Name | The server name displayed to users. |
| Deployment Zone | Which deployment zone to set for the server. |
| Pool | Which pool does the server belong to. |
| Assigned User | (Optional) Select a User to assign to this Server. Only available for members of `Server` type Pools with [user-server assignment](../workspaces-sessions/server-workspace/user-server-assignment.mdx) enabled. |
| Drain Time | (Update view only) The time when this server switches to "Draining" mode, in which the server will not accept any new sessions. Once all active sessions have ended, the server will be automatically deleted. This field is editable for autoscaled servers so that administrators can rotate a specific server earlier than the autoscale "Expire Servers in (Days)" setting. |
| Labels | Labels assigned to this Server. These labels can be used to control where [Workspace](../workspaces-sessions/container-workspace/workspaces.mdx#add--edit-workspaces) sessions are launched. You can specify these labels in a Workspace's "Include Labels" or "Exclude Labels" settings to ensure sessions run only on certain servers. |
| Kasm Desktop Service | Whether this is a Windows host with Kasm Desktop Service installed |
| Connection Type | Whether to use KasmVNC, RDP, SSH, or VNC. |
| IP/Hostname | The IP or Hostname used to connect to the server. |
| Connection Port | Which port to connect to the server on. |
| Connection Credential Type | Which type of credentials are used for this server. Options are Static Credentials, Dynamic User Accounts, SSO User Accounts, Authenticate with Smartcard, and Prompt User |
| SSO Domain | This field applies when **Connection Credential Type** is set to `SSO User Accounts`. Use this field to modify the username. For example, in Kasm the username may be john.smith@acme.com, but Windows may expect john.smith@acme.local. A value of `localhost` strips the domain name from the username, i.e. `john.smith`. A value ending in `\` prepends this field to the username, i.e. `acme.local\john.smith`. All other values are appended to the username with @, i.e. `john.smith@acme.local`. |
| Connection Username | The username to use to connect to the server. Only visible with Static Credentials **Connection Credential Type**. |
| Connection Password | The password to use to connect to the server. Only visible with Static Credentials **Connection Credential Type**. |
| Use User SSH Key | (Optional) This only applies to the SSH Connection type. When selected Kasm uses the User's SSH Keys to authenticate against the server. |
| Connection Private Key | (Optional) This only applies to the SSH Connection type. This is the private key to be used to authenticate to the server. |
| Connection Private Key Passphrase | (Optional) This only applies to the SSH Connection type. This is the passphrase of the Private Key specified above. |
| Connection Info | (Optional) Additional connection info that needs to be passed to the server. For more information see the Connections section of the [global settings](../../reference/settings.mdx) |
| Max Simultaneous Sessions | The maximum amount of sessions that can connect to the server at a time. For RDP servers with RemoteApps, admins may want to set this value higher than then `Max Simultaneous Users` setting to allow for multiple RemoteApps per user. |
| Max Simultaneous Users | For RDP and SSH servers, the number of concurrently connected users per server. |
#### Single Sign-On to Windows Systems via LDAP
When users login to Kasm via [LDAP Authentication](../security/users-groups-mgmt/ldap.mdx), they are able to create sessions to Windows systems that are joined to the same Active Directory domain and are configured for SSO credential pass-through. In the above table covering the configuration fields for Servers is the **Connection Credential Type** field. Select the value *SSO User Accounts* in the **Connection Credential Type** field. This requires that all users accessing this server are authenticated to Kasm using LDAP authentication. See our Windows Deployment Guide video for a walk through of this topic and more.
### Authentication Options When Connecting to an SSH Server
Kasm Workspaces has the ability to connect to arbitrary SSH servers. It can use SSH key or password authentication. There are a few combinations of options on the Server edit screen that can be selected.
The server can be configured to use:
- Username/password authentication
- Username and select the `Use User SSH Key` to send the username and private key stored with the Kasm user.
- Username and a pasted in private key, optionally including a passphrase if the key requires one.
Select the value *SSO User Accounts* in the **Connection Credential Type** field and check the **Use User SSH Key** checkbox and Kasm Workspaces will send the user's Kasm Workspaces username along with the user's Kasm Workspaces SSH key allowing easy multiple user support on SSH servers.
There are some restrictions on the ssh keys supported that are enforced by the connection proxy library used for the ssh server connections:
The SSH key can be in either OpenSSH format (beginning with `-----BEGIN OPENSSH PRIVATE KEY-----`) or RSA PKCS1 format (beginning with `-----BEGIN RSA PRIVATE KEY-----` or `-----BEGIN PRIVATE KEY-----`) with a key size of 2048.
When using RSA keys with some newer Linux distributions such as Ubuntu 22.04 LTS, you may need to edit the `/etc/ssh/sshd_config` file on the target server and add these two lines to the config:
```bash
HostKeyAlgorithms +ssh-rsa
PubkeyAcceptedKeyTypes +ssh-rsa
```
### SSH session continuity
Kasm Workspaces uses Guacamole to provide SSH connectivity for SSH server definitions. Guacamole does not provide the ability to resume SSH sessions. This means that when disconnecting from an SSH Workspace such as when clicking **Workspaces** from the control panel it will not be possible to resume the same session when clicking **Resume** and a fresh SSH session will be created. This also applies to disconnections caused by network interruptions. To avoid this a user can utilize a utility such as screen/tmux to have a persistent terminal session on the server.
#### Tmux Connection Settings Example
This is an example of how it would be possible to configure the Kasm connection settings for a Server to use tmux to have a preserved environment on an SSH server.
```json
{
"guac": {
"type": "ssh",
"settings": {
"font-size": "11",
"color-scheme": "gray-black",
"font-name": "monospace",
"scrollback": "1000",
"command": "tmux a || tmux"
}
}
}
```
#### Screen Connection Settings Example
This is an example of how it would be possible to configure the Kasm connection settings for a Server to use screen to have a preserved environment on an SSH server.
```json
{
"guac": {
"type": "ssh",
"settings": {
"command": "screen -R my_session"
}
}
}
```
### Creating Templates For Use With The VMware vSphere Provider
When using the VMware vSphere provider the administrator must create templates on the cluster for the provider to clone from.
#### Linux Templates
When creating Linux VM templates ensure that:
- VMware tools are installed, either the official version or open-vm-tools.
- If SSH access is desired, ensure that a public SSH certificate is installed on the machine, and use the matching private key when creating the [Autoscale Configuration](autoscale/infrastructure-components/autoscale-config-server#autoscale-settings-for-server-pool).
- If creating this template for use in a Docker Agent pool, take note of the primary ethernet interface name as that will be needed for the [autoscale startup scripts](https://github.com/kasmtech/workspaces-autoscale-startup-scripts).
##### Troubleshooting Linux Startup Script Execution
The startup script will be copied to a temporary directory on the Linux host, this is usually /tmp. inside the temporary directory VMware will create a folder named vmware-root_ followed by a set of random numbers e.g. vmware-root_437-1849036237. Then VMware will create the script file inside this directory also randomly named e.g. vmware119.sh. VMware does not provide a logging facility for executing these scripts but the script writer could log important events by creating an adjacent file and writing to it.
If the script fails during testing of the Autoscale/vm-provider configuration the administrator can bring up VMware console access to the cloned machine, find the script in the temporary directory and manually execute the script to observe it's output.
#### Windows Templates
When creating a Windows VM template ensure that:
- VMware tools is installed.
- Remote desktop has been enabled on the VM.
- The startup script entered into the [VM Config Provider](autoscale/vm-providers.mdx) will be run as a Powershell script, so ensure that unrestricted remote scripting is enabled.
- If desired ensure that the [Kasm Desktop Service](../workspaces-sessions/server-workspace/windows/kds-windows-service.mdx) is installed, this will make uploads and downloads available from the [Kasm Control Panel](../../tutorials/user-guide/control-panel.mdx).
##### Troubleshooting Windows Startup Script Execution
The startup script will be copied to a temporary directory on the Windows host, this is usually the directory pointed to by %TEMP%. This environment variable must be resolved when logged in as the user the script will be executed as to give an accurate location.
Inside the temporary directory VMware will create a folder named vmware-root_ followed by a set of random numbers e.g. vmware-root_437-1849036237. Then VMware will create the script file inside this directory also randomly named e.g. vmware119.sh. VMware does not provide a logging facility for executing these scripts but the script writer could log important events by creating an adjacent file and writing to it.
If the script fails during testing of the Autoscale/vm-provider configuration the administrator can bring up VMware console access to the cloned machine, find the script in the temporary directory and manually execute the script to observe it's output.
### Bulk Import
Servers can be created in bulk through the "Import Servers" button on the Server administration page.
The ensuing import wizard will expect a utf-8 encoded CSV file, with a size limit of 10,000 records.
Bulk import is an all-or-nothing operation; if any errors are found, none of the CSV data is imported into Kasm.
If there are errors in the file, the interface will present an interactive table that displays the errors alongside the CSV data. The field(s) for each error are enclosed in parentheses `( )`.
Click the information button for a row to inspect the errors:
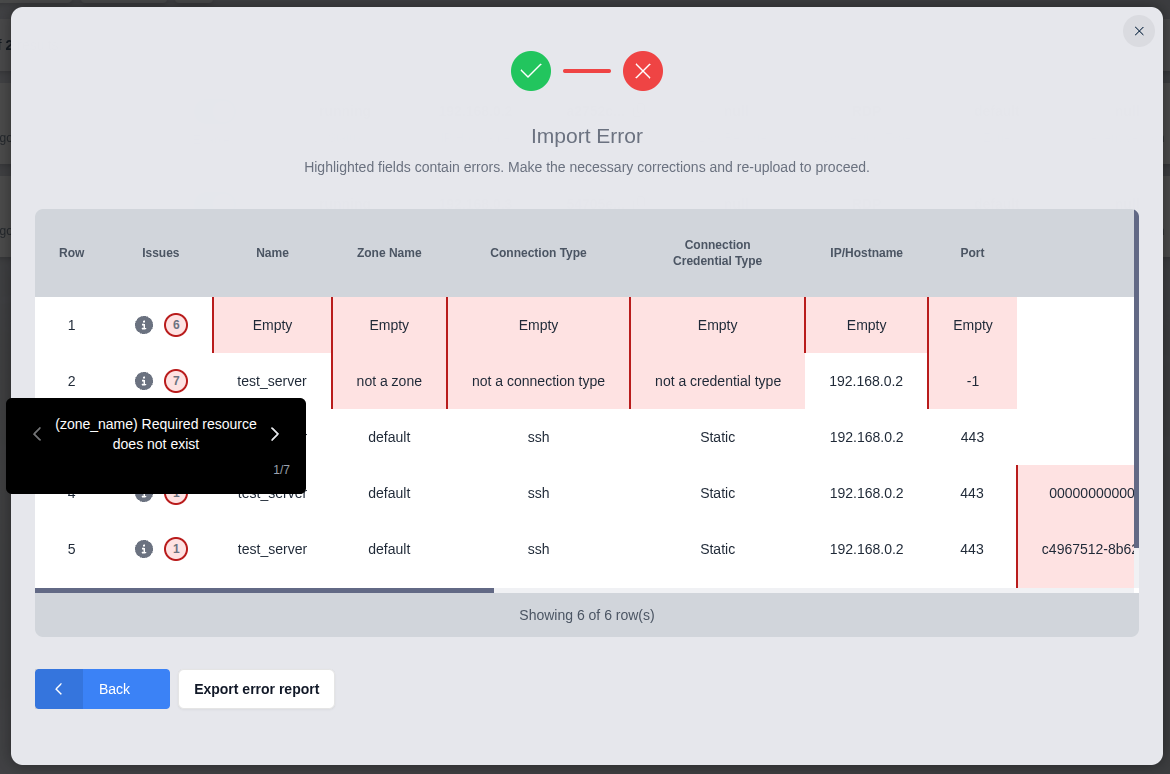
The import wizard provides the option to download the marked-up data for further inspection. This format adds an "issues" column to the beginning of the data that lists all of the errors for each row. In addition to the localized error messages shown in the import wizard, this data also includes the untranslated error message from the Kasm server for each field. The untranslated message is enclosed by square brackets `[ ]`.
Below is an abridged sample from the exported CSV error report produced by clicking "Export error report" in the image above:
```csv
issues,name,zone_name,connection_type,connection_credential_type,ip_hostname,port,pool_id,assigned_username,windows_service_installed,connection_username,connection_password,sso_username_domain,passphrase,private_key,use_user_private_key,connection_info,max_simultaneous_sessions,max_simultaneous_users,labels
"(name) Wrong data type [Input should be a valid string]; (zone_name) Wrong data type [Input should be a valid string]; (connection_type) Bad value for enum [Input should be 'KasmVNC', 'RDP', 'VNC' or 'SSH']; (connection_credential_type) Bad value for enum [Input should be 'STATIC', 'SSO_CREATE_USER', 'SSO_USERNAME', 'SMARTCARD' or 'PROMPT_USER']; (ip_hostname) Wrong data type [Input should be a valid string]; (port) Wrong data type [Input should be a valid integer]",,,,,,,,,,,,,,,,,,,
"(zone_name) Required resource does not exist [Zone(not a zone) does not exist]; (connection_type) Bad value for enum [Input should be 'KasmVNC', 'RDP', 'VNC' or 'SSH']; (connection_credential_type) Bad value for enum [Input should be 'STATIC', 'SSO_CREATE_USER', 'SSO_USERNAME', 'SMARTCARD' or 'PROMPT_USER']; (port) Value is too small [Input should be greater than or equal to 0]; (connection_info) Invalid JSON [Value is not a valid JSON string]; (max_simultaneous_sessions) Value is too small [Input should be greater than or equal to 1]; (max_simultaneous_users) Value is too small [Input should be greater than or equal to 1]",test_server,not a zone,not a connection type,not a credential type,192.168.0.2,-1,,,,,,,,,,{test,0,0,
"(assigned_username, pool_id) Invalid combination [User assignment requires a Server Pool]",test_server,default,ssh,Static,192.168.0.2,443,,user@kasm.local,,,,,,,,,,,
```
The Developer API also exposes the [`/api/public/batch_create_server`](../../reference/developer-api.mdx#batch-create-servers) endpoint for programmatic use.
#### CSV Formatting
Kasm Workspaces requires that imported CSV files to adhere to the following format specifications.
1. The file must be `utf-8` encoded.
2. Fields are comma-separated (`,`). Commas and linebreaks inside of a double-quoted field value will be interpreted as part of the value and not as a new field or line marker. Example: `a,"b,c",d` would separate into three fields,`a`, `b,c`, and `d`.
3. A header row is required.
4. Empty fields, which includes those whose content is a quoted empty string (`""`), will be interpreted as `null`.
5. Double-quote characters inside of a field can be escaped with duplication. Example: `"12""34"` in a CSV field would produce `12"34`.
6. All rows must have the same number of columns.
#### Server CSV Schema
The CSV file for Server bulk imports recognizes the following columns. Optional columns may be omitted if they are not needed for any record.
The descriptions from the "Create Server" properties table above apply to these fields, except where noted.
A Server's combination of Zone, IP / Hostname, and Port is unique during import. A CSV record that duplicates an existing Server will cause the import to fail.
| Column Header | Required | Default | User Property | Notes |
| --- | --- | --- | --- | --- |
| name | Yes | | Friendly Name | |
| zone_name | yes | | Deployment Zone | |
| connection_type | yes | | Connection Type | Values: `"KasmVNC"`, `"RDP"`, `"VNC"`, and `"SSH"` |
| connection_credential_type | yes | | Connection Credential Type | Values: `"STATIC"`, `"SSO_CREATE_USER"`, `"SSO_USERNAME"`, `"SMARTCARD"`, `"PROMPT_USER"` |
| ip_hostname | yes | | IP/Hostname | |
| port | yes | | Connection Port | |
| pool_id | No | `null` | Pool | This is the `pool_id` (UUID) of the Server Pool. |
| assigned_username | No | `null` | Assigned User | See notes above about pool requirements. |
| windows_service_installed | No | `"false"` | Kasm Desktop Service | |
| connection_username | Conditionally | `null` | Connection Username | See notes below |
| connection_password | Conditionally | `null` | Connection Password | See notes below |
| sso_username_domain | No | `null` | SSO Domain | |
| private_key | No | `null` | Connection Private Key | |
| passphrase | No | `null` | Connection Private Key Passphrase | |
| use_user_private_key | No | `"false"` | Use User SSH Key | Paste the contents of the SSH keyfile (inside quotes) in this field, including linebreaks. |
| connection_info | No | `null` | Connection Info | |
| max_simultaneous_sessions | No | `1` | Max Simultaneous Sessions | |
| max_simultaneous_users | No | `1` | Max Simultaneous Users | |
| labels | No | `null` | Labels | Labels assigned to this Server. These labels can be used to control where [Workspace](../workspaces-sessions/container-workspace/workspaces.mdx#add--edit-workspaces) sessions are launched |
**Valid Credential Type Combinations**
* `"KasmVNC"` connections require `"STATIC"` credentials and values for `connection_username` and `connection_password`
* `"RDP"` connections support all types. The `"SSO_CREATE_USER"` credential setting requires `windows_service_installed` to be `true`
* `"VNC"` connections only support `"STATIC"` credentials
* `"SSH"` connections support `"STATIC"` and `"SSO_USERNAME"` credential types
Below is an example of a valid Server CSV file containing all columns. It would generate five servers:
1. A KasmVNC server
2. A RDP server in a Server Pool that creates users in the SSO Domain on demand
3. A VNC server
4. A SSH Server that is assigned to an initial User and uses the connecting User's SSH certificate for authentication.
5. A SSH Server that uses an encrypted SSH private key for all connections
```csv
name,zone_name,connection_type,connection_credential_type,ip_hostname,port,pool_id,assigned_username,windows_service_installed,connection_username,connection_password,sso_username_domain,passphrase,private_key,use_user_private_key,connection_info,max_simultaneous_sessions,max_simultaneous_users,labels
KasmVNC Server,default,KasmVNC,STATIC,internal.host.local,6901,,,,test_user,SuperPassword1!,,,,,,,
RDP Server 1,default,RDP,SSO_CREATE_USER,192.168.10.24,3389,00001111-2222-3333-4444-5555-666677778888,,true,,,localssodomain,,,,,1,1,"production,windows"
VNC Server,default,VNC,STATIC,192.168.20.5,5900,,,,vnc_user,vnc_pass,,,,,,,
Personal SSH Server,default,SSH,STATIC,bob.host.local,22,,bob@local,false,,,,,,true,,24,1,"development,personal"
Shared SSH Server,default,SSH,STATIC,192.168.20.15,22,,,,,,,super_securePASSPHRASE!2,"-----BEGIN RSA PRIVATE KEY-----
Proc-Type: 4,ENCRYPTED
DEK-Info: AES-128-CBC,F399B33DA2403C6087C082C64C9ABD25
Nr/Qzem29v5dkE/bKsOOg8tJvzsSBncoiUysfZ2gpTLrILDRPMYb9fh36HrAJVSO
...
vUmKldKBvmfBFOoAUc1MqUNO8gxuEGEU37FGdiZG7EZmSSjphR3Q//zFbGyC4myl
-----END RSA PRIVATE KEY-----",,,,"shared,production"
```
---
## Using systemd for Kasm Service Management
Kasm Workspaces provides systemd service integration, allowing admins to manage Kasm services using standard systemd commands ensuring proper initialization order of all plugins and components.
### Service Names
Kasm automatically installs the following systemd services:
| Service Name | Description |
|--------------|-------------|
| `kasm.service` | Main Kasm service that controls all components |
| `kasm-network-plugin.service` | Kasm Network Plugin service that manages the docker network plugin providing egress capabilities |
### Service Management
To list all installed Kasm related services:
```bash
sudo systemctl list-unit-files | grep kasm
```
To check the status of Kasm services:
```bash
sudo systemctl status kasm
sudo systemctl status kasm-network-plugin
```
To start/stop/restart all Kasm services:
```bash
# start
sudo systemctl start kasm
# stop
sudo systemctl stop kasm
# restart
sudo systemctl restart kasm
```
#### Enable/Disable Automatic Startup
Kasm services are enabled by default during installation to automatically start at system boot.
To manage automatic startup of all Kasm services at boot:
```bash
# enable
sudo systemctl enable kasm
# disable
sudo systemctl disable kasm
```
### Troubleshooting Startup Issues
If you encounter issues with Kasm services starting up, check the following:
1. Verify the service status:
```bash
sudo systemctl status kasm
```
2. Check for error messages in the startup logs:
```bash
sudo journalctl -u kasm -n 100
```
3. Ensure Docker is running, as Kasm requires it to start properly:
```bash
sudo systemctl status docker
```
4. Check if all required services are enabled for automatic startup:
```bash
sudo systemctl list-unit-files | grep kasm
```
---
## Configure TLS Certificates for Kasm on Kubernetes
Kasm requires TLS for secure communication between its components. For your Kasm Kubernetes deployment to function correctly, you must create and add a certificate secret to the **Kasm namespace**. This guide covers the three most common methods for creating and managing your TLS secret.
---
### Options for Creating Your Certificate Secret
1. [Use cert-manager (Recommended)](#using-cert-manager-recommended)
2. [Manually create a self-signed certificate](#manually-creating-a-self-signed-certificate)
3. [Upload a certificate from a Certificate Authority (CA)](#upload-a-certificate-from-a-different-certificate-authority-ca)
:::note
Before you begin:
- Ensure you know which Kubernetes namespace your Kasm deployment uses (`{NAMESPACE}` is used in this document).
- Decide if you'll use cert-manager or manage your own certificate files.
:::
---
### Using cert-manager (Recommended)
If your cluster has [cert-manager](https://cert-manager.io/docs/) installed, you can let cert-manager automatically create and manage your TLS secret. The Helm chart is already configured for this scenario. You will need to know the name and kind of your issuer, then pick a secret name.
1. Open your `values.yaml` file and locate the `certificate` block:
```yaml
certificate:
secretName: {SECRET-NAME}
certManager:
enabled: true
addWildCard: true
issuerName: {ISSUER-NAME}
issuerKind: ""
issuerGroup: ""
annotations: {}
labels: {}
```
2. Copy and paste the block to your `my-values.yaml`
3. Apply any modifications you would like to make.
4. Deploy or update your Helm release as usual.
The following table describes the fields available for configuring the certificate:
| Field | Description |
|---|---|
| `secretName` | The name of the Kubernetes secret where the certificate is stored. cert-manager will create and manage this secret automatically. |
| `certManager.enabled` | Set to `true` to enable cert-manager integration. |
| `certManager.addWildCard` | When `true`, adds a wildcard SAN (``*.{publicAddr}``) to the generated certificate. |
| `certManager.issuerName` | The name of the cert-manager `Issuer` or `ClusterIssuer` to use for certificate issuance. |
| `certManager.issuerKind` | The kind of the cert-manager issuer. Leave empty to default to `Issuer`. Set to `ClusterIssuer` if using a cluster-wide issuer. |
| `certManager.issuerGroup` | The API group of the issuer. Leave empty to default to `cert-manager.io`. |
| `certManager.annotations` | Additional annotations to add to the Certificate resource. |
| `certManager.labels` | Additional labels to add to the Certificate resource. |
See the [cert-manager documentation](https://cert-manager.io/docs/) for details on configuring [Issuers and ClusterIssuers](https://cert-manager.io/docs/concepts/issuer/).
:::note
If you have already deployed Kasm using the Helm chart, remember to update your values file according to the instructions in the [installation guide](../../tutorials/install/kubernetes).
:::
---
### Manually Creating a Self-Signed Certificate
If you do not use cert-manager, you can generate a self-signed certificate and create a Kubernetes secret manually. There are two options:
1. Use the example script below (copy-paste and run):
```bash
openssl req -x509 -nodes -days 365 -newkey rsa:2048 \
-keyout tls.key -out tls.crt \
-subj "/CN=kasm.example.com/O=Kasm Self-Signed"
```
2. Follow the guide in the official [Kubernetes documentation](https://kubernetes.io/docs/tasks/administer-cluster/certificates/)
**Filename requirements for this chart:**
* Certificate file: `tls.crt`
* Key file: `tls.key`
* CA certificate (optional, for custom CAs): `ca.crt`
---
### Upload a Certificate from a Different Certificate Authority (CA)
If you already have a certificate from your organization's CA or a public CA:
1. Obtain/export your certificate (`tls.crt`), key (`tls.key`), and optional CA certificate (`ca.crt`).
2. Continue to the [Adding the generated TLS secret to Kubernetes](#adding-the-generated-tls-secret-to-kubernetes) section below.
---
### Adding the Generated TLS Secret to Kubernetes
Run the following commands, substituting your values:
```bash
# Set your secret and namespace names
SECRET_NAME="kasm-cert-secret"
NAMESPACE="kasm-ns"
# Create a TLS secret (cert + key only):
kubectl create secret tls $SECRET_NAME \
--cert=tls.crt \
--key=tls.key \
--namespace $NAMESPACE
# If you need to include a CA certificate as well:
kubectl create secret generic $SECRET_NAME \
--from-file=tls.crt=/path/to/tls.crt \
--from-file=tls.key=/path/to/tls.key \
--from-file=ca.crt=/path/to/ca.crt \
--namespace $NAMESPACE
```
:::note
The Helm chart expects the `certificate.secretName` in your `my-values.yaml` to match the secret you just created. You can also set this at install/upgrade time by adding the following in your `my-values.yaml`:
```yaml
certificate:
secretName: {SECRET-NAME}
```
:::
:::note
If you have already deployed Kasm using the Helm chart, remember to update your values file according to the instructions in the [installation guide](../../tutorials/install/kubernetes).
:::
---
### Cloud-Managed TLS
If you are deploying on a managed Kubernetes platform (e.g., GKE, EKS, AKS), you may prefer to terminate TLS at a cloud-managed load balancer or gateway rather than at the Kubernetes Ingress. For example, on GCP you can use a [Gateway](https://cloud.google.com/kubernetes-engine/docs/concepts/gateway-api) with [Google-managed certificates](https://cloud.google.com/certificate-manager/docs/overview) to handle external TLS, while still using cert-manager or self-signed certificates for internal cluster traffic. This hybrid approach can simplify certificate lifecycle management and firewall configuration, as the external IP is managed by the cloud provider.
---
### Additional References
* [kubectl create secret tls](https://kubernetes.io/docs/reference/kubectl/generated/kubectl_create/kubectl_create_secret_tls/)
* [kubectl create secret generic](https://kubernetes.io/docs/reference/kubectl/generated/kubectl_create/kubectl_create_secret_generic/)
* [cert-manager documentation](https://cert-manager.io/docs/)
* [Kubernetes Gateway API](https://gateway-api.sigs.k8s.io/)
---
## Migrate Kasm Workspaces from VM to Kubernetes
## Migrate from VM to Kubernetes
This guide walks you through migrating your existing VM-based Kasm deployment to Kubernetes.
:::note
Ensure your VM deployment is on Kasm **1.19.0** before migrating. If you are on an older version, upgrade your VM deployment first.
:::
:::warning
**Scope:** This guide covers the migration of the **Kasm control plane**, including primary zone dedicated and connection proxies. Agents and additional zone dedicated and connection proxies are not part of the Helm chart and must be migrated or reinstalled separately after the control plane is up.
:::
Choose the section that matches your current database setup:
- [Included DB](#migrating-with-included-db) — your VM uses Kasm's built-in PostgreSQL container (`database.standalone=false`)
- [Standalone DB](#migrating-with-standalone-db) — your VM connects to an external PostgreSQL database (`database.standalone=true`)
---
### Migrating with Included DB
Use this path if your VM deployment uses Kasm's built-in PostgreSQL container.
:::warning
This migration requires downtime. Your existing Kasm deployment will be unavailable during the process. Plan accordingly and schedule a maintenance window.
:::
#### At a Glance
1. [Back up the database on the VM](#1-back-up-the-database-on-the-vm)
2. [Preserve your Kasm secrets](#2-preserve-your-kasm-secrets)
3. [Transfer the backup to Kubernetes](#3-transfer-the-backup-to-kubernetes)
4. [Install the Kasm Helm chart](#4-install-the-kasm-helm-chart)
5. [Confirm the DB is running](#5-confirm-the-db-is-running)
6. [Restore the database](#6-restore-the-database)
7. [Verify and log in](#7-verify-and-log-in)
---
#### 1. Back Up the Database on the VM
Follow the official Kasm documentation to take a database backup on your VM:
- [Container DB Backup](../infra-autoscale/database)
Rename the backup file to `kasm_dump.tar` once complete.
---
#### 2. Preserve Your Kasm Secrets
To retain the same credentials after migration, create the Kasm secrets in your target namespace before installing the chart.
Copy the file `examples/kasm-secrets.yaml` from our [chart source](https://github.com/kasmtech/kasm-helm/blob/release/1.1190.0/examples/kasm-secrets.yaml) and populate it with the credential values from your VM deployment:
:::warning
The secret name must be `{RELEASE_NAME}-secrets`, where `{RELEASE_NAME}` is the name you will use in your `helm install` command. Update the `name` field in `kasm-secrets.yaml` accordingly before applying.
:::
:::warning
All secret values must be base64 encoded.
Encode a value with: `echo -n {secret-value} | base64`
:::
```bash
kubectl create namespace {NAMESPACE}
kubectl apply -f kasm-secrets.yaml -n {NAMESPACE}
```
Verify the values are correct:
```bash
kubectl -n {NAMESPACE} get secrets/{RELEASE_NAME}-secrets \
--template='{{ range $key, $value := .data }}{{ printf "%s: %s\n" $key ($value | base64decode) }}{{ end }}'
```
---
#### 3. Transfer the Backup to Kubernetes
Download [db-upload.yaml](https://raw.githubusercontent.com/kasmtech/kasm-helm/refs/heads/release/1.1190.0/examples/db-upload.yaml) and update the following fields before applying:
| Field | Value |
|---|---|
| `image` | Replace with your current VM Kasm version, e.g. `kasmweb/api:1.19.0` |
| `storageClassName` | Commented out by default to use the namespace default. Uncomment and set a value to use a specific storage class |
| `claimName` | PVC name for the backup. Keep default (`kasm-db-dump-pvc`) unless you need a custom name — if changed, update `claimName` in `db-restore.yaml` to match |
Deploy the upload pod to create a PVC and receive the backup file:
```bash
kubectl apply -f db-upload.yaml -n {NAMESPACE}
```
Copy your backup file into the pod:
```bash
kubectl cp /path/to/kasm_dump.tar {NAMESPACE}/{UPLOAD_POD_NAME}:/data/kasm-db-dump/kasm_dump.tar
```
Replace `{UPLOAD_POD_NAME}` with the actual pod name. Retrieve it with:
```bash
kubectl get pods -n {NAMESPACE}
```
Monitor the upload pod logs to confirm the transfer is complete:
```bash
kubectl logs -f {UPLOAD_POD_NAME} -n {NAMESPACE}
```
Expected output:
```
Waiting for DB file upload...
File uploading.
⏳ Upload in progress... (size: 150240768 bytes)
✅ File upload complete. Final size: 206191616 bytes
```
Verify the `Final size` matches the size of your local backup file exactly before proceeding.
---
#### 4. Install the Kasm Helm Chart
**Install your TLS certificate** into the namespace before installing the chart. Refer to [Configure TLS Certificates for Kasm on Kubernetes](./configure_tls) for the available methods. Note the secret name you create — you will need it in `my-values.yaml` below.
Create your `my-values.yaml`. Refer to the [chart documentation](https://github.com/kasmtech/kasm-helm/tree/release/1.1190.0/charts/kasm-helm) for all available configuration options, including ingress settings. At minimum, include:
```yaml
publicAddr: kasm.contoso.com
certificate:
secretName: {CERTIFICATE_SECRET_NAME} # The TLS secret name you created above
dbManagement:
initialize: false
```
:::warning
Set `dbManagement.initialize: false`. Enabling it will pre-populate the schema and conflict with the restore in Step 6.
:::
Install the chart:
:::warning
The `{RELEASE_NAME}` used here must match the secret name you applied in the previous step. For example, if your secret is named `kasm-secrets`, your release name must be `kasm`.
:::
##### OCI Registry (Recommended)
```bash
helm install {RELEASE_NAME} oci://registry-1.docker.io/kasmweb/kasm-helm \
--version 1.1190.0 -n {NAMESPACE} -f my-values.yaml
```
##### Classic Helm Repository
```bash
helm repo add kasm https://helm.kasm.com
helm repo update
helm install {RELEASE_NAME} kasm/kasm-helm --version 1.1190.0 -n {NAMESPACE} -f my-values.yaml
```
---
#### 5. Confirm the DB is Running
Watch the pods until the DB is ready:
```bash
kubectl get pods -n {NAMESPACE} --watch
```
Example output:
```text
kasm-api-default-7985f66df6-pnhng 0/1 Init:0/1 0 53s
kasm-db-1-19-0-0 1/1 Running 0 52s
kasm-guac-6d44dd8844-zmpzv 0/1 Init:0/1 0 53s
kasm-manager-default-585f45f8df-h8n6z 0/1 Init:0/2 0 53s
kasm-proxy-default-9c98f99f8-k69wt 0/1 Init:0/4 0 52s
kasm-rdp-gateway-f9996c885-n74h5 0/1 Init:0/1 0 52s
kasm-rdp-https-gateway-6f5d456b59-67hxj 0/1 Init:0/1 0 52s
```
Once the `{RELEASE_NAME}-db-*` pod shows `Running`, press `Ctrl+C` to stop watching and proceed to the next step.
---
#### 6. Restore the Database
Download [db-restore.yaml](https://raw.githubusercontent.com/kasmtech/kasm-helm/refs/heads/release/1.1190.0/examples/db-restore.yaml) and update the following fields:
| Field | Value |
|---|---|
| `image` | Replace with your current VM Kasm version, e.g. `kasmweb/api:1.19.0` |
| `POSTGRES_HOST` | DB service name. Run `kubectl -n {NAMESPACE} get service` to find it |
| `POSTGRES_DB` | Defaults to `kasm`. Only change if you set `database.kasmDbName` in `my-values.yaml` |
| `POSTGRES_USER` | Defaults to `kasmapp`. Only change if you set `database.kasmDbUser` in `my-values.yaml` |
| `secretKeyRef.name` | Must be `{RELEASE_NAME}-secrets`, where `{RELEASE_NAME}` is your Helm release name |
| `secretKeyRef.key` | Defaults to `db-password` — auto-generated by the Helm chart. Keep default |
| `claimName` | Defaults to `kasm-db-dump-pvc`. Keep default unless you changed it in `db-upload.yaml` |
Apply the restore job:
```bash
kubectl apply -n {NAMESPACE} -f db-restore.yaml
kubectl logs -f job/kasm-db-restore -n {NAMESPACE}
```
Expected output when the restore completes:
```
Restoring database from /data/kasm-db-dump/kasm_dump.tar
Restore complete
```
---
#### 7. Verify and Log In
After the restore completes, the pods will gradually come into a running state. Watch until all pods are running:
```bash
kubectl get pods -n {NAMESPACE} --watch
```
Once all pods are running, press `Ctrl+C` to stop watching.
If you enabled ingress in your `my-values.yaml`, update your DNS record for `publicAddr` to point to the ingress address. Retrieve it with:
```bash
kubectl get ingress -n {NAMESPACE}
```
Use the value in the `ADDRESS` column. Once DNS has propagated, access your Kasm environment using the `publicAddr` you set. For credentials, run:
```bash
helm get notes {RELEASE_NAME} -n {NAMESPACE}
```
---
### Migrating with Standalone DB
Use this path if your VM deployment connects to an external PostgreSQL database. Since your database is not managed by Kasm, it will continue running independently.
:::warning
This migration requires downtime. Your existing Kasm deployment will be unavailable during the process. Plan accordingly and schedule a maintenance window.
:::
#### At a Glance
1. [Back up the database](#1-back-up-the-database)
2. [Preserve your Kasm secrets](#2-preserve-your-kasm-secrets-1)
3. [Install the Kasm Helm chart](#3-install-the-kasm-helm-chart)
4. [Verify and log in](#4-verify-and-log-in)
---
#### 1. Back Up the Database
Follow the official Kasm documentation to take a backup of your standalone PostgreSQL database:
- [Standalone DB Backup](../../tutorials/install/remote-database#backing-up-the-postgresql-server)
Store the backup in a safe location before proceeding.
Once the backup is complete, stop all Kasm services on the VM to prevent any further writes to the database:
```bash
sudo /opt/kasm/current/bin/stop
```
---
#### 2. Preserve Your Kasm Secrets
To retain the same credentials after migration, create the Kasm secrets in your target namespace before installing the chart.
Edit and apply [kasm-secrets.yaml](https://raw.githubusercontent.com/kasmtech/kasm-helm/refs/heads/release/1.1190.0/examples/kasm-secrets.yaml) with the credential values from your VM deployment:
:::warning
The secret name must be `{RELEASE_NAME}-secrets`, where `{RELEASE_NAME}` is the name you will use in your `helm install` command. Update the `name` field in `kasm-secrets.yaml` accordingly before applying.
:::
:::warning
All secret values must be base64 encoded.
Encode a value with: `echo -n {secret-value} | base64`
:::
```bash
kubectl create namespace {NAMESPACE}
kubectl apply -f kasm-secrets.yaml -n {NAMESPACE}
```
Verify the values are correct:
```bash
kubectl -n {NAMESPACE} get secrets/{RELEASE_NAME}-secrets \
--template='{{ range $key, $value := .data }}{{ printf "%s: %s\n" $key ($value | base64decode) }}{{ end }}'
```
---
#### 3. Install the Kasm Helm Chart
**Install your TLS certificate** into the namespace before installing the chart. Refer to [Configure TLS Certificates for Kasm on Kubernetes](./configure_tls) for the available methods. Note the secret name you create — you will need it in `my-values.yaml` below.
Create your `my-values.yaml`. Refer to the [chart documentation](https://github.com/kasmtech/kasm-helm/tree/release/1.1190.0/charts/kasm-helm) for all available configuration options, including ingress settings. At minimum, include:
```yaml
publicAddr: kasm.contoso.com
certificate:
secretName: {CERTIFICATE_SECRET_NAME} # The TLS secret name you created above
database:
standalone: true
hostname: "{DB_HOSTNAME}" # <-- REPLACE with your standalone DB hostname
port: 5432 # Change if your PostgreSQL instance uses a non-default port
kasmDbName: kasm # Default VM installation uses "kasm". Change if you used a different database name
kasmDbUser: kasmapp # Default VM installation uses "kasmapp". Change if you used a different database user
dbManagement:
initialize: false
```
Install the chart:
:::warning
The `{RELEASE_NAME}` used here must match the secret name you applied in the previous step. For example, if your secret is named `kasm-secrets`, your release name must be `kasm`.
:::
##### OCI Registry (Recommended)
```bash
helm install {RELEASE_NAME} oci://registry-1.docker.io/kasmweb/kasm-helm \
--version 1.1190.0 -n {NAMESPACE} -f my-values.yaml
```
##### Classic Helm Repository
```bash
helm repo add kasm https://helm.kasm.com
helm repo update
helm install {RELEASE_NAME} kasm/kasm-helm --version 1.1190.0 -n {NAMESPACE} -f my-values.yaml
```
---
#### 4. Verify and Log In
The pods will gradually come into a running state. Watch until all pods are running:
```bash
kubectl get pods -n {NAMESPACE} --watch
```
Once all pods are running, press `Ctrl+C` to stop watching.
If you enabled ingress in your `my-values.yaml`, update your DNS record for `publicAddr` to point to the ingress address. Retrieve it with:
```bash
kubectl get ingress -n {NAMESPACE}
```
Use the value in the `ADDRESS` column. Once DNS has propagated, access your Kasm environment using the `publicAddr` you set. For credentials, run:
```bash
helm get notes {RELEASE_NAME} -n {NAMESPACE}
```
---
### Troubleshooting
See [Kubernetes Troubleshooting](../troubleshooting/kubernetes) for assistance.
---
## Configure Multi-Zone Proxies with Kubernetes
## Multi-Zone Proxies with Kubernetes
By default, all session traffic is routed through the Kubernetes cluster where the Kasm Helm chart is deployed. When you define additional zones, those zones only receive the App role from the Helm chart — proxy and agent components must be provisioned externally.
Multi-zone deployments are commonly used to serve users across geographic regions, but zones can also be used to segment groups of users or isolate different workload types across separate pools of compute resources — for example, separating contractor traffic from internal users, or giving a specific team dedicated agent capacity.
This guide walks through deploying the external proxy components for an additional zone. The Connection Proxy is required if the zone supports RDP or VNC sessions. The Dedicated Proxy is optional for Docker sessions — it routes traffic locally within the zone rather than through the App role, which reduces latency when the zone is geographically distant from the primary zone.
:::tip[Not sure which components you need?]
See [Kubernetes Deployment Options](../../explanations/kubernetes-deployment-options) for a breakdown of which roles the Helm chart covers and which you need to provision externally based on your session types.
:::
This guide covers two configurations:
- **Docker sessions only** — no additional VMs required. Optionally deploy a Dedicated Proxy to reduce latency.
- **Docker and RDP/VNC sessions** — requires one VM per additional zone (a Connection Proxy). Optionally add a Dedicated Proxy to reduce Docker session latency.
---
### Before You Begin
#### VM Requirements
| Session Type | Required VMs | Optional VMs |
|---|---|---|
| Docker only | None | Dedicated Proxy (reduces latency) |
| Docker + RDP/VNC | Connection Proxy | Dedicated Proxy (reduces Docker session latency) |
#### DNS Hostnames
Each proxy VM needs its own DNS hostname, separate from the zone's `proxyAddress`, sharing the same parent domain. For example, given:
```yaml
proxyAddress: zone-b.kasm.contoso.com
```
| VM | Example Hostname | Configured in Kasm UI as |
|---|---|---|
| Dedicated Proxy | `proxy.zone-b.kasm.contoso.com` | **Proxy Hostname** |
| Connection Proxy *(RDP/VNC)* | `rdp.zone-b.kasm.contoso.com` | **RDP HTTPS Proxy Hostname** |
#### Network Requirements
- **Dedicated Proxy**: must have network connectivity to all Kasm Agents in the zone and bidirectional connectivity to the zone `proxyAddress`.
- **Connection Proxy**: must have network connectivity to all RDP and VNC targets in the zone that users will access, and bidirectional connectivity to the zone `proxyAddress`.
:::note
For best performance, Kasm Agents and their zone's Dedicated Proxy should be deployed on infrastructure that is close to each other and to the users they serve. This keeps session traffic within the zone rather than routing it back through the primary zone.
:::
---
### Step 1: Configure Multi-Zone Kasm Helm
In your `my-values.yaml`, configure the `kasmZones` section to define multiple zones:
```yaml
publicAddr: kasm.contoso.com
kasmZones:
- name: primary
proxyAddress: kasm.contoso.com
- name: zone-b
proxyAddress: zone-b.kasm.contoso.com
```
Then install or upgrade your Kasm Helm chart with these values. See [Install Kasm on Kubernetes](../../tutorials/install/kubernetes) or [Upgrade Kasm on Kubernetes](../upgrade/kubernetes/upgrade_new_chart) for instructions.
:::note
1. The first zone in the list is treated as the primary zone and receives the full set of proxy roles from the Helm chart. External proxies are only needed for additional zones.
2. Traffic to the configured `publicAddr` in the ingress rule is routed to the primary zone.
:::
---
### Step 2: Install the Dedicated Proxy *(optional)*
:::note
Skip this step if latency through the primary zone is acceptable. Without a Dedicated Proxy, Docker session traffic routes through the App role's built-in proxy rather than a zone-local relay.
:::
Follow the [proxy installation steps](../../tutorials/install/multi-server-install) (`--role proxy`) in the Multi-Server Installation guide, setting `--api-hostname` to the zone's `proxyAddress` from `my-values.yaml` (e.g., `zone-b.kasm.contoso.com`). This tells the dedicated proxy where to forward upstream authentication requests.
---
### Step 3: Install the Connection Proxy *(RDP and VNC sessions)*
:::note
Skip this step if you are only proxying Docker sessions.
:::
Follow the [connection proxy installation steps](../../tutorials/install/multi-server-install) (`--role guac`) in the Multi-Server Installation guide, using the following flag values specific to this zone:
- `--api-hostname`: The zone's `proxyAddress` from `my-values.yaml`, e.g., `zone-b.kasm.contoso.com`.
- `--public-hostname`: The DNS hostname of this connection proxy VM (see [Before You Begin](#before-you-begin)).
- `--registration-token`: Retrieve your token with:
```bash
kubectl get secret --namespace {NAMESPACE} {RELEASE_NAME}-secrets -o jsonpath="{.data.service-token}" | base64 -d; echo
```
- `--server-zone`: The zone `name` from `my-values.yaml`, e.g., `zone-b`.
---
### Step 4: Configure the Kasm Zone
Log in to your Kasm UI. You can retrieve the `admin@kasm.local` password with:
```bash
kubectl get secret --namespace {NAMESPACE} {RELEASE_NAME}-secrets \
-o jsonpath="{.data.admin-password}" | base64 -d; echo
```
In the Kasm Admin UI, go to **Infrastructure** → **Deployment Zones** → **Edit** your additional zone:
1. **Upstream Auth Address**: Set to the zone's `proxyAddress` from `my-values.yaml`, e.g., `zone-b.kasm.contoso.com`.
2. **Proxy Hostname**: Set to your dedicated proxy hostname, e.g., `proxy.zone-b.kasm.contoso.com`.
3. **RDP HTTPS Proxy Hostname** *(RDP and VNC sessions)*: Set to your connection proxy hostname, e.g., `rdp.zone-b.kasm.contoso.com`.
---
## Direct RDP Connections on Kubernetes (Port 3389)
When a user launches an RDP workspace in Kasm, the session can be delivered in three ways depending on workspace and zone configuration:
| Connection mode | How it works | Extra Kubernetes config needed |
|---|---|---|
| **Web native client** | Rendered in the browser via Guacamole; no RDP gateways involved | None |
| **Thick client via RDP HTTPS Gateway** | Native RDP client connects over HTTPS (port 443) via the RDP HTTPS Gateway | None — works through standard ingress |
| **Thick client via RDP Gateway (direct)** | Native RDP client connects directly on port 3389 via the RDP Gateway | Required — this guide |
```mermaid
---
title: RDP Connection Paths
config:
layout: elk
---
flowchart TB
subgraph clients ["Client"]
Browser(["Browser"])
RDPClient([Native RDP Client])
end
Ingress["Ingress\n(port 443)"]
NP["NodePort / LoadBalancer\n(port 3389)"]
Guacamole[Guacamole]
HTTPS_GW[RDP HTTPS Gateway]
RDP_GW[RDP Gateway]
Session([Workspace Session])
Browser -->|"HTTPS"| Ingress
Ingress --> Guacamole
Guacamole -->|"Path 1 — web native"| Session
RDPClient -->|"HTTPS port 443"| Ingress
Ingress --> HTTPS_GW
HTTPS_GW -->|"Path 2 — RDP HTTPS Gateway"| RDP_GW
RDP_GW --> Session
RDPClient -->|"TCP port 3389\n(this guide)"| NP
NP -->|"Path 3 — direct RDP Gateway"| RDP_GW
```
The web native and RDP HTTPS Gateway modes both work out of the box with a standard Kasm Kubernetes deployment. The thick client default is to route through the RDP HTTPS Gateway. To switch to the direct RDP Gateway path, an admin must disable **Enable RDP HTTPS Gateway** in the zone settings — after which Kasm generates `.rdp` files that connect directly on port 3389.
:::note
The RDP HTTPS Gateway also routes connections internally through the RDP Gateway when **Enable RDP HTTPS Gateway DLP** is enabled (the default). This is transparent and does not require any of the configuration in this guide.
:::
This guide covers the additional Kubernetes configuration needed to expose the **RDP Gateway** on **port 3389** for direct thick client connections. Standard Kubernetes Ingress does not support arbitrary TCP ports, so you must expose the RDP Gateway using a NodePort or LoadBalancer service type.
---
### How it Works
When a user launches an RDP session using the direct RDP Gateway path, Kasm generates an `.rdp` file containing the gateway address. This address is built from the `SERVER_HOSTNAME` environment variable on the RDP Gateway container, which defaults to the internal Kubernetes service name (not reachable from outside the cluster).
The Kasm Helm chart provides the `directRdpService` values to handle this configuration. When enabled, the chart:
1. Creates an external-facing service (NodePort or LoadBalancer) to route port 3389 traffic to the RDP Gateway pods
2. Automatically sets `SERVER_HOSTNAME` to the `rdpAccessURL` you provide, so generated `.rdp` files contain the correct external address
---
### Step 1: Configure `directRdpService` in Your Values File
Add the `directRdpService` block to your `my-values.yaml`. Choose **LoadBalancer** (cloud environments with a load balancer provisioner) or **NodePort** (available on any cluster).
#### Option A: LoadBalancer
A LoadBalancer service provisions an external IP or hostname from your cloud provider. Clients connect directly to port 3389 on that address.
```yaml
directRdpService:
enabled: true
rdpAccessURL: rdp.example.com
type: LoadBalancer
```
Cloud providers may require annotations to configure the load balancer (e.g., internal vs external, NLB vs ALB). Add them under `directRdpService.annotations`:
```yaml
directRdpService:
enabled: true
rdpAccessURL: rdp.example.com
type: LoadBalancer
annotations:
service.beta.kubernetes.io/aws-load-balancer-type: nlb
```
#### Option B: NodePort
A NodePort service exposes a port on every worker node in the cluster. External clients connect to any node IP on the assigned node port.
```yaml
directRdpService:
enabled: true
rdpAccessURL: rdp-node.example.com
type: NodePort
```
:::note
If your nodes are behind a load balancer or NAT, set `rdpAccessURL` to the address clients actually reach — not the internal node IP.
:::
---
### Step 2: Apply the Configuration
Apply your updated values file:
##### OCI Registry (Recommended)
```bash
helm upgrade {RELEASE_NAME} oci://registry-1.docker.io/kasmweb/kasm-helm \
--version 1.1190.0 -n {NAMESPACE} -f my-values.yaml \
--set dbManagement.initialize=false \
--set dbManagement.upgrade.enable=false
```
##### Classic Helm Repository
```bash
helm repo add kasm https://helm.kasm.com
helm repo update
helm upgrade {RELEASE_NAME} kasm/kasm-helm --version 1.1190.0 -n {NAMESPACE} -f my-values.yaml \
--set dbManagement.initialize=false \
--set dbManagement.upgrade.enable=false
```
---
### Step 3: Configure DNS (LoadBalancer only)
:::tip[This step is optional]
Skip this step if you used **NodePort**, or if your cluster runs [ExternalDNS](https://kubernetes-sigs.github.io/external-dns/) or a similar controller that automatically creates DNS records from service annotations.
:::
If you chose LoadBalancer, retrieve the external address assigned by your cloud provider:
```bash
kubectl get service -n {NAMESPACE} -l app.kubernetes.io/name={RELEASE_NAME}-rdp-gateway
```
Create a DNS record pointing your `rdpAccessURL` hostname to the value in the `EXTERNAL-IP` column. Wait a few minutes for provisioning if the value shows ``.
---
### Verify
1. Confirm the RDP Gateway service shows the expected type and external address:
```bash
kubectl get service -n {NAMESPACE} -l app.kubernetes.io/name={RELEASE_NAME}-rdp-gateway
```
2. Confirm `SERVER_HOSTNAME` is set to your `rdpAccessURL`:
```bash
kubectl get deployment {RELEASE_NAME}-rdp-gateway -n {NAMESPACE} \
-o jsonpath='{.spec.template.spec.containers[0].env[?(@.name=="SERVER_HOSTNAME")].value}'
```
3. In the Kasm Admin UI, go to **Infrastructure** → **Deployment Zones** → **Edit** your zone and confirm **Enable RDP HTTPS Gateway** is disabled.
4. Launch an RDP workspace through the Kasm web interface. Kasm will generate an `.rdp` file — open it in your RDP client and verify the connection succeeds on port 3389.
---
### Troubleshooting
See [Kubernetes Troubleshooting](../troubleshooting/kubernetes) for general pod and service diagnostics.
---
## Kasm Workspaces: Bridged Network Source NAT Configuration
## Bridged Network Source NAT
### Overview
Administrators may desire to provision Kasm sessions that egress out of a specific IP assigned to
the host. This might be useful if the network utilizes special policy routes based on source IPs to direct traffic.
In this example we will demonstrate how to:
- Create a custom docker network using the bridge driver.
- Configure the docker network to egress out of defined interface IP.
- Configure a Kasm Workspace to always be provisioned on the desired docker network, using the **Restrict to Docker Network** [Workspace Setting](../workspaces-sessions/container-workspace/workspaces.mdx)
In this model, the Kasm sessions will be given a NATed address inside the docker network pool (e.g 172.19.0.0/16) but
when the traffic leaves the docker host it will utilize a specific IP that belongs to one of the hosts interfaces.
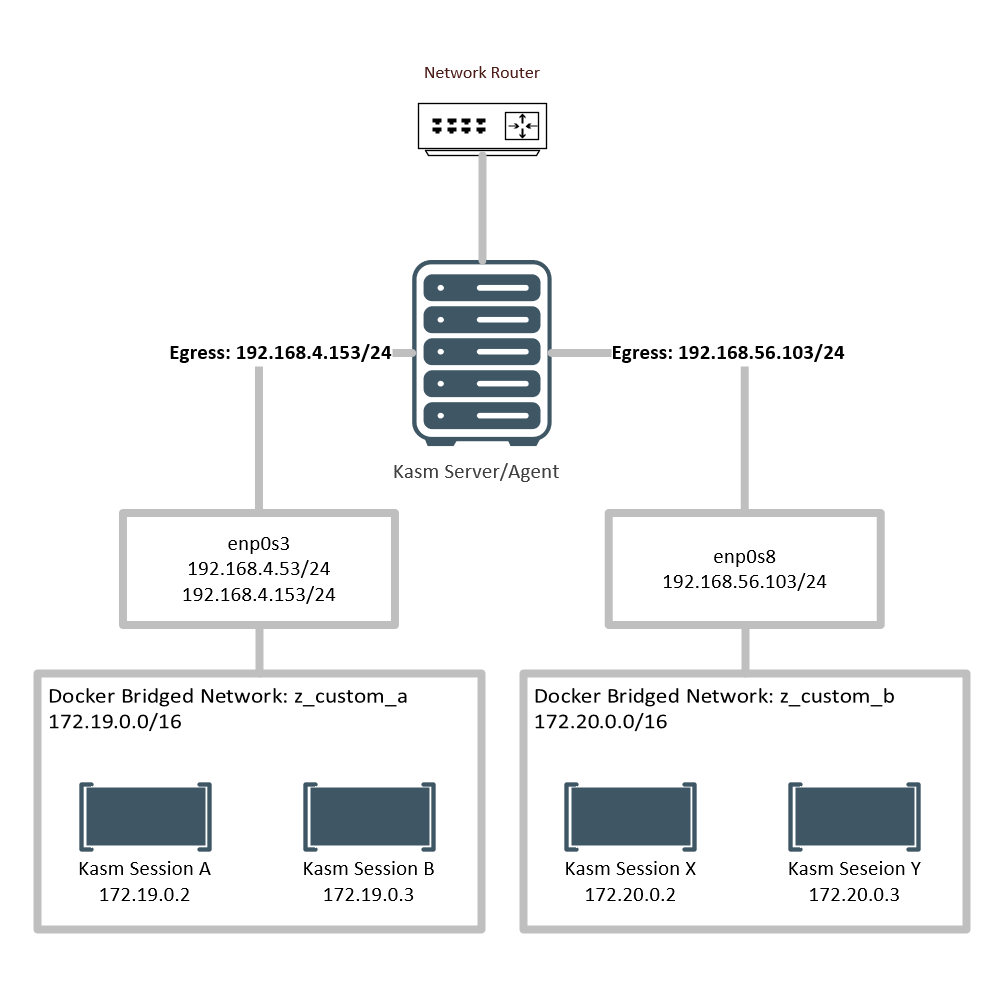
### Environment
**Network Interfaces**
| **Interface** | **IP(s)** |
| ------------- | -------------------------------- |
| enp0s3 | 192.168.4.53/24 192.168.4.153/24 |
| enp0s8 | 192.168.56.103/24 |
```Bash
ip a
1: lo: mtu 65536 qdisc noqueue state UNKNOWN group default qlen 1000
link/loopback 00:00:00:00:00:00 brd 00:00:00:00:00:00
inet 127.0.0.1/8 scope host lo
valid_lft forever preferred_lft forever
inet6 ::1/128 scope host
valid_lft forever preferred_lft forever
2: enp0s3: mtu 1500 qdisc pfifo_fast state UP group default qlen 1000
link/ether 08:00:27:be:61:fa brd ff:ff:ff:ff:ff:ff
inet 192.168.4.53/22 brd 192.168.7.255 scope global noprefixroute dynamic enp0s3
valid_lft 12112sec preferred_lft 12112sec
inet 192.168.4.153/24 scope global enp0s3
valid_lft forever preferred_lft forever
inet6 fe80::e7be:8f90:49c:ec27/64 scope link noprefixroute
valid_lft forever preferred_lft forever
3: enp0s8: mtu 1500 qdisc pfifo_fast state UP group default qlen 1000
link/ether 08:00:27:b4:47:93 brd ff:ff:ff:ff:ff:ff
inet 192.168.56.103/24 brd 192.168.56.255 scope global noprefixroute dynamic enp0s8
valid_lft 506sec preferred_lft 506sec
inet6 fe80::dbad:e1ea:d353:c4a/64 scope link noprefixroute
valid_lft forever preferred_lft forever
```
### Docker Network Configuration
The docker network names used in this example are intentionally prefixed with `z_` . Due to a quirk
`docker` will choose the default route for the container based on the name of the docker network ordered
alphabetically. We name these custom networks accordingly so that they won't cause interruptions with the Kasm
service containers or user workflow.
1. Create a bridged docker network named `z_custom_a`
> ```Bash
> sudo docker network create \
> --driver bridge \
> --attachable \
> --opt "com.docker.network.bridge.name"="z_custom_a" \
> --opt "com.docker.network.bridge.enable_ip_masquerade"="false" \
> z_custom_a
> ```
1. After the network is created, get the auto-generated subnet
> ```Bash
> sudo docker inspect z_custom_a | grep Subnet
> "Subnet": "172.19.0.0/16",
> ```
1. Update `iptables` to source nat traffic from the custom docker network to the defined IP
> ```Bash
> sudo iptables -t nat -A POSTROUTING -s 172.19.0.0/16 ! -o z_custom_a -j SNAT --to-source 192.168.4.153
> ```
1. Create a bridged docker network named `z_custom_b`.
> ```Bash
> sudo docker network create \
> --driver bridge \
> --attachable \
> --opt "com.docker.network.bridge.name"="z_custom_b" \
> --opt "com.docker.network.bridge.enable_ip_masquerade"="false" \
> z_custom_b
> ```
1. After the network is created, get the auto-generated subnet
> ```Bash
> sudo docker inspect z_custom_b | grep Subnet
> "Subnet": "172.20.0.0/16",
> ```
1. Update `iptables` to source nat traffic from the custom docker network to the defined IP
> ```Bash
> sudo iptables -t nat -A POSTROUTING -s 172.20.0.0/16 ! -o z_custom_b -j SNAT --to-source 192.168.56.103
> ```
1. The generated briged interfaces can also be observed using `ip a`
> ```Bash
> ip a
> ...
> 32: z_custom_a: mtu 1500 qdisc noqueue state DOWN group default
> link/ether 02:42:5e:07:7a:e6 brd ff:ff:ff:ff:ff:ff
> inet 172.19.0.1/16 brd 172.19.255.255 scope global z_custom_a
> valid_lft forever preferred_lft forever
> 33: z_custom_b: mtu 1500 qdisc noqueue state DOWN group default
> link/ether 02:42:f4:a5:a7:ca brd ff:ff:ff:ff:ff:ff
> inet 172.20.0.1/16 brd 172.20.255.255 scope global z_custom_b
> valid_lft forever preferred_lft forever
> ```
### Kasm Workspace Configuration
1. Log into the Kasm UI as an administrator.
2. Select **Workspaces** -> **Workspaces**.
3. Select **Edit** next to the desired Workspace from the arrow menu.
4. Check **Restrict Image to Docker Network** and select the desired network
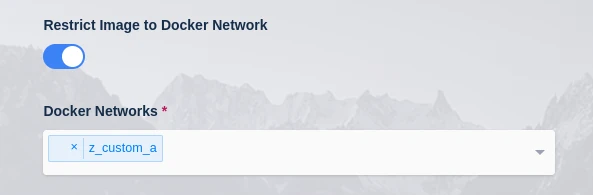
Create a new session using the Workspace and verify the configurations. In this example we make a request to a web server that returns our IP
---
## BYOVPN: Running VPNs Inside Kasm Workspaces Containers
## Bring Your Own VPN Containers (BYOVPN)
This guide will cover how to use the Kasm Workspaces images that come pre-built to simplify using VPNs within the containers. The images support allowing the end-user or admin to specify the configuration details for the following VPN Services.
* [OpenVPN](https://openvpn.net/)
* [Wireguard](https://www.wireguard.com/)
* [Tailscale](https://tailscale.com/)
The following images are available to install via the [Kasm Workspaces Registry](https://registry.kasmweb.com/)
| | **Docker Image** | **Dockerhub Path** | **AMD64** | **ARM64** | **GPU** |
| :------------ | :-------------------------------------------- | :--------------------------------------------- | :-------- | :-------- | :-------- |
| | kasmweb/ubuntu-jammy-desktop-vpn:[[release]] | [DockerHub](https://hub.docker.com/r/kasmweb/ubuntu-jammy-desktop-vpn) | **X** | **X** | **X** |
### End-User provided VPN Configuration
By default, the BYOVPN images utilize a custom [Workspace Launch Forms](../workspaces-sessions/container-workspace/workspace-launch-form.mdx) to present options for the end-user to configuring their VPN details, such as a Tailscale authentication key. When the user selects the VPN Workspace from the dashboard, the form will be rendered to capture the VPN details. When the workspace is launched, the user will be presented with notifications regarding the state of the VPN Connection. With a number of consumer VPN services offering OpenVPN and/or WireGuard based connection options, this provides substantial flexibility for user's to leverage their own VPN accounts within Kasm.
If this is the desired use-case, no futher action is needed other than to install the Workspace and publish it to users.
OpenVPN ExampleWireguard Example
### Admin-Provided VPN Configurations
The BYOVPN Images can also be used to pre-configure the VPN Connection requiring no end-user intervention. In order to use the admin-provided configurations, remove the **Launch Config** configurations from the Workspace entry. This will remove the custom launch form when launching the Workspace, and allow the container to use the admin-provided options.
VPN configurations or credentials supplied by the admin may be visible to the end-user when running the container.
If this is not acceptable, consider using a [VPN Sidecar](./vpn-sidecar.mdx).
#### Tailscale Configuration
Tailscale is not a full VPN isolation solution out of the box, it allows you to connect to the shared machines also connected to the account. All other Internet traffic will still go out over the local network by default.
In order to use Tailscale an auth key will need to be generated from the Tailscale admin dashboard, please reference [Getting the Tailscale auth key](vpn-sidecar.mdx) to generate one.
By default, Tailscale does not require manual device approval for machines that seek to automatically join the network, even when joining with pre-generated keys. However, if this setting is enabled, the Tailscale connection will not succeed for new Kasm sessions until the Tailscale admin approves them. See [Device Approval](https://tailscale.com/kb/1099/device-approval) for more information.
With an auth key the **Docker Run Config Override** for the Workspace will need to be modified to upldate the `TAILSCALE_KEY` IE:
```json
{
"environment": {
// highlight-next-line
"TAILSCALE_KEY": "tskey-auth-XXXXXXXXXXXX-XXXXXXXXXXXXXXXXXXXXXXXXXXXXXXXXX",
"SHOW_VPN_STATUS": "1",
"SHOW_IP_STATUS": "1"
},
"sysctls": {
"net.ipv4.conf.all.src_valid_mark": 1
},
"dns": [
"8.8.8.8",
"8.8.4.4"
]
}
```
#### Wireguard Configurations
* After installing the Workspace from the Kasm Workspace Registry, navigate to the Administrator Dashboard -> Workspaces -> Workspaces -> click the arrow next to the Workspace -> Click Edit (pencil icon) -> File Mapping tab -> Add File Mapping.
* Select Text for Type
* Customize the Name (here we use `VPN Config`)
* Customize the Description (here we use `VPN Configuration File`)
* Set the destination path as `/dockerstartup/wireguard.conf`
* Paste the contents of your Wireguard configuration file in the Text area
* Click Save
##### Wireguard DNS
Wireguard uses configuration information from it's own conf file to setup DNS in the Workspace so the default Google DNS servers can be left in the **Docker Run Config Override** or removed it will not matter once connected on init.
#### OpenVPN Configurations
* After installing the Workspace from the Kasm Workspace Registry, navigate to the Administrator Dashboard -> Workspaces -> Workspaces -> click the arrow next to the Workspace -> Click Edit (pencil icon) -> File Mapping tab -> Add File Mapping.
* Select Text for Type
* Customize the Name (here we use `VPN Config`)
* Customize the Description (here we use `VPN Configuration File`)
* Set the destination path as `/dockerstartup/openvpn.conf`
* Paste the contents of your OpenVPN configuration file in the Text area
* Click Save
##### OpenVPN DNS
The default settings are pointed to Google's public DNS servers. It is important to keep in mind that private DNS servers that only the client can access will not function over an OpenVPN tunnel. It is necessary to use either public DNS servers or DNS servers that can be accessed on the server side of the tunnel.
##### OpenVPN authentication
OpenVPN might also require a username and password as well as the config file being mapped into the Workspace. This depends entirely on the Server side configuration.
This is automatically detected by the VPN enabled Workspace and will prompt the user to enter their username and password when the container is launched.
After entering the authentication information the user will be notified when the VPN is connected or if there was an error.
##### OpenVPN Automating user/pass Authentication
If the OpenVPN server requires user/pass authentication, and the workflow desired is automatically log in, an additional file will need to be mapped into the container referencing this login information.
* Navigate to the Administrator Dashboard -> Workspaces -> Workspaces -> click the arrow next to the Workspace -> Click Edit (pencil icon) -> File Mapping tab -> Add File Mapping
* Select Text for Type
* Customize the Name (here we use `Auth`)
* Customize the Description (here we use `OpenVPN Authentication file`)
* Set the destination path as `/dockerstartup/openvpn-auth`
* In the text area enter the username on the first line and the password as the second line.
* Click Save
It is also necessary to reference this file in the main OpenVPN configuration by modifying the line `auth-user-pass` to:
```
auth-user-pass /dockerstartup/openvpn-auth
```
### VPN and Public IP Status Notifications
By default, the VPN containers will display VPN Status, and Public IP Status messages when the VPN connection is established. This can be helpful to end users to verify connectivity. These notifications can be removed by adjusting the `SHOW_VPN_STATUS` and `SHOW_IP_STATUS` environment variables to `0` using the Docker Run Config.
```json
{
"environment": {
"TAILSCALE_KEY": "",
// highlight-next-line
"SHOW_VPN_STATUS": "0",
// highlight-next-line
"SHOW_IP_STATUS": "0"
},
"sysctls": {
"net.ipv4.conf.all.src_valid_mark": 1
},
"dns": [
"8.8.8.8",
"8.8.4.4"
]
}
```
### Troubleshooting
On any connection errors the user will be notified via a pop up and logs of the logic flow are stored inside the Workspace under the path `/dockerstartup/vpn_start.log`.
This file can be read by the user in a terminal using:
```
cat /dockerstartup/vpn_start.log
```
Or any other GUI text editor in the Workspace.
---
## Cisco Umbrella / OpenDNS Integration
## Cisco Umbrella / OpenDNS
Administrators have several options for integrative Kasm with Cisco Umbrella / OpenDNS.
- Users can be redirected to Kasm session when accessing restricted sites.
- Kasm sessions can be configured to use custom DNS servers, thus using DNS filtering systems such as Cisco Umbrella / OpenDNS.
In some situations this may be preferred to Kasm Workspace's built in [Web Filtering](../security/web-filtering.mdx).
### Redirect Blocked Requests to Kasm
Administrators can configure Cisco Umbrella to redirect the user's request to Kasm when a policy is violated.
For example, it certain categories of sites are denied by Cisco Umbrella policy, the Administrator may wish to provide
access to the site only through Kasm isolation. This is instrumented via the use of a **Custom Block Page** that is
coded to either automatically redirect the user to Kasm or provide a link for the user to click.
The following figure shows an example of a user's request being denied by Cisco Umbrella policy to auctions sites. The custom block page is shown,
and the user has the option to open the link inside a Kasm session. The Kasm session is opened in a new window and automatically launches to the requested site.
#### Deploy a Custom Block Page
A custom block page is used to redirect the user's original request to Kasm or provide them a link to do so. Administrator's
must customize and place the block page in a website that is accessible to all users.
1. Download the example block page: [Custom Block Page Example](https://kasm-static-content.s3.amazonaws.com/cisco_umbrella_custom_block_page.html) (Right Click and Save)
The example block page is intentionally devoid of styling to more simply illustrate the workflow.
Administrators can customize the page with styling and branding as desired.
2. Edit the file and replace `kasm.server` in the `kasm_url` variable with a domain for your Kasm Deployment.
Partial Block Page Contents
```jsx
...
// highlight-next-line
var kasm_url = "https://kasm.server/#/go?kasm_url=";
var urlParams = new URLSearchParams(window.location.search);
var kasm_message_elem = document.getElementById("kasm");
var kasm_link_elem = document.getElementById("kasm_link");
var url_elem = document.getElementById('url');
...
```
3. Deploy the file to a web server that is accessible by the users. e.g `https://my.server/block.html`
#### Update Cisco Umbrella
01. Log into the [Cisco Umbrella Portal](https://login.umbrella.com/)
02. Select **Policies** -> **Policy Components** -> **Block Page Appearance**
03. Click **Add**
04. Update the **Block Page Appearance Name** (e.g **Kasm Block Page**)
05. Choose a **Blocked requests should be treated:** method.
06. Select **Redirect users to this URL** and enter the address of the deployed custom block page: e.g `https://my.server/block.html`
07. Select **Save**
08. Select **Policies** -> **Management** -> **All Policies**
09. Expand the desired policy (e.g **Default Policy**) and select **Edit** under **Custom Block Page Applied**
10. Select **Use a Custom Appearance** and select the policy created in the previous steps (e.g **Kasm Block Page**)
11. Select **Set & Return** then select **Save**
It may take several minutes for changes to the policy to take effect.
12. When applicable users violate the policy they should see the configured block page with the option to open the link in Kasm. Cisco provides [Test URLs](https://support.umbrella.com/hc/en-us/articles/115000411528-What-are-the-Umbrella-Test-Destinations-) to help verify behavior.
### Kasm Sessions as Cisco Umbrella / OpenDNS Clients
#### DNS Configuration
Administrators can configure Kasm sessions to use custom DNS server such as those provide by Cisco Umbrella / OpenDNS.
Use the following steps to locate the Cisco Umbrella DNS servers for the account, then see [Custom DNS Servers](./custom-dns-servers.mdx) for configuration details details.
1. Log into the [Cisco Umbrella Portal](https://login.umbrella.com/)
2. Select **Deployments** -> **Core Identities** -> **Networks**
3. Select **+** next to desired networks's IP address
4. The DNS Servers are displayed. Utilize the **IPv4** DNS Servers when configuring an image with [Custom DNS Servers](./custom-dns-servers.mdx)
6) Once configured, navigate to one of the [Test URLs](https://support.umbrella.com/hc/en-us/articles/115000411528-What-are-the-Umbrella-Test-Destinations-) from within the Kasm session to verify the configuration.
#### Root Certificate Installation
In order to for Cisco Umbrella / OpenDNS to utilize more advanced filtering , inspect SSL traffic and display block pages without the user getting a
warning, the custom root certificate must be installed within the Kasm Image. Use the following steps to retrieve the
CA cert provided by Cisco. Once retrieved, create a custom Image using the certificate by following the [Custom CA Certificates](./custom-root-certificate.mdx) instructions.
**Helpful References**
* [https://docs.umbrella.com/umbrella-user-guideinstall-the-cisco-umbrella-root-certificate](https://docs.umbrella.com/umbrella-user-guide/docs/install-the-cisco-umbrella-root-certificate)
1. Log into the [Cisco Umbrella Portal](https://login.umbrella.com/)
2. Select **Deployments** -> **Configuration** -> **Root Certificate**
3. Select *Download Certificate*
4. Create a custom Image using the certificate by following the [Custom CA Certificates](./custom-root-certificate.mdx) instructions.
---
## Kasm Workspaces: Gathering Client Debugging Information
## Client Debugging Information
Administrators may need users to gather detailed connection information to triage a problem. The following
steps may be used to harvest Console logs and HAR (HTTP Archive Format) network information from the client.
Data gathered by the following steps will contain sensitive information. Never post this data to public forums.
It should be securely transmitted to the Kasm administrator.
It is recommended that users change their passwords after submitting the debugging information.
### Developer Tools Console Log and HAR Data
The following steps can be used to gather the Console logs and HAR networking data. The example is for Firefox, but is
similarly applicable for Chrome/Chromium-based browsers.
#### Pre-Test
- Log into Kasm Workspaces.
- Press **F12** to open the web browser **Developer Tools.**
- Select the **Network** tab in the developer tools, and ensure **Persist Logs** is checked.
- Select the **Console** tab and ensure **Persist Logs** is checked.

- *Conduct the desired test.*
#### Post-Test
- Select the **Network** tab from developer tools. Select the settings gear icon and select **Save all as HAR**.
- Select the **Console** tab from the developer tools. Right click one of the messages and select, **Export Visible Messages To → File**.
- *Send the files to the Kasm administrator.*
---
## Securing Kasm with Cloudflare Tunnels
## Cloudflare Tunnels
A Cloudflare Tunnel provides secure web connectivity to your Kasm Workspaces instance without requiring a publicly routable IP address or valid external SSL certificate by routing through the Cloudflare service. In this video, we will show you how to configure Kasm Workspaces with Cloudflare Tunnels using your own DNS hostname.
### Video Tutorial
If you prefer to follow along with a video tutorial, you can watch this YouTube video that covers the same steps outlined in this guide.
### Prerequisites
Before starting, please ensure that you have completed the following steps:
1. Deployed a Kasm instance.
2. Registered a DNS domain.
3. Set up a Cloudflare account.
4. Connected cloudflare nameservers to your domain provider.
### Connecting Your Domain to Cloudflare
The first step is to connect your domain to Cloudflare. To do this, you need to change the name servers for your domain to Cloudflare's name servers. Here are the steps to follow:
1. Navigate to the DNS tab on the left-hand side of your Cloudflare dashboard.
2. Scroll to the bottom and copy the two Cloudflare name servers.
3. Log in to your domain provider and replace the existing name servers with the Cloudflare name servers.
The process of changing your domain's name servers may take up to 48 hours to propagate.
#### Setting up the Tunnel
To set up the tunnel after connecting your domain to Cloudflare, follow these steps:
1. Navigate to the Access tab on the left-hand side of your Cloudflare dashboard and click on the "Launch Zero Trust" button. This will take you to the zero-trust dashboard, where you can access tunnels by clicking the drop-down arrow next to Access and selecting Tunnels.
2. To install a new tunnel, click on "Create a Tunnel," give it a name, and click "Save Tunnel."
3. Select the Docker tab and copy the provided code.
4. Paste this code into a text editor of your choice, such as VS Code.
Add "-d" after the "run" section to ensure it runs in the background.
4. Copy and paste the updated code into your host machine, and you'll see that it's now connected.
For more information about installing and configuring Cloudflare Tunnel, you can refer to [the official documentation](https://developers.cloudflare.com/cloudflare-one/connections/connect-apps).
#### Connecting to a Public Host Domain
Once the tunnel is connected and running, you can connect it to a public host domain. To connect your tunnel to a public host domain, follow these steps:
1. Navigate to your existing tunnel by clicking on the drop-down arrow next to "Access" and selecting "Tunnels."
2. Find the name of your tunnel and click on it.
3. Click on the "Configure" button, and then click on "Public Hostname."
4. To create a new tunnel route, enter a subdomain, such as "test," and select your domain from the dropdown menu.
5. Leave the path section blank and select "HTTPS" as the service type.
6. In the URL section, enter the IP address of your Kasm instance.
7. Click on the "Additional Application Settings" tab.
8. Enable "No TLS Verify" and "HTTP2 Connection."
9. Save the hostname.
#### Testing the Connection
To test the connection, you can either enter the URL into your search bar or click on the created route and then the external link. Your Kasm Workspaces instance is now accessible via your domain using Cloudflare Tunnels.
If you are using the [RDP local client workspace option](../workspaces-sessions/container-workspace/workspaces.mdx), make sure the [**Restrict RDP Client IP Address**](../infra-autoscale/deployment-zones.mdx) setting is disabled in Infrastructure / Zones. If it isn't may not be able to connect, as the IP stored with the request will differ due to the connection being over the tunnel. If this is the case it will be reported in the Error Logs with a message such as "Invalid Request. Wrong client IP."
### Conclusion
By following the steps outlined in this guide, you can easily configure your Kasm Workspaces with Cloudflare Tunnels and your own SSL certificates for your domain. This allows you to provide secure and convenient access to your Kasm Workspaces instance through your own domain name, with the added benefits of Cloudflare's CDN and DDoS protection.
---
## Configure Custom DNS Servers in Kasm Workspaces
## Custom DNS Servers
Administrators can use the **Docker Run Config** [Workspace Setting](../workspaces-sessions/container-workspace/workspaces.mdx) or [Group Setting](../security/users-groups-mgmt/groups.mdx)
to specify custom DNS servers that are used by the Kasm sessions.
```json
{
"dns": [
"208.67.220.220",
"208.67.222.222"
]
}
```
The following instructions demonstrate how to configure custom DNS servers using the **Docker Run Config** [Workspace Setting](../workspaces-sessions/container-workspace/workspaces.mdx)
1. Log into the Kasm UI as an administrator.
2. Select **Workspaces** -> **Workspaces**
3. Select **Edit** (Pencil) next to the desired Workspace from the arrow menu.
4. Specify the DNS Server in **Docker Run Config**
5. Select Save
New sessions created with this Workspace will utilize the specified DNS servers for resolution.
---
## Install Custom Root Certificates in Images
## Custom Root Certificates
Administrators may wish to install custom root certificates inside a Kasm Image so that users can
access organization resources that have certificates singed by an internal CA, or to utilize transparent proxies to
inspect traffic and enforce policies.
In order to install a custom root cert inside an Image, the Administrator must build a Custom Image.
Administrators should first review [Building Custom Images](../workspaces-sessions/container-workspace/customization/building-images.mdx) documentation to familiarize
themselves with the process.
### Building the Custom Image
The following steps may be used to install a custom root certificate. The steps make use of our
[open source Git repository](https://github.com/kasmtech/workspaces-images) that contains the example
Dockerfiles and scripts. Firefox is used in the example but the same steps will apply for the other provided images.
For simplicity, the steps assume the Image is being built on a Single Server Kasm deployment. If using a multi-server/distributed deployment
these steps can be performed from a seperate machine and the Image pushed to a registry.
See [Building Custom Images](../workspaces-sessions/container-workspace/customization/building-images.mdx) for more details.
- SSH to the Kasm Workspaces server and clone the example Git repository that has examples of for creating custom images.
> ```yml
> git clone https://github.com/kasmtech/workspaces-images
> cd workspaces-images
> ```
- Place your certificate in the following directory, overwriting the placeholder file that is currently there `./src/ubuntu/install/certificates/ca.crt` ( ensure it is named ca.crt)
- Edit `dockerfile-kasm-firefox` and uncomment the following lines – ( Remove the “#” characters ). This will :
> ```yml
> ...
> # Install Custom Certificate Authority
> # COPY ./src/ubuntu/install/certificates $INST_SCRIPTS/certificates/
> # RUN bash $INST_SCRIPTS/certificates/install_ca_cert.sh && rm -rf $INST_SCRIPTS/certificates/
> ...
> ```
>
> ```yml
> ...
> # Install Custom Certificate Authority
> COPY ./src/ubuntu/install/certificates $INST_SCRIPTS/certificates/
> RUN bash $INST_SCRIPTS/certificates/install_ca_cert.sh && rm -rf $INST_SCRIPTS/certificates/
> ...
> ```
- Build the image.
> ```yml
> sudo docker build -t firefox:custom -f dockerfile-kasm-firefox .
> ```
- Login to the Kasm UI as an administrator, and create a new Workspaces that references the new Docker image. See [Building Custom Images.](../workspaces-sessions/container-workspace/customization/building-images.mdx) for details.
---
## Gateway-based Egress: Custom
## Custom
Custom is a gateway-based egress provider type for advanced and provider-specific integration patterns.
Use this when OpenVPN/Wireguard built-in types do not match your environment.
### Typical inputs
- Provider type: `Custom`
- Gateway config: provider-specific fields required by your custom implementation.
- Credential model: optional, based on your custom provider requirements.
### Best-fit use cases
- Proprietary or internally developed VPN/tunneling systems.
- Integration patterns that require custom connection bootstrap logic.
---
## Gateway-based Egress Overview
Gateway-based providers route workspace traffic through selectable egress gateways.
Supported providers in this model:
- [Custom](./custom.mdx)
- [OpenVPN](./openvpn.mdx)
- [PureVPN (Managed)](./purevpn.mdx)
- [Wireguard](./wireguard.mdx)
The following is an example of the new Egress Selection menu presented when a User launches a Workspace:
### Gateway Selection Behavior
Egress Providers and Egress Credentials can be applied to users, groups, and workspaces.
When users launch a workspace, they are presented with available gateways.
Gateways are shown only when:
- The gateway is enabled.
- A credential exists for the same provider mapped to the selected workspace, user, or one of the user's groups.
A credential can be paired with a gateway even if they are mapped to different resources.
For instance the User "user@kasm.local" can use a Gateway attached to "All Users" group with a credential attached to "user@kasm.local".
The first matching, enabled credential in a list credentials sorted by their egress_credential_id will
be automatically selected to be used when a user specifies an Egress Gateway when launching a Workspace.
Manually specifying an Egress Credential on Workspace launch is not currently supported.
If a Credential has **Limit Active Connections** enabled and the number of concurrent connections using that credential has reached the limit
it will not be available to be used on a new Egress credential until a Kasm Session using the credential have ended.
### Configuration Workflow
In this example we will be configuring an OpenVPN provider, but Wireguard is also supported.
#### Create Provider and Gateways
- Log into the Kasm Web UI as an administrator
- Click **Infrastructure -> Egress**
- Click **Add**
| Name | Description |
| :-------------------------- | :--------------------------------------------------------------------------------------------------------------------------------------------------------------------------- |
| **Enabled** | Enable or disable this configuration |
| **Name** | The Unique Name for the Egress Provider |
| **Egress Provider Type** | The type of Egress Provider Configuration |
| **Enable New Managed Gateways** | (Managed Egress Provider Only) When enabled any new Egress Gateways sent by the Egress Plugin Service will be automatically enabled. |
- Fill out the form and click **Save**
- A list of all Egress Providers is shown.
- Click the arrow menu on the OpenVPN Provider and Select **Edit**
- Select the **Egress Gateway** tab and click **Add**
| Name | Description |
| :-------- | :-------------------------------------------------------------------------------------------------------------------------------------------------------------------------------------------------------------------------------------------------------------------- |
| **Enabled** | Enable or Disable this configuration. |
| **Name** | The Unique Name for the Egress Gateway |
| **Country** | The Country for the Egress Gateway |
| **City** | The City for the Egress Gateway |
| **Config** | The Egress Gateway Config (OpenVPN, Wireguard or Custom) |
For Wireguard Configurations the `PrivateKey` value in Config is set by the Egress Credential.
#### Assigning Provider and Credentials
Provider Assignments and Credential creation can be done on Users, Groups and Workspaces. In this example we will be
performing an Assignment on the User *user@kasm.local*.
- Log in to the Kasm Web UI as Administrator
- Click **Access Management** -> **Users**
- Click the arrow menu on *user@kasm.local* and select **Edit**.
- Click on the **Egress** tab and select **Add**
| Name | Description |
| :-------------------- | :----------------------------------------------------------------------------------------------------------------------------------------------------------------------------------------- |
| **Enabled** | Enable or Disable this configuration. |
| **Egress Provider** | The name of the Egress Provider to Map. |
| **Allow All Gateways** | When Enabled, all Egress Gateways in the selected Provider will be mapped. Disabling requires that the Admin specify which gateways to map in the **Selected Gateways** field. |
| **Selected Gateways** | When **Allow All Gateways** is enabled this setting sets the gateways that apply to this mapping. |
- Fill out the form and click **Save**
- Click on the **Egress Credential** tab.
| Name | Description |
| :----------------------- | :-------------------------------------------------------------------------------------------------------------------------------------------------------------------------------------------------------- |
| **Enabled** | Enable or Disable this configuration. |
| **Egress Provider** | The name of the Egress Provider for this Credential. |
| **Name** | The name of this Egress Credential. |
| **Username** | The Username for the Egress Credential (OpenVPN Provider) |
| **Password** | The Password for the Egress Credential (OpenVPN Provider) |
| **Private Key** | The Wireguard Private Key for the Egress Credential (Wireguard Provider) |
| **Custom Credential** | The Custom Credential for the Egress Credential (Custom Provider) |
| **Allow All Gateways** | When Enabled, the Credential will apply to all Egress Gateways in the selected Provider. Disabling requires that the Admin specify which gateways to map in the **Selected Gateways** setting. |
| **Selected Gateways** | When **Allow All Gateways** is enabled, this sets the gateways that this Credential can be used with. |
| **Limit Active Connections** | When Enabled, the number of concurrent connections that this Egress Credential can be used in is limited to the setting in **Active Connection Limit**. |
| **Active Connection Limit** | When **Limit Active Connections** is enabled, this value sets the maximum number concurrent connections the credential can be used in. |
Now that the Egress Provider and Credential are assigned to this user, they may select the Egress Gateway when launching a Container Workspace.
---
## Gateway-based Egress: OpenVPN
## OpenVPN
OpenVPN is a gateway-based egress provider type in Kasm.
Use this provider when you want launch-time gateway selection and credential-based VPN tunneling.
### Typical Inputs
- Provider type: `OpenVPN`
- Gateway config: OpenVPN configuration and endpoint details.
- Credential model: username and password credentials assigned through Kasm mappings.
### Best-Fit Use Cases
- Existing OpenVPN infrastructure with known operational patterns.
- Teams that require user-selectable gateways by region or policy.
- Environments that already distribute OpenVPN client configs.
### Setup Pattern
1. Create an egress provider with type **OpenVPN**.
2. Add one or more egress gateways.
3. Map provider to users/groups/workspaces.
4. Create egress credentials with username/password.
5. Launch workspace and select a gateway.
---
## Gateway-based Egress: PureVPN (Managed)
## PureVPN (Managed)
Kasm has partnered with PureVPN to provide a quick and easy way to gain secure access to **80+ locations across 65 countries**. This "Managed" Egress Provider is a licensed feature, requiring a Kasm license to use. All gateways are owned and operated by PureVPN, with Kasm servers managing auto-population of gateways and credential configuration.
To purchase the PureVPN Managed Egress license, contact a Kasm sales rep or purchase via our [web checkout](https://kasm.com/server-checkout). You can find more details about licensing in our [Licensing Guide](../../../../reference/license.mdx).
Once you have the appropriate license applied to your Kasm deployment, give it a few minutes so that Kasm can verify and apply the new feature to your deployment.
### Integration
You can then go to **"Infrastructure" -> "Egress"** to see that the PureVPN Egress provider has now been added.
You can click "Edit" to view/configure more details about the PureVPN provider. The "Enable New Managed Gateways" option decides whether you want to automatically add and configure new gateways that might be added by PureVPN in the future.
### Managed Egress Providers
Kasm allows for Licenses to be purchased that grant a number of connections to a Managed Egress Provider.
When a license that grants the use of an Managed Egress Provider is applied to the Kasm Workspaces deployment,
Kasm Workspaces automatically reaches out to the Kasm Egress Plugin Service to obtain a list of Egress
Accounts and Egress Providers and adds them to the Kasm Deployment.
For example the following screenshot is of the Egress Providers section on a deployment that has a License applied that grants 5 connections
to the PureVPN Managed Egress Provider.
Using these Managed Egress Providers is as simple as [mapping them to a User, Group, or Workspace](../../../../tutorials/user-guide/pwa.mdx).
Managed Egress providers do not require the creation of Egress Credentials, they only require mapping the Egress Provider to a User Group or Workspace.
#### Egress Plugin System Info
When a license is added that grants connections for a Managed Egress Provider, it creates a "Egress Plugins" Tab in `Diagnostics->System Info`, which contains summarized information
about all the Egress Plugins for all the Licenses on the Kasm Workspaces Deployment.
Listed below are the fields in the Egress Plugins table:
| **Name** | **Description** |
| :------------------- | :------------------------------------------------------------------------------------------------------------------------------------------------------------------------------------------------------------ |
| **Egress Plugin ID** | The ID of the Egress Plugin. |
| **Accounts** | The number of Managed Egress Accounts currently provisioned on this Kasm Workspaces Deployment for this Plugin. |
| **Allowed Connections** | The total number of allowed connections permitted by all the licenses on the Kasm Workspaces Deployment for this Plugin |
| **Remaining Connections** | The number of remaining available connections for this plugin. This is based on the number of accounts provisioned on the system and the the number of Workspaces sessions currently using an Egress Connection. |
#### Egress Plugin License Info
Information about the Managed Egress Providers granted by an individual license can be viewed by logging into the Kasm Workspaces Admin UI
and navigating to `Diagnostics->System Info->Licenses` and then selecting the "View" button on an individual license and then scrolling to
the "Egress Plugins" section.
The first entry is a table containing a list of the Egress Plugins granted by the license:
| **Name** | **Description** |
| :------------------- | :-------------------------------------------------------------------------------------------------------------------------------------------------------------------------------------------------------------------------------------- |
| **Egress Plugin ID** | The ID of the Egress Plugin. |
| **Accounts** | The number of Managed Egress Accounts currently provisioned on this Kasm Workspaces Deployment for this Plugin on this License. |
| **Allowed Connections** | The total number of allowed connections permitted by this license on the Kasm Workspaces Deployment for this Plugin. |
| **Remaining Connections** | The number of remaining available connections for this Plugin on this License. This is based on the number of accounts provisioned on this system and the number of Workspaces sessions currently using an Egress connection. |
Next are a number of fields that show Egress Plugin information for the License:
| **Name** | **Description** |
| :--------------------------- | :------------------------------------------------------------------------------------------------- |
| **Is License Valid** | The License validity according to the Egress Plugin Service. |
| **Is Entitlement Valid** | The License Entitlement validity according to the Egress Plugin Service. |
| **Next Egress Plugin Check In** | The next time Kasm Workspaces will attempt to query the Egress Plugin Service to update Managed Egress Accounts and Managed Egress Providers for this License. |
| **Last Egress Plugin Check In** | The last time this License was checked in to the Egress Plugin Service. |
#### Managed Egress Provider Info
When a license is added that grants access to Managed Egress providers, additional information about the Egress Providers can be found by
logging into Kasm Administrator UI, navigating to `Infrastructure->Egress` and selecting **Edit** on a Managed Egress Provider
and then navigating to **Details** and then scrolling down to the **Egress Plugins** section.
The section contains the following:
| **Name** | **Description** |
| :------------------------------ | :-------------------------------------------------------------------------------------------------------------------------------------------- |
| **Is Managed** | Wether the Egress Provider is managed by an Egress Plugin. |
| **Egress Plugin ID** | The ID of the Egress Plugin that Manages this Egress Provider. |
| **Egress Plugin Account Count** | The number of Managed Egress Accounts currently provisioned on this Kasm Workspaces Deployment for this Managed Egress Provider. |
| **Egress Plugin Active Connections** | The number Kasm Connections currently using this Manage Egress Provider |
| **Egress Plugin Remaining Connections** | The number of remaining available connections for this Managed Egress. This is based on the number of accounts provisioned on this system and the number of active connections. |
---
## Gateway-based Egress: Wireguard
## Wireguard
Wireguard is a gateway-based egress provider type in Kasm.
Use this provider when you want low-overhead gateway-based tunneling with Wireguard configs and private-key credential handling.
### Typical Inputs
- Provider type: `Wireguard`
- Gateway config: Wireguard peer/network configuration.
- Credential model: user-specific private key material stored in Kasm egress credentials.
### Best-Fit Use Cases
- Environments that already standardize on Wireguard for secure transport.
- Deployments that require user-scoped key management.
### Setup Pattern
1. Create an egress provider with type **Wireguard**.
2. Add one or more Wireguard gateways.
3. Map provider to users/groups/workspaces.
4. Create egress credentials with Wireguard private key.
5. Launch workspace and select a gateway.
---
## Egress Configuration: Gateways, VPN & Zero Trust
## Egress
Kasm Workspaces lets administrators define **Egress Providers** to control how session traffic reaches external or private destinations.
Kasm supports two egress models:
- **Gateway-based egress**: users choose a gateway at launch and the workspace's outbound traffic tunnels through that route.
- **Zero-trust egress**: access is identity and policy based.
Use egress to meet security, network segmentation, and geography requirements.
**Egress Providers** can be mapped to a [Workspace](../../workspaces-sessions/container-workspace/workspaces.mdx), [User](../../security/users-groups-mgmt/users.mdx) or [Group](../../security/users-groups-mgmt/groups.mdx)
For gateway-based providers, this mapping controls which gateways can be selected at launch.
Credentials can also be assigned on workspace/group/user objects.
For example, username/password for OpenVPN, or private key for Wireguard.
For operational logs, troubleshooting commands, and forensics considerations, see [Operations and Troubleshooting](./operations_and_troubleshooting.mdx).
When using [Banners](../../workspaces-sessions/banners.mdx), Kasm can expose egress environment variables (provider, gateway, location).
### Choose An Egress Model
#### [Gateway-based](./gateway_based/index.mdx)
Gateway-based providers use provider-specific gateway configs and optional user credentials.
Administrators may use the Egress feature to grant access to secure environments via a VPN or have Kasm
traffic be routed through a location geographically separated from the Kasm Deployment.
- [Custom](./gateway_based/custom.mdx): Flexible provider model for non-standard or internal integrations.
- [OpenVPN](./gateway_based/openvpn.mdx): Classic VPN workflow using username/password credentials.
- [PureVPN (Managed)](./gateway_based/purevpn.mdx): Managed gateway catalog synchronized through Kasm licensing.
- [Wireguard](./gateway_based/wireguard.mdx): Lightweight VPN workflow using user private key credentials.
#### [Zero-trust](./zero_trust/index.mdx)
Zero-trust egress is a security model that treats every connection as untrusted until verified by identity and policy.
Instead of giving broad network path access through a selected gateway, administrators define who can access which services under what conditions.
- [OpenZiti](./zero_trust/openziti/index.mdx): Identity-driven, policy-based egress without launch-time gateway selection.
### Video tutorial
### Operational Guidance
Shared runtime, diagnostics, and maintenance guidance is in:
- [Operations and Troubleshooting](./operations_and_troubleshooting.mdx)
---
## Egress Operations and Troubleshooting
This page covers runtime implementation details and operational checks that apply to egress deployments.
### Runtime Implementation
Kasm egress relies on a Docker network plugin to manage session networking, including interface setup, routing rules, and provider-specific tunnel handling.
Primary logs:
- `/var/log/kasm-sidecar/network_sidecar.log`: network setup, tunnel behavior, policy/routing actions.
- `/var/log/kasm-sidecar/plugin.log`: Docker engine interactions made by the sidecar plugin.
Plugin runtime files are written under:
- `/var/run/kasm-sidecar/$container_namespace`
A quick way to retrieve a container namespace:
```bash
docker inspect -f '{{.NetworkSettings.SandboxKey}}' $container_name | grep -o -E "[a-h0-9]+$"
```
### Environment Variables
When egress is enabled for a session, Kasm can expose these variables in the container:
```bash
KASM_EGRESS_GATEWAY_NAME
KASM_EGRESS_GATEWAY_CITY
KASM_EGRESS_GATEWAY_COUNTRY
KASM_EGRESS_PROVIDER_NAME
```
Example:
```bash
KASM_EGRESS_PROVIDER_NAME=PureVPN
KASM_EGRESS_GATEWAY_NAME=AU-MELBOURNE-31
KASM_EGRESS_GATEWAY_COUNTRY=AU
KASM_EGRESS_GATEWAY_CITY=Melbourne
```
To disable exposure, set `EXPOSE_EGRESS_ENVIRONMENT_VARS=0` in [Docker Run Config](../../workspaces-sessions/container-workspace/workspaces.mdx#docker-run-config):
```json
{
"environment": {
"EXPOSE_EGRESS_ENVIRONMENT_VARS": "0"
}
}
```
### Troubleshooting Flow
If a session cannot connect to an egress provider, users are shown an error in the launch flow.
Use this checklist:
1. Verify plugin health with `docker plugin ls`.
2. Review `/var/log/kasm-sidecar/network_sidecar.log` for setup and connection errors.
3. Validate provider config files under `/var/run/kasm-sidecar/$container_namespace/$vpn` (for example, `.../wg/wg.conf`).
4. Confirm `kasm_proxy` is attached to the sidecar network bridge via `docker exec -it kasm_proxy ip a`. The interface name should follow the pattern `k-p-p-*.`
5. Validate session routes with `docker exec -it kasm_proxy ip route` and verify traffic leaves on the plugin interface.
```bash
default via 172.20.0.1 dev k-p-1389f8
172.20.0.0/16 dev k-p-1389f8 proto kernel scope link src 172.20.0.3
```
6. Confirm hostname resolution for `KASM_API_HOST` by inspecting container `env` and `/etc/hosts`.
```bash
> docker exec -it $CONTAINER_NAME env | grep KASM_API_HOST
KASM_API_HOST=proxy
> docker exec -it $CONTAINER_NAME cat /etc/hosts
fe00::0 ip6-localnet
ff00::0 ip6-mcastprefix
ff02::1 ip6-allnodes
ff02::2 ip6-allrouters
172.20.0.2 proxy
172.20.0.3 505c32d766d9
```
7. Inspect namespace `iptables` rules with `nsenter --net=$container_namespace iptables -L -v -n`.
Example route output:
```bash
Chain INPUT (policy ACCEPT 0 packets, 0 bytes)
pkts bytes target prot opt in out source destination
897 131K ACCEPT 0 -- k-p-1389f8 * 172.20.0.2 0.0.0.0/0 # <-- kasm_proxy IP address
20581 4534K ACCEPT 0 -- lo * 0.0.0.0/0 0.0.0.0/0
0 0 ACCEPT 0 -- tun0 * 0.0.0.0/0 0.0.0.0/0
25 7620 ACCEPT 0 -- wg * 0.0.0.0/0 0.0.0.0/0
0 0 ACCEPT 0 -- * * 172.20.0.0/16 0.0.0.0/0 # <-- kasm_sidecar_network IP range
28 9644 ACCEPT 0 -- * * XXX.XXX.XX.XX 0.0.0.0/0 # <-- VPN server IP
Chain OUTPUT (policy ACCEPT 0 packets, 0 bytes)
pkts bytes target prot opt in out source destination
78 16678 ACCEPT 6 -- * k-p-1389f8 0.0.0.0/0 172.20.0.2 tcp dpt:443 # <-- kasm_proxy IP address
20581 4534K ACCEPT 0 -- * lo 0.0.0.0/0 0.0.0.0/0
0 0 ACCEPT 0 -- * tun0 0.0.0.0/0 0.0.0.0/0
27 2340 ACCEPT 0 -- * wg 0.0.0.0/0 0.0.0.0/0
1125 4567K ACCEPT 0 -- * * 0.0.0.0/0 172.20.0.0/16 # <-- kasm_sidecar_network IP range
29 4464 ACCEPT 0 -- * * 0.0.0.0/0 XXX.XXX.XX.XX # <-- VPN server IP
```
### Restarting The Network Plugin
In case of issues not caused by a VPN misconfiguration (as described by steps 4-8), the following script can be used to restart the plugin:
Ensure no active workspaces using egress are running on the target agent before restarting the plugin.
```yml
# disconnect kasm_proxy from the plugin network
plugin_name=$(docker network inspect kasm_sidecar_network --format '{{.Driver}}')
docker network disconnect kasm_sidecar_network kasm_proxy
# restart the plugin
docker network rm kasm_sidecar_network
docker plugin disable $plugin_name
docker plugin enable $plugin_name
# reconnect kasm_proxy to the plugin network
docker network create -d $plugin_name kasm_sidecar_network
docker network connect kasm_sidecar_network kasm_proxy
```
Some VPN Providers such as Private Internet Access may use configurations that are not supported by the latest package versions used by the Kasm Network Plugin.
This may result in connections failing or timing out. [See this OpenSSL GitHub issue for more details.](https://github.com/openssl/openssl/discussions/24301)
### Upgrading The Network Plugin
Occasionally Docker or dependency changes require plugin upgrades.
Ensure no active workspaces using egress are running on the target agent before performing this upgrade.
```yml
# disconnect kasm_proxy from the plugin network
plugin_name=$(docker network inspect kasm_sidecar_network --format '{{.Driver}}')
plugin_reference=$(docker plugin inspect $plugin_name --format '{{.PluginReference}}')
docker network disconnect kasm_sidecar_network kasm_proxy
# upgrade the plugin
docker network rm kasm_sidecar_network
docker plugin disable $plugin_name
docker plugin rm $plugin_name
docker plugin install --alias $plugin_name --grant-all-permissions $plugin_reference
# reconnect kasm_proxy to the plugin network
docker network create -d $plugin_name kasm_sidecar_network
docker network connect kasm_sidecar_network kasm_proxy
```
### Forensics and Geolocation
Egress gateways can support forensic and location-sensitive workflows, but they are not a complete attribution solution by themselves.
Key considerations:
- VPN egress IP alone may not satisfy a full forensic profile. Browser locale, timezone, and profile-level settings can still expose mismatches.
- Geolocation databases vary by provider and service. Different websites may report different locations for the same exit IP.
- Shared commercial VPN IPs can trigger additional anti-abuse checks (for example, CAPTCHAs).
For dedicated IP and managed attribution requirements, contact Kasm sales for an enterprise architecture review.
---
## Zero-trust Egress Overview
Zero-trust providers in Kasm use identity and policy controls rather than launch-time gateway selection.
### What zero trust means
In a zero-trust model, access is not granted simply because traffic is on a trusted network path.
Each connection is evaluated against identity and policy, and only explicitly authorized services are reachable.
For Kasm egress, this means administrators still map providers to users, groups, and workspaces in Kasm, while the zero-trust provider enforces service-level access policy.
### Benefits
- Enforces least-privilege service access instead of broad network-level access.
- Limits blast radius if credentials or a session are compromised.
- Removes launch-time gateway and per-user VPN credential selection complexity.
- Improves policy consistency and audit posture through centralized access rules.
Currently supported providers:
- [OpenZiti](./openziti/index.mdx)
### Model characteristics
- Provider mappings are still managed in Kasm (users/groups/workspaces).
- Access is determined by provider-side policy and identity.
- No per-user gateway picker at launch.
- No per-user VPN credential model in Kasm for this type.
---
## Zero-trust Egress: OpenZiti
## OpenZiti
OpenZiti is the first zero-trust egress provider supported in Kasm.
Unlike gateway-based providers, OpenZiti grants access by identity and policy at the service layer, not by tunnel selection at workspace launch.
### How OpenZiti differs from gateway-based egress
Gateway-based providers (OpenVPN, Wireguard, PureVPN) tunnel a session's whole network path through a chosen gateway, and the user picks which gateway at workspace launch. OpenZiti is structured differently:
- **Service-level access, not network-path access.** Each session reaches specific named services, not the network behind a gateway.
- **No launch-time gateway picker.** Which services a session can reach is decided by OpenZiti policy, evaluated against the session's identity.
- **No per-user VPN credentials in Kasm.** Kasm automates the OpenZiti identity lifecycle (create, enroll, remove) for entitled users and workspaces.
- **Per-connection authorization.** Every access decision is policy-evaluated against the requesting identity, which makes audit straightforward.
### Terminology
The vocabulary you need before reading the rest of this page or the quickstart.
- **Controller** — OpenZiti control plane for identities, services, and policies.
- **Edge router** — data-plane component that carries authorized traffic in the OpenZiti fabric.
- **Identity** — certificate-backed user, workload, or device identity used for authentication and authorization.
- **Service** — a logical target (host:port) protected by OpenZiti policies. Reached by name from a session, not by IP.
- **Dial** — permission for an identity to connect to a service.
- **Bind** — permission for an identity to host (provide) a service.
### How it fits together
An OpenZiti deployment has at minimum a controller and one edge router. Workloads hosting private services run alongside (or as) router tunnelers and Bind those services to the controller. Clients with dial-permitted identities reach those services by name; the router routes their traffic through the encrypted fabric.
Kasm hooks in by holding an admin identity for one OpenZiti provider and using it to manage per-user and per-workspace identities under that controller. At session launch, the sidecar drops the right identity into the session namespace and starts a Ziti tunnel inside it. Whether that session can actually reach any given service is decided by OpenZiti policy — Kasm never overrides that.
For the deeper architecture (multi-tenant networks, public/private router split, policy role design), see the [kziti architecture](./kziti.mdx) page.
### Constraints worth knowing about
- Provider mapping is still done in Kasm (users, groups, workspaces). Kasm decides *who gets a managed identity*; OpenZiti decides *what each identity can reach*.
- There is no per-user Egress Credential model for OpenZiti providers, and no launch-time gateway selector.
- A Kasm mapping without matching OpenZiti policies gives the user an enrolled identity but no service access.
- Identity reconciliation is asynchronous — mapping changes take effect after the next reconcile cycle, not instantly.
### Setup outline
1. Create an egress provider with type **OpenZiti**.
2. Configure the OpenZiti admin identity JSON on the provider.
3. Map the provider to users, groups, or workspaces.
4. Configure OpenZiti policies that allow Kasm-managed identities to access target services.
5. Launch a workspace and validate service reachability.
For an evaluation lab on a single VM, see the [quickstart](./quickstart.mdx). For the Kasm-side internals, see the [integration deep dive](./kasm_integration_deep_dive.mdx).
### What Kasm does behind the scenes
For each enabled OpenZiti provider, Kasm reconciles identities against entitled users and workspaces:
1. Discover entitled users and workspaces from provider mappings.
2. Create and enroll missing OpenZiti identities.
3. Store the identity JSON for launch-time use.
4. Remove identities that are no longer entitled.
At workspace launch the sidecar:
1. Retrieves the managed identity JSON for the session.
2. Writes the identity files under `/var/run/kasm-sidecar/$container_namespace/ziti`.
3. Starts `ziti tunnel run --identity-dir ` in the session namespace.
4. Configures DNS so Ziti name resolution works inside the session, with upstream fallback for non-Ziti destinations.
The [integration deep dive](./kasm_integration_deep_dive.mdx) covers the full identity lifecycle, naming conventions, and troubleshooting flow.
---
## OpenZiti Kasm Integration Deep Dive
## Kasm Integration Deep Dive
This page explains what Kasm is doing behind the scenes when OpenZiti egress is enabled.
### Integration overview
Kasm OpenZiti support is based on a provider model:
- An egress provider of type `OpenZiti` is configured in Kasm.
- An OpenZiti admin identity is stored on that provider.
- Kasm periodically reconciles entitled users/workspaces and manages OpenZiti identities.
- At session launch, the sidecar injects identity files and starts `ziti tunnel run`.
### Identity lifecycle
For each enabled OpenZiti provider:
1. Kasm identifies entitled users/workspaces from provider mappings.
2. Kasm creates missing OpenZiti identities and enrolls them.
3. Identity JSON is stored for launch-time use.
4. Identities no longer entitled are removed.
Identity names are generated with Kasm metadata patterns such as:
- `kasm-user---`
- `kasm-workspace---`
### Session launch behavior
At workspace start:
1. Sidecar receives script data for OpenZiti setup.
2. Sidecar writes user/workspace identity JSON under:
`/var/run/kasm-sidecar/$container_namespace/ziti`
3. Sidecar starts:
`ziti tunnel run --identity-dir `
4. DNS behavior is updated so Ziti name resolution functions inside the session namespace.
If tunnel startup fails, session startup reports an egress-related error and logs details for admin diagnostics.
### Configuration summary
OpenZiti configuration in Kasm is done through:
- **Infrastructure -> Egress -> Add** with provider type **OpenZiti**.
- **OpenZiti Configuration** tab on that provider for admin identity JSON.
- Mappings to users/groups/workspaces that should receive OpenZiti access.
OpenZiti does not use per-user Egress Credentials or gateway selection in the same way as OpenVPN/Wireguard providers.
### Policy expectations
Kasm mapping grants entitlement to participate in OpenZiti identity lifecycle, but effective service access still depends on OpenZiti policy.
Typical requirements:
- Service policy allowing managed identities to dial target services.
- Edge-router policy allowing managed identities to use required routers.
### Troubleshooting and validation
- Confirm provider type is `OpenZiti` and config is present.
- Confirm identities are created in OpenZiti after mappings and reconciliation.
- Confirm policy roles include expected Kasm-managed identity names.
- Check logs:
- `/var/log/kasm-sidecar/network_sidecar.log`
- `/var/run/kasm-sidecar/$container_namespace/ziti.log`
### Related docs
- [How OpenZiti differs from gateway-based egress](./index.mdx#how-openziti-differs-from-gateway-based-egress)
- [OpenZiti Quickstart](./quickstart.mdx)
- [Egress Overview](../../index.mdx)
---
## Add an HA Controller with kziti
## Add an HA controller
For production, run multiple controllers with Raft consensus. Three-node clusters are the common production minimum, with 2-of-3 quorum surviving a single host loss.
After your single-controller deployment is healthy, follow the steps below for each additional controller you want to add.
Additional requirements for adding an HA controller:
- The new controller host needs `docker` and `docker compose` (same as the bootstrap host) **plus `7zip`** (`p7zip-full` on Debian/Ubuntu, `p7zip` on RHEL/Fedora) to extract the encrypted join package.
- The new host does **not** need the `kziti` binary. The join package is self-contained and includes the installer.
- You will be transferring two things to the new host: the encrypted join package, and the extraction password. These should travel through different channels.
- The new controller needs its own DNS A record (e.g. `ziti2.example.com`) and its router needs one too (e.g. `ziti2-router.example.com`), with ports `1280/tcp`, `6262/tcp`, and `3022/tcp` open inbound.
### On the existing controller
Generate a join package for the new controller:
```bash
kziti deploy ha create-join-package \
--output /tmp/join.zip \
--node-name ziti-c-2 \
--controller-host ziti2.example.com \
--router-host ziti2-router.example.com \
--admin-password ''
```
Notes on the flags:
- `--node-name` is the cluster member name. It must be unique within the cluster.
- `--controller-host` and `--router-host` are the FQDNs of the **new** controller and its router — not the existing one.
- Add `--controller-ip ` if the new controller's hostname does not resolve from inside the existing controller container. This injects an `extra_hosts` entry into a docker-compose override on the existing host so it can reach the new node by name during the join.
`kziti` produces an **AES-encrypted zip** at the path you supplied with `--output`, and prints a randomly generated extraction password.
Transfer the zip to the new host:
```bash
scp /tmp/join.zip user@ziti2.example.com:/tmp/
```
Send the extraction password through a **separate** secure channel — a password manager, an encrypted message, or similar. Do not put the password in the same email or the same chat as the zip.
### On the new controller host
Install `7zip` if it is not already present:
```bash
# Debian / Ubuntu
apt-get install -y p7zip-full
# RHEL / Fedora
dnf install -y p7zip
```
Extract the encrypted package and run the bundled installer:
```bash
7z x -p /tmp/join.zip -o/tmp/kziti-join
bash /tmp/kziti-join/install.sh
```
If the bootstrap controller's hostname does not resolve from this new host, add `--existing-controller-ip ` to the `install.sh` invocation so the new node can reach the bootstrap controller during join.
The new controller starts as a non-voter, syncs Raft state from the existing cluster, and self-promotes to a voting member once it is caught up.
### Verify cluster health
On any controller host, list cluster members:
```bash
docker compose -f /opt/kziti/docker-compose.yml exec ziti-controller \
ziti agent cluster list
```
The new node should appear with `voter: true` once promotion completes (typically within a minute of join).
---
## kziti CLI Reference
This page is auto-generated from the kziti CLI source. Run `kziti --help` for the same content interactively. To regenerate this page, run `python scripts/gen-cli-docs.py` in the kziti repo and copy the output to `docs/how-to/networking/egress/zero_trust/openziti/kziti-operations/cli-reference.mdx` in the docs project.
### Global options
- `--version`, `-V` — Show version and exit.
- `--verbose`, `-v` — Enable verbose/debug logging.
- `--profile` — Use a specific profile for this command invocation.
- `--output-format`, `-o` — Output format for list/show commands: table|json
### `kziti access`
Manage identity access to networks, services, and service sets.
**Usage:**
```bash
kziti access COMMAND [ARGS]...
```
#### `kziti access grant`
Grant an identity access to a network, service set, or individual service.
This command adds the appropriate role attribute to the identity, allowing it to access the specified resource through existing Dial service policies.
**Examples:**
```bash
# Grant access to entire network
kziti access grant user-123 net-corp-a
# Grant access to service set
kziti access grant user-123 svcset-devops
# Grant access to individual service
kziti access grant user-123 svc-corp-a-gitlab
```
**Usage:**
```bash
kziti access grant [OPTIONS] IDENTITY_ID_OR_NAME RESOURCE_ID
```
**Arguments:**
- `IDENTITY_ID_OR_NAME` *(required)* — Identity ID or name to grant access to
- `RESOURCE_ID` *(required)* — Network ID (e.g., 'net-corp-a'), Service Set ID (e.g., 'svcset-devops'), or Service ID
#### `kziti access list`
List all access grants for an identity.
Shows all networks, service sets, and services that the identity has access to based on its role attributes, displayed in a detailed table format.
**Example:**
```bash
kziti access list user-123
```
**Usage:**
```bash
kziti access list [OPTIONS] IDENTITY_ID_OR_NAME
```
**Arguments:**
- `IDENTITY_ID_OR_NAME` *(required)* — Identity ID or name to list access for
#### `kziti access remove`
Remove an identity's access to a network, service set, or individual service.
This command removes the appropriate role attribute from the identity, revoking its access to the specified resource.
**Examples:**
```bash
# Remove access to entire network
kziti access remove user-123 net-corp-a
# Remove access to service set
kziti access remove user-123 svcset-devops
# Remove access to individual service
kziti access remove user-123 svc-corp-a-gitlab
```
**Usage:**
```bash
kziti access remove [OPTIONS] IDENTITY_ID_OR_NAME RESOURCE_ID
```
**Arguments:**
- `IDENTITY_ID_OR_NAME` *(required)* — Identity ID or name to revoke access from
- `RESOURCE_ID` *(required)* — Network ID (e.g., 'net-corp-a'), Service Set ID (e.g., 'svcset-devops'), or Service ID
**Options:**
- `--yes`, `-y` — Skip confirmation prompt.
#### `kziti access who`
List all identities that have access to a network, service set, or service.
**Examples:**
```bash
kziti access who net-corp-a
kziti access who svcset-devops
kziti access who svc-corp-a-gitlab
```
**Usage:**
```bash
kziti access who [OPTIONS] RESOURCE_ID
```
**Arguments:**
- `RESOURCE_ID` *(required)* — Network ID (e.g., 'net-corp-a'), Service Set ID (e.g., 'svcset-devops'), or Service ID
### `kziti config`
Manage kziti configuration.
**Usage:**
```bash
kziti config COMMAND [ARGS]...
```
#### `kziti config init`
Interactive configuration setup wizard.
**Usage:**
```bash
kziti config init
```
#### `kziti config path`
Show config file path.
**Usage:**
```bash
kziti config path
```
#### `kziti config profiles`
Manage named configuration profiles.
**Usage:**
```bash
kziti config profiles COMMAND [ARGS]...
```
##### `kziti config profiles create`
Create a new profile, optionally by cloning an existing profile.
**Usage:**
```bash
kziti config profiles create [OPTIONS] NAME
```
**Arguments:**
- `NAME` *(required)* — New profile name
**Options:**
- `--from` — Copy configuration from an existing profile
##### `kziti config profiles delete`
Delete a profile.
**Usage:**
```bash
kziti config profiles delete [OPTIONS] NAME
```
**Arguments:**
- `NAME` *(required)* — Profile name to delete
**Options:**
- `--yes`, `-y` — Skip confirmation prompt
##### `kziti config profiles list`
List configured profile names.
**Usage:**
```bash
kziti config profiles list
```
##### `kziti config profiles show`
Show details for one profile.
**Usage:**
```bash
kziti config profiles show [OPTIONS] [NAME]
```
**Arguments:**
- `NAME` — Profile name (defaults to selected profile)
##### `kziti config profiles use`
Set the active profile.
**Usage:**
```bash
kziti config profiles use [OPTIONS] NAME
```
**Arguments:**
- `NAME` *(required)* — Profile name to set active
#### `kziti config set-ziti`
Configure the Ziti connection for a profile.
With --host / --user / --password, creates and enrolls a new admin identity (same as 'kziti config init'). Use --identity to point to an existing identity JSON file instead.
**Examples:**
```bash
kziti config set-ziti --host https://ziti.example.com:1280 --user admin --password secret
kziti config set-ziti --identity /path/to/admin-kziti.json
```
**Usage:**
```bash
kziti config set-ziti [OPTIONS]
```
**Options:**
- `--host` — Ziti controller URL (e.g. https://ziti.example.com:1280)
- `--user`, `-u` — Admin username
- `--password`, `-p` — Admin password — creates and enrolls a new admin identity
- `--identity-name` — Name for the new enrolled identity (default: `admin-kziti`)
- `--identity`, `-i` — Path to an existing identity JSON file (skip enrollment)
- `--profile` — Profile to update (defaults to selected profile)
#### `kziti config show`
Show current configuration.
**Usage:**
```bash
kziti config show
```
### `kziti deploy`
Deploy and manage the OpenZiti stack.
**Usage:**
```bash
kziti deploy COMMAND [ARGS]...
```
#### `kziti deploy ha`
HA cluster operations.
**Usage:**
```bash
kziti deploy ha COMMAND [ARGS]...
```
##### `kziti deploy ha add-member`
Tell the bootstrap controller to add a new member to the RAFT cluster.
**Usage:**
```bash
kziti deploy ha add-member [OPTIONS]
```
**Options:**
- `--target` *(required)* — Target node, e.g. tls:ctrl2.example.com:1280
- `--install-dir` — Installation directory. (default: `/opt/kziti`)
##### `kziti deploy ha create-join-package`
Build an encrypted, self-contained HA join package for a new node.
**Usage:**
```bash
kziti deploy ha create-join-package [OPTIONS]
```
**Options:**
- `--output`, `-o` *(required)* — Output zip path.
- `--node-name` *(required)* — Unique cluster node name (e.g. 'ctrl2').
- `--controller-host` *(required)* — Joining controller FQDN.
- `--controller-ip` — IP this bootstrap node should use to reach the joining controller's hostname. Required if --controller-host doesn't resolve from inside the bootstrap container (no shared DNS). Injected as a docker-compose.override.yml extra_hosts entry on THIS node.
- `--controller-port` — Port the joining controller will bind and advertise. Defaults to the bootstrap's controller port. Set a different port (e.g. 1281) when both controllers run on the same machine.
- `--router`, `--no-router` — Include an edge router (default: yes).
- `--router-host` — Joining router FQDN (required if --router).
- `--router-port` — Port the joining router will bind. Defaults to 3022. Set a different port (e.g. 3028) for same-machine deployments. (default: `3022`)
- `--admin-user` — Admin username. (default: `admin`)
- `--admin-password` *(required)* — Bootstrap controller admin password (to mint the router JWT).
- `--install-dir` — Installation directory. (default: `/opt/kziti`)
##### `kziti deploy ha recover`
Recover a cluster that's lost quorum because a joining node went down without being removed from membership first. Spins up a short-lived ephemeral peer that impersonates the dead node to restore quorum, runs remove-member, then cleans up. Preserves all edge state (users, services, routers, policies).
**Usage:**
```bash
kziti deploy ha recover [OPTIONS]
```
**Options:**
- `--node` *(required)* — Node ID of the dead member to remove (e.g. ctrl2)
- `--install-dir` — Installation directory. (default: `/opt/kziti`)
##### `kziti deploy ha remove-member`
Remove a member from the RAFT cluster. Run on a remaining cluster node.
**Usage:**
```bash
kziti deploy ha remove-member [OPTIONS]
```
**Options:**
- `--node` *(required)* — Node ID to remove, e.g. ctrl2
- `--install-dir` — Installation directory. (default: `/opt/kziti`)
- `--yes`, `-y` — Skip confirmation prompt.
#### `kziti deploy install`
Install the OpenZiti stack.
**Usage:**
```bash
kziti deploy install [OPTIONS]
```
**Options:**
- `--profile` — Deployment profile. (default: `standard`)
- `--controller-host` — Controller FQDN.
- `--controller-port` — Controller port. (default: `1280`)
- `--router-host` — Router FQDN.
- `--router-port` — Router port. (default: `3022`)
- `--admin-password` — Admin password.
- `--admin-user` — Admin username. (default: `admin`)
- `--trust-domain` — SPIFFE trust domain.
- `--node-name` — Cluster node name.
- `--enrollment-token` — Router enrollment JWT.
- `--join-package` — Path to HA join package zip.
- `--install-dir` — Installation directory. (default: `/opt/kziti`)
- `--project` — Compose project name (defaults to install-dir basename). Lets multiple stacks coexist on one host.
- `--ziti-tag` — OpenZiti image tag. Defaults to the pinned v2 prerelease. Note: openziti/ziti-controller:latest currently points at 1.6.12, not v2 -- avoid unless you're testing v1 regression. (default: `2.0.0`)
- `--enable-sni-proxy`, `--no-enable-sni-proxy` — Enable SNI routing proxy on port 443.
- `--registry-prefix` — Private registry prefix. (default: ``)
- `--registry-username` — Registry username.
- `--registry-password` — Registry password.
- `--yes`, `-y` — Skip confirmation prompt.
- `--dry-run`, `--no-dry-run` — Show plan without installing.
#### `kziti deploy render`
Render deployment files without installing.
**Usage:**
```bash
kziti deploy render [OPTIONS]
```
**Options:**
- `--profile` — Deployment profile. (default: `standard`)
- `--controller-host` — Controller FQDN.
- `--controller-port` — Controller port. (default: `1280`)
- `--router-host` — Router FQDN.
- `--router-port` — Router port. (default: `3022`)
- `--admin-password` — Admin password.
- `--admin-user` — Admin username. (default: `admin`)
- `--trust-domain` — SPIFFE trust domain.
- `--node-name` — Cluster node name.
- `--enrollment-token` — Router enrollment JWT.
- `--join-package` — Path to HA join package zip.
- `--install-dir` — Installation directory. (default: `/opt/kziti`)
- `--project` — Compose project name (defaults to install-dir basename). Lets multiple stacks coexist on one host.
- `--ziti-tag` — OpenZiti image tag. Defaults to the pinned v2 prerelease. Note: openziti/ziti-controller:latest currently points at 1.6.12, not v2 -- avoid unless you're testing v1 regression. (default: `2.0.0`)
- `--enable-sni-proxy`, `--no-enable-sni-proxy` — Enable SNI routing proxy on port 443.
- `--registry-prefix` — Private registry prefix. (default: ``)
- `--registry-username` — Registry username.
- `--registry-password` — Registry password.
- `--output-dir` — Write files to directory instead of stdout.
#### `kziti deploy uninstall`
Remove the OpenZiti stack.
**Usage:**
```bash
kziti deploy uninstall [OPTIONS]
```
**Options:**
- `--install-dir` — Installation directory. (default: `/opt/kziti`)
- `--remove-data`, `--no-remove-data` — Also remove volumes and data.
- `--yes`, `-y` — Skip confirmation prompt.
### `kziti identity`
Manage Ziti identities.
**Usage:**
```bash
kziti identity COMMAND [ARGS]...
```
#### `kziti identity create`
Create a new identity and write an OTT enrollment token to a .jwt file.
By default the enrollment token is saved to \.jwt in the current directory. Use --auto-enroll to immediately enroll the identity and save the resulting identity JSON file instead.
Identities created via this command are tagged kasm_type=manual, which marks them as operator-managed and allows them to be deleted with 'identity delete'.
**Usage:**
```bash
kziti identity create [OPTIONS] NAME
```
**Arguments:**
- `NAME` *(required)* — Identity name
**Options:**
- `--email` — Email address to store as a tag
- `--auto-enroll` — Automatically enroll the identity and save JSON file
- `--output-dir` — Directory to write the enrollment token JWT (or identity JSON with --auto-enroll). Defaults to current directory.
- `--admin` — Grant admin privileges to the identity
#### `kziti identity delete`
Delete a Ziti identity.
Only identities created via 'kziti identity create' (tagged kasm_type=manual) can be deleted. Router identities, Kasm-managed user/workspace identities, and the default admin identity are all blocked.
Deleting an identity revokes all of its access grants and invalidates any active sessions.
**Usage:**
```bash
kziti identity delete [OPTIONS] IDENTITY_ID_OR_NAME
```
**Arguments:**
- `IDENTITY_ID_OR_NAME` *(required)* — Identity ID or name to delete
**Options:**
- `--yes`, `-y` — Skip confirmation prompt.
#### `kziti identity list`
List all Ziti identities.
**Usage:**
```bash
kziti identity list [OPTIONS]
```
**Options:**
- `--limit`, `-l` — Max items to return (default: `100`)
- `--type` — Filter by identity type: user|workspace
#### `kziti identity search`
Search identities by filter expression.
**Usage:**
```bash
kziti identity search [OPTIONS] QUERY
```
**Arguments:**
- `QUERY` *(required)* — Search query (e.g. "name contains 'user'")
#### `kziti identity show`
Show details for a specific identity.
**Usage:**
```bash
kziti identity show [OPTIONS] IDENTITY_ID
```
**Arguments:**
- `IDENTITY_ID` *(required)* — Identity ID
### `kziti network`
Manage ZTNA networks.
**Usage:**
```bash
kziti network COMMAND [ARGS]...
```
#### `kziti network create`
Create a new ZTNA network.
**Usage:**
```bash
kziti network create [OPTIONS] NETWORK_ID NAME
```
**Arguments:**
- `NETWORK_ID` *(required)* — Network ID (e.g., 'net-corp-a' or 'corp-a')
- `NAME` *(required)* — Network display name (e.g., 'Corp A')
#### `kziti network delete`
Delete a ZTNA network.
**Usage:**
```bash
kziti network delete [OPTIONS] NETWORK_ID
```
**Arguments:**
- `NETWORK_ID` *(required)* — Network ID to delete (e.g., 'net-corp-a')
**Options:**
- `--yes`, `-y` — Skip confirmation prompt
#### `kziti network list`
List all ZTNA networks.
**Usage:**
```bash
kziti network list
```
#### `kziti network rename`
Rename an existing ZTNA network.
**Usage:**
```bash
kziti network rename [OPTIONS] NETWORK_ID NEW_NAME
```
**Arguments:**
- `NETWORK_ID` *(required)* — Network ID to rename (e.g., 'net-corp-a')
- `NEW_NAME` *(required)* — New network display name
### `kziti router`
Manage edge routers.
**Usage:**
```bash
kziti router COMMAND [ARGS]...
```
#### `kziti router dmz`
Manage DMZ routers.
**Usage:**
```bash
kziti router dmz COMMAND [ARGS]...
```
##### `kziti router dmz delete`
Delete a DMZ router.
**Usage:**
```bash
kziti router dmz delete [OPTIONS] ROUTER_ID
```
**Arguments:**
- `ROUTER_ID` *(required)* — Router ID to delete
**Options:**
- `--yes`, `-y` — Skip confirmation prompt
##### `kziti router dmz list`
List all DMZ routers.
**Usage:**
```bash
kziti router dmz list [OPTIONS]
```
**Options:**
- `--limit`, `-l` — Max items to return (default: `100`)
##### `kziti router dmz provision`
Provision a new DMZ router.
**Usage:**
```bash
kziti router dmz provision [OPTIONS] NAME
```
**Arguments:**
- `NAME` *(required)* — Router name
**Options:**
- `--tunneler`, `--no-tunneler` — Enable tunneler mode (default: enabled)
- `--cost` — Router cost for path selection
- `--output-dir`, `-d` — Directory to write JWT file (default: current directory) (default: `.`)
#### `kziti router list`
List all Ziti edge routers.
**Usage:**
```bash
kziti router list [OPTIONS]
```
**Options:**
- `--limit`, `-l` — Max items to return (default: `100`)
#### `kziti router private`
Manage private routers.
**Usage:**
```bash
kziti router private COMMAND [ARGS]...
```
##### `kziti router private delete`
Delete a private router.
**Usage:**
```bash
kziti router private delete [OPTIONS] ROUTER_NAME_OR_ID
```
**Arguments:**
- `ROUTER_NAME_OR_ID` *(required)* — Router name or ID to delete
**Options:**
- `--yes`, `-y` — Skip confirmation prompt
##### `kziti router private list`
List all private routers.
**Usage:**
```bash
kziti router private list [OPTIONS]
```
**Options:**
- `--network`, `-n` — Filter by network ID
- `--limit`, `-l` — Max items to return (default: `100`)
##### `kziti router private provision`
Provision a new private router for a network.
**Usage:**
```bash
kziti router private provision [OPTIONS] NETWORK_ID NAME
```
**Arguments:**
- `NETWORK_ID` *(required)* — Network ID (e.g., 'net-corp-a' or 'corp-a')
- `NAME` *(required)* — Router name
**Options:**
- `--tunneler`, `--no-tunneler` — Enable tunneler mode (default: enabled)
- `--cost` — Router cost for path selection
- `--output-dir`, `-d` — Directory to write JWT file (default: current directory) (default: `.`)
#### `kziti router show`
Show details for a specific edge router.
**Usage:**
```bash
kziti router show [OPTIONS] ROUTER_ID
```
**Arguments:**
- `ROUTER_ID` *(required)* — Edge router ID
### `kziti service`
Manage Ziti services.
**Usage:**
```bash
kziti service COMMAND [ARGS]...
```
#### `kziti service create`
Create a new service.
**Examples:**
```bash
kziti service create corp-a gitlab gitlab.corp-a.internal 443 --alias gitlab.corp-a.zt
kziti service create corp-a ssh-bastion 10.10.5.25 22 --alias ssh.corp-a.zt
kziti service create corp-a web-app webapp.local 80,443 --alias web.corp-a.zt --service-set devops
kziti service create corp-a wiki wiki.corp-a.internal 443 --alias wiki.corp-a.zt --service-set devops --service-set infra
```
**Usage:**
```bash
kziti service create [OPTIONS] NETWORK_ID NAME DESTINATION PORTS
```
**Arguments:**
- `NETWORK_ID` *(required)* — Network ID (e.g., 'net-corp-a' or 'corp-a')
- `NAME` *(required)* — Service name
- `DESTINATION` *(required)* — Destination DNS name or IP address
- `PORTS` *(required)* — Port specification (e.g., '443', '80,443', '8000-8100')
**Options:**
- `--alias` *(required)* — Alias DNS name used as the intercept address (must differ from destination).
- `--service-set`, `-g` — Service set name (repeatable: --service-set devops --service-set infra)
#### `kziti service delete`
Delete a service and its associated configs.
**Usage:**
```bash
kziti service delete [OPTIONS] SERVICE_ID
```
**Arguments:**
- `SERVICE_ID` *(required)* — Service ID or svc-\ to delete
**Options:**
- `--yes`, `-y` — Skip confirmation prompt
#### `kziti service list`
List all services or services for a specific network.
**Usage:**
```bash
kziti service list [OPTIONS]
```
**Options:**
- `--network`, `-n` — Filter by network ID
- `--limit`, `-l` — Max items to return (default: `100`)
#### `kziti service search`
Search services by filter expression.
**Examples:**
```bash
kziti service search 'name contains "gitlab"'
kziti service search 'name = "corp-a-web"'
```
**Usage:**
```bash
kziti service search [OPTIONS] QUERY
```
**Arguments:**
- `QUERY` *(required)* — Filter expression (e.g. 'name contains "gitlab"')
#### `kziti service show`
Show details for a specific service.
**Usage:**
```bash
kziti service show [OPTIONS] SERVICE_ID
```
**Arguments:**
- `SERVICE_ID` *(required)* — Service ID
#### `kziti service update`
Rename a service.
Note: Updating destination, ports, or alias is not yet supported.
**Usage:**
```bash
kziti service update [OPTIONS] SERVICE_ID
```
**Arguments:**
- `SERVICE_ID` *(required)* — Service ID to update
**Options:**
- `--name` — New service name
### `kziti service-set`
Manage service sets (global, cross-network groupings of services).
**Usage:**
```bash
kziti service-set COMMAND [ARGS]...
```
#### `kziti service-set add`
Add an existing service to a service set.
**Example:**
```bash
kziti service-set add devops svc-corp-a-wiki
kziti service-set add devops
```
**Usage:**
```bash
kziti service-set add [OPTIONS] NAME SERVICE_REF
```
**Arguments:**
- `NAME` *(required)* — Service set name (e.g. 'devops')
- `SERVICE_REF` *(required)* — Service UUID or svc-\
#### `kziti service-set create`
Create a global service set.
Service sets are cross-network groupings — services from any network can belong to the same set. An identity granted access to a set gets Dial access to all services in it, regardless of which network hosts them.
**Example:**
```bash
kziti service-set create devops "DevOps Services"
kziti service create corp-a gitlab gitlab.internal 443 --alias gitlab.corp-a.zt --service-set devops
kziti service create corp-b wiki wiki.internal 443 --alias wiki.corp-b.zt --service-set devops
kziti access grant user-123 svcset-devops
```
**Usage:**
```bash
kziti service-set create [OPTIONS] NAME [DISPLAY_NAME]
```
**Arguments:**
- `NAME` *(required)* — Service set name (e.g. 'devops')
- `DISPLAY_NAME` — Optional human-readable label
#### `kziti service-set delete`
Delete a global service set.
**Usage:**
```bash
kziti service-set delete [OPTIONS] NAME
```
**Arguments:**
- `NAME` *(required)* — Service set name to delete
**Options:**
- `--yes`, `-y` — Skip confirmation prompt
#### `kziti service-set list`
List all global service sets.
**Usage:**
```bash
kziti service-set list
```
#### `kziti service-set remove`
Remove an existing service from a service set.
**Example:**
```bash
kziti service-set remove devops svc-corp-a-wiki
kziti service-set remove devops
```
**Usage:**
```bash
kziti service-set remove [OPTIONS] NAME SERVICE_REF
```
**Arguments:**
- `NAME` *(required)* — Service set name (e.g. 'devops')
- `SERVICE_REF` *(required)* — Service UUID or svc-\
#### `kziti service-set show`
Show details and member services for a service set.
**Usage:**
```bash
kziti service-set show [OPTIONS] NAME
```
**Arguments:**
- `NAME` *(required)* — Service set name
### `kziti status`
Show connection status for the OpenZiti controller.
**Usage:**
```bash
kziti status
```
### `kziti ziti`
OpenZiti management commands.
**Usage:**
```bash
kziti ziti COMMAND [ARGS]...
```
#### `kziti ziti audit`
Audit the live Ziti configuration for policy misconfigurations.
Checks for issues that cause routing loops, privilege escalation, or broken connectivity — including the ouroboros circuit-cycle bug, overly broad Bind policies, router identities with Dial access, and host/intercept address overlap.
Exits 0 when the configuration is clean, 1 when any ERROR is found.
**Usage:**
```bash
kziti ziti audit
```
---
## Configure kziti
Before running any operational command, `kziti` needs to know how to reach your OpenZiti controller. This page explains the configuration model and covers the commands for setting it up.
### What a profile is
A **profile** is a named set of credentials that `kziti` uses to authenticate against one OpenZiti controller. Every profile contains:
- A path to an enrolled **identity JSON file** (the standard way), or
- A raw **management API URL + cert/key pair** (for environments where a pre-existing PKI manages the controller credential).
All operational commands (`network`, `service`, `access`, `router`, …) read from the active profile. Switching profiles switches the target controller entirely — there is no mixing of credentials within a single command.
One profile exists by default and is named `default`. Most operators running a single controller never need more than one.
### First-time setup
The interactive wizard creates a new admin identity, enrolls it against the controller, and stores the resulting JSON file automatically:
```bash
kziti config init
```
It prompts for the controller URL, admin credentials, and an identity name, then writes a config file at `~/.config/kziti/config.toml`.
For scripted or CI environments, use `config set-ziti` directly:
```bash
kziti config set-ziti \
--host https://ziti.example.com:1280 \
--user admin \
--password ''
```
This runs the same enrollment flow non-interactively and updates the active profile. To point a profile at an existing identity file instead:
```bash
kziti config set-ziti --identity /path/to/existing-identity.json
```
Verify the connection:
```bash
kziti status
```
### Multiple profiles
Use separate profiles when you have more than one controller — staging and production, multiple customer deployments, or a primary and DR controller.
#### Create a profile for a second controller
```bash
# Create a blank profile
kziti config profiles create staging
# Enroll a new identity against the staging controller into that profile
kziti config set-ziti \
--profile staging \
--host https://ziti-staging.example.com:1280 \
--user admin \
--password ''
```
#### Switch the active profile
All commands run against whichever profile is currently active:
```bash
kziti config profiles use staging
kziti network list # now talks to the staging controller
kziti config profiles use default
kziti network list # back to production
```
#### Use a profile for a single command
The global `--profile` flag overrides the active profile for one invocation without changing the persisted setting:
```bash
kziti --profile staging service list
kziti --profile staging access grant alice@example.com net-demo
```
This is useful in scripts where the caller controls which environment a command targets.
#### Clone a profile
To create a staging profile that starts from the same settings as production:
```bash
kziti config profiles create staging --from default
# Then update just the Ziti credentials
kziti config set-ziti --profile staging --host https://ziti-staging.example.com:1280 ...
```
### View current configuration
```bash
kziti config show
```
Shows all profiles, which is active, and the connection settings for each (secrets redacted). For a single profile:
```bash
kziti config profiles show staging
```
### Profile commands reference
| Command | What it does |
|---------|-------------|
| `kziti config init` | Interactive wizard — prompts for controller URL, credentials, and identity name |
| `kziti config set-ziti --host … --user … --password …` | Non-interactive enrollment — creates and enrolls a new admin identity |
| `kziti config set-ziti --identity /path/to/file.json` | Point a profile at an existing identity JSON file |
| `kziti config show` | Show all profiles and their settings |
| `kziti config path` | Print the config file path |
| `kziti config profiles list` | List profile names and indicate which is active |
| `kziti config profiles create ` | Create a new empty profile |
| `kziti config profiles create --from ` | Clone an existing profile |
| `kziti config profiles use ` | Set the persistent active profile |
| `kziti config profiles show ` | Show settings for one profile |
| `kziti config profiles delete ` | Delete a profile (cannot delete the last one) |
### Config file location
The config file lives at `~/.config/kziti/config.toml` by default, respecting `XDG_CONFIG_HOME` when set. When running under `sudo`, `kziti` resolves the path against the invoking user's home so that deploy commands (which require root) and operational commands (which do not) see the same config.
Enrolled identity JSON files are stored under `~/.config/kziti/identities//`.
---
## Grant Access with kziti
## Grant access with kziti
For the underlying model see [kziti architecture](../kziti.mdx).
### Find the identity
If you know the identity name (a Kasm user email, a workspace name, or an external user identifier), you can use that directly. To browse:
```bash
kziti identity list
```
To search by substring or attribute:
```bash
kziti identity search 'name contains "alice"'
```
Kasm-managed identities have predictable names like `kasm-user---` and `kasm-workspace---`.
### Three scopes of access
`kziti access grant` accepts three kinds of resource ID, in order of decreasing breadth:
- **A network ID** (e.g. `net-corp-a`) — the identity gains access to every service in the network.
- **A service set ID** (e.g. `svcset-devops`) — access to every service in the named set.
- **A service ID** (e.g. `svc-corp-a-gitlab`) — access to a single service only.
Pick the narrowest scope that satisfies the requirement. Service-set grants are the common middle ground for groups of users who need access to a coherent set of services.
### Grant access
#### To an entire network
```bash
kziti access grant alice@example.com net-corp-a
```
#### To a service set
```bash
kziti access grant alice@example.com svcset-devops
```
#### To a single service
```bash
kziti access grant alice@example.com svc-corp-a-gitlab
```
Adds the resource ID as a role attribute on the identity. Effective immediately for new sessions; existing tunnels may need to reconnect.
### List grants for an identity
```bash
kziti access list alice@example.com
```
The output shows each access role attribute the identity holds (`net-*`, `svcset-*`, or `svc-*`), with a human-readable description of what it covers.
### Who has access to a resource
The inverse of `access list` — given a resource, show every identity that can reach it:
```bash
# All identities with access to the corp-a network
kziti access who net-corp-a
# All identities with access to a service set
kziti access who svcset-devops
# All identities with access to a single service
kziti access who svc-corp-a-gitlab
```
Accepts the same resource IDs as `grant` and `remove`. For each matching identity the output shows the name, type (Kasm user, workspace, or external), and whether it currently has an active session. Use `-o json` (the global `--output-format` flag) for machine-readable output.
### Revoke access
Use the same scope you used to grant:
```bash
kziti access remove alice@example.com svcset-devops
```
`remove` strips the role attribute immediately for new dial attempts; existing tunnels are not torn down. To terminate live sessions for a compromised identity, revoke the workspace mapping in Kasm to remove the identity entirely.
---
## Operations with kziti
These how-to guides cover the day-to-day administration of a `kziti`-managed OpenZiti deployment. They assume you already have a working [kziti](../kziti.mdx) deployment and have configured Kasm Workspaces to use OpenZiti as an [egress provider](../index.mdx).
If you have not yet read the [kziti architecture](../kziti.mdx) page, the mental model there will make these pages easier to follow.
### What's in this section
- [Configure kziti](./configure-profiles.mdx) — set up `kziti` to talk to your controller, and manage named profiles for multiple environments.
- [Manage networks](./manage-networks.mdx) — create, list, and delete the private networks that group services together, and provision the private routers that host those services.
- [Publish services](./publish-services.mdx) — define services that Kasm sessions and external clients can dial through OpenZiti, and group them into service sets.
- [Grant access](./grant-access.mdx) — give a Kasm user, workspace, or external identity access to a network, service set, or individual service.
- [Recover from quorum loss](./recover-quorum.mdx) — restore an HA cluster after a controller has gone down without being cleanly removed.
- [Remove an HA controller](./remove-ha-controller.mdx) — cleanly remove a controller from the Raft cluster.
- [Tear down a deployment](./teardown.mdx) — uninstall `kziti` from a host, with or without removing persistent data.
- [kziti CLI Reference](./cli-reference.mdx) — auto-generated reference for every command, subcommand, argument, and flag.
### When to reach for raw OpenZiti instead
`kziti` covers the operational shape described in the [kziti architecture](../kziti.mdx). For inspections that fall outside the kziti command surface (raw policy bodies, controller diagnostics, ZAC visualisation, and so on), the OpenZiti CLI and project tooling remain available — `kziti` does not hide them from you. See the architecture page for the boundary between kziti's scope and raw OpenZiti's domain.
---
## Manage Networks with kziti
## Manage networks with kziti
A **network** in `kziti` is a logical grouping of services — typically one customer, team, or environment. Each network gets one or more **private routers** that host its services and connect outbound to the public routers in the existing kziti deployment.
This guide covers creating networks, provisioning their private routers, and removing them.
### List existing networks
```bash
kziti network list
```
### Create a new network
Creating a network is a control-plane record only — infrastructure comes from the private router (next section).
```bash
kziti network create net-corp-a "Corp A"
```
The first argument is the **network ID** — the `net-` prefix is the convention used in role attributes and access grants (e.g. the network `net-corp-a` is granted via `kziti access grant alice@example.com net-corp-a`). The short form without the prefix (`corp-a`) also works and is normalised automatically. Keep the name short and lowercase. The second argument is a human-readable display name.
### Provision a private router for the network
#### Step 1. Create the router record on the controller
On the controller host:
```bash
kziti router private provision net-corp-a corp-a-router-1 --output-dir /tmp
```
This creates an OpenZiti router identity tagged for the network and writes a router enrollment JWT to `/tmp/corp-a-router-1.jwt`.
`--tunneler` is enabled by default (router hosts services). Use `--no-tunneler` only if running a separate hosting identity.
Transfer the JWT to the host that will run the router:
```bash
scp /tmp/corp-a-router-1.jwt user@router-host.corp-a.example.com:/tmp/
```
#### Step 2. Install kziti and start the router on the new host
On the host where the private router will run, install the `kziti` binary as in [the quickstart](../quickstart.mdx#step-1-install-kziti), then start it as a router:
```bash
kziti deploy install --profile router \
--router-host router-host.corp-a.example.com \
--enrollment-token "$(cat /tmp/corp-a-router-1.jwt)"
```
The router enrolls with the controller using the JWT and starts hosting traffic for the network.
#### Step 3. Verify
On the controller host:
```bash
kziti router list
```
The new router should appear with status `online` and the network attribute set.
### Rename a network
```bash
kziti network rename net-corp-a "Corp A (renamed)"
```
The network ID does not change — only the display name.
### Delete a network
Deleting a network removes its services, role attributes, and policies from the controller. Identities lose access to anything previously scoped to the network. Make sure no Kasm sessions depend on the network's services before deleting.
```bash
kziti network delete net-corp-a
```
After deletion, tear down any private routers that were specific to the network using [Tear down a deployment](./teardown.mdx).
---
## Publish Services with kziti
## Publish services with kziti
### Create a service
```bash
kziti service create net-corp-a gitlab gitlab.corp-a.internal 443 \
--alias gitlab.corp-a.zt
```
Arguments, in order:
- **Network ID** — the network this service belongs to (`net-corp-a`). The short form without the prefix (`corp-a`) also works.
- **Service name** — the short name (`gitlab`).
- **Destination** — the real DNS name or IP the private router will reach (`gitlab.corp-a.internal`).
- **Ports** — single port (`443`), comma-separated list (`80,443`), or range (`8000-8100`).
`--alias` is required and sets the **intercept address** — the hostname clients dial inside the Ziti tunnel. It must differ from the destination and does not need a real DNS entry; the Ziti tunnel resolves it locally.
### Service sets
A **service set** groups related services. Grant access to the set once; add or remove services without touching user grants. Service sets are global — they can span multiple networks.
#### Create a service set
The set must exist before you can assign services to it:
```bash
kziti service-set create devops "DevOps Services"
```
The role attribute `svcset-devops` is created and registered. Pass `--service-set` when creating services. The flag is repeatable — a service can belong to multiple sets:
```bash
kziti service create net-corp-a gitlab gitlab.corp-a.internal 443 \
--alias gitlab.corp-a.zt --service-set devops
kziti service create net-corp-a jira jira.corp-a.internal 443 \
--alias jira.corp-a.zt --service-set devops
kziti service create net-corp-b wiki wiki.corp-b.internal 443 \
--alias wiki.corp-b.zt --service-set devops --service-set infra
```
The three services share the `svcset-devops` role attribute. A single `access grant` against `svcset-devops` gives an identity Dial access to all three, regardless of which network hosts them.
#### List service sets
```bash
kziti service-set list
```
#### Show a service set and its members
```bash
kziti service-set show devops
```
Lists the set's metadata and every service currently in the set, with network and destination details. The **ID** column shows the `svc-` reference you pass to `add` and `remove`.
#### Add an existing service to a set
```bash
kziti service-set add devops svc-corp-a-gitlab
```
The argument is either the `svc-` shown by `service-set show` and `service list`, or the full service UUID. The short ID is `svc--` — for a service named `gitlab` in network `corp-a` it is `svc-corp-a-gitlab`.
Both the service's role attributes and its dial policy are updated atomically. A service can belong to any number of sets.
#### Remove a service from a set
```bash
kziti service-set remove devops svc-corp-a-gitlab
```
Strips `svcset-devops` from the service's role attributes and from its dial policy. Membership in other sets, the network role, and any individually granted access are not affected.
#### Delete a service set
```bash
kziti service-set delete devops
```
Deletion is blocked if any services still carry the set's role attribute. Remove them from the set first, or delete the services. Deleting the set does not affect the services themselves.
### List services
```bash
# All services across all networks
kziti service list
# Just the services in one network
kziti service list --network corp-a
```
### Search services
```bash
kziti service search 'name contains "gitlab"'
kziti service search 'name = "corp-a-web"'
```
Returns the same columns as `service list` (ID, name, network, destination, available-at). Use filter expressions supported by the [OpenZiti filter syntax](https://openziti.io/docs/reference/api/filtering) — `contains`, `=`, `startswith`, and boolean operators.
### Show service details
```bash
kziti service show
```
The output includes the intercept config, host config, and any service-set membership.
### Rename a service
```bash
kziti service update --name new-name
```
`update` only supports renaming. To change the destination, ports, or alias, delete and recreate the service. To change service-set membership, use `service-set add` and `service-set remove`.
### Delete a service
```bash
kziti service delete
```
Deletion removes the service and its intercept and host configs. Identities that had access via the service ID lose it; identities scoped via the network or service set retain access to the remaining services.
---
## Recover from Quorum Loss with kziti
## Recover from quorum loss
When a Raft cluster loses too many members to maintain quorum (more than half the configured members are unreachable), the controllers that remain become read-only — the cluster cannot make decisions. This typically happens when an HA controller goes down hard before it can be cleanly removed from membership: hardware failure, terminated VM, network partition that does not heal.
`kziti deploy ha recover` is the rescue path. It spins up a short-lived ephemeral peer that impersonates the dead member to restore quorum, runs the `remove-member` step, then cleans up. Edge state — users, services, routers, policies — is preserved.
This procedure is for recovering from a node that is permanently gone or not coming back. If the missing node is just temporarily unreachable (network blip, host restart, planned maintenance), wait for it to return rather than running recovery. Removing a node that later rejoins creates split-brain risk.
- You have a working [kziti](../kziti.mdx) deployment.
- At least one controller in the cluster is still reachable; you will run the recovery command on that host.
- You know the **node name** of the dead member (the value of `--node-name` from when it was originally added).
### Confirm quorum is lost
On a surviving controller host, list cluster members:
```bash
docker compose -f /opt/kziti/docker-compose.yml exec ziti-controller \
ziti agent cluster list
```
Quorum is lost if the dead member appears as `voter: true` and the cluster is unable to elect a leader. Pure read access (listing identities, services) typically still works; mutating commands fail with timeouts or quorum errors.
### Run recovery
On a surviving controller host:
```bash
kziti deploy ha recover --node ziti-c-2
```
`--node` is the dead member's node name. The command performs the following steps:
1. Reads cluster state to confirm `ziti-c-2` is still a member.
2. Starts an ephemeral peer container with the same node identity, joining as a non-voter.
3. The cluster regains quorum once the ephemeral peer is connected.
4. `remove-member ziti-c-2` runs against the cluster leader.
5. The ephemeral peer is torn down.
This typically completes in under a minute.
### Verify
```bash
docker compose -f /opt/kziti/docker-compose.yml exec ziti-controller \
ziti agent cluster list
```
The dead node should be gone from the member list. The cluster should report a healthy leader and the remaining controllers should all be voters.
Try a mutating operation to confirm write quorum is restored (read-only commands still work even when quorum is lost, so they do not prove recovery):
```bash
kziti network create quorum-test "Quorum Test" && \
kziti network delete quorum-test --yes
```
If both commands complete without error, the cluster is accepting writes and is back to normal operation.
### After recovery
Quorum is restored, but you are now running with one fewer controller than your target. To restore the original HA topology, [add a new HA controller](./add-ha-controller.mdx) on a fresh host (or on the recovered host if you have repaired it).
---
## Remove an HA Controller with kziti
## Remove an HA controller
Use this procedure when a controller is **healthy and you want to remove it cleanly** — host decommissioning, scaling down, or moving the cluster to different infrastructure. The controller is removed from Raft membership without losing quorum, and the docker compose stack on the host is then torn down.
If the controller is already dead and quorum is lost, use [Recover from quorum loss](./recover-quorum.mdx) instead.
- The controller you are removing is healthy and reachable.
- The remaining controllers can maintain quorum without it (more than half of the surviving members must be voters).
- You will need shell access on a remaining controller host and on the host being removed.
### Step 1. Remove the member from Raft
On a remaining controller host, remove the target member from Raft membership:
```bash
kziti deploy ha remove-member --node ziti-c-2
```
`--node` is the node name of the controller being removed. The command tells the cluster leader to remove the target from membership; the target controller is no longer authoritative for any cluster state once this returns.
Verify it has been removed:
```bash
docker compose -f /opt/kziti/docker-compose.yml exec ziti-controller \
ziti agent cluster list
```
The removed node should no longer appear in the list. Remaining controllers should still report a healthy leader.
### Step 2. Tear down the removed host
On the host that was removed, stop and uninstall the kziti stack:
```bash
kziti deploy uninstall --remove-data --yes
```
This stops all containers, removes the docker compose project, and deletes the `/opt/kziti` data directory. The host no longer participates in the cluster in any way.
If you intend to redeploy the same host as a fresh HA controller, you can omit `--remove-data` to retain the old data directory for inspection — but for a planned removal followed by a fresh install, removing data is the safer default.
---
## Tear Down a kziti Deployment
## Tear down a kziti deployment
Use this procedure when you want to stop and remove a `kziti`-managed OpenZiti deployment from a host entirely. This applies to single-controller setups, individual HA members, and standalone private router hosts.
For removing a single HA controller while keeping the cluster running, see [Remove an HA controller](./remove-ha-controller.mdx) instead — you should run `remove-member` first, then teardown.
` --remove-data ` is destructive. It deletes the persistent OpenZiti state on the host (controller database, router certificates, identity material). Make sure you have any backups or exports you need before running with this flag.
### Stop the stack only
To stop containers and remove the docker compose project, but keep the data directory in place:
```bash
kziti deploy uninstall --yes
```
This is appropriate when you are reinstalling on the same host and want to preserve state, or when you are inspecting state offline.
The data directory at `/opt/kziti/data` (or `/data` if you used a non-default `--install-dir`) is left intact.
### Stop and wipe
To also remove the persistent data:
```bash
kziti deploy uninstall --remove-data --yes
```
This stops all containers, removes the docker compose project, and deletes the data directory. The host is left clean — only the `kziti` binary remains on `PATH`.
To remove the binary as well:
```bash
sudo rm /usr/local/bin/kziti
```
---
## kziti
`kziti` is a CLI tool for deploying and operating an OpenZiti environment for Kasm Workspaces. This page explains the architecture that `kziti` deploys on your behalf,
the deployment shape, and what stays in raw OpenZiti's domain. For setup, see the [quickstart](./quickstart.mdx).
Administrators grant access to specific named services rather than to network ranges, and connectivity is brokered through identity-bound routers.
The OpenZiti primitives (controllers, routers, identities, policies) are the building blocks.
The grouping (public versus private routers, networks, service sets) is what `kziti` layers on top.
For large or complex networks you may want to consider NetFoundry's official OpenZiti SAAS offering.
### kziti Deployment Shape
`kziti` is an opinionated deployment:
- **Public routers are pure transit.** They accept client connections at the edge and route fabric traffic. They do not host services.
- **Private routers run alongside the resources they expose.** Outbound-only to the controller and public routers — no inbound firewall rules required at the resource site.
- **Networks are the unit of grouping.** All resources for one team, customer, or environment live under one logical network. Access is granted at network, service-set, or individual-service granularity.
- **Identity types are explicit.** Kasm users, Kasm workspaces, and external users are distinct types.
### The shape of a deployment
```mermaid
flowchart TD
Internet([Internet])
subgraph DMZ["Public edge — kziti-managed"]
DMZUS[Public router — region 1]
DMZEU[Public router — region 2]
Controller[(OpenZiti HA Controller)]
end
subgraph CorpA["Network: corp-a"]
PrivA[Private router]
SvcA1[gitlab]
SvcA2[jira]
PrivA -.- SvcA1
PrivA -.- SvcA2
end
subgraph CorpB["Network: corp-b"]
PrivB[Private router]
SvcB1[db-prod]
PrivB -.- SvcB1
end
Internet --> DMZUS
Internet --> DMZEU
DMZUS <==> Controller
DMZEU <==> Controller
PrivA -- outbound only --> Controller
PrivA -- outbound only --> DMZUS
PrivB -- outbound only --> Controller
PrivB -- outbound only --> DMZEU
```
A deployment has three kinds of OpenZiti component:
- **Controller(s)**: the control plane. Holds identities, services, and policies. Run with Raft consensus when you need high availability.
- **Public routers**: the data plane at the edge. Public-facing listeners on a known port. Clients (Kasm sessions, external devices running the OpenZiti edge tunnel) connect here.
- **Private routers**: the data plane next to your resources. Each private router is bound to a single network and makes only outbound connections.
Two kinds of host connect on the Kasm side:
- **Kasm sessions**: dial services from inside their session container, using a Ziti tunnel that the egress sidecar manages.
- **External clients**: (optional) run the OpenZiti edge tunnel on a laptop or other device. They dial the same services from anywhere, with the same access controls.
### Tagging: how networks, services, and access are joined
OpenZiti uses **role attributes** as the join key between identities, services, and policies.
`kziti` assigns role attributes consistently so that policies stay declarative.
Adding or revoking access changes attributes, not policy bodies.
#### Router attributes
In OpenZiti a private router is two distinct objects: the **edge router record** (the control-plane entry) and the **tunneler identity** (the SDK identity the router uses to connect outbound as a connector). `kziti` assigns different attributes to each, because SERPs reference router record attributes and ERPs reference identity attributes.
**Edge router record** `roleAttributes`:
- `#role-dmz`: public router (pure transit, no tunneler identity).
- `#role-private`: private router.
- `#net-corp-a`: marks this router as belonging to the corp-a network. Referenced by the per-network SERP to restrict which routers can carry corp-a service traffic.
**Tunneler identity** `roleAttributes` (private routers only):
- `#role-private`: mirrors the router record.
- `#connector-corp-a`: the hosting (Bind) role for the corp-a network. Referenced by two per-network policies: the ERP `erp-corp-a-connectors` (grants the connector identity access to `#net-corp-a` private routers, which it needs in order to host) and the Bind service policy `sp-bind-corp-a` (authorizes it to host `#net-corp-a` services). Scoped per-network so a router enrolled in corp-b cannot host corp-a services.
#### Service attributes
- `#net-corp-a`: every service in the corp-a network.
- `#svcset-devops`: a *service set* (a named, globally-scoped group of services that can span multiple networks). Service sets are not a first-class OpenZiti object; they are a shared attribute applied to the services in the group.
- `#svc-corp-a-gitlab`: the individual service attribute.
#### Client identity attributes
Client identities (Kasm users, workspace images, external tunnel users) carry access attributes. The attribute name is the resource ID:
- `#net-corp-a`: grants access to every service in the corp-a network.
- `#svcset-devops`: grants access to every service carrying that service-set attribute.
- `#svc-corp-a-gitlab`: grants access to a single service.
To grant or revoke access, `kziti` adds or removes the corresponding resource attribute on the relevant identity.
### Identity types
`kziti` distinguishes three identity types by metadata. You will see all three in the controller after `kziti` has reconciled an entitlement:
- **Kasm user identity**: created when an entitled Kasm user is mapped to an OpenZiti egress provider. Used when that user accesses services through a Kasm session.
- **Kasm workspace identity**: created when a workspace, rather than a user, is the unit of entitlement. Useful when a workspace image needs access regardless of which user launches it.
- **External user identity**: for users running the OpenZiti edge tunnel on their own device, outside Kasm. The same access controls apply; only the launch context differs.
All three types use the same role attribute scheme (`#net-*`, `#svcset-*`, `#svc-*`). They differ in how they are issued and where they are presented to the OpenZiti controller.
### The three policy axes
OpenZiti has three independent policy types. **All three must permit traffic** before it flows. `kziti` generates and maintains these for you, but understanding the three axes helps you reason about why a connection succeeded or failed.
| Axis | Question it answers |
|---|---|
| **Edge router policy (ERP)** | Which identities are allowed to use which routers to connect? |
| **Service edge router policy (SERP)** | Which routers are allowed to carry traffic for which services? |
| **Service policy (Dial / Bind)** | Which identities can connect to (Dial) or host (Bind) which services? |
Three rules to keep in mind:
1. **All three must allow.** A Dial permission with no matching ERP gives an identity nothing — the client cannot even reach a router to attempt the connection.
2. **Policies are additive, not subtractive.** Granting matches add up; you cannot revoke with a deny rule. To take access away, remove the granting attribute or policy.
3. **Granularity lives in the Service Policy axis.** `kziti` maintains a universal client ERP (`#all` → `#role-dmz`) so any client can reach the DMZ routers, a per-network connector ERP (`#connector-corp-a` → `#net-corp-a`) so the private router's tunneler identity can reach its own private router to host services, and a per-network Bind service policy (`#connector-corp-a` → `#net-corp-a` services) to authorize hosting. SERPs are per-network (`#net-corp-a` services → `#role-dmz` + `#net-corp-a` routers). Every Dial entitlement you make is reflected in the Dial service policy: it grants access to any identity holding the matching `#net-*`, `#svcset-*`, or `#svc-*` attribute. Adding or revoking access is a single attribute change on the identity.
### Multi-tenant isolation
The combination of policies provides hard tenant separation:
- An identity without `#net-corp-a`, `#svcset-*`, or a `#svc-corp-a-*` attribute cannot reach any corp-a service. No Dial policy matches, so the controller refuses the connection before any router is involved.
- Even with a matching Dial policy, traffic only flows if the SERP allows the chosen routers to carry that service's traffic. Misconfiguring a per-network SERP can limit routing options, but it cannot create cross-tenant access.
- A private router for corp-a can only host (Bind) corp-a services. Even if compromised, it cannot be used as a pivot to host another tenant's services.
- Public routers are pure transit. The universal client ERP that lets every identity reach any public router does not weaken isolation, because all three policy axes still gate traffic.
### kziti's scope, and what stays in raw OpenZiti
`kziti` handles routers, role attributes, identities, and policies. Raw OpenZiti tooling remains available for auditing (ZAC, `ziti edge` read operations), custom topologies outside kziti's model, and recovery scenarios not covered by kziti's commands. If an operation feels like it should be a `kziti` command but isn't, report it.
---
## OpenZiti Quickstart for Kasm
## OpenZiti Quickstart
This walkthrough uses [`kziti`](./kziti-operations/cli-reference.mdx), a CLI that wraps OpenZiti behind an opinionated model, to stand up a small lab on a single VM and reach a private `nginx` from a Kasm workspace.
You will:
1. Install `kziti` and bring up an OpenZiti controller and router.
2. Create a network and a private router that hosts your services.
3. Run an `nginx` container behind the private router and publish it as a service.
4. Configure Kasm to use OpenZiti as an egress provider.
5. Grant a Kasm-managed identity access to the service.
6. Validate traffic from a Kasm session.
### Prerequisites
- A Linux VM (x86_64 or aarch64) with:
- access to root/sudo
- an internet accessible IPV4 address
- a DNS record pointed at the IPV4 address
- an installation of Docker
- A Kasm deployment whose Manager and Agents can reach the Linux VM on ports:
- `1280/tcp` - controller edge/client and management API.
- `6262/tcp` - controller fabric port (used by routers).
- `3022/tcp` - public edge router listener.
- `3023/tcp` - private router listener.
### Step 1. Install kziti
```bash
curl -fsSL https://kasmweb-build-artifacts.s3.amazonaws.com/kziti/install.sh | bash
kziti --version
```
You should see a version printout:
```
$ kziti --version
kziti 0.1.0.dev28+dc90047
commit: dc9004792a40
built: 2026-05-08T17:18:17Z
```
### Step 2. Deploy the OpenZiti controller and public router
Parameters:
- ``: DNS record from prerequisites
- ``: Generate yourself a secure alphanumeric password
```bash
kziti deploy install \
--controller-host \
--router-host \
--admin-password '' \
--yes
```
This bootstraps:
- An OpenZiti Controller on the controller hostname.
- A Public Router on the router hostname.
- An admin identity that `kziti` uses for every subsequent command on this host.
The install runs in a few minutes and lives at `/opt/kziti` by default. It will conclude with `Installation complete`.
### Step 3. Create a network and a private router
In `kziti`'s model a **network** groups related services. A **private router** sits next to the resources the network exposes and is the only thing that hosts services.
Create the network record on the controller:
```bash
kziti network create demo "Demo"
```
Provision a private router record for the network — this writes an enrollment JWT:
```bash
kziti router private provision demo demo-router-1 --output-dir /tmp
```
For a single-host quickstart, run the private router on the same VM in a separate `kziti` install directory and compose project:
Use --router-port 3023 to avoid conflicting with the public router already bound to port 3022:
```bash
kziti deploy install \
--profile router \
--install-dir /opt/kziti-demo-router \
--project kziti-demo-router \
--router-host \
--router-port 3023 \
--enrollment-token "$(cat /tmp/demo-router-1.jwt)" \
--yes
```
Confirm the new router shows online:
```bash
kziti router list
```
### Step 4. Run a private nginx behind the router
Run an `nginx` container attached to the private router's compose network so the router can reach it by container hostname:
```bash
docker run -d \
--name private-nginx \
--network kziti-demo-router_ziti \
nginx:alpine
```
If your install used a different `--project` name, run `docker network ls` and pick the network whose name starts with the project you chose.
### Step 5. Publish the nginx service
```bash
kziti service create demo private-nginx private-nginx 80 \
--alias private-nginx.demo.zt
```
`--alias` is the hostname Kasm sessions will dial; the Ziti tunnel resolves it, no DNS entry needed.
### Step 6. Generate a Kasm admin identity
Kasm authenticates to the OpenZiti controller using an admin identity. Create and auto-enroll one:
```bash
kziti identity create kasm_api --admin --auto-enroll --output-dir .
```
This writes `./kasm_api.json` — the identity file you will paste into Kasm in the next step.
### Step 7. Configure OpenZiti egress in Kasm
1. Go to **Infrastructure → Egress**.
2. Create an egress provider with type **OpenZiti**.
3. Open the provider and go to **OpenZiti Configuration**.
4. Open `./kasm_api.json` and paste the full JSON as the OpenZiti admin identity.
Example admin identity JSON shape:
```json
{
"ztAPI": "https://ziti.example.com:1280/edge/client/v1",
"id": {
"cert": "pem:-----BEGIN CERTIFICATE-----...",
"key": "pem:-----BEGIN PRIVATE KEY-----...",
"ca": "pem:-----BEGIN CERTIFICATE-----..."
}
}
```
5. Map the provider to target users or workspaces.
### Step 8. Grant the Kasm-managed identity access
After mapping and reconciliation, Kasm creates identities named like:
- `kasm-user---`
- `kasm-workspace---`
You can find the native OpenZiti UI located at `https://:1280/zac`.
List the Kasm-managed identities and pick the one to grant:
```bash
kziti identity list --type workspace
```
Grant it access to every service in the `demo` network:
```bash
kziti access grant net-demo
```
To scope more narrowly, target a service set (`svcset-`) or individual service (`svc-`) instead. See [Grant access](./kziti-operations/grant-access.mdx).
### Step 9. Validate from Kasm session
Open a browser inside a mapped Kasm workspace session and navigate to `http://private-nginx.demo.zt`. You should see the default nginx welcome page.
If this fails, continue with the troubleshooting flow.
### Troubleshooting basics
1. Confirm the OpenZiti stack is healthy and the private router is online:
```bash
kziti status
kziti router list
```
2. Confirm the service exists and the grant resolved:
```bash
kziti service list --network demo
kziti access list
```
3. Check Kasm sidecar logs during session startup:
- `/var/log/kasm-sidecar/network_sidecar.log`
- `/var/run/kasm-sidecar/$container_namespace/ziti.log`
4. For deeper troubleshooting see the [OpenZiti troubleshooting guide](./troubleshooting.mdx).
---
## Troubleshoot OpenZiti Egress in Kasm
## Troubleshoot OpenZiti egress in Kasm
Common failure modes, ordered by traffic path: workspace → sidecar → tunneler → policy → router → destination. See [kziti architecture](./kziti.mdx) and the [integration deep dive](./kasm_integration_deep_dive.mdx) for background.
### Where to look first
The four primary signals when troubleshooting are:
- **Sidecar log on the Kasm host:** `/var/log/kasm-sidecar/network_sidecar.log` (network setup, identity injection, tunnel start).
- **Per-session Ziti tunnel log:** `/var/run/kasm-sidecar/$container_namespace/ziti.log` (tunnel start, dial errors, policy failures).
- **kziti status (on the Ziti host):** `kziti status` (overall controller and router health).
- **OpenZiti controller and router logs:** `docker compose -f /opt/kziti/docker-compose.yml logs ziti-controller` and similarly for the router container.
A useful first step is to find the namespace for a failing session:
```bash
docker inspect -f '{{.NetworkSettings.SandboxKey}}' \
| grep -o -E '[a-f0-9]+$'
```
Then check both the per-session ziti log and the sidecar log for that namespace.
### A session reports an egress error at launch
The Kasm UI shows an egress error when the workspace launches.
**Most common causes:**
1. **No managed identity for this user or workspace.** Reconciliation has not yet run, or has run but not picked up the new mapping. List identities on the Ziti host: `kziti identity list | grep kasm-` and confirm one matches the expected `kasm-user-...` or `kasm-workspace-...` pattern.
2. **Identity present but Kasm has not received the JSON.** Restart the egress reconciliation in Kasm or re-save the mapping to force a refresh.
3. **Controller unreachable from the Kasm host.** The sidecar needs outbound TCP to `:1280` on the controller. Test from the Kasm host: `curl -k https://:1280/edge/client/v1/version`. A response with version metadata indicates connectivity.
The session's `network-sidecar.log` will name the specific failure. Look for `failed to enroll`, `failed to authenticate`, or `failed to start ziti tunnel`.
### A session starts but cannot reach a service
The session is up and the Kasm UI does not show an egress error, but the user cannot reach a service the policies say they should.
Walk the policy axes in this order:
#### Step 1. Confirm the identity has the right access attribute
```bash
kziti access list
```
The output should show a role attribute (`net-*`, `svcset-*`, or `svc-*`) that covers the target service. If it is missing, the access grant was not made or the Kasm mapping has not reconciled.
#### Step 2. Confirm the target service exists and the destination is reachable from the private router
```bash
kziti service show
```
Verify the destination DNS name or IP is correct. Test reachability from the host running the relevant private router: `curl -k https://:` from inside the router host or via `docker compose exec`.
#### Step 3. Confirm the policies match
```bash
kziti ziti audit
```
The audit command checks that the universal edge router policy (`erp-clients-dmz`) exists, that every network has its Bind and Dial policies, and that no overly broad policies exist. Any `ERROR` finding is a hard blocker for connectivity; `WARN` findings indicate configuration drift. Under normal kziti-managed operations policy misconfigurations are uncommon, but adopting an existing controller or manual edits can introduce them.
#### Step 4. Confirm the routers and edge-router policies allow the path
```bash
kziti router list
```
The relevant private router should be `online`. The public routers should be `online`. If a router is `offline`, check its container logs.
#### Step 5. Check the session's tunnel log
In the Kasm session container's namespace dir on the Kasm host:
```text
/var/run/kasm-sidecar/$container_namespace/ziti.log
```
A failed dial logs the service name and the reason. Common reasons: `not authorized`, `no terminators` (no router is hosting the service), `service not found` (intercept hostname does not match a service definition).
### Identity is created but does not appear online in ZAC
The identity exists on the controller (visible via `kziti identity list` or in ZAC) but never reports online when a session is launched.
**Most common causes:**
- **The session never launched a Ziti tunnel.** Look in `network-sidecar.log` for `ziti tunnel run` or its absence. If the tunnel never started, the egress sidecar code path was not taken — confirm the workspace is mapped to the OpenZiti provider in Kasm.
- **The tunnel started but failed enrollment.** Check `ziti.log` for the session's namespace. A signed JWT that has expired or been used produces a clear error.
- **Network path to the public router is blocked.** The session container needs TCP `:3022` (or whatever port your public router listens on) reachable. Network policy on the Kasm host or its environment can block this.
### A private router is offline after recent infrastructure changes
A private router that was previously healthy reports as `offline`.
**Most common causes:**
- **The router host lost outbound TCP** to the controller (`:6262`) or the public router (`:10080` for fabric link). Confirm with `nc -zv` from the router host.
- **The controller IP changed** without a corresponding `--existing-controller-ip` update on the router host. If the router was provisioned when DNS resolution was different, you may need to update the router's compose override on its host.
- **The router certificate is rotating.** OpenZiti routers occasionally re-enroll. The router log will say so.
### HA cluster commands time out
Mutating commands fail with quorum or timeout errors but read-only commands still work.
This is the quorum-loss signature. See [Recover from quorum loss](./kziti-operations/recover-quorum.mdx).
Do not run recovery if the missing controller is just temporarily unreachable — wait for it to return. Recovery is for nodes that are permanently gone.
### When to escalate
For raw policy bodies, Raft state, fabric link health, or PKI internals: [OpenZiti docs](https://openziti.io/docs/) and [issue tracker](https://github.com/openziti/ziti/issues). If you're on the Kasm-pinned v2 prerelease and suspect an upstream bug, report it to Kasm too.
### Related
- [Operations with kziti](./kziti-operations/index.mdx) — day-2 admin tasks.
- [Integration deep dive](./kasm_integration_deep_dive.mdx) — Kasm-side internals.
- [OpenZiti egress provider](./index.mdx) — the user-facing concept page.
---
## Configure External Proxy for Kasm Workspaces
## Configuring an External Proxy
Administrators may deploy Kasm Workspaces in a corporate environment that has a forward proxy, such as a ZScaler or BlueCoat device, in these environments Admins may wish to send outbound
Kasm user traffic through the corporate proxy.
This document covers the necessary configuration to create a Desktop Image that has the browsers and desktop applications configured send outbound traffic through the proxy.
It assumes you understand the process for [Building Custom Images](../workspaces-sessions/container-workspace/customization/building-images.mdx).
The example URL: `http://10.10.1.1:3128` can be replaced with the URL of your forward proxy server.
### Creating the Custom Image
1. SSH to the Kasm Workspaces server and clone the example Git repository that has examples of custom images.
```Bash
git clone https://github.com/kasmtech/workspaces-images
cd workspaces-images
```
2. Create a file named `proxy.json` with the following contents.
Ensure that `http://10.10.1.1:3128` is replaced with the URL of your proxy server.
This file will be copied into our image using the `COPY` command in our Dockerfile and will be used by the Chrome Browser.
```json
{
"ProxyMode": "fixed_servers",
"ProxyServer": "10.10.1.1:3128",
"ProxyBypassList": ""
}
```
3. Create a file named `policies.json` with the following contents.
: Ensure that `http://10.10.1.1:3128` is replaced with the URL of your proxy server.
This file will be copied into our image using the `COPY` command in our Dockerfile and will be used by the Firefox Browser.
```json
{
"policies": {
"Proxy": {
"Mode": "manual",
"Locked": true,
"HTTPProxy": "10.10.1.1:3128",
"UseHTTPProxyForAllProtocols": true,
"Passthrough": ""
}
}
}
```
4. Next we will create a Dockerfile that applies our proxy configs to the Browsers and the Desktop OS. In this example
we are basing our image off the `kasmweb/desktop` image, but any image that has the desired browsers installed will work.
Create a file named `Dockerfile` with the following contents.
Ensure that `http://10.10.1.1:3128` is replaced with the URL of your proxy server.
```yml
FROM kasmweb/desktop:[[release]]
USER root
ENV HOME /home/kasm-default-profile
ENV STARTUPDIR /dockerstartup
ENV INST_SCRIPTS $STARTUPDIR/install
WORKDIR $HOME
######### Customize Container Here ###########
# Install Custom Certificate Authority
# COPY ./src/ubuntu/install/certificates $INST_SCRIPTS/certificates/
# RUN bash $INST_SCRIPTS/certificates/install_ca_cert.sh && rm -rf $INST_SCRIPTS/certificates/
ENV http_proxy http://10.10.1.1:3128
ENV https_proxy http://10.10.1.1:3128
ENV ftp_proxy http://10.10.1.1:3128
COPY ./proxy.json /etc/opt/chrome/policies/managed/proxy.json
COPY ./policies.json /usr/lib/firefox/distribution/policies.json
######### End Customizations ###########
RUN chown 1000:0 $HOME
RUN $STARTUPDIR/set_user_permission.sh $HOME
ENV HOME /home/kasm-user
WORKDIR $HOME
RUN mkdir -p $HOME && chown -R 1000:0 $HOME
USER 1000
```
5. If your proxy server is terminating SSL connections, you may need to load your custom root CA certificate onto your system.
To do that you need to complete the following:
1. Place your certificate in the following directory, overwriting the placeholder file that is currently
there `./src/ubuntu/install/certificates/ca.crt` (ensure it is named ca.crt).
2. Edit `Dockerfile` and uncomment the following lines – ( Remove the “#” characters ):
```Bash
...
# Install Custom Certificate Authority
# COPY ./src/ubuntu/install/certificates $INST_SCRIPTS/certificates/
# RUN bash $INST_SCRIPTS/certificates/install_ca_cert.sh && rm -rf $INST_SCRIPTS/certificates/
...
```
```Bash
...
# Install Custom Certificate Authority
COPY ./src/ubuntu/install/certificates $INST_SCRIPTS/certificates/
RUN bash $INST_SCRIPTS/certificates/install_ca_cert.sh && rm -rf $INST_SCRIPTS/certificates/
...
```
6. Build the image
```Bash
sudo docker build -t desktop:custom -f Dockerfile .
```
7. Register the new image in the Kasm UI. See [Building Custom Images](../workspaces-sessions/container-workspace/customization/building-images.mdx).
---
## IPVLAN Networking with Kasm: Configuration and Setup
## IPVLAN Networking
#### Summary
By default Kasm uses docker bridge networking with NAT. While this makes networking and scaling very simple, it comes with the disadvantage that user generated traffic all comes from the single IP address of the Kasm Agent they are deployed on. A solution is to use Docker IPVLAN networks. Kasm allows you to assign Images to a docker network, making it possible to assign different groups of users to different VLANs on the physical network.
#### Virtualization
If your Kasm Agents are virtual machines, you must first setup your virtualization infrastructure to support trunking. This step can be skipped if Kasm is running on bare metal
#### VMWare vSphere
These instructions assume your vSphere is already setup with a Dswitch trunked to the physical network.
1. Navigate to the networking tab in the vSphere Web Client
2. Right click on the appropriate Dswitch that has connectivity to the target physical network.
3. Click Distributed Port Group -> New Distributed Port Group
The new Distributed Port Group dialog has three pages.
1. Provide your new port group a name and hit next
2. In the VLAN section select “VLAN Trunking” for the VLAN Type and provide a trunk range.
3. Select Next to view the summary and then Finish to confirm.
Next you need to associate the trunk to the VM. It is recommended to have two NICs on the VM. One is a normal access port for the Kasm management interface. This NIC will have an IP address and that IP will be used to facilitate communication between the Kasm API server and the Agent. User generated traffic inside of a Kasm desktop or browser will come from the trunk interface.
1. In the vSphere Web Client, Navigate to the target VM, right click, and Edit Settings.
2. Click Add Device, Network Adapter
3. Assign one NIC to the Trunk and one NIC to the Management VLAN
#### Configure Kasm Agent OS for Trunking
The following instructions add trunking capabilities for Ubuntu 22.04LTS.
```yml
sudo apt-get install vlan
sudo modprobe 8021q
sudo su -c 'echo "8021q" >> /etc/modules'
```
Edit /etc/network/interfaces
```yml
admin@kasm-agent-1:~$ cat /etc/network/interfaces
# This file describes the network interfaces available on your system
# and how to activate them. For more information, see interfaces(5).
source /etc/network/interfaces.d/*
# The loopback network interface
auto lo
iface lo inet loopback
# The primary network interface
auto ens192
iface ens192 inet static
address 192.168.10.1
netmask 255.255.255.0
network 192.168.10.0
broadcast 192.168.10.255
gateway 192.168.10.1
# dns-* options are implemented by the resolvconf package, if
installed
dns-nameservers 8.8.8.8
auto ens160
iface ens160 inet manual
```
In the example configuration above, ens192 is the management port and ens160 is the trunk. There is no need to define VLAN interfaces, docker will do this automatically and any attempt to create them will only interfere or break things.
#### Docker Networking
There are two types of docker networks that would allow placing containers on VLANs directly, macvlan and ipvlan. If you are running in a virtualized environment, using macvlan requires special configurations on the hypervisors, therefore, we recommend IPVLAN instead of macvlan.
IPVLAN was an experimental feature prior to docker 19.03.0, released 2019-07-22. If
you are using a version of docker prior to 19.03.0, you must enable experimental features
by editing/creating the file /etc/docker/daemon.json
**Example of /etc/docker/daemon.json**
```yml
{
"experimental":true
}
```
The following is an example of creating an IPVLAN docker network.
```yml
sudo docker network create -d ipvlan --subnet=192.168.150.0/26 --
gateway=192.168.150.1 --ip-range=192.168.75.16/28 -o ipvlan_mode=12 -o
parent=ens160.150 vlan150
```
The proceeding command creates a docker network called “vlan150” on the parent network adapter ens160, sub interface 150 “-o parent=ens160.150”. The name “vlan150” can be any arbitrary name you desire. In this example the subnet is a /26 as configured with the --subnet option. However, you may have multiple Kasm agents and you will want each agent to use different IP addresses for their respective containers. Therefore, in the example we used the --ip-range option to specify a smaller /28 inside the /26 subnet. This particular agent will use ip address specified in the ip-range option for its containers.
We recommend using larger IP spaces to allow for easier expansion. For example, if today you had 4 hosts, you may want to consider using a /22 for each VLAN, which would support up to 510 users, and each agent’s docker network would have a /25 within the subnet allowing each agent to support up to 128 users.
---
## Running Kasm Behind Organizr
## Organizr
Kasm can be run behind [Organizr](https://organizr.app) but may require some configuration during installation. If Organizer is running on port 443
Kasm can be installed on a separate port with this [guide](reverse-proxy.mdx).
The guide will also explain how to install kasm behind a reverse proxy. This may also be useful for Organizr if
Kasm access needs to be setup on a separate server name such as kasm.server.com.
### Setting up the Kasm Tab
The Kasm tab can be setup as an Iframe in Organizr even if the test tab button returns false it may still work. Adding the
URL of the Kasm is enough for the setup no other changes need to be made.
---
## Replace Self-Signed Certificates in Kasm Workspaces
## Replacing Self-Signed Certificates
During installation, the system creates self-signed certificates that are used when connecting to the Web UI.
Administrators may wish to replace these with valid, trusted certificates for the domain Kasm is to be published on.
An alternative is to place Kasm Server behind a self-managed reverse proxy such as Nginx or Caddy. See the
[Reverse Proxy](reverse-proxy.mdx) documentation for more details on this configuration.
Acquiring valid certificates is outside the scope of this document, but once acquired, the following steps may be used
to replace Kasm's self signed certificates. The certificate and key must be in **PEM** format.
For multi-server installations, repeat the following steps on each Web App role.
### Steps to Replace Certificates
1. **Stop the Kasm Services.**
```bash
sudo systemctl stop kasm
```
2. **Replace `kasm_nginx.crt` and `kasm_nginx.key` files.**
```bash
sudo cp /opt/kasm/current/certs/kasm_nginx.crt
sudo cp /opt/kasm/current/certs/kasm_nginx.key
```
3. **Start the Kasm Services.**
```bash
sudo systemctl start kasm
```
4. **Test if nginx is running correctly. Wait 30 seconds.**
```bash
sudo docker ps | grep kasm_proxy
```
5. **Ensure that the container has been running for more than 30 seconds.**
---
### Video Tutorial
This video walks you through installing an SSL certificate on your Kasm Workspaces instance using [Let's Encrypt](https://letsencrypt.org/).
---
## Restricting Kasm Workspaces to Specific Docker Networks
## Restricting Workspaces to Docker Networks
Workspaces allows the administrator to restrict certain Docker workspace images to only provision on specified custom docker networks.
This may be useful if there is a need to use specialized networking such as [macvlan](https://docs.docker.com/network/macvlan/)/[ipvlan](https://docs.docker.com/network/ipvlan/) or [Bridged Network Source NAT](bridged-network-source-nat.mdx).
But, it is also useful to provision sessions on groups of Agents to achieve a more simple multi-enclave architecture similar
to what can be accomplished with the use of multiple [Deployment Zones](../infra-autoscale/deployment-zones.mdx) or with
Agents that have certain characteristics (e.g specialized hardware) that are helpful to be grouped and associated with
certain workspace images.
In this guide we will demonstrate how to:
1. Create custom docker networks on Agents
2. Configure an image to use one or more custom networks
3. Allow the user to select a network at runtime
### Architecture
For this example, we are using in multi-server deployment, with a single webapp, and 4 Agents,
each in different enclaves.
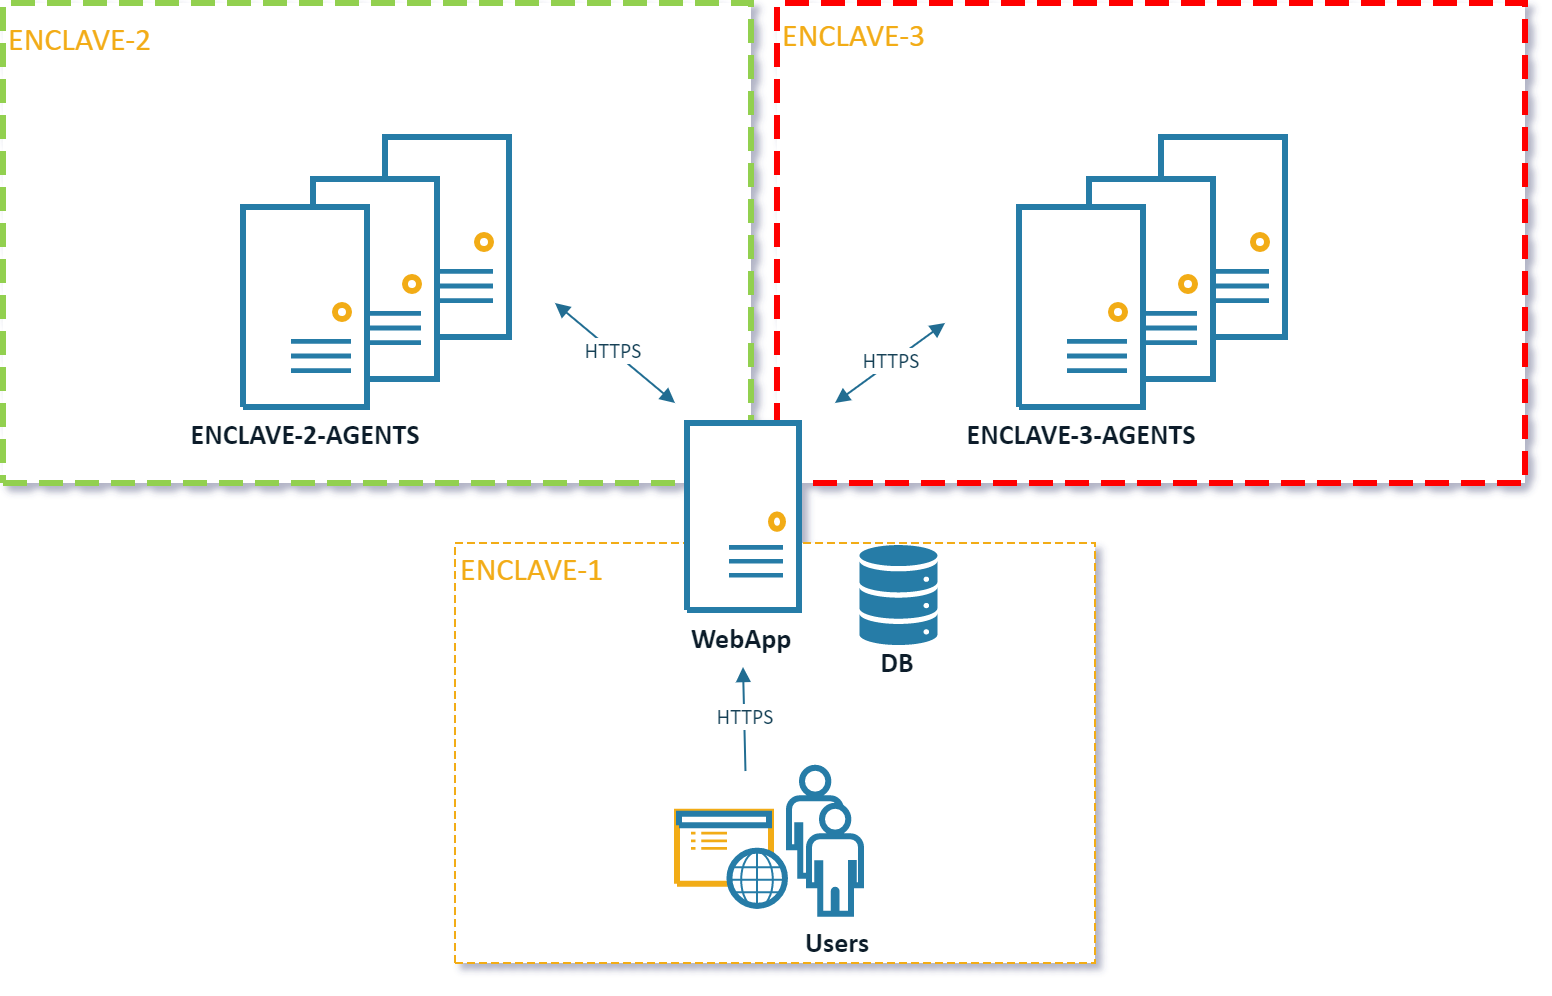
### Creating Custom Networks
Workspaces installs a customer bridged docker network named `kasm_default_network`. By default, all sessions are created
on this network. For this example, we will create an additional custom bridged docker network that represents the target
enclave.
1. SSH to the desired Agent.
2. Create a custom docker network.
```Bash
sudo docker network create z_enclave_2
```
The docker network names used in this example are intentionally prefixed with `z_` . Due to a quirk
`docker` will choose the default route for the container based on the name of the docker network ordered
alphabetically. We name these custom networks accordingly so that they won't cause interruptions with the Kasm
service containers or user workflow.
3. Repeat this step for each Agent. In our example, creating the `z_enclave_2` network on all the Agents in enclave 2
and `z_enclave_3` on all the Agents in enclave 3.
### Workspace Configuration
1. Log into the Workspaces UI as an admin.
2. Select **Workspaces** -> **Workspaces**.
3. Click **Edit** next to the desired Workspace from the arrow menu (e.g Chrome).
4. Check **Restrict Image to Docker Network** and add the custom networks (e.g `z_enclave_2` and `z_enclave_3`). Note.
Custom networks will appear in this list a few minutes after they are created on an active Agent.
5. Check **Allow Network Selection**. This will allow the user to choose from the listed networks when they launch a session.
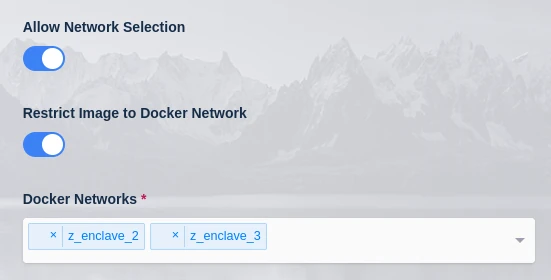
6. Click **Save**.
### Launching the Workspace
1. From the Workspaces launcher, click on the previously modified Workspace. A dropdown will appear with a list of the networks defined.
2. Select the desired network and launch the session. Selecting **Auto** will provision the session on any Agent with one of the previously specified networks.
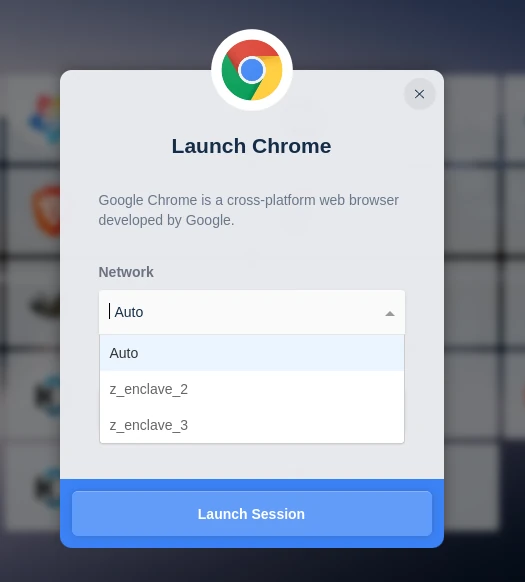
---
## Reverse Proxy Setup: Nginx, Caddy, HAProxy, Apache
## Reverse Proxy
### Overview
Administrators may desire to run Kasm Workspaces behind a reverse proxy such as [Nginx](https://nginx.org/) or
[Caddy](https://caddyserver.com/docs/caddyfile/directives/reverse_proxy) . A handful of configurations are required for communication to properly
flow between the proxy and Kasm.
Once Kasm is placed behind a reverse proxy, be sure to update the Zone configuration. See [Update Zones](#update-zones).
Troubleshooting info can be found on the [Troubleshooting Page](../troubleshooting)
### Running Kasm Workspaces on a Non-Standard Port
By default, Kasm Workspaces will listen on port 443. Administrators may wish to run the application on another port so that
the reverse proxy can run on port 443.
During the installation pass the **-L** flag to choose a different port.
e.g `sudo bash kasm_release/install.sh -L 8443`
Users will now access Kasm Workspaces via the defined port **https://kasm.server:8443**
### Example Nginx Config
Below is an example Nginx config with the appropriate settings for Kasm annotated. In this example, Nginx is listening
on port **443** and Kasm Workspaces is listening on port **8443**
Example Nginx Configuration
```yaml
server {
listen 443 ssl;
ssl_certificate /etc/nginx/ssl/nginx.crt;
ssl_certificate_key /etc/nginx/ssl/nginx.key;
location / {
# The following configurations must be configured when proxying to Kasm Workspaces
# WebSocket Support
proxy_set_header Upgrade $http_upgrade;
proxy_set_header Connection "upgrade";
# Host and X headers
proxy_set_header Host $host;
proxy_set_header X-Real-IP $remote_addr;
proxy_set_header X-Forwarded-For $proxy_add_x_forwarded_for;
proxy_set_header X-Forwarded-Proto $scheme;
# Should match the listening port of this proxy
proxy_set_header X-Forwarded-Port 443;
# Connectivity Options
proxy_http_version 1.1;
proxy_read_timeout 1800s;
proxy_send_timeout 1800s;
proxy_connect_timeout 1800s;
proxy_buffering off;
# Allow large requests to support file uploads to sessions
client_max_body_size 10M;
# Proxy to Kasm Workspaces running locally on 8443 using ssl
proxy_pass https://127.0.0.1:8443 ;
}
}
```
### Multiple Server Names
Kasm supports proxying via subdomains (e.g [https://kasm1.example.com/](https://kasm1.example.com/) / [https://kasm2.example.com/](https://kasm2.example.com/)) or paths (e.g [https://example.com/kasm1/](https://example.com/kasm1/) / [https://example.com/kasm2/](https://example.com/kasm2/))
#### Proxy via Subdomain
Use a dedicated `server_name` for traffic destined for Kasm. (e.g [https://kasm.example.com/](https://kasm.example.com/)). See
[Nginx Server Names](http://nginx.org/en/docs/http/server_names.html) documentation for more details.
##### Example Nginx Config
Multiple Server Names Example
```yaml
server {
listen 443 ssl;
// highlight-next-line
server_name app1.example.com;
ssl_certificate /etc/nginx/ssl/nginx.crt;
ssl_certificate_key /etc/nginx/ssl/nginx.key;
location / {
return 200 'App 1';
add_header Content-Type text/plain;
}
}
server {
listen 443 ssl;
// highlight-next-line
server_name kasm.example.com;
ssl_certificate /etc/nginx/ssl/nginx.crt;
ssl_certificate_key /etc/nginx/ssl/nginx.key;
location / {
# The following configurations must be configured when proxying to Kasm Workspaces
# WebSocket Support
proxy_set_header Upgrade $http_upgrade;
proxy_set_header Connection "upgrade";
# Host and X headers
proxy_set_header Host $host;
proxy_set_header X-Real-IP $remote_addr;
proxy_set_header X-Forwarded-For $proxy_add_x_forwarded_for;
proxy_set_header X-Forwarded-Proto $scheme;
# Should match the listening port of this proxy
proxy_set_header X-Forwarded-Port 443;
# Connectivity Options
proxy_http_version 1.1;
proxy_read_timeout 1800s;
proxy_send_timeout 1800s;
proxy_connect_timeout 1800s;
proxy_buffering off;
# Allow large requests to support file uploads to sessions
client_max_body_size 10M;
# Proxy to Kasm Workspaces running locally on 8443 using ssl
proxy_pass https://127.0.0.1:8443 ;
}
}
```
##### Example Caddy Config
Below is an example Caddy v2 config with the appropriate settings for Kasm. In this example, Caddy is configured to listen
for requests on **kasm.example.com** and reverse proxy them to Kasm running on
**https://127.0.0.1:8443** Note that we include
the **tls_insecure_skip_verify** option to skip TLS certificate verification.
For more information on configuring Caddy, check out the Caddy documentation at [https://caddyserver.com/docs/caddyfile/directives/reverse_proxy#defaults](https://caddyserver.com/docs/caddyfile/directives/reverse_proxy#defaults)
Example Caddy Configuration
```json
kasm.example.com {
reverse_proxy https://127.0.0.1:8443 {
transport http {
tls_insecure_skip_verify
}
header_up Host {host}
# Should match the listening port of this proxy
header_up X-Forwarded-Port "443"
header_up X-Real-IP {remote_host}
header_up X-Forwarded-For {remote_host}
header_up X-Forwarded-Proto {scheme}
}
}
```
##### Example HAProxy Config
Below is an example HAProxy config with the appropriate settings for Kasm annotated. In this example HAProxy is listening
on port **443** and Kasm Workspaces is listening on port **8443**
Example HAProxy config
```yaml
global
log /dev/log local0
log /dev/log local1 notice
chroot /var/lib/haproxy
stats socket /run/haproxy/admin.sock mode 660 level admin expose-fd listeners
stats timeout 30s
user haproxy
group haproxy
daemon
# Default SSL material locations
ca-base /etc/ssl/certs
crt-base /etc/ssl/private
ssl-default-bind-ciphers ECDH+AESGCM:DH+AESGCM:ECDH+AES256:DH+AES256:ECDH+AES128:DH+AES:RSA+AESGCM:RSA+AES:!aNULL:!MD5:!DSS
ssl-default-bind-options no-sslv3
defaults
log global
mode http
option httplog
option dontlognull
timeout connect 5000
timeout client 50000
timeout server 50000
errorfile 400 /etc/haproxy/errors/400.http
errorfile 403 /etc/haproxy/errors/403.http
errorfile 408 /etc/haproxy/errors/408.http
errorfile 500 /etc/haproxy/errors/500.http
errorfile 502 /etc/haproxy/errors/502.http
errorfile 503 /etc/haproxy/errors/503.http
errorfile 504 /etc/haproxy/errors/504.http
frontend localhost
bind *:443 ssl crt /tmp/all.pem alpn http/1.1
redirect scheme https if !{ ssl_fc }
mode http
default_backend node
backend node
mode http
option forwardfor
server kasm 127.0.0.1:8443 check ssl verify none
http-request set-header X-Forwarded-Port %[dst_port]
http-request add-header X-Forwarded-Proto https if { ssl_fc }
```
##### Example Apache Config
Below is an example Apache config with the appropriate settings for Kasm annotated. In this example, Apache is listening
on port **443** and Kasm Workspaces is listening on port **8443**.
Example Apache Configuration
```yaml
# Server and ssl
ServerName kasm.example.com
SSLEngine on
SSLCertificateFile /etc/ssl/apache2/server.pem
SSLCertificateKeyFile /etc/ssl/apache2/server.key
# Websocket upgrade
RewriteEngine on
RewriteCond ${HTTP:Upgrade} websocket [NC]
RewriteCond ${HTTP:Connection} upgrade [NC]
RewriteRule .* "wss://127.0.0.1:8443/$1" [P,L]
# Proxy
SSLProxyEngine on
SSLProxyVerify none
SSLProxyCheckPeerCN off
SSLProxyCheckPeerName off
SSLProxyCheckPeerExpire off
ProxyPreserveHost on
ProxyPass / https://127.0.0.1:8443/
ProxyPassReverse / https://127.0.0.1:8443/
ProxyRequests off
RequestHeader set X-Forwarded-Proto https
# Should match the listening port of this proxy
RequestHeader set X-Forwarded-Port 443
```
#### Proxy via Path
The same settings need to be sent as with subdomain proxies, we are sending the majority outside of the location block so that they apply to all the locations, but feel free to change this to suit your needs.
##### Set Proxy Path global setting
- Select **Settings > Global** from the navigation menu.
- Find the **Proxy Path** setting and update the value to match the path for this server. The value should start with a trailing slash, therefore if the path url in the address bar looks like `https://example.com/kasm1/#/settings` then the value entered should be **/kasm1**
Do not use paths that overlap, for example `/kasm` and `/kasm2` as it will cause issues. This is only the case for where it's an exact overlap from the beginning including the slash. `/kasm` and `/mykasm` would be fine, `/server` and `/servers-us` would not be. When setting up for the first time, on initial login a cookie will be set for the root `/` location. After setting a path value and logging out and logging in again, the correct cookie will be set, but the original root cookie will also still exist. It is recommended to clear cookies before logging in to prevent any conflicts when first setting up.
##### Example Nginx Config
Multiple Paths Example
```yaml
server {
listen 443 ssl;
server_name example.com;
ssl_certificate /etc/nginx/ssl/nginx.crt;
ssl_certificate_key /etc/nginx/ssl/nginx.key;
# The following configurations must be configured when proxying to Kasm Workspaces
# WebSocket Support
proxy_set_header Upgrade $http_upgrade;
proxy_set_header Connection "upgrade";
# Host and X headers
proxy_set_header Host $host;
proxy_set_header X-Real-IP $remote_addr;
proxy_set_header X-Forwarded-For $proxy_add_x_forwarded_for;
proxy_set_header X-Forwarded-Proto $scheme;
# Should match the listening port of this proxy
proxy_set_header X-Forwarded-Port 443;
# Connectivity Options
proxy_http_version 1.1;
proxy_read_timeout 1800s;
proxy_send_timeout 1800s;
proxy_connect_timeout 1800s;
proxy_buffering off;
# Allow large requests to support file uploads to sessions
client_max_body_size 10M;
// highlight-next-line
location /kasm1/ {
# Proxy to Kasm Workspaces running locally on 8443 using ssl
proxy_pass https://127.0.0.1:8443/;
}
// highlight-next-line
location /kasm2/ {
# Proxy to Kasm Workspaces running externally over ssl
proxy_pass https://kasm.example.com/;
}
}
```
### Update Zones
In order for clients to properly make connections to Kasm sessions when using a reverse proxy,
the **Upstream Auth Address** and **Proxy Port** settings for each [deployment zone](../../reference/glossary.mdx#deployment-zone)
must be updated. Update the **Proxy Port** setting to 0, and Kasm Workspaces will attempt to automatically determine the correct port from window.location.port.
Update the **Upstream Auth Address** with either the word "proxy" or the IP or FQDN
of the Kasm Workspaces server if using a single-server installation or if using a multi-server deployment, using the IP
or FQDN of the Web App role for that Zone.
Updates to Zone settings are applied to new sessions created after the change. Resuming existing sessions will not have the changes applied.
1. Log into the Kasm Workspaces UI as an administrator.
2. Select **Infrastructure** -> **Zones**.
3. Edit the default Zone.
4. Change the **Upstream Auth Address** setting to the "proxy" or the IP or FQDN of the Kasm Workspaces server. If using reverse proxy via path then it needs to be the IP or FQDN that points directly to the upstream server if using a multiserver setup.
5. Change the **Proxy Port** setting to 0.
6. Repeat for each additional **Zone**.
If you are using the [RDP local client workspace option](../workspaces-sessions/container-workspace/workspaces.mdx), make sure the [**Restrict RDP Client IP Address**](../infra-autoscale/deployment-zones.mdx) setting is disabled in Infrastructure / Zones. If it isn't may not be able to connect, as the IP stored with the request will differ due to the connection being over a reverse proxy. If this is the case it will be reported in the Error Logs with a message such as "Invalid Request. Wrong client IP."
---
## Kasm with Tailscale: Secure Remote Access
## Running Kasm with Tailscale
This guide will cover setting up a single server Kasm instance with a basic Tailscale configuration.
If you are looking to run a Tailscale as a sidecar container to access other Tailscale devices only from stock Workspaces containers please see [VPN Sidecar Containers](vpn-sidecar.mdx).
### Network architecture overview
For our setup we had three nodes.
- An Ubuntu 22.04 LTS graphical desktop running chromium to access the Kasm UI.
- An Ubuntu 22.04 LTS server that we will perform a single server install of Kasm on.
- An Ubuntu 22.04 LTS server that we configured as a Tailscale exit node. (This is only used in [Configuring Kasm with a Tailscale exit node](#configuring-kasm-with-a-tailscale-exit-node) )
#### Tailscale
This guide uses Tailscale version 1.18.2.
This guide assumes you already have a Tailscale account and are familiar with using Tailscale.
##### Kasm with Tailscale without an exit node
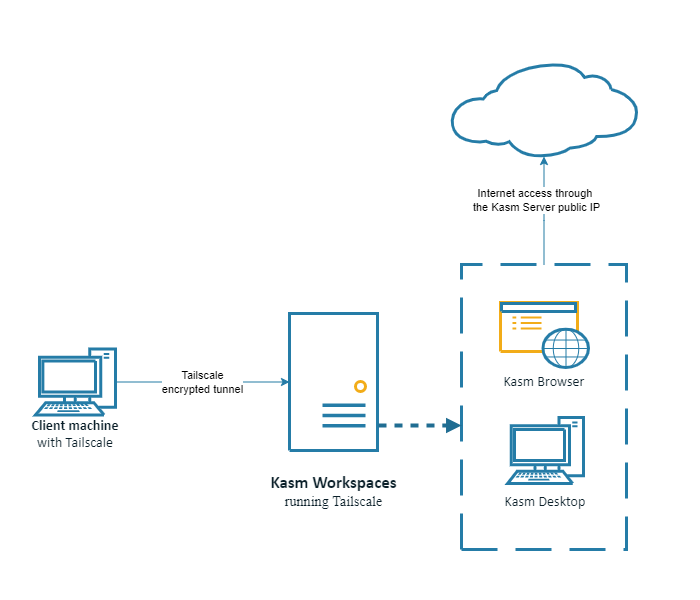
Setup a single server Kasm instance as described in the [single server installation guide](../../tutorials/install/single-server-install.mdx).
Verify that you can access the Kasm web app running on port 443 at **https://\**
Install Tailscale on the Kasm node following the instructions at [Tailscale Ubuntu 22.04 LTS install](https://tailscale.com/kb/1187/install-ubuntu-2204/)
Take note of the Tailscale ip address for the Kasm server.
```bash
sudo tailscale ip --4
```
Verify you can access the Kasm web app at the Tailscale ip address from a Tailscale client.
In order for clients to properly make connections to Kasm sessions when using a reverse proxy,
the **Upstream Auth Address** setting for each [deployment zone](../../reference/glossary.mdx#deployment zone)
must be updated. Update the **Upstream Auth Address** with the public (non-tailscale) IP or FQDN of the Kasm Workspaces server. See [Update Zones](reverse-proxy.mdx#update-zones) for more information.
Kasm workspaces is now working with Tailscale.
Outbound Kasm session traffic will go out the normal public ip, if the desire is to route traffic from Kasm sessions through a Tailscale exit node continue with [Configuring Kasm with a Tailscale exit node](#configuring-kasm-with-a-tailscale-exit-node).
##### Configuring Kasm with a Tailscale exit node
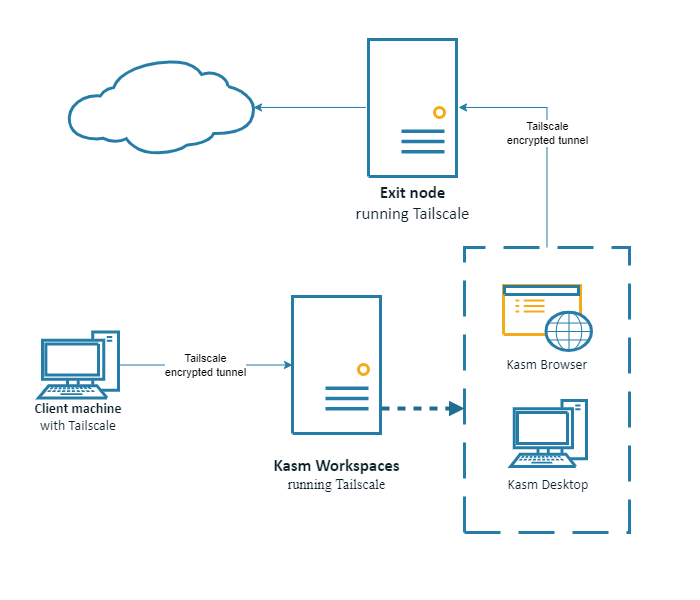
Perform the setup in [Kasm with Tailscale without an exit node](#kasm-with-tailscale-without-an-exit-node).
Once that setup is complete ensure that you have a Tailscale exit node configured. Instructions are available at: [Exit Nodes (route all traffic)](https://tailscale.com/kb/1103/exit-nodes/)
Update the Tailscale configuration for the Kasm server with the new exit node.
```bash
sudo tailscale up --exit-node= --exit-node-allow-lan-access
```
Adding the `--exit-node-allow-lan-access` parameter is required to be able to access the Kasm web app.
Next we will need the IP address of the Kasm proxy server to update the **Upstream Auth Address** in the zone configuration.
```bash
sudo docker exec -it kasm_proxy ip a
```
Use the non loopback address and update each [deployment zone](../../reference/glossary.mdx#deployment zone) with the new **Upstream Auth Address**. See [Update Zones](reverse-proxy.mdx#update-zones) for more information.
Uploading files to the Kasm session does not work with a Tailscale exit node configured.
##### Troubleshooting
During our configuration of Tailscale we ran into issues with DNS.
We were able to solve our issue by adding a public DNS server to the Tailscale administration page under [DNS](https://login.tailscale.com/admin/dns) (This step may not apply to all configurations of Tailscale)
---
## Using VPNs from inside Kasm Workspaces containers
## Using VPNs From Inside Kasm Workspaces Containers
This how to guide will cover configuring a VPN to run from inside a Kasm Workspaces container. This will involve customizing one of the Kasm Workspaces existing docker images to add the VPN software. This works as an alternative to setting up a [VPN Sidecar](vpn-sidecar.mdx).
Kasm also publishes Workspace images with OpenVPN, Wireguard and Tailscale VPNs built in. This provides a more streamlined
workflow for using VPNs from within Workspace container sessions.
See [Using a VPN With a Supported Kasm Workspace Container](byo-vpn-container.mdx) for more details.
This guide will cover two VPN configurations using tailscale and using openVPN.
This guide assumes basic familiarity with the process to [build and register new docker images](../workspaces-sessions/container-workspace/customization/building-images.mdx) in Kasm Workspaces
### Video Tutorial
This video walks through configuring a VPN to run from inside a Kasm Workspaces container.
### Running Tailscale Inside a Kasm Workspaces Container
1. Create the dockerfile and build the image
The example dockerfile uses the `kasmweb/ubuntu-jammy-desktop` image as the base with the [[release]] tag this image is based on Ubuntu 22.04 LTS. It should be possible to use this guide with other Kasm provided images by adapting the tailscale installation logic in the provided dockerfile.
```yml
ARG BASE_TAG="[[release]]"
FROM kasmweb/ubuntu-jammy-desktop:$BASE_TAG
USER root
ENV HOME /home/kasm-default-profile
ENV STARTUPDIR /dockerstartup
ENV INST_SCRIPTS $STARTUPDIR/install
WORKDIR $HOME
######### Customize Container Here ###########
# Install Tailscale
RUN curl -fsSL https://pkgs.tailscale.com/stable/ubuntu/jammy.gpg | apt-key add -
RUN curl -fsSL https://pkgs.tailscale.com/stable/ubuntu/jammy.list | tee -a /etc/apt/sources.list.d/tailscale.list
RUN apt-get update && \\
apt-get install -y tailscale
# Sudo is not strictly necessary when using docker exec to start tailscale but will be needed to start tailscale manually
RUN apt-get update \\
&& apt-get install -y sudo \\
&& echo 'kasm-user ALL=(ALL) NOPASSWD: ALL' >> /etc/sudoers \\
&& rm -rf /var/lib/apt/list/*
######### End Customizations ###########
RUN chown 1000:0 $HOME
ENV HOME /home/kasm-user
WORKDIR $HOME
RUN mkdir -p $HOME && chown -R 1000:0 $HOME
USER 1000
```
The below lines from the dockerfile add the Tailscale Ubuntu Jammy repository to apt. Tailscale makes repositories available for many other OSs if using a Kasm image with a different OS look at https://pkgs.tailscale.com/stable/ for the appropriate package repository.
```yml
RUN curl -fsSL https://pkgs.tailscale.com/stable/ubuntu/jammy.gpg | apt-key add -
RUN curl -fsSL https://pkgs.tailscale.com/stable/ubuntu/jammy.list | tee -a /etc/apt/sources.list.d/tailscale.list
```
2. Build the container with the command:
```yml
docker build -t custom:tailscalevpn -f Dockerfile .
```
3. Optionally add this image to a docker registry
This allows sharing the image easily to multiple agents
4. In Kasm create a workspace for the new image
5. Use the following for the Docker Run Config on the **Add Workspace** screen
```json
{
"devices": [
"dev/net/tun",
"/dev/net/tun"
]
}
```
6. Use the following for the Docker Exec Config on the **Add Workspace** screen
Start tailscaled as root - notice the use of an [ephemeral key](https://tailscale.com/kb/1085/auth-keys/) so that the container can be auto connected to and removed from the tailscale network.
These commands can also be put in a custom_startup script instead of using the Docker Exec Config.
```json
{
"first_launch": {
"user": "root",
"privileged": true,
"cmd": "bash -c 'tailscaled & tailscale up --authkey=tskey-abc123'"
}
}
```
7. Launch the container and run tailscale status, if everything is correct the status will show the container is connected you the tailscale network.
### Running OpenVPN inside a Kasm Workspaces Container
1. Create the dockerfile and build the image
The example dockerfile uses the `kasmweb/ubuntu-jammy-desktop` image as the base with the [[release]] tag this image is based on Ubuntu 22.04 LTS. It should be possible to use this guide with other Kasm provided images by adapting the OpenVPN installation logic in the provided dockerfile.
Modifying what connection profiles are used in this example docker file should allow using other VPN services.
```yml
ARG BASE_TAG="[[release]]"
FROM kasmweb/ubuntu-jammy-desktop:$BASE_TAG
USER root
ENV HOME /home/kasm-default-profile
ENV STARTUPDIR /dockerstartup
ENV INST_SCRIPTS $STARTUPDIR/install
WORKDIR $HOME
######### Customize Container Here ###########
# Install OpenVPN
RUN apt-get update && \\
apt-get install -y openvpn
# Copy the NordVPN OpenVPN connection profiles
RUN cd /etc/openvpn && \\
wget https://downloads.nordcdn.com/configs/archives/servers/ovpn.zip && \\
unzip ovpn.zip && \\
rm ovpn.zip
######### End Customizations ###########
RUN chown 1000:0 $HOME
RUN $STARTUPDIR/set_user_permission.sh $HOME
ENV HOME /home/kasm-user
WORKDIR $HOME
RUN mkdir -p $HOME && chown -R 1000:0 $HOME
USER 1000
```
There are two important components to this dockerfile:
`RUN apt-get update && apt-get install -y openvpn` installs the OpenVPN client from the default OS package repository. This can be adapted for other Kasm image OSs.
`RUN cd /etc/openvpn && wget https://downloads.nordcdn.com/configs/archives/servers/ovpn.zip && unzip ovpn.zip && rm ovpn.zip` installs the Nord VPN configuration. This can be adapted for other VPN services.
2. Build the container with the command:
```yml
docker build -t custom:openvpn -f Dockerfile .
```
3. Optionally add this image to a docker registry
This allows sharing the image easily to multiple agents
4. In Kasm create a workspace for the new image
5. Use the following for the Docker Run Config on the **Add Workspace** screen
The container must run in privileged mode so that the network stack can be modified when the VPN is attempting to connect. The example provides the container with the Nord DNS servers.
```json
{
"dns": [
"103.86.98.100",
"103.86.99.100"
],
"devices": [
"dev/net/tun",
"/dev/net/tun"
],
"user": "root",
"privileged": true
}
```
6. Use the following for the Docker Exec Config on the **Add Workspace** screen
In the Docker Exec Config tell the container to execute using one of the .ovpn files provided by nord (Each file in the zip extracted in the dockerfile is a NordVPN server in a different location.). Nord VPN provides a tool to look up the recommended server https://nordvpn.com/servers/tools/
```json
{
"first_launch":{
"cmd":"bash -c '/usr/bin/desktop_ready && xfce4-terminal -T OpenVPN -x openvpn /etc/openvpn/ovpn_tcp/us9923.nordvpn.com.tcp.ovpn'",
"user":"root"
}
}
```
The ovpn file from the example for NordVPN can be replaced by the ovpn file provided to connect to the desired endpoint for other VPN providers. If the ovpn file is present on the system building the docker image, for instance in /tmp/client1.ovpn, then add `COPY /tmp/client1.ovpn /etc/openvpn/client1.ovpn` to the Dockerfile replacing `RUN cd /etc/openvpn && wget https://downloads.nordcdn.com/configs/archives/servers/ovpn.zip && unzip ovpn.zip && rm ovpn.zip`. Then modify the Docker Exec accordingly to point to the new connection profile file.
7. Launch the container and a terminal will automatically launch to connect to NordVPN.
8. Enter the account login details and connect to NordVPN
#### Mapping in the NordVPN connection profiles
Kasm Workspaces 1.13 added support for mapped files for container based workspaces. This feature can be leveraged to easily map in the NordVPN connection profiles rather than downloading them at docker image build time.
There are three places that the profile file can be added as a file mapping, for the user, for the group, or for the workspace.
When defined for the workspace, the administrator can easily create multiple workspaces that will each connect to a different VPN endpoint.
When defined for the group, the administrator can define one workspace image, and have that image connect to the VPN endpoint based on which group the user is part of.
Finally, when setting the file mapping by user, the administrator can have each user connect to their own specific VPN endpoint.
When this is done for the user and group levels the file will be mapped into all container based sessions, so it is possible to have multiple OpenVPN enabled images, and have the user/group level file mapping apply to all the images. For non OpenVPN images the file will be mapped in but have no effect as OpenVPN will not be installed.
In the example here this is used to map in NordVPN connection profiles, but this would apply the same to connection profiles from other VPN providers.
1. Remove the connection profile download from the dockerfile
`RUN cd /etc/openvpn && wget https://downloads.nordcdn.com/configs/archives/servers/ovpn.zip && unzip ovpn.zip && rm ovpn.zip` can be removed from the dockerfile used above.
2. Modify the Docker Exec for the image to:
```json
{
"first_launch":{
"cmd":"bash -c '/usr/bin/desktop_ready && xfce4-terminal -T OpenVPN -x openvpn /etc/openvpn/client1.ovpn'",
"user":"root"
}
}
```
3. Download the NordVPN connection profiles individually from https://nordvpn.com/ovpn/ or as a bundle from https://downloads.nordcdn.com/configs/archives/servers/ovpn.zip.
Follow the process in [file mappings](../workspaces-sessions/file-mappings.mdx) to add this file to the image, group or user as /etc/openvpn/client1.ovpn
---
## Kasm Workspaces: VPN Sidecar Container Integration Guide
## VPN Sidecar Containers
### Intro
For security reasons or to gain access to a remote network it might be required to give specific Kasm Workspaces access to a VPN. One way to do that would be to customize an existing Kasm core image with VPN tools, but then it requires many network level permissions and becomes a configuration nightmare.
The Kasm team's recommended configuration would be to use an off the shelf or custom VPN docker container running alongside Kasm Workspaces while leveraging the existing desktop and application containers.
Their traffic can then be forced through the external VPN container using a custom Docker exec config. This document will be covering three different ways to achieve this.
Deployment time ~10 minutes.
* [Option 1 Create a standalone openvpn setup](vpn-sidecar.mdx#option-1-create-a-standalone-openvpn-setup)
+ [The OpenVPN server](vpn-sidecar.mdx#the-openvpn-server)
+ [The OpenVPN sidecar container](vpn-sidecar.mdx#the-openvpn-sidecar-container)
+ [Finding the public IP OpenVPN](vpn-sidecar.mdx#finding-the-public-ip-openvpn)
* [Option 2 using a popular VPN Vendor container](vpn-sidecar.mdx#option-2-using-a-popular-vpn-vendor-container)
+ [Setting up a VPN container (NordVPN)](vpn-sidecar.mdx#setting-up-a-vpn-container)
+ [Nord VPN Testing](vpn-sidecar.mdx#nord-vpn-testing)
* [Option 3 Tailscale](vpn-sidecar.mdx#option-3-tailscale)
+ [Getting the Tailscale auth key](vpn-sidecar.mdx#getting-the-tailscale-auth-key)
+ [Setting up a Tailscale Docker container](vpn-sidecar.mdx#setting-up-a-tailscale-docker-container)
+ [Tailscale testing](vpn-sidecar.mdx#tailscale-testing)
### Option 1 Create a standalone openvpn setup
This configuration is going to be using an off the shelf OpenVPN container for the server as the assumption is most users will already have an OpenVPN endpoint available. Then the example will show building a custom client container to act as the sidecar.
#### The OpenVPN server
Here [kylemanna/openvpn](https://hub.docker.com/r/kylemanna/openvpn/) is being used to be able to quickly spin up an endpoint on a remote server. Use the following commands to deploy and dump a usable client config file:
```yml
sudo docker volume create --name Kasm_vpn
sudo docker run -v Kasm_vpn:/etc/openvpn --rm kylemanna/openvpn ovpn_genconfig -u udp://IP_OR_HOSTNAME
sudo docker run -v Kasm_vpn:/etc/openvpn --rm -it kylemanna/openvpn ovpn_initpki
sudo docker run -v Kasm_vpn:/etc/openvpn -d -p 1194:1194/udp --cap-add=NET_ADMIN kylemanna/openvpn
sudo docker run -v Kasm_vpn:/etc/openvpn --rm -it kylemanna/openvpn easyrsa build-client-full Kasm nopass
sudo docker run -v Kasm_vpn:/etc/openvpn --rm kylemanna/openvpn ovpn_getclient Kasm > Kasm.ovpn
```
Please substitute the `IP_OR_HOSTNAME` for the actual server IP or hostname for the server. After filling out the prompted information for password protecting the certificates the `Kasm.ovpn` configuration file needed to connect the VPN sidecar client will be written to disk.
#### The OpenVPN sidecar container
Build a custom docker container to act as the VPN sidecar container on the Kasm Workspaces host.
```yml
mkdir openvpn-client
cd openvpn-client
mkdir root
```
Here is the `Dockerfile`:
```yml
FROM debian:latest
RUN apt update && \
apt install -y \
iptables \
openvpn && \
apt clean
# add local files
COPY /root /
VOLUME [ "/vpn/config"]
ENTRYPOINT [ "/entrypoint.sh"]
```
And custom `root/entrypoint.sh`:
```yml
#! /bin/sh
# create tun device
if [ ! -c /dev/net/tun]; then
mkdir -p /dev/net
mknod /dev/net/tun c 10 200
fi
# Enable devices MASQUERADE mode
iptables -t nat -A POSTROUTING -o tun+ -j MASQUERADE
# start vpn client
openvpn --config /vpn/config/${VPN_CONFIG}
```
Make sure the entrypoint is executable:
```yml
chmod +x root/entrypoint.sh
```
The directory structure should look like this:
```yml
openvpn-client/
├─ root/
│ ├─ entrypoint.sh
├─ Dockerfile
```
Now build the container:
```yml
sudo docker build -t openvpn-client .
```
On the Docker host running Kasm Workspaces (or Agent Server if using a Mult-Server Deploy) create a custom docker network:
```yml
sudo docker network create \
--driver=bridge \
--opt icc=true \
--subnet=172.20.0.0/16 \
vpn-1
```
And finally navigate to the folder containing the `Kasm.ovpn` config file and run the container:
```yml
sudo docker run -d \
--cap-add NET_ADMIN \
--name open-vpn \
--net vpn-1 \
--ip 172.20.0.2 \
-e VPN_CONFIG=Kasm.ovpn \
-v $(pwd):/vpn/config \
--restart unless-stopped \
openvpn-client
```
#### Customizing Workspaces
Login to the Workspaces web interface and click on "Workspaces -> Workspaces" from the Admin tab:

Now select the arrow button next to the Workspace to be modified to use this network and select "Clone":
This example will be modifying a AlmaLinux 8 desktop Workspace.
First rename the `Friendly Name` to append that this is a special VPN enabled container `AlmaLinux 8 - VPN`.
For some configurations it may be necessary to populate the DNS server addresses of the container. This will be indicated by DNS resolution failure inside the container.
This can be done by modifying the `Docker Run Config Override (JSON)` and adding DNS server entries (This workspace already had the `"hostname": "kasm"` populated in this field):
```json
{
"dns": [
"8.8.8.8",
"8.8.4.4"
]
}
```
Here the public Google DNS servers are used, but these can be any DNS servers.
Next change the `Docker Exec Config (JSON)` to:
```json
{
"first_launch":{
"user":"root",
"privileged":true,
"cmd":"bash -c 'ip route delete default && ip route add default via 172.20.0.2'"
}
}
```
Then select "Restrict Image to Docker Network" and choose the network created in the previous step (vpn-1).
Once finished the Workspace settings should look something like this:
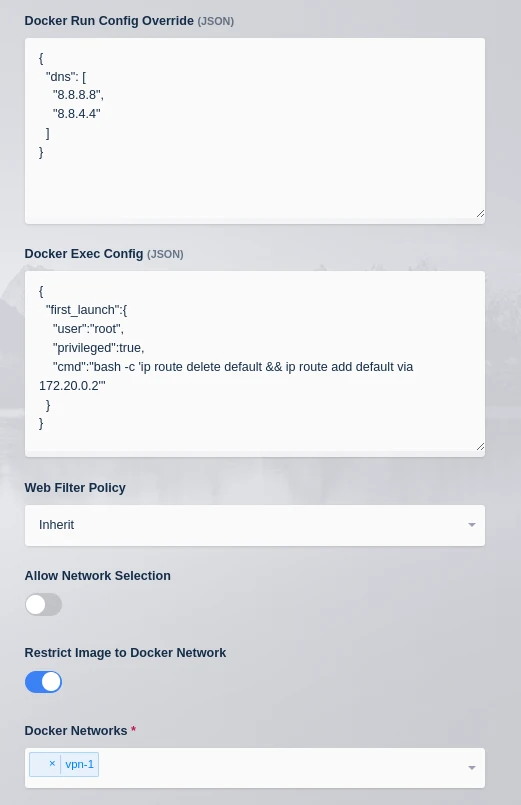
Click on **Save** and hop back over to the Workspaces tab. The new `AlmaLinux 8 - VPN` workspace should be present:
OK the Workspace is ready to deploy, the same process can be followed for any of the Kasm Workspaces to pipe their network traffic through the VPN container.
#### Testing
Testing the VPN configuration in the container will vary depending on the provider or use case, but here are some tips.
These examples will be using the `AlmaLinux 8 - VPN` Workspace configured earlier.
##### Finding the public IP OpenVPN
Click on Applications -> Terminal Emulator and enter:
```yml
curl icanhazip.com
```
Make sure the IP returned is not the current public IP of the Kasm Workspaces Agent the container is running on.
### Option 2 using a popular VPN Vendor container
This example will be using an off the shelf VPN container here specifically geared for [NordVPN](https://nordvpn.com/), but the steps should be similar depending on the desired provider or configuration.
#### Setting up a VPN container
On the Docker host running Kasm Workspaces (or Agent Server if using a Mult-Server Deploy) first create a custom docker network:
```yml
docker network create \
--driver=bridge \
--opt icc=true \
--subnet=172.20.0.0/16 \
vpn-1
```
Now spinup a NordVPN Docker container:
A NordVPN token is required and can be obtained following these [instructions](https://support.nordvpn.com/1905092252)
```yml
docker run -d \
--cap-add NET_ADMIN \
--cap-add NET_RAW \
--name nord-vpn \
--net vpn-1 \
--ip 172.20.0.2 \
-e TOKEN=NORDVPNTOKEN \
-e TECHNOLOGY=NordLynx \
--restart unless-stopped \
ghcr.io/bubuntux/nordvpn
```
#### Customizing Workspaces
Login to the Workspaces web interface and click on "Workspaces -> Workspaces" from the Admin tab:

Now select the arrow button next to the Workspace to be modified to use this network and select "Clone":

This example will be modifying a AlmaLinux 8 desktop Workspace.
First rename the `Friendly Name` to append that this is a special VPN enabled container `AlmaLinux 8 - VPN`.
For some configurations it may be necessary to populate the DNS server addresses of the container. This will be indicated by DNS resolution failure inside the container.
This can be done by modifying the `Docker Run Config Override (JSON)` and adding DNS server entries (This workspace already had the `"hostname": "kasm"` populated in this field):
```json
{
"dns": [
"8.8.8.8",
"8.8.4.4"
]
}
```
Here the public Google DNS servers are used, but these can be any DNS servers.
Next change the `Docker Exec Config (JSON)` to:
```json
{
"first_launch":{
"user":"root",
"privileged":true,
"cmd":"bash -c 'ip route delete default && ip route add default via 172.20.0.2'"
}
}
```
Then select "Restrict Image to Docker Network" and choose the network created in the previous step (vpn-1).
Once finished the Workspace settings should look something like this:

Click on **Save** and hop back over to the Workspaces tab. The new `AlmaLinux 8 - VPN` workspace should be present:

OK the Workspace is ready to deploy, the same process can be followed for any of the Kasm Workspaces to pipe their network traffic through the VPN container.
#### Testing
Testing the VPN configuration in the container will vary depending on the provider or use case, but here are some tips.
These examples will be using the `AlmaLinux 8 - VPN` Workspace configured earlier.
##### Nord VPN Testing
Most VPN providers' webpages will give some kind of indication that the browsing session is "protected" from their home page. This example uses a NordVPN, so open up Firefox from the desktop and navigate to [https://nordvpn.com](https://nordvpn.com), The page should display a `Protected` status:
### Option 3 Tailscale
[Tailscale](https://tailscale.com/) is a zero configuration VPN solution that allows users to quickly connect to a network of remote computers by their Tailscale IP addresses. This example will be configuring a sidecar container to route traffic to the machines on the Tailscale network. It is important to note here this example does not configure an exit node here simply allowing configured VPN containers to route traffic out to the Tailscale network.
#### Getting the Tailscale auth key
Most users can skip this step when trying to connect Workspaces containers to existing Tailscale infrastructure. For those who are new to Tailscale sign up for an account with them [here](https://login.tailscale.com/start).
After signed up a login screen will be presented:
Ignore the setup wizard and click the avatar on the top right of the screen and select "Billing":
From here click on "Keys" under "Personal Settings":
Click on "Generate auth key...":

The Kasm team recommends setting "Reusable" and "Ephemeral" but ultimately review the settings and decide the best settings:
Copy the key created and move on to the next step.
#### Setting up a Tailscale Docker container
On the Kasm Workspaces host build a custom docker container to act as the VPN sidecar container.
```yml
mkdir tailscale
cd tailscale
mkdir root
```
Here is the `Dockerfile`:
```yml
FROM alpine:3.15
RUN \
apk add --no-cache \
bind-tools \
tailscale
# add local files
COPY /root /
ENTRYPOINT [ "/entrypoint.sh"]
```
And custom `root/entrypoint.sh`:
```yml
#! /bin/sh
# create tun device
if [ ! -c /dev/net/tun]; then
mkdir -p /dev/net
mknod /dev/net/tun c 10 200
fi
# Enable devices MASQUERADE mode
iptables -t nat -A POSTROUTING -o eth+ -j MASQUERADE
iptables -t nat -A POSTROUTING -o tailscale+ -j MASQUERADE
# start vpn client
tailscaled
```
Make sure the entrypoint is executable:
```yml
chmod +x root/entrypoint.sh
```
The directory structure should look like this:
```yml
tailscale/
├─ root/
│ ├─ entrypoint.sh
├─ Dockerfile
```
Now build the container:
```yml
sudo docker build -t tailscaled .
```
On the Docker host running Kasm Workspaces (or Agent Server if using a Mult-Server Deploy) create a custom docker network:
```yml
sudo docker network create \
--driver=bridge \
--opt icc=true \
--subnet=172.20.0.0/16 \
vpn-1
```
Now spinup a Tailscale Docker container:
```yml
sudo docker run -d \
--cap-add NET_ADMIN \
--name tailscaled \
--net vpn-1 \
--ip 172.20.0.2 \
--restart unless-stopped \
tailscaled
```
Now login using the auth key:
```yml
sudo docker exec tailscaled tailscale up --authkey=
```
Now navigate [here](https://login.tailscale.com/admin/machines) and ensure the machine is listed:

#### Customizing Workspaces
Login to the Workspaces web interface and click on "Workspaces -> Workspaces" from the Admin tab:

Now select the arrow button next to the Workspace to be modified to use this network and select "Clone":

This example will be modifying a AlmaLinux 8 desktop Workspace.
First rename the `Friendly Name` to append that this is a special VPN enabled container `AlmaLinux 8 - VPN`.
For some configurations it may be necessary to populate the DNS server addresses of the container. This will be indicated by DNS resolution failure inside the container.
This can be done by modifying the `Docker Run Config Override (JSON)` and adding DNS server entries (This workspace already had the `"hostname": "kasm"` populated in this field):
```json
{
"dns": [
"8.8.8.8",
"8.8.4.4"
]
}
```
Here the public Google DNS servers are used, but these can be any DNS servers.
Next change the `Docker Exec Config (JSON)` to:
```json
{
"first_launch":{
"user":"root",
"privileged":true,
"cmd":"bash -c 'ip route delete default && ip route add default via 172.20.0.2'"
}
}
```
Then select "Restrict Image to Docker Network" and choose the network created in the previous step (vpn-1).
Once finished the Workspace settings should look something like this:

Click on **Save** and hop back over to the Workspaces tab. The new `AlmaLinux 8 - VPN` workspace should be present:

OK the Workspace is ready to deploy, the same process can be followed for any of the Kasm Workspaces to pipe their network traffic through the VPN container.
#### Testing
Testing the VPN in the container will vary depending on the provider or use case, but here are some tips.
These examples will be using the `AlmaLinux 8 - VPN` Workspace configured earlier.
##### Tailscale testing
An easy way to test is to simply run a ping to another device on the Tailscale network from the workspace. In order to test this at least one other device connected to the Tailscale network will be needed. From the Tailscale dashboard [here](https://login.tailscale.com/admin/machines) the IPs of other connected devices can be seen. This example will be using `100.86.224.182`.
Assuming the Workspace is a modified desktop Workspace and in particular that this container is using the AlmaLinux 8 example from above.
Once launched into the session go ahead and open a terminal from Applications -> Terminal Emulator:
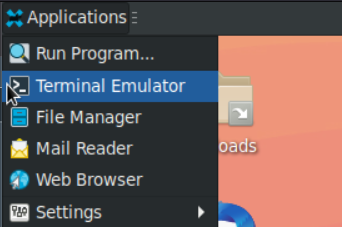
Now run a ping command:
```yml
ping 100.86.224.182
```
There should be acks printed to the screen:
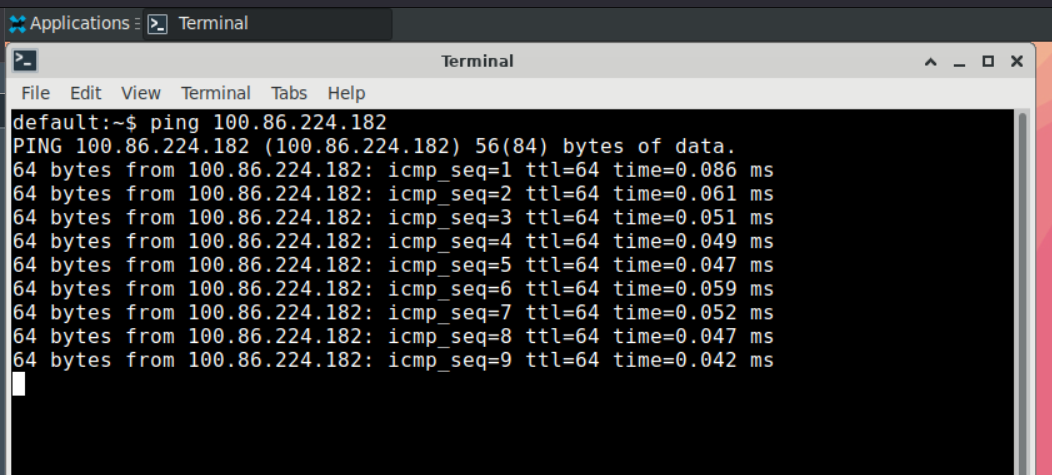
Any container with this configuration will have access to other machines on the connected Tailscale network.
---
## Kasm Workspaces: Admin Account Password Recovery
## Admin Account Recovery
Admins may find themselves locked out of their accounts by forgetting or mis-setting their account passwords.
This guide will show show the steps for resetting the admin account password.
1. SSH to the Kasm Workspaces server and connect to the database with the following command:
> ```Bash
> sudo docker exec -it kasm_db psql -U kasmapp -d kasm
> ```
2. Reset the Admin password, clear WebAuthn credentials, clear TOTP credentials and exit the psql shell
> ```Bash
> update users set
> pw_hash = 'fe519184b60a4ef9b93664a831502578499554338fd4500926996ca78fc7f522',
> salt = '83d0947a-bf55-4bec-893b-63aed487a05e',
> secret=NULL, set_two_factor=False, locked=False,
> disabled=False, failed_pw_attempts = 0 where username ='admin@kasm.local';
> DELETE FROM webauthn_credentials WHERE user_id IN ( SELECT user_id FROM users WHERE username = 'admin@kasm.local' );
> \q
> ```
3. Login to the Workspaces UI using "admin@kasm.local" with the password "password" and reset your password to a secure password.
---
## Kasm Workspaces: Data Loss Prevention (DLP) Guide
## Data Loss Prevention
There are many features of the Kasm Workspaces platform that lend themselves to the goal of preventing users from either taking data out of the Kasm Workspaces environment to their local system or from transferring data from their local system to the Kasm Workspaces environment. This guide covers the many disparate features and how they can be used together with these goals in mind.
### Group Settings
Many features can be configured via [group settings](users-groups-mgmt/groups.mdx). Users can belong to multiple groups, overlapping settings are applied using the group's configured priority. The Group with the lower priority value takes precedent. This table covers the group settings which are related to data loss prevention. For example, allowing audio in and out provides additional avenues of potential data exhilaration.
| allow_kasm_audio | Allow audio streaming for a Kasm. |
| --- |------------------------------------------------------------------------------------------------------------------------------------------------------------------------------------------------------------------------------------------------------------------------------------------------------------------------------------------------|
| allow_kasm_clipboard_down | Allows users to paste text from the Kasm to their local computer. |
| allow_kasm_clipboard_seamless | Allows users to copy and paste text without using Kasm control panel. This feature is only available on Chrome and Chromium-based client browsers |
| allow_kasm_clipboard_up | Allow users to paste from their local computer to the Kasm. |
| allow_kasm_downloads | Allow users to download files from a Kasm. On `RDP local client` workspaces this has no effect see **allow_kasm_rdp_client_file_transfer_clipboard**. |
| allow_kasm_gamepad | Allow users to pass local gamepads into the Kasm session. See [Gamepad Passthrough](../workspaces-sessions/container-workspace/gamepad-passthrough.mdx) for more details. |
| allow_kasm_microphone | Allow microphone passthrough to a Kasm. When enabled, users can pass their local microphone through to the Kasm session. On `RDP local client` workspaces this only works with desktop editions of Windows. |
| allow_kasm_printing | Allow printing of documents using local printers |
| allow_kasm_rdp_client_file_transfer_clipboard | This setting only applies to RDP client Kasm sessions. In RDP file transfers are part of the clipboard and independent directional control of file transfers is not possible. This setting will enable file transfer in the directions that text clipboard has been enabled via **allow_kasm_clipboard_down** and **allow_kasm_clipboard_up**. |
| allow_kasm_rdp_map_local_drives | Allow sessions using the RDP Gateway to map client local drives into the RDP target. This setting is an all or nothing setting. When enabled it will map all client drives into the rdp session. |
| allow_kasm_sharing | Allow the user to share access to their session with other users. See [Session Sharing](../workspaces-sessions/sessions/session-sharing.mdx) for more details. |
| allow_kasm_uploads | Allow users to upload files to a Kasm. On `RDP local client` workspaces this has no effect see **allow_kasm_rdp_client_file_transfer_clipboard**. |
| allow_kasm_webcam | Allow webcam passthrough to a Kasm. When enabled, users can pass their local webcam through to the Kasm session. On `RDP local client` workspaces this only works with desktop editions of Windows. |
| allow_persistent_profile | Allow the use of persistent profiles if configured on the Workspace. See [Persistent Profiles](../data-storage/persistent-profiles.mdx) for details |
| allow_user_storage_mapping | When enabled the user is allowed to configure their own [Storage Mappings](../data-storage/storage-mappings/index.mdx) via their profile. When disabled, new user configurations will not be allowed, nor will using any previously configured mappings be allowed when new sessions are created. |
| enable_ui_server_logging | If enabled, log messages will be sent from client browser to the Kasm Workspaces server. |
| expose_user_environment_vars | Expose KASM_USER and KASM_USER_ID environment variables inside the Kasm. |
| session_time_limit | The amount of time (in seconds) a session will automatically expire. A countdown timer will be displayed to the user. |
| usage_limit | Limits the total number of hours a user or group can have running sessions. **Type** - **Per User** - Each user of the group has their own limit. - **Per Group** - All members share the usage limit. **Interval** - **Daily** , **Weekly** , **Monthly** , **Total**. **Hours** - The number of hours allowed during each interval. |
| web_filter_policy | Enabled web filtering and sets the [Web Filter Policy](web-filtering.mdx) to be used. Policies can also be set or force disabled on Workspaces. Policies assigned to Workspaces take priority over those defined via Group Settings. |
### KasmVNC DLP Policy
While group settings provide basic on/off capability for features like the clipboard, KasmVNC DLP Policies allow for a greater level of control. For example, KasmVNC DLP settings allow for defining rate limits for the clipboard and keyboard input. For a full reference of the KasmVNC YAML configuration, see the [KasmVNC Docs](https://www.kasmweb.com/kasmvnc/docs/latest/configuration.html).
See our how-to guide on [Applying KasmVNC DLP Policies](../workspaces-sessions/container-workspace/kasmvnc-dlp-policies.mdx) to a Kasm Workspaces by utilizing the [File Mapping](../workspaces-sessions/file-mappings.mdx) feature.
The following shows the default settings for the DLP section of the KasmVNC configuration. For a detailed explanation of all settings, see the [KasmVNC Docs, DLP Section](https://www.kasmweb.com/kasmvnc/docs/latest/configuration.html#data-loss-prevention).
```yaml
data_loss_prevention:
visible_region:
# top: 10
# left: 10
# right: -40
# bottom: -40
concealed_region:
allow_click_down: false
allow_click_release: false
clipboard:
delay_between_operations: none
allow_mimetypes:
- chromium/x-web-custom-data
- text/html
- image/png
server_to_client:
enabled: true
size: unlimited
primary_clipboard_enabled: false
client_to_server:
enabled: true
size: unlimited
keyboard:
enabled: true
rate_limit: unlimited
logging:
level: off
watermark:
# image: /etc/kasmvnc/picture.png
# location: 10,10
# tint: 255,20,20,128
# repeat_spacing: 10
```
### RDP DLP Policy
In addition to the existing Data Loss Prevention (DLP) capabilities within KasmVNC, the platform extends its security measures to Remote Desktop Protocol (RDP) sessions by providing both text and image based watermarking remote desktop access.
For more details, see [RDP Session Watermarking](../../reference/settings.mdx#rdp-session-watermarking).
### Web URL Filter
The built-in [Web Filter](web-filtering.mdx) feature allows the administrator to easily define and enforce URL filtering that is applied to Kasm Workspaces container based sessions. Using these policies you can, for example, ensure that users are unable to visit file sharing sites or only visit a whitelist of websites from inside a Kasm Workspaces session.
### Environmental Variables
Container based Workspace environments have environmental variables that can be set in the [Workspace](../workspaces-sessions/container-workspace/workspaces.mdx) definition under the **Docker Run Config Override** setting. The following table shows a listing of available environmental variables that are applicable to DLP for containerized Workspace environments.
| Name | Default | Description |
|------|---------|-------------|
| DLP_PROCESS_FAIL_SECURE | not set | If set to a value of `1`, the container will restart on the failure of any Kasm service running on the container. See the subsection below for more details. |
| KASM_SVC_AUDIO | not set | If set to `0`, the audio out service is not started. This provides additional protection, above disabling audio output in Kasm group settings, by reducing the attack surface area of the container and potential data extraction vectors. |
| KASM_SVC_AUDIO_INPUT | not set | If set to `0`, the audio in service is not started. This provides additional protection, above disabling audio input in Kasm group settings, by reducing the attack surface area of the container and potential data extraction vectors. |
| KASM_SVC_UPLOADS | not set | If set to `0`, the upload in service is not started. This provides additional protection, above disabling uploads in Kasm group settings, by reducing the attack surface area of the container and potential data extraction vectors. |
| KASM_SVC_GAMEPAD | not set | If set to `0`, the gamepad in service is not started. This provides additional protection, above disabling gamepad support in Kasm group settings, by reducing the attack surface area of the container and potential data extraction vectors. |
#### Service Fail Secure
Container based Workspace images have a number of services running that support audio in, audio out, uploads, KasmVNC, game pad, and other features. When one of these processes crash unexpectedly, the default behavior is to merely restart them. When DLP_PROCESS_FAIL_SECURE is enabled, the entire container will instead restart. When the container restarts, all processes are terminated and everything in RAM is lost. Everything on disk will persist once the container restarts. This mode of recovery ensures that potential memory resident malware is lost, but work written to the disk can be recovered.
The following **Docker Run Override** setting on a Workspace image shows an example of enabling the `DLP_PROCESS_FAIL_SECURE` feature.
```json
{
"hostname": "kasm",
"environment": {
"DLP_PROCESS_FAIL_SECURE": 1
}
}
```
The following shows how to also disable the restart policy on the container, this will result in the container being immediately destroyed if a Kasm service process terminates during runtime.
```json
{
"hostname": "kasm",
"environment": {
"DLP_PROCESS_FAIL_SECURE": 1
},
"restart_policy": {
"Name": "no"
}
}
```
---
## Securing Docker: STIG Compliance & Hardening
## Docker
Kasm Workspaces requires Docker and will install Docker if it is not already installed on the system. Organizations should consider this before installing Kasm, especially in offline environments. The standard Ubuntu 22.04 LTS and newer APT repository already has a version of Docker that is new enough to be used with Kasm Workspaces. For offline environments, we recommend that you install Docker from the APT repository prior to installing Kasm. This will ensure the offline system will be able to patch docker from your organization's internal APT repository.
```bash
sudo apt-get install docker.io
```
To fully pass Docker STIGs, you must install Kasm on a non-default (443) port using the -L option, in addition to other options required for your specific deployment.
```bash
sudo bash kasm_release/install.sh -L 8443
```
Kasm Technologies has created [open-source hardening scripts](https://github.com/kasmtech/workspaces-stigs). The project includes one script that hardens the Docker daemon configuration and the other that hardens the Docker runtime of Kasm. Both scripts are targeting the DISA Docker Enterprise STIG checklist. The scripts also output a list of STIGs with vulnerability IDs and a pass/fail status. This can be used as an artifact for STIG checklists. Follow the instructions provided in the README of the project page.
The following table lists all Docker EE STIGs and CIS Docker CE Benchmarks that are either fixed by the Kasm hardening scripts or that pass by default assuming the system was clean prior to installing Kasm. This has been tested on clean installs of Ubuntu 22.04LTS.
| Vuln ID | CIS ID |
|----------|------------|
| V-235812 | 2.16, 5.21 |
| V-235816 | 2.18, 5.25 |
| V-235851 | 3.1 |
| V-235861 | 3.11 |
| V-235864 | 3.14 |
| V-235865 | 3.15 |
| V-235866 | 3.16 |
| V-235867 | 3.17 |
| V-235868 | 3.18 |
| V-235869 | 3.19 |
| V-235870 | 3.20 |
| V-235853 | 3.3 |
| V-235855 | 3.5 |
| V-235859 | 3.9 |
| V-235809 | 5.17 |
| V-235817 | 5.30 |
| V-235818 | 5.31 |
| V-235805 | 5.9 |
| V-235807 | 5.11 |
| V-235791 | 2.15 |
| V-235790 | 2.5 |
| V-235844 | 2.7 |
| V-235815 | 2.9, 5.24 |
| V-235830 | 4.1 |
| V-235827 | 4.6, 5.26 |
| V-235799 | 5.1 |
| V-235806 | 5.10 |
| V-235820 | 5.13 |
| V-235784 | 5.15 |
| V-235785 | 5.16 |
| V-235810 | 5.19 |
| V-235811 | 5.20 |
| V-235828 | 5.28 |
| V-235801 | 5.3 |
| V-235802 | 5.4 |
| V-235837 | 5.8 |
| V-235831 | |
| V-235804 | |
| | 2.6 |
| V-235800 | 5.2 |
| V-235783 | 5.5 |
| V-235803 | 5.6 |
| V-235813 | 5.22 |
| V-235792 | 2.17 |
| V-235814 | 5.23 |
| | 2.10 |
| | 2.3 |
| | 7.1 |
The following list of STIGs/CIS checks pass after running the Kasm hardening script or pass by default, however, they have additional notes that need to be considered per your specific deployment and security requirements.
| Vuln ID | CIS ID | Explanation |
|---|---|---|
| V-235786 | 5.1 | The documented fix for this STIG is not compatible with all versions of Docker, therefore, it was removed from our hardening script. Clients will need to manually add this setting to the daemon.json file, if the version of Docker that is installed supports this feature. |
| V-235808 | 5.12 | All Kasm service containers pass this check after the apply_kasm_stigs.sh script is ran on all Kasm systems. However, user Workspace containers are not set to read only. This is not practical on a desktop. We believe this check is intended and practical for the 99% of the use cases of docker, however, it does not apply nor is it intended for Desktop containers. If the authorizing official is not satisfied with this explanation, then there are two potential courses of action: 1) Use full stack VMs for user desktops (now supported by Kasm). Since a full stack VM would also not use a read-only file system, nor is there a STIG that requires this for a desktop operating system. We feel this solution provides no security benefit as related to this particular STIG, but it does bypass the STIG since user desktops would use VMs instead of containers. 2) An exception to policy. |
| V-235860 | 3.10 | This check is applied by the apply_kasm_stigs.sh script, however, it is missing from the script output. Perform this command to validate, 'ls -l /etc/docker/certs' |
| V-235862 | 3.12 | This check is applied by the apply_kasm_stigs.sh script, however, it is missing from the script output. Perform this command to validate, 'ls -l /etc/docker/certs' |
| V-235863 | 3.13 | This check is applied by the apply_kasm_stigs.sh script, however, it is missing from the script output. Perform this command to validate, 'ls -l /etc/docker/certs' |
| V-235833 | | See section on enterprise logging. |
| | 2.12 | See section on enterprise logging. |
| V-235800 | 5.2 | This is N/A for Ubuntu systems, which use AppArmor profiles instead. If SELinux is enabled by default in RHEL compatibale Operating Systems (i.e Rocky Linux), it is not disabled by Kasm. Therefore, systems should be compliant by default under normal curcumstances. |
| V-235783 | 5.5 | The apply_docker_stigs.sh script will report if the system passes, but will not alter the system. |
| V-235803 | 5.6 | The apply_docker_stigs.sh script will report if the system passes, but will not alter the system. |
| V-235872 | 7.4 | Kasm Workspaces does not rely on Docker for underlying communications between containers on different nodes. All communications between componets on different nodes is encrypted with TLS. |
| | 1.4 | Kasm does not add any users to the docker group, therefore, this check should pass unless you have modified the system. |
| | 2.1 | Kasm does not use the default docker network for service containers or user containers. DO NOT implement the CIS recommended fix of disabling inter-container traffic at the dockerd level, this would break Kasm. If you are using the host only for Kasm, then this check is passed by default as the default docker network would not be used. Otherwise, you need to disable inter-contaienr communications only for the default network. |
| | 2.8 | By default and with the STIG scripts applied, all containers run as an explicit user that is explicitly mapped to a known user on the host. The audit check says to look for containers running as a user that maps to root on the host. Again, by default and with STIG scripts applied, this would not be the case. It is still possible to configure a Kasm Workspace to run as root, see Check column. |
| | 4.2 | A default installation will use all Kasm maintained images or official vendor maintained images for third party containers such as NGINX, and Postgres. The admin can define user Workspaces that use a non-Kasm maintained image. See the check column for details. |
| V-235832 | | This is N/A on the latest version of Docker, as the max-file and max-size options are not supported by the log-drivers required by V-235831 |
### Docker Enterprise
Kasm does not require Docker Enterprise and installs Docker CE if it is not already installed. If you decide to use Docker CE, you must then choose whether to apply the CIS Benchmarks for Docker CE, or use the DISA STIGs for Docker EE and mark checks as N/A where they apply only to EE. The STIG checklist refers to Docker **Enterprise** throughout, however, you must read the checks carefully to determine if they would apply to CE. The table we provide clearly marks which ones we believe only apply to Docker Enterprise, however, you will need to make that determination for yourself.
### Enterprise Logging and Audit Rules
Both the DISA STIGs and CIS Benchmarks have you apply various configurations related to logging and audit rules. Some of these settings are at the docker daemon level and some are at the system level. Our guide assumes that your system is hardened and already meets operating system level STIGs which already enforce centralized logging for syslog as well as auditd installation and configuration.
Our hardening script will configure dockerd to forward logs using syslog to 127.0.0.1:25224 over UDP. This allow the host to pass automated checks based on the DISA audit commands, however, this in and of itself is not enough to complete the configuration. You must either configure each host to listen on that port and then forward the logs, or you must change the /etc/docker/daemon.json configuration to forward the logs to another server. Another option would be to configure dockerd to log to a [json file](https://docs.docker.com/config/containers/logging/configure/), and then use a logging agent to forward the logs to a centralized logging solution. Once the logs are forwarded to a centralized logging solution, you should meet the controls related to alerts, assuming your enterprise logging solution is already configured to provide such alerting.
To meet all STIG and CIS Benchmarks related to auditd rules, ensure the following lines are in /etc/audit/audit.rules:
```bash
-w /usr/bin/docker -k docker
-w /var/lib/docker -k docker
-w /etc/docker -k docker
-w /usr/lib/systemd/system/docker.service -k docker
-w /usr/lib/systemd/system/docker.socket -k docker
-w /etc/default/docker -k docker
-w /etc/docker/daemon.json -k docker
-w /usr/bin/docker-containerd -k docker
-w /usr/bin/docker-runc -k docker
```
Then restart the audit daemon.
```bash
service auditd restart
```
Kasm application logs are covered in the Kasm Workspaces section.
### Docker Swarm
Kasm Workspaces does not require or configure Docker Swarm. With a default installation of Kasm and Docker, with our hardening scripts ran, the Docker Swarm checks should be N/A.
---
## Host-Based Security & Iptables Configuration
## Host Based Security Protection
Products such as HBSS may be required to install on the servers Kasm is running on. Products like HBSS will control iptables. This can result in confusion, since Docker and firewalld also control iptables. Ensure that both TCP ports 2375 and the port Kasm has been configured to listen on, are allowed by your host based security product.
In our experience, iptables can occasionally get into a bad state, where HBSS, firewalld, and Docker are all modifying IP tables. Symptoms such as containers not being able to communicate outbound or receive inbound traffic can occur. Clearing all iptables rules and restarting docker usually clears up these issues. When docker restarts, it will reconstruct all iptables rules applicable to docker and containers it manages. Restarting firewalld may be required to rebuild rules managed by firewalld. Consult your HBSS documentation for guidance with HBSS.
---
## Security Overview: Hardening & Configuration
## Security
The Workspaces platform is a powerful and flexible system that can be configured and used in many different scenarios. This guide covers many different topics related to security, to include hardening of Docker, Postgres, underlying systems and the Kasm Workspaces configuration. This guide will also answer common security related questions that organizations have.
Many organizations are required to implement secure baseline configuration, such as [DISA STIGs](https://public.cyber.mil/stigs/) or [CIS Benchmarks](https://www.cisecurity.org/cis-benchmarks/). There are existing STIG checklists and CIS Benchmarks for the components and/or dependencies used by Kasm. Kasm follows general DISA guidance provided in the [Application Security and Development Security STIGs](https://stigviewer.com/stigs/application_security_and_development) for the Kasm Workspaces product and our configuration guidance.
---
## Hardening Guide: Security Best Practices
## Kasm Workspaces
The following guide is an official hardening checklist for Kasm. Per DISA guidance, you may use the vendor provided hardening baseline guidance when applicable STIGs are not available.
### Global Settings
The following tables cover [settings](../../reference/settings.mdx) that should be checked along with their default value and hardened value. After hardening of global settings, all Kasm services should be restarted.
**Authentication**
| Name | Severity | Default Setting | Recommended Setting | Rationale |
|------|----------|-----------------|---------------------|-----------|
| Enable Kasm Authorization | Critical | True | True | This is in reference to authentication of HTTPS requests that are sent to the user's container. Disabling Kasm Authentication would allow unauthenticated access to user container sessions. |
| Kasm Authorization Domain | Low | $request_host$ | The domain name used by users to access the system. | Kasm dynamically uses the domain name in the user request. Using a hard coded domain name is more explicit and removes a potential attack vector. |
| Max Login Attempts | Low | 5 | 3 | This applies only to Kasm Local Accounts. A setting of 3 is more in line with STIG guidance. |
| Notice Message | Low | Empty | Organization required banner. | DoD STIGs and other guidance usually requires a login Banner. |
| Session Lifetime | Medium | 288000 | 3600 | A user's token is refreshed every 5 minutes when actively using the application. If the user is idle, they will automatically be logged off after the idle session timeout, which is a group setting. If the user ungracefully terminates their browser, the token will not get refreshed and they will also not get auto logged off. This setting ensures the token is only good for 1 hour after the last refresh. |
**Images**
| Name | Severity | Default Setting | Recommended Setting | Rationale |
|------|----------|-----------------|---------------------|-----------|
| Add Images to Default Group | High | True | False | New Workspaces are automatically added to the All Users group, essentially giving all users access to all Workspaces. This might make sense for small deployments, however, in an Enterprise grade environment, Workspaces should be manually added to groups ensuring access management is explicitly granted by an administrator. |
**Logging**
By default, Kasm forwards all logs to managers, which then log them to the database. The database logs are fine for small deployments, however, they are not appropriate to meet enterprise grade logging, auditing, and alerting requirements. Kasm supports forwarding logs to Splunk using the Splunk native HEC protocol. This can be configured in the server global settings. A restart of each web app role server services is required after changing the global log settings. The alternative is to use a log forwarding agent on each server, such as logstash or Splunk Forwarder. Kasm stores all logs at `/opt/kasm/current/log` in both raw and json format. It is recommended to forward the json formatted files. Kasm utilizes rotated logs, therefore, it is only necessary to forward the current log file for each log file series.
With centralized logging configured, the following settings can be used, which will reduce burden on the database.
| Name | Default Setting | Recommended Setting | Rationale |
|------|-----------------|---------------------|-----------|
| Debug Log Retention | 4 | 0 | Large deployments will produce large amounts of debug logs that will overwhelm the database. With log forwarding configured, debug logs can be dropped from database logging. |
| Log Host | | Hostname or IP address of Splunk HEC receiver | Configure if using Kasm's built in support for Splunk HEC log forwarding. |
| Log Port | | The port number used by the Splunk HEC receiver | Configure if using Kasm's built in support for Splunk HEC log forwarding. |
| Log Protocol | internal | splunk | Configure if using Kasm's built in support for Splunk HEC log forwarding. |
| Log Retention | 7 | 5 | This controls the number of days worth of logs to keep in the Kasm database. With log forwarding configured, this can be reduced. Larger deployments should use a lower value. A value of 0 can be used to completely disable storing logs in the database. |
**Manager**
| Name | Severity | Default Setting | Recommended Setting | Rationale |
|------|----------|-----------------|---------------------|-----------|
| Update Check | Medium | True | False | Kasm periodically checks for updates and makes an API call to a public endpoint managed by Kasm. The API contains only the installation ID. For offline or internet restricted environments, this should be disabled. |
### Group Settings
A user can belong to multiple groups. [Group Settings](users-groups-mgmt/groups.mdx#group-settings) are aggregated for all groups a user belongs to. Most settings can only be applied once, in which case the Group with the lowest priority value takes precedent. You can view a user's effective groups and group settings by viewing a user in the Users panel in the Admin dashboard. We recommend using the All Users group to define the most restrictive set of group settings. To override with less restrictive group settings, merely define the same setting on a group with a lower priority.
The following table defines the recommended settings and values to be placed on the **All Users** group. This table only includes settings we believe are required under the general [Application Security and Development Security STIGs](https://stigviewer.com/stigs/application_security_and_development). Other values should also be set based on your organizations requirements, such as whether to allow audio in and out, clipboard in and out, uploads and downloads, and other settings. Some settings, such as password_expires, only apply to local user accounts and are not shown in the below table. To meet STIG requirements, an external authentication provider must be used, see the Authentication section for more details.
| Name | Recommended Setting | Rationale |
|------|---------------------|-----------|
| idle_disconnect | 20 | The user will be logged out after this many minutes of no interaction. |
| shared_session_full_control | False | Allows users to share their session with other users and provide full control of the desktop. |
### Workspace Images
Kasm maintains three tags for each version of a Kasm Workspace image. One tag is the version, such as 'kasmweb/ubuntu-jammy-desktop:[[release]]', where [[release]] is the version. This version only tag is a point in time release that is never updated. The second tag has '-rolling-daily' on the end, such as 'kasmweb/ubuntu-jammy-desktop:[[release]]-rolling-daily', these rolling daily tagged images are updated daily. The third tag has '-rolling-weekly' on the end, these rolling weekly tagged images are updated weekly. If the Kasm Workspace definitions are configured to point to a Docker Registry, Kasm will automatically pull updates and start using them for new sessions. By default, Kasm uses the non-rolling tagged images. The reason for using non-rolling images is to ensure reliability for production environments. For security purposes, the use of rolling tags are recommended, however, for production environments, it is recommended to test image updates prior to updating.
Many use cases will require the need for [custom images](../workspaces-sessions/container-workspace/customization/building-images.mdx), which are based on one of our core docker images. We recommend basing your images from a rolling tagged image. Kasm admins can create a "staging" Workspace for testing new image updates, prior to updating production Workspaces. We recommend using automated [CI/CD](../workspaces-sessions/container-workspace/image-maintenance.mdx) pipelines, to create the custom images, and to perform automated scans of the resulting images.
### Authentication
In order to meet general requirements under the [Application Security and Development Security STIGs](https://stigviewer.com/stigs/application_security_and_development), you must use an external identity provider for authentication. Kasm supports [LDAP](users-groups-mgmt/ldap.mdx), [SAML](users-groups-mgmt/saml-authentication.mdx), and [OIDC](users-groups-mgmt/oidc.mdx) for authentication providers.
The default local accounts will still be defined in Kasm. You should delete user@kasm.local in the Users table. Keeping the default admin@kasm.local would allow emergency access, should the external authentication provider be down. Kasm has built in MFA that can be used for local accounts and alerts could be established for login events for this user, with a central logging solution such as Splunk. Additionally, you could delete admin@kasm.local and create a different local account with a more obscure name that is not a known default username. These security controls can help mitigate the risk of leaving the default local account on the system. Check with your security team for guidance.
---
## Security-Focused Operating System Setup
## Operating System
Kasm Workspaces requires underlying Linux systems to run on. While Workspaces will run on a number of Linux based operating systems, organizations that are concerned with security and/or having to run in an air-gapped network without internet access, typically have more restrictions that will dictate which underlying operating system to use. The US Federal Government and Department of Defense (DoD) have historically been tied to RedHat, however that changed when DISA released a STIG checklist for [Ubuntu Pro](https://ubuntu.com/security/disa-stig), which was specifically created to help organizations meet FedRAMP, FISMA, FIPS and/or DISA-STIG compliance. Current STIG documentation from the DoD can be obtained on [its official public portal](https://www.cyber.mil/stigs/downloads). [Stigviewer](https://stigviewer.com/) is a community tool that provides a user-friendly interface for working with STIGs.
The Kasm Technologies recommended operating system for organizations that need to meet DISA STIG requirements or NIST 800-53 controls in general, is Ubuntu 22.04 LTS with a strong preference for the paid support version, which is required to enable FIPS enforcement. Kasm Technologies has worked directly with many different DoD organizations using both Red Hat and Ubuntu 22.04 LTS and this recommendation is based on our experience. Kasm Technologies does **not** support the underlying operating system or the hardening of the operating system.
The following table lists hardening requirements on the underlying operating system which need to be considered carefully on systems that support Kasm Workspaces:
| Name | Severity | Summary | Caution |
|------|----------|---------|---------|
| [V-260517](https://stigviewer.com/stigs/canonical_ubuntu_22.04_lts/2025-03-03/finding/V-260517) | Medium | Configure rate limiting on the host-based firewall. | All Kasm components use HTTPS for client communication and inter-service communications. Given that Kasm is a server application that handles requests from many users, a high limit should be used on the Kasm port. The default port is 443, but per this guide, you should use a high port number during installation. The DISA documented method for rate limiting using ufw on Ubuntu is an on or off proposition. Kasm's recommendation is to place rate limiting on a traditional firewall in the security stack and/or the front-end reverse proxy. If rate limiting on each server is absolutely required, you will need to manually edit iptables, rather than using ufw for the port Kasm is listening on, in order to specify what the limits should be. A higher limit should be chosen, to accommodate high traffic demands expected for your deployment. |
| [V-257939](https://stigviewer.com/stigs/red_hat_enterprise_linux_9/2025-02-27/finding/V-257939) | Medium | Configure rate limiting on the host-based firewall. | All Kasm components use HTTPS for client communication and inter-service communications. Given that Kasm is a server application that handles requests from many users, it would not be wise to rate limit the port Kasm listens on. The default port is 443, but per this guide, you should use a high port number during installation. A higher limit should be chosen for the port Kasm is listening on, to accommodate high traffic demands expected for your deployment. |
---
## Kasm Workspaces: PostgreSQL STIG Compliance & Security
## Postgres
Kasm Workspaces uses the official Postgres Docker image, which does not include the optional PG_AUDIT module required to meet many of the STIG requirements. The following table lists which STIGs pass with the default Kasm configuration and which require the optional pg_audit module. There are two options to meet the pg_audit checks. The first option is to use an external database, rather than the containerized version used for Kasm by default. Kasm currently ships with Postgres version 14. Kasm will also operate on Postgres compatible solutions such as AWS RDS, AWS Aurora, AWS Aurora Serverless V2, MS Azure Database for Postgres, and similar platforms. See our documentation on using an [external database](../../tutorials/install/remote-database.mdx). The second option is to use the Kasm Technologies maintained Postgres container, which includes the PG_AUDIT module. The [open-source project](https://github.com/kasmtech/kasm-db) for this Docker image, contains the instructions needed alter a deployment to use it. After the deployment is running on this database container, you will be able to edit the postgres configuration to meet the remaining STIG requirements.
| Finding ID | Status | Severity | Title | Notes |
|---|---|---|---|---|
| [V-233511](https://www.stigviewer.com/stigs/crunchy_data_postgresql/2024-08-27/finding/V-233511) | Pass | Medium | PostgreSQL must be configured to prohibit or restrict the use of organization-defined functions, ports, protocols, and/or services, as defined in the PPSM CAL and vulnerability assessments. | |
| [V-233512](https://www.stigviewer.com/stigs/crunchy_data_postgresql/2024-08-27/finding/V-233512) | pg_audit | Medium | PostgreSQL must produce audit records containing sufficient information to establish the outcome (success or failure) of the events. | |
| [V-233513](https://www.stigviewer.com/stigs/crunchy_data_postgresql/2024-08-27/finding/V-233513) | Pass (See Notes) | High | Security-relevant software updates to PostgreSQL must be installed within the time period directed by an authoritative source (e.g., IAVM, CTOs, DTMs, and STIGs). | On installation and upgrades to Kasm, the latest minor release for the current major version of Postgres used is pulled. |
| [V-233514](https://www.stigviewer.com/stigs/crunchy_data_postgresql/2024-08-27/finding/V-233514) | Pass | Medium | The audit information produced by PostgreSQL must be protected from unauthorized modification. | |
| [V-233515](https://www.stigviewer.com/stigs/crunchy_data_postgresql/2024-08-27/finding/V-233515) | See Notes | High | PostgreSQL must integrate with an organization-level authentication/access mechanism providing account management and automation for all users, groups, roles, and any other principals. | Kasm does not recommend nor support using another authentication provider for the kasmapp account used for service authentication to the database. The fix text does say that accounts that use authentication methods other than gss, sspi, or ldap should be docuemented with justification. Work with your ISSO to document the use of local authentication for the kasmapp account, used by Kasm micro services for authentication in your systems SSP. |
| [V-233516](https://www.stigviewer.com/stigs/crunchy_data_postgresql/2024-08-27/finding/V-233516) | Pass | Medium | PostgreSQL must provide non-privileged users with error messages that provide information necessary for corrective actions without revealing information that could be exploited by adversaries. | |
| [V-233517](https://www.stigviewer.com/stigs/crunchy_data_postgresql/2024-08-27/finding/V-233517) | Pass | Medium | Privileges to change PostgreSQL software modules must be limited. | |
| [V-233518](https://www.stigviewer.com/stigs/crunchy_data_postgresql/2024-08-27/finding/V-233518) | Pass | Medium | PostgreSQL must limit privileges to change functions and triggers, and links to software external to PostgreSQL. | |
| [V-233519](https://www.stigviewer.com/stigs/crunchy_data_postgresql/2024-08-27/finding/V-233519) | Pass | High | If passwords are used for authentication, PostgreSQL must transmit only encrypted representations of passwords. | |
| [V-233520](https://www.stigviewer.com/stigs/crunchy_data_postgresql/2024-08-27/finding/V-233520) | Pass | High | PostgreSQL must enforce approved authorizations for logical access to information and system resources in accordance with applicable access control policies. | |
| [V-233521](https://www.stigviewer.com/stigs/crunchy_data_postgresql/2024-08-27/finding/V-233521) | N/A (See Notes) | Medium | PostgreSQL must associate organization-defined types of security labels having organization-defined security label values with information in transmission. | The Kasm API service and manager service are the only services with access to the database. These services make decisions and enforce access to row level data. These enforcements are based on user group membership. For this reason, security labeling at the database level is not required. Per the check text, this STIG only applies if labeling is required. |
| [V-233522](https://www.stigviewer.com/stigs/crunchy_data_postgresql/2024-08-27/finding/V-233522) | Pass | Medium | PostgreSQL must limit the number of concurrent sessions to an organization-defined number per user for all accounts and/or account types. | |
| [V-233523](https://www.stigviewer.com/stigs/crunchy_data_postgresql/2024-08-27/finding/V-233523) | | Medium | The role(s)/group(s) used to modify database structure (including but not necessarily limited to tables, indexes, storage, etc.) and logic modules (functions, trigger procedures, links to software external to PostgreSQL, etc.) must be restricted to authorized users. | |
| [V-233524](https://www.stigviewer.com/stigs/crunchy_data_postgresql/2024-08-27/finding/V-233524) | Pass (See Notes) | Medium | PostgreSQL must uniquely identify and authenticate non-organizational users (or processes acting on behalf of non-organizational users). | By default, the Kasm Postgres database has only one user, used by the Kasm micro services. If admin access for individual users is required, you will need to define them. |
| [V-233525](https://www.stigviewer.com/stigs/crunchy_data_postgresql/2024-08-27/finding/V-233525) | N/A (See Notes) | Medium | PostgreSQL must associate organization-defined types of security labels having organization-defined security label values with information in storage. | The Kasm API service and manager service are the only services with access to the database. These services make decisions and enforce access to row level data. These enforcements are based on user group membership. For this reason, security labeling at the database level is not required. Per the check text, this STIG only applies if labeling is required. |
| [V-233526](https://www.stigviewer.com/stigs/crunchy_data_postgresql/2024-08-27/finding/V-233526) | N/A (See Notes) | Medium | PostgreSQL must check the validity of all data inputs except those specifically identified by the organization. | Kasm utilizes a Object Relational Mapper (ORM) framework called SQLAlchemy and does not directly call database functions or stored procedures. The use of an ORM library ensures that database input is sanitized and meets validity checks prior to being written to the database. |
| [V-233527](https://www.stigviewer.com/stigs/crunchy_data_postgresql/2024-08-27/finding/V-233527) | N/A (See Notes) | Medium | PostgreSQL and associated applications must reserve the use of dynamic code execution for situations that require it. | Kasm utilizes a Object Relational Mapper (ORM) framework called SQLAlchemy and does not directly call database functions or stored procedures. The use of an ORM library ensures that database input is sanitized and meets validity checks prior to being written to the database. |
| [V-233528](https://www.stigviewer.com/stigs/crunchy_data_postgresql/2024-08-27/finding/V-233528) | N/A (See Notes) | Medium | PostgreSQL and associated applications, when making use of dynamic code execution, must scan input data for invalid values that may indicate a code injection attack. | Kasm utilizes a Object Relational Mapper (ORM) framework called SQLAlchemy and does not directly call database functions or stored procedures. The use of an ORM library ensures that database input is sanitized and meets validity checks prior to being written to the database. |
| [V-233529](https://www.stigviewer.com/stigs/crunchy_data_postgresql/2024-08-27/finding/V-233529) | | Medium | PostgreSQL must allocate audit record storage capacity in accordance with organization-defined audit record storage requirements. | Kasm writes postgres logs to /opt/kasm/current/log/postgres, ensure this location has space required and that logs are forwarded to a centralized logging solution. |
| [V-233530](https://www.stigviewer.com/stigs/crunchy_data_postgresql/2024-08-27/finding/V-233530) | | Medium | PostgreSQL must enforce discretionary access control policies, as defined by the data owner, over defined subjects and objects. | |
| [V-233531](https://www.stigviewer.com/stigs/crunchy_data_postgresql/2024-08-27/finding/V-233531) | Pass | Medium | The audit information produced by PostgreSQL must be protected from unauthorized deletion. | |
| [V-233532](https://www.stigviewer.com/stigs/crunchy_data_postgresql/2024-08-27/finding/V-233532) | Pass | Medium | PostgreSQL must record time stamps, in audit records and application data, that can be mapped to Coordinated Universal Time (UTC, formerly GMT). | |
| [V-233533](https://www.stigviewer.com/stigs/crunchy_data_postgresql/2024-08-27/finding/V-233533) | Pass | Medium | PostgreSQL must reveal detailed error messages only to the ISSO, ISSM, SA and DBA. | |
| [V-233534](https://www.stigviewer.com/stigs/crunchy_data_postgresql/2024-08-27/finding/V-233534) | | Medium | PostgreSQL must allow only the ISSM (or individuals or roles appointed by the ISSM) to select which auditable events are to be audited. | |
| [V-233535](https://www.stigviewer.com/stigs/crunchy_data_postgresql/2024-08-27/finding/V-233535) | | Medium | PostgreSQL must provide an immediate real-time alert to appropriate support staff of all audit log failures. | Kasm writes postgres logs to /opt/kasm/current/log/postgres, ensure this location has space required and that logs are forwarded to a centralized logging solution with proper alerting. |
| [V-233538](https://www.stigviewer.com/stigs/crunchy_data_postgresql/2024-08-27/finding/V-233538) | | Medium | PostgreSQL must maintain the confidentiality and integrity of information during reception. | SSL Client certificat authentication is not configured by default. Per the STIG guideance, work with your ISSO to properly document the exception or configure SSL Client cert authentication. |
| [V-233539](https://www.stigviewer.com/stigs/crunchy_data_postgresql/2024-08-27/finding/V-233539) | | Medium | Database objects (including but not limited to tables, indexes, storage, trigger procedures, functions, links to software external to PostgreSQL, etc.) must be owned by database/DBMS principals authorized for ownership. | |
| [V-233540](https://www.stigviewer.com/stigs/crunchy_data_postgresql/2024-08-27/finding/V-233540) | | High | The PostgreSQL software installation account must be restricted to authorized users. | |
| [V-233541](https://www.stigviewer.com/stigs/crunchy_data_postgresql/2024-08-27/finding/V-233541) | Pass | Medium | Database software, including PostgreSQL configuration files, must be stored in dedicated directories separate from the host OS and other applications. | |
| [V-233542](https://www.stigviewer.com/stigs/crunchy_data_postgresql/2024-08-27/finding/V-233542) | pg_audit | Medium | PostgreSQL must include additional, more detailed, organization-defined information in the audit records for audit events identified by type, location, or subject. | |
| [V-233543](https://www.stigviewer.com/stigs/crunchy_data_postgresql/2024-08-27/finding/V-233543) | N/A (See Notes) | Medium | Execution of software modules (to include functions and trigger procedures) with elevated privileges must be restricted to necessary cases only. | Kasm utilizes a Object Relational Mapper (ORM) framework called SQLAlchemy and does not directly call database functions or stored procedures. |
| [V-233544](https://www.stigviewer.com/stigs/crunchy_data_postgresql/2024-08-27/finding/V-233544) | Pass | Medium | When invalid inputs are received, PostgreSQL must behave in a predictable and documented manner that reflects organizational and system objectives. | The kasm postgres database is configured to log syntax errors in SQL commands as shown in this findings check text. The Kasm application has exception handling and will log SQL syntax errors in the Kasm application logs as well. |
| [V-233610](https://www.stigviewer.com/stigs/crunchy_data_postgresql/2024-08-27/finding/V-233610) | See Notes | Medium | PostgreSQL must utilize centralized management of the content captured in audit records generated by all components of PostgreSQL. | The kasm postgres database is configured to log to file at /opt/kasm/current/log/postgres. There will be a log file for each day. A log forwarder should be installed and confirgured to forward those logs to a centralized logging solution. |
| [V-233546](https://www.stigviewer.com/stigs/crunchy_data_postgresql/2024-08-27/finding/V-233546) | | Medium | PostgreSQL must isolate security functions from non-security functions. | |
| [V-233547](https://www.stigviewer.com/stigs/crunchy_data_postgresql/2024-08-27/finding/V-233547) | pg_audit | Medium | PostgreSQL must produce audit records of its enforcement of access restrictions associated with changes to the configuration of PostgreSQL or database(s). | |
| [V-233549](https://www.stigviewer.com/stigs/crunchy_data_postgresql/2024-08-27/finding/V-233549) | Pass | Medium | The audit information produced by PostgreSQL must be protected from unauthorized read access. | The kasm postgres database is configured to log to file at /opt/kasm/current/log/postgres. Files at this location have 0600 permissions and are owned by the kasm_db (postgres) user. |
| [V-233550](https://www.stigviewer.com/stigs/crunchy_data_postgresql/2024-08-27/finding/V-233550) | Pass | Medium | When updates are applied to PostgreSQL software, any software components that have been replaced or made unnecessary must be removed. | Since Kasm uses a containerized database, updates to Postgres replace the entire container, thus no old components are left behind. |
| [V-233551](https://www.stigviewer.com/stigs/crunchy_data_postgresql/2024-08-27/finding/V-233551) | pg_audit | Medium | PostgreSQL must generate audit records when categorized information (e.g., classification levels/security levels) is accessed. | |
| [V-233552](https://www.stigviewer.com/stigs/crunchy_data_postgresql/2024-08-27/finding/V-233552) | pg_audit | Medium | PostgreSQL must generate audit records when unsuccessful attempts to access security objects occur. | |
| [V-233553](https://www.stigviewer.com/stigs/crunchy_data_postgresql/2024-08-27/finding/V-233553) | See Notes | Medium | PostgreSQL must generate audit records when unsuccessful logons or connection attempts occur. | Edit /opt/kasm/current/conf/database/postgres.sql, change log_disconnections to on and log_connections to on.. Do not alter the current log_line_prefix as the configured format meets multiple STIGs including this one. |
| [V-233554](https://www.stigviewer.com/stigs/crunchy_data_postgresql/2024-08-27/finding/V-233554) | See Notes | Medium | PostgreSQL must generate audit records showing starting and ending time for user access to the database(s). | Edit /opt/kasm/current/conf/database/postgres.sql, change log_disconnections to on and log_connections to on.. Do not alter the current log_line_prefix as the configured format meets multiple STIGs including this one. |
| [V-233555](https://www.stigviewer.com/stigs/crunchy_data_postgresql/2024-08-27/finding/V-233555) | pg_audit | Medium | PostgreSQL must generate audit records when unsuccessful attempts to modify security objects occur. | |
| [V-233556](https://www.stigviewer.com/stigs/crunchy_data_postgresql/2024-08-27/finding/V-233556) | pg_audit | Medium | PostgreSQL must generate audit records when privileges/permissions are added. | |
| [V-233557](https://www.stigviewer.com/stigs/crunchy_data_postgresql/2024-08-27/finding/V-233557) | pg_audit | Medium | PostgreSQL must generate audit records when unsuccessful attempts to delete categorized information (e.g., classification levels/security levels) occur. | |
| [V-233558](https://www.stigviewer.com/stigs/crunchy_data_postgresql/2024-08-27/finding/V-233558) | See Notes | Medium | PostgreSQL must generate audit records when successful logons or connections occur. | Edit /opt/kasm/current/conf/database/postgres.sql, change log_disconnections to on and log_connections to on.. Do not alter the current log_line_prefix as the configured format meets multiple STIGs including this one. |
| [V-233559](https://www.stigviewer.com/stigs/crunchy_data_postgresql/2024-08-27/finding/V-233559) | pg_audit | Medium | PostgreSQL must generate audit records when security objects are deleted. | |
| [V-233560](https://www.stigviewer.com/stigs/crunchy_data_postgresql/2024-08-27/finding/V-233560) | pg_audit | Medium | PostgreSQL must generate audit records when unsuccessful attempts to retrieve privileges/permissions occur. | |
| [V-233561](https://www.stigviewer.com/stigs/crunchy_data_postgresql/2024-08-27/finding/V-233561) | pg_audit | Medium | PostgreSQL must generate audit records when unsuccessful attempts to delete privileges/permissions occur. | |
| [V-233562](https://www.stigviewer.com/stigs/crunchy_data_postgresql/2024-08-27/finding/V-233562) | pg_audit | Medium | PostgreSQL must be able to generate audit records when privileges/permissions are retrieved. | |
| [V-233563](https://www.stigviewer.com/stigs/crunchy_data_postgresql/2024-08-27/finding/V-233563) | pg_audit | Medium | PostgreSQL must generate audit records when unsuccessful attempts to modify categorized information (e.g., classification levels/security levels) occur. | |
| [V-233564](https://www.stigviewer.com/stigs/crunchy_data_postgresql/2024-08-27/finding/V-233564) | pg_audit | Medium | PostgreSQL must generate audit records when unsuccessful accesses to objects occur. | |
| [V-233565](https://www.stigviewer.com/stigs/crunchy_data_postgresql/2024-08-27/finding/V-233565) | pg_audit | Medium | PostgreSQL must generate audit records for all privileged activities or other system-level access. | |
| [V-233566](https://www.stigviewer.com/stigs/crunchy_data_postgresql/2024-08-27/finding/V-233566) | pg_audit | Medium | PostgreSQL must generate audit records when unsuccessful attempts to access categorized information (e.g., classification levels/security levels) occur. | |
| [V-233567](https://www.stigviewer.com/stigs/crunchy_data_postgresql/2024-08-27/finding/V-233567) | pg_audit | Medium | PostgreSQL must be able to generate audit records when security objects are accessed. | |
| [V-233568](https://www.stigviewer.com/stigs/crunchy_data_postgresql/2024-08-27/finding/V-233568) | pg_audit | Medium | PostgreSQL must generate audit records when privileges/permissions are deleted. | |
| [V-233569](https://www.stigviewer.com/stigs/crunchy_data_postgresql/2024-08-27/finding/V-233569) | See Notes | Medium | PostgreSQL must generate audit records when concurrent logons/connections by the same user from different workstations occur. | Edit /opt/kasm/current/conf/database/postgres.sql, change log_disconnections to on and log_connections to on.. Do not alter the current log_line_prefix as the configured format meets multiple STIGs including this one. |
| [V-233570](https://www.stigviewer.com/stigs/crunchy_data_postgresql/2024-08-27/finding/V-233570) | pg_audit | Medium | PostgreSQL must generate audit records when unsuccessful attempts to delete security objects occur. | |
| [V-233571](https://www.stigviewer.com/stigs/crunchy_data_postgresql/2024-08-27/finding/V-233571) | pg_audit | Medium | PostgreSQL must generate audit records when privileges/permissions are modified. | |
| [V-233572](https://www.stigviewer.com/stigs/crunchy_data_postgresql/2024-08-27/finding/V-233572) | pg_audit | Medium | PostgreSQL must generate audit records when unsuccessful attempts to execute privileged activities or other system-level access occur. | |
| [V-233573](https://www.stigviewer.com/stigs/crunchy_data_postgresql/2024-08-27/finding/V-233573) | pg_audit | Medium | PostgreSQL must generate audit records when security objects are modified. | |
| [V-233574](https://www.stigviewer.com/stigs/crunchy_data_postgresql/2024-08-27/finding/V-233574) | pg_audit | Medium | PostgreSQL must generate audit records when categorized information (e.g., classification levels/security levels) is modified. | |
| [V-233575](https://www.stigviewer.com/stigs/crunchy_data_postgresql/2024-08-27/finding/V-233575) | pg_audit | Medium | PostgreSQL must generate audit records when unsuccessful attempts to modify privileges/permissions occur. | |
| [V-233576](https://www.stigviewer.com/stigs/crunchy_data_postgresql/2024-08-27/finding/V-233576) | pg_audit | Medium | PostgreSQL must generate audit records when unsuccessful attempts to add privileges/permissions occur. | |
| [V-233577](https://www.stigviewer.com/stigs/crunchy_data_postgresql/2024-08-27/finding/V-233577) | N/A | Medium | PostgreSQL, when utilizing PKI-based authentication, must validate certificates by performing RFC 5280-compliant certification path validation. | |
| [V-233578](https://www.stigviewer.com/stigs/crunchy_data_postgresql/2024-08-27/finding/V-233578) | Pass | Medium | PostgreSQL must produce audit records containing sufficient information to establish where the events occurred. | |
| [V-233579](https://www.stigviewer.com/stigs/crunchy_data_postgresql/2024-08-27/finding/V-233579) | Pass | Medium | PostgreSQL must maintain the confidentiality and integrity of information during preparation for transmission. | |
| [V-233580](https://www.stigviewer.com/stigs/crunchy_data_postgresql/2024-08-27/finding/V-233580) | pg_audit | Medium | PostgreSQL must provide audit record generation capability for DoD-defined auditable events within all DBMS/database components. | |
| [V-233581](https://www.stigviewer.com/stigs/crunchy_data_postgresql/2024-08-27/finding/V-233581) | Pass | Medium | PostgreSQL must generate time stamps, for audit records and application data, with a minimum granularity of one second. | |
| [V-233582](https://www.stigviewer.com/stigs/crunchy_data_postgresql/2024-08-27/finding/V-233582) | Pass | Medium | PostgreSQL must produce audit records containing sufficient information to establish the identity of any user/subject or process associated with the event. | |
| [V-233583](https://www.stigviewer.com/stigs/crunchy_data_postgresql/2024-08-27/finding/V-233583) | See Notes | High | PostgreSQL must implement NIST FIPS 140-2 or 140-3 validated cryptographic modules to generate and validate cryptographic hashes. | This is a system level setting, ensure FIPS mode is enabled on the OS. |
| [V-233585](https://www.stigviewer.com/stigs/crunchy_data_postgresql/2024-08-27/finding/V-233585) | See Notes | High | PostgreSQL must implement NIST FIPS 140-2 or 140-3 validated cryptographic modules to protect unclassified information requiring confidentiality and cryptographic protection, in accordance with the data owners requirements. | This is a system level setting, ensure FIPS mode is enabled on the OS. |
| [V-233586](https://www.stigviewer.com/stigs/crunchy_data_postgresql/2024-08-27/finding/V-233586) | Pass (See Notes) | High | PostgreSQL must protect the confidentiality and integrity of all information at rest. | Kasm encrypts sensitive fields at the application layer. Since the STIG guidance seems to provide leeway in the implementation, we believe our native encryption of sensitive data meets the requirement, however, your system owner may desire full disk encryption.. If the system owner wants full database encryption, you will need to use an externally managed Postgres database, such as AWS RDS, Azure Database Postgres, or a traditional Postgres database server. |
| [V-233587](https://www.stigviewer.com/stigs/crunchy_data_postgresql/2024-08-27/finding/V-233587) | | Medium | PostgreSQL must prohibit user installation of logic modules (functions, trigger procedures, views, etc.) without explicit privileged status. | |
| [V-233588](https://www.stigviewer.com/stigs/crunchy_data_postgresql/2024-08-27/finding/V-233588) | | Medium | PostgreSQL must separate user functionality (including user interface services) from database management functionality. | |
| [V-233589](https://www.stigviewer.com/stigs/crunchy_data_postgresql/2024-08-27/finding/V-233589) | pg_audit | Medium | PostgreSQL must initiate session auditing upon startup. | |
| [V-233590](https://www.stigviewer.com/stigs/crunchy_data_postgresql/2024-08-27/finding/V-233590) | See Notes | Medium | PostgreSQL must implement cryptographic mechanisms to prevent unauthorized modification of organization-defined information at rest (to include, at a minimum, PII and classified information) on organization-defined information system components. | Read the finding details to see if this check applies to your system or not. Then read the notes column of this table for V-233586. |
| [V-233591](https://www.stigviewer.com/stigs/crunchy_data_postgresql/2024-08-27/finding/V-233591) | Pass | Medium | PostgreSQL must produce audit records containing sufficient information to establish the sources (origins) of the events. | |
| [V-233592](https://www.stigviewer.com/stigs/crunchy_data_postgresql/2024-08-27/finding/V-233592) | Pass | Medium | Unused database components, PostgreSQL software, and database objects must be removed. | Kasm uses a containerized postgres database, no additional software is included in the image. |
| [V-233593](https://www.stigviewer.com/stigs/crunchy_data_postgresql/2024-08-27/finding/V-233593) | Pass | Medium | Access to external executables must be disabled or restricted. | |
| [V-233594](https://www.stigviewer.com/stigs/crunchy_data_postgresql/2024-08-27/finding/V-233594) | Pass | Medium | Unused database components which are integrated in PostgreSQL and cannot be uninstalled must be disabled. | Kasm uses a containerized postgres database, no additional software is included in the image. |
| [V-233595](https://www.stigviewer.com/stigs/crunchy_data_postgresql/2024-08-27/finding/V-233595) | N/A (See Notes) | Medium | PostgreSQL must associate organization-defined types of security labels having organization-defined security label values with information in process. | The Kasm API service and manager service are the only services with access to the database. These services make decisions and enforce access to row level data. These enforcements are based on user group membership. For this reason, security labeling at the database level is not required. Per the check text, this STIG only applies if labeling is required. |
| [V-233596](https://www.stigviewer.com/stigs/crunchy_data_postgresql/2024-08-27/finding/V-233596) | Pass | High | If passwords are used for authentication, PostgreSQL must store only hashed, salted representations of passwords. | |
| [V-233597](https://www.stigviewer.com/stigs/crunchy_data_postgresql/2024-08-27/finding/V-233597) | | Medium | PostgreSQL must enforce access restrictions associated with changes to the configuration of PostgreSQL or database(s). | |
| [V-233598](https://www.stigviewer.com/stigs/crunchy_data_postgresql/2024-08-27/finding/V-233598) | pg_audit | Medium | PostgreSQL must protect against a user falsely repudiating having performed organization-defined actions. | |
| [V-233599](https://www.stigviewer.com/stigs/crunchy_data_postgresql/2024-08-27/finding/V-233599) | See Notes | Medium | The system must provide a warning to appropriate support staff when allocated audit record storage volume reaches 75% of maximum audit record storage capacity. | This is a system level control or a control that applies to your centalized logging solution. |
| [V-233601](https://www.stigviewer.com/stigs/crunchy_data_postgresql/2024-08-27/finding/V-233601) | | Medium | PostgreSQL must require users to reauthenticate when organization-defined circumstances or situations require reauthentication. | The STIG does not seem to provide a Fix Text with implementation. |
| [V-233602](https://www.stigviewer.com/stigs/crunchy_data_postgresql/2024-08-27/finding/V-233602) | See Notes | High | PostgreSQL must enforce authorized access to all PKI private keys stored/utilized by PostgreSQL. | The postgres database will show /etc/ssl/certs/db_server.crt and /etc/ssl/certs/db_server.key for the cert file and key file respectively. These are mapped into the container and stored on the host at /opt/kasm/current/certs/. If your organization requires storing these files on a FIPS 140-2 or 140-3 cryptographic module, you will need to move these files to the location on the file system that the device is mounted to. After moving the files, you will need to stop the Kasm services by running 'sudo systemctl stop kasm', then edit /opt/kasm/current/docker/docker-compose.yaml and changing the volume mappings in the kasm_db service, for the two files. Then start the Kasm services backup, 'sudo systemctl start kasm'. This needs to be done only on the database server. |
| [V-233603](https://www.stigviewer.com/stigs/crunchy_data_postgresql/2024-08-27/finding/V-233603) | See Notes | Medium | PostgreSQL must only accept end entity certificates issued by DoD PKI or DoD-approved PKI Certification Authorities (CAs) for the establishment of all encrypted sessions. | To swap the Kasm generated certs with DoD approved certificates, stop the Kasm services by running 'sudo systemctl stop kasm', then rename the /opt/kasm/current/certs/db_server.crt and /opt/kasm/current/certs/db_server.key files and place your cert and key file at this loction using teh db_server.crt and .key filenames. Start the kasm services back up using 'sudo systemctl start kasm' |
| [V-233604](https://www.stigviewer.com/stigs/crunchy_data_postgresql/2024-08-27/finding/V-233604) | pg_audit | Medium | PostgreSQL must produce audit records containing sufficient information to establish what type of events occurred. | |
| [V-233605](https://www.stigviewer.com/stigs/crunchy_data_postgresql/2024-08-27/finding/V-233605) | | Medium | PostgreSQL must implement cryptographic mechanisms preventing the unauthorized disclosure of organization-defined information at rest on organization-defined information system components. | Read the finding details to see if this check applies to your system or not. Then read the notes column of this table for V-233586. |
| [V-233606](https://www.stigviewer.com/stigs/crunchy_data_postgresql/2024-08-27/finding/V-233606) | See Notes | Medium | PostgreSQL must invalidate session identifiers upon user logout or other session termination. | Edit /opt/kasm/current/conf/database/postgres.sql per the STIG Fix Text. Restart the kasm database, 'sudo docker restart kasm_db' |
| [V-233607](https://www.stigviewer.com/stigs/crunchy_data_postgresql/2024-08-27/finding/V-233607) | pg_audit | Medium | PostgreSQL must protect its audit features from unauthorized access. | |
| [V-233608](https://www.stigviewer.com/stigs/crunchy_data_postgresql/2024-08-27/finding/V-233608) | pg_audit | Medium | PostgreSQL must produce audit records containing time stamps to establish when the events occurred. | |
| [V-233609](https://www.stigviewer.com/stigs/crunchy_data_postgresql/2024-08-27/finding/V-233609) | pg_audit | Medium | PostgreSQL must protect its audit features from unauthorized removal. | |
| [V-233610](https://www.stigviewer.com/stigs/crunchy_data_postgresql/2024-08-27/finding/V-233610) | See Notes | Medium | PostgreSQL must off-load audit data to a separate log management facility; this must be continuous and in near real time for systems with a network connection to the storage facility and weekly or more often for stand-alone systems. | The kasm postgres database is configured to log to file at /opt/kasm/current/log/postgres. There will be a log file for each day. A log forwarder should be installed and confirgured to forward those logs to a centralized logging solution. |
| [V-233611](https://www.stigviewer.com/stigs/crunchy_data_postgresql/2024-08-27/finding/V-233611) | Pass | Medium | PostgreSQL must maintain the authenticity of communications sessions by guarding against man-in-the-middle attacks that guess at Session ID values. | |
| [V-233612](https://www.stigviewer.com/stigs/crunchy_data_postgresql/2024-08-27/finding/V-233612) | See Notes | Medium | PostgreSQL must uniquely identify and authenticate organizational users (or processes acting on behalf of organizational users). | End users never access the Kasm database. The kasm application layer implements its own authentication and authorization check for all data access. |
| [V-233613](https://www.stigviewer.com/stigs/crunchy_data_postgresql/2024-08-27/finding/V-233613) | | Medium | PostgreSQL must automatically terminate a user session after organization-defined conditions or trigger events requiring session disconnect. | |
| [V-233614](https://www.stigviewer.com/stigs/crunchy_data_postgresql/2024-08-27/finding/V-233614) | See Notes | High | PostgreSQL must prevent non-privileged users from executing privileged functions, to include disabling, circumventing, or altering implemented security safeguards/countermeasures. | Kasm utilizes a Object Relational Mapper (ORM) framework called SQLAlchemy and does not directly call database functions or stored procedures. The use of an ORM library ensures that database input is sanitized and meets validity checks prior to being written to the database. End users do not have access to the database. The Kasm application layer enforces authentication and authorization for data retrieved from the database on behalf of the user. |
| [V-233615](https://www.stigviewer.com/stigs/crunchy_data_postgresql/2024-08-27/finding/V-233615) | See Notes | Medium | PostgreSQL must map the PKI-authenticated identity to an associated user account. | Kasm utilizes a Object Relational Mapper (ORM) framework called SQLAlchemy and does not directly call database functions or stored procedures. The use of an ORM library ensures that database input is sanitized and meets validity checks prior to being written to the database. End users do not have access to the database. The Kasm application layer enforces authentication and authorization for data retrieved from the database on behalf of the user. Kasm applicaiton logs cotain all requests by users with the data required for application logging, including username, timestamp, requested data, result of request, and more. |
| [V-233616](https://www.stigviewer.com/stigs/crunchy_data_postgresql/2024-08-27/finding/V-233616) | | Medium | Database contents must be protected from unauthorized and unintended information transfer by enforcement of a data-transfer policy. | |
| [V-233617](https://www.stigviewer.com/stigs/crunchy_data_postgresql/2024-08-27/finding/V-233617) | Pass | Medium | Access to database files must be limited to relevant processes and to authorized, administrative users. | |
| [V-233618](https://www.stigviewer.com/stigs/crunchy_data_postgresql/2024-08-27/finding/V-233618) | Pass | Medium | PostgreSQL must protect its audit configuration from unauthorized modification. | |
| [V-233619](https://www.stigviewer.com/stigs/crunchy_data_postgresql/2024-08-27/finding/V-233619) | See Notes | High | PostgreSQL must use NIST FIPS 140-2 or 140-3 validated cryptographic modules for cryptographic operations. | This is a system level setting, ensure FIPS mode is enabled on the OS. |
| [V-233620](https://www.stigviewer.com/stigs/crunchy_data_postgresql/2024-08-27/finding/V-233620) | pg_audit | Medium | Audit records must be generated when categorized information (e.g., classification levels/security levels) is deleted. | |
| [V-233621](https://www.stigviewer.com/stigs/crunchy_data_postgresql/2024-08-27/finding/V-233621) | pg_audit | Medium | PostgreSQL must generate audit records when successful accesses to objects occur. | |
| [V-233622](https://www.stigviewer.com/stigs/crunchy_data_postgresql/2024-08-27/finding/V-233622) | pg_audit | Medium | PostgreSQL must generate audit records for all direct access to the database(s). | |
| [V-233623](https://www.stigviewer.com/stigs/crunchy_data_postgresql/2024-08-27/finding/V-233623) | See Notes | High | The DBMS must be configured on a platform that has a NIST certified FIPS 140-2 or 140-3 installation of OpenSSL. | This is a system level setting, ensure FIPS mode is enabled on the OS. Kasm recommends using Ubuntu 22.04LTS Advantage. |
| [V-233584](https://www.stigviewer.com/stigs/crunchy_data_postgresql/2024-08-27/finding/V-233584) | Pass | Medium | PostgreSQL must use NSA-approved cryptography to protect classified information in accordance with the data owners requirements. | This passes with default Kasm configs according to the STIG check, however, the underlying system really should have FIPS mode is enabled. |
---
## Reverse Proxy Security & NGINX Hardening
## Reverse Proxy Security
Kasm WebApp roles servers come with an NGINX container (kasm_proxy) that sits in front of service containers and other
components within the system. This is a required component, however, organizations may wish to either harden the nginx
configuration or place the Kasm Workspaces application behind an Enterprise grade reverse proxy or load balancer.
### F5 BIG-IP
By deploying [F5 BIG-IP](https://www.f5.com) in front of Kasm Workspaces, organizations can leverage Advanced Web Application Firewall (AWAF)
capabilities, DDoS protection, and Zero Trust Access Controls to safeguard virtual workspace environments against modern
cyber threats. BIG-IP’s iRules and SSL/TLS Offloading provide enterprises with granular control over traffic flows while
reducing the processing burden on backend Kasm servers, resulting in both improved security posture and optimized resource
utilization.
**Seamless Authentication and Secure Access Management**
BIG-IP integrates seamlessly with enterprise authentication solutions such as SAML, OAuth, and LDAP, ensuring that access to
Kasm Workspaces aligns with corporate identity and access management (IAM) policies. With BIG-IP Access Policy Manager (APM),
organizations can enforce conditional access policies based on device posture, user location, and risk scores, preventing
unauthorized access and mitigating insider threats. By acting as a centralized authentication gateway, BIG-IP enables Multi-Factor
Authentication (MFA) enforcement without modifying Kasm’s internal authentication mechanisms, enhancing security without
disrupting user experience.
**Traffic Optimization and Performance Enhancements**
Enterprises leveraging Kasm Workspaces at scale need a high-performance, low-latency connection experience for remote users.
BIG-IP’s intelligent load balancing ensures traffic is distributed efficiently across multiple Kasm Workspace nodes, preventing
bottlenecks and ensuring high availability (HA). Features like TCP optimization, HTTP/2 support, and advanced caching minimize
\latency while improving the responsiveness of virtualized desktops and applications. With built-in Global Server Load Balancing (GSLB),
BIG-IP can also facilitate geo-distributed Kasm deployments, dynamically directing users to the nearest or healthiest data
center based on real-time availability.
**Enterprise-Grade Threat Intelligence and Compliance**
For organizations operating in regulated industries, compliance with security standards such as NIST, ISO 27001, HIPAA, and GDPR
is critical. F5 BIG-IP provides automated threat intelligence, real-time bot mitigation, and traffic anomaly detection, ensuring
that Kasm Workspaces are protected from credential stuffing, malware injection, and brute force attacks. Enterprises can configure
custom security policies to enforce compliance mandates while benefiting from detailed logging, analytics, and SIEM integration to
maintain full visibility into workspace access and usage.
#### Configuring F5 BIG-IP
The following video walks through the deployment of Kasm Workspaces behind a F5 BIG-IP using FAST Templates. This
[F5 Guide](https://techdocs.f5.com/kb/en-us/products/big-ip_ltm/manuals/product/ltm-implementations-12-1-0/17.html) steps through
configuring your BIG-IP to server as a reverse proxy.
### NGINX
The default configuration of the Kasm NGINX service is fairly well secured, however,
there are certain configurations that we cannot harden out of the box because the hardening may break
certain use cases and/or degrade compatibility. Organizations that choose to directly expose Kasm Worksapces without
placing it behind an Enterprise grade layer 7 security appliance may wish to harden the Kasm NGINX configuration. This
guide walks through some of the settings that you may run into with different hardening guides or benchmark frameworks
that exist. This is not an all encompassing list, as there is a lot of guidance out there from a number of different
sources. We focus on US DoD STIG benchmarks that are released by DISA.
#### X-Frame-Options Header
Including the [X-Frame-Options](https://developer.mozilla.org/en-US/docs/Web/HTTP/Headers/X-Frame-Options) header
will allow you to block other sites embedding your deployment of Kasm in an iframe within another site. This is
not configured by default in Kasm, because many clients wish to embed Kasm in their own website. The following
example will configure NGINX to add the X-Frame-Options header to same origin, which will require the parent page
to be on the same domain. See the link above for more details on other configurations, such specifying explicit
domain names to be allowed for the parent site. Add this line to each NGINX configuration file that
currently defines `add_header` directives in this directory and subdirectories within /opt/kasm/current/conf/nginx.
```
add_header X-Frame-Options SAMEORIGIN always;
```
After making modifications, restart the kasm_proxy container.
```
sudo docker restart kasm_proxy
```
#### Content Security Policy
Admins may desire to define a [Content Security Policy](https://developer.mozilla.org/en-US/docs/Web/HTTP/CSP). The
following header is commented out in `/opt/kasm/current/conf/nginx/services.d/website.conf` and in two locations in
`/opt/kasm/current/conf/nginx/services.d/upstream_proxy.conf`, remove the proceeding `#` before the add_header statement
in all three locations.
```
add_header 'Content-Security-Policy' "default-src 'unsafe-inline' 'unsafe-eval' 'self' blob: data:;";
```
You also need to uncomment the following line, there is only one in `/opt/kasm/current/conf/nginx/services.d/upstream_proxy.conf`.
```
proxy_hide_header 'Content-Security-Policy'
```
After uncommenting the total of 4 lines in the two nginx configuration files, restart the kasm_proxy container.
```bash
sudo docker restart kasm_proxy
```
#### Cross Origin Embedder Policy
Admins may desire to define a [Cross Origin Embedder Policy](https://developer.mozilla.org/en-US/docs/Web/HTTP/Headers/Cross-Origin-Embedder-Policy). The
following header is commented out in `/opt/kasm/current/conf/nginx/services.d/website.conf` and in two locations in
`/opt/kasm/current/conf/nginx/services.d/upstream_proxy.conf`, remove the proceeding `#` before the add_header statement
in all three locations.
```
add_header 'Cross-Origin-Embedder-Policy' 'require-corp';
```
You also need to uncomment the following line, there is only one in `/opt/kasm/current/conf/nginx/services.d/upstream_proxy.conf`.
```
proxy_hide_header 'Cross-Origin-Embedder-Policy';
```
After uncommenting the total of 4 lines in the two nginx configuration files, restart the kasm_proxy container.
```bash
sudo docker restart kasm_proxy
```
#### TLS Settings
Kasm ships with a default cipher suite and SSL settings that meet a high degree of security compliance out of the
box, however, organizations may wish to define more restrictive SSL cipher suites. The cipher suites are
defined on each WebApp server in the file `/opt/kasm/current/conf/nginx/orchestration.conf`.
Kasm's default SSL Configuration:
```
ssl_certificate /etc/ssl/certs/kasm_nginx.crt;
ssl_certificate_key /etc/ssl/private/kasm_nginx.key;
ssl_protocols TLSv1.2 TLSv1.3;
ssl_prefer_server_ciphers off;
ssl_ciphers "ECDHE-ECDSA-AES128-GCM-SHA256:ECDHE-RSA-AES128-GCM-SHA256:ECDHE-ECDSA-AES256-GCM-SHA384:ECDHE-RSA-AES256-GCM-SHA384:ECDHE-ECDSA-CHACHA20-POLY1305:ECDHE-RSA-CHACHA20-POLY1305:DHE-RSA-AES128-GCM-SHA256:DHE-RSA-AES256-GCM-SHA384";
ssl_stapling on;
ssl_stapling_verify on;
```
Here is an example of a more secure configuration. **Warning**: More restrictive cipher suites may break compatibility
with older clients.
```
ssl_protocols TLSv1.3 TLSv1.2;
ssl_prefer_server_ciphers on;
ssl_ecdh_curve secp521r1:secp384r1;
ssl_ciphers EECDH+AESGCM:EECDH+AES256;
ssl_dhparam /etc/ssl/certs/dhparam.pem;
ssl_session_cache shared:TLS:2m;
ssl_buffer_size 4k;
ssl_stapling on;
ssl_stapling_verify on;
```
In order to configure `ssl_dhparam` you will need to generate the dhparam.pem file referenced in the above configuration.
```
sudo openssl dhparam -out /opt/kasm/current/certs/dhparam.pem 4096
sudo chown kasm:kasm /opt/kasm/current/certs/dhparam.pem
```
Next, edit the `/opt/kasm/current/docker/docker-compose.yaml` file to map in the dhparam.pem file into the nginx
configuration. The following snippet shows only the relevant portions of the yaml configuration. Add the volume
mapping shown on the last line of the below snippet to the proxy definition in the yaml file.
```yaml
proxy:
container_name: kasm_proxy
image: "kasmweb/nginx:1.25.1"
volumes:
- /opt/kasm/current/certs/dhparam.pem:/etc/ssl/certs/dhparam.pem
```
Next remove the kasm_proxy container and start kasm services back up.
```
sudo docker rm -f kasm_proxy
sudo systemctl start kasm
```
#### SSL Certificates
Kasm uses self-signed certificates that are generated during the installation process. The cert and key are stored
on each host at `/opt/kasm/current/certs/kasm_nginx.crt` and `/opt/kasm/current/certs/kasm_nginx.key` respectively.
Clients may wish to replace these certs with properly signed public SSL certs or certs generated by their organizations
certificate authority. You can replace the cert and key mentioned above with files named the same as those above, in
the PEM format. Ensure both files are owned by the `kasm` user.
```
cd /opt/kasm/current/certs
mv kasm_nginx.crt kasm_nginx.crt.bak
mv kasm_nginx.key kasm_nginx.key.bak
cp /my/cert/location/mycert.pem ./kasm_nginx.crt
cp /my/key/location/mykey.pem ./kasm_nginx.key
chown kasm:kasm /opt/kasm/current/certs/kasm_nginx.crt
chown kasm:kasm /opt/kasm/current/certs/kasm_nginx.key
```
Next restart the services.
```
sudo systemctl restart kasm
```
If you already have certificates stored on any host prior to installation, there are two shortcut flags available which will reuse
your existing cert and key without the need to restart services later. Ensure you have both the cert and key in PEM format
as described above and supply two flags, `--ssl-public-cert` and `--ssl-private-key`, to the install command with the path to each file
(e.g., `install.sh --role app --ssl-public-cert /etc/ssl/certs/kasm_nginx.crt --ssl-private-key /etc/ssl/certs/kasm_nginx.key`).
#### Referrer Policy
You may wish to define a [referrer policy](https://developer.mozilla.org/en-US/docs/Web/HTTP/Headers/Referrer-Policy) which will
keep client browsers from passing the referrer header to external sites. Add this line to each NGINX configuration file that
currently defines `add_header` directives in /opt/kasm/current/conf/nginx/services.d/.
```
add_header Referrer-Policy 'same-origin';
```
#### Rate Limiting
Many organizations will require rate limiting. NGINX supports rate limiting of requests, see the
[NGINX documentation](https://www.nginx.com/blog/rate-limiting-nginx/) for full details. Kasm Workspaces does
not ship with rate limiting enabled, mostly due to the fact that some context of the deployment is needed to
configure it properly. First, you need to know if Kasm's WebApp servers are directly accessible via clients, or
if there is a load balancer of some other device between the clients and the web app servers. If there is a
device between the client and the Kasm WebApp servers, NGINX may not see the original source IP address of the
client, this must be considered when considering which rate limiting approach to take.
If clients access the Kasm WebApp servers directly, then you can create a simple rate limiting policy that imposes
a request rate limit per client based on the source IP address of the client. The following configuration would
be placed above the `server` directive within the file `/opt/kasm/current/conf/nginx/orchestration.conf`.
```
limit_req_zone $binary_remote_addr zone=mylimit:10m rate=100r/s;
server {
}
```
If there is a reverse proxy or load balancer in front of the Kasm WebApp servers, you may want to place the
rate limiting on the front facing load balancer instead. NGINX can, however, use the X-Forwarded-For header for
rate limiting, assuming the front facing reverse proxy/load-balancer injects this header on proxied requests.
```
limit_req_zone $http_x_forwarded_for zone=zone:10m rate=100r/s;
```
After implementing one of the two lines above, you must apply it to each proxied location. Within each `.conf` file
located at `/opt/kasm/current/conf/nginx/services.d/`, place the following line under each location stanza.
```
location / {
limit_req zone=mylimit burst=20 nodelay;
}
```
#### CORS Headers
Kasm implements proper CORS headers, however, we must use a dynamic origin value. This is considered a low severity
security finding. The following is the offending line, which can be found in multiple files under
`/opt/kasm/current/conf/nginx/services.d/`
```
add_header 'Access-Control-Allow-Origin' $http_origin always;
```
Replace the above line with the following, replace `example.com` with your domain name.
```
add_header 'Access-Control-Allow-Origin' 'https://example.com' always;
```
This may affect deployments that use sub domains for different [Zones](../infra-autoscale/deployment-zones.mdx). The
following more complex example may be used if you must clear this vulnerability and also support multiple
domain names with CORs. This uses a dynamic Access-Control-Allow-Origin header value, but whitelists it to a
list of regular expressions.
```
map $http_origin $allow_origin {
~^https?://(.*\.)?example.com(:\d+)?$ $http_origin;
~^https?://(.*\.)?example2.com(:\d+)?$ $http_origin;
default "";
}
location / {
add_header 'Access-Control-Allow-Origin' $allow_origin always;
}
---
## Administration Groups: Common Permissions | Developer Guide
## {/* to keep default heading blank */}
The following table lists each permission and its description.
| Name | Description |
|------|-------------|
| User | Default level of permissions for normal users. |
| Global Admin | Global Administrator with all permissions. |
| Users View | View users and user information. |
| Users Modify | Modify existing users. |
| Users Create | Create new users. |
| Users Delete | Delete exiting users. |
| Users Modify Admin | Modify users with Global Admin permissions. |
| Users Auth Session | Login and logout on behalf of another user. |
| Groups View | View groups, group members, and group settings. |
| Groups Modify | Modify group members and settings. |
| Groups Create | Create new groups. |
| Groups Delete | Delete existing groups. |
| Groups View IfMember | View groups you are a member of, excluding system groups. |
| Groups Modify IfMember | Modify groups you are a member of, excluding system groups. |
| Groups View System | View groups, group members and group settings of system defined groups. |
| Groups Modify System | Modify group members and settings of system groups. |
| Groups Delete System | Delete a system group. |
| Agents View | View agents and agent settings. |
| Agents Modify | Modify agent settings. |
| Agents Create | Create agents. |
| Agents Delete | Delete existing agents. |
| Staging View | View staging list and stage configuration settings. |
| Staging Modify | Modify existing staging settings. |
| Staging Create | Create new staging configurations. |
| Staging Delete | Delete existing staging configurations. |
| Casting View | View casting list and casting configuration settings. |
| Casting Modify | Modify existing casting settings. |
| Casting Create | Create new casting configurations. |
| Casting Delete | Delete existing casting configurations. |
| Sessions View | View all user sessions. |
| Sessions Modify | Perform modifications to a session of another user. |
| Sessions Delete | Delete the session of another user. |
| Session Recordings View | View user session recordings. |
| Images View | View images |
| Images Modify | Modify image configurations. |
| Images Create | Create new images. |
| Images Delete | Delete existing images. |
| Images Modify Resources | Modify image resource settings, such as CPU and Memory settings. |
| DevAPI View | View developer API list. |
| DevAPI Modify | Modify developer API configurations. |
| DevAPI Create | Create a new developer API key. |
| DevAPI Delete | Delete an existing developer API key. |
| Webfilters View | View webfilters |
| Webfilters Modify | Modify existing webfilters |
| Webfilters Create | Create a new webfilter. |
| Webfilters Delete | Delete an existing webfilter |
| Brandings View | View branding configurations. |
| Brandings Modify | Modify existing branding configurations. |
| Brandings Create | Create new branding configurations. |
| Brandings Delete | Delete existing branding configurations. |
| Settings View | View global settings. |
| Settings Modify | Modify global settings in all categories. |
| Settings Modify Auth | Modify global settings in the authentication category. |
| Settings Modify Auth Captcha | Modify global settings in the authentication captcha category. |
| Settings Modify Cast | Modify global settings in the casting category. |
| Settings Modify Images | Modify global settings in the images category. |
| Settings Modify License | Modify global settings in the license category. |
| Settings Modify Logging | Modify global settings in the logging category. |
| Settings Modify Manager | Modify global settings in the manager category. |
| Settings Modify Scale | Modify global settings in the scale category. |
| Settings Modify Subscription | Modify global settings in the subscription category. |
| Settings Modify Filter | Modify global settings in the filter category. |
| Settings Modify Storage | Modify global settings in the storage category. |
| Settings Modify Connections | Modify global settings in the connections category. |
| Settings Modify Theme | Modify global settings in the theme category. |
| Auth View | View LDAP/OIDC/SAML configurations. |
| Auth Modify | Modify LDAP/OIDC/SAML configurations. |
| Auth Create | Create LDAP/OIDC/SAML configurations. |
| Auth Delete | Delete LDAP/OIDC/SAML configurations. |
| Licenses View | View licenses. |
| Licenses Create | Add new licenses. |
| Licenses Delete | Delete licenses. |
| System View | View system information. |
| System Export Schema | Export system schema. |
| System Import Data | Import system data. |
| System Export Data | Export system data. |
| Reports View | View system reports and logging. **Warning**: Providing access to logs can provide a lot of potentially sensitive information. |
| Managers View | View the managers. |
| Managers Modify | Modify existing managers. |
| Managers Create | Create a new manager. |
| Managers Delete | Delete existing managers. |
| Zones View | View Zones and Zone settings. |
| Zones Modify | Modify Zone settings. |
| Zones Create | Create new Zones. |
| Zones Delete | Delete existing Zones. |
| Companies View | View companies. |
| Companies Modify | Modify existing company. |
| Companies Create | Create a new company. |
| Companies Delete | Delete an existing company. |
| Connection Proxy View | View connection proxies. |
| Connection Proxy Modify | Modify connection proxies. |
| Connection Proxy Create | Create a connection proxy. |
| Connection Proxy Delete | Delete an existing connection proxy. |
| Physical Tokens View | View physical 2FA tokens. |
| Physical Tokens Modify | Assign/Unassign physical 2FA tokens. |
| Physical Tokens Create | Import or create physical 2FA tokens. |
| Physical Tokens Delete | Delete a physical 2FA token. |
| Servers View | View servers. |
| Servers Modify | Modify existing servers. |
| Servers Create | Create new servers. |
| Servers Delete | Delete servers. |
| Server Pools View | View server pools. |
| Server Pools Modify | Modify server pools. |
| Server Pools Create | Create a new server pool. |
| Server Pools Delete | Delete a server pool. |
| Autoscale View | View AutoScale configurations. |
| Autoscale Modify | Modify an existing AutoScale configuration. |
| Autoscale Create | Create a new AutoScale configuration. |
| Autoscale Delete | Delete AutoScale configurations. |
| VM Provider View | View VM Provider configurations. |
| VM Provider Modify | Modify VM Provider configurations. |
| VM Provider Create | Create new VM Provider configurations. |
| VM Provider Delete | Delete VM Provider configurations. |
| Autoscale Schedule View | View an AutoScale schedule. |
| Autoscale Schedule Modify | Modify an AutoScale schedule. |
| Autoscale Schedule Create | Create an AutoScale schedule. |
| Autoscale Schedule Delete | Delete an AutoScale schedule. |
| DNS Providers View | View DNS provider configurations. |
| DNS Providers Modify | Modify DNS provider configurations. |
| DNS Providers Create | Create new DNS Provider configurations. |
| DNS Providers Delete | Delete DNS Provider configurations. |
| Registries View | View Workspace Registries. |
| Registries Modify | Modify existing Workspace Registries. |
| Registries Create | Add new Workspace Registries |
| Registries Delete | Delete a Workspace Registry |
| Storage Providers View | View Storage Providers. |
| Storage Providers Modify | Modify existing Storage Providers. |
| Storage Providers Create | Create new Storage Providers. |
| Storage Providers Delete | Delete an existing Storage Provider. |
| Egress Providers View | View Egress Providers. |
| Egress Providers Modify | Modify existing Egress Providers. |
| Egress Providers Create | Create new Egress Providers. |
| Egress Providers Delete | Delete an existing Egress Provider. |
| Egress Gateways View | View Egress Gateways. |
| Egress Gateways Modify | Modify existing Egress Gateways. |
| Egress Gateways Create | Create new Egress Gateways. |
| Egress Gateways Delete | Delete an existing Egress Gateway. |
| Egress Credentials View | View Egress Credentials. |
| Egress Credentials Modify | Modify existing Egress Credentials. |
| Egress Credentials Create | Create new Egress Credentials. |
| Egress Credentials Delete | Delete an existing Egress Credential. |
| Banners View | View banners. |
| Banners Modify | Modify existing banners. |
| Banners Create | Create new banners. |
| Banners Delete | Delete an existing banner. |
| AD User Management View | View AD User Management Configurations. |
| AD User Management Modify | Modify existing AD User Management Configurations. |
| AD User Management Create | Create new AD User Management Configurations. |
| AD User Management Delete | Delete an existing AD User Management Configuration. |
#### Permission changes
Kasm embeds a user's permissions in their session token, which is generated on login. The
**Session Lifetime** global setting controls the token lifetime. The UI requests a new session
token every 5 minutes. To apply new permissions fastest, have the user log out and log back in.
Otherwise, the change applies within 5 minutes.
#### Permission dependencies
Most permissions stand alone, but some permissions depend on others. Generally, a `Modify`,
`Create`, or `Delete` permission needs the corresponding `View` permission. The following
additional dependencies require you to grant multiple permissions to achieve the desired effect.
- `Licenses View` requires `System View`
- `Permissions View` requires `Groups View`
- `Registries View` requires `Images View`, `System View`, and `Agents View`
- `Autoscale View` requires `Server Pools View`
- `Autoscale Schedule View` requires `Server Pools View`
- `DNS Providers View` requires `Server Pools View`
- `VM Providers View` requires `Server Pools View` and `Autoscale View`
- `Users Delete` requires `Sessions Delete` if the target user has running sessions and `Users Modify`
- `Users Delete` requires `Users Modify Admin` to delete a user that has the `Global Admin` permission
- `Egress Gateways Create`, `Egress Gateways Modify`, `Egress Gateways Delete`, `Egress Credentials Create`, `Egress Credentials Modify` and `Egress Credentials Delete` require `Egress Providers Modify`.
- `Servers View` and `Server Templates View` requires `Server Pools View` and `Zones View`
In many cases multiple permissions are not required. However, Kasm hides certain UI elements
when the user lacks the permissions to view them. For example, a user may have `View Images`
permissions but not `View Servers` permissions. When that user views an individual Workspace
Image that targets a Server, the drop-down to view or edit the targeted server stays hidden.
#### Special permissions
Groups offer more permissions beyond the basic View, Create, Modify, and Delete actions. The
`Groups View IfMember` and `Groups Modify IfMember` permissions allow a user to view or modify a
group when they are a member of that group. This access does not extend to built-in system groups
(All Users and Administrator). To edit or view system groups, the user also needs the Groups
View/Modify System permission.
An additional permission protects the modification of users with the `Global Admin` permission. To
modify a `Global Admin`, the requesting user must be a `Global Admin` or hold the `User Modify
Admin` permission.
Two permissions allow modifications to Workspace Images: `Images Modify` and `Images Modify
Resources`. The `Images Modify` permission allows modification of all Image settings except those
that change the physical or virtual compute resources. The following settings require the `Images
Modify Resources` permission to edit:
- GPU Count
- Cores
- Memory
- CPU Allocation Method
- Uncompressed Image Size
- Docker Registry
- Docker Registry Username
- Docker Registry Password
- Hash
- Volume Mappings
- Docker Run Config Override
- Docker Exec Config
---
## Group Permissions: Configuration and Management | Docusaurus
## {/* to keep default heading blank */}
### Group permissions
Groups have an optional list of permissions attached to them. When a user logs in, Kasm aggregates all permissions across the groups the user belongs to, which determine the actions the user is authorized for. There are two built-in groups, `Administrators` and `All Users`. The Administrators group has the Global Admin permission, and the built-in `All Users` group has the User permission. All users are members of the `All Users` group automatically.
To configure group permissions:
1. Log in to the UI as an administrator.
2. Select **Groups**.
3. Next to the desired group, select **Edit** from the actions menu.
4. Select the **Permissions** tab to view and edit the permissions applied to the group.
The following table lists each permission and its description.
| Name | Description |
|------|-------------|
| User | Default level of permissions for normal users. |
| Global Admin | Global Administrator with all permissions. |
| Users View | View users and user information. |
| Users Modify | Modify existing users. |
| Users Create | Create new users. |
| Users Delete | Delete exiting users. |
| Users Modify Admin | Modify users with Global Admin permissions. |
| Users Auth Session | Login and logout on behalf of another user. |
| Groups View | View groups, group members, and group settings. |
| Groups Modify | Modify group members and settings. |
| Groups Create | Create new groups. |
| Groups Delete | Delete existing groups. |
| Groups View IfMember | View groups you are a member of, excluding system groups. |
| Groups Modify IfMember | Modify groups you are a member of, excluding system groups. |
| Groups View System | View groups, group members and group settings of system defined groups. |
| Groups Modify System | Modify group members and settings of system groups. |
| Groups Delete System | Delete a system group. |
| Agents View | View agents and agent settings. |
| Agents Modify | Modify agent settings. |
| Agents Create | Create agents. |
| Agents Delete | Delete existing agents. |
| Staging View | View staging list and stage configuration settings. |
| Staging Modify | Modify existing staging settings. |
| Staging Create | Create new staging configurations. |
| Staging Delete | Delete existing staging configurations. |
| Casting View | View casting list and casting configuration settings. |
| Casting Modify | Modify existing casting settings. |
| Casting Create | Create new casting configurations. |
| Casting Delete | Delete existing casting configurations. |
| Sessions View | View all user sessions. |
| Sessions Modify | Perform modifications to a session of another user. |
| Sessions Delete | Delete the session of another user. |
| Session Recordings View | View user session recordings. |
| Images View | View images |
| Images Modify | Modify image configurations. |
| Images Create | Create new images. |
| Images Delete | Delete existing images. |
| Images Modify Resources | Modify image resource settings, such as CPU and Memory settings. |
| DevAPI View | View developer API list. |
| DevAPI Modify | Modify developer API configurations. |
| DevAPI Create | Create a new developer API key. |
| DevAPI Delete | Delete an existing developer API key. |
| Webfilters View | View webfilters |
| Webfilters Modify | Modify existing webfilters |
| Webfilters Create | Create a new webfilter. |
| Webfilters Delete | Delete an existing webfilter |
| Brandings View | View branding configurations. |
| Brandings Modify | Modify existing branding configurations. |
| Brandings Create | Create new branding configurations. |
| Brandings Delete | Delete existing branding configurations. |
| Settings View | View global settings. |
| Settings Modify | Modify global settings in all categories. |
| Settings Modify Auth | Modify global settings in the authentication category. |
| Settings Modify Auth Captcha | Modify global settings in the authentication captcha category. |
| Settings Modify Cast | Modify global settings in the casting category. |
| Settings Modify Images | Modify global settings in the images category. |
| Settings Modify License | Modify global settings in the license category. |
| Settings Modify Logging | Modify global settings in the logging category. |
| Settings Modify Manager | Modify global settings in the manager category. |
| Settings Modify Scale | Modify global settings in the scale category. |
| Settings Modify Subscription | Modify global settings in the subscription category. |
| Settings Modify Filter | Modify global settings in the filter category. |
| Settings Modify Storage | Modify global settings in the storage category. |
| Settings Modify Connections | Modify global settings in the connections category. |
| Settings Modify Theme | Modify global settings in the theme category. |
| Auth View | View LDAP/OIDC/SAML configurations. |
| Auth Modify | Modify LDAP/OIDC/SAML configurations. |
| Auth Create | Create LDAP/OIDC/SAML configurations. |
| Auth Delete | Delete LDAP/OIDC/SAML configurations. |
| Licenses View | View licenses. |
| Licenses Create | Add new licenses. |
| Licenses Delete | Delete licenses. |
| System View | View system information. |
| System Export Schema | Export system schema. |
| System Import Data | Import system data. |
| System Export Data | Export system data. |
| Reports View | View system reports and logging. **Warning**: Providing access to logs can provide a lot of potentially sensitive information. |
| Managers View | View the managers. |
| Managers Modify | Modify existing managers. |
| Managers Create | Create a new manager. |
| Managers Delete | Delete existing managers. |
| Zones View | View Zones and Zone settings. |
| Zones Modify | Modify Zone settings. |
| Zones Create | Create new Zones. |
| Zones Delete | Delete existing Zones. |
| Companies View | View companies. |
| Companies Modify | Modify existing company. |
| Companies Create | Create a new company. |
| Companies Delete | Delete an existing company. |
| Connection Proxy View | View connection proxies. |
| Connection Proxy Modify | Modify connection proxies. |
| Connection Proxy Create | Create a connection proxy. |
| Connection Proxy Delete | Delete an existing connection proxy. |
| Physical Tokens View | View physical 2FA tokens. |
| Physical Tokens Modify | Assign/Unassign physical 2FA tokens. |
| Physical Tokens Create | Import or create physical 2FA tokens. |
| Physical Tokens Delete | Delete a physical 2FA token. |
| Servers View | View servers. |
| Servers Modify | Modify existing servers. |
| Servers Create | Create new servers. |
| Servers Delete | Delete servers. |
| Server Pools View | View server pools. |
| Server Pools Modify | Modify server pools. |
| Server Pools Create | Create a new server pool. |
| Server Pools Delete | Delete a server pool. |
| Autoscale View | View AutoScale configurations. |
| Autoscale Modify | Modify an existing AutoScale configuration. |
| Autoscale Create | Create a new AutoScale configuration. |
| Autoscale Delete | Delete AutoScale configurations. |
| VM Provider View | View VM Provider configurations. |
| VM Provider Modify | Modify VM Provider configurations. |
| VM Provider Create | Create new VM Provider configurations. |
| VM Provider Delete | Delete VM Provider configurations. |
| Autoscale Schedule View | View an AutoScale schedule. |
| Autoscale Schedule Modify | Modify an AutoScale schedule. |
| Autoscale Schedule Create | Create an AutoScale schedule. |
| Autoscale Schedule Delete | Delete an AutoScale schedule. |
| DNS Providers View | View DNS provider configurations. |
| DNS Providers Modify | Modify DNS provider configurations. |
| DNS Providers Create | Create new DNS Provider configurations. |
| DNS Providers Delete | Delete DNS Provider configurations. |
| Registries View | View Workspace Registries. |
| Registries Modify | Modify existing Workspace Registries. |
| Registries Create | Add new Workspace Registries |
| Registries Delete | Delete a Workspace Registry |
| Storage Providers View | View Storage Providers. |
| Storage Providers Modify | Modify existing Storage Providers. |
| Storage Providers Create | Create new Storage Providers. |
| Storage Providers Delete | Delete an existing Storage Provider. |
| Egress Providers View | View Egress Providers. |
| Egress Providers Modify | Modify existing Egress Providers. |
| Egress Providers Create | Create new Egress Providers. |
| Egress Providers Delete | Delete an existing Egress Provider. |
| Egress Gateways View | View Egress Gateways. |
| Egress Gateways Modify | Modify existing Egress Gateways. |
| Egress Gateways Create | Create new Egress Gateways. |
| Egress Gateways Delete | Delete an existing Egress Gateway. |
| Egress Credentials View | View Egress Credentials. |
| Egress Credentials Modify | Modify existing Egress Credentials. |
| Egress Credentials Create | Create new Egress Credentials. |
| Egress Credentials Delete | Delete an existing Egress Credential. |
| Banners View | View banners. |
| Banners Modify | Modify existing banners. |
| Banners Create | Create new banners. |
| Banners Delete | Delete an existing banner. |
| AD User Management View | View AD User Management Configurations. |
| AD User Management Modify | Modify existing AD User Management Configurations. |
| AD User Management Create | Create new AD User Management Configurations. |
| AD User Management Delete | Delete an existing AD User Management Configuration. |
#### Permission changes
Kasm embeds a user's permissions in their session token, which is generated on login. The
**Session Lifetime** global setting controls the token lifetime. The UI requests a new session
token every 5 minutes. To apply new permissions fastest, have the user log out and log back in.
Otherwise, the change applies within 5 minutes.
#### Permission dependencies
Most permissions stand alone, but some permissions depend on others. Generally, a `Modify`,
`Create`, or `Delete` permission needs the corresponding `View` permission. The following
additional dependencies require you to grant multiple permissions to achieve the desired effect.
- `Licenses View` requires `System View`
- `Permissions View` requires `Groups View`
- `Registries View` requires `Images View`, `System View`, and `Agents View`
- `Autoscale View` requires `Server Pools View`
- `Autoscale Schedule View` requires `Server Pools View`
- `DNS Providers View` requires `Server Pools View`
- `VM Providers View` requires `Server Pools View` and `Autoscale View`
- `Users Delete` requires `Sessions Delete` if the target user has running sessions and `Users Modify`
- `Users Delete` requires `Users Modify Admin` to delete a user that has the `Global Admin` permission
- `Egress Gateways Create`, `Egress Gateways Modify`, `Egress Gateways Delete`, `Egress Credentials Create`, `Egress Credentials Modify` and `Egress Credentials Delete` require `Egress Providers Modify`.
- `Servers View` and `Server Templates View` requires `Server Pools View` and `Zones View`
In many cases multiple permissions are not required. However, Kasm hides certain UI elements
when the user lacks the permissions to view them. For example, a user may have `View Images`
permissions but not `View Servers` permissions. When that user views an individual Workspace
Image that targets a Server, the drop-down to view or edit the targeted server stays hidden.
#### Special permissions
Groups offer more permissions beyond the basic View, Create, Modify, and Delete actions. The
`Groups View IfMember` and `Groups Modify IfMember` permissions allow a user to view or modify a
group when they are a member of that group. This access does not extend to built-in system groups
(All Users and Administrator). To edit or view system groups, the user also needs the Groups
View/Modify System permission.
An additional permission protects the modification of users with the `Global Admin` permission. To
modify a `Global Admin`, the requesting user must be a `Global Admin` or hold the `User Modify
Admin` permission.
Two permissions allow modifications to Workspace Images: `Images Modify` and `Images Modify
Resources`. The `Images Modify` permission allows modification of all Image settings except those
that change the physical or virtual compute resources. The following settings require the `Images
Modify Resources` permission to edit:
- GPU Count
- Cores
- Memory
- CPU Allocation Method
- Uncompressed Image Size
- Docker Registry
- Docker Registry Username
- Docker Registry Password
- Hash
- Volume Mappings
- Docker Run Config Override
- Docker Exec Config
---
## Group Properties in Administration Groups
## {/* to keep default heading blank */}
### Group properties
| Property | Description |
| --- | --- |
| Name | The name of the group. |
| Description | The description of the group. |
| Priority | Sets the priority of the settings over other groups. |
| Is System | A system-level group that cannot be deleted. |
---
## Kasm Workspaces: Understanding and Configuring Group Settings
## {/* to keep default heading blank */}
### Group settings
To change the settings for a specific group, select the groups tab, click the edit icon on the desired group, and click **Add Settings** in the Group Settings card. Delete and edit icons appear to the right of each setting. When a user belongs to multiple groups, the setting on the group with the lowest priority takes effect. For settings such as `volume_mapping`, all settings are combined across the groups a user belongs to.
The following video gives an overview of groups and group settings.
To configure group settings:
- Log into the UI as an administrator.
- Select **Groups**
- Next to the desired group select **View** from the actions menu.
- Scroll down to the Group Settings panel. Update settings as desired.
| Variable Name | Description |
| :----------------------------- | :------------------------------------------------------------------------------------------------------------------------------------------------------------------------------------------------------------------------------------------------------------------------------------------------------------------ |
| allow_2fa_self_enrollment | Allow users to self enroll two factor devices in the profile settings page when enabled. |
| allow_kasm_audio | Allow audio streaming for a Kasm. |
| allow_kasm_clipboard_down | Allows users to paste text from the Kasm to their local computer. |
| allow_kasm_clipboard_seamless | Allows users to copy and paste text without using Kasm control panel. This feature is only available on Chrome and Chromium-based client browsers |
| allow_kasm_clipboard_up | Allow users to paste from their local computer to the Kasm. |
| allow_kasm_delete | If enabled, users are allowed to delete their running sessions. |
| allow_kasm_downloads | Allow users to download files from a Kasm. On `RDP local client` workspaces this has no effect see **allow_kasm_rdp_client_file_transfer_clipboard**. |
| allow_kasm_force_delete | If enabled, users are allowed to force-delete sessions that are stuck in the deleting state |
| allow_kasm_gamepad | Allow users to pass local gamepads into the Kasm session. See Gamepad Passthrough for more details. |
| allow_kasm_microphone | Allow microphone passthrough to a Kasm. When enabled, users can pass their local microphone through to the Kasm session. On `RDP local client` workspaces this only works with desktop editions of Windows. |
| allow_kasm_rdp_client_file_transfer_clipboard | This setting only applies to RDP client Kasm sessions. In RDP file transfers are part of the clipboard and independent directional control of file transfers is not possible. This setting will enable file transfer in the directions that text clipboard has been enabled via **allow_kasm_clipboard_down** and **allow_kasm_clipboard_up**. |
| allow_kasm_rdp_map_local_drives | Allow sessions using the RDP Gateway to map client local drives into the RDP target. This setting is an all or nothing setting. When enabled it will map all client drives into the rdp session. |
| allow_kasm_smart_card_passthrough | Allow sessions to pass smart cards through for authentication and signing. Supports RDP sessions via RDP Gateway or web native client, and container workspaces with the Kasm Native Smartcard Client. See Smart Card Passthrough for details. |
| allow_kasm_rdp_webauthn_passthrough | Allow sessions using the RDP Gateway to pass webauthn requests from the RDP target to the client. This only works for Windows clients running the builtin mstsc.exe RDP client. |
| allow_kasm_webcam | Allow webcam passthrough to a Kasm. When enabled, users can pass their local webcam through to the Kasm session. On `RDP local client` workspaces this only works with desktop editions of Windows. |
| allow_kasm_printing | Allow printing of documents using local printers |
| allow_kasm_pause | If enabled, users are allowed to pause their running sessions. |
| allow_kasm_sharing | Allow the user to share access to their session with other users. See Session Sharing for more details. |
| allow_kasm_stop | If enabled, users are allowed to stop their running sessions. |
| allow_kasm_uploads | Allow users to upload files to a Kasm. On `RDP local client` workspaces this has no effect see **allow_kasm_rdp_client_file_transfer_clipboard**. |
| allow_persistent_profile | Allow the use of persistent profiles if configured on the Workspace. See Persistent Profiles for details |
| allow_point_of_presence | Allow the user to use point of presence features for certain Workspaces. |
| allow_totp_2fa | Allow for TOTP tokens (e.g.: Google Authenticator) to be used as a two factor authentication method for the group. |
| allow_user_storage_mapping | When enabled the user is allowed to configure their own Storage Mappings via their profile. When disabled, new user configurations will not be allowed, nor will using any previously configured mappings be allowed when new sessions are created. |
| allow_webauthn_2fa | Allow for WebAuthn devices (e.g. YubiKeys) to be used as a two factor authentication method for the group. |
| allow_zone_selection | Allow the user to specify the deployment zone when creating a session. A dropdown will appear on the user dashboard with the available Zones. **Auto** represents the default behavior which is to provision in current Zone. If a Zone is specified, the request will not search alternate zones if no resources are available in the requested Zone. |
| auto_add_local_user | When enabled, local users will automatically be added to this group when created and upon each authentication. |
| auto_login_to_kasm | Sends users directly to kasm using default workspace after login |
| control_panel. advanced_settings. show_game_mode | Whether the game mode option is present in the advanced menu on the Kasm Session control panel. |
| control_panel. advanced_settings. show_ime_input_mode | Whether the ime input mode option is present in the advanced menu on the Kasm Session control panel. |
| control_panel. advanced_settings. show_keyboard_controls | Whether the keyboard controls option is present in the advanced menu on the Kasm Session control panel. |
| control_panel. advanced_settings. show_pointer_lock | Whether the pointer lock option is present in the advanced menu on the Kasm Session control panel. |
| control_panel. advanced_settings. show_prefer_local_cursor | Whether the prefer local cursor option is present in the advanced menu on the Kasm Session control panel. |
| control_panel.show_fullscreen | Whether the fullscreen option is present on the Kasm Session control panel. |
| control_panel. show_delete_session | Whether the delete session option is present on the Kasm Session control panel. |
| control_panel. show_display_manager | Whether the display manager is present on the Kasm Session control panel. The display manager allows the user to add and remove additional displays. |
| control_panel.show_logout | Whether the logout option is present on the Kasm Session control panel. |
| control_panel. show_return_to_workspaces | Whether the return to workspaces option is present on the Kasm Session control panel. |
| control_panel. show_streaming_quality | Whether the show streaming quality workspaces option is present on the Kasm Session control panel. |
| control_panel.pwa_install_option | Whether the user must be presented with the option to install per-workspace PWAs. |
| dashboard_redirect | If configured, standard users will be redirected to the defined external website instead of being shown the main dashboard screen. |
| default_image | The default Workspace used when the **/go** url is called. This is also used for the auto_login_to_kasm setting. The system will create a Workspace if one does not exist. If the user already has a Workspace, the session is resumed |
| default_ui_language | The default UI language to set for the group. This is applied at next user login and is also overridden if the user sets the language in their profile. |
| delete_anon_user_on_expiry_with_active_session | If enabled, anonymous users are deleted immediately upon expiration even if they have an active session. If disabled, deletion is deferred until all active sessions have ended. |
| display_ui_errors | If enabled, detailed information will be displayed on the client browser in the event of an error. |
| enable_container_logging | If enabled, each workspace container will log to the database. |
| enable_ui_server_logging | If enabled, log messages will be sent from client browser to the Kasm Workspaces server. |
| expose_user_environment_vars | Expose KASM_USER and KASM_USER_ID environment variables inside the Kasm. |
| idle_disconnect | Disconnect the Kasm connection if idle for this long. Time specified in minutes. |
| inject_ssh_keys | When enabled the system will inject the user's SSH public and private keys into new sessions automatically. Users can update their keys via the Profile. |
| kasm_audio_default_on | Default to audio enabled on Kasm start |
| kasm_ime_mode_default_on | Default to IME enabled on Kasm start |
| kasmvnc_mode_preference | Set the KasmVNC streaming modes available and the preferred order. See Kasm Performance for more details. |
| keepalive_expiration | The number of seconds a Kasm will stay alive unless a keeplive request is sent from the client. |
| keepalive_expiration_action | The action the system should take when a session expires according to the keepalive_expiration. Valid options are `delete`, `stop`, and `pause`. `stop` and `pause` actions are only valid for container based Workspaces. All other Workspaces will utilize `delete` regardless of what is defined. |
| keepalive_interval | The number of seconds in between keepalive requests from the client when the user is actively in a session. |
| lock_sharing_video_mode | Locks video quality to static resolution of 720p when sharing is enabled. Recommended for best performance. |
| max_kasms_per_user | The maximum number of simultaneous sessions a users is allowed to provision. |
| max_user_storage_mappings | The maximum number of Storage Mappings a user is allowed to have registered to their account. |
| read_only_user_storage_mappings | When enabled, any storage mappings configured on the user account will be forced to read-only. |
| require_2fa | Enables two factor authentication for group. Users will be prompted to set Key on next log on. |
| run_config | Specify arbitrary docker run params. The settings for run_config on a group will override the run_config settings on an image. See Docker Run Config for more details |
| session_time_limit | The amount of time (in seconds) a session will automatically expire. A countdown timer will be displayed to the user. |
| staged_session_language_and _timezone_preference_override | When launching a workspace Kasm will by default try to match the user language and timezone to a staged session. If a staged session does not exist that has the matching language and timezone then Kasm will create a new session with the specified language and timezone. If the override is set to true then Kasm will use a staged session for the selected workspace even if the language and timezone do not match. This overrides the user setting in the user profile. |
| usage_limit | Limits the total number of hours a user or group can have running sessions. See the `usage_limit`_ documentation below for more details. **Type** - **Per User** - Each user of the group has their own limit. - **Per Group** - All members share the usage limit. **Interval** - **Daily** , **Weekly** , **Monthly** , **Total**. **Hours** - The number of hours allowed during each interval. |
| volume_mapping | Map a local server directory to Kasm. Details available in the Volume Mapping Guide |
| web_filter_policy | Enabled web filtering and sets the Web Filter Policy to be used. Policies can also be set or force disabled on Workspaces. Policies assigned to Workspaces take priority over those defined via Group Settings. |
:::caution
The `allow_kasm_clipboard_up` setting (Control Panel clipboard) is subject to browser-side limitations. Very large clipboard payloads, typically above ~15 MiB, can overwhelm the browser WebSocket send buffer and delay client heartbeats, which results in a temporary session disconnect and automatic reconnection. This does not affect Seamless Clipboard behavior. For best reliability, enable `allow_kasm_clipboard_seamless` for workflows that paste very large text payloads.
:::
#### Session time limits
Several settings in the table above control Kasm session lifetime. The following sections describe them and their relationship to each other.
##### keepalive_expiration
This can also be described as the session timeout. This value determines how long Kasm will wait before destroying, stopping or pausing a session if no keepalive is received from the client. Keepalives are sent whenever a user is connected to a Kasm session even if the user is not actively using the Kasm Session.
This value should be at least twice the keepalive_interval. This setting is 1 hour by default in the "All Users Group". The action taken is determined by the
`keepalive_expiration_action` Group Setting.
##### keepalive_expiration_action
Administrators can decide what happens to sessions once they expire. Valid options are:
- `delete` - The session is destroyed.
- `pause` - The session is paused, preserving the disk, process and memory state. Paused sessions will still consume resources in physical memory and/or swap.
Sessions resumed from a paused state will still have the previous programs launched and active.
This action is valid for container-based sessions only. All other types will utilize the `delete` action.
- `stop` - The session is stopped, preserving the disk state. Sessions resumed from a stopped state will have the previous files intact, but previously running programs will need to be restarted.
This action is valid for container-based sessions only. All other types will utilize the `delete` action.
:::note
When sessions are stopped or paused, the CPU and RAM resources on the agent become available for other requests to create new sessions. This can prevent a user from resuming a paused or stopped session when the agent's resources are consumed by other running sessions. With cloud AutoScale, the system does not destroy agents that have stopped or paused sessions, and it allows other sessions to be provisioned on the agent. When this is undesirable, do not give users the `allow_kasm_pause` and `allow_kasm_stop` permissions.
:::
##### keepalive_interval
The keepalive_interval is how often the client will send a keepalive request to Kasm when the user is actively using a session. This setting is 300 seconds by default for the "All Users Group".
##### idle_disconnect
This setting is the number of minutes Kasm will wait when the user is idle before taking an action. This action will depend on the user context.
If the user is in a Kasm session when the idle timeout expires the user is disconnected from the Kasm session and sent back to the dashboard. Any Kasm sessions that the user was connected to will be disconnected and those sessions will be subject to the keepalive_expiration.
If the user is at the dashboard when the idle timeout expires the user is logged out of Kasm.
This setting is set to 20 minutes by default in the "All Users Group". This setting must be higher than the keepalive_interval setting to function properly.
##### usage_limit
The usage_limit setting is a highly flexible option allowing the administrator to configure a maximum usage number of hours either for each user in the group or for the entire group collectively to use over a set time period. This setting is a decimal value.
When using the usage_limit setting all time that a Kasm session is running is counted against the total, this includes when the user is not actively connected to the session but the session is still running. This setting is for use cases where user workspace access should be metered. This setting is not enabled by default.
:::note
Accounting for paused or stopped sessions is unchanged. Users are charged for the full duration of the session, even when the session is paused or stopped.
:::
The user can see how much time they have used/have remaining on the user dashboard:
Clicking on this icon will bring up a more detailed display.
##### session_time_limit
The session_time_limit is a set amount of time that a workspace will be allowed to run once that workspace is created. This time limit is irrespective of whether the user is actively using the session or if the session is disconnected and running in the background. When session_time_limit is configured, the keepalive_expiration setting is not used. This setting is not enabled by default
---
## Managing User Access with Groups
## Groups
Groups are used to define roles for specific sets of users in Kasm Workspaces. By default there are two groups created
by the system, the Administrators group and the All Users group, the All Users group is the default group for every user
where statewide settings can be set.
Groups can be used to specify Kasm images and settings for different sets of users. For example, you may have a custom image for
developers with pre-installed developer tools. You can tie that image to a group. You can define settings for that group, such
as enabling bi-directional clipboard.
### Create Group
Steps to create individual groups for sections of users.
- Select **Access Management > Groups** tab from navigation menu
- Select **Add Group** from the top right of the table
- Specify Group properties listed below
### Group properties
| Property | Description |
| --- | --- |
| Name | The name of the group. |
| Description | The description of the group. |
| Priority | Sets the priority of the settings over other groups. |
| Is System | A system-level group that cannot be deleted. |
Note that group name and priority number must be unique. For help identifying what group priority numbers are available, use the Filters tool in the Group view to sort by **Priority**.
There is a **Users** tab in the edit group page that allows for the selection of its users.
### Group settings
To change the settings for a specific group, select the groups tab, click the edit icon on the desired group, and click **Add Settings** in the Group Settings card. Delete and edit icons appear to the right of each setting. When a user belongs to multiple groups, the setting on the group with the lowest priority takes effect. For settings such as `volume_mapping`, all settings are combined across the groups a user belongs to.
The following video gives an overview of groups and group settings.
To configure group settings:
- Log into the UI as an administrator.
- Select **Groups**
- Next to the desired group select **View** from the actions menu.
- Scroll down to the Group Settings panel. Update settings as desired.
| Variable Name | Description |
| :----------------------------- | :------------------------------------------------------------------------------------------------------------------------------------------------------------------------------------------------------------------------------------------------------------------------------------------------------------------ |
| allow_2fa_self_enrollment | Allow users to self enroll two factor devices in the profile settings page when enabled. |
| allow_kasm_audio | Allow audio streaming for a Kasm. |
| allow_kasm_clipboard_down | Allows users to paste text from the Kasm to their local computer. |
| allow_kasm_clipboard_seamless | Allows users to copy and paste text without using Kasm control panel. This feature is only available on Chrome and Chromium-based client browsers |
| allow_kasm_clipboard_up | Allow users to paste from their local computer to the Kasm. |
| allow_kasm_delete | If enabled, users are allowed to delete their running sessions. |
| allow_kasm_downloads | Allow users to download files from a Kasm. On `RDP local client` workspaces this has no effect see **allow_kasm_rdp_client_file_transfer_clipboard**. |
| allow_kasm_force_delete | If enabled, users are allowed to force-delete sessions that are stuck in the deleting state |
| allow_kasm_gamepad | Allow users to pass local gamepads into the Kasm session. See Gamepad Passthrough for more details. |
| allow_kasm_microphone | Allow microphone passthrough to a Kasm. When enabled, users can pass their local microphone through to the Kasm session. On `RDP local client` workspaces this only works with desktop editions of Windows. |
| allow_kasm_rdp_client_file_transfer_clipboard | This setting only applies to RDP client Kasm sessions. In RDP file transfers are part of the clipboard and independent directional control of file transfers is not possible. This setting will enable file transfer in the directions that text clipboard has been enabled via **allow_kasm_clipboard_down** and **allow_kasm_clipboard_up**. |
| allow_kasm_rdp_map_local_drives | Allow sessions using the RDP Gateway to map client local drives into the RDP target. This setting is an all or nothing setting. When enabled it will map all client drives into the rdp session. |
| allow_kasm_smart_card_passthrough | Allow sessions to pass smart cards through for authentication and signing. Supports RDP sessions via RDP Gateway or web native client, and container workspaces with the Kasm Native Smartcard Client. See Smart Card Passthrough for details. |
| allow_kasm_rdp_webauthn_passthrough | Allow sessions using the RDP Gateway to pass webauthn requests from the RDP target to the client. This only works for Windows clients running the builtin mstsc.exe RDP client. |
| allow_kasm_webcam | Allow webcam passthrough to a Kasm. When enabled, users can pass their local webcam through to the Kasm session. On `RDP local client` workspaces this only works with desktop editions of Windows. |
| allow_kasm_printing | Allow printing of documents using local printers |
| allow_kasm_pause | If enabled, users are allowed to pause their running sessions. |
| allow_kasm_sharing | Allow the user to share access to their session with other users. See Session Sharing for more details. |
| allow_kasm_stop | If enabled, users are allowed to stop their running sessions. |
| allow_kasm_uploads | Allow users to upload files to a Kasm. On `RDP local client` workspaces this has no effect see **allow_kasm_rdp_client_file_transfer_clipboard**. |
| allow_persistent_profile | Allow the use of persistent profiles if configured on the Workspace. See Persistent Profiles for details |
| allow_point_of_presence | Allow the user to use point of presence features for certain Workspaces. |
| allow_totp_2fa | Allow for TOTP tokens (e.g.: Google Authenticator) to be used as a two factor authentication method for the group. |
| allow_user_storage_mapping | When enabled the user is allowed to configure their own Storage Mappings via their profile. When disabled, new user configurations will not be allowed, nor will using any previously configured mappings be allowed when new sessions are created. |
| allow_webauthn_2fa | Allow for WebAuthn devices (e.g. YubiKeys) to be used as a two factor authentication method for the group. |
| allow_zone_selection | Allow the user to specify the deployment zone when creating a session. A dropdown will appear on the user dashboard with the available Zones. **Auto** represents the default behavior which is to provision in current Zone. If a Zone is specified, the request will not search alternate zones if no resources are available in the requested Zone. |
| auto_add_local_user | When enabled, local users will automatically be added to this group when created and upon each authentication. |
| auto_login_to_kasm | Sends users directly to kasm using default workspace after login |
| control_panel. advanced_settings. show_game_mode | Whether the game mode option is present in the advanced menu on the Kasm Session control panel. |
| control_panel. advanced_settings. show_ime_input_mode | Whether the ime input mode option is present in the advanced menu on the Kasm Session control panel. |
| control_panel. advanced_settings. show_keyboard_controls | Whether the keyboard controls option is present in the advanced menu on the Kasm Session control panel. |
| control_panel. advanced_settings. show_pointer_lock | Whether the pointer lock option is present in the advanced menu on the Kasm Session control panel. |
| control_panel. advanced_settings. show_prefer_local_cursor | Whether the prefer local cursor option is present in the advanced menu on the Kasm Session control panel. |
| control_panel.show_fullscreen | Whether the fullscreen option is present on the Kasm Session control panel. |
| control_panel. show_delete_session | Whether the delete session option is present on the Kasm Session control panel. |
| control_panel. show_display_manager | Whether the display manager is present on the Kasm Session control panel. The display manager allows the user to add and remove additional displays. |
| control_panel.show_logout | Whether the logout option is present on the Kasm Session control panel. |
| control_panel. show_return_to_workspaces | Whether the return to workspaces option is present on the Kasm Session control panel. |
| control_panel. show_streaming_quality | Whether the show streaming quality workspaces option is present on the Kasm Session control panel. |
| control_panel.pwa_install_option | Whether the user must be presented with the option to install per-workspace PWAs. |
| dashboard_redirect | If configured, standard users will be redirected to the defined external website instead of being shown the main dashboard screen. |
| default_image | The default Workspace used when the **/go** url is called. This is also used for the auto_login_to_kasm setting. The system will create a Workspace if one does not exist. If the user already has a Workspace, the session is resumed |
| default_ui_language | The default UI language to set for the group. This is applied at next user login and is also overridden if the user sets the language in their profile. |
| delete_anon_user_on_expiry_with_active_session | If enabled, anonymous users are deleted immediately upon expiration even if they have an active session. If disabled, deletion is deferred until all active sessions have ended. |
| display_ui_errors | If enabled, detailed information will be displayed on the client browser in the event of an error. |
| enable_container_logging | If enabled, each workspace container will log to the database. |
| enable_ui_server_logging | If enabled, log messages will be sent from client browser to the Kasm Workspaces server. |
| expose_user_environment_vars | Expose KASM_USER and KASM_USER_ID environment variables inside the Kasm. |
| idle_disconnect | Disconnect the Kasm connection if idle for this long. Time specified in minutes. |
| inject_ssh_keys | When enabled the system will inject the user's SSH public and private keys into new sessions automatically. Users can update their keys via the Profile. |
| kasm_audio_default_on | Default to audio enabled on Kasm start |
| kasm_ime_mode_default_on | Default to IME enabled on Kasm start |
| kasmvnc_mode_preference | Set the KasmVNC streaming modes available and the preferred order. See Kasm Performance for more details. |
| keepalive_expiration | The number of seconds a Kasm will stay alive unless a keeplive request is sent from the client. |
| keepalive_expiration_action | The action the system should take when a session expires according to the keepalive_expiration. Valid options are `delete`, `stop`, and `pause`. `stop` and `pause` actions are only valid for container based Workspaces. All other Workspaces will utilize `delete` regardless of what is defined. |
| keepalive_interval | The number of seconds in between keepalive requests from the client when the user is actively in a session. |
| lock_sharing_video_mode | Locks video quality to static resolution of 720p when sharing is enabled. Recommended for best performance. |
| max_kasms_per_user | The maximum number of simultaneous sessions a users is allowed to provision. |
| max_user_storage_mappings | The maximum number of Storage Mappings a user is allowed to have registered to their account. |
| read_only_user_storage_mappings | When enabled, any storage mappings configured on the user account will be forced to read-only. |
| require_2fa | Enables two factor authentication for group. Users will be prompted to set Key on next log on. |
| run_config | Specify arbitrary docker run params. The settings for run_config on a group will override the run_config settings on an image. See Docker Run Config for more details |
| session_time_limit | The amount of time (in seconds) a session will automatically expire. A countdown timer will be displayed to the user. |
| staged_session_language_and _timezone_preference_override | When launching a workspace Kasm will by default try to match the user language and timezone to a staged session. If a staged session does not exist that has the matching language and timezone then Kasm will create a new session with the specified language and timezone. If the override is set to true then Kasm will use a staged session for the selected workspace even if the language and timezone do not match. This overrides the user setting in the user profile. |
| usage_limit | Limits the total number of hours a user or group can have running sessions. See the `usage_limit`_ documentation below for more details. **Type** - **Per User** - Each user of the group has their own limit. - **Per Group** - All members share the usage limit. **Interval** - **Daily** , **Weekly** , **Monthly** , **Total**. **Hours** - The number of hours allowed during each interval. |
| volume_mapping | Map a local server directory to Kasm. Details available in the Volume Mapping Guide |
| web_filter_policy | Enabled web filtering and sets the Web Filter Policy to be used. Policies can also be set or force disabled on Workspaces. Policies assigned to Workspaces take priority over those defined via Group Settings. |
:::caution
The `allow_kasm_clipboard_up` setting (Control Panel clipboard) is subject to browser-side limitations. Very large clipboard payloads, typically above ~15 MiB, can overwhelm the browser WebSocket send buffer and delay client heartbeats, which results in a temporary session disconnect and automatic reconnection. This does not affect Seamless Clipboard behavior. For best reliability, enable `allow_kasm_clipboard_seamless` for workflows that paste very large text payloads.
:::
#### Session time limits
Several settings in the table above control Kasm session lifetime. The following sections describe them and their relationship to each other.
##### keepalive_expiration
This can also be described as the session timeout. This value determines how long Kasm will wait before destroying, stopping or pausing a session if no keepalive is received from the client. Keepalives are sent whenever a user is connected to a Kasm session even if the user is not actively using the Kasm Session.
This value should be at least twice the keepalive_interval. This setting is 1 hour by default in the "All Users Group". The action taken is determined by the
`keepalive_expiration_action` Group Setting.
##### keepalive_expiration_action
Administrators can decide what happens to sessions once they expire. Valid options are:
- `delete` - The session is destroyed.
- `pause` - The session is paused, preserving the disk, process and memory state. Paused sessions will still consume resources in physical memory and/or swap.
Sessions resumed from a paused state will still have the previous programs launched and active.
This action is valid for container-based sessions only. All other types will utilize the `delete` action.
- `stop` - The session is stopped, preserving the disk state. Sessions resumed from a stopped state will have the previous files intact, but previously running programs will need to be restarted.
This action is valid for container-based sessions only. All other types will utilize the `delete` action.
:::note
When sessions are stopped or paused, the CPU and RAM resources on the agent become available for other requests to create new sessions. This can prevent a user from resuming a paused or stopped session when the agent's resources are consumed by other running sessions. With cloud AutoScale, the system does not destroy agents that have stopped or paused sessions, and it allows other sessions to be provisioned on the agent. When this is undesirable, do not give users the `allow_kasm_pause` and `allow_kasm_stop` permissions.
:::
##### keepalive_interval
The keepalive_interval is how often the client will send a keepalive request to Kasm when the user is actively using a session. This setting is 300 seconds by default for the "All Users Group".
##### idle_disconnect
This setting is the number of minutes Kasm will wait when the user is idle before taking an action. This action will depend on the user context.
If the user is in a Kasm session when the idle timeout expires the user is disconnected from the Kasm session and sent back to the dashboard. Any Kasm sessions that the user was connected to will be disconnected and those sessions will be subject to the keepalive_expiration.
If the user is at the dashboard when the idle timeout expires the user is logged out of Kasm.
This setting is set to 20 minutes by default in the "All Users Group". This setting must be higher than the keepalive_interval setting to function properly.
##### usage_limit
The usage_limit setting is a highly flexible option allowing the administrator to configure a maximum usage number of hours either for each user in the group or for the entire group collectively to use over a set time period. This setting is a decimal value.
When using the usage_limit setting all time that a Kasm session is running is counted against the total, this includes when the user is not actively connected to the session but the session is still running. This setting is for use cases where user workspace access should be metered. This setting is not enabled by default.
:::note
Accounting for paused or stopped sessions is unchanged. Users are charged for the full duration of the session, even when the session is paused or stopped.
:::
The user can see how much time they have used/have remaining on the user dashboard:
Clicking on this icon will bring up a more detailed display.
##### session_time_limit
The session_time_limit is a set amount of time that a workspace will be allowed to run once that workspace is created. This time limit is irrespective of whether the user is actively using the session or if the session is disconnected and running in the background. When session_time_limit is configured, the keepalive_expiration setting is not used. This setting is not enabled by default
### Group permissions
Groups have an optional list of permissions attached to them. When a user logs in, Kasm aggregates all permissions across the groups the user belongs to, which determine the actions the user is authorized for. There are two built-in groups, `Administrators` and `All Users`. The Administrators group has the Global Admin permission, and the built-in `All Users` group has the User permission. All users are members of the `All Users` group automatically.
To configure group permissions:
1. Log in to the UI as an administrator.
2. Select **Groups**.
3. Next to the desired group, select **Edit** from the actions menu.
4. Select the **Permissions** tab to view and edit the permissions applied to the group.
The following table lists each permission and its description.
| Name | Description |
|------|-------------|
| User | Default level of permissions for normal users. |
| Global Admin | Global Administrator with all permissions. |
| Users View | View users and user information. |
| Users Modify | Modify existing users. |
| Users Create | Create new users. |
| Users Delete | Delete exiting users. |
| Users Modify Admin | Modify users with Global Admin permissions. |
| Users Auth Session | Login and logout on behalf of another user. |
| Groups View | View groups, group members, and group settings. |
| Groups Modify | Modify group members and settings. |
| Groups Create | Create new groups. |
| Groups Delete | Delete existing groups. |
| Groups View IfMember | View groups you are a member of, excluding system groups. |
| Groups Modify IfMember | Modify groups you are a member of, excluding system groups. |
| Groups View System | View groups, group members and group settings of system defined groups. |
| Groups Modify System | Modify group members and settings of system groups. |
| Groups Delete System | Delete a system group. |
| Agents View | View agents and agent settings. |
| Agents Modify | Modify agent settings. |
| Agents Create | Create agents. |
| Agents Delete | Delete existing agents. |
| Staging View | View staging list and stage configuration settings. |
| Staging Modify | Modify existing staging settings. |
| Staging Create | Create new staging configurations. |
| Staging Delete | Delete existing staging configurations. |
| Casting View | View casting list and casting configuration settings. |
| Casting Modify | Modify existing casting settings. |
| Casting Create | Create new casting configurations. |
| Casting Delete | Delete existing casting configurations. |
| Sessions View | View all user sessions. |
| Sessions Modify | Perform modifications to a session of another user. |
| Sessions Delete | Delete the session of another user. |
| Session Recordings View | View user session recordings. |
| Images View | View images |
| Images Modify | Modify image configurations. |
| Images Create | Create new images. |
| Images Delete | Delete existing images. |
| Images Modify Resources | Modify image resource settings, such as CPU and Memory settings. |
| DevAPI View | View developer API list. |
| DevAPI Modify | Modify developer API configurations. |
| DevAPI Create | Create a new developer API key. |
| DevAPI Delete | Delete an existing developer API key. |
| Webfilters View | View webfilters |
| Webfilters Modify | Modify existing webfilters |
| Webfilters Create | Create a new webfilter. |
| Webfilters Delete | Delete an existing webfilter |
| Brandings View | View branding configurations. |
| Brandings Modify | Modify existing branding configurations. |
| Brandings Create | Create new branding configurations. |
| Brandings Delete | Delete existing branding configurations. |
| Settings View | View global settings. |
| Settings Modify | Modify global settings in all categories. |
| Settings Modify Auth | Modify global settings in the authentication category. |
| Settings Modify Auth Captcha | Modify global settings in the authentication captcha category. |
| Settings Modify Cast | Modify global settings in the casting category. |
| Settings Modify Images | Modify global settings in the images category. |
| Settings Modify License | Modify global settings in the license category. |
| Settings Modify Logging | Modify global settings in the logging category. |
| Settings Modify Manager | Modify global settings in the manager category. |
| Settings Modify Scale | Modify global settings in the scale category. |
| Settings Modify Subscription | Modify global settings in the subscription category. |
| Settings Modify Filter | Modify global settings in the filter category. |
| Settings Modify Storage | Modify global settings in the storage category. |
| Settings Modify Connections | Modify global settings in the connections category. |
| Settings Modify Theme | Modify global settings in the theme category. |
| Auth View | View LDAP/OIDC/SAML configurations. |
| Auth Modify | Modify LDAP/OIDC/SAML configurations. |
| Auth Create | Create LDAP/OIDC/SAML configurations. |
| Auth Delete | Delete LDAP/OIDC/SAML configurations. |
| Licenses View | View licenses. |
| Licenses Create | Add new licenses. |
| Licenses Delete | Delete licenses. |
| System View | View system information. |
| System Export Schema | Export system schema. |
| System Import Data | Import system data. |
| System Export Data | Export system data. |
| Reports View | View system reports and logging. **Warning**: Providing access to logs can provide a lot of potentially sensitive information. |
| Managers View | View the managers. |
| Managers Modify | Modify existing managers. |
| Managers Create | Create a new manager. |
| Managers Delete | Delete existing managers. |
| Zones View | View Zones and Zone settings. |
| Zones Modify | Modify Zone settings. |
| Zones Create | Create new Zones. |
| Zones Delete | Delete existing Zones. |
| Companies View | View companies. |
| Companies Modify | Modify existing company. |
| Companies Create | Create a new company. |
| Companies Delete | Delete an existing company. |
| Connection Proxy View | View connection proxies. |
| Connection Proxy Modify | Modify connection proxies. |
| Connection Proxy Create | Create a connection proxy. |
| Connection Proxy Delete | Delete an existing connection proxy. |
| Physical Tokens View | View physical 2FA tokens. |
| Physical Tokens Modify | Assign/Unassign physical 2FA tokens. |
| Physical Tokens Create | Import or create physical 2FA tokens. |
| Physical Tokens Delete | Delete a physical 2FA token. |
| Servers View | View servers. |
| Servers Modify | Modify existing servers. |
| Servers Create | Create new servers. |
| Servers Delete | Delete servers. |
| Server Pools View | View server pools. |
| Server Pools Modify | Modify server pools. |
| Server Pools Create | Create a new server pool. |
| Server Pools Delete | Delete a server pool. |
| Autoscale View | View AutoScale configurations. |
| Autoscale Modify | Modify an existing AutoScale configuration. |
| Autoscale Create | Create a new AutoScale configuration. |
| Autoscale Delete | Delete AutoScale configurations. |
| VM Provider View | View VM Provider configurations. |
| VM Provider Modify | Modify VM Provider configurations. |
| VM Provider Create | Create new VM Provider configurations. |
| VM Provider Delete | Delete VM Provider configurations. |
| Autoscale Schedule View | View an AutoScale schedule. |
| Autoscale Schedule Modify | Modify an AutoScale schedule. |
| Autoscale Schedule Create | Create an AutoScale schedule. |
| Autoscale Schedule Delete | Delete an AutoScale schedule. |
| DNS Providers View | View DNS provider configurations. |
| DNS Providers Modify | Modify DNS provider configurations. |
| DNS Providers Create | Create new DNS Provider configurations. |
| DNS Providers Delete | Delete DNS Provider configurations. |
| Registries View | View Workspace Registries. |
| Registries Modify | Modify existing Workspace Registries. |
| Registries Create | Add new Workspace Registries |
| Registries Delete | Delete a Workspace Registry |
| Storage Providers View | View Storage Providers. |
| Storage Providers Modify | Modify existing Storage Providers. |
| Storage Providers Create | Create new Storage Providers. |
| Storage Providers Delete | Delete an existing Storage Provider. |
| Egress Providers View | View Egress Providers. |
| Egress Providers Modify | Modify existing Egress Providers. |
| Egress Providers Create | Create new Egress Providers. |
| Egress Providers Delete | Delete an existing Egress Provider. |
| Egress Gateways View | View Egress Gateways. |
| Egress Gateways Modify | Modify existing Egress Gateways. |
| Egress Gateways Create | Create new Egress Gateways. |
| Egress Gateways Delete | Delete an existing Egress Gateway. |
| Egress Credentials View | View Egress Credentials. |
| Egress Credentials Modify | Modify existing Egress Credentials. |
| Egress Credentials Create | Create new Egress Credentials. |
| Egress Credentials Delete | Delete an existing Egress Credential. |
| Banners View | View banners. |
| Banners Modify | Modify existing banners. |
| Banners Create | Create new banners. |
| Banners Delete | Delete an existing banner. |
| AD User Management View | View AD User Management Configurations. |
| AD User Management Modify | Modify existing AD User Management Configurations. |
| AD User Management Create | Create new AD User Management Configurations. |
| AD User Management Delete | Delete an existing AD User Management Configuration. |
#### Permission changes
Kasm embeds a user's permissions in their session token, which is generated on login. The
**Session Lifetime** global setting controls the token lifetime. The UI requests a new session
token every 5 minutes. To apply new permissions fastest, have the user log out and log back in.
Otherwise, the change applies within 5 minutes.
#### Permission dependencies
Most permissions stand alone, but some permissions depend on others. Generally, a `Modify`,
`Create`, or `Delete` permission needs the corresponding `View` permission. The following
additional dependencies require you to grant multiple permissions to achieve the desired effect.
- `Licenses View` requires `System View`
- `Permissions View` requires `Groups View`
- `Registries View` requires `Images View`, `System View`, and `Agents View`
- `Autoscale View` requires `Server Pools View`
- `Autoscale Schedule View` requires `Server Pools View`
- `DNS Providers View` requires `Server Pools View`
- `VM Providers View` requires `Server Pools View` and `Autoscale View`
- `Users Delete` requires `Sessions Delete` if the target user has running sessions and `Users Modify`
- `Users Delete` requires `Users Modify Admin` to delete a user that has the `Global Admin` permission
- `Egress Gateways Create`, `Egress Gateways Modify`, `Egress Gateways Delete`, `Egress Credentials Create`, `Egress Credentials Modify` and `Egress Credentials Delete` require `Egress Providers Modify`.
- `Servers View` and `Server Templates View` requires `Server Pools View` and `Zones View`
In many cases multiple permissions are not required. However, Kasm hides certain UI elements
when the user lacks the permissions to view them. For example, a user may have `View Images`
permissions but not `View Servers` permissions. When that user views an individual Workspace
Image that targets a Server, the drop-down to view or edit the targeted server stays hidden.
#### Special permissions
Groups offer more permissions beyond the basic View, Create, Modify, and Delete actions. The
`Groups View IfMember` and `Groups Modify IfMember` permissions allow a user to view or modify a
group when they are a member of that group. This access does not extend to built-in system groups
(All Users and Administrator). To edit or view system groups, the user also needs the Groups
View/Modify System permission.
An additional permission protects the modification of users with the `Global Admin` permission. To
modify a `Global Admin`, the requesting user must be a `Global Admin` or hold the `User Modify
Admin` permission.
Two permissions allow modifications to Workspace Images: `Images Modify` and `Images Modify
Resources`. The `Images Modify` permission allows modification of all Image settings except those
that change the physical or virtual compute resources. The following settings require the `Images
Modify Resources` permission to edit:
- GPU Count
- Cores
- Memory
- CPU Allocation Method
- Uncompressed Image Size
- Docker Registry
- Docker Registry Username
- Docker Registry Password
- Hash
- Volume Mappings
- Docker Run Config Override
- Docker Exec Config
### Group Workspaces
Administrators can define which Workspaces are available to each group.
By default newly created workspaces are automatically assigned to the **All Users** group. This behavior can be changed
by modifying the **Add Images To Default Group** global [Settings](../../../reference/settings.mdx).
### SSO Group Mappings
Administrators can configure the system to automatically map users that authenticate with an SSO provider
(e.g SAML, OpenID, LDAP) into Kasm Groups.
If **Assign All Users** is selected, any user that authenticates with the defined SSO provider will be added to the
Kasm group. Otherwise, only users that have the defined **Group Attributes** passed in by the SSO provider will be
added to the group.
These group mappings are evaluated and updated at each user login. If a mapping is defined and a user does not have
the group attributes listed, the user will be removed from the group.
### Group File Mappings
File Mappings allow the administrator to manage files to be mapped to the inside of a user's container
based Workspace session. File Mappings can be defined on a User, Group, and/or Workspace. See the primary
documentation on [File mappings](../../workspaces-sessions/file-mappings.mdx) for more details.
When a user belongs to multiple Groups that define a File Mapping with the same destination, the group with the lowest priority
value gets mapped into the user's container.
The following is an example File Mapping of a Chrome Managed Policy to define bookmarks in Chrome.
---
## Active Directory
### Active Directory / OpenLDAP
The following section gives an example of a typical LDAP configuration of users and groups using Active Directory.
Consider the following domain “kasm.core” with the following structure
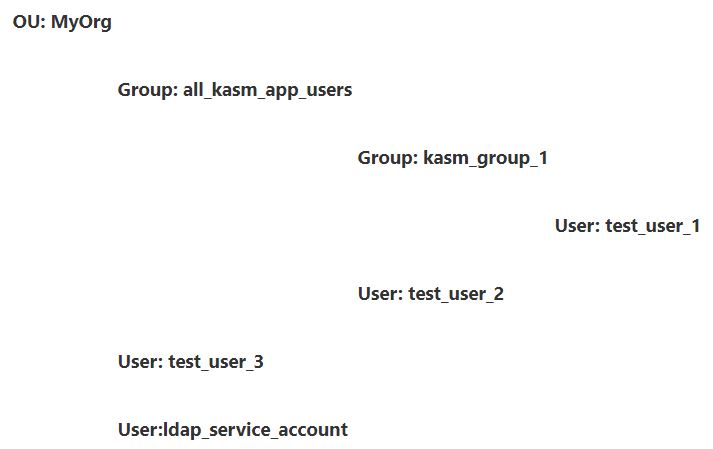
- MyOrg
: Top level OU in the kasm.core domain
- all_kasm_app_users
: Security Group under the MyOrg OU that houses all users and groups that should be allowed access to the Kasm App. If a user is not a member of this group they should not be allowed to log into the app.
- kasm_group_1
: A Security group that is a member of the all_kasm_app_users Group. Members of this group should automatically be mapped to a group in Kasm named Ldap Group 1
- Test_user_1
: A user that is a member of kasm_group_1
- Test_user_2
: A user that is a member of all_kasm_app_users. This user should be allowed to access the Kasm app but is not automatically placed in to special groups
- test_user_3
: This user is not a member of the all_kasm_app_users group and therefore not be allowed to log in to the Kasm application
- ldap_service_account
: This user will be used as a service or ‘bot’ account do to LDAP queries
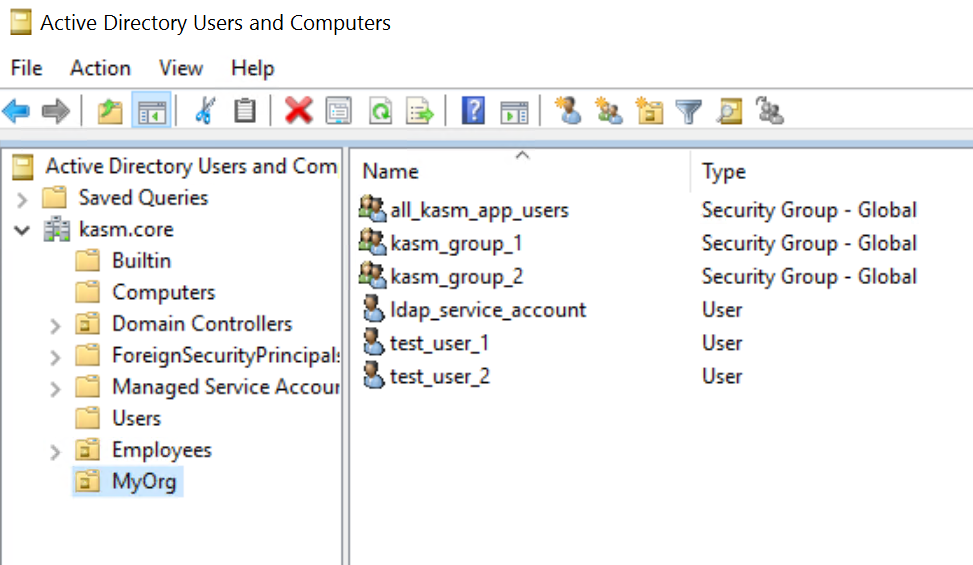
#### Configure the LDAP Configuration (Active Directory)
* Log into the Kasm Web UI as an administrator
* Click Access Management -> Authentication -> LDAP
* Click on Add Configuration
* The configurations for Microsoft Active Directory are as follows
| **Property** | **Value** |
| --- | --- |
| Name | Kasm Test LDAP Settings |
| URL | ldaps://ldap.kasm.core:636 |
| Search Base | OU=MyOrg,DC=kasm,DC=core |
| Search Filter | &(objectClass=user)(sAMAccountName={"{"}0{"}"})(memberof:1.2.840.113556.1.4.1941:=CN=all_kasm_app_users,OU=MyOrg,DC=kasm,DC=core) |
| Group Membership Filter | &(objectClass=group)(member:1.2.840.113556.1.4.1941:={"{"}0{"}"}) |
| Email Attribute | mail |
| Service Account DN | CN=ldap_service_account,OU=MyOrg,DC=kasm,DC=core |
| Service Account Password | password |
| Search Subtree | Checked |
| Auto Create App User | Checked |
| Enabled | Checked |
The placeholder '\{0\}' is substituted with a user's username (ex: test_user_1@kasm.core).
The placeholder '\{0\}' is required to appear in the Search Filter. A Search Filter must result in exactly one user result.
1.2.840.113556.1.4.1941 is a special OID allowing for recursive enumeration of objects. Effectively this allows users
to be determined to members of members. Otherwise the user would need to be a direct member of the specified group.
See [Microsoft Docs](https://docs.microsoft.com/en-us/windows/desktop/adsi/search-filter-syntax) for details
#### Configure the LDAP Configuration (OpenLDAP / IDM)
- Log into the Kasm Web UI as an administrator
* Click Access Management -> Authentication -> LDAP
- Click on Add Configuration
- The configurations for OpenLDAP or IDM are as follows
| **Property** | **Value** |
| --- | --- |
| Name | Kasm Test LDAP Settings |
| URL | ldaps://ldap.kasm.core:636 |
| Search Base | OU=MyOrg,DC=kasm,DC=core |
| Search Filter | (&(objectClass=posixAccount)(uid={"{"}0{"}"}) |
| Group Membership Filter | (&(objectClass=groupOfNames)(member={"{"}0{"}"})) |
| Email Attribute | mail |
| Service Account DN | CN=ldap_service_account,OU=MyOrg,DC=kasm,DC=core |
| Service Account Password | password |
| Search Subtree | Checked |
| Auto Create App User | Checked |
| Enabled | Checked |
Kasm only supports the "groupOfNames" or "groupOfUniqueNames" objectClasses in OpenLDAP/IDM, linking to a "posixGroup"
objectClass is not currently supported.
#### Configure an LDAP Enabled Group
The following settings can be used to create a group in Kasm named **“LDAP Group 1”**. It will be mapped to LDAP group
**kasm_group_1**. When LDAP users that are members of **kasm_group_1** sign in they will automatically be put in the
**LDAP Group 1** Kasm group.
Settings for the group creation screen:
| **Property** | **Description** |
| --- | --- |
| Name | LDAP Group 1 |
| Description | Group mapped to kasm_group_1 in Active Directory |
| Priority | 100 |
Settings for the **SSO Group Mapping** screen
| **Property** | **Description** |
| --- | --- |
| SSO Provider | LDAP - Kasm Test LDAP Settings |
| Assign All Users | Unchecked |
| Group Attributes | CN=kasm_group_1,OU=MyOrg,DC=kasm,DC=core |
#### Verifying Configurations
**Discovering and Authenticating Users**
- Log into the Kasm Web UI as an administrator
* Click Access Management -> Authentication -> LDAP
- Click the arrow for the LDAP Configuration you want to test and then Test LDAP Connection
- Enter test_user_1@kasm.core and the correct password
- The test should succeed. test_user_1 is a member of kasm_group_1 which is a member of all_kasm_app_users
- Enter test_user_2@kasm.core and the correct password
- The test should succeed. test_user_2 is a member of all_kasm_app_users
- Enter test_user_3@kasm.core and the correct password
- The test should fail. test_user_3 is NOT a member of all_kasm_app_users group or any group that is a member of that group
#### Group Assignment
- Log out of the Kasm Application and Log in as test_user_1@kasm.core
- Click Profile. Notice the user is a member of All Users ( set by default) and LDAP Group 1
- Log out of the Kasm Application and Log in as test_user_2@kasm.core
- Login will succeed.
- Click Profile. Notice the user is only a member of the All Users Group (Set by default) but is not a member of any additional groups
- Log out of the Kasm Application. Attempt to log in as test_user_3@kasm.core
- Access is denied. test_user_3 is not a member of the required all_kasm_app_user group so is denied access because the LDAP query cant find the user.
---
## Jumpcloud
## JumpCloud
This example assumes the use of JumpCloud LDAP-as a Service with the following configurations.
- A **User Group** named **Kasm Users** that is bound to LDAP. Only users that are members of this group
should be allowed to authenticate to Kasm
- Users named **kasm-user-1** and **kasm-admin-1** are a member of this group.
- A **User Group** group named **Kasm Admins** that is bound to LDAP. Users that are a member of this group will be
placed in Kasm's **Administrators** group
- A user named **kasm-admin-1** is a member of this group.
- A user account named **kasm-ldap-svc** is configured as an [LDAP Binding User](https://support.jumpcloud.com/support/s/article/using-jumpclouds-ldap-as-a-service1)
#### Kasm LDAP Configuration
- Log into the Kasm Web UI as an administrator
* Click Access Management -> Authentication -> LDAP
- Click on Add Configuration
- Enter the following information , substituting the example **Organization ID** `633df00190c6d619236d3ae1` with your own.
| **Property** | **Value** |
| --- | --- |
| Name | JumpCloud |
| URL | ldaps://ldap.jumpcloud.com:636 |
| Search Base | ou=Users,o=633df00190c6d619236d3ae1,dc=jumpcloud,dc=com |
| Search Filter | &(objectClass=inetOrgPerson)(uid={"{"}0{"}"})(memberOf=cn=Kasm Users,ou=Users,o=633df00190c6d619236d3ae1,dc=jumpcloud,dc=com) |
| Group Membership Filter | (&(objectClass=groupOfNames)(member={"{"}0{"}"})) |
| Email Attribute | mail |
| Service Account DN | uid=kasm-ldap-svc,ou=Users,o=633df00190c6d619236d3ae1,dc=jumpcloud,dc=com |
| Service Account Password | password |
| Search Subtree | Checked |
| Auto Create App User | Checked |
| Enabled | Checked |
#### LDAP Group Mapping
The following settings can be used to map the JumpCloud **Kasm Admins** group to the Kasm Workspaces build in
**Administrators** Group.
See [Create LDAP linked Group](../ldap.mdx#create-ldap-linked-group) for more details.
Settings for the **SSO Group Mapping** screen
| **Property** | **Description** |
| --- | --- |
| SSO Provider | LDAP - Kasm Test LDAP Settings |
| Assign All Users | Unchecked |
| Group Attributes | cn=Kasm Admins,ou=Users,o=633df00190c6d619236d3ae1,dc=jumpcloud,dc=com |
#### Verifying Configurations
- Verify you can log into the Workspaces UI with user. **kasm-user-1@jumpcloud.com**.
- Verify you can log into the Workspaces UI with user. **kasm-admin-1@jumpcloud.com**. Once authenticated the user
should now have access to administrative functions within the app.
- Attempting to log into Workspaces as any other user that is NOT a member of the JumpCloud **Kasm Users** group should
not succeed.
#### Helpful References
- https://support.jumpcloud.com/support/s/article/using-jumpclouds-ldap-as-a-service1
- https://support.jumpcloud.com/support/s/article/filtering-by-user-or-group-in-ldap-search-filters1
- https://support.jumpcloud.com/support/s/article/using-ldapsearch-with-jumpcloud1
- https://support.jumpcloud.com/support/s/article/user-attributes-2019-08-21-10-36-47
---
## LDAP & Active Directory (AD) Authentication
## LDAP Authentication
### Create an LDAP Configuration
The first step in configuring Kasm to use LDAP for authentication is to set up an LDAP configuration.
- Log into the Kasm Web UI as an administrator
- Click Access Management -> Authentication -> LDAP
- Click Add Configuration
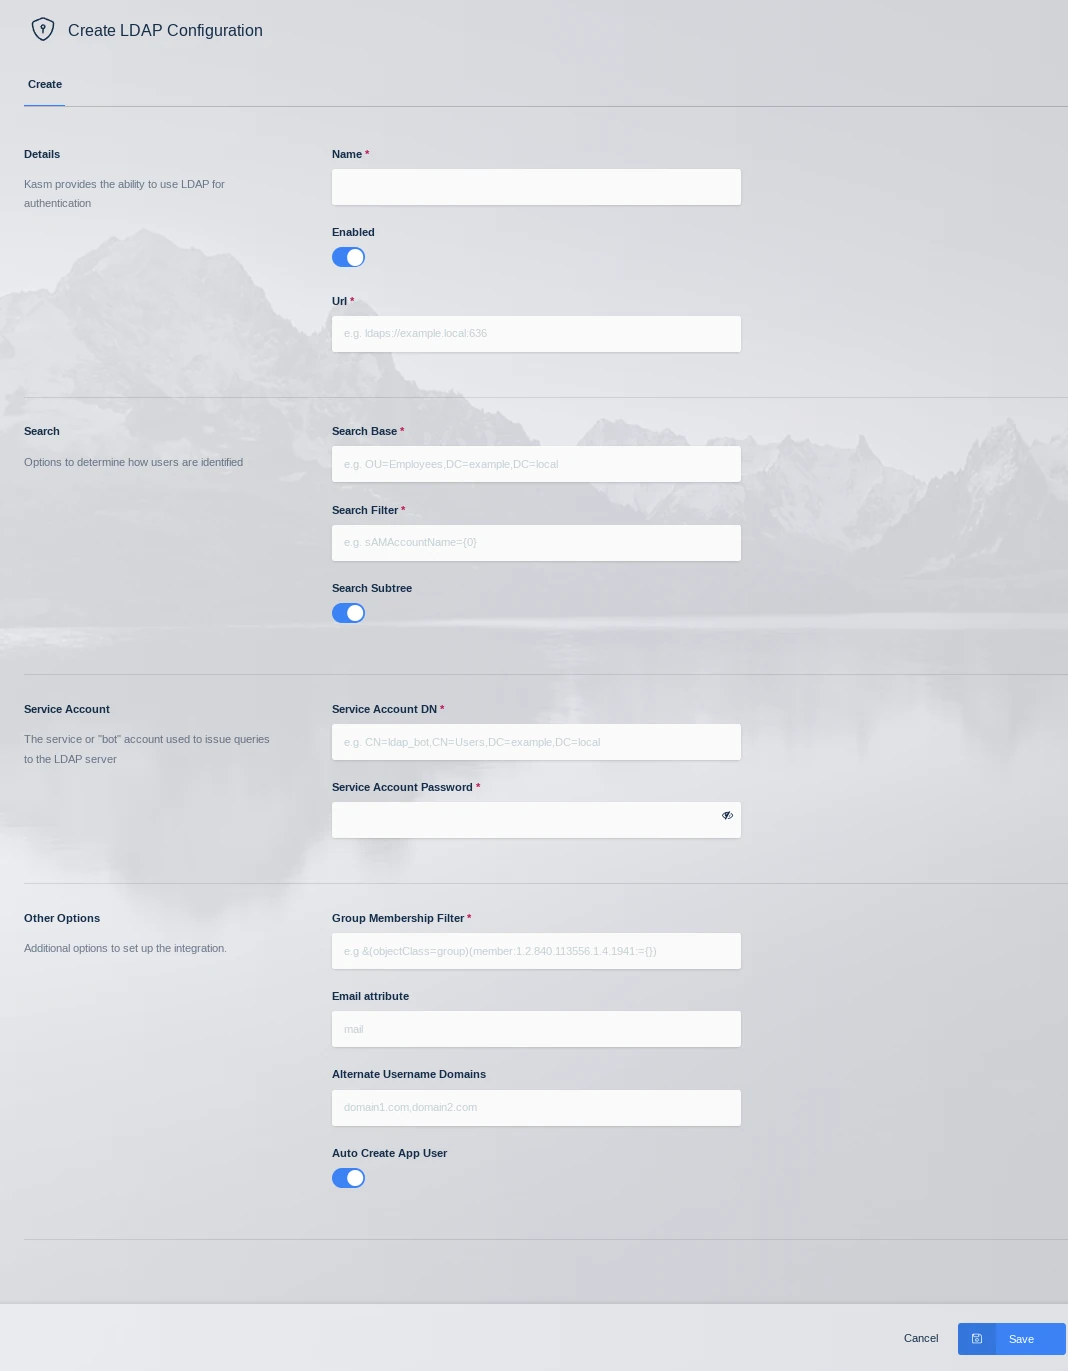
| **Property** | **Description** |
| --- | --- |
| Name | A name given to the configuration |
| URL | The LDAP connection URL to the LDAP server |
| Search Base | The Base OU used for searching for objects. Kasm will use the search base DCs to identify users to the applicable LDAP Configuration. i.e `DC=kasm,DC=core` will map to `@kasm.core` |
| Search Filter | The search filter used to identify user account names |
| Group Membership Filter | This query is used to identify if the user is a member of a particular group. Used for Kasm group to LDAP group mapping |
| Email Attribute | The user attribute used to denote the users email address |
| Alternate Username Domains | Comma separated list of additional domain names that usernames should match on. Use an asterisks to match usernames without a domain name. See section below on domain name matching. |
| Service Account DN | The service or ‘bot’ account used to issue queries to the LDAP server |
| Service Account Password | The service or ‘bot’ account password |
| Search Subtree | If enabled, objects beneath the Search Base will be discovered |
| Auto Create App User | If enabled, Kasm will create an associated user account inside the application when the user first logs in. |
| Enabled | Enable or disable this configuration |
In order for password resets to work with LDAP accounts, the service account must be provided the authority to reset user passwords in Active Directory and the connection must be made over a secure LDAPS connection.
### User Domain Name Matching
Users are expected to login with usernames in the format of username@domain.name. The domain-name portion of the username is used to find the appropriate LDAP configuration based on the domain name specified in the `Search Base` field. There are situations where it is desirable for the usernames to have a different domain name that what is Active Directory. In that case administrators can use the `Alternate Username Domains` field to specify a list of alternate domain names in the username that should be used to match to this LDAP configuration. For example 'greenearth.com,acquired_company.com' would be used with users logging in with username@greenearth.com and username@acquired_company.com in addition to the domain in the `Search Base` field.
An asterisks in the `Alternate Username Domains` is supported. An asterisks signifies that usernames that do not have a domain name at all should be matched to this LDAP configuration. Administrators can configure multiple LDAP configurations with an asterisks in the `Alternate Username Domains`, as long as they all point to the same domain. This can be done for redundancy, for example. However, you should not have multiple LDAP configurations that specify an asterisks in the `Alternate Username Domains` field, when they are pointed to different domains. This would result in nondeterministic behavior in matching users to the appropriate LDAP configuration.
### Test Authentication
After creating an LDAP configuration, you can test the settings by clicking the Test LDAP Connection icon on the LDAP Configurations Page.
Enter known valid user credentials
### Common Errors
| **Error** | **Notes** |
| --- | --- |
| Authentication Error : socket connection error while opening: timed out | The Kasm API server cannot make a connection to the specified LDAP URL. Verify the URL is correct, and network connectivity between the two end points. |
| Authentication Error : automatic bind not successful - invalid Credentials | The password for the LDAP service account is invalid. Verify the password is correct and that the account is not locked out. Verify the Service Account DN is correct |
| Authentication Error : socket ssl wrapping error : [Errno 104] Connection reset by peer | LDAPS was specified in the LDAP URL but the LDAP server is not communicating over SSL |
| Authentication Error : error recieving data : [Errno 104] Connection reset by peer | The LDAP server rejected the connection. Verify that the port specified in the URL is correct. Verify that protocol LDAP or LDAPS is correct in the URL |
| Unable to locate user (test@kasm.local) | The user could not be located. Verify the Search Base and Search Filter parameters are correct |
| LDAP Login failed for user (test@kam.local) : `({'message':'80090308: LdapErr:DSID-0C09042A, comment: AcceptSecurityContext error, data 52e, v3839\x00','saslCreds': None, 'result':49,'dn':", 'description': 'InvalidCredentials','type': 'bindResponse','refferals':None})` | The provided credentials are invalid or the account is locked out. |
| LDAP password reset failed:`({'result': 53, 'description': 'unwillingToPerform', 'dn': '', 'message': '0000001F: SvcErr: DSID-031A124C, problem 5003 (WILL_NOT_PERFORM), data 0\n\x00', 'referrals': None, 'type': 'modifyResponse'})` . | LDAP without SSL was used in the connection, and password reset for a user was attempted. Windows servers only support changing passwords over secure LDAPS connections. |
### Create LDAP linked Group
Kasm Workspaces can be configured to automatically map LDAP users to specific Kasm application groups via their LDAP group membership. The mapping is updated for each user when the user logs into the Kasm Web Application.
The mapping functionality can be accessed by using the arrow menu and selecting edit for the group you want to add a mapping to. Then selecting the **SSO Group Mappings** tab and click **Add SSO Mapping**.
The **Add SSO Mapping Screen** is presented the following fields are available to be filled in:
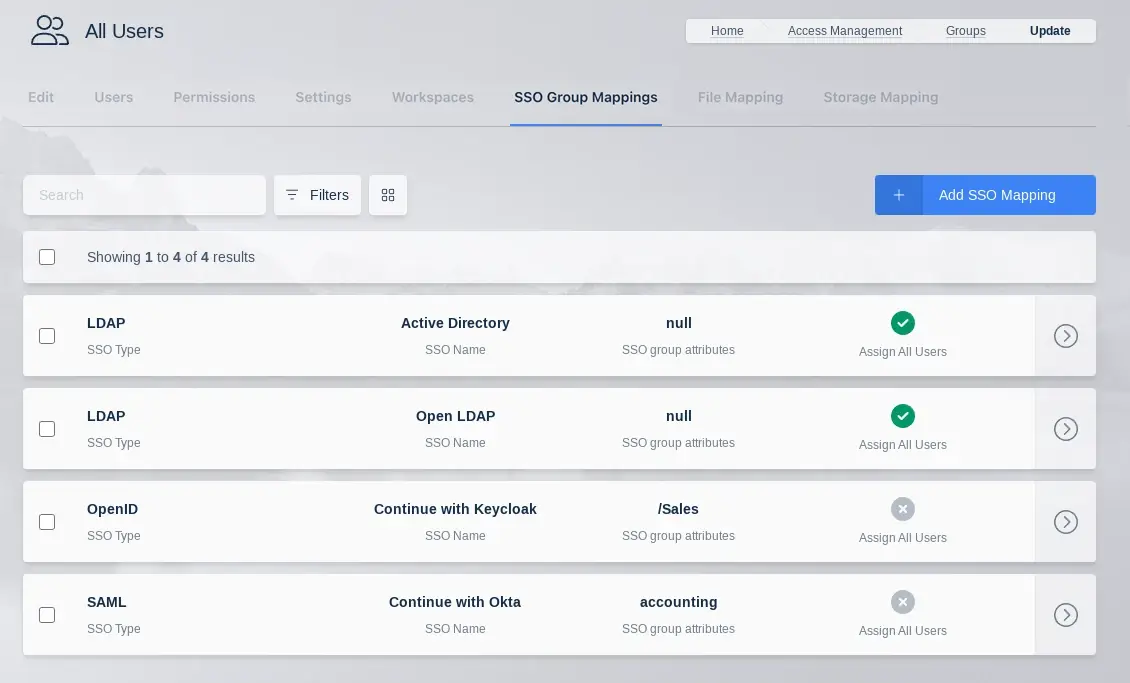
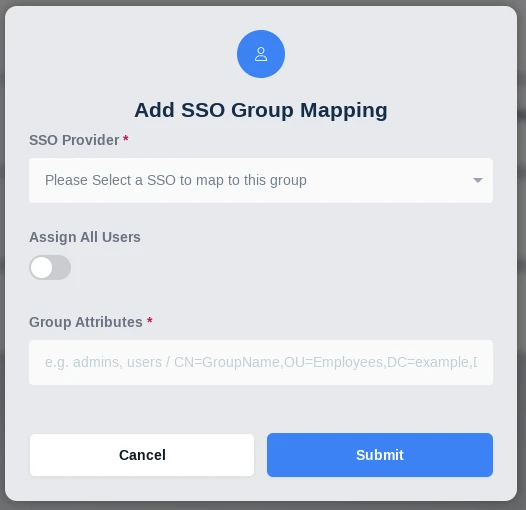
| **Property** | **Description** |
| --- | --- |
| SSO Provider | A dropdown of the available SSO identity providers (LDAP, SAML, OpenID) configured in the system. |
| Assign All Users | A checkbox that indicates any user that authenticates with the defined SSO provider will be added to the Kasm group |
| Group Attributes | The LDAP DN to the desired group |
### LDAP Attribute Mapping
Additional LDAP user attributes are returned by the authentication request to the LDAP server. These LDAP user attributes can be mapped to Kasm User fields. Every time the user logs in, the Kasm user fields will be updated with the values returned by the LDAP server. See the documentation for your LDAP provider for a listing of user attributes.
These can be configured by editing an existing LDAP Authentication configuration, if creating a new configuration you will need to submit and edit to add them.
The following Kasm User fields can be populated with values from LDAP user attributes.
- First Name
- Last Name
- Phone
- Organization
- Notes
- City
- State
- Country
- Email
- Custom Attribute 1
- Custom Attribute 2
- Custom Attribute 3
Kasm can log all LDAP user attributes present in the login event, this is helpful for determining the attribute names. Add a LDAP Attribute Mapping with an attribute name of 'debug' and target any user field. The next time a user logs in, all LDAP user attributes and values will be logged by Kasm.
### AD Sync
Kasm can manage user accounts in Microsoft Active Directory by automatically creating user accounts in AD and resetting the user's password in AD to a randomly generated password on each login. This is primarily used in scenarios where the user is authenticated from a SAML or OIDC identity provider and you want Kasm to then create an associated user in AD. This is useful for deployments where Active Directory is required for various purposes, but where AD is not the primary source of identity and access management for the organization. Because Kasm sets a random password for the user in AD each time they login to Kasm, Kasm is able to provide single sign-on to Windows servers that are part of the same AD.
The first step in configuring AD Sync is to create an LDAP configuration under Access Management->LDAP, in the administrator panel. See the LDAP configuration sections for details on configuring LDAP. LDAP configurations are normally used in Kasm for authenticating users, but in this case we don't want users to be able to use their AD credentials to log into Kasm. Therefore, the recommendation is to disable the LDAP configuration in Kasm, which will keep this LDAP configuration from being used for authentication to Kasm. The service account used in the LDAP configuration must have the authority to reset user accounts in AD. If you have enabled user account creation or managing group membership, the service account will need proper authority to create users and/or add and remove users from groups. The LDAP Configuration needs to specify **Alternative User Domains**, which is a comma separated list of domain names within a username that will get mapped to the domain configured by the LDAP configuration. For example, you may have a SAML identity provider where usernames are in the format username@company.com, but your Active Directory domain is company.local. Specifying an Alternative User Domain value of `company.com` will cause Kasm to search for the user in AD as `username@company.local`.
After the LDAP Configuration is created, Edit the configuration and switch to the **AD Sync** tab. Click the Add button to create an AD Sync configuration. AD Sync configurations have the following properties.
| Property | Description |
| -------- | ----------- |
| Type | The source of identities for Kasm to synchronize. Valid options are local, saml, or oidc. |
| Enable Random Password on Login | Kasm will reset the password on the associated AD user account, each time the user logs into Kasm. |
| Enable Create User | Kasm will automatically create the user in AD if it does not already exist. |
| Enable AD Group Management | Kasm will automatically add/remove users from groups in AD, based on group mappings in Kasm. |
| Password Length | Kasm will use a randomly generated password of this length for AD users managed by Kasm. |
| User Container DN | The DN of the container in AD to create new users within. Existing users do not need to be in this container. Example: OU=MyOrg,DC=kasmweb,DC=local |
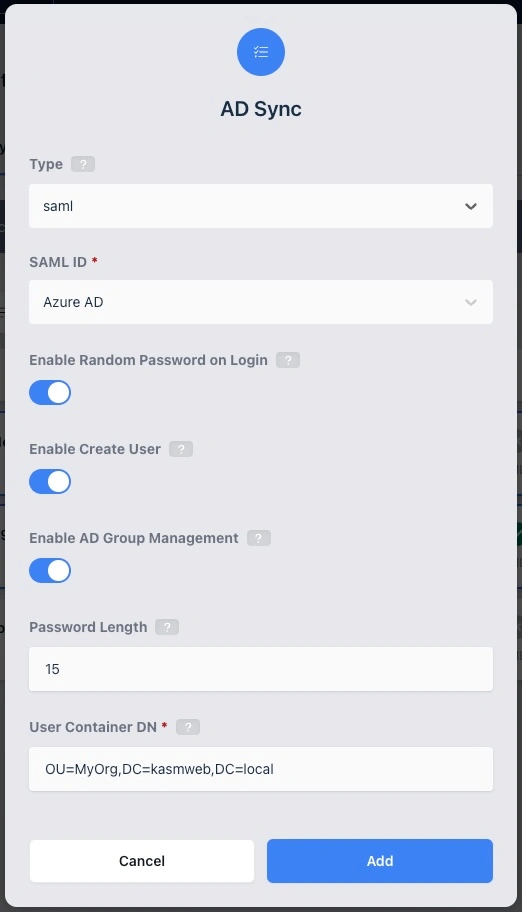
Turning off Random Password on Login will break single sign-on to servers in Kasm that are joined to the same Active Directory domain and is not a recommended configuration.
#### Synchronize AD Groups
If enabled, Kasm will add and remove users to/from groups in AD, based on group mappings defined in Kasm. In order for a group in Kasm to be eligible for synchronization, it must have two SSO group mappings, one pointing to the [LDAP](../../workspaces-sessions/pwa/index.mdx) configuration with the target AD Sync and one pointing to the source [SAML](saml-authentication.mdx#group-assignment) or [OIDC](oidc.mdx#group-assignment) configuration. In addition to the Kasm group having the two SSO Group Mappings, the user must also be a member of that group in Kasm, in order for them to get added to the associated group in AD. Users will be removed from the associated group in AD if they are not a member of the associated Kasm group.
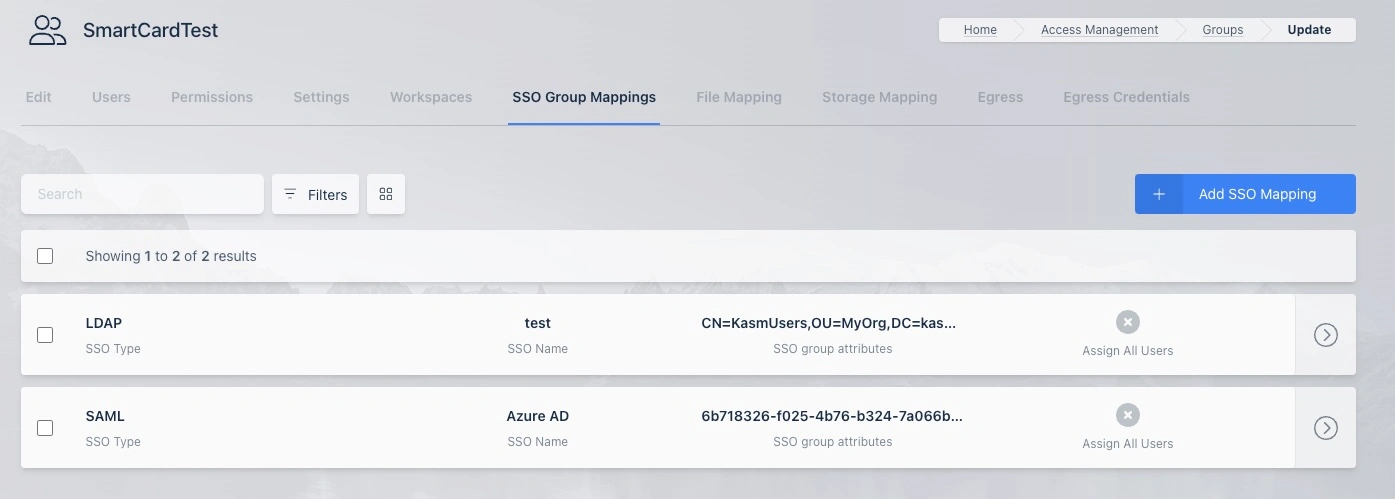
#### AD User Attributes
By default, Kasm creates users with the following AD attributes and values.
- **displayName** - The displayName is set to the username as seen in Kasm, unmodified.
- **sAMAccountName** - Set to the same value as the `name` attribute.
- **name** - By default Kasm creates an AD name using the first 9 alpha numeric characters of the Kasm username, domain name excluded, followed by a hyphen and the first 10 characters of the Kasm user ID. For example, a user that logs into Kasm as `john.smith@company.com` would have a Windows sAMAccountName of `john-smit-abc1234567`. Use an attribute mapping to `name` to override both the `name` and `sAMAccountName` LDAP Attributes with a username defined by the IdP. See details below for defining attribute mappings.
- **userPrincipalName** - The sAMAccountName with the domain name appended, see the above definition for sAMAccountName for how that value is derived. Example, john.smith@company.com where the LDAP Configuration **Search Base** field is `OU=MyOrg,DC=company,DC=local` would result in a value of `john-smit-abc1234567@company.local`.
- **givenName** - The `First Name` field on the Kasm User is used if present.
- **sn** - The `Last Name` field on the Kasm User is used if present.
[LDAP attribute mappings](../../workspaces-sessions/pwa/index.mdx) can be used to map additional Kasm User fields to AD User attributes and/or overwrite the above defaults. If the source users come from a [SAML](saml-authentication.mdx#saml-attribute-mapping) or [OIDC](oidc.mdx#openid-attribute-mapping) identity provider, administrators can configure attribute mappings, so that the Kasm users will have fields such as `First Name` and `Last Name` populated by the SAML/OIDC IdP.
This is a screenshot of [SAML Attribute Mappings](saml-authentication.mdx#saml-attribute-mapping) that cause the Kasm user attributes `First Name`, `Last Name`, and `Custom Attribute 1` fields to get populated by data provided by the SAML Identity Provider.
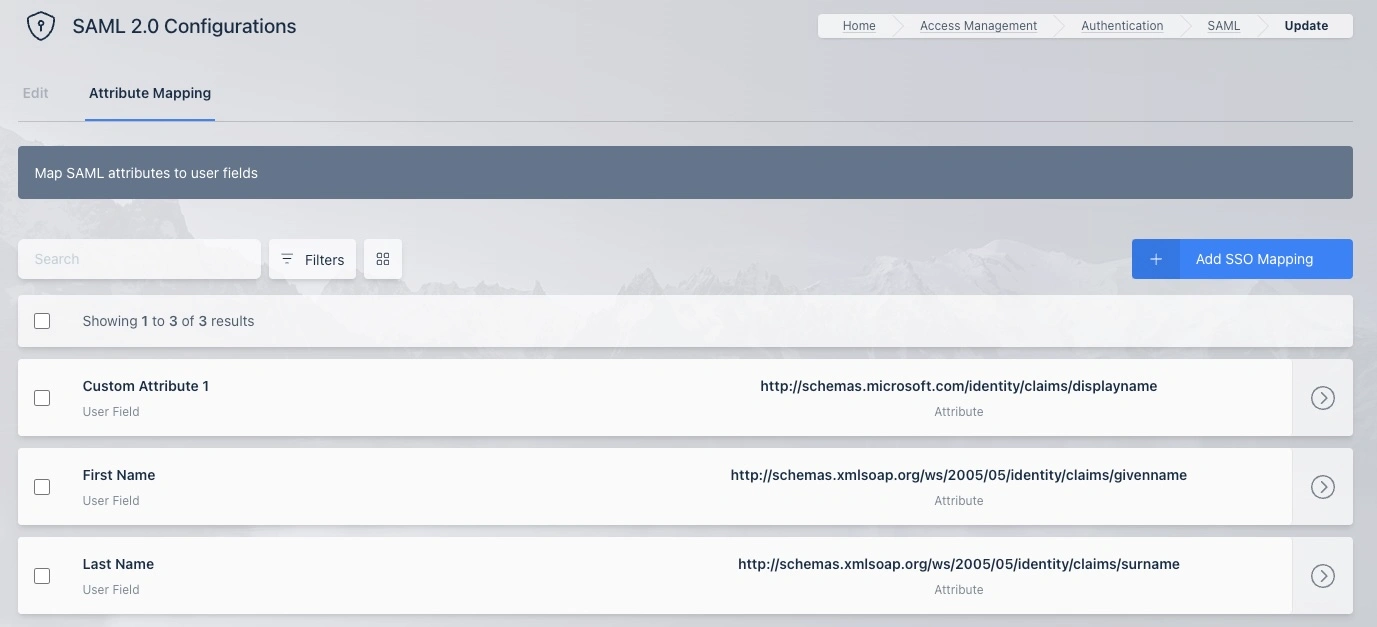
This screenshot shows a [LDAP Attribute Mapping](../../workspaces-sessions/pwa/index.mdx) defined for taking the value in the Kasm User `Custom Attribute 1` field and populating the `displayName` in the AD user created by Kasm. In the previous screenshot, you can see that the SAML Identity Provider provides that value through its configured attribute mapping.
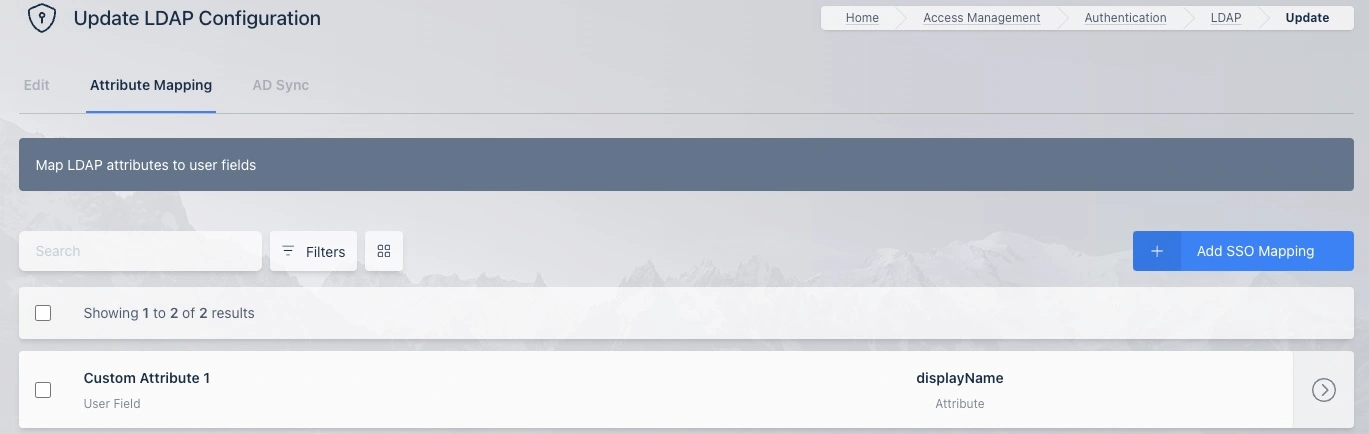
Changes to AD user attributes are synchronized on each login.
### Configuration Examples
- [Active Directory / OpenLDAP](ldap/active-directory.mdx)
- [JumpCloud](ldap/jumpcloud.mdx)
---
## Login Configuration: Auth & Notices
## Login Configurations
Kasm offers several alternate authentication methods for users with either [Two Factor](two-factor.mdx),
[SAML 2.0](saml-authentication.mdx) or [LDAP](ldap.mdx) integration.
### Login Notice
The login notice is a message displayed at the bottom of the login form. This message can be configured using the
**Notice Title** and **Notice Message** in the global [Settings](../../../reference/settings.mdx). This message can be used to display
a legal notice, terms of service, and other information that needs to be displayed to a user prior to login.
### Login Assistance
Login assistance can be setup for users giving them an easily accessible link on the login page.
The login help page must be created in a separate link that can be passed to the login panel through the
login_assistance [Setting](../../../reference/settings.mdx) under the Authentication section.
Change this setting back to 'None' to hide the login assistance link.
---
## Auth0
### Auth0 OpenID Setup
This guide walks through a basic setup allowing Auth0 users to authenticate with a Kasm deployment.
Reference Docs:
- [https://auth0.com/docs/authenticate/protocols/openid-connect-protocol](https://auth0.com/docs/authenticate/protocols/openid-connect-protocol)
- [https://auth0.com/docs/get-started/apis/scopes/openid-connect-scopes](https://auth0.com/docs/get-started/apis/scopes/openid-connect-scopes)
#### Creating an Auth0 OAuth App
01. Login to the Auth0 portal as an Admin.
02. Expand **Authentication** and select **Applications**.
03. Click **Create Application**.
04. Give the app a name (e.g `Kasm`), select **Regular Web Application** and click **Create**.
05. Select the **Settings** Tab.
06. Take note of the **Client ID** and **Client Secret** values. These will be used in later steps.
07. In the **Application URIs** section, **Allowed Callback URLs**, add the deployment's Kasm callback endpoint. Ex: `https://kasm.example.com/api/oidc_callback`
08. In the **Application URIs** section, **Allowed Logout URLs**, add the root of the Kasm deployment. Ex: `https://kasm.example.com/`
09. If using Auth0 `enterprise`, in the **Backchannel Logout** section, configure the **Back-Channel Logout URI** with the deployment's endpoint, ex. `https://kasm.example.com/api/oidc_backchannel_logout`. Select any or all supported logout-initiating events.
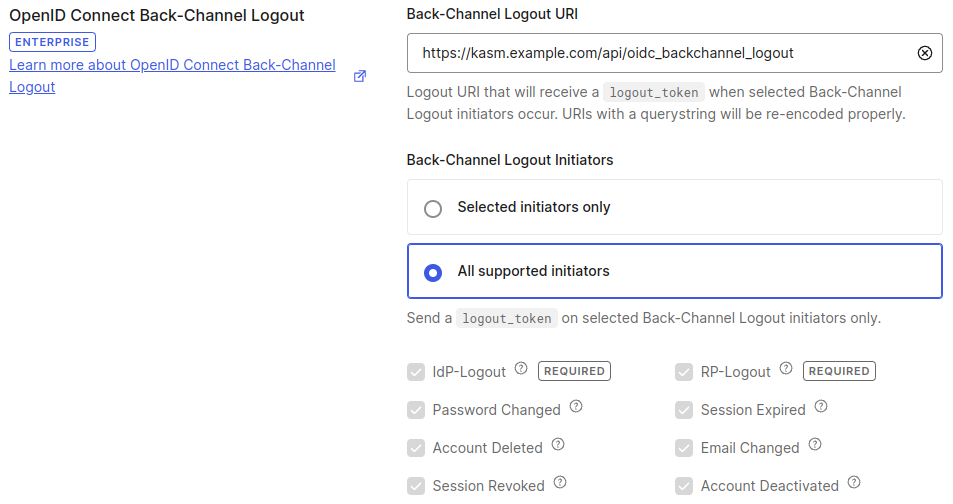
Back-channel logout will fail with vague errors in the Auth0 console if the Kasm is configured with insecure HTTPS certificates, e.g. if the certificates are self-signed.
10. Scroll down and expand **Advanced Settings**, the select **Endpoints**. Take note of the **OAuth Authorization URL**, **OAuth Token URL**, and
**OAuth User Info URL**, and **OpenID Configuration**. These will be used in later steps.
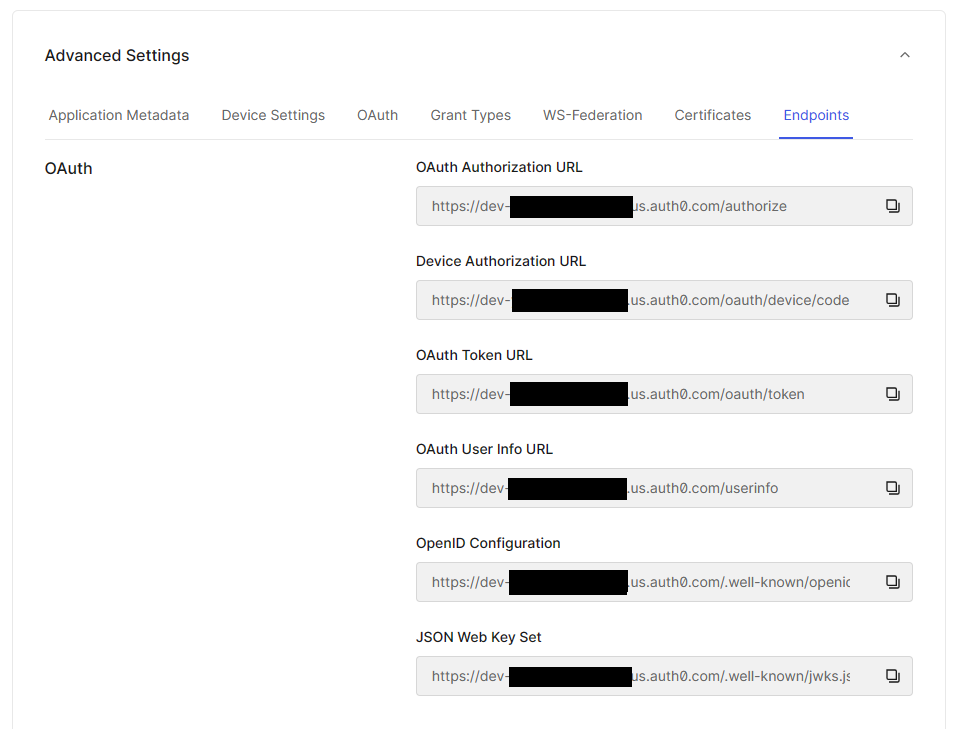
11. Click **Save Changes**.
12. In a separate tab, navigate to the URL value obtained from the **OpenID Configuration** field earlier.
13. Find and save off the value for `"issuer"`, for use in a later step.
#### (Optional) Configuring Auth0 to forward User Roles
In many cases it may be desireable to place SSO users in specific Kasm Groups based on their Roles as defined within
Auth0. The following steps may be used to configure Auth0 to provide Kasm with the User's Role during authentication.
01. From the Auth0 admin console expand **Actions**, select **Library** and click **Build Custom**.
02. In the Create Action popup, enter a name (e.g `Add User Roles`) , select `Login / Post Login` as the **Trigger** and the recommended runtime (e.g `Node 18 Recommended`).
03. Click **Create**.
04. Replace the contents of editor with the following code snippet and click **Deploy** .
```Javascript
exports.onExecutePostLogin = async (event, api) => {
const namespace = 'auth0';
if (event.authorization) {
api.idToken.setCustomClaim(`${namespace}/roles`, event.authorization.roles);
api.accessToken.setCustomClaim(`${namespace}/roles`, event.authorization.roles);
}
}
```
This example is pulled from the Auth0 Documentation:
https://auth0.com/docs/manage-users/access-control/sample-use-cases-actions-with-authorization#add-user-roles-to-tokens
The `namespace` can be changed as desired. Per the example `auth0` is used which will result in the
**Groups Attrbute** setting in the Kasm OIDC config being `auth0/roles`.
05. In the main menu, expand **Actions**, select **Flows**, then click **Login**.
06. In the **Add Action** section, select **Custom**. The recently created action (e.g `Add User Roles`) should be visible.
07. Drag the action into the workflow and click **Apply**.
#### Kasm OpenID Config
1. Log into the Kasm UI as an administrator.
2. Select **Access Management** -> **Authentication** -> **OpenID** -> **Add Config**.
3. Update the form with the following entries, using the **Client ID** and **Client Secret** gathered in the previous section.
| **Property** | **Value** |
| --- | --- |
| **Enabled** | Checked |
| **Display Name** | Continue with Auth0 |
| **Logo URL** | `https://cdn.auth0.com/website/new-homepage/dark-favicon.png` |
| **Auto Login** | Unchecked |
| **Hostname** | `` |
| **Default** | Checked |
| **Client ID** | `` |
| **Client Secret** | `` |
| **Authorization URL** | `` |
| **Token URL** | `` |
| **User Info URL** | `` |
| **Scope** | `openid` `email` `profile` |
| **Username Attribute** | `email` |
| **Groups Attribute** | `auth0/roles` |
| **Debug** | Unchecked |
| **Redirect URL** | `https:///api/oidc_callback` |
| **OpenID Connect Issuer** | `` |
| **Logout with OIDC Provider** | Checked |
| **Enable OIDC SLO Frontchannel Endpoint** | Unchecked |
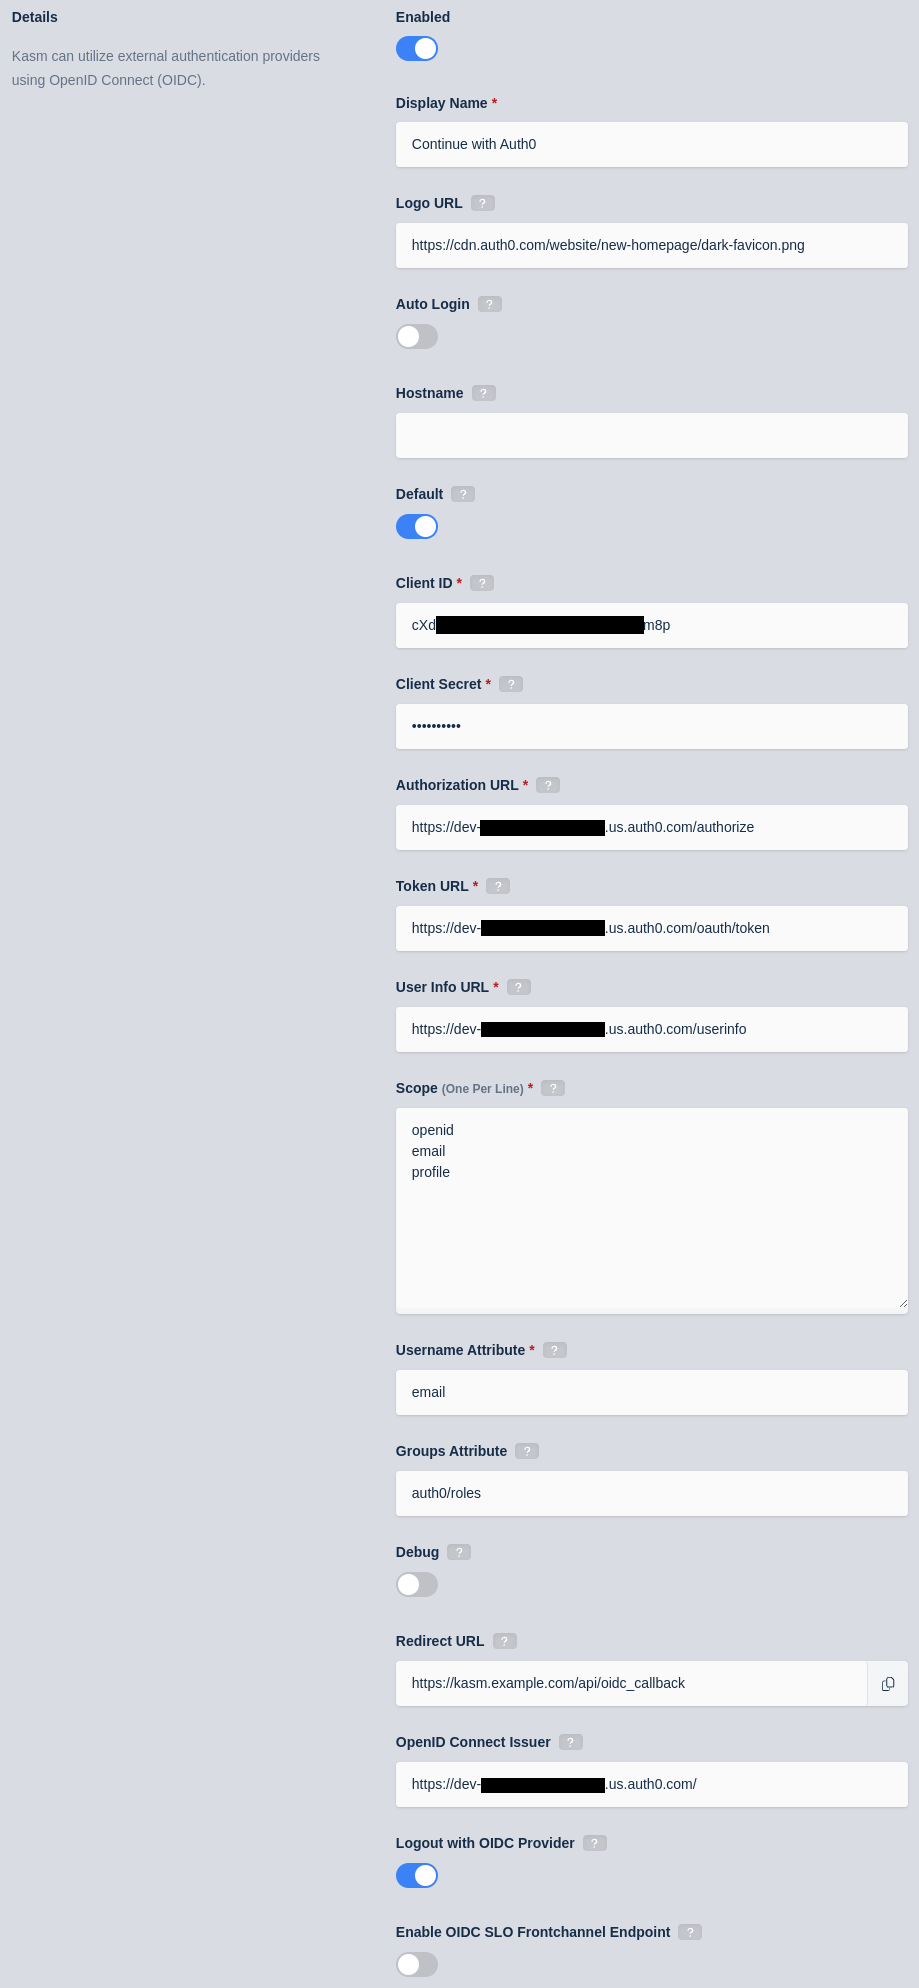
6) Click **Save** to save the changes.
#### Auth0 Login Test
1. Logout of the Kasm to display the login screen. The OpenID configuration should be shown.
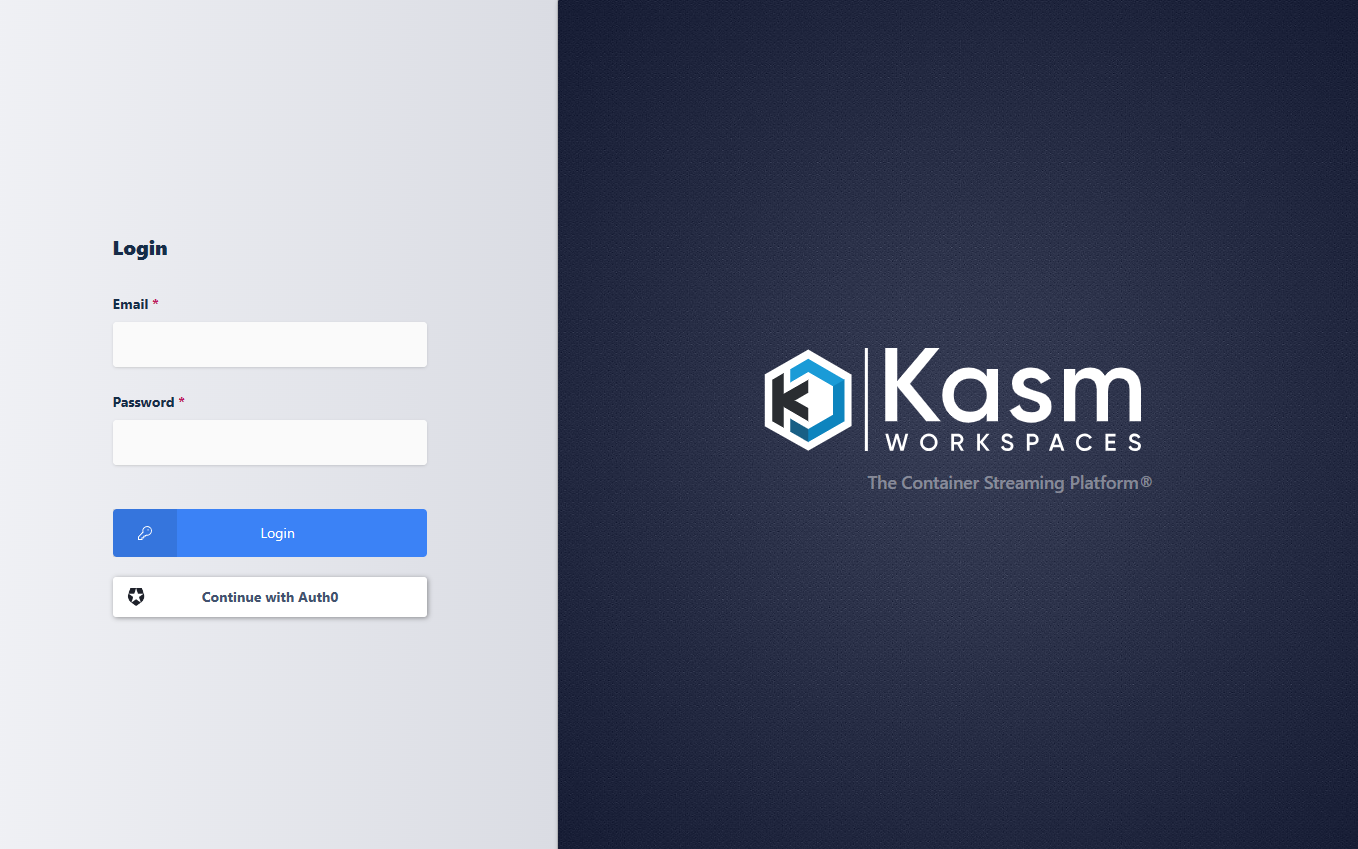
2. Click **Continue with Auth0**
3. The user is redirected to Auth0 for auth.
4. Upon completion, the user is logged into the Kasm app.
#### Group Mapping
In a previous section Auth0 was configured to send a list of **Roles** the user belongs to during
the OpenID auth workflow. We can now configure Kasm Groups with the Role associations so that
users are automatically added/removed based on their Auth0 Membership.
1. Log into the Kasm UI as an administrator.
2. Select **Access Management** -> **Groups** -> **Add Group**.
3. Name the Group **Premium**, and define a priority.
4. Click **Save** to create the group.
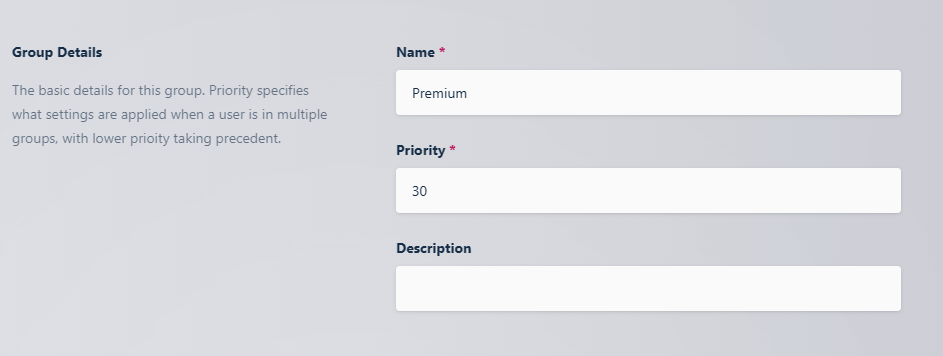
1. On the groups screen, using the arrow menu select **Edit** on the group that was just created.
2. Navigate to the **SSO Group Mappings** tab and select **Add SSO Mapping**.
3. Select the OpenID IDP that was created above `OpenID - Continue with Auth0` for the **SSO Provider**.
4. Then enter the Auth0 group name desired in the **Group Attributes** field, e.g `Kasm Premium`.
5. Click **Submit**
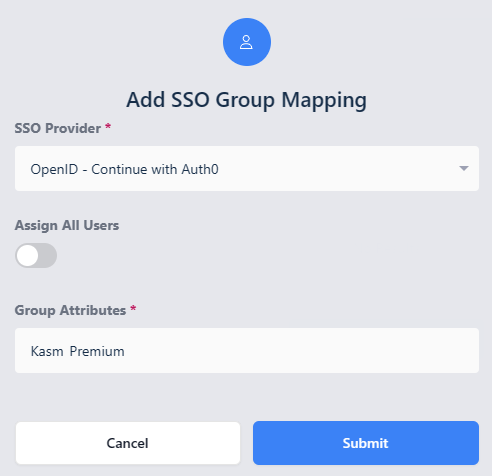
The Example Role as defined in Auth0.
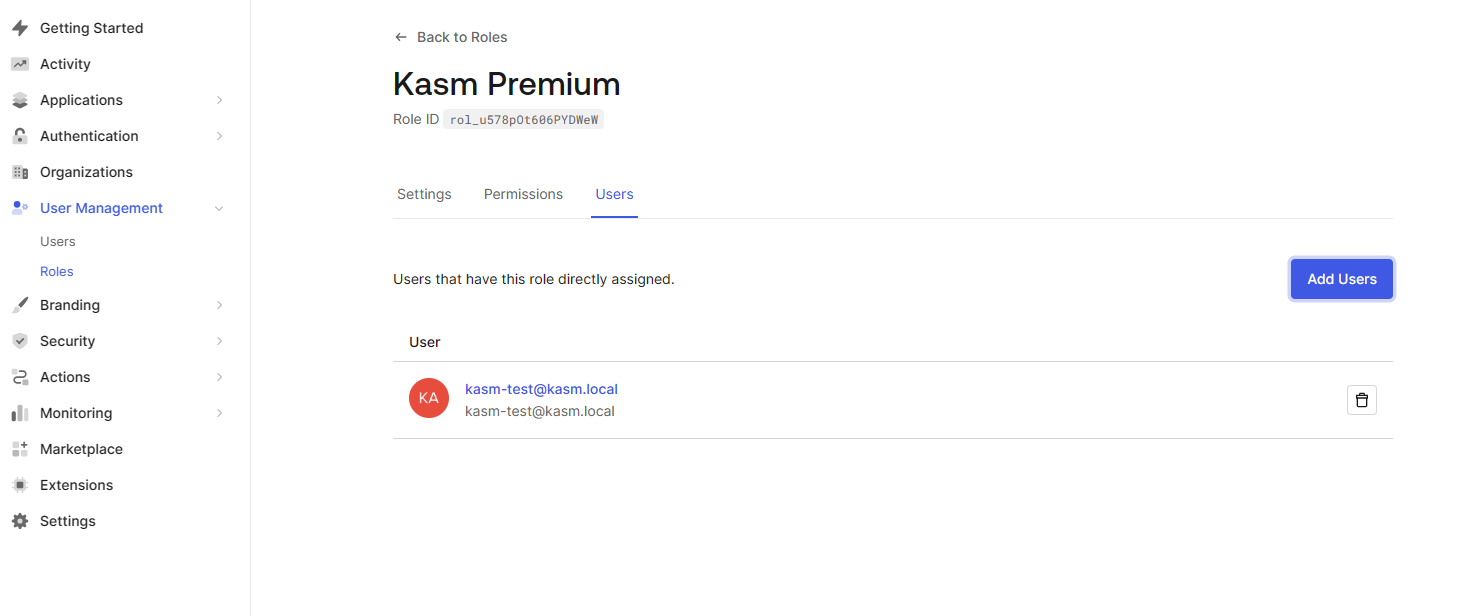
1. Logout, then login via the Auth0 Open ID login with a user that is a member of the specified group.
2. View the users group membership to ensure they are added to the newly created group.
---
## Github
### Github OpenID Setup
:::warning
Be mindful when configuring public OpenID providers. Any user who authenticates with the provider gains access to your Kasm Workspaces deployment. Kasm group permissions can restrict access to Workspace apps and desktops, but any user of the public authentication provider can still log in to your deployment. Use a private OpenID provider unless you intend to allow access to all users of the OpenID platform provider.
:::
This guide walks through a basic setup allowing Github users to authenticate with your Kasm deployment
Github OpenID does not support OIDC Single Logout.
Reference Docs:
- [https://docs.github.com/en/developers/apps/building-oauth-apps](https://docs.github.com/en/developers/apps/building-oauth-apps)
#### Creating a Github OAuth App
1. Login to Github and select **Settings** from the profile dropdown: [https://github.com/settings/profile](https://github.com/settings/profile)
2. Select **Developer Settings**.
3. Select **OAuth Apps**, then click **New OAuth App**.
4. Give the application a name (e.g `Kasm`), enter the URL of the deployment in the Homepage URL, and the Authorization callback to be `https:///api/oidc_callback`.
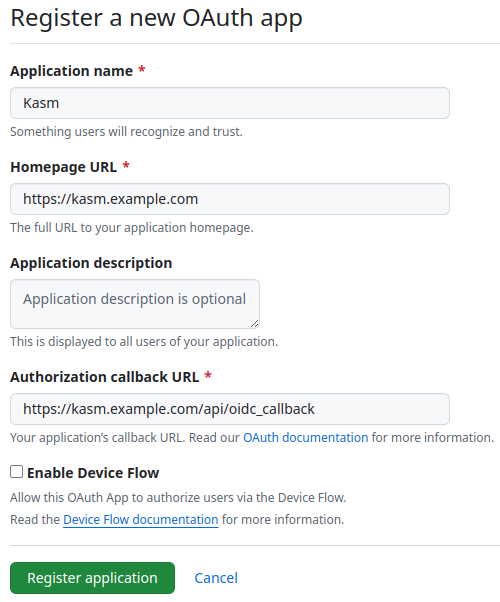
5. Select **Register Application**.
6. On the next page note the **Client ID**. It will be needed for upcoming configurations.
7. Click **Generate a new client secret** and note the value. It will be needed for upcoming configurations.
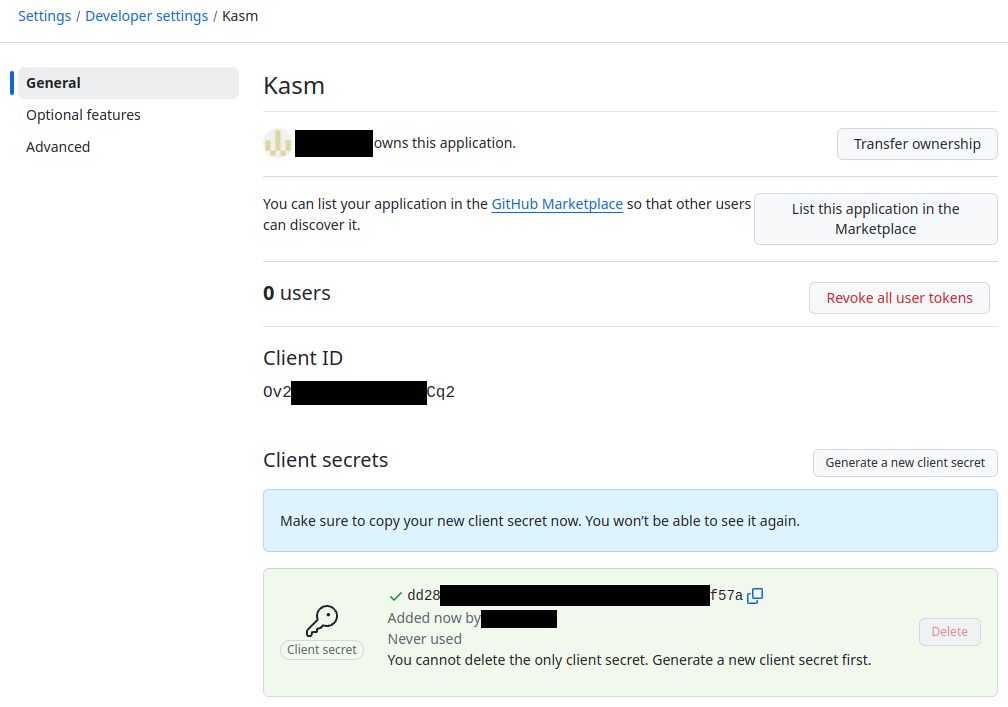
#### Kasm OpenID Config
1. Log into the Kasm UI as an administrator.
2. Select **Access Management** -> **Authentication** -> **OpenID** -> **Add Config**.
3. Update the form with the following entries, using the **Client ID** and **Client Secret** gathered in the previous section.
| **Property** | **Value** |
| --- | --- |
| **Enabled** | Checked |
| **Display Name** | Continue with Github |
| **Logo URL** | `https://github.com/favicon.ico` |
| **Auto Login** | Unchecked |
| **Hostname** | `` |
| **Default** | Checked |
| **Client ID** | `` |
| **Client Secret** | `` |
| **Authorization URL** | `https://github.com/login/oauth/authorize` |
| **Token URL** | `https://github.com/login/oauth/access_token` |
| **User Info URL** | `https://api.github.com/user` |
| **Scope** | `user:email` |
| **Username Attribute** | `email` |
| **Groups Attribute** | `` |
| **Debug** | Unchecked |
| **Redirect URL** | `https:///api/oidc_callback` |
| **OpenID Connect Issuer** | Blank |
| **Logout with OIDC Provider** | Unchecked |
| **Enable OIDC SLO Frontchannel Endpoint** | Unchecked |
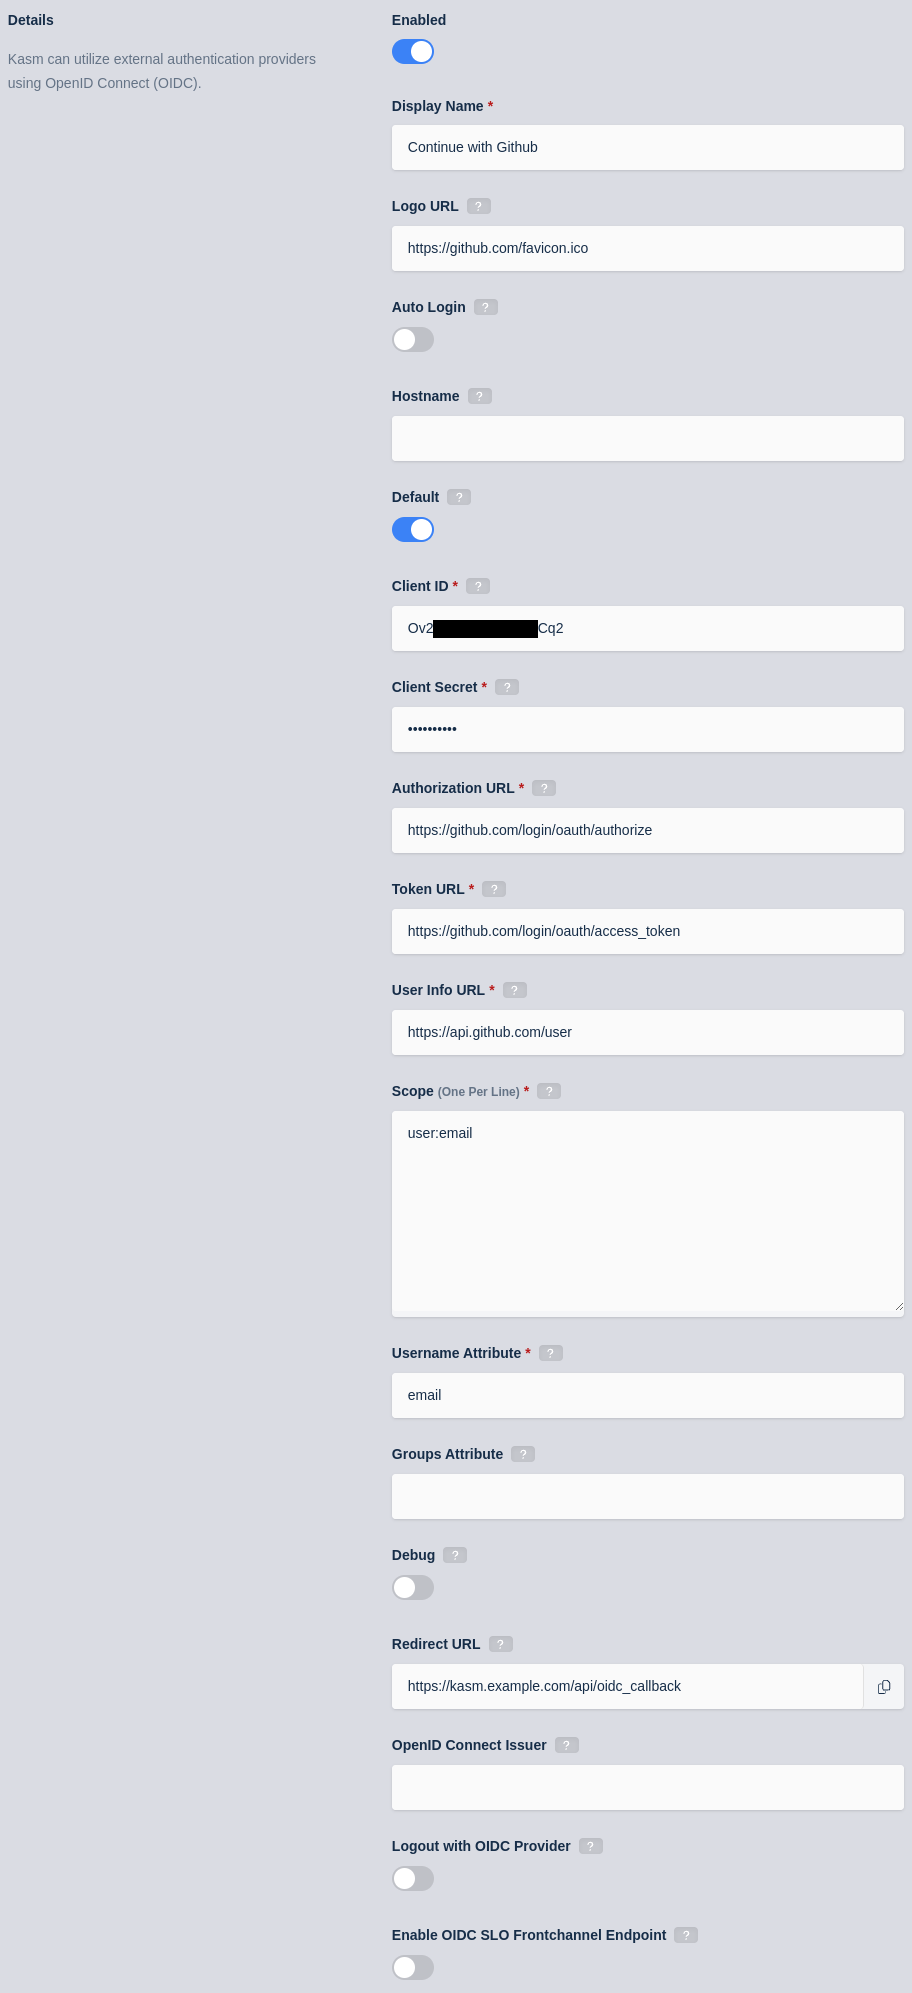
6. Click **Save** to save the changes.
#### Github Login Test
1. Logout of the Kasm to display the login screen. The OpenID configuration should be shown.
2. Click **Continue with Github**.
3. The user is redirected to Github. Login if necessary. The first time the user utilizes the OpenID auth, they will be prompted to accept
the access requested. Select **Authorize**
4. Upon compleation, the user is logged into the Kasm app.
---
## Google
### Google OpenID Setup
:::warning
Be mindful when configuring public OpenID providers. Any user who authenticates with the provider gains access to your Kasm Workspaces deployment. Kasm group permissions can restrict access to Workspace apps and desktops, but any user of the public authentication provider can still log in to your deployment. Use a private OpenID provider unless you intend to allow access to all users of the OpenID platform provider.
:::
This guide walks through a basic setup allowing Google users to authenticate with your Kasm deployment.
Google OpenID does not support OIDC Single Logout.
Reference Docs:
- [https://developers.google.com/identity/protocols/oauth2](https://developers.google.com/identity/protocols/oauth2)
#### Creating a Google OAuth App
1. Login to the Google Developer Console: [https://console.developers.google.com](https://console.developers.google.com)
2. Select **OAuth consent screen**.
3. Select **External** then click **Create**.
In this example, we walk through creating an integration where any Google user can auth with the Kasm app. This is ideal for a public
facing deployment. Choose **Internal** if only user from your Google Workspaces corporate account should be allowed to authenticate.
4. Provide values for the **App Name** , **User support email**, and **Developer Contact email**.
5. In the **Authorized Domains** section, enter your deployment's top private domain (e.g `example.com`).
6. Click **Save and Continue**.
7. Click **Add or Remove Scopes**.
8. In the **Update Selected Scopes** window check `.../auth/userinfo.email` , then click Update.
09. Click **Save and Continue**.
10. Until the app is fully verified and published it can only be used to auth specific test accounts.
Click **Add Users** to authorize several test google accounts.
11. Click **Save and Continue**.
12. In the **APIs & Services** menu, select **Credentials**.
13. Select **Create Credentials**, then **OAuth client ID**.
14. Select `Web Application` as the **Application type**, then give the client a name (e.g `Kasm`).
15. Click **Add URI** in the **Authorized redirect URIs** section, and enter `https:///api/oidc_callback`.
16. Click **Create**.
17\. A dialogue will display with a **Client ID** and **Client Secret**. Save these values for the next configuration steps.
The JSON download will also include URLs needed for the next configuration steps.
#### Kasm OpenID Config
1. Log into the Kasm UI as an administrator.
2. Select **Access Management** -> **Authentication** -> **OpenID** -> **Add Config**.
3. Update the form with the following entries, using the **Client ID** and **Client Secret** gathered in the previous section.
| **Property** | **Value** |
| --- | --- |
| **Enabled** | Checked |
| **Display Name** | Continue with Google |
| **Logo URL** | `https://www.google.com/favicon.ico` |
| **Auto Login** | Unchecked |
| **Hostname** | `` |
| **Default** | Checked |
| **Client ID** | `` |
| **Client Secret** | `` |
| **Authorization URL** | `https://accounts.google.com/o/oauth2/auth` |
| **Token URL** | `https://oauth2.googleapis.com/token` |
| **User Info URL** | `https://www.googleapis.com/oauth2/v1/userinfo` |
| **Scope** | `openid` `https://www.googleapis.com/auth/userinfo.email` `https://www.googleapis.com/auth/userinfo.profile` |
| **Username Attribute** | `email` |
| **Groups Attribute** | Unchecked |
| **Debug** | Unchecked |
| **Redirect URL** | `https:///api/oidc_callback` |
| **OpenID Connect Issuer** | Blank |
| **Logout with OIDC Provider** | Unchecked |
| **Enable OIDC SLO Frontchannel Endpoint** | Unchecked |
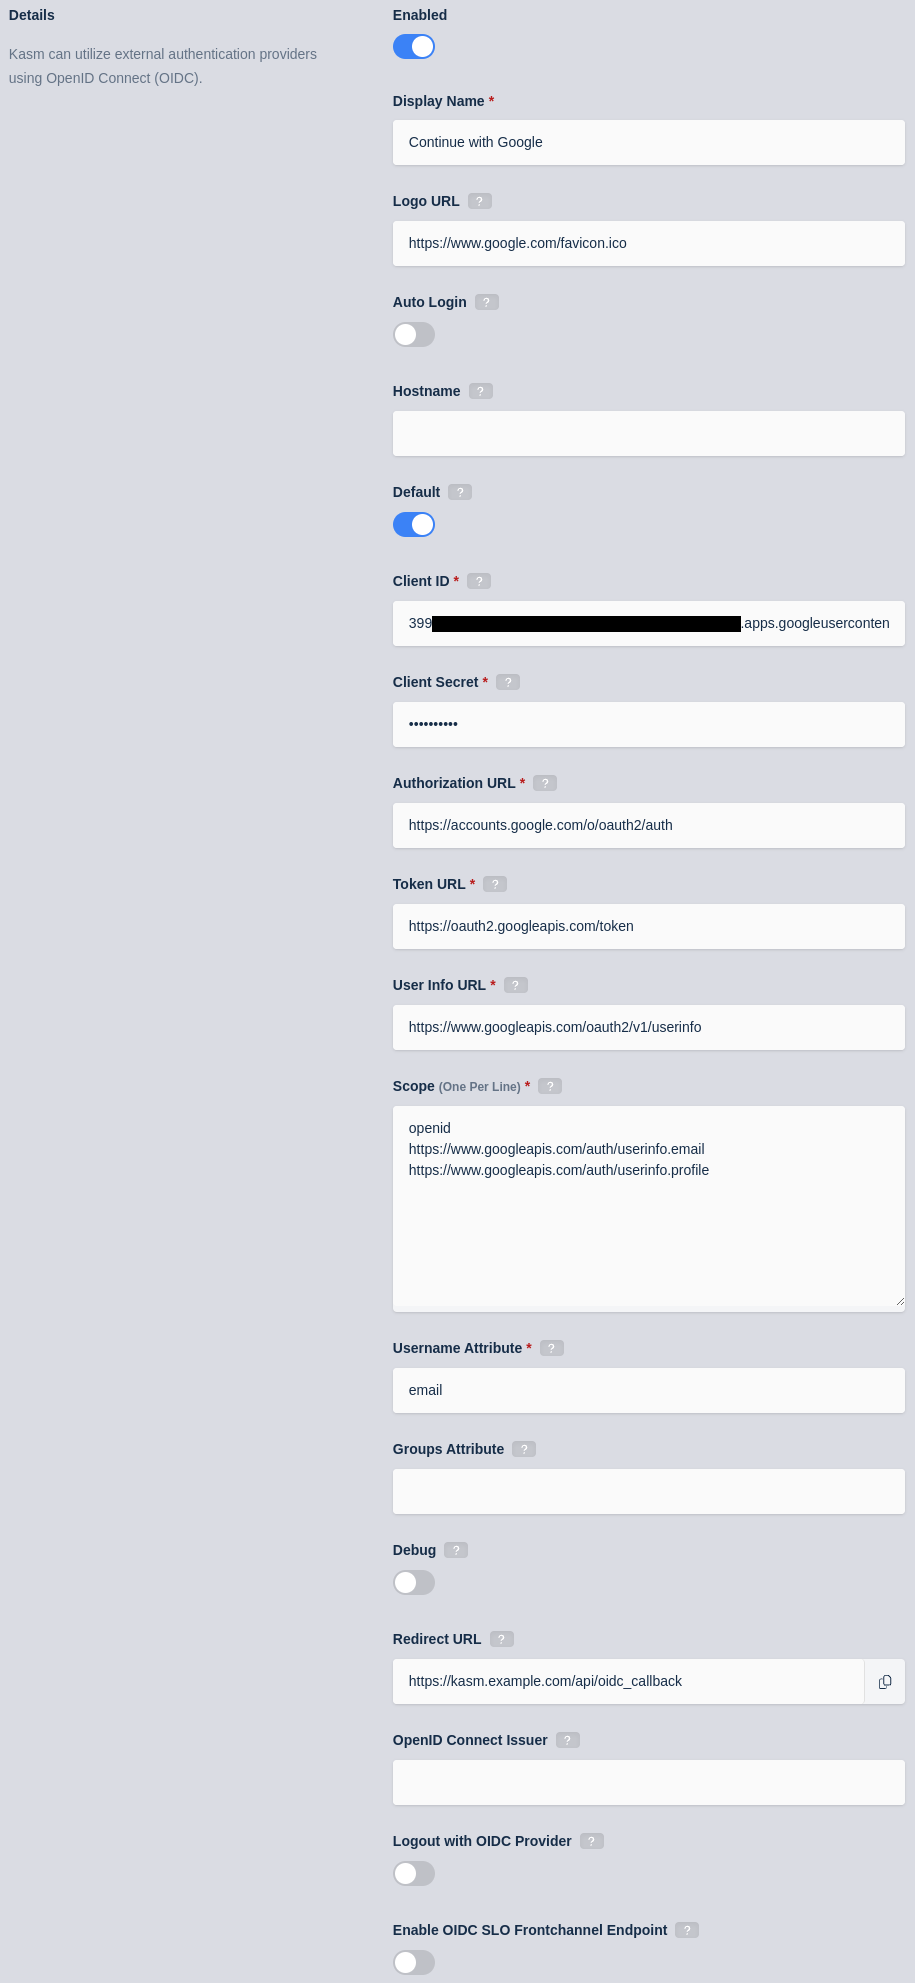
6. Click **Save** to save the changes.
#### Google Login Test
1. Logout of the Kasm to display the login screen. The OpenID configuration should be shown.
2. Click **Continue with Google**.
3. The user is redirected to Google for auth.
4. Upon completion, the user is logged into the Kasm app.
---
## Keycloak
### Keycloak OpenID Setup
:::warning
Be mindful when configuring public OpenID providers. Any user who authenticates with the provider gains access to your Kasm Workspaces deployment. Kasm group permissions can restrict access to Workspace apps and desktops, but any user of the public authentication provider can still log in to your deployment. Use a private OpenID provider unless you intend to allow access to all users of the OpenID platform provider.
:::
This guide walks through a basic setup allowing Keycloak users to authenticate with your Kasm deployment.
Reference Docs:
- [https://www.keycloak.org/docs/latest/securing_apps/#_oidc](https://www.keycloak.org/docs/latest/securing_apps/#_oidc)
#### Creating a Keycloak OAuth App
01. Login to the Keycloak portal as an Admin.
02. Under the the desired realm (e.g **Master**) , select **Realm Settings**.
03. Click **OpenID Endpoint Configuration** next to Endpoints.
04. Save off the urls for `issuer`, `authorization_endpoint` , `token_endpoint`, and `userinfo_endpoint`.
These will be used in future steps.
05. Back in the console, select **Clients** under the Realm.
06. Select **Create**.
07. Define a **Client ID** , e.g `kasm-12345`. Select `openid-connect` for **Client Protocol** and enter the URL for
the Kasm deployment under **Root URL** (e.g `https://kasm.example.com`).
08. In the client settings, change **Access Type** to `confidential`, then slick **Save**.
09. In the **Settings** section, at the bottom, under **Logout**, choose one of the following:
Backchannel Logout is recommended as it is more stable and secure than front-channel.
Choose front-channel if backchannel is not possible, e.g. keycloak is unable to make a direct HTTPS request to Kasm.
01. Front-channel Logout
- Set **Front-channel logout** to **On**
- Fill out **Front-channel logout URL** with the endpoint URL for the kasm deployment (e.g. `https://kasm.example.com/api/oidc_frontchannel_logout`)
- Click **Save**
02. Backchannel Logout
- Set **Front channel logout** to **Off**
- Fill out **Backchannel logout** with the endpoint URL for the kasm deployment (e.g. `https://kasm.example.com/api/oidc_backchannel_logout`)
- Set **Backchannel logout session required** to **On**
- Click **Save**
10. Select **Credentials**. Save off the **Secret**. It will be used in future steps.
11. In the client settings, select **Mappers**, then click **Create**.
12. Enter `groups` for **Name**, and select **Group Membership** from the Mapper Type. Enter `groups` for
**Token Claim Name**, then select **Save**.
#### Kasm OpenID Config
1. Log into the Kasm UI as an administrator.
2. Select **Access Management** -> **Authentication** -> **OpenID** -> **Add Config**.
3. Update the form with the following entries, using the **Client ID** and **Client Secret** gathered in the previous section.
| **Property** | **Value** |
| :----------------------- | :-------------------------------------------------------------- |
| **Enabled** | Checked |
| **Display Name** | Continue with Keycloak |
| **Logo URL** | `https://www.keycloak.org/resources/favicon.ico` |
| **Auto Login** | Unchecked |
| **Hostname** | `` |
| **Default** | Checked |
| **Client ID** | `` |
| **Client Secret** | `` |
| **Authorization URL** | `` |
| **Token URL** | `` |
| **User Info URL** | `` |
| **Scope** | `openid` `email` `profile` |
| **Username Attribute** | `preferred_username` |
| **Groups Attribute** | `groups` |
| **Debug** | Unchecked |
| **Redirect URL** | `https:///api/oidc_callback` |
| **OpenID Connect Issuer** | `` |
| **Logout with OIDC Provider** | Checked |
| **Enable OIDC SLO Frontchannel Endpoint** | Checked if Frontchannel Logout was chosen in the previous section |
6) Click **Save** to save the changes.
#### Keycloak Login Test
1. Logout of the Kasm to display the login screen. The OpenID configuration should be shown.
2. Click **Continue with Keycloak**
3. The user is redirected to Keycloak for auth.
4. Upon completion, the user is logged into the Kasm app.
#### Group Mapping
The previous configurations will instruct the identity provider to send a list of **Security Group ID** the user belongs to during
the OpenID auth workflow. We can configure Kasm Groups with the Security Group IDs from Azure AD so that users are automatically added/removed
based on their Azure AD group Membership.
1. Log into the Kasm UI as an administrator.
2. Select **Access Management** -> **Groups** -> **Add Group**.
3. Name the Group **Group Test**, and define a priority.
4. Click **Save** to create the group.
1. On the groups screen, using the arrow menu select **Edit** on the group that was just created.
2. Navigate to the **SSO Group Mappings** tab and select **Add SSO Mapping**.
3. Select the OpenID IDP that was created above "OpenID - Continue with Keycloak" for the **SSO Provider**.
4. Then enter the Keycloak group name desired in the **Group Attributes** field, e.g `/Kasm-Test`.
Note the slash. This is needed when **Full group path** is set in the Keycloak Client Mapper which is the default.
1. Click **Submit**
1. Logout, then login via the Keycloak Open ID login with a user that is a member of the specified group.
2. View the users group membership to ensure they are added to the newly created group.
---
## Microsoft Internal
### Microsoft (Internal) OpenID Setup
This guide walks through a basic setup allowing Microsoft users to authenticate with your Kasm deployment.
Reference Docs:
- [https://docs.microsoft.com/en-us/azure/active-directory/develop/quickstart-register-app](https://docs.microsoft.com/en-us/azure/active-directory/develop/quickstart-register-app)
- [https://docs.microsoft.com/en-us/azure/active-directory/develop/active-directory-v2-protocols](https://docs.microsoft.com/en-us/azure/active-directory/develop/active-directory-v2-protocols)
- [https://docs.microsoft.com/en-us/azure/active-directory/hybrid/how-to-connect-fed-group-claims](https://docs.microsoft.com/en-us/azure/active-directory/hybrid/how-to-connect-fed-group-claims)
#### Creating a Microsoft OAuth App
01. Login to the Microsoft Azure Portal: [https://portal.azure.com/](https://portal.azure.com/)
02. Select **Azure Active Directory**.
03. Select **App Registrations**.
04. Select New Registration.
05. Give the app a Name (e.g `Kasm`)
06. In the **Supported account types** select **Accounts in this organizational directory only...**.
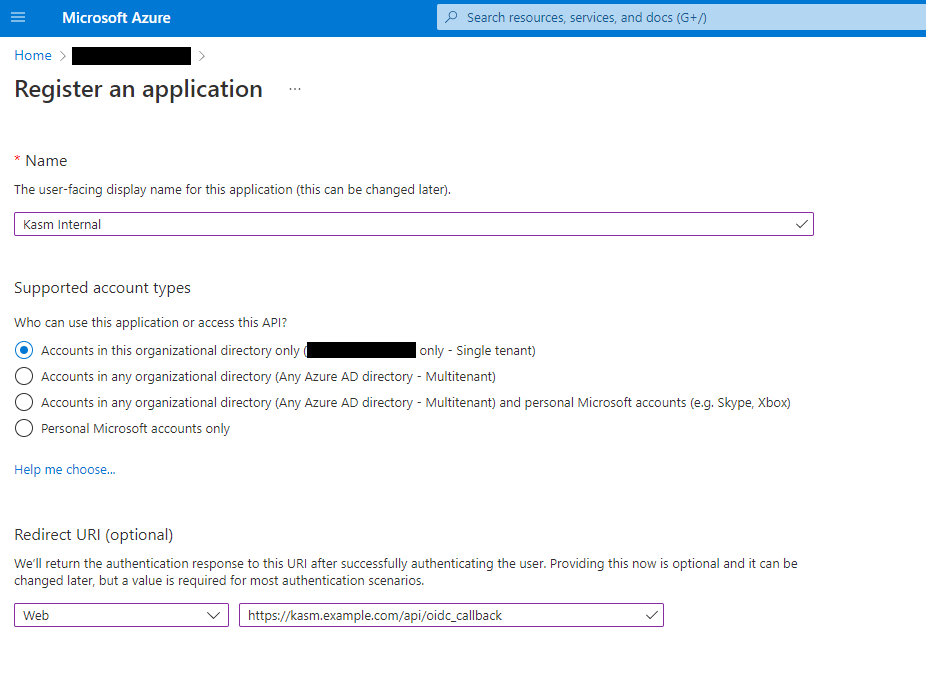
07. On the next page, the **Application (client) ID** is shown, save this value as the Client ID to be used in the next section.
08. Select **Endpoints**. Note the **OAuth 2.0 authorization endpoint (v2)**, **OAuth 2.0 token endpoint (v2)**, and **OpenID Connect metadata document** values to be used in the next section.
09. Select **Add a certificate or secret** next to **Client credentials**.
10. Select the **Client secrets** tab, then slick **New client secret**.
11. Enter a description and expiration then click **Add**.
12. The credentials are shown, save the **Value** as the **Client Secret** to be used in the next section.
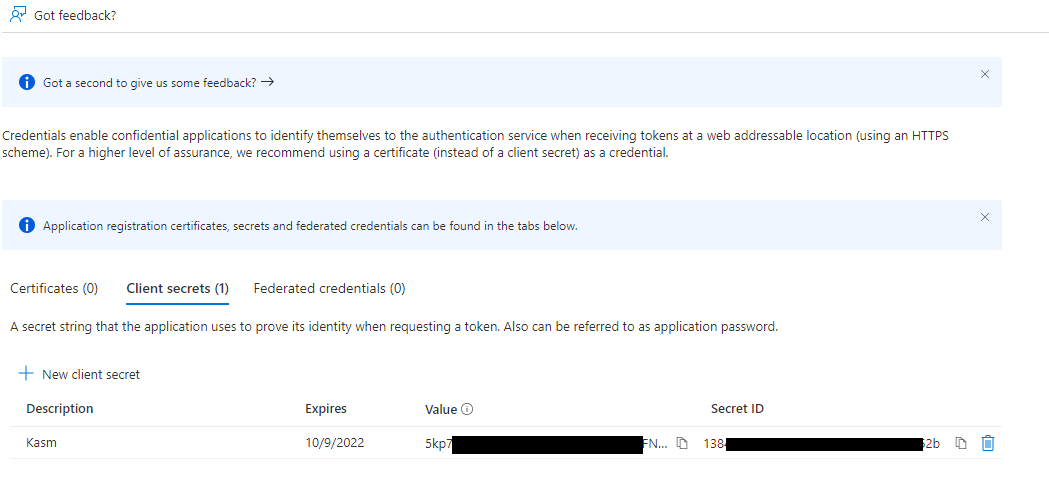
13. Select **Token configuration**.
14. Select **Add groups claim**.
15. Check **Security groups**, then click **Add**.
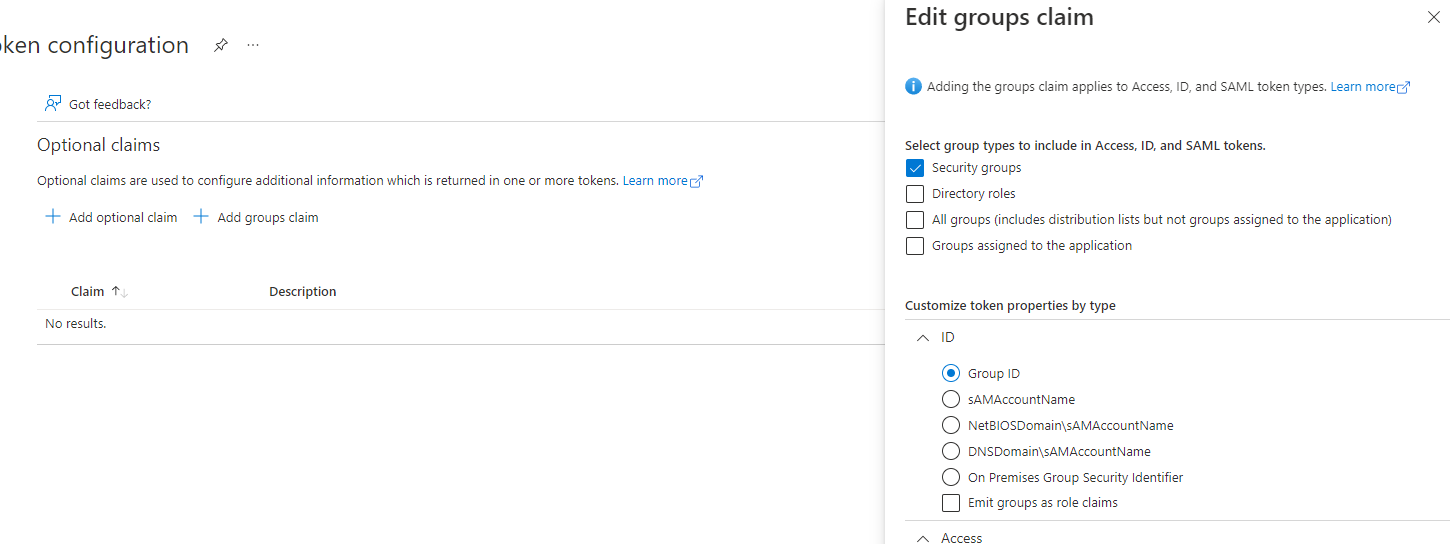
16. Select **Add Optional Claim**
17. Under **Token Type** select **ID**, then check the box for **sid**. Click **Add**.
``` {figure} /img/oidc/microsoft_internal/sid_claim.webp
:align: center
**SID Claim**
```
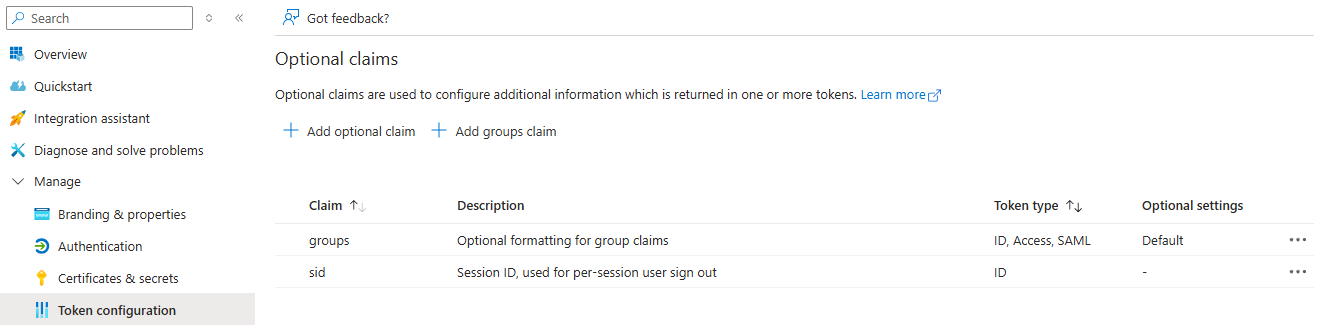
18. Select **Authentication**
19. In **Front-channel Logout URL**, provide the Kasm `/api/oidc_frontchannel_logout` endpoint as shown. Click **Save**.
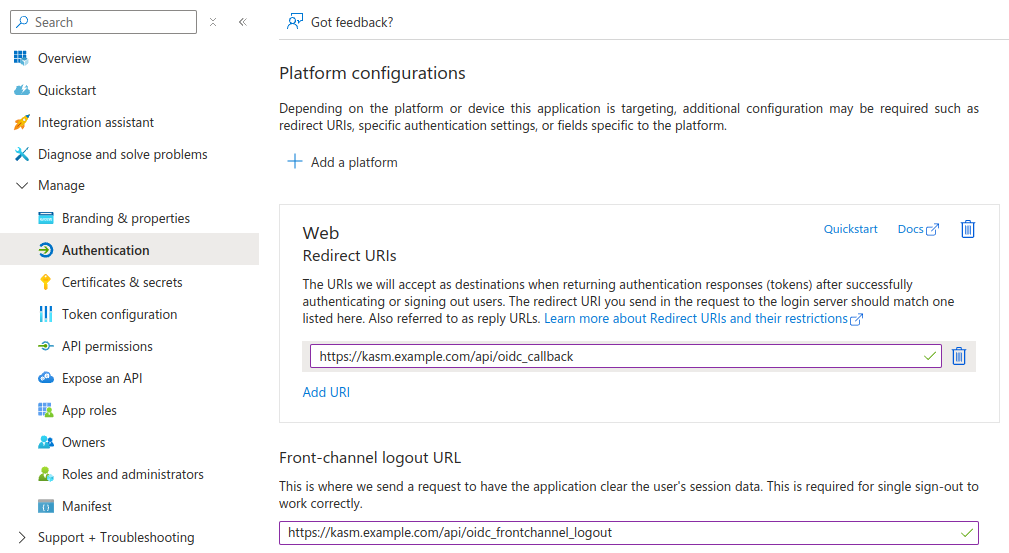
18. In another browser tab, navigate to the **OpenID Connect metadata document** URL value saved from earlier. Find and save off the value for the `"issuer"` field in the response, to be used in the next section.
#### Kasm OpenID Config
1. Log into the Kasm UI as an administrator.
2. Select **Access Management** -> **Authentication** -> **OpenID** -> **Add Config**.
3. Update the form with the following entries, using the **Client ID** and **Client Secret** gathered in the previous section.
| **Property** | **Value** |
| --- | --- |
| **Enabled** | Checked |
| **Display Name** | Continue with Microsoft |
| **Logo URL** | `https://www.microsoft.com/favicon.ico` |
| **Auto Login** | Unchecked |
| **Hostname** | `` |
| **Default** | Checked |
| **Client ID** | `` |
| **Client Secret** | `` |
| **Authorization URL** | `` |
| **Token URL** | `` |
| **User Info URL** | `https://graph.microsoft.com/oidc/userinfo` |
| **Scope** | `openid` `email` `profile` |
| **Username Attribute** | `email` |
| **Groups Attribute** | `groups` |
| **Debug** | Unchecked |
| **Redirect URL** | `https:///api/oidc_callback` |
| **OpenID Connect Issuer** | `` |
| **Logout with OIDC Provider** | Checked |
| **Enable OIDC SLO Frontchannel Endpoint** | Checked |
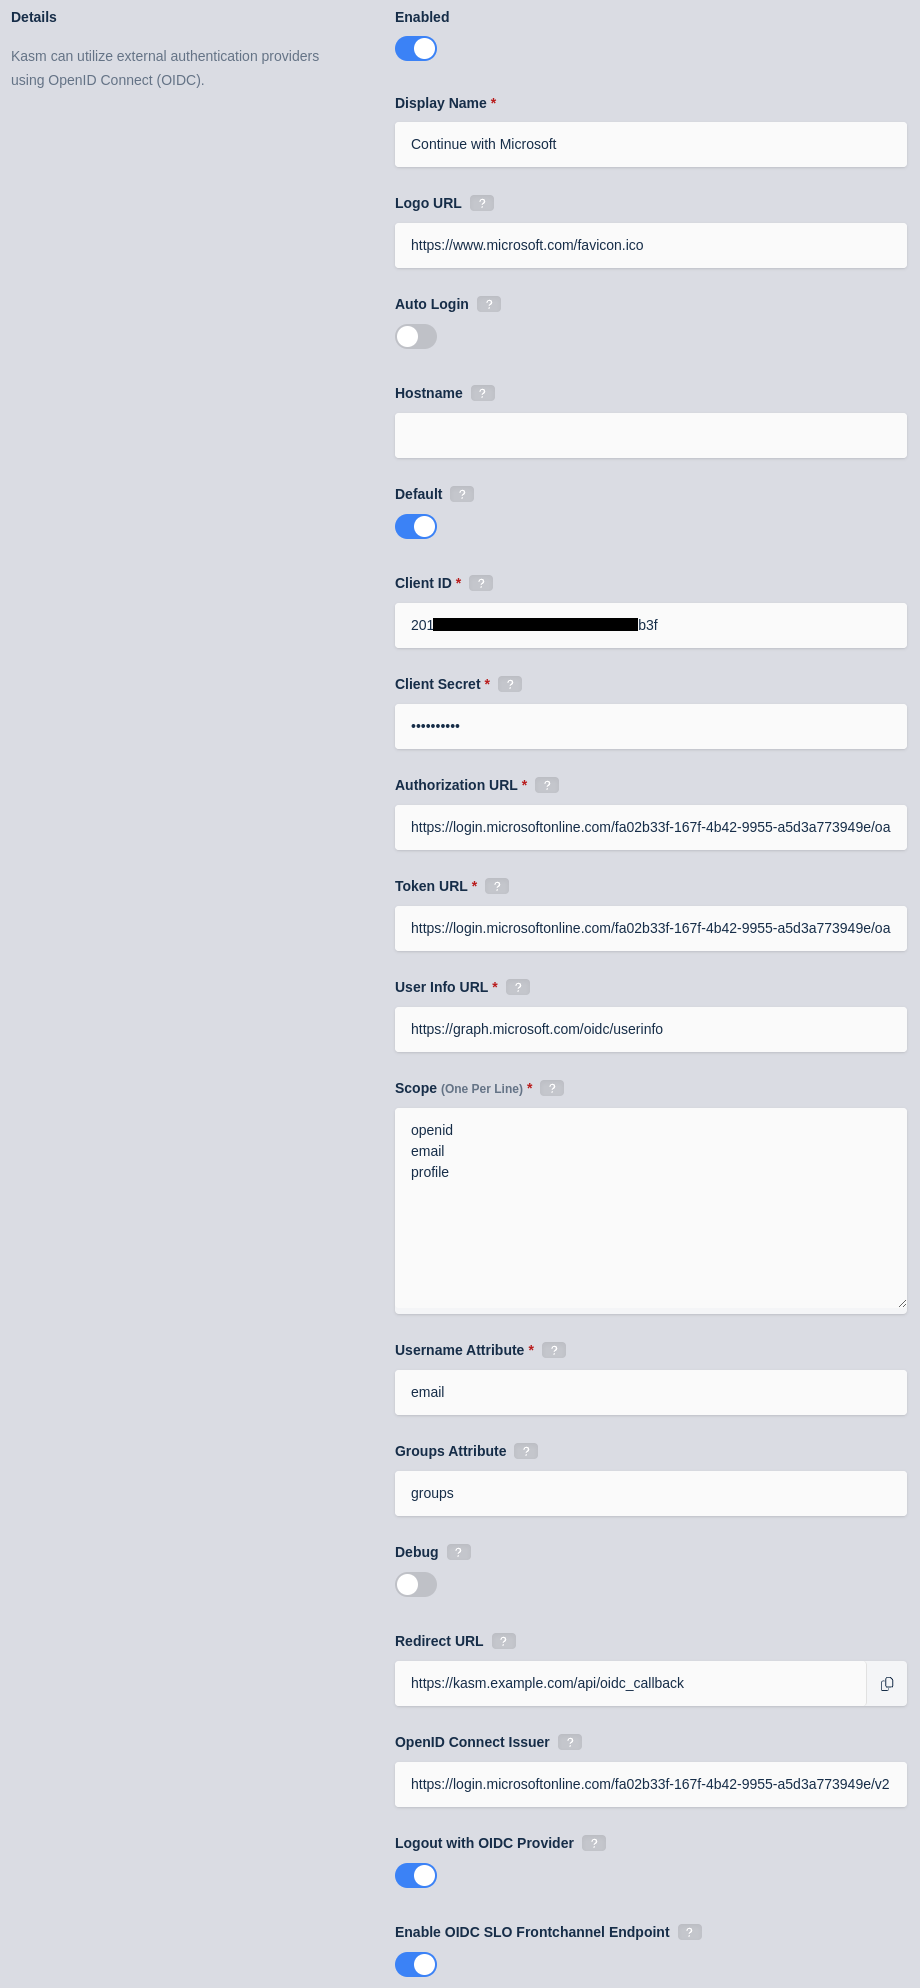
6) Click **Save** to save the changes.
#### Microsoft Login Test
1. Logout of the Kasm to display the login screen. The OpenID configuration should be shown.
2. Click **Continue with Microsoft**
3. The user is redirected to Microsoft for auth.
4. Upon completion, the user is logged into the Kasm app.
#### Group Mapping
The previous configurations will instruct the identity provider to send a list of **Security Group ID** the user belongs to during
the OpenID auth workflow. We can configure Kasm Groups with the Security Group IDs from Azure AD so that users are automatically added/removed
based on their Azure AD group Membership.
1. Log into the Kasm UI as an administrator.
2. Select **Access Management** -> **Groups** -> **Add Group**.
3. Name the Group **Group Test**, and define a priority.
4. Click **Save** to create the group.
1. On the groups screen, using the arrow menu select **Edit** on the group that was just created.
2. Navigate to the **SSO Group Mappings** tab and select **Add SSO Mapping**.
3. Select the OpenID IDP that was created above "OpenID - Continue with Microsoft" for the **SSO Provider**.
4. Then enter the Azure AD security group ID desired in the **Group Attributes** field.
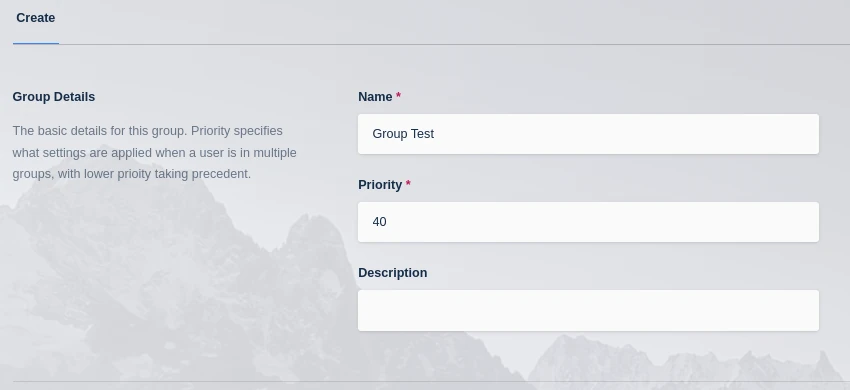
1. Click **Submit**
2. Logout, then login via the Microsoft Open ID login with a user that is a member of the specified group.
3. View the users group membership to ensure they are added to the newly created group.
---
## Microsoft
### Microsoft (Public) OpenID Setup
:::warning
Be mindful when configuring public OpenID providers. Any user who authenticates with the provider gains access to your Kasm Workspaces deployment. Kasm group permissions can restrict access to Workspace apps and desktops, but any user of the public authentication provider can still log in to your deployment. Use a private OpenID provider unless you intend to allow access to all users of the OpenID platform provider.
:::
This guide walks through a basic setup allowing Microsoft users to authenticate with your Kasm deployment.
Reference Docs:
- [https://docs.microsoft.com/en-us/azure/active-directory/develop/quickstart-register-app](https://docs.microsoft.com/en-us/azure/active-directory/develop/quickstart-register-app)
- [https://docs.microsoft.com/en-us/azure/active-directory/develop/active-directory-v2-protocols](https://docs.microsoft.com/en-us/azure/active-directory/develop/active-directory-v2-protocols)
#### Creating a Microsoft OAuth App
1. Login to the Microsoft Azure Portal: [https://portal.azure.com/](https://portal.azure.com/)
2. Select **Azure Active Directory**.

3. Select **App Registrations**.

4. Select New Registration.
5. Give the app a Name (e.g `Kasm`).
6. In the **Supported account types** select **Accounts in any organizational directory (Any Azure AD directory - Multitenant) and personal Microsoft accounts (e.g. Skype, Xbox)**.
In this example, we walk through creating an integration where any Microsoft user can auth with the Kasm app. This is ideal for a public
facing deployment. Other options are available for single-tenant and multi-tenant configurations.
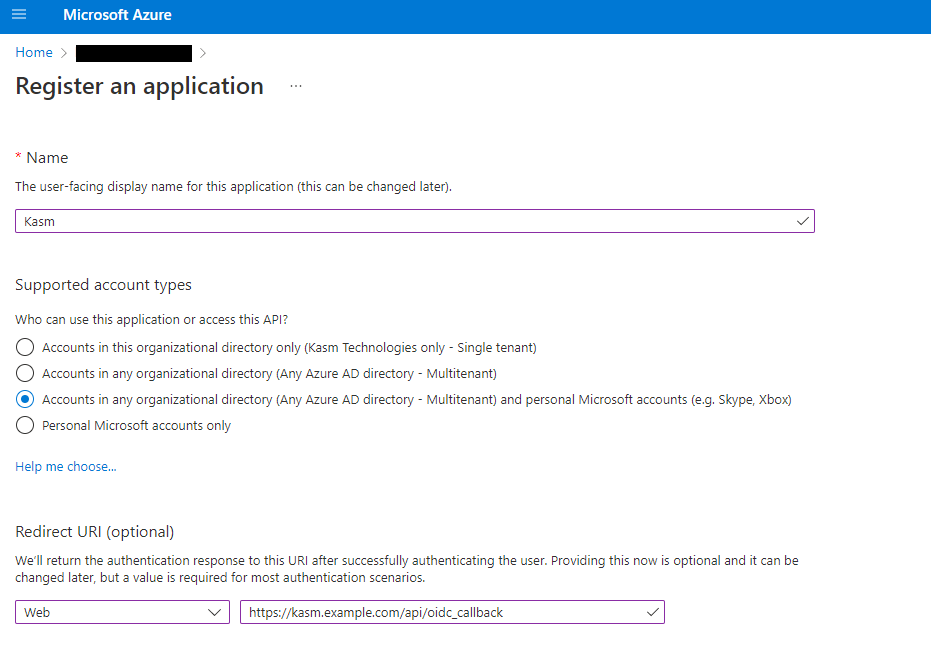
7. On the next page, the **Application (client) ID** is shown, save this value as the Client ID to be used in the next section.
8. Select **Add a certificate or secret** next to **Client credentials**.

09. Select the **Client secrets** tab, then slick **New client secret**.
10. Enter a description and expiration then click **Add**.
11. The credentials are shown, save the **Value** as the **Client Secret** to be used in the next section.

12. Select **Token configuration**.
13. Select **Add Optional Claim**
14. Under **Token Type** select **ID**, then check the box for **sid**. Click **Add**.
``` {figure} /img/oidc/microsoft/sid_claim.webp
:align: center
**SID Claim**
```
15. Select **Authentication**
16. In **Front-channel Logout URL**, provide the Kasm `/api/oidc_frontchannel_logout` endpoint as shown. Click **Save**.

#### Kasm OpenID Config
1. Log into the Kasm UI as an administrator.
2. Select **Access Management** -> **Authentication** -> **OpenID** -> **Add Config**.
3. Update the form with the following entries, using the **Client ID** and **Client Secret** gathered in the previous section.
| **Property** | **Value** |
| --- | --- |
| **Enabled** | Checked |
| **Display Name** | Continue with Microsoft |
| **Logo URL** | `https://www.microsoft.com/favicon.ico` |
| **Auto Login** | Unchecked |
| **Hostname** | `` |
| **Default** | Checked |
| **Client ID** | `` |
| **Client Secret** | `` |
| **Authorization URL** | `https://login.microsoftonline.com/common/oauth2/v2.0/authorize` |
| **Token URL** | `https://login.microsoftonline.com/common/oauth2/v2.0/token` |
| **User Info URL** | `https://graph.microsoft.com/oidc/userinfo` |
| **Scope** | `openid` `email` `profile` |
| **Username Attribute** | `email` |
| **Groups Attribute** | Unchecked |
| **Debug** | Unchecked |
| **Redirect URL** | `https:///api/oidc_callback` |
| **OpenID Connect Issuer** | `https://login.microsoftonline.com/common/v2.0` |
| **Logout with OIDC Provider** | Checked |
| **Enable OIDC SLO Frontchannel Endpoint** | Checked |
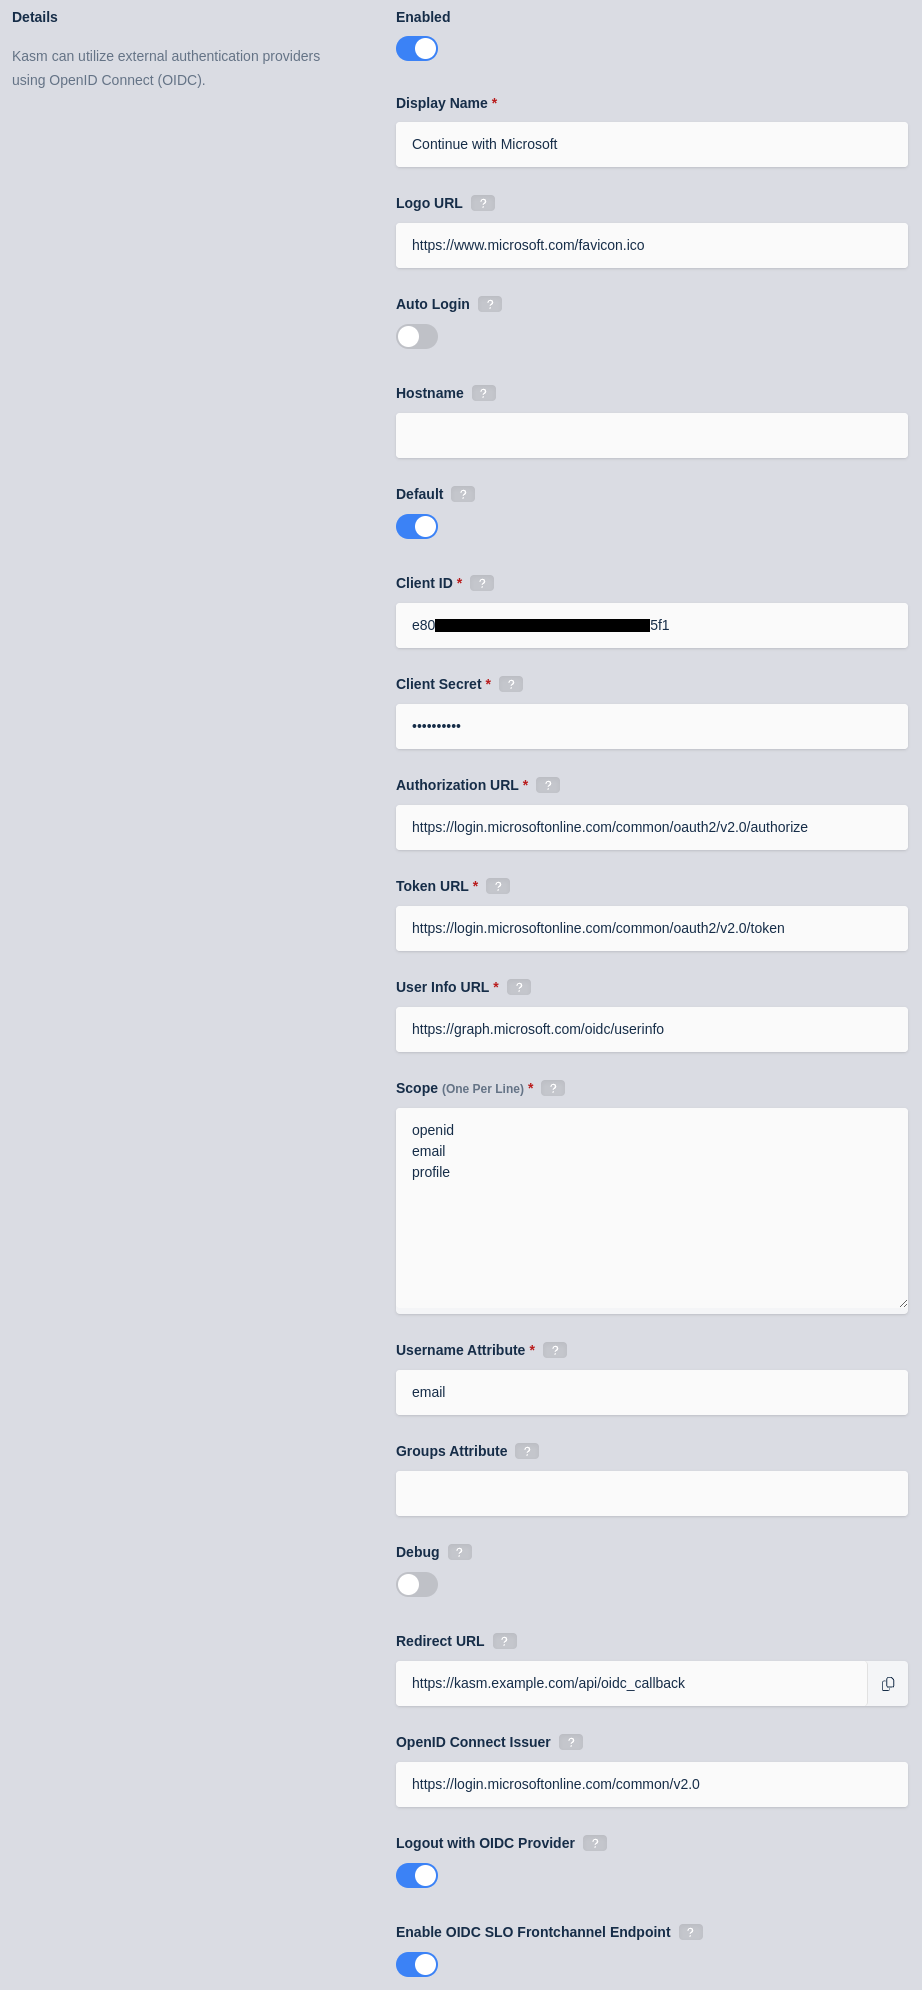
6. Click **Save** to save the changes.
#### Microsoft Login Test
1. Logout of the Kasm to display the login screen. The OpenID configuration should be shown.

2. Click **Continue with Microsoft**
3. The user is redirected to Microsoft for auth.

4. Upon completion, the user is logged into the Kasm app.
---
## Configuring OpenID Authentication for Kasm Workspaces
## OpenID Authentication
Kasm can utilize external authentication providers using OAuth, including OpenID Connect (OIDC) providers.
:::warning
Be mindful when configuring public OpenID providers. Any user who authenticates with the provider gains access to your Kasm Workspaces deployment. Kasm group permissions can restrict access to Workspace apps and desktops, but any user of the public authentication provider can still log in to your deployment. Use a private OpenID provider unless you intend to allow access to all users of the OpenID platform provider.
:::
### Configuration
OpenID configuration can be found under the Access Management -> Authentication tab in the Admin Navigation Bar.
| **Property** | **Description** |
| :----------------------------- | :---------------------------------------------------------------------------------------------------------------------------------------------------------------------------------------------------------------------------------------------------------------------------------------------------------------------------------------------------------------------------------------------------------------- |
| **Enabled** | When checked this configuration will be active. |
| **Display Name** | This name is displayed on the login page to represent the authentication provider. (e.g `Continue with Github`) |
| **Logo URL** | A URL to a login logo image for the authentication provider. (e.g `https://github.com/favicon.ico`) |
| **Auto Login** | When checked, the user will be automatically navigated to the OIDC provider when they view the login screen. This only applies if a single authentication provider is visible. If this configuration is set, the fixed login page (without redirection) can be accessed via `/#/staticlogin` |
| **Hostname** | The URL hostname (e.g kasm.example.com) of the deployment. This OIDC config will only be displayed when the deployment is accessed via this URL host name. This allows for a single deployment to service multiple tenants who may need different OIDC configurations. If Default is defined, this config will apply regardless of the host name. |
| **Default** | If checked this OIDC config will be shown on the login screen of the deployment when access with any hostname, unless another config is defined with the specific hostname. |
| **Client ID** | The Client ID received from the authentication provider. |
| **Client Secret** | The Client Secret received from the authentication provider. |
| **Authorization URL** | The authorization url for the authentication provider. (e.g `https://github.com/login/oauth/authorize`) |
| **Token URL** | The token url for the authentication provider. (e.g `https://github.com/login/oauth/access_token`) |
| **User Info URL** | The user info url for the authentication provider. (e.g `https://api.github.com/user`). This service will be queried if the **Username Attribute** or **Groups Attribute** are not provided by the identity provider in the id or access tokens. |
| **Scope** | The OIDC Scopes for the authentication provider. Enter one scope per line. e.g: `openid` `email` |
| **Username Attribute** | The attribute from the authentication provider to use for the username within Kasm (e.g `email`). The system will search the access_token, id_token and user_info api for this property. |
| **Groups Attribute** | The attribute from the authentication provider to user for group membership mapping within Kasm (e.g `groups`). The system will search the access_token, id_token and user_info api for this property. This field is optional, but if defined, authentication will fail if the group attribute is not found. |
| **Debug** | When checked, the OIDC access and id tokens are logged as well as the response from the user_info api if queried. TLS Verification is disabled for the Authorization URL, Token URL, and URL Info URL API interactions. This feature should remain disabled unless needed for troubleshooting. |
| **Redirect URL** | The identify provider can be configured to allow access to redirect to this URL. `https:///api/oidc_callback` |
| **OpenID Connect Issuer** | An OIDC provider has an issuer value. This is a complete URL, e.g: `https://oidc.host/realms/master` |
| **Logout with OIDC Provider** | If checked, the user will be redirected to the OIDC provider's logout page after logging out of their Kasm session. Requires `OpenID Connect Issuer` to be configured. |
| **Enable OIDC SLO Frontchannel Endpoint** | If checked, Kasm will honor frontchannel logout requests from the OIDC provider. If available, also configure `OpenID Connect Issuer` for verification. Note: where possible, backchannel logout is recommended over frontchannel as it is more stable and secure. |
A non redirecting login page is at [https://hostname/#/staticlogin](https://hostname/#/staticlogin) when auto login is enabled.
### Group Assignment
Users that auth via OIDC, can automatically be associated with Groups defined in Kasm. To automatically assign groups:
1. In the OpenID Authentication configuration, ensure the **Groups Attribute** is defined to match the corresponding group attribute of the IDP.
2. Navigate to the Access Management -> Groups tab in the admin navigation bar.
3. Using the arrow menu select **Edit** of the desired group.
4. Navigate to the **SSO Group Mappings** tab and select **Add SSO Mapping**.
5. Select the OpenID IDP for example "OpenID - test_oidc" for the **SSO Provider**.
6. Enter the group name used in the identity provider for the OpenID Group Name field, either preceded by a forward slash (e.g. `/sales`) if the OIDC Provider has Full Group Path set to On, or without a preceding forward slash (e.g. `sales`) if Full Group Path is set to Off.
### OpenID Attribute Mapping
Additional OpenID attributes can be passed with the login redirect. Administrators can optionally map those attribute values to fields on the Kasm user. See the documentation for your OpenID provider for a listing of attributes.
These can be configured by editing an existing OpenID Authentication configuration, if creating a new configuration you will need to submit and edit to add them.
The following Kasm User fields can be populated with values from OpenID attributes.
- First Name
- Last Name
- Phone
- Organization
- Notes
- City
- State
- Country
- Email
- Custom Attribute 1
- Custom Attribute 2
- Custom Attribute 3
Kasm can log all OpenID attributes present in the login event, this is helpful for determining the attribute
names. Add an OpenID Attribute Mapping with an attribute name of 'debug' and target any user field. The next time
a user logs in, all OpenID attributes and values will be logged by Kasm.
### Single Logout
Kasm supports the Single Logout (SLO) mechanisms defined by the OpenID Connect protocol.
* Backchannel (server-to-server) SLO is enabled as long as the `OpenID Connect Issuer` value is configured
* Enabling `Logout with OIDC Provider` will direct the user's browser to the OIDC provider's logout page once they
have logged out of Kasm
* Frontchannel (iframe-in-browser) logout requests are not honored unless
`Enable OIDC SLO Frontchannel Endpoint` is checked
Please see the example configurations for more information on SLO.
### Configuration Examples
- [Github OpenID Setup](oidc/github.mdx)
- [Google OpenID Setup](oidc/google.mdx)
- [Keycloak OpenID Setup](oidc/keycloak.mdx)
- [Microsoft (Public) OpenID Setup](oidc/microsoft.mdx)
- [Microsoft (Internal) OpenID Setup](oidc/microsoft-internal.mdx)
- [Auth0 OpenID Setup](oidc/auth0.mdx)
---
## Adfs
##
### Active Directory Federation Services (ADFS) SAML Setup
This guide walks through a basic setup for connecting Kasm to ADFS on Windows Server 2016 via SAML. Active Directory
user accounts are assumed to have a populated email address attribute.
#### ADFS Signing Certificate
1. From the ADFS Management console, expand **Service**, and select **Certificates**.
2. Right-Click the **Token-signing** certificate and select **View Certificate**.
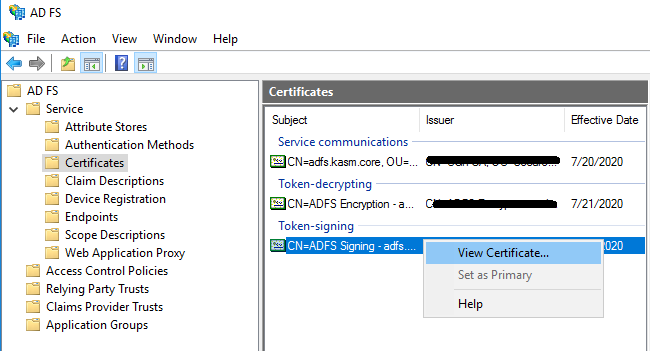
3. Select the **Details** tab, then click **Copy to File**.
4. In the **Certificate Export Wizard**, click **Next**.
5. Select **Base-64 encoded X.509 (CER)** . Click **Next**.
6. Select a desired output file and click **Next**.
7. Click **Finish**.
8. Open the certificate in your preferred text editor. This data will be used in the creation of the Kasm SAML configuration in the next section.
#### Create a new SAML configuration in Kasm
1. Log into the Kasm UI as an administrator.
2. Select **Access Management** -> **Authentication** -> **SAML** -> **Add Configuration**.
3. The **SAML 2.0 Configuration** page will auto-generate the **Entity ID**, **Single Sign On Service**, **Single Logout Server**, and **Relay State** values.
4. Edit the auto-generated **Entity ID** value to remove the query argument in the URL. (e.g [https://kasm.server/api/metadata/?id=123](https://kasm.server/api/metadata/?id=123) => [https://kasm.server/api/metadata/](https://kasm.server/api/metadata/) )
5. Update the form with the following entries.
| **Setting** | **Value** |
| --- | --- |
| ADFS | *Checked* |
| Debug | *Checked* |
| Digest Algorithm | http://www.w3.org/2001/04/xmlenc#sha256 |
| Enabled | *Checked* |
| Group Member Attribute | `http://schemas.xmlsoap.org/claims/Group` |
| Identity Provider: Entity Id | `http:///adfs/services/trust` |
| Identity Provider: Single Logout Service: | `https:///adfs/ls/?wa=wsignout1.0` |
| Identity Provider: Single Sign On Service | `https:///adfs/ls/` |
| Identity Provider: X509 Certificate | *Certificate data from the previous section* |
| Name | ADFS |
| NameID Attribute | emailAddress |
| Signature Algorithm | http://www.w3.org/2001/04/xmldsig-more#rsa-sha256 |
| Want Attribute Statement | *Checked* |
| Want Assertion Signed | *Checked* |
| Want Name ID | *Checked* |
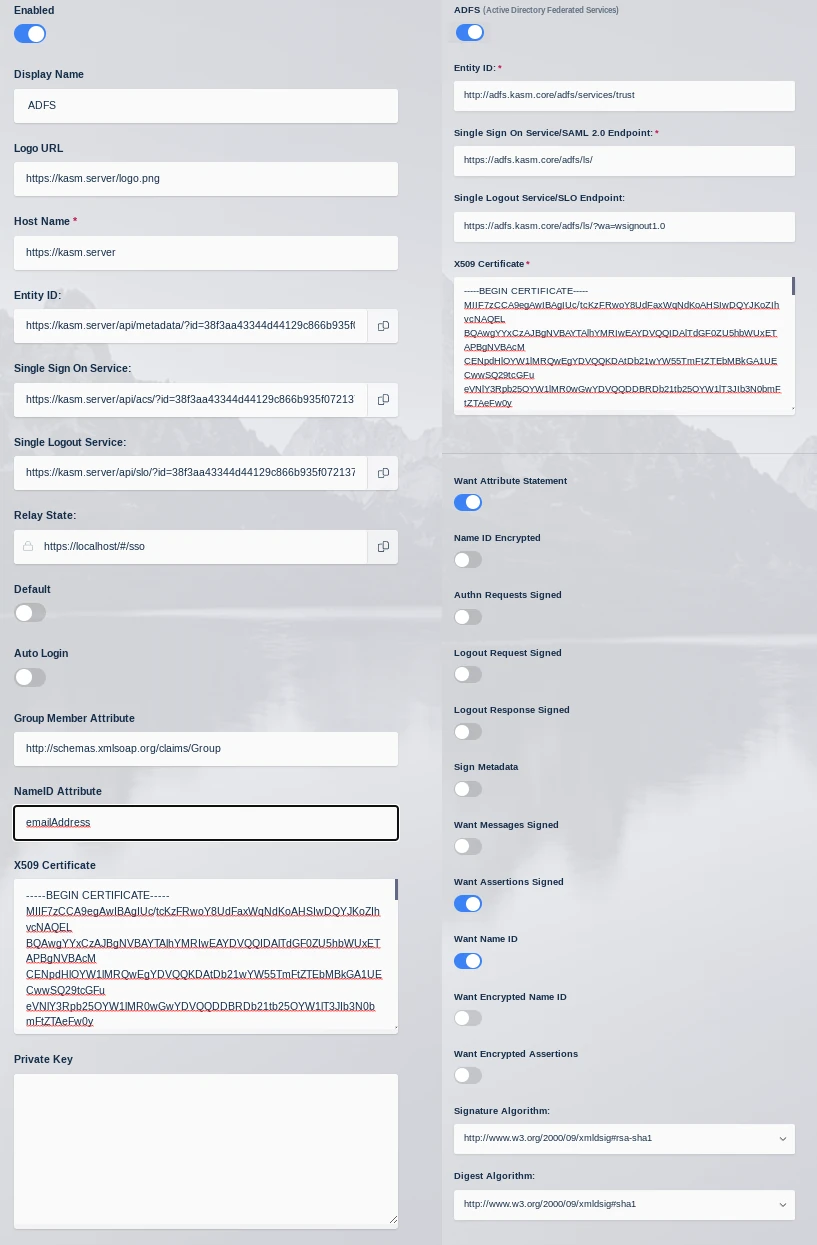
6. Click **Save** to save the changes.
7. Click the **Edit** icon to re-open to SAML configuration. Leave this page open and continue to the next steps.
#### ADFS Party Trust
1. Log into the ADFS Management Console.
2. Right-Click **Relying Party Trusts** and select **Add Relying Party Trust**. The wizard will open.
3. Select **Claims aware** then click **Start**.
4. Select **Enter data about the relying party manually** and click **Next**.
5. Enter a **Display Name** and select **Next** e.g (Kasm ADFS).
6. Click **Next** to accept the defaults for the **Configure Certificate** step.
7. Select **Enable support for the SAML 2.0 WebSSO Protocol**. Enter the **Single Sign On Server** URL from the **Service Provider** section of the KASM SAML configuration page started in the previous section. Click **Next**.
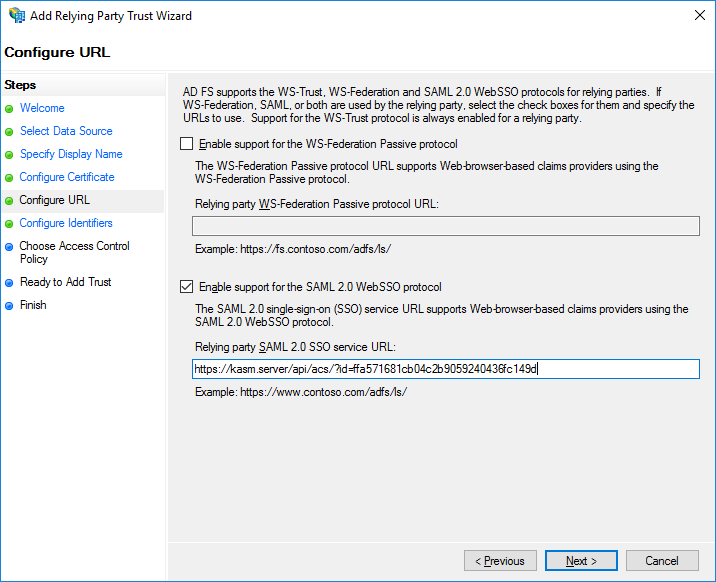
8. In the **Relay party trust identifier**, enter the **Entity ID** from the Service Provider section from the Kasm SAML configuration page started in the previous section. Click **Add**, then Click **Next**.
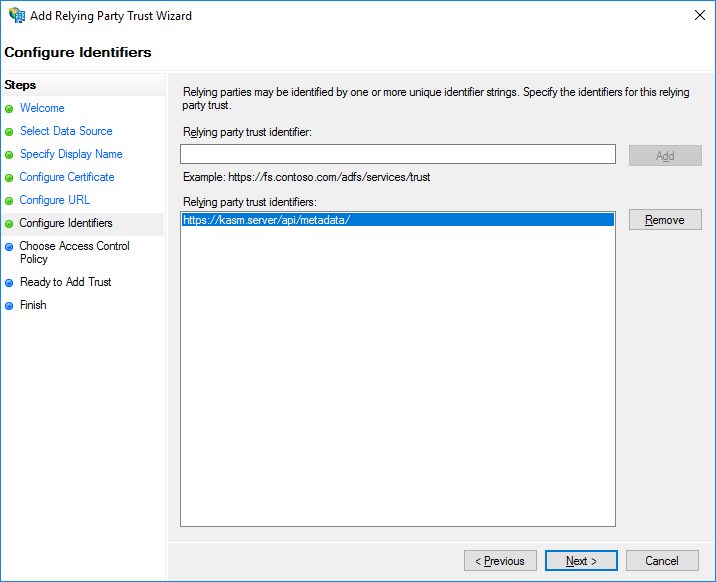
9. Select **Permit Everyone**, then click **Next**.
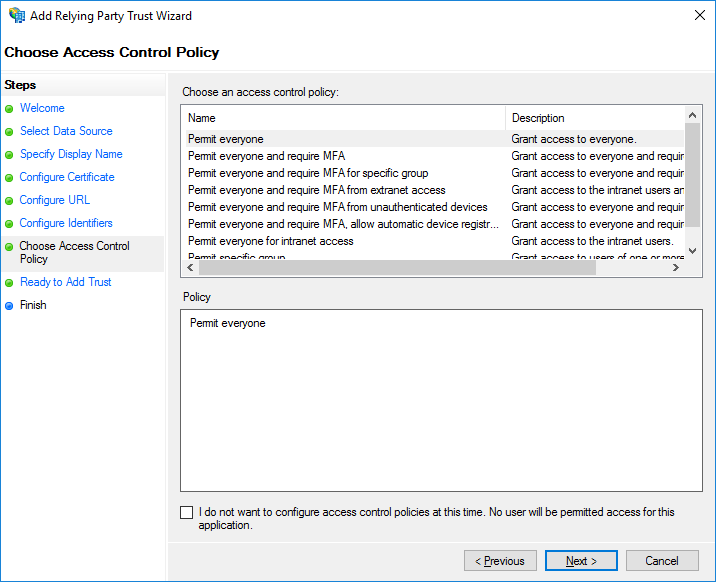
10. No changes are needed for the **Ready to Add Trust** section. Click **Next**.
11. At the **Finish** screen, Uncheck **Configure claims issuance policy for this application**, then click **Close**.
12. Right click the new trust (e.g Kasm ADFS) and select **Properties**.
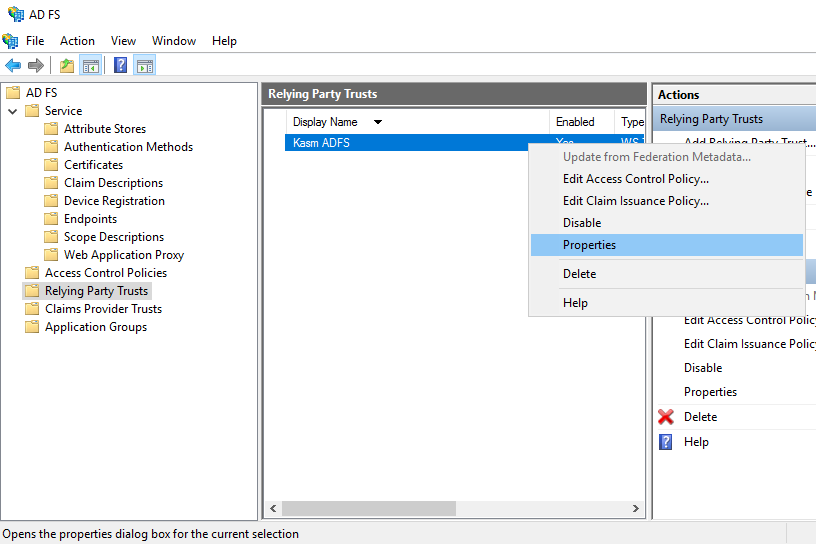
13. Select the **Endpoints** tab, then click **Add SAML**.
14. Select **SAML Logout** as the **Endpoint type** and select **POST** as the **Binding**.
15. Enter **https://\/adfs/ls/?wa=wsignout1.0** in the **Trusted URL**. Click **OK**, then **OK** again.
#### ADFS Edit Claim Issuance Policy
1. From the ADFS management console, select **Relying Party Trusts**, right click trust previously configured (.e.g Kasm ADFS) and select **Edit Claim Issuance Policy**.
2. Click **Add Rule**.
3. In the **Claim rule template** field, select **Send LDAP Attributes as Claims**. Click **Next**.
4. Enter a name in **Claim rule name**, then select **Active Directory** in the **Attribute store** drop down.
5. Select **E-Mail-Addresses** as the **LDAP Attribute**. Select **E-Mail-Address** as the **Outgoing Claim Type**.
6. In another entry, select **Is-Member-Of-DL** in **LDAP Attribute** and select **Group** in the **Outgoing Claim Type**. Click **Finish**.
6. Create another rule to expose the email address as the NameID. Click **Add Rule**.
7. Select **Transform an Incoming Claim** from the **Claim rule template** dropdown. Click **Next**.
08. Enter a name in **Claim rule name**.
09. Select **E-Mail Address** for **Incoming claim type**.
10. Select **Name ID** for **Outgoing claim type**.
11. Select **Email** for **Outgoing name ID format** and click **Finish**.
12. Back in the **Edit Claim Issuance Policy** window, click **OK**
#### Verifying Access
1. Navigate to the Kasm UI Login screen. An "ADFS" button is visible representing the SAML config.
2. Click **ADFS**
3. The user is navigated to the ADFS login portal. Enter the username/password of the desired user.
4. The user is redirected and logged into Kasm.
5. From the Kasm UI select Logout. The user is logged out and redirected to the ADFS logout page.
#### ADFS Group Mapping
In the previous configuration ADFS was configured to pass along the user's Active Directory group membership in the SAML assertions.
Administrators can leverage this to automatically map users to groups defined in Kasm based off their group membership in Active Directory.
1. Log into the Kasm UI as an administrator.
2. Select **Access Management** -> **Groups** then click **Add Group**.
3. Enter a **Name** and **Priority**.
4. Save the new group by clicking **Save**.
5. On the groups screen, using the arrow menu select **Edit** on the group that was just created.
6. Navigate to the **SSO Group Mappings** tab and select **Add SSO Mapping**.
7. Select the SAML IDP that was created above "SAML - ADFS" for the **SSO Provider**.
8. Enter the group DN in **Group Attributes** (e.g CN=MyGroup,OU=MyOrg,DC=kasm,DC=core).
9. Click **Submit**.
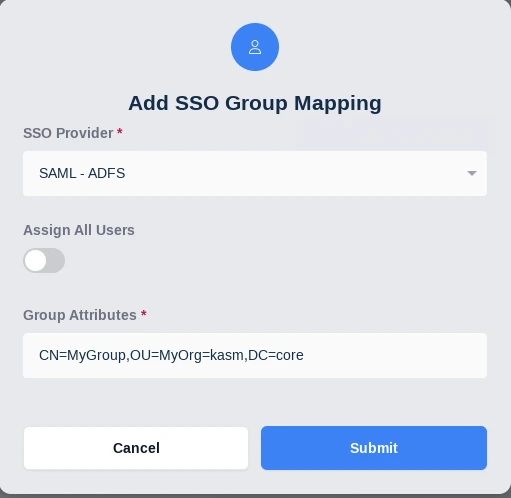
7. Login via SAML as a user that is a member of the group. Notice the users is automatically placed in the Kasm group.
---
## Azure
### Azure Active Directory SAML Setup
#### Create a new SAML configuration in Kasm
1. Log into the Kasm UI as an administrator.
2. Select **Access Management** -> **Authentication** -> **SAML** -> **Add Configuration**
3. The **SAML 2.0 Configuration** page will auto-generate the **Entity ID**, **Single Sign On Service**, **Single Logout Server**, and **Relay State** values.
4. Check **Enable** and enter a **Display Name**. e.g (Azure AD)
5. Enter `http://schemas.microsoft.com/ws/2008/06/identity/claims/groups` in **Group Member Attribute**
6. Enter `emailAddress` in **NameID Attribute**
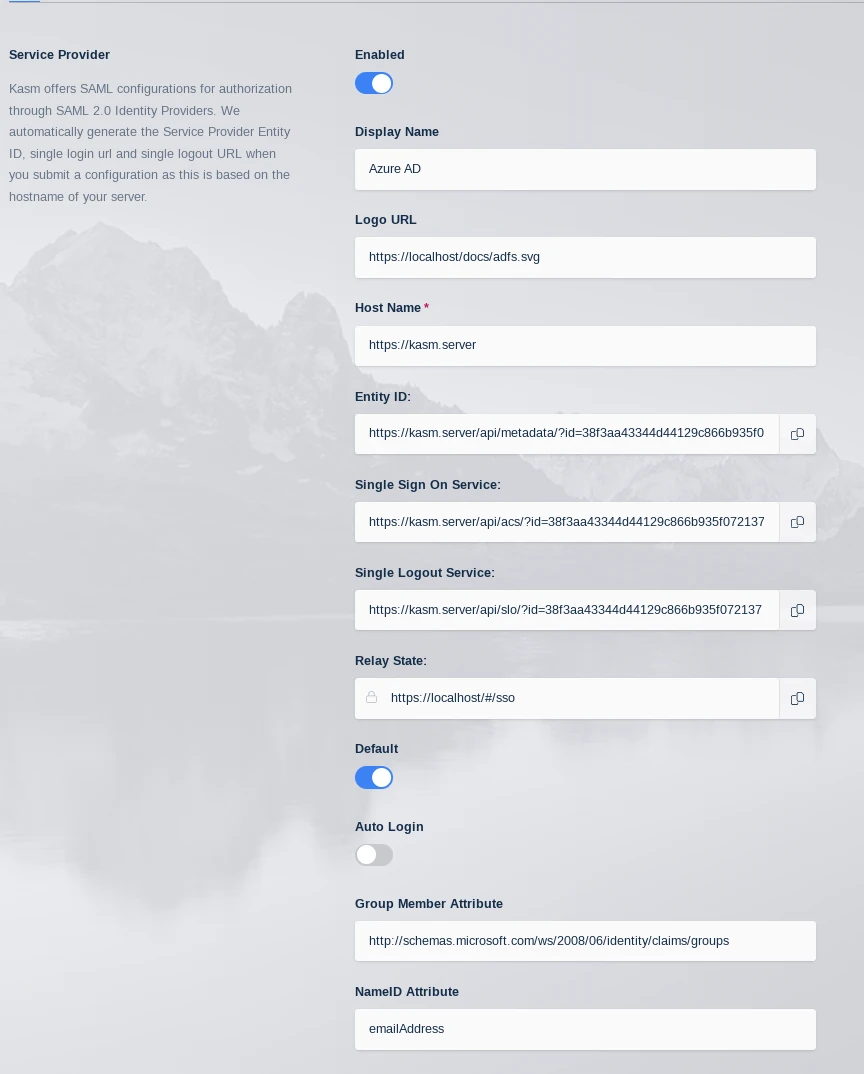
5. Leave this page open and continue to the next steps.
#### Add a new application in Azure
1. Navigate to **Azure Active Directory** in the Portal.
2. Under the **Manage** section of the menu, select **Enterprise applications**.
3. Click the **New Application** button and select **Non-Gallery application**. Provide a name. e.g (**Kasm**) and click **Add**
#### Basic SAML Configurations
1. Select **Single Sign-On** under the **Manage** Menu.
2. Select **SAML**.
3. Select **Edit** next to the **Basic SAML Configuration**
4. Copy the **Service Provider** entries from the Kasm SAML Configurations started in the previous section into the Basic SAML configurations and click **Save** , and close the section.
| **Kasm Property Name** | **Azure Property Name** |
| --- | --- |
| Entity ID | Identifier (Entity ID) |
| Single Sign On Service | Reply URL (Assertion Consumer Service URL) |
| Single Logout Service | Logout URL |
| Relay State | Relay State |
#### User Attributes and Claims
1. Select **Single Sign-On** under the **Manage** Menu.
2. Select **SAML**.
3. Select **Edit** next to the **User Attributes and Claims**
4. Click **Add a Group to Claim**
5. Select **Security Groups**, leave the **Source Attributes** as **Group ID** and click **Save** then close the section.
#### SAML Signing Certificate
1. Select **Single Sign-On** under the **Manage** Menu.
2. Select **SAML**.
3. Click **Download** next to **Certificate (Base64)** in the **SAML Signing Certificate** section . Save this file for later
4. Select **Edit** next to the **SAML Signing Certificate**
5. Change the **Singing Algorithm** to **SHA-1** and click **Save**. Close the section.
6. Open the Base64 certificate that was downloaded in the earlier step in a text editor. Copy the contents into the **X509 Certificate** setting in the **Identity Provider** section of the Kasm configuration
#### Set Up Kasm
1. Select **Single Sign-On** under the **Manage** Menu.
2. Select **SAML**.
3. Review *Section 4* , **Set Up Kasm**. Copy the properties into the **Identity Provider** options in the Kasm Configuration.
| **Kasm Property Name** | **Azure Property Name** |
| --- | --- |
| Single Sign On Service / SAML 2.0 Endpoint | Login URL |
| Entity ID | Azure AD Identifier |
| Single Logout Service / SLO Endpoint | Logout URL |
4. In the **Advanced Settings** of check **Want Assertion Signed** and click **Submit**
#### Mapping Users
You must assign users or groups to the Azure Kasm application. This will provide users access to login. Azure will
then pass all user group memberships during login so that Kasm can determine Authorization (e.g mapping AD groups to
Kasm groups)
In this example, a **Kasm Users** and **Kasm Admin** groups were defined.
1. Navigate to **Azure Active Directory** in the Portal.
2. Under the Manage section of the menu, select **Enterprise applications**.
3. Search for **Kasm** and select it.
4. Click **Users and Groups** under the **Manage** menu.
5. Click **Add Users** and add the desired users and group assignments.
6. Inspect the desired groups and note the **Object ID**. This will be used to map to Kasm groups.
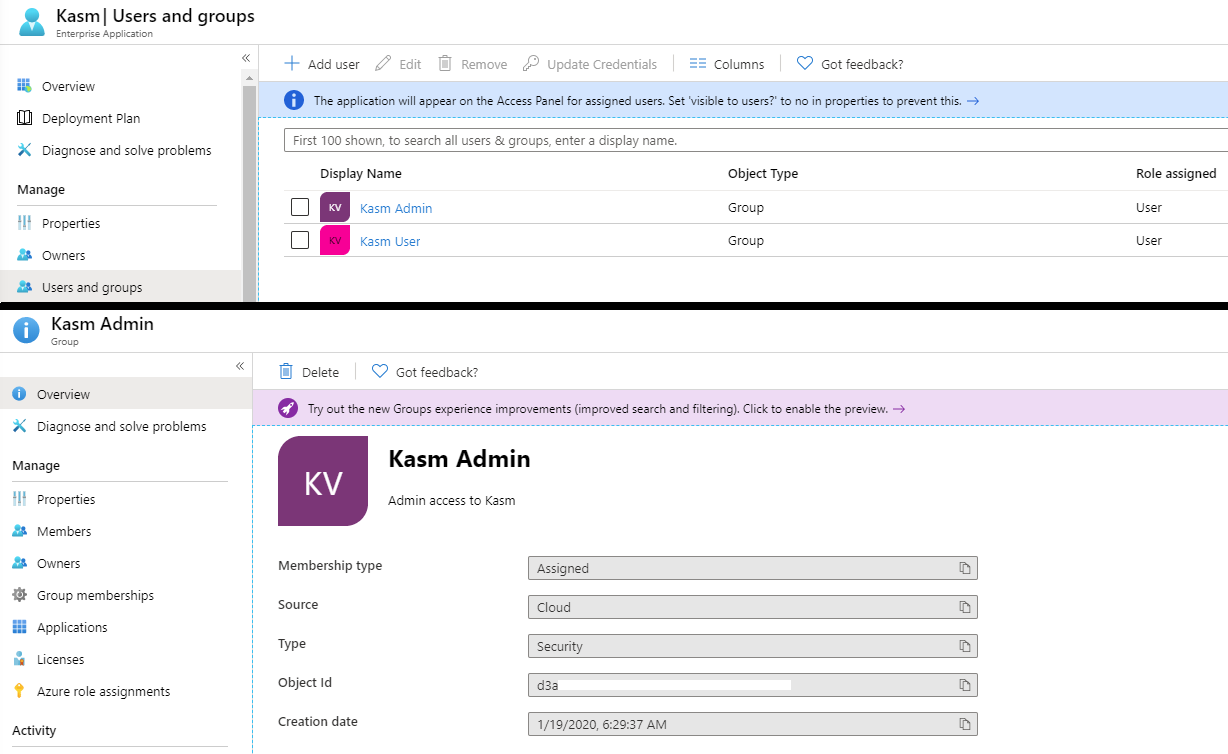
07. Log into the Kasm UI as an administrator.
08. Select **Access Management** -> **Groups**, then using the arrow menu click **Edit** next to the **Administrators** Group.
09. Navigate to the **SSO Group Mappings** tab and select **Add SSO Mapping**.
10. Select "SAML - Azure AD" as the **SSO Provider** and enter the **Object Id** for the desired Azure AD Security group previously configured into the **Group Attributes** field.
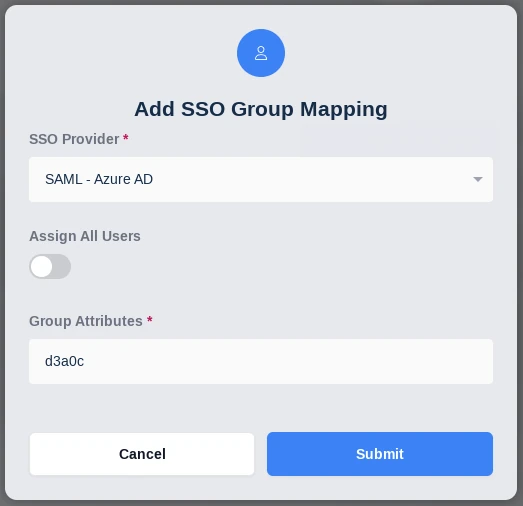
#### Testing Access
1. Log out of the Kasm UI if already logged in.
2. Navigate to the Kasm UI login page.
3. Click Azure AD to initiate the SAML SSO process.
#### Known Issues
##### SLO Error AADSTS75005
Azure AD may present the following error when a user logs out the application:
```Bash
AADSTS75005: The request is not a valid SAML 2.0 protocol message.
```
In some Azure AD deployments, Microsoft will generate a SLO URL similar to `https://login.microsoftonline.com//saml2`
This endpoint requires an encoding that is not currently supported by Kasm. The workaround is to utilize the older federated SLO endpoint `https://login.microsoftonline.com/common/wsfederation?wa=wsignout1.0`
for the **Single Logout Service/SLO Endpoint** in the Kasm SAML Configuration.
---
## F5 APM
### F5 BIG-IP Access Policy Manager (APM) SAML Setup
This guide walks through a basic setup for connecting Kasm to F5 BIG-IP Access Policy Manager (APM) SAML via SAML using Active Diretory as a backend. Active Directory
user accounts are assumed to have a populated email address attribute. Also an LDAP Service account should be created in Active Directory already.
#### Prerequisites
Before starting the configuration, F5 BIG-IP should be enabled with Local Traffic (LTM) and Access Policy Manager (APM) feature.
#### Architecture
Here is the architecture for this deployment.
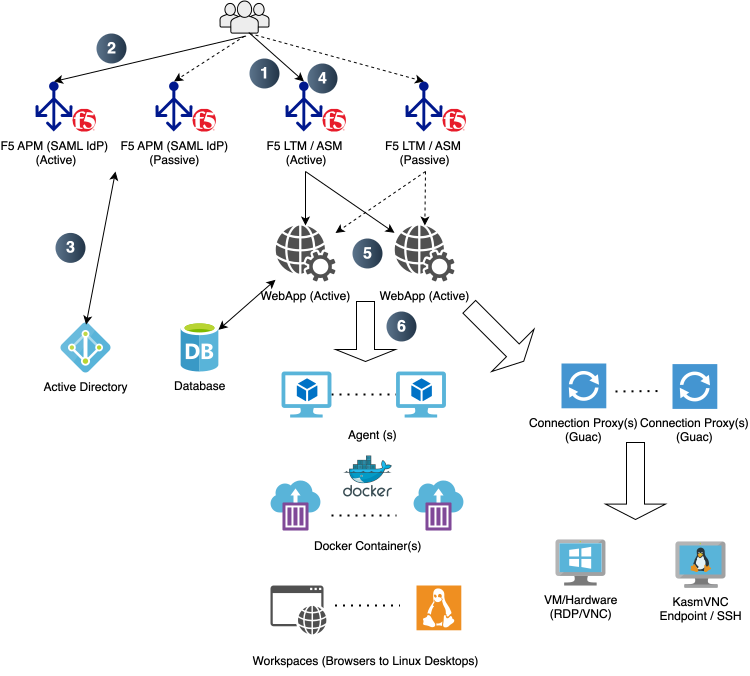
#### Signing Certificate
1. From the F5 BIG-IP console, select **System**, select **Certificate Management**, select **Traffic Certificate Management**, and select **SSL Certificate List**.
2. Click **Create...**.
3. Enter Certificate settings:
| **Setting** | **Value** |
| --- | --- |
| Name | *Enter friendly name for identification* |
| Issuer | Self |
| Common Name | *Enter the hostname for the SAML Identity Provider, e.g. auth.internal.kasm* |
| Division/Organization/Locality/State or Province/Country | *Enter the relevant details as appropriate* |
| Lifetime | *Enter appropriate lifetime according to organization policy* |
| Subject Alternative Name | *Enter as* `DNS:` |
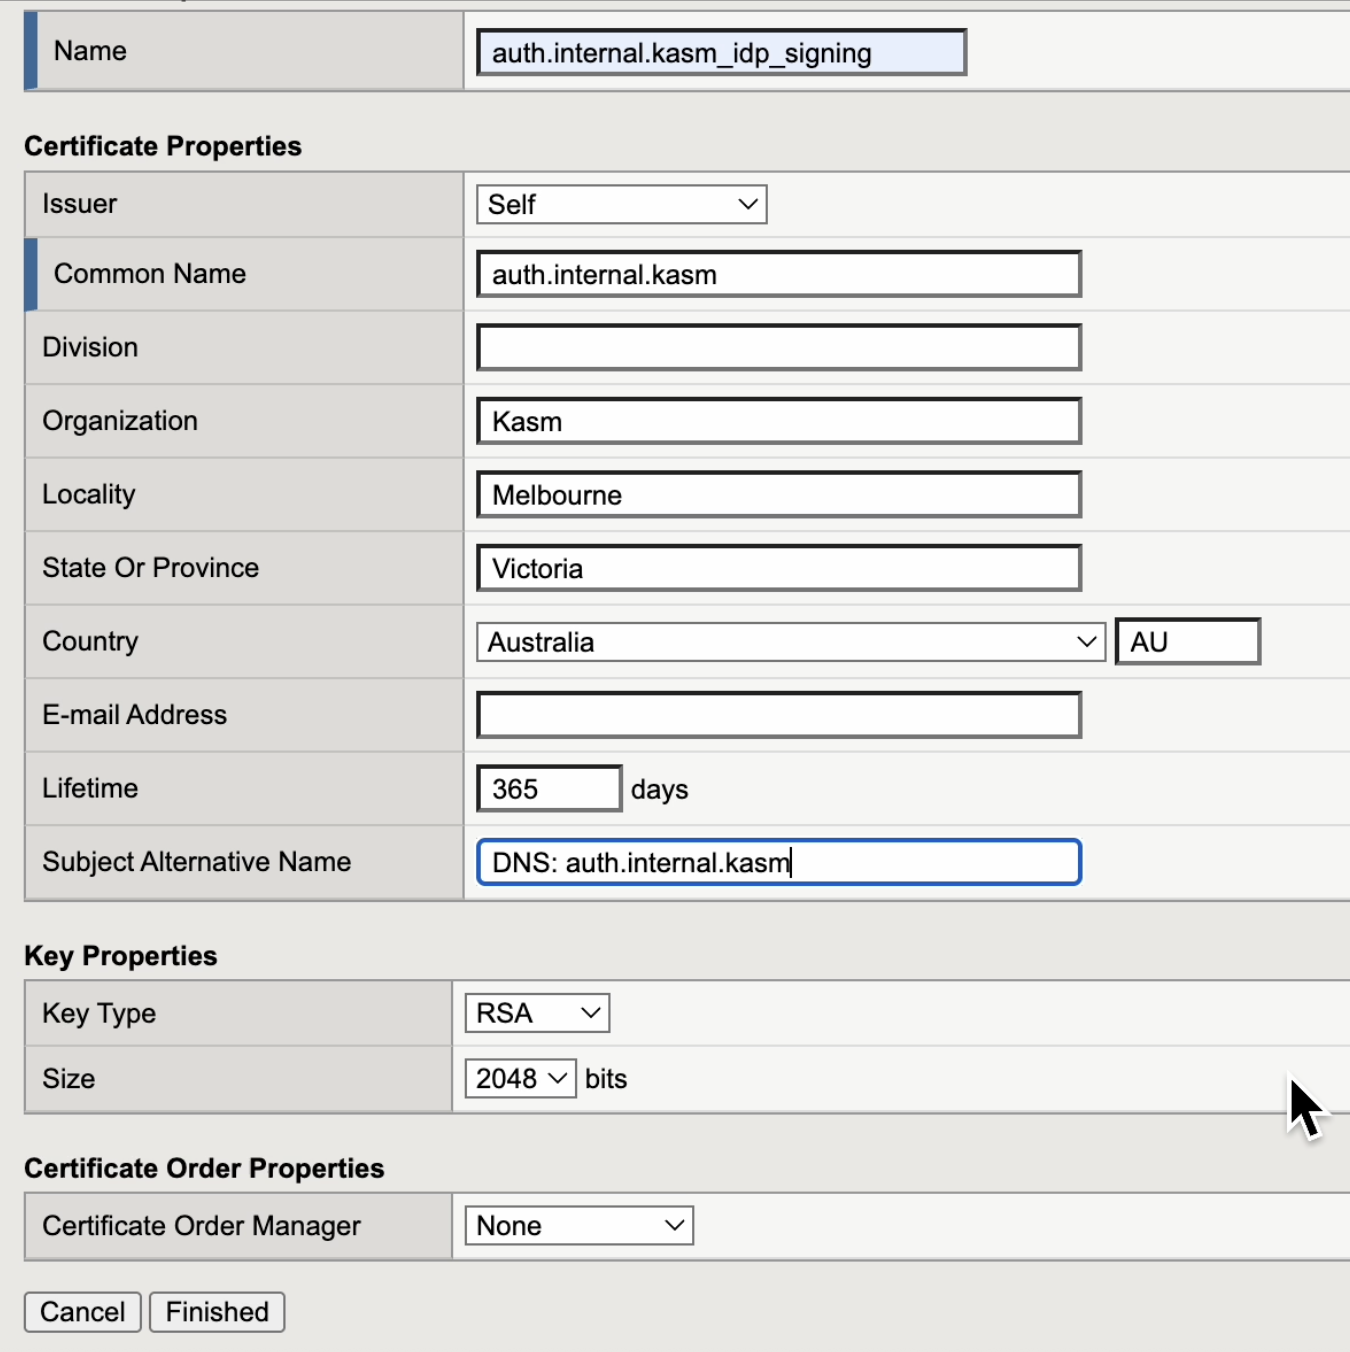
4. Click **Finished**.
5. Click on the newly created signing certificate. Click **Export**, and then copy the **Certificate Text**. This data will be used in the creation of the Kasm SAML configuration in the next section.
#### Create a new SAML configuration in Kasm
1. Log into the Kasm UI as an administrator.
2. Select **Access Management** -> **Authentication** -> **SAML** -> **Add Configuration**.
3. The **SAML 2.0 Configuration** page will auto-generate the **Entity ID**, **Single Sign On Service**, **Single Logout Server**, and **Relay State** values.
4. Update the form with the following entries.
| **Setting** | **Value** |
| --- | --- |
| **Service Provider** | ---|
| Enabled | Yes |
| Display Name | *Enter friendly name for F5 SAML IdP*|
| Host Name | *Enter Kasm Workspaces host name* |
| Default | Unchecked |
| Auto Login | Unchecked |
| Group Member Attribute | *Leave empty*|
| NameID Attribute | emailAddress |
| Debug | Checked *Remark: Leave checked for more debug messages. Can be unchecked if confirmed everything is working.* |
| **Identity Provider** | ---|
| Entity Id | `http:///idp` |
| Single Sign On Service | `https:///saml/idp/profile/redirectorpost/sso` |
| Single Logout Service: | `https:///saml/idp/profile/redirect/sls` |
| X509 Certificate | *Certificate data from the previous section* |
| **Advanced Settings** | ---|
| Want Attribute Statement | Checked |
| Send Requested Authn Context | Checked |
| Want Assertion Signed | Checked |
| Want Name ID | Checked |
| Signature Algorithm | http://www.w3.org/2001/04/xmldsig-more#rsa-sha256 |
| Digest Algorithm | http://www.w3.org/2001/04/xmlenc#sha256 |
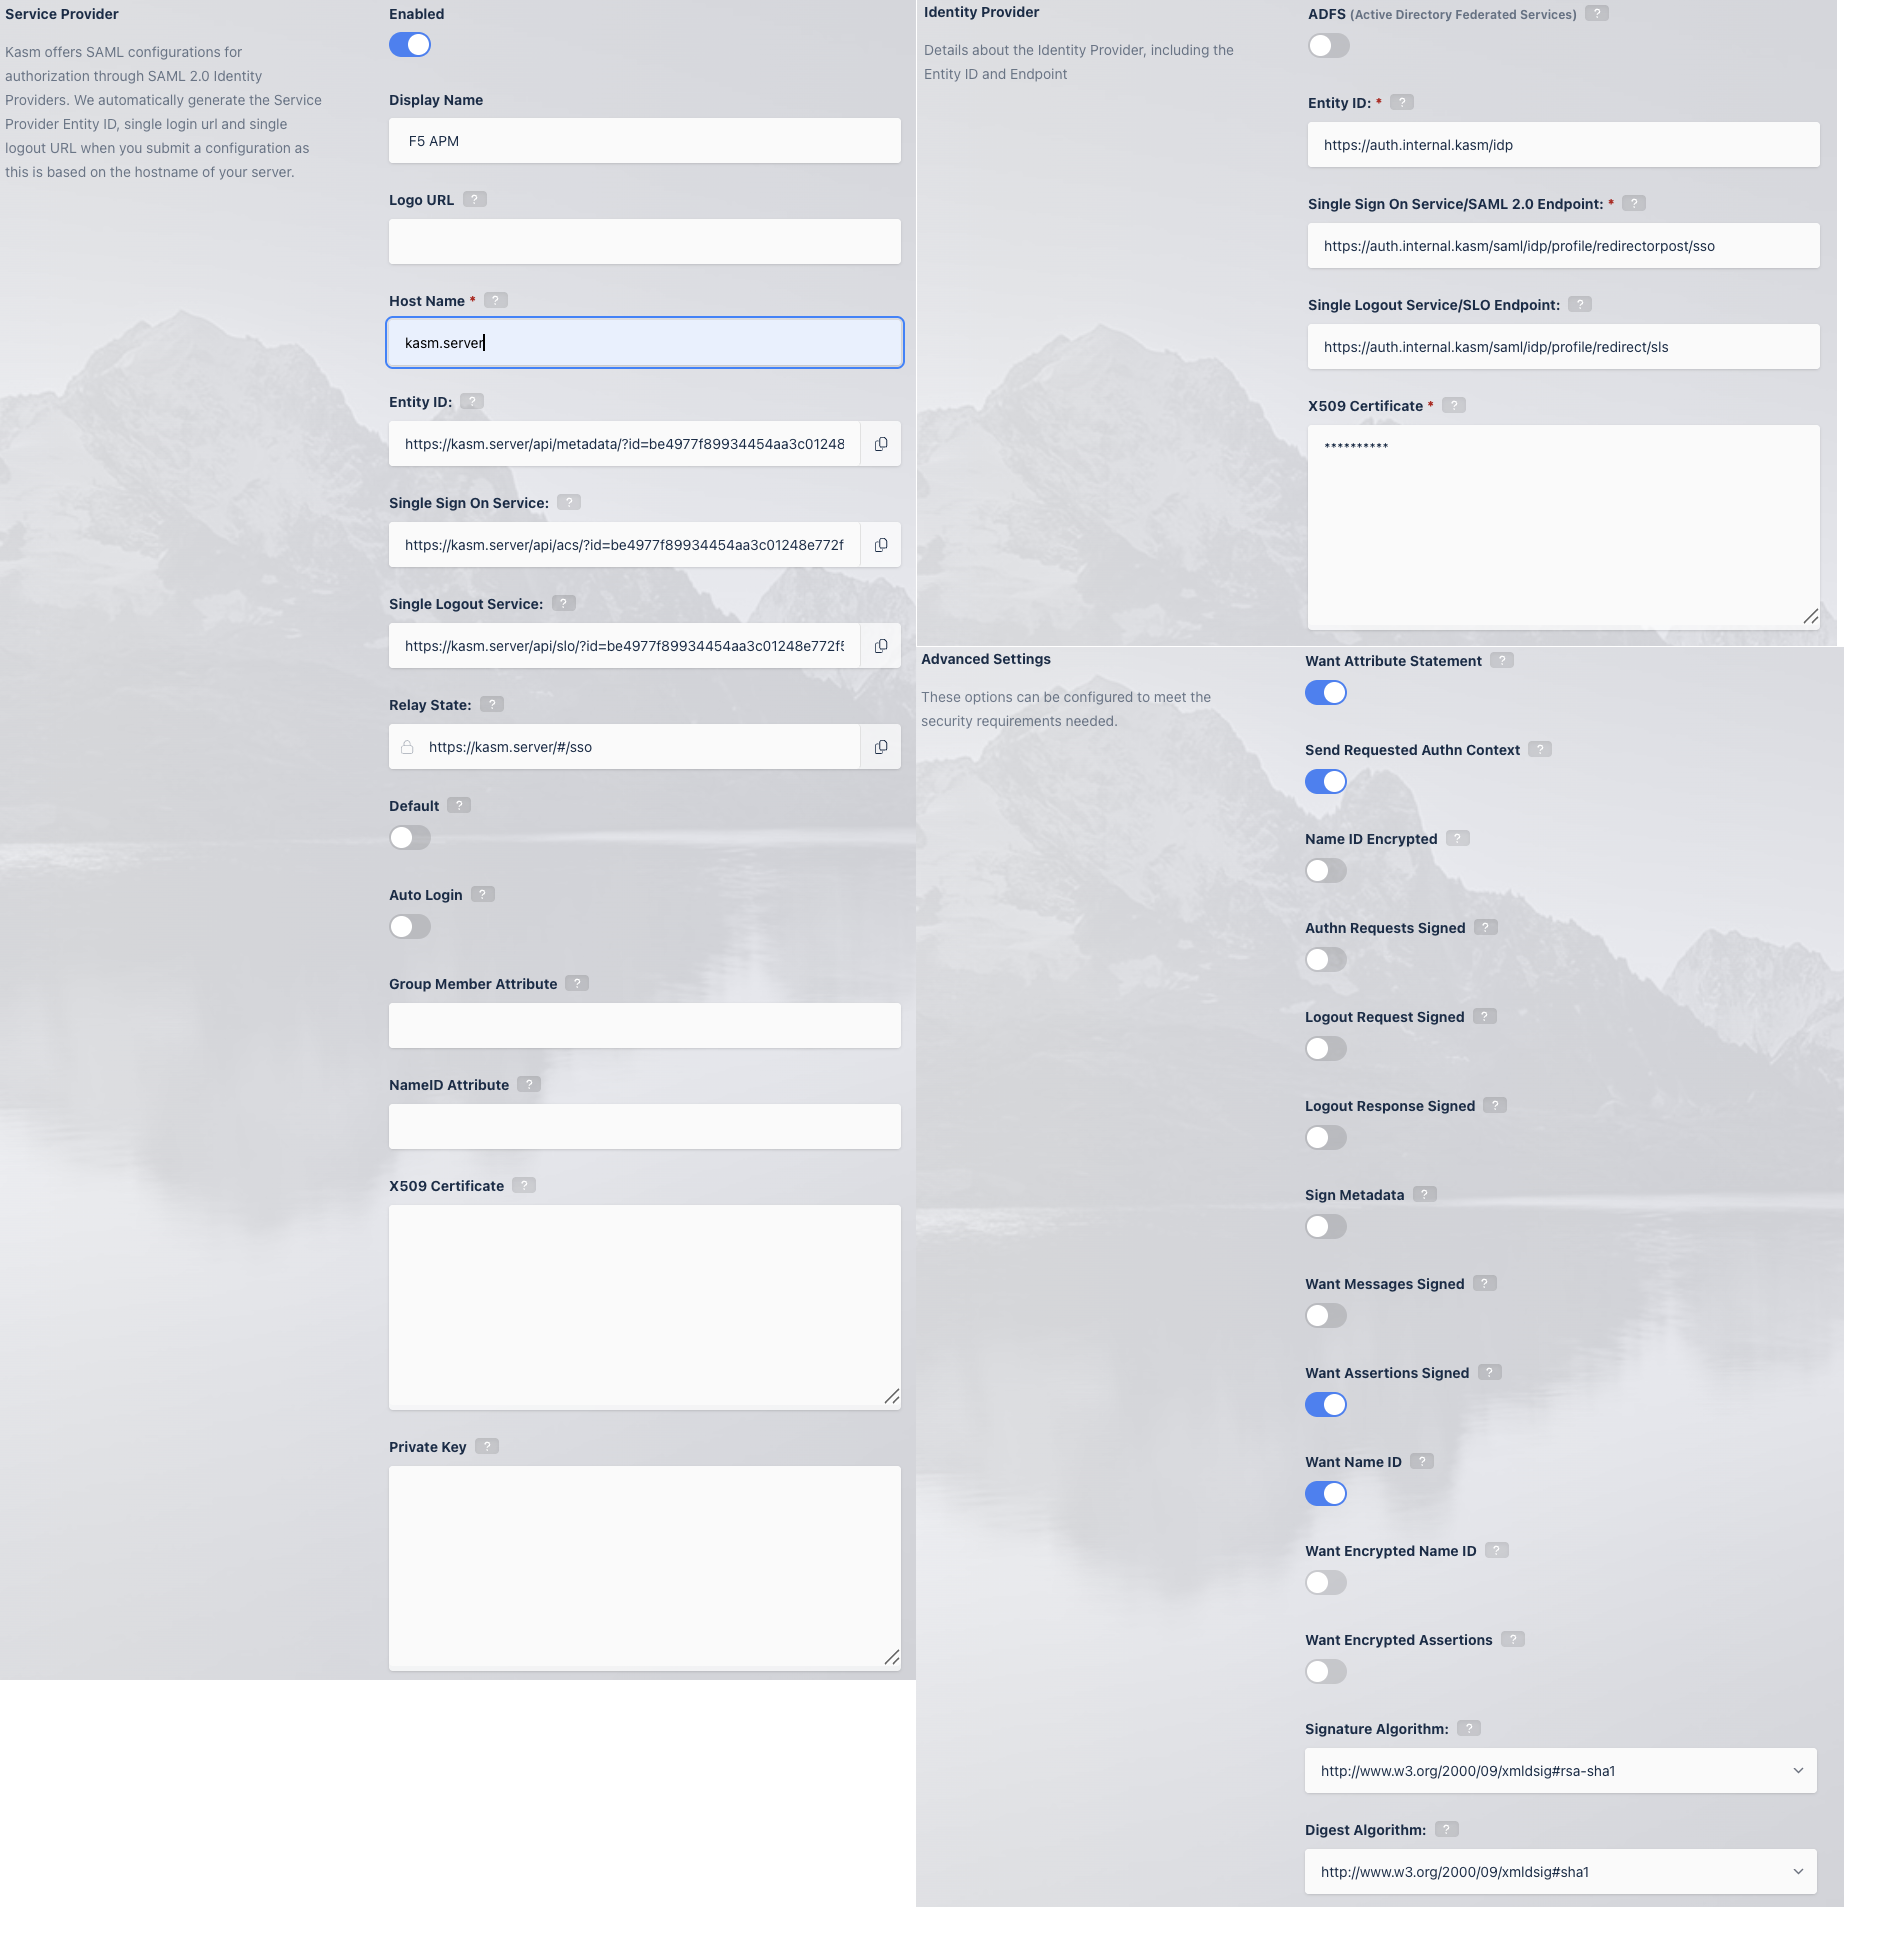
6. Click **Save** to save the changes.
7. Click the **Edit** icon to re-open to SAML configuration. Leave this page open and continue to the next steps.
#### Upload or Confirm F5 iApp Guided Configurations package
1. From the F5 BIG-IP console, select **iApps** and select **Package Management LX**. Confirm *f5-iappsix-access-framework* and *f5-iappsix-access-saml-idp* exists.
2. If the package does not exist, download *Access and Advanced WAF Guided Configuration* packages under *Guided Configuration* product line in *BIG-IP* Group from MyF5 page. Go back to the **Package Management LX** console, click **Import...**, select the package and click **Upload**. Repeat the upload for the next package.
3. Confirm the *f5-iappsix-access-framework* and *f5-iappsix-access-saml-idp* packages are installed.
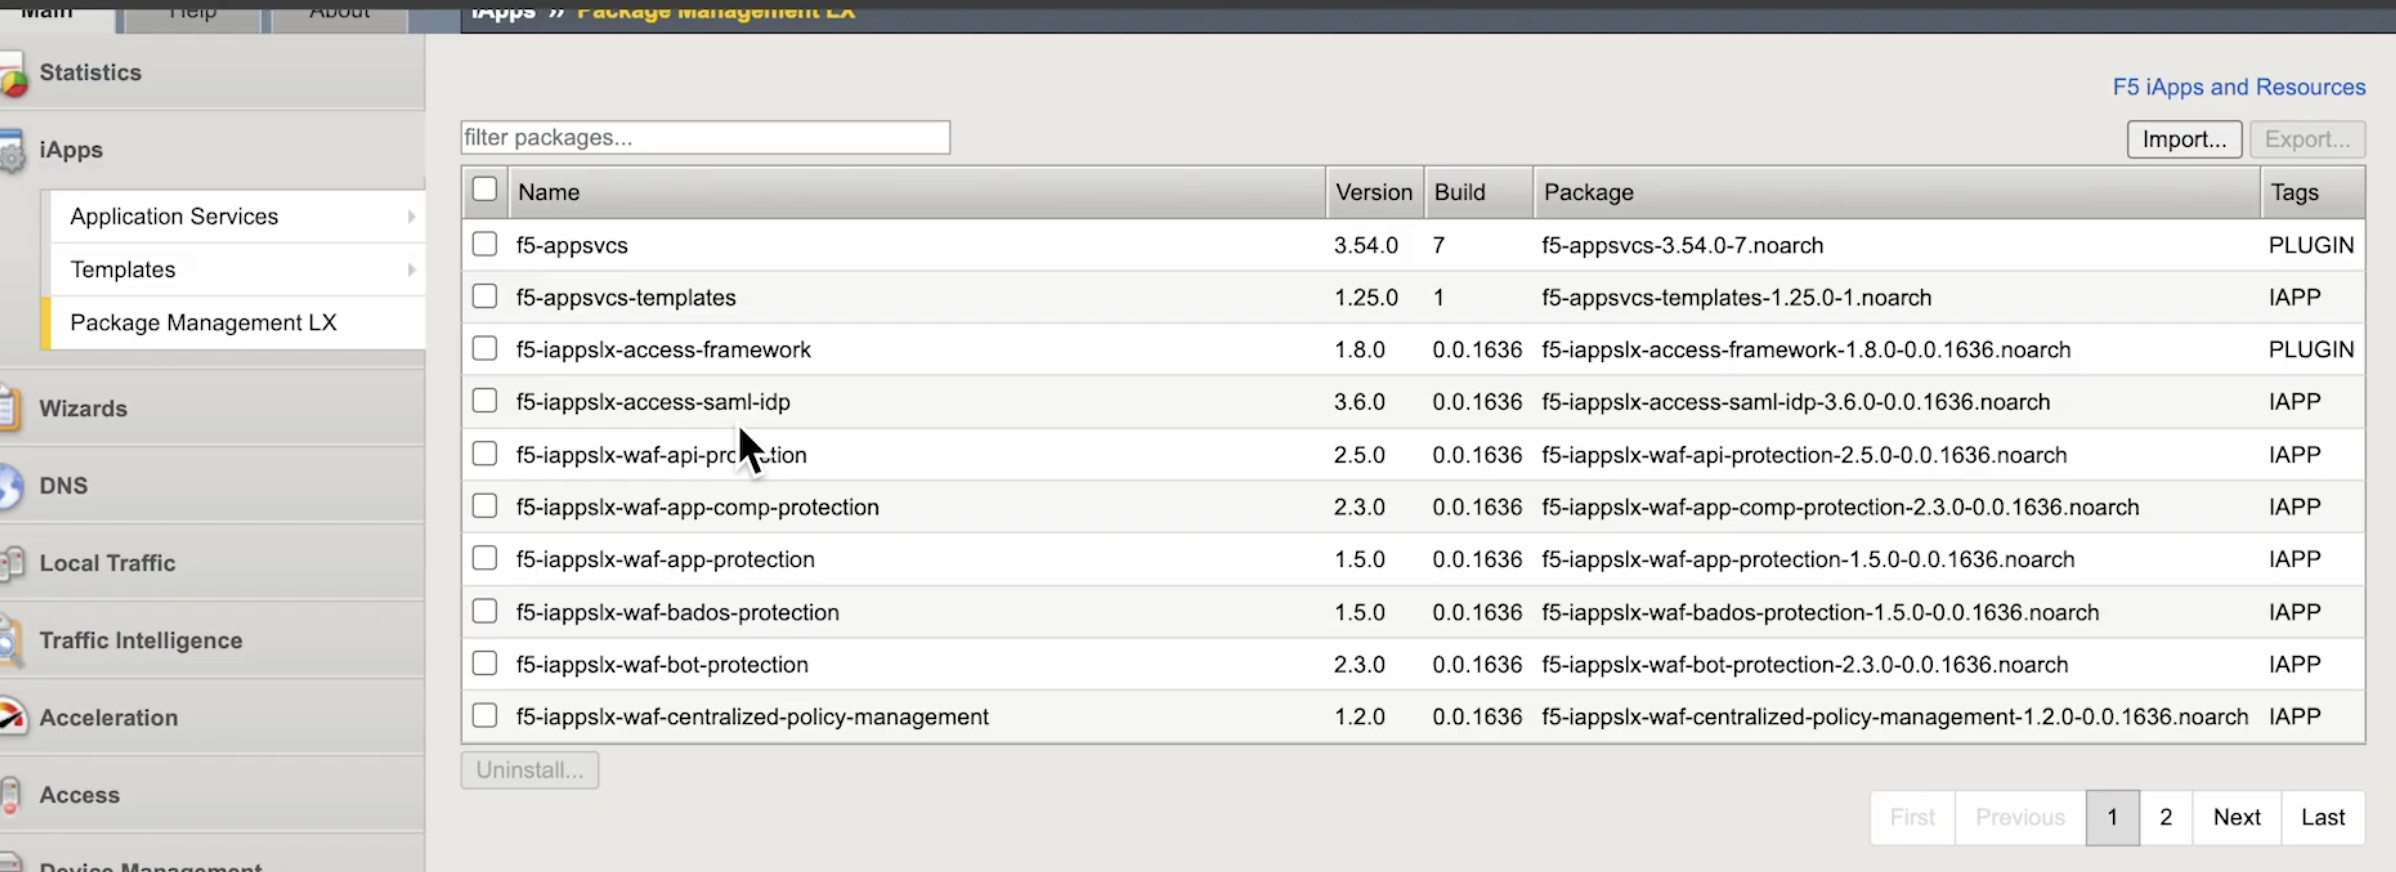
#### Import TLS certificate for SAML Identity Provider
1. From the F5 BIG-IP console, select **System**, select **Certificate Management**, select **Traffic Certificate Management**, and select **SSL Certificate List**.
2. Import TLS certificate key in PEM format.
* Click **Import**.
* Select **Import Type** as **Key**.
* Click **Choose File...**. Select certificate key file.
* Click **Import**.
3. Import TLS certificate in PEM format.
* Click **Import**.
* Select **Import Type** as **Certificate**.
* Click **Choose File...**. Select certificate file.
* Click **Import**.
4. Ensure the TLS certificate key and certificate are properly imported.
5. Select **Local Traffic**, select **Profiles**, select **SSL**, and select **Client**.
* Click **Create...**.
* Update the form with the following entries. For rows where **Custom** is enabled, remember to click the checkbox on the right hand side.
| **Setting** | **Value** | **Custom** |
| --- | --- | --- |
| Name | *Enter friendly name for the Client SSL Profile* | *Not Applicable* |
| Certificate Key Chain | *Click Add. Select the TLS certificate imported in last section for the certificate. Remember this is not the signing certificate. Select the TLS certificate key.* | Yes |
* Click **Finished**.
#### F5 Guided Configuration
1. From the F5 BIG-IP console, select **Access** and then select **Guided Configuration**.
2. Click **Federation**.
3. Click **SAML Identity Provider for Applications**.
4. Click **Next** in the page of *Configuration Example*.
5. Update the **Identity Provider Properties** form with the following entries.
| **Setting** | **Value** |
| --- | --- |
| Configuration Name | *Enter friendly name for the configuration* |
| Entity Id | `http:///idp` |
| Scheme | https |
| Host Name | `` |
| Assertion Properties \\ Signing Key | *Select the IdP signing certificate key previously imported* |
| Assertion Properties \\ Signing Certificate | *Select the IdP signing certificate previously imported* |
Click **Save & Next**.
6. Update the **Virtual Server Properties** form with the following entries.
| **Setting** | **Value** |
| --- | --- |
| Destination Address | *Enter F5 SAML IdP Virtual Server IP address* |
| Service Port | 443 \/ HTTPS |
| Enable Redirect Port | Checked |
| Redirect Port | 80 \/ HTTP |
| Client SSL Profile | *Select **Use Existing** \/ Add previously created Client SSL Profile* |
Click **Save & Next**.
7. Update the **Authentication Properties** form with the following entries.
| **Setting** | **Value** |
| --- | --- |
| Choose Authentication Server Type | Active Directory |
| Choose New Authentication Server | Create New |
| Authentication Server Properties \\ Domain Name | *Enter Active Directory domain name* |
| Server Connection | Direct |
| Domain Controller | *Enter Domain Controller IP address* |
| Admin Name | *Enter the service account for authenticating users in Active Directory using LDAP* |
| Admin Password | *Enter the password for the above service account* |
| Verify Admin Password | *Enter the password for the above service account again* |
Click **Save & Next**.
8. Click **Save & Next** on the **Multi Factor Authentication** form.
9. Click **Add Application** on the **Configured Application List** form.
10. Update the **Authentication Properties** form with the following entries.
| **Setting** | **Value** |
| --- | --- |
| Select method to configure your application | Custom |
| Application Name | *Enter friendly application name* |
| IdP Initiated SSO | No |
| Create New or pick existing SP Connector | Create New |
| Service Provider Name | *Enter friendly Service Provider Name* |
| Entity ID | *Copy Entity ID from Kasm administration panel under **Access Management** -> **Authentication** -> **SAML**. It should look like* `https:///api/metadata/?id=` |
| Assertion Consumer Services | *Select* **Default** *on Index 0. Copy Single Sign On Service from Kasm administration panel under* **Access Management** -> **Authentication** -> **SAML** *to Location URL. It should look like* `https:///api/acs/?id=` *Keep Binding to POST.*|
Click **Save**.
11. Click on the newly created application. Click on **Show Advanced Setting** to modify properties previously hidden.
12. Select **Yes** on **Does SaaS application require SAML attributes?**
13. Update the **Authentication Properties** form with the following entries.
| **Setting** | **Value** |
| --- | --- |
| SAML Attributes \\ Attribute Name | NameID |
| SAML Attributes \\ Attribute Value | emailAddress |
| Single Logout Service Settings \\ Single Logout Request URL | *Copy Single Logout Service from Kasm administration panel under* **Access Management** -> **Authentication** -> **SAML** *to Location URL. It should look like* `https:///api/slo/?id=` |
| Single Logout Service Settings \\ Single Logout Response URL | *Copy Single Logout Service from Kasm administration panel under* **Access Management** -> **Authentication** -> **SAML** *to Location URL. It should look like* `https:///api/slo/?id=` |
| Single Logout Service Settings \\ Single Logout Binding | POST |
Click **Save**.
14. Click **Save & Next** on the next three screens, including **Endpoint Checks Properties**, **Customization Properties** and **Session Management Properties**.
15. Click **Deploy**.
16. Click **Finish**. Confirm the application has a **Deployed** status.
17. In the Kasm Workspaces login screen, there will be a new button for login via F5 APM. Click to test the new SAML authentication method.
#### Configuration Video Tutorial
This video walks through configuring F5 APM SAML Identity Provider as discussed above.
---
## Gsuite
### Google Workspace SAML Setup
#### Create a new SAML configuration in Kasm
1. Log into the Kasm UI as an administrator.
2. Select **Access Management** -> **Authentication** -> **SAML** -> **Add Configuration**.
3. The **SAML 2.0 Configuration** page will auto-generate the **Entity ID**, **Single Sign On Service**, **Single Logout Server**, and **Relay State** values.
4. Check **Enable**, enter the **Hostname** of the Kasm Workspaces URL (e.g `kasm.example.com`) and enter a **Display Name**. e.g (Login with Google).
5. Update the following Settings:
| **Setting** | **Value** |
| --- | --- |
| Group Member Attribute | groups |
| NameID Attribute | emailAddress |
| Want Attribute Statement | Unchecked |
| Want Assertions Signed | Unchecked |
| Want Messages Signed | Checked |
| Want Name ID | Checked |
| Signature Algorithm | rsa-sha256 |
| Digest Algorithm | sha256 |
6. Leave this page open and continue to the next steps.
#### Add a new application in Google Workspace
1. Open the **Google Admin** Console, Expand **Apps**, then Select **Web and mobile apps**.
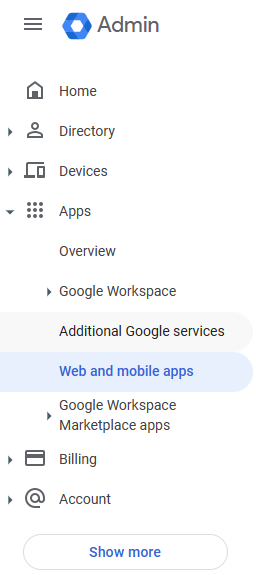
2. Select **Add app**, then click **Add custom SAML app**.
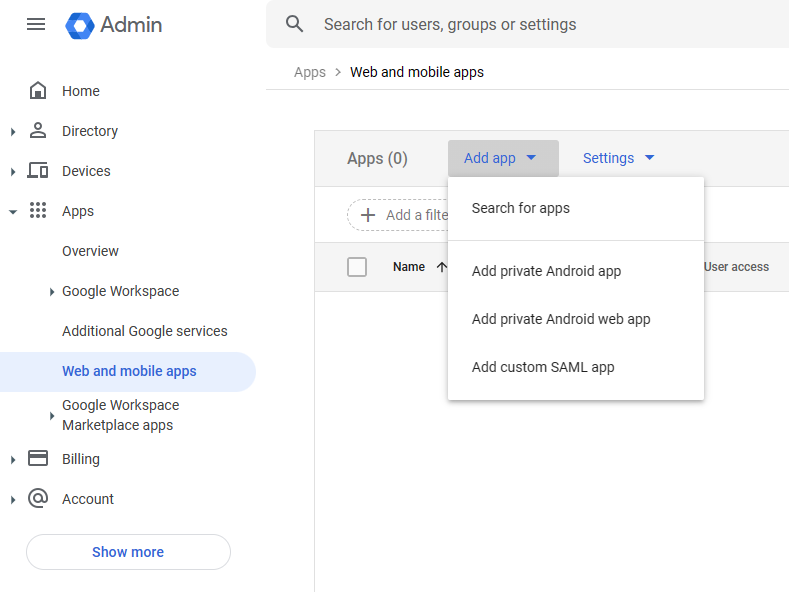
3. Enter an App name (e.g Kasm Workspaces) then select **Continue**.
4. Copy the Google IdP entries to the **Identity Provider** section of the Kasm SAML Configurations started in the previous section. Then click **Continue**.
| **Kasm Property Name** | **Google Workspace Property Name** |
| --- | --- |
| Entity ID | Entity ID |
| Single Sign On Service | SSO URL |
| X509 Certificate | Certificate |
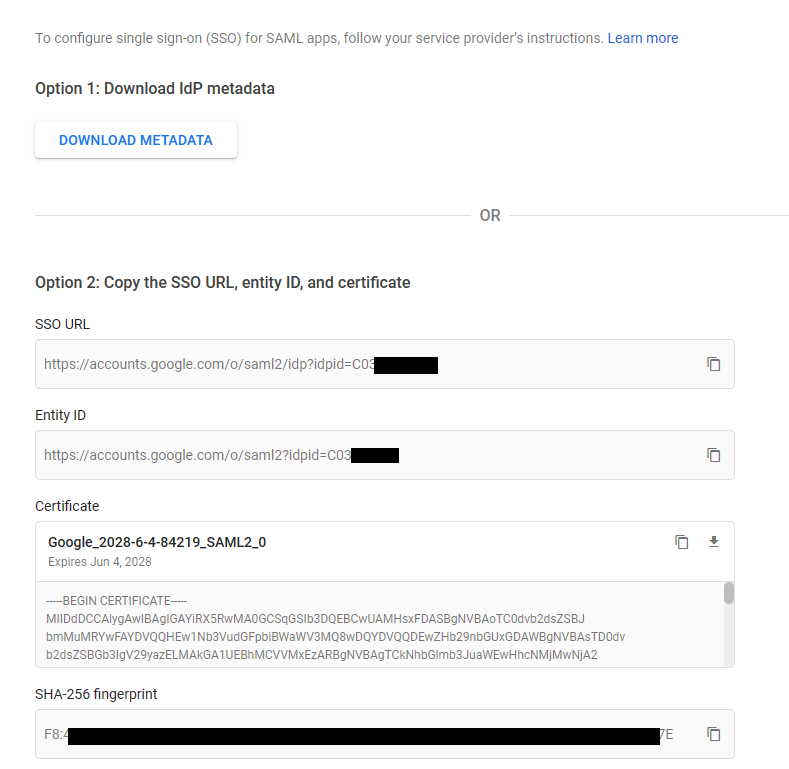
5. Copy the Kasm SAML configurations from the **Service Provider** section into the **Service Provider Details** section.
| **Kasm Property Name** | **Google Workspace Property Name** |
| --- | --- |
| Entity ID | Entity ID |
| Single Sign On Service | ACS URL |
| `https:///#/staticlogin` e.g `https://kasm.example.com/#/staticlogin` | Start URL |
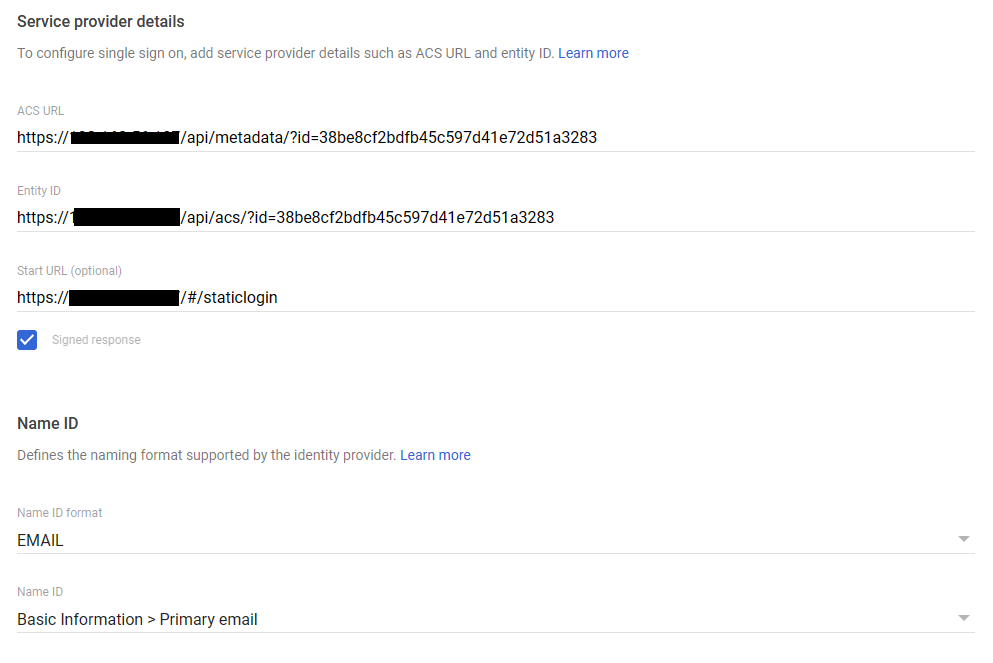
6. Ensure the following settings are configured in the Google Workspace **Service Provider Details** . Select **Continue**.
| **Setting** | **Value** |
| --- | --- |
| Signed Response | Checked |
| Name ID | Basic Information / Primary Email |
| Name ID Format | EMAIL |
7. If desired, select Google groups to pass to Kasm in the SAML assertion. Ensure the **App attribute**
is set to `groups` to match the **Group Membership Attribute** previously configured in the Kasm SAML settings.
In this example, a previously created security group `KasmAdmins` is selected. When complete, select **Finish**.
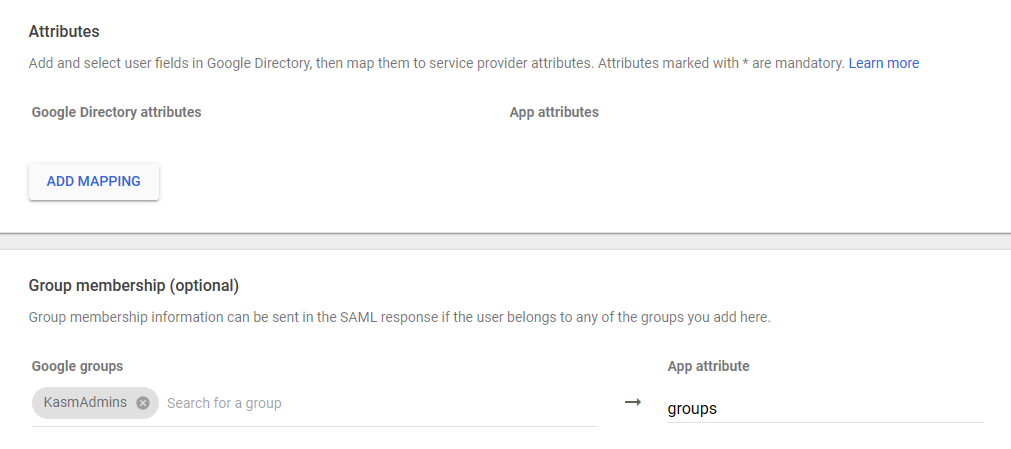
10. Review the final Kasm SAML Configuration form. Click **Sumbit** to save.
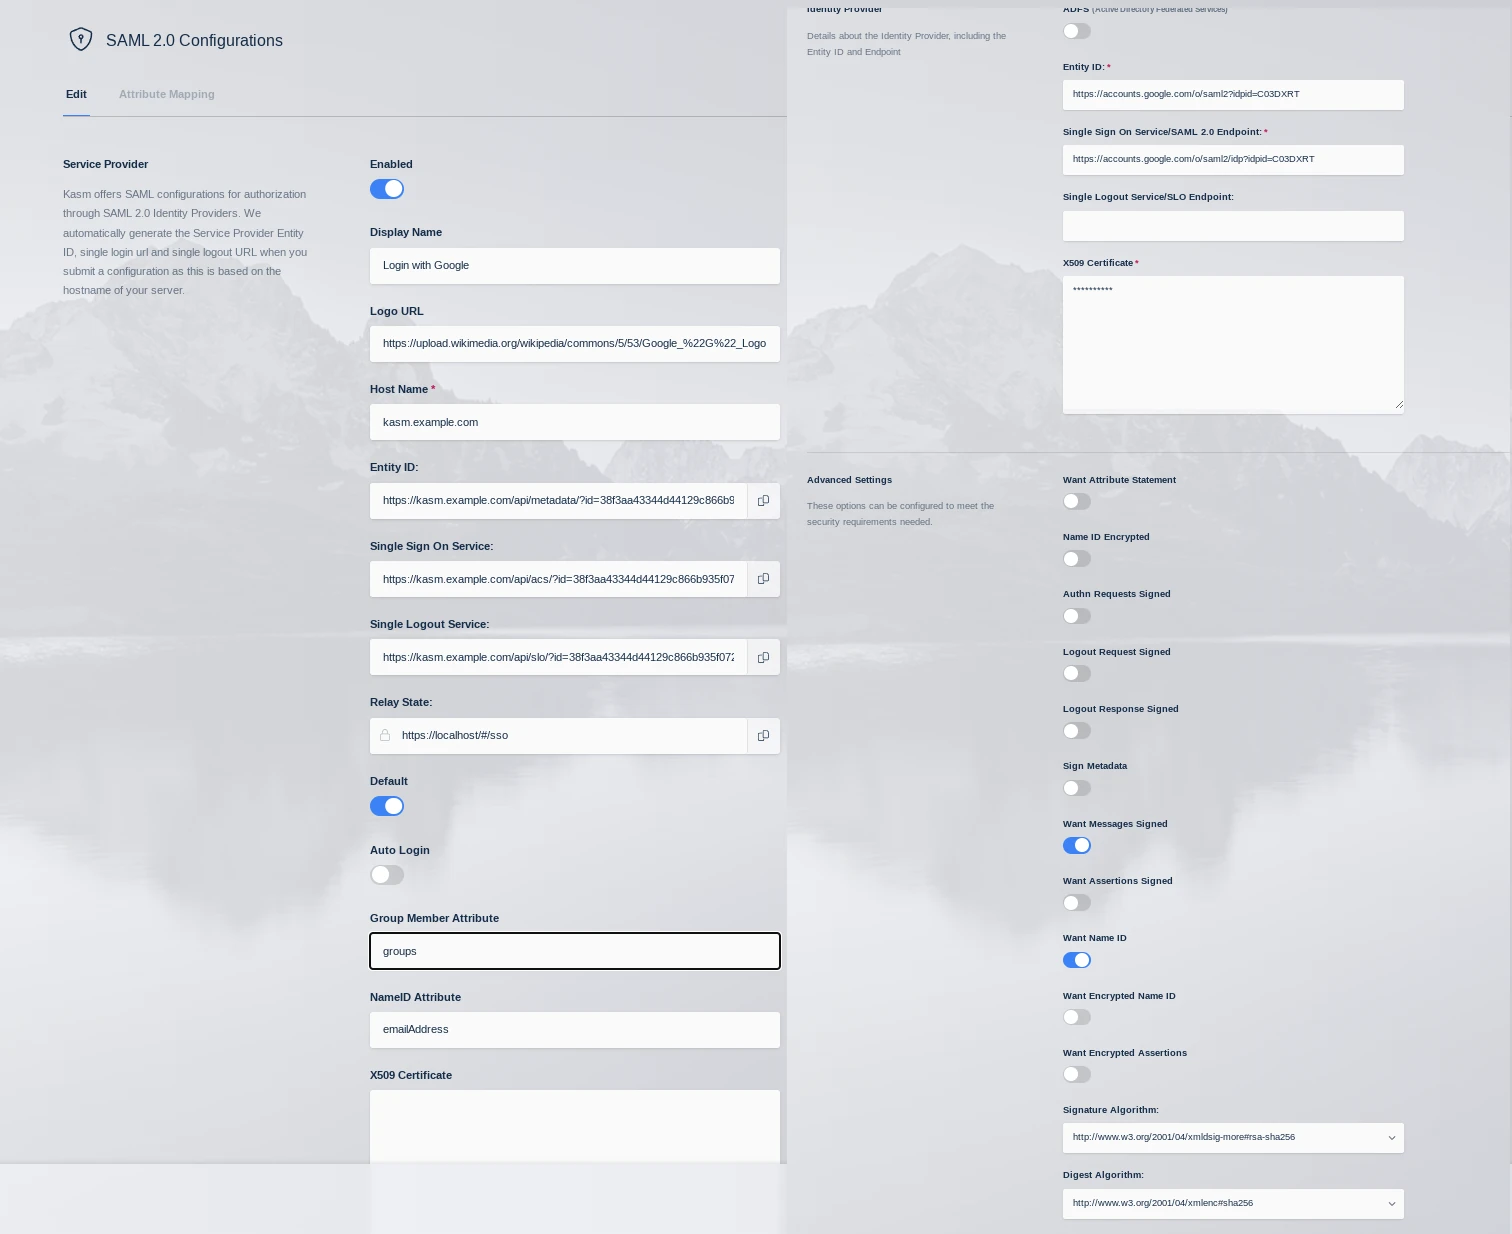
#### Enabling Access for Users
Once the Kasm SAML app is configured , access must be granted to Google users.
1. From the **Google Admin** Admin Console Expand **Apps**, then Select **Web and mobile Apps**, then select **Kasm Workspaces**
2. Click **User Access**
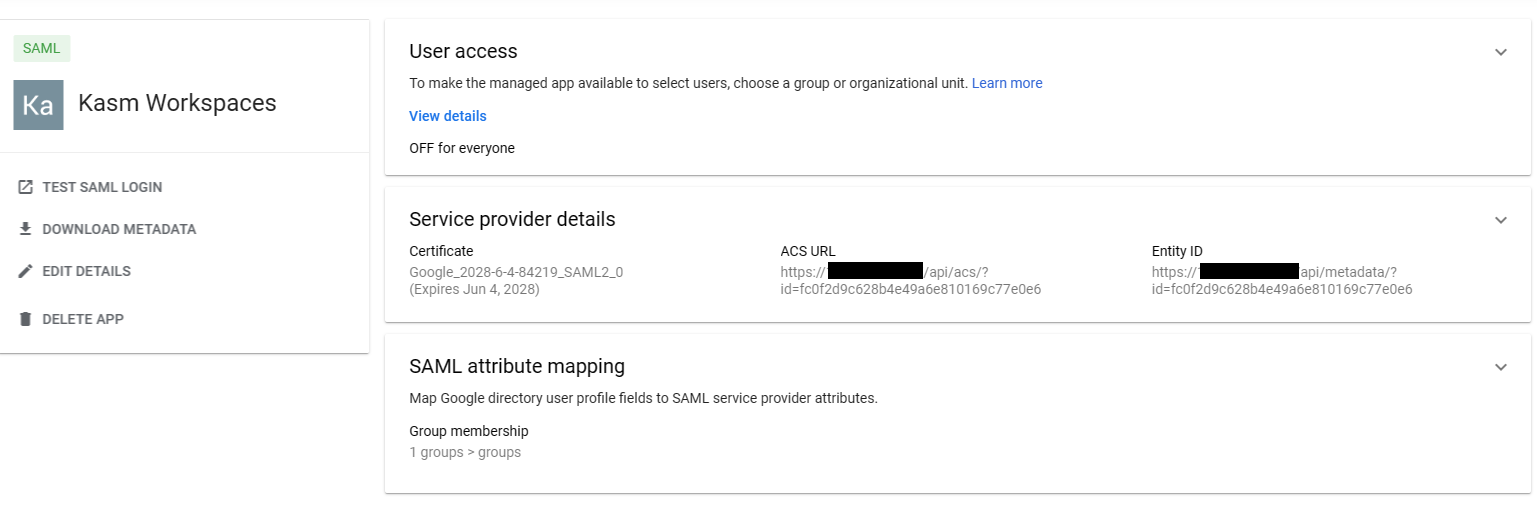
3. Select **ON for everyone** or for the desired Organizational Units or Groups, then click **Save**
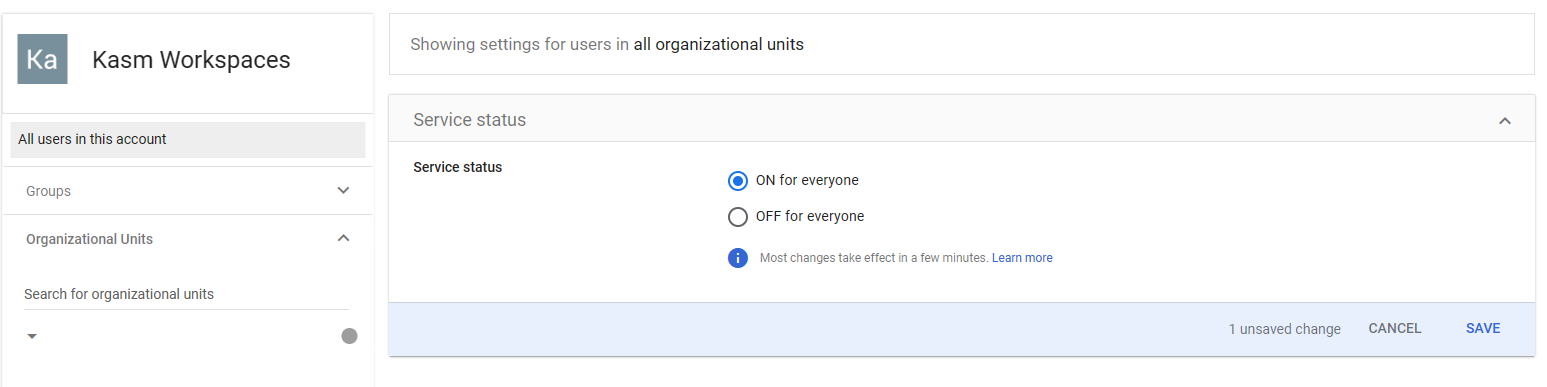
### Group Mappings
In the previous steps, the Google Workspace SAML configuration was configured to pass the `KasmAdmin`
security group in the SAML assertion. The following example will demonstrate how to associate the Google
group with a Kasm Group.
1. Log into the Kasm UI as an administrator.
2. Select **Access Management** -> **Groups** then select **Edit** next to the **Administrators Group**.
3. In the **SSO Group Mappings** section, select **Add SSO Mapping**.
4. Select **SAML-Login with Google** in the *SSO Provider** section.
5. Enter `KasmAdmins` in the **Group Attribute** section.
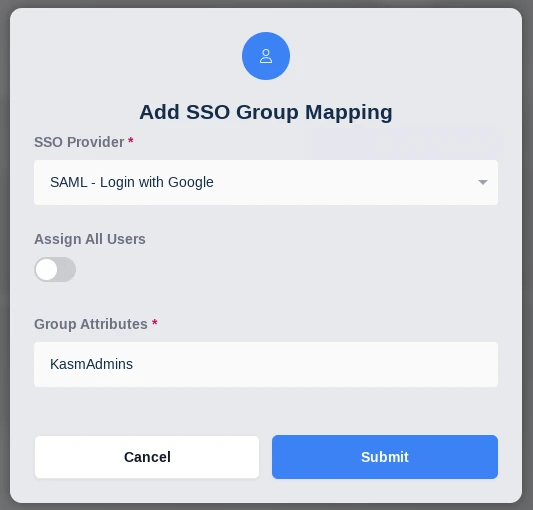
#### Testing Access
1. Log out of the Kasm UI if already logged in.
2. Navigate to the Kasm UI login page.
3. Click **Login with Google** to initiate the SAML SSO process.
4. After logging in, you should be redirected to the Kasm UI Dashboard. If the user was a member of
the `KasmAdmins` Google group, they should now be a member of the `Administrators` group within Kasm.
5. From another browser, login to Google. Click the Google Apps icon in the top right corner. Scroll down and click **Kasm**. You should be logged into the Kasm UI Dashboard.
---
## Keycloak(Saml)
### Keycloak SAML Setup
#### Create a new SAML configuration in Kasm
1. Log into the Kasm UI as an administrator.
2. Select **Access Management** -> **Authentication** -> **SAML** -> **Add Configuration**
3. The **SAML 2.0 Configuration** page will auto-generate the **Entity ID**, **Single Sign On Service**, **Single Logout Server**, and **Relay State** values.
4. Check **Enable** and enter a **Display Name**. e.g (Keycloak)
5. Enter the **Hostname** for the Workspaces deployment (e.g my.kasm.server).
6. Check **Default**.
7. Enter `Role` in **Group Member Attribute**.
8. Enter `username` in **NameID Attribute**.
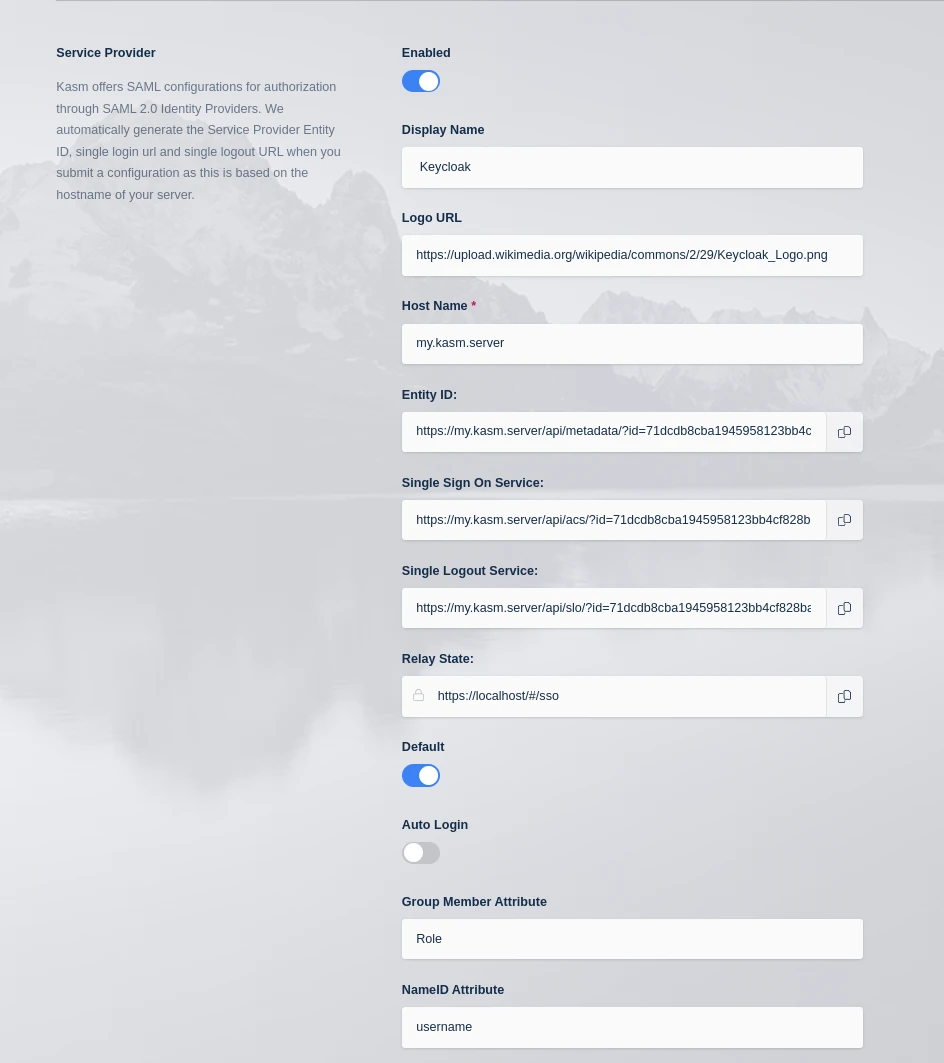
09. Check **Debug**. **Disable this setting after testing is complete**.
10. Leave this page open and continue to the next steps.
#### Realm SAML Settings
1. Navigate to the Keycloak Admin Portal. Select the desired Realm (e.g `master`) then select Realm Settings.
2. Click on **SAML 2.0 Identity Provider Metadata**.
3. Copy the following items from the XML document to the **Identity Provider** section of the SAML configuration in Workspaces.
| **Keycloak Property** | **Kasm Property Name** |
| --- | --- |
| entityID | Entity ID |
| ds:X509Certificate | X509 Certificate |
| md:SingleLogoutService..HTTP-POST | Single Logout Service/SLO Endpoint |
| md:SingleSignOnService..HTTP-POST | Single Sign On Service/SAML 2.0 Endpoint |
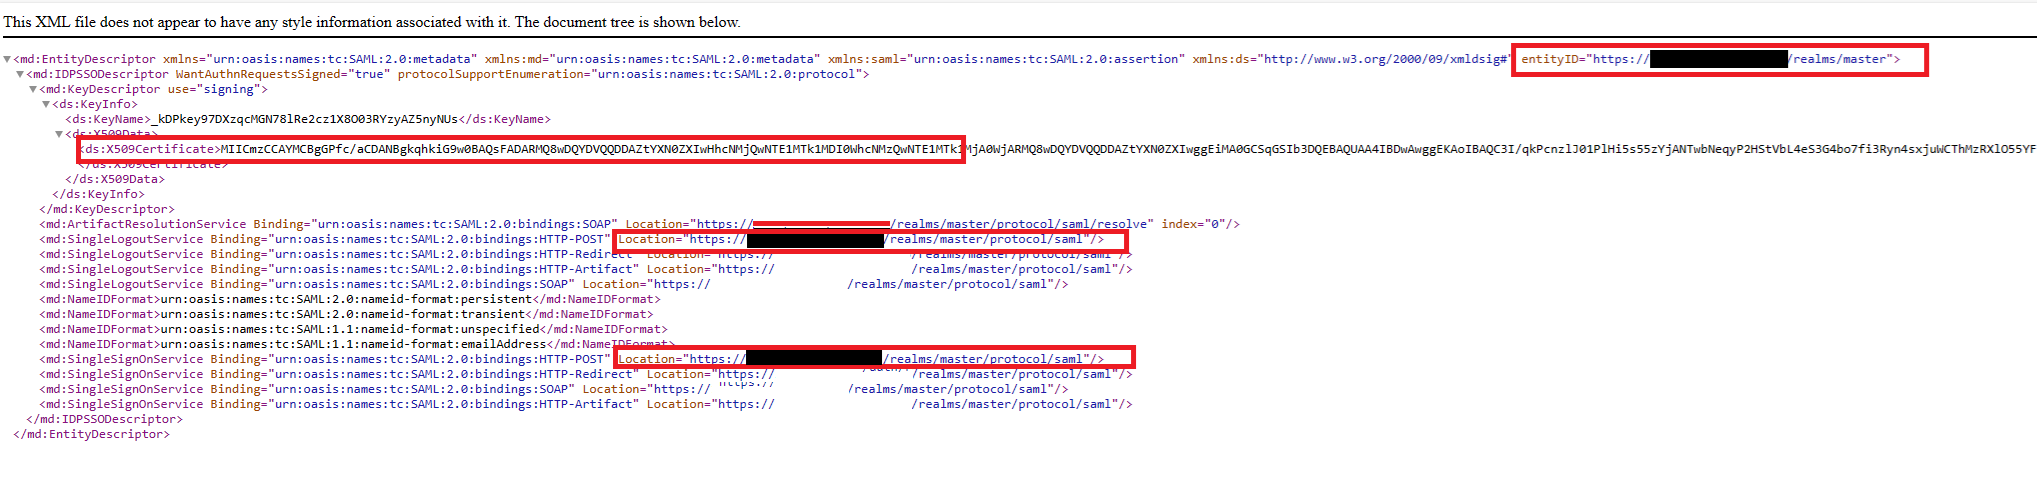
4. In the **Advanced Settings** of the Workspaces SAML configuration, ensure **Want Attribute Statement**, **Want Assertions Signed**, and **Want Name ID** are enabled.
5. In the **Advanced Settings** of the Workspaces SAML configuration, set **Signature Algorithm** to **rsa-sha256**.
6. Click **Save**.
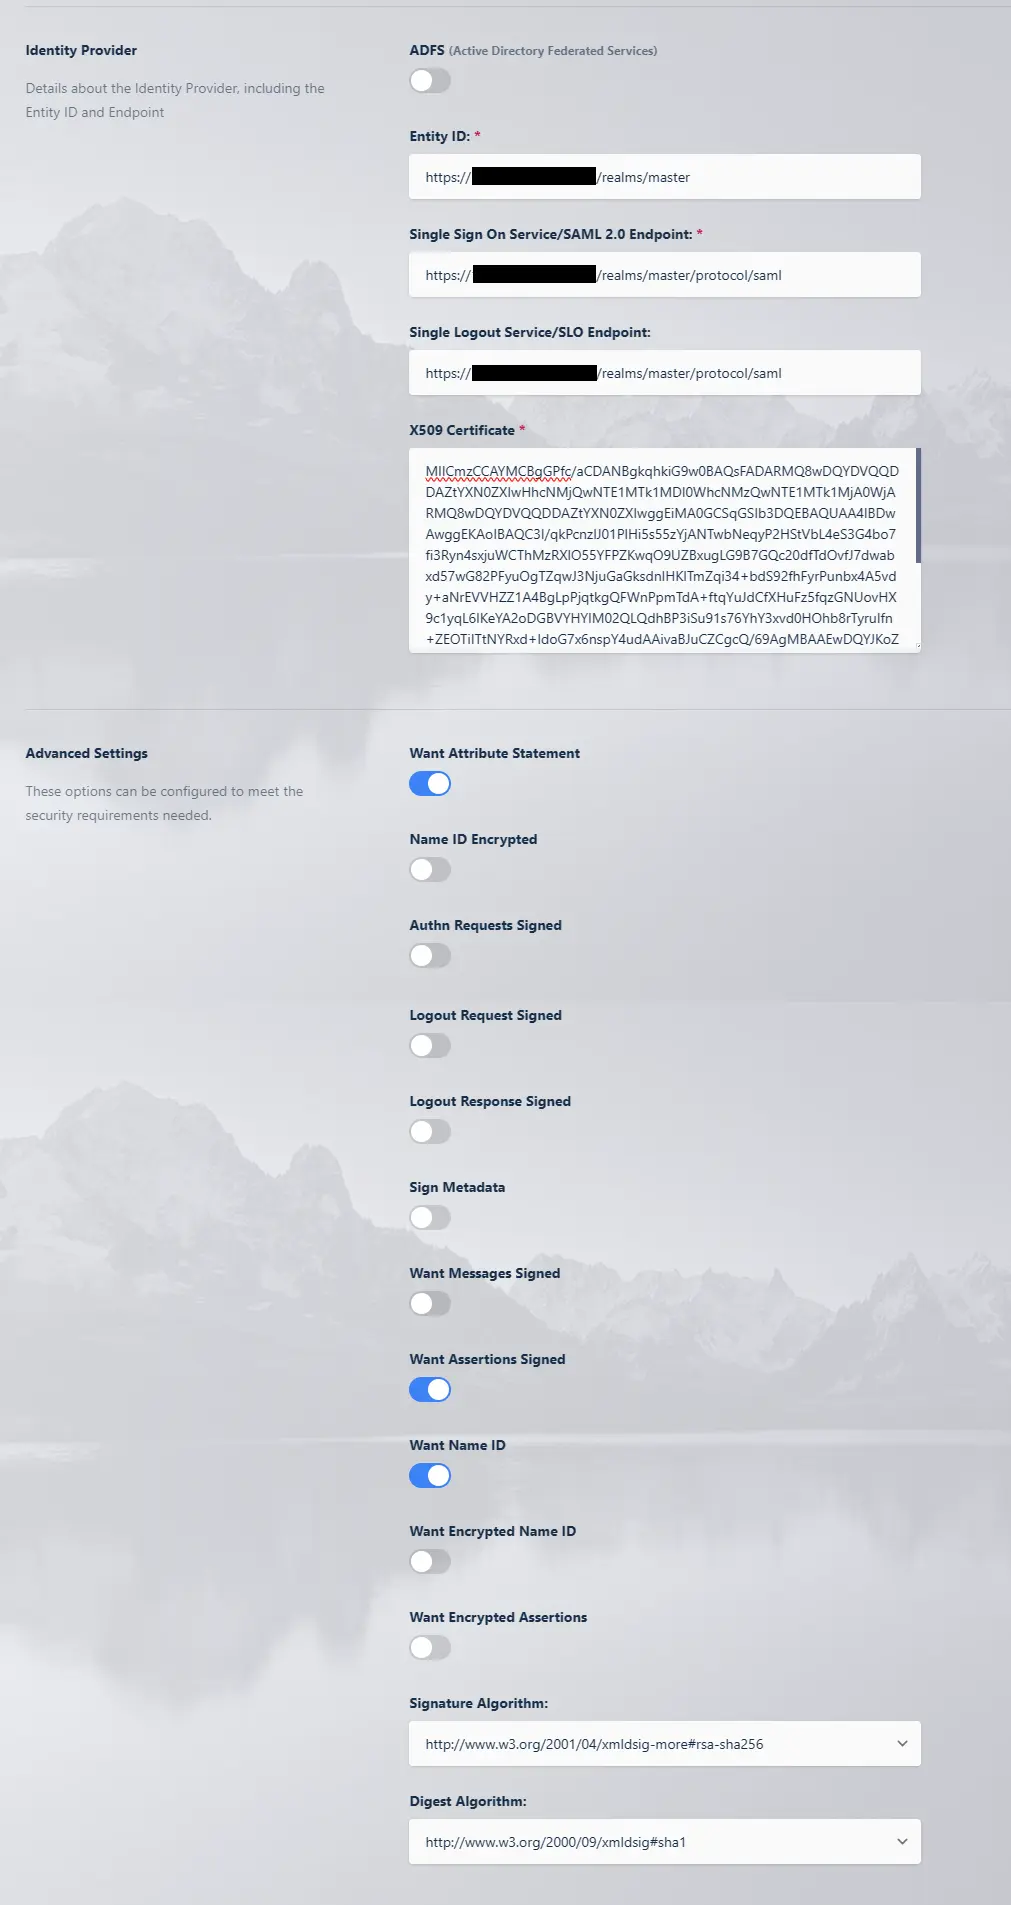
7. Select **Edit** next to the new Saml config as these settings will need to be referenced in th following sections.
#### Add a new client in Keycloak
1. Navigate to the Keycloak Admin Portal. Select the desired Realm (e.g `master`) then select Clients.
2. In the Clients window select **Create Client**.
3. In the **Client type** select **SAML**
4. In the **Client ID** enter a short name (e.g `kasm`) - Note: we will modify this in the next section to work around a keycloak bug.
5. Enter a value for the **Name** field (e.g Kasm Workspaces).
6. Select **Next**.
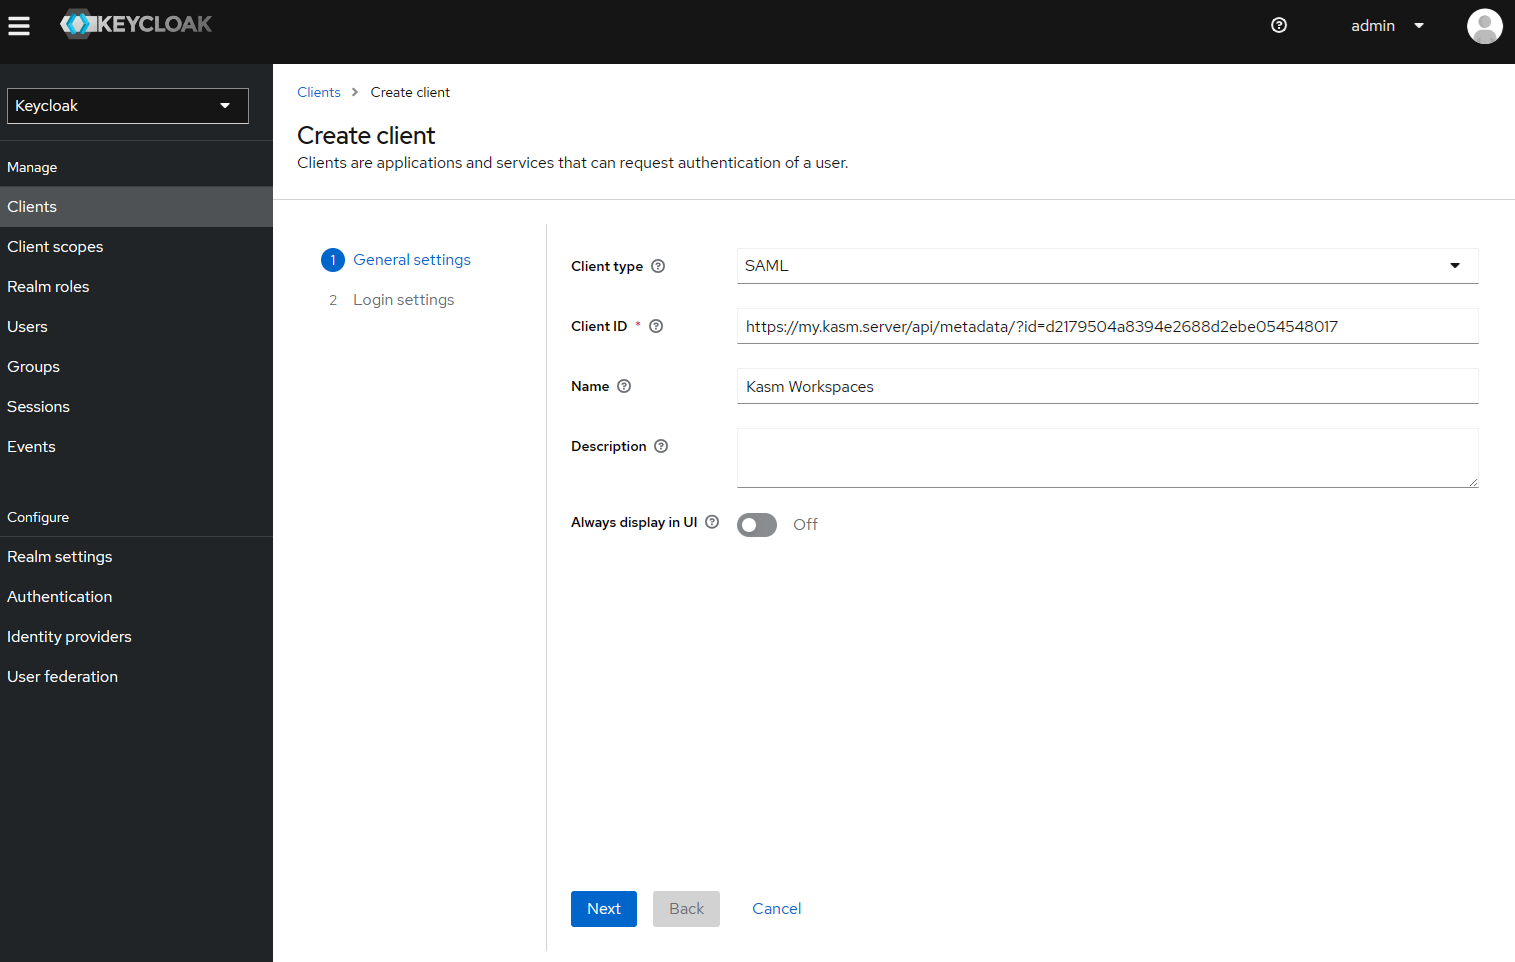
7. Update the **Home URL** with the URL of the Workspaces deployment (e.g `https://my.kasm.server`).
8. Update **Valid Redirect URLs** with a wildcard entry for the Workspaces deployment (e.g `https://my.kasm.server/*`
9. Select **Save**.
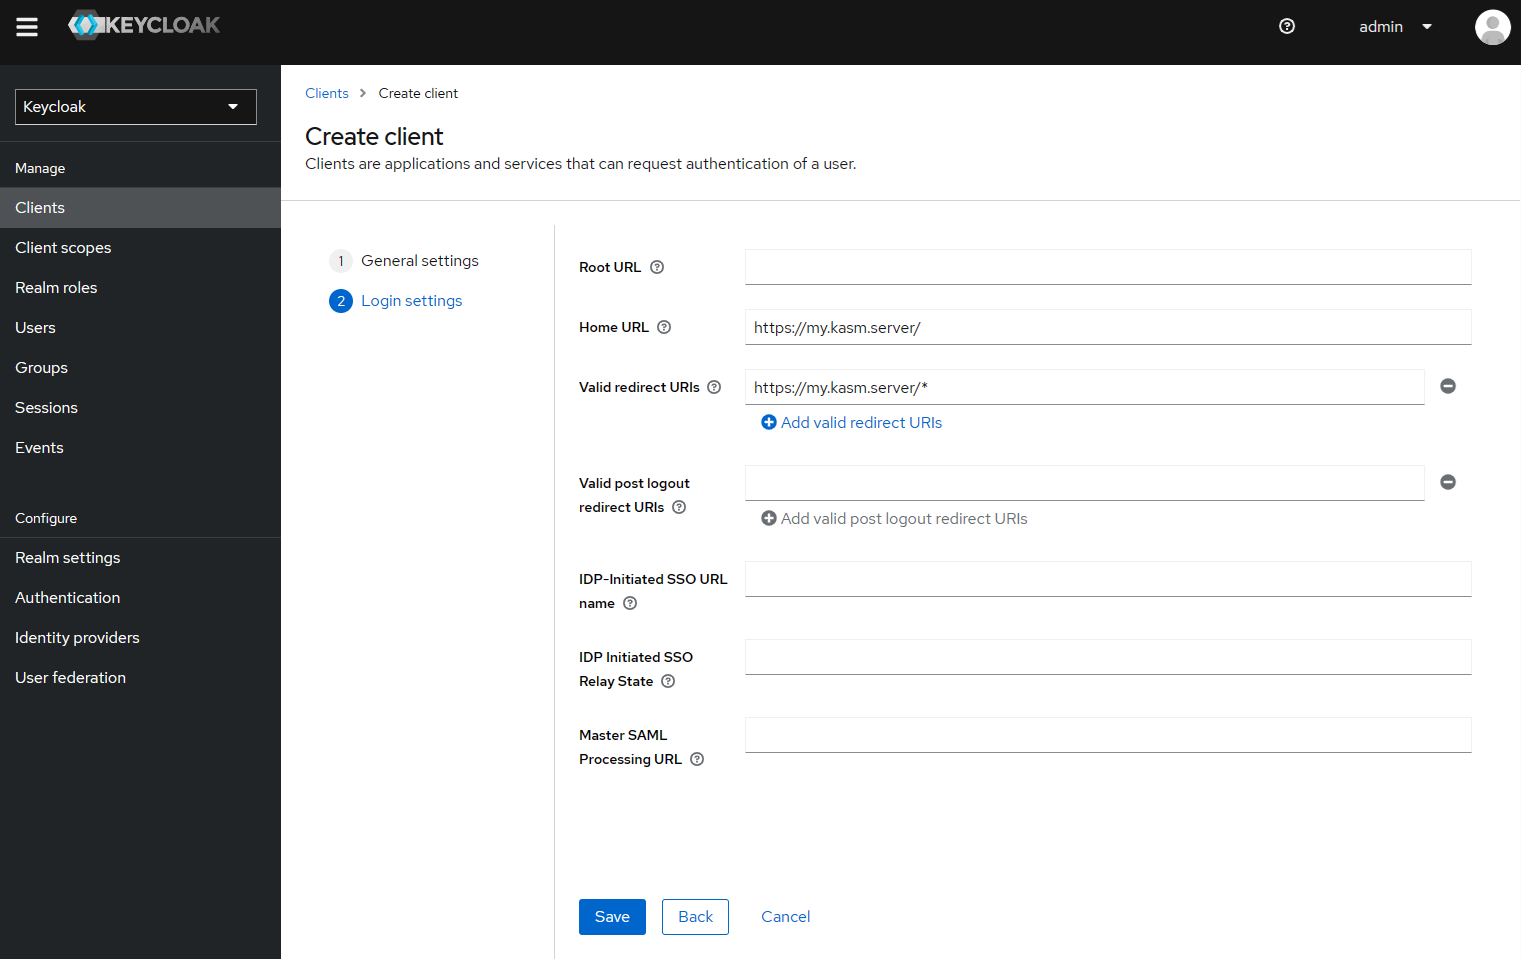
#### Client Configurations
Update the client details configuration
1. In the Client Details page, select the **Settings** tab.
2. In the **Client ID** field, enter the value found in the **Entity ID** from the **Service Provider** sections in the Workspaces SAML configuration form.
3. In the **Master SAML Processing URL** enter the value found in the **Single Sign On Service** from the **Service Provider** sections in the Workspaces SAML configuration form.
4. Ensure **Name ID format** is `username`.
5. Ensure **Force name ID format** is set to **On**.
6. Ensure **Sign Assertions** is set to **On**.
7. Click **Save**
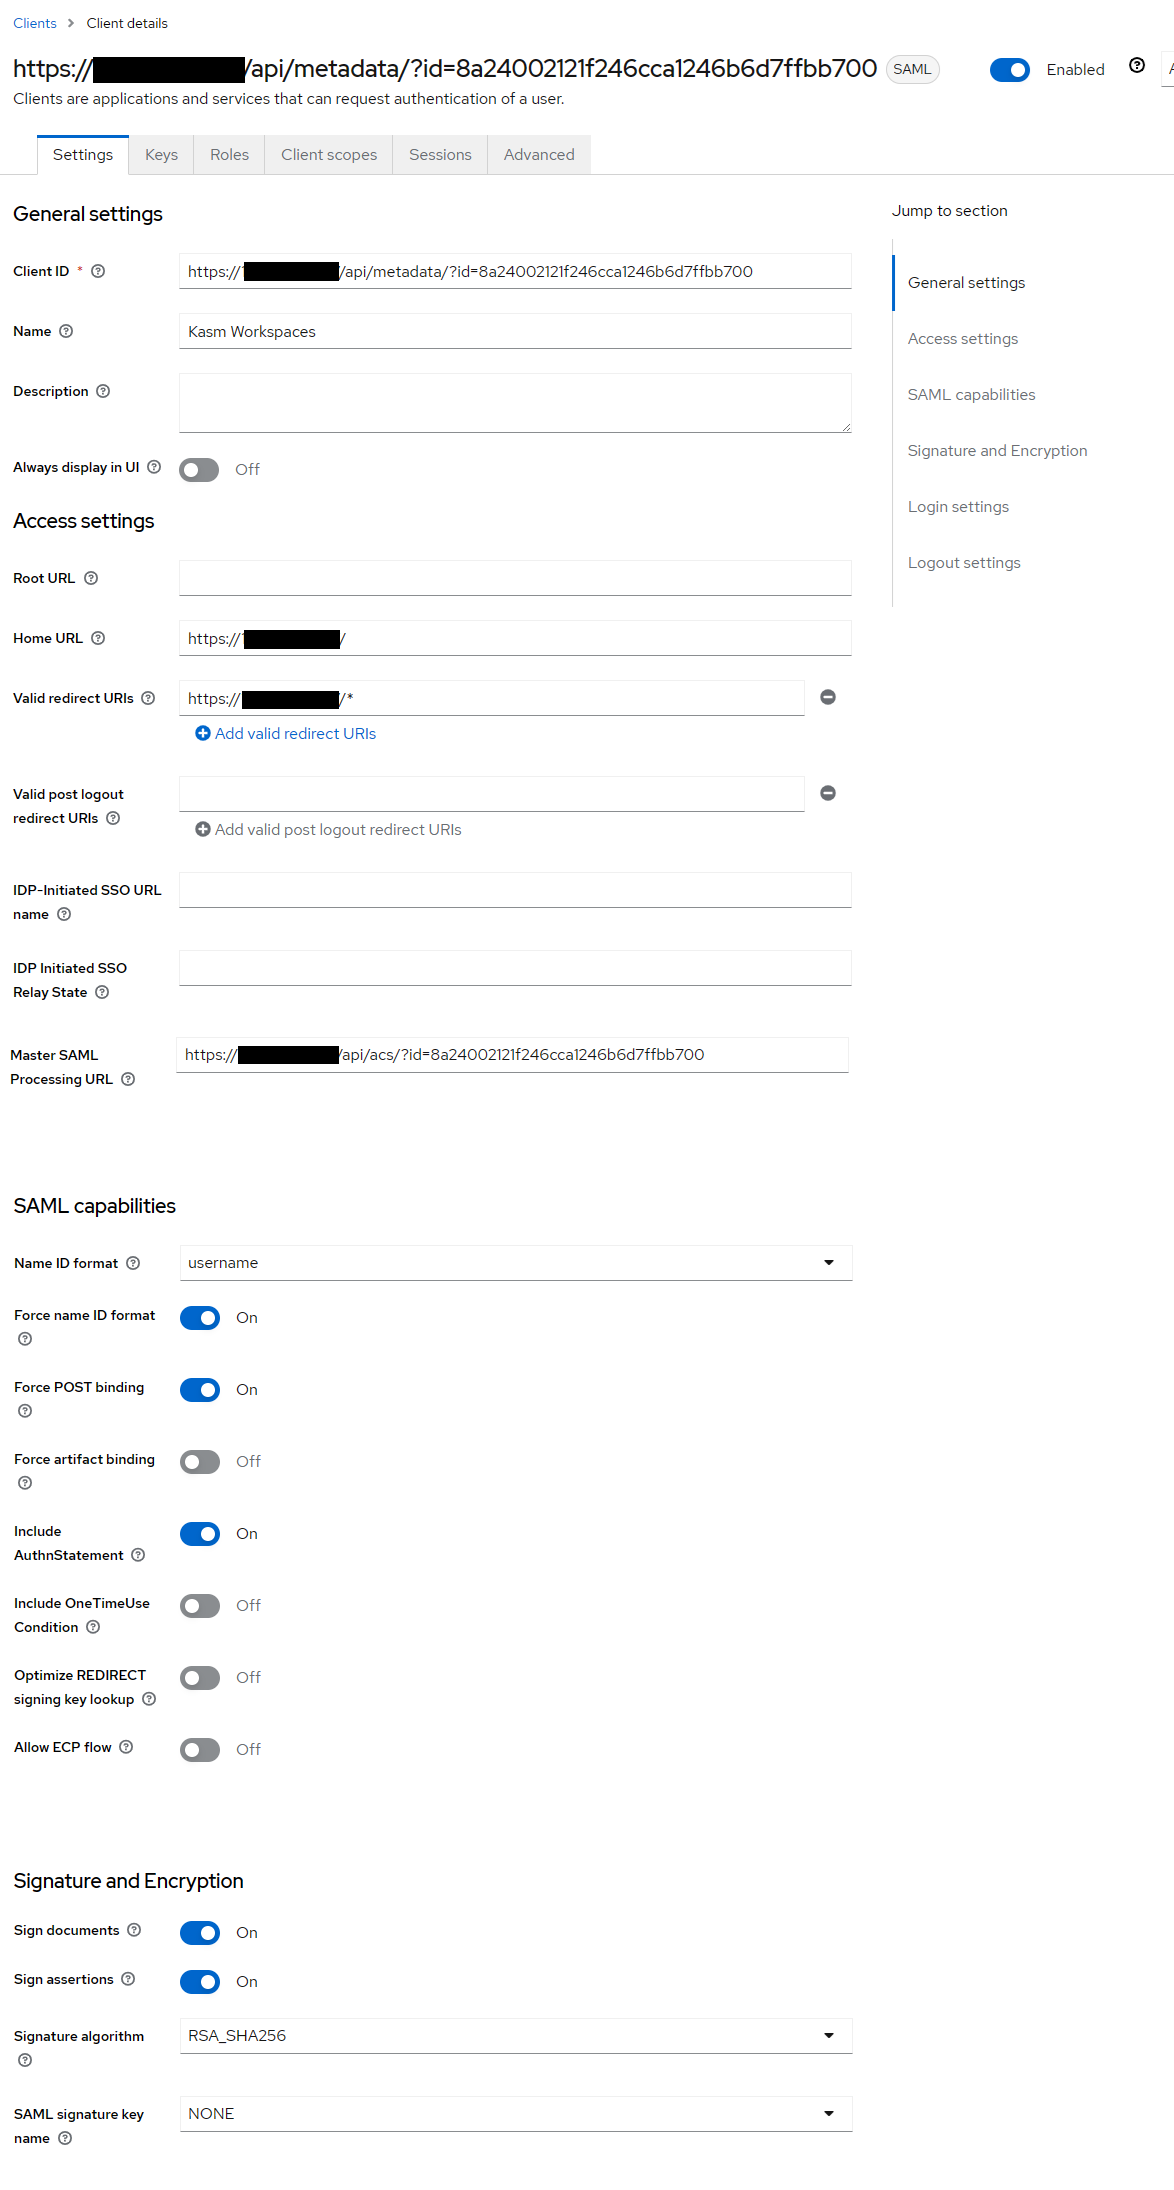
8. Select the **Keys** tab.
9. Set **Client signature required** to **Off**
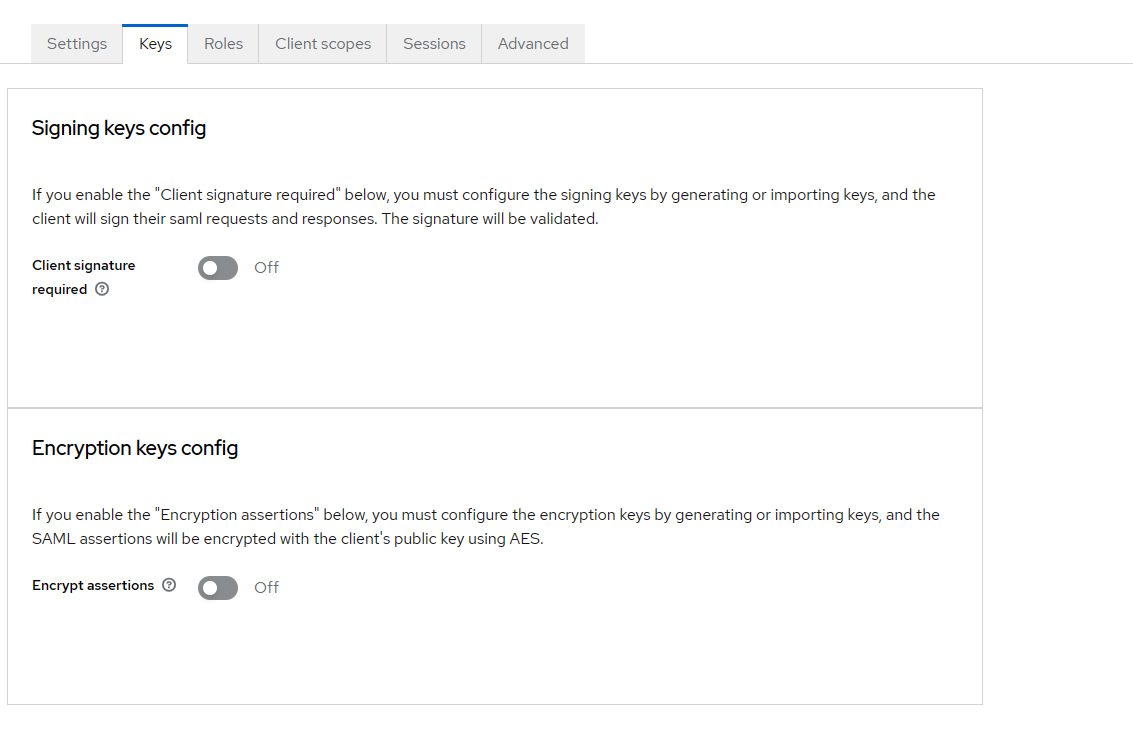
10. Select the **Advanced** Tab.
11. In the **Logout Service POST Binding URL** enter the value found in the **Single Logout Service** from the **Service Provider** sections in the Workspaces SAML configuration form.
12. Click **Save**
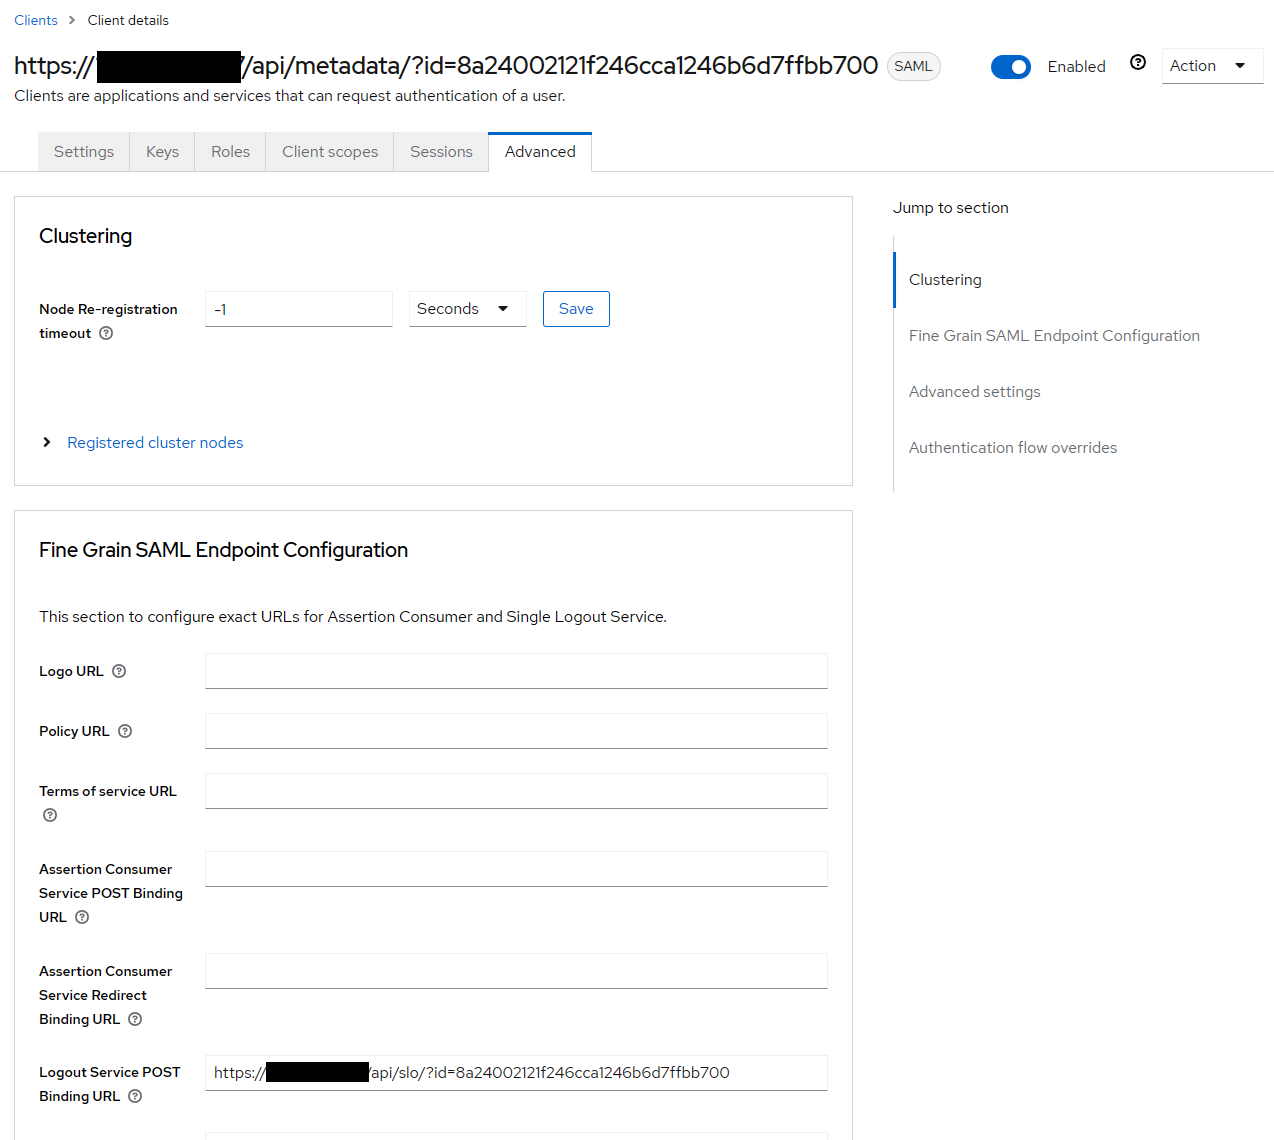
#### Adjust Single Role Attribute in Keycloak
1. Navigate to the Keycloak Admin Portal. Select the desired Realm (e.g `master`) then select **Client Scopes**.
2. Select **role_list** (saml).
3. Select the **Mappers** tab.
4. Select **role list**.
5. Set **Single Role Attribute** to **On**, then click Save.
#### Testing Access
1. Log out of the Kasm UI if already logged in.
2. Navigate to the Kasm UI login page.
3. Click **Keycloak** to initiate the SAML SSO process.
#### Mapping Roles
During the SAML authentication process , Keycloak will send a list of the user's roles. These can be mapped to
Kasm Groups.
1. Navigate to the Keycloak Admin Portal. Select the desired Realm (e.g `master`) then select **Realm Roles**.
2. Select **Create Role**.
3. Name the role **kasm_admins** then click **Save**.
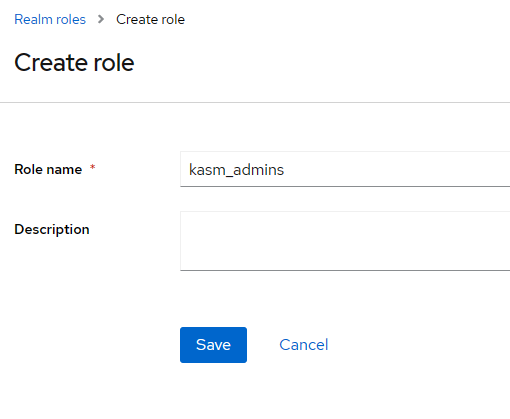
4. Select **Users** from the Keycloak menu, then click the username for the desired user.
05. Select the **Role Mappings** tab, then select **Assign role**
06. Select **kasm_admins** from the **Available Roles** then click **Assign**.
07. Log into the Kasm UI as an administrator.
08. Select **Access Management** -> **Groups**, then click **Add Group**.
09. Name the Group **Keycloak Kasm Admins** and give it a priority (e.g 10).
10. Save the new group by clicking **Save**.
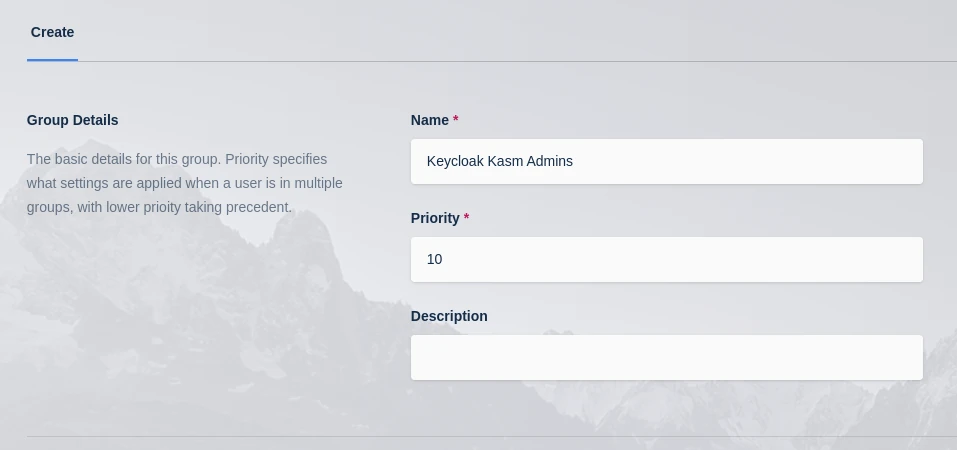
11. On the **Groups** screen, using the arrow menu select **Edit** on the group that was just created.
12. Navigate to the **SSO Group Mappings** tab and select **Add SSO Mapping**.
13. Select the SAML IDP that was created above "SAML - Keycloak" for the **SSO Provider**.
14. Enter **kasm_admins** as the **Group Attributes** then click **Submit**.
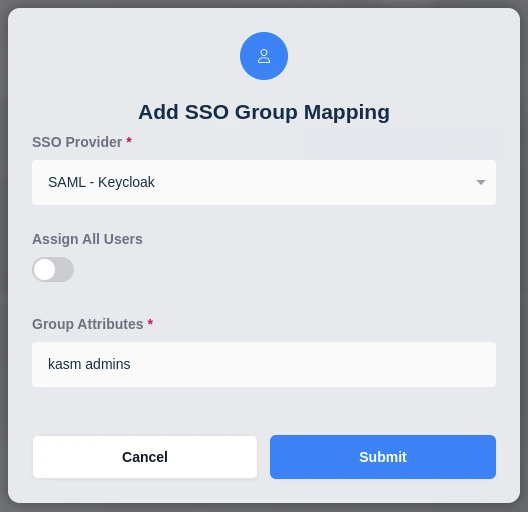
15. Log out of Kasm, and back in via SAML as the previously assigned user. The user should now be mapped to the **Keycloak Kasm Admins** a group.
---
## Okta
### Okta SAML Setup
Follow the steps in the Okta application [setup](https://help.okta.com/oie/en-us/content/topics/apps/apps_app_integration_wizard_saml.htm).
Some of the Okta SAML settings fields displayed blow require information from the Kasm SAML configuration page.
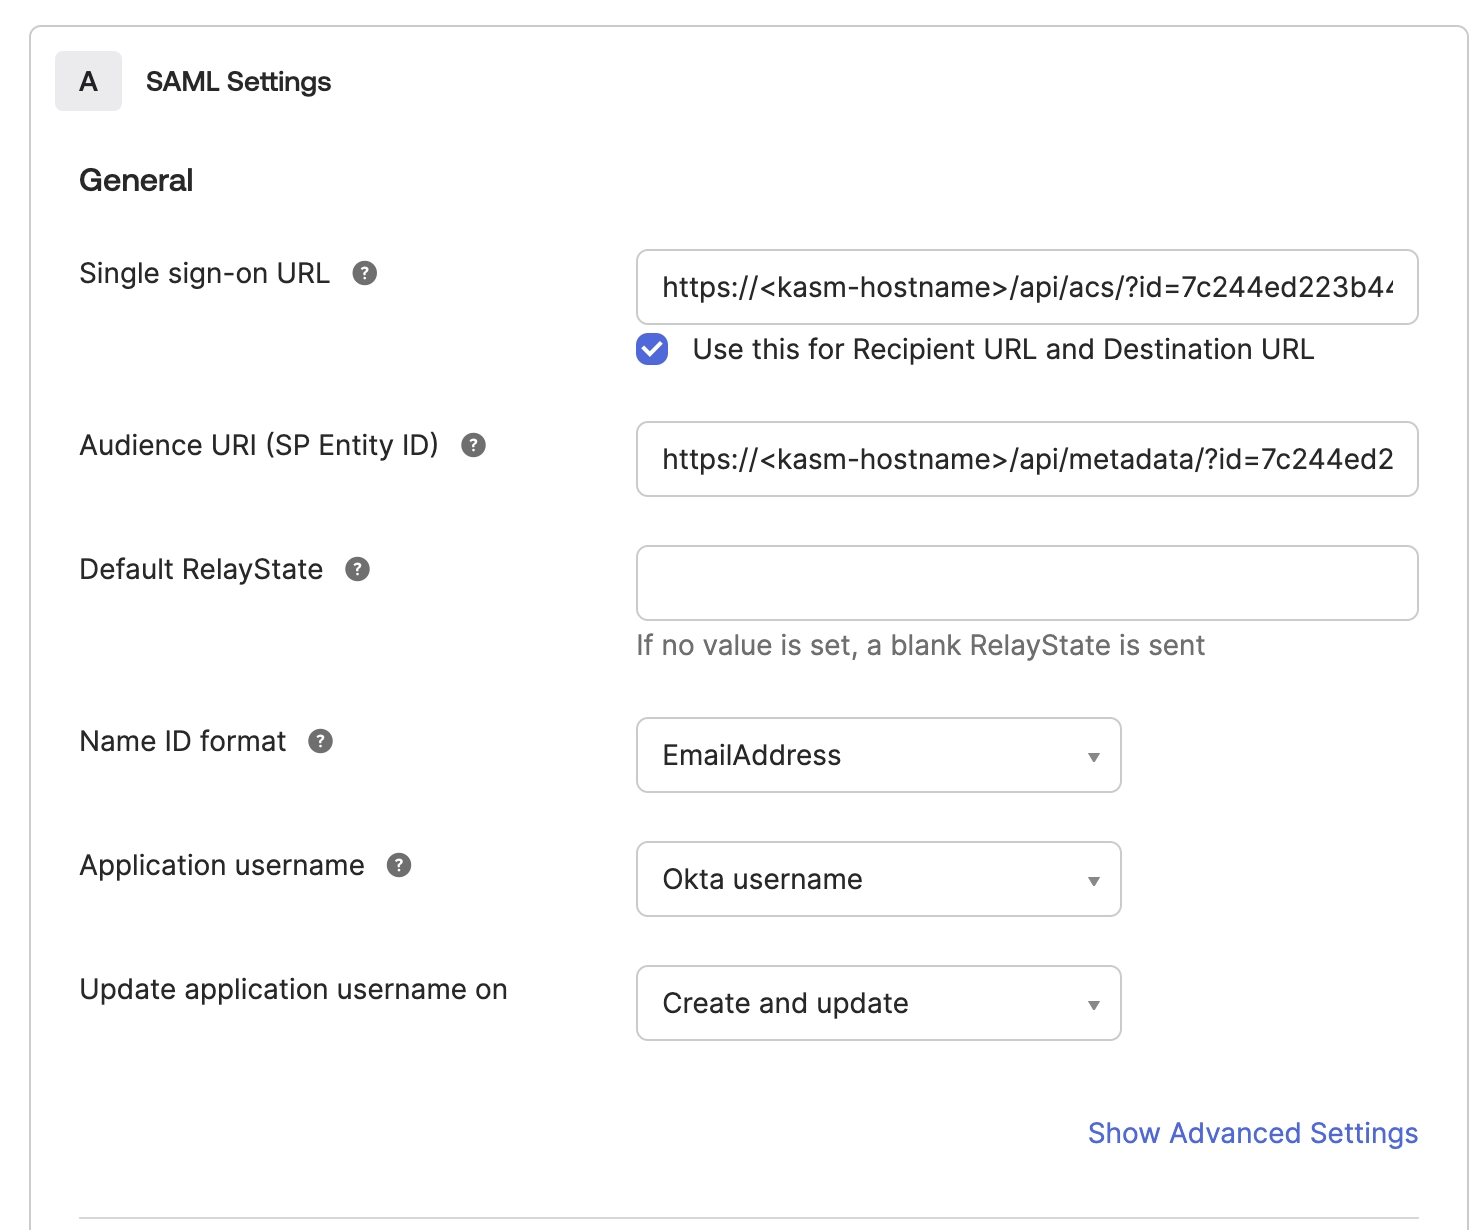
Go To Kasm's SAML configuration
- Select Add Configuration
Fill out the Okta Configuration form from the Kasm Information:
> - Copy the "Single Sign on Service" from the Kasm configuration page to the "Single sign-on URL" field in Okta
> - Copy "Entity ID" from the Kasm configuration page to the "Audience URI (SP Entity ID)" field in Okta
> - Change Name ID format to EmailAddress
> - Optionally advanced settings can be set here and the Single Logout Service could be configured
Kasm SAML currently requires attributes to be returned in the SAML response unless security option wantAttributeStatement is false
> - Add the setting below to ensure that Okta sends the username attribute in the SAML response.
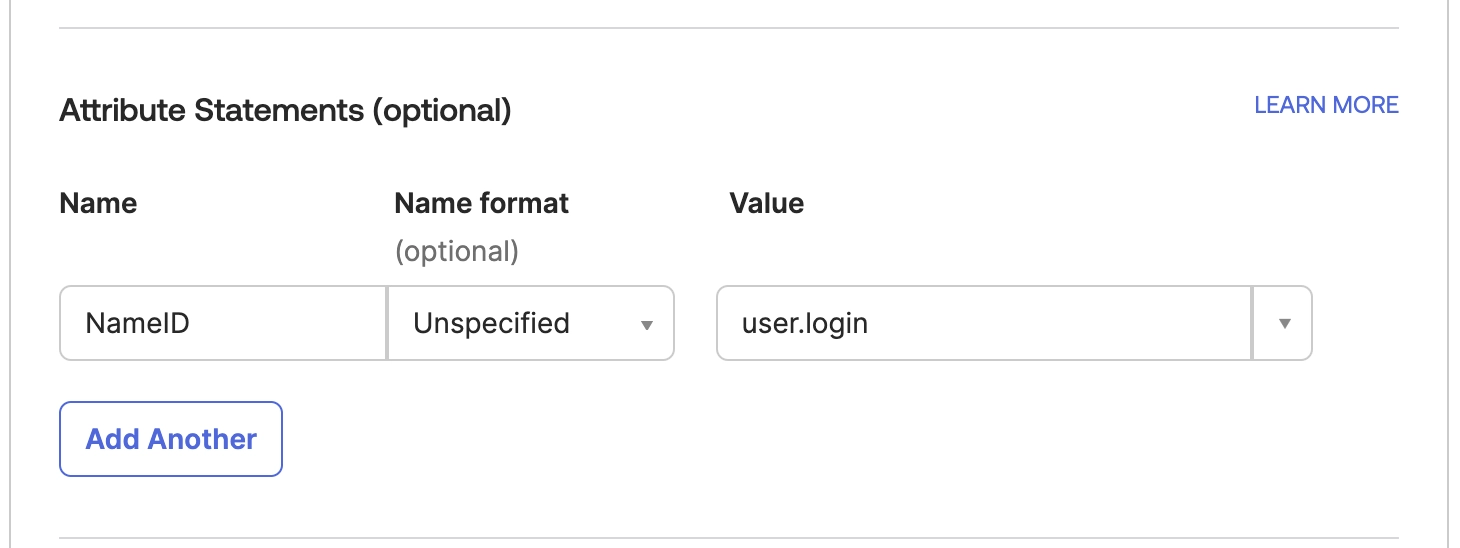
Okta can be configured to send over group membership information to Kasm in order for Kasm to assign groups based on Okta groups.
In the example below Okta will send over all groups the user is a part of that start with "kasm" via the "samlGroup" attribute
in the SAML Response. The Kasm "Group Member Attribute" setting must be configured to match this Okta setting.
- Add the setting below if you wish Okta to send group information to Kasm
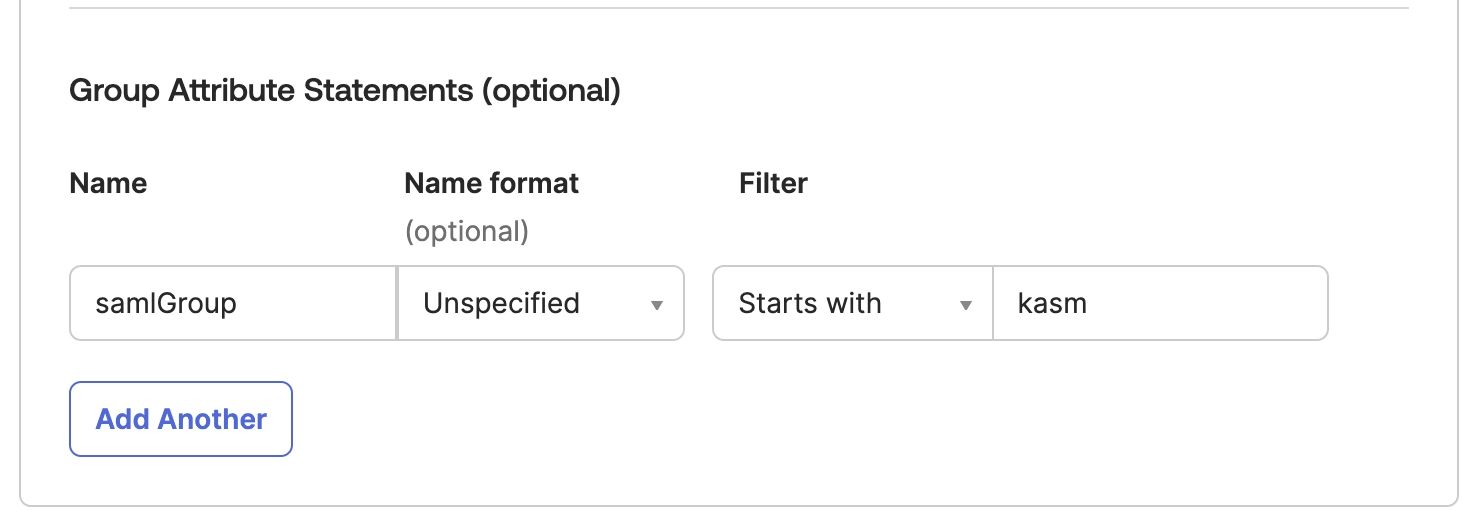
Select next and add an internal app.
Once created navigate to the the Sign On configuration page in Okta and click on "View SAML Setup Instructions" on the right side
of the page.
Copy the following fields from this Okta page into the corresponding fields of the Kasm Saml Configuration page.
- Copy the "Identity Provider Single Sign-On URL" from Okta to the "Single Sign On Service/SAML 2.0 Endpoint" in the Kasm Identity Provider configuration
- Copy the "Identity Provider Issuer" in Okta to the "Entity ID" in the Kasm Identity Provider configuration
- Copy the "X.509 Certificate" in Okta to the "X509 Certificate" in the Kasm Identity Provider configuration
Then in Okta assign a user to the application in the Okta Configuration.
In Kasm Select the "Test SSO" button at the bottom of the configuration form to perform a test of the SSO configuration.
Users should now be able to select Okta as an authentication method in the sign-on page.
---
## Onelogin
### OneLogin SAML Setup
In the Administration panel of OneLogin:
- Select add app
- Select SAML Test Connector (IdP w/attr)
- Select Save
- Select the Configuration tab
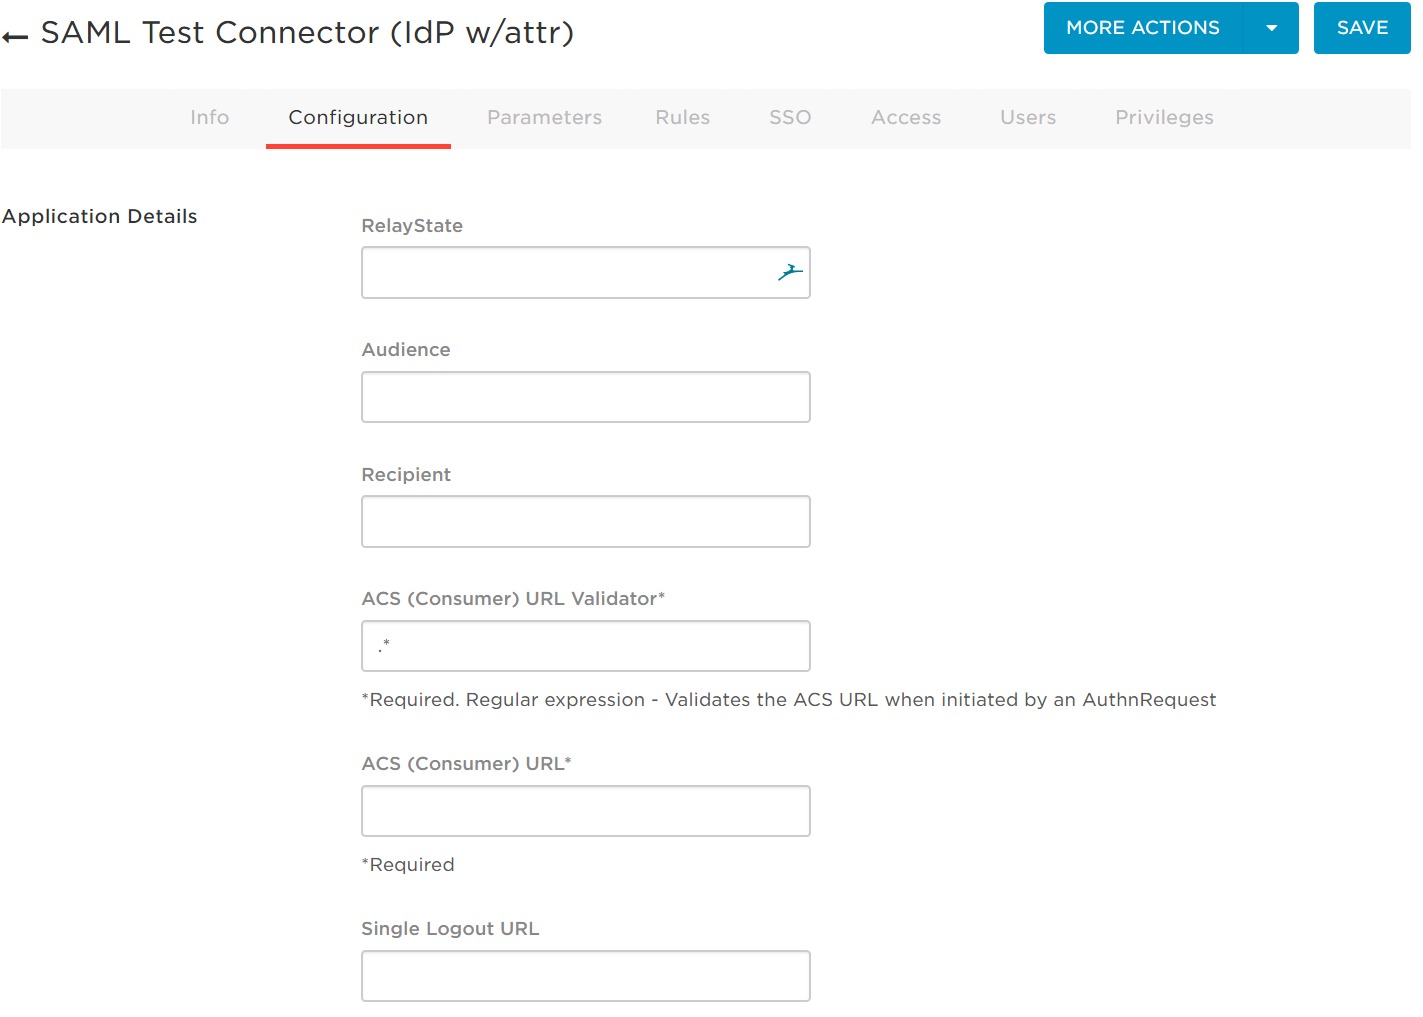
Open Kasm as an administrator.
- Go to Access Management -> Authentication -> SAML in Kasm's navigation bar
- Click "Add Configuration"
- Copy Entity ID to OneLogin's Audience field
- Copy Single Sign On Service to OneLogin's Recipient Field.
- Copy Single Sign on Service to OneLogin's ACS (Consumer) URL
- Enter .\* in ACS validator (this should be updated with regex for the ACS URL later once login is setup)
- Optionally copy Single Logout Service to Single Logout URL
- Select Save on the OneLogin configuration page
Go to the SSO tab on OneLogin's page
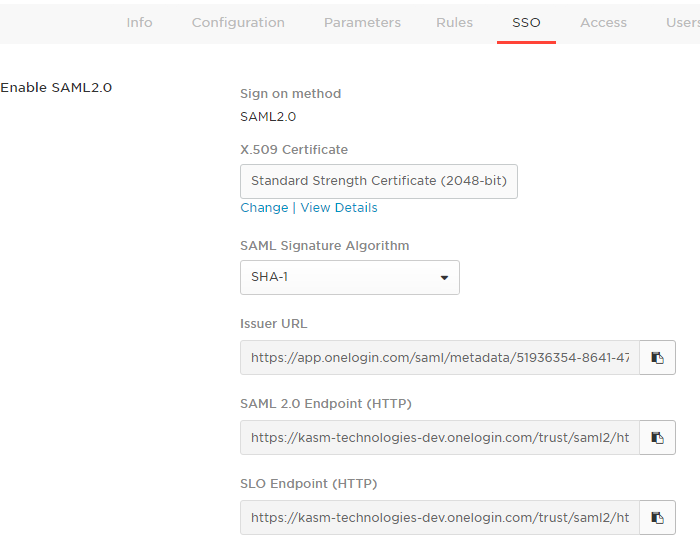
- Copy the Issuer URL to the Identity Provider Entity ID field on the bottom of the Kasm SAML configuration form
- Copy the SAML 2.0 Endpoint URL to the Identity Provider Single Sign field on the bottom of the Kasm SAML configuration form
- Optionally add the SLO endpoint single logout service to the Single Logout Field
- Select the SSO, then select View Details of the X.509 certificate on the OneLogin page
- Copy the certificate into the X509 certificate text area in Kasm
- Select Save on the Kasm Configuration
In OneLogin select the Access tab and select the default roles for users. Go back to the Kasm Saml configuration and
select Test SSO.
This will launch the login with the OneLogin portal. If the test is successful the Kasm will be logged in under the
username for the OneLogin email provided.
If the test was successful it will have logged out the Admin. Logout and log back in as an administrator.
If the login is not working you may select the debug checkbox in the saml configuration the response will contain the
specific saml error
If the login works properly enable the configuration with the enabled checkbox under service Provider
This will enable the login to be seen by the users
---
## Pingone
### PingOne SAML Setup
#### Create a new SAML configuration in Kasm
1. Log into the Kasm UI as an administrator.
2. Select **Access Management** -> **Authentication** -> **SAML** -> **Add Configuration**
3. The **SAML 2.0 Configuration** page will auto-generate the **Entity ID**, **Single Sign On Service**, **Single Logout Server**, and **Relay State** values.
4. Check **Enable** and enter a **Display Name**. e.g (PingOne)
5. Enter `memberOf` in **Group Member Attribute**
6. Enter `emailAddress` in **NameID Attribute**
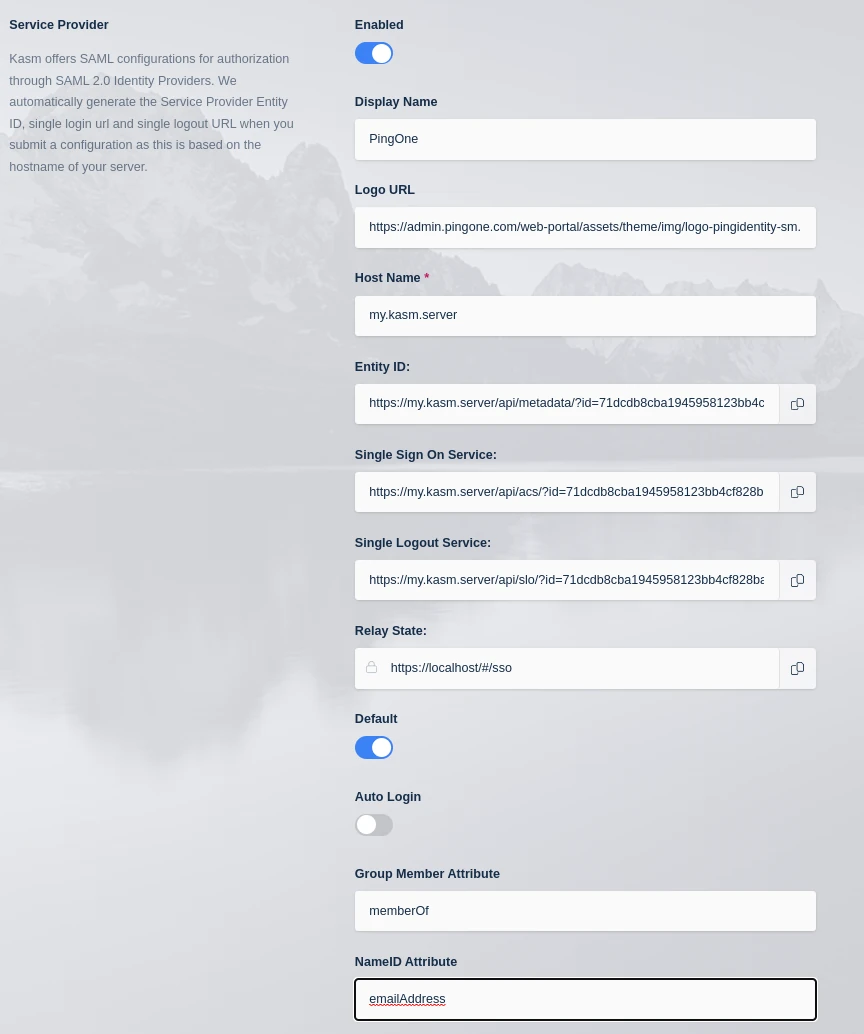
7. Leave this page open and continue to the next steps.
#### Create a new SAML Application in PingOne
01. In the PingOne Admin portal, click **Applications** -> **My Applications** -> **Add Application** -> **New SAML Application**
02. Give the application a Name, Description , Category and optionally an icon. Click **Continue to Next Step**
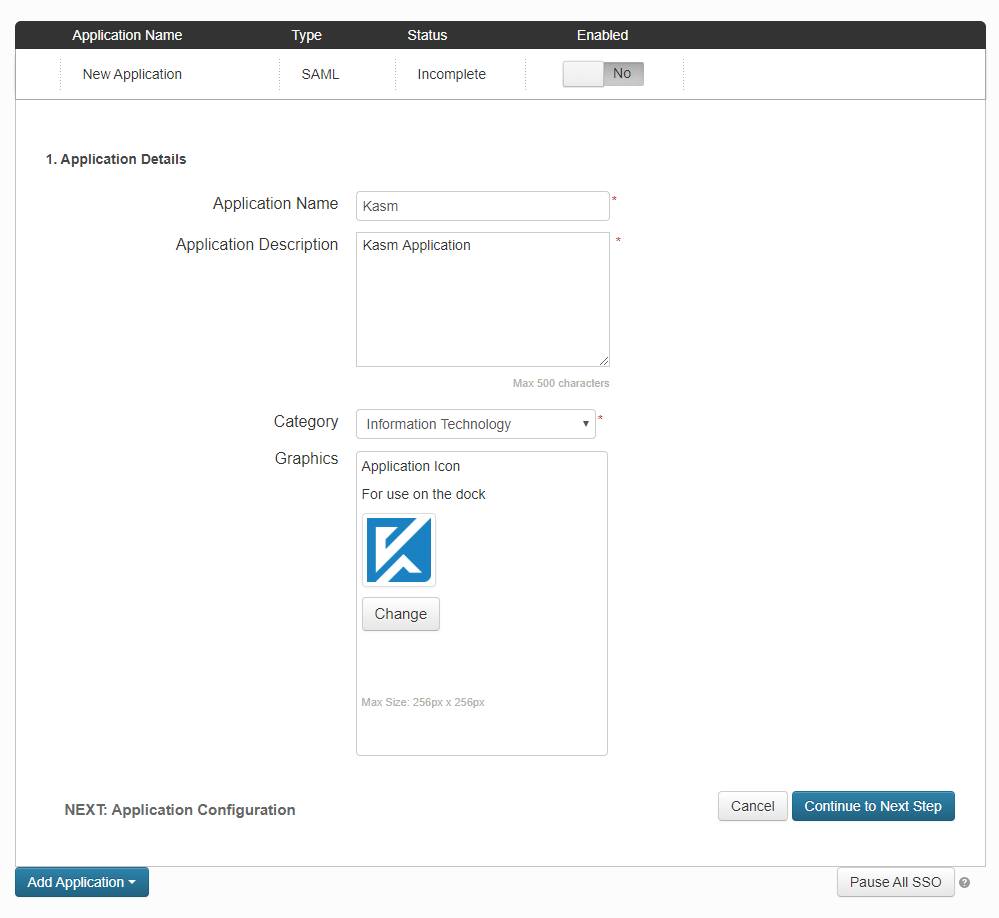
03. Copy the **Service Provider** entries from the Kasm SAML Configurations started in the previous section into the Basic SAML configurations and click.
| **Kasm Property Name** | **PingOne Property Name** |
| --- | --- |
| Entity ID | Entity ID |
| Single Sign On Service | Assertion Consumer Service (ACS) |
| Single Logout Service | `` (e.g https://kasm.server) |
| Relay State | Application URL |
04. Select **Redirect** for **Single Logout Binding Type**
05. Select **RSA_SHA1** for **Signing Algorithm**
06. Select **Continue to Next Step**
07. At the **SSO Attribute Mapping** page click **Continue to Next Step**
08. At the **Group Access** page enabled the groups desired. In this example we will add both the built in **Domain Administrators@directory** and **Users@directory** groups.
09. Select **Continue to Next Step**. The **Review Setup** page is shown.
10. Click **Download** next to **Signing Certificate**. Open this file with a text editor. This will be used as the **Singing Certificate** in the next section.
11. Click **Download** next to **SAML Metadata**. Open the file with a text editor.
1. Identify the **Location** for the `md:SingleLogoutService Binding="urn:oasis:names:tc:SAML:2.0:bindings:HTTP-Redirect` property. This will be used as the **Single Logout Service** property in the next section.
2. Identify the **Location** for the `md:SingleSignOnService Binding="urn:oasis:names:tc:SAML:2.0:bindings:HTTP-Redirect` property. This will be used as the **Single Sign On Service** property in the next section.

#### Complete SAML configuration in Kasm
1. Back in the Kasm UI SAML configuration page update the **Identity Provider** selections
| **Kasm Property Name** | **Azure Property Name** |
| --- | --- |
| Entity ID | Issuer |
| Single Sign On Service | Single Sign On Service |
| Single Logout Service / SLO Endpoint | Single Logout Service |
| X509 Certificate | Signing Certificate |
2. In the **Advanced Settings** of check **Want Assertion Signed** and click **Save**
#### Mapping Users
PingOne is not set up to pass along the user's group membership during the SAML assertion. These groups can be mapped
to groups within the Kasm Application. In the previous step we gave application login permissions to both the
**Domain Administrators@directory** and **Users@directory** groups in PingOne. The following steps will now map the
PingOne **Domain Administrators@directory** group to the **Administrators** group in Kasm.
1. In the PingOne Admin portal, click **Users** -> **User Groups**
2. Inspect the **Domain Administrators@directory** group.
3. Log into the Kasm UI as an administrator.
4. Select **Access Management** -> **Groups**, then using the arrow menu click **Edit** next to the **Administrators** Group
5. Navigate to the **SSO Group Mappings** tab and select **Add SSO Mapping**.
6. Select the SAML IDP that was created above "SAML - PingOne" for the **SSO Provider**.
7. Enter **Domain Administrators@directory** into the **Group Attributes** field.
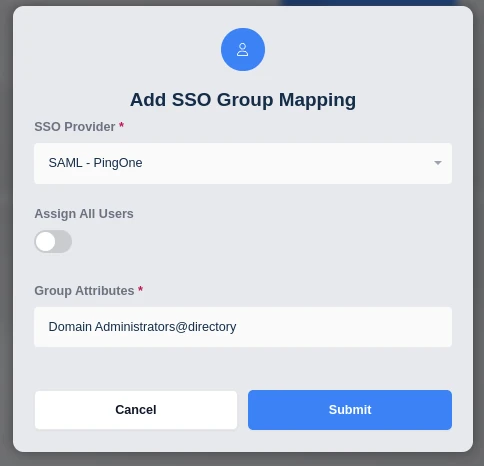
#### Testing Access
1. Log out of the Kasm UI if already logged in.
2. Navigate to the Kasm UI login page.
3. Click PingOne to initiate the SAML SSO process.
4. Login as a member of the **Domain Administrators@directory** group.
---
## RequestedAuthnContext
##
In previous releases of Kasm, the `RequestedAuthnContext` was required, which was problematic as some configurations with certain IdPs will not work
properly when Kasm requires this value.
An example of this issue is documented on [Microsoft.com](https://docs.microsoft.com/en-us/troubleshoot/azure/active-directory/error-code-aadsts75011-auth-method-mismatch)
This is no longer the case and is now configurable in the SAML form.
---
## Keycloak(3)
### VMware Workspace ONE SAML Setup
#### Create a new SAML configuration in Kasm
1. Log into the Kasm UI as an administrator.
2. Select **Access Management** -> **Authentication** -> **SAML** -> **Add Configuration**
3. The **SAML 2.0 Configuration** page will auto-generate the **Entity ID**, **Single Sign On Service**, **Single Logout Server**, and **Relay State** values.
4. Check **Enable** and enter a **Display Name**. e.g (Workspace One)
5. Update the following Settings
| **Setting** | **Value** |
| --- | --- |
| Group Member Attribute | groupNames |
| NameID Attribute | emailAddress |
| Want Attribute Statement | Unchecked |
| Want Message Signed | Checked |
| Want Name ID | Checked |
6. Leave this page open and continue to the next steps.
#### Add a new SaaS Application
1. Open the **Workspace One Access** Admin Console and select the **Catalog** tab, then select **New**.
2. In the **New SaaS Application** dialogue, enter a **Name** (e.g Kasm) and optionally a **Description** and **Icon**. Select **Next**.
3. Select **SAML 2.0** as the **Authentication Type** and select **Manual** for the **Configuration**.
4. Copy the following values from the Kasm SAML Configurations started in the previous section into the **New SaaS Application form**.
| **Workspace One Property Name** | **Kasm Property Name** |
| --- | --- |
| Single Sign-On URL | Single Sign On Service |
| Recipient URL | Single Sign On Service |
| Application ID | Entity ID |
| Relay State URL | Relay State |
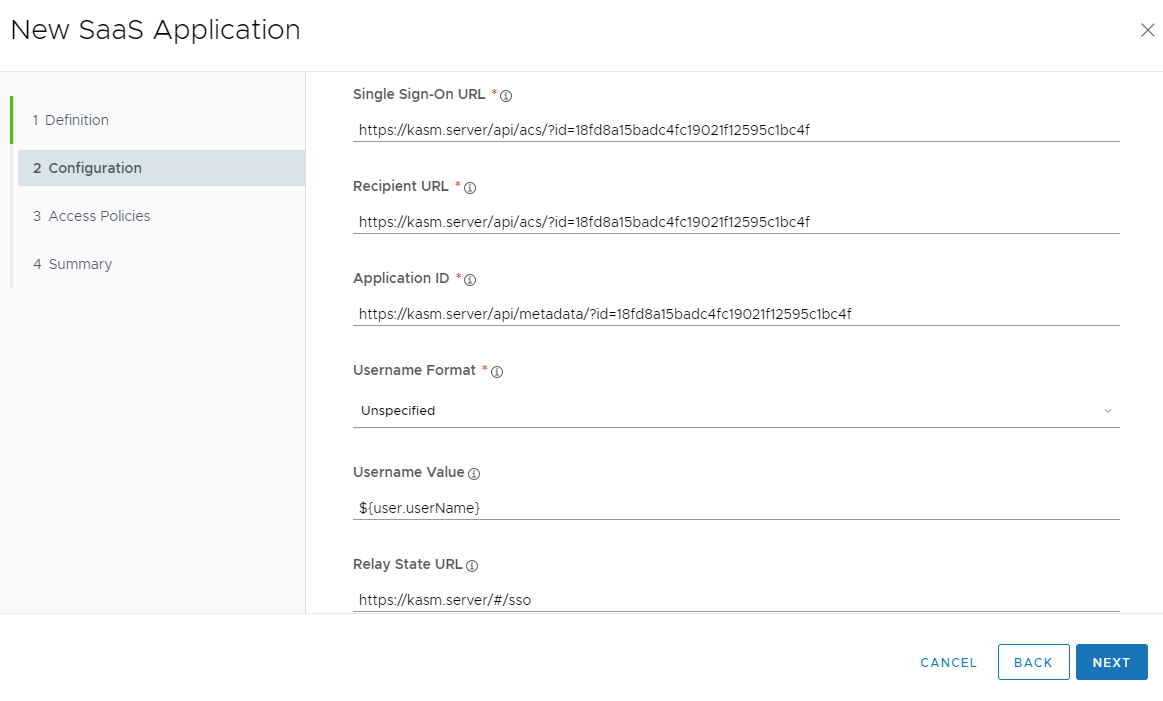
5. Select **Email Address** as the **Username Format**.
6. Click **Advanced Properties**. Scroll down to the **Custom Attribute Mapping** section. Add an entry with the following information then click **Next**
| **Attribute** | **Value** |
| --- | --- |
| Name | groupNames |
| Format | Basic |
| Namespace | `` |
| Value | `${groupNames}` |
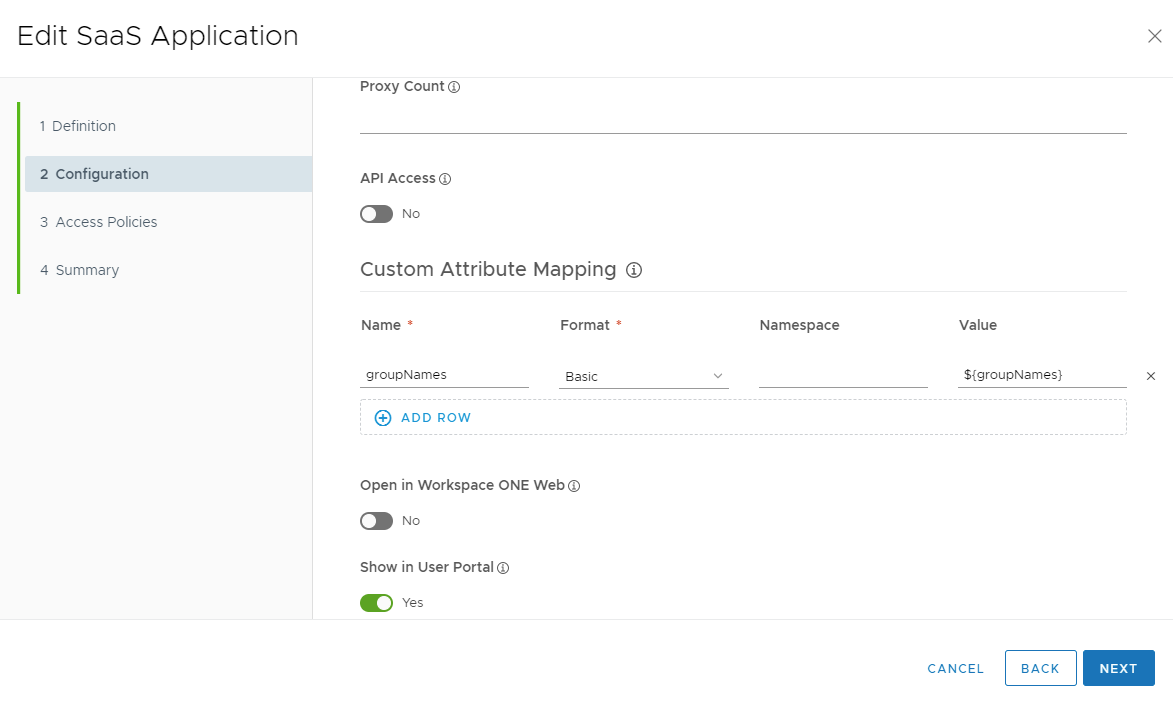
7. Select a desired **Access Policy**. In this example we will use the **default_access_policy_set**. Select **Next**.
8. Review the configuration then select **Save & Assign**.
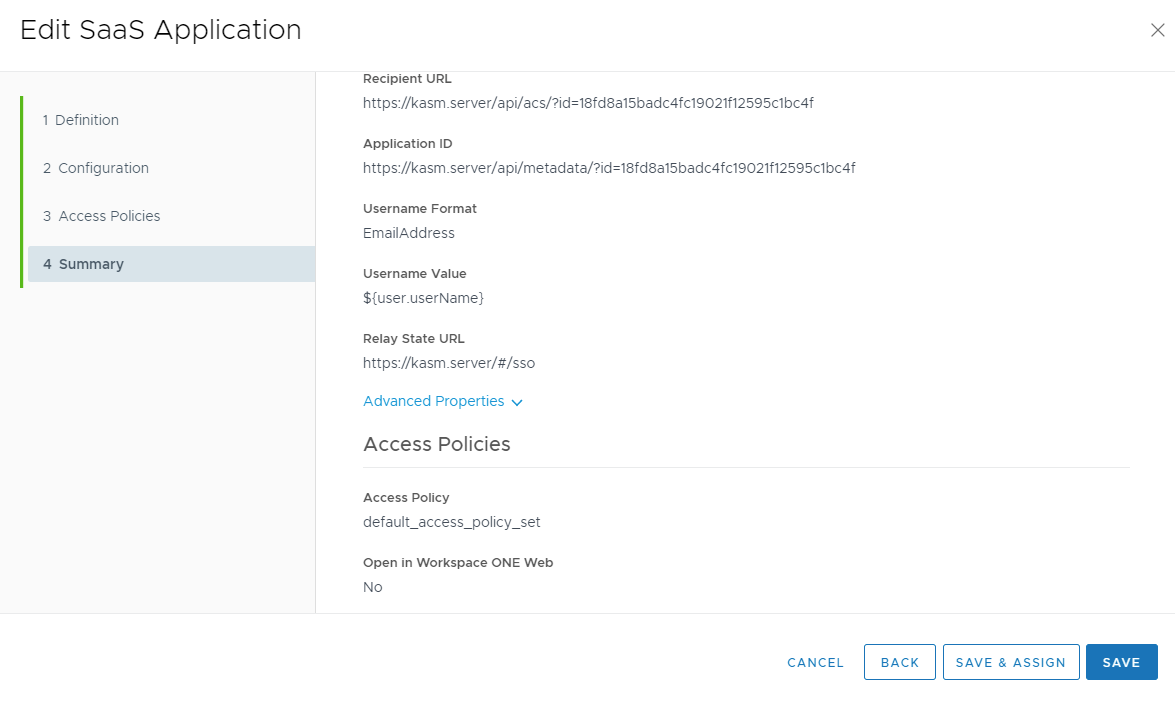
9. In the **Assign** dialogue, type in the desired user or group. In this example the **ALL USERS** group is used. Select **Save**
10. From the **Catalog** tab of the **Workspace ONE Access** panel, select **Settings**.
11. Select **SAML Metadata**. Copy the contents of the **Signing Certificate** into **X509 Certificate** field under **Identity Provider** in the Kasm SAML Configurations started in the prior section.
12. Back in the **Settings** dialogue, click **Identity Provider (IdP) metatdata**.

13. An XML metatdata file will be shown. Copy the highlighted sections into **Identity Provider** fields in the Kasm SAML Configurations started in the prior section. Once complete click **Submit**
| **Workspace One Property Name** | **Kasm Property Name** |
| --- | --- |
| entityID | Entity ID |
| SingleSignOnService | Single Sign On Service/SAML 2.0 Endpoint |
| SingleLogoutService | Single Logout Service/SLO Endpoint |
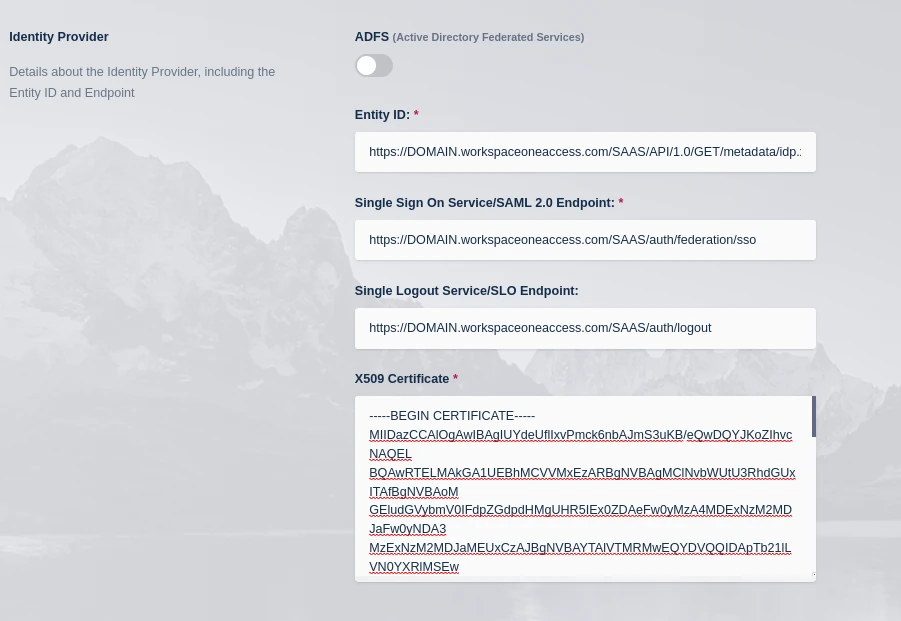
### Testing Access
1. Log out of the Kasm UI if already logged in.
2. Navigate to the Kasm UI login page.
3. Click **Workspace One** to initiate the SAML SSO process.
4. After logging in, you should be redirected to the Kasm UI Dashboard
5. From another browser, login to Workspace ONE Access. **Kasm** should be displayed as an App. You may click the link to automatically open and log in to Kasm
#### Group Mappings
In the prior steps, Workspace One was configured to pass along the group names the user is a member of in the SAML assertion.
This can be used to automatically map users into Groups within the Kasm application.
The following assumes a group is created in Workspace named **Accounting**
1. Log into the Kasm UI as an administrator.
2. Select **Access Management** -> **Groups**, the select **Create New Group**
3. Give the Group a **Name** (Does not need to match the Workspace ONE Group Name) and **Priority**
4. Click **Save** to create the new group.
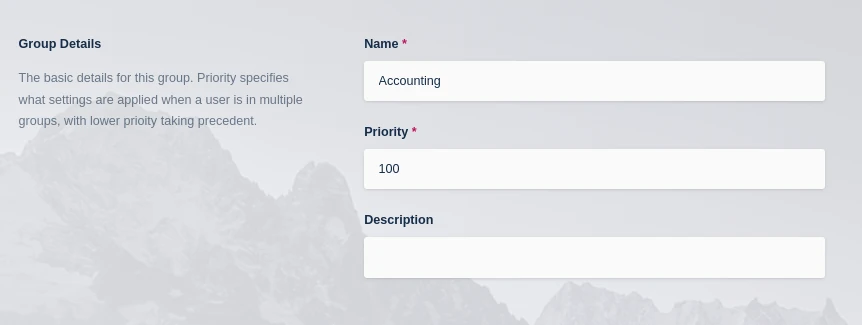
5. Select **Access Management** -> **Groups**, then using the arrrow menu click **Edit** next to the group just created.
6. Navigate to the **SSO Group Mapppings** tab and select **Add SSO Mapping**.
7. Select the SAML IDP that was created above e.g. "SAML - Workspace One" for the **SSO Provider**.
8. Enter the Workspace ONE Group Name in the **Group Attributes** field. Click **Submit**
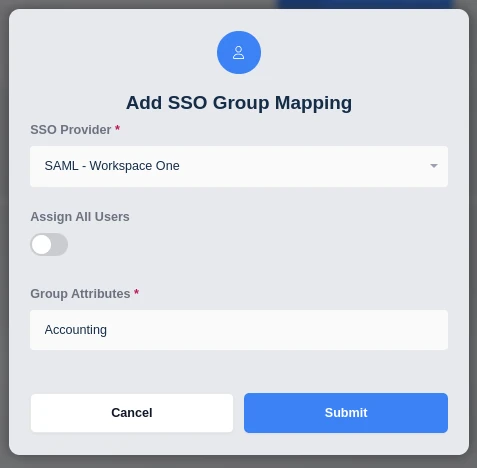
The next time a user of the **Accounting** group logs in they will automatically become a member of this Kasm Group.
---
## SAML 2.0 Authentication Configuration in Kasm
## SAML 2.0 Authentication
Kasm offers SAML configurations for authorization through SAML 2.0 Identity Providers. This gives users a single sign on
experience and improves security.
### Configuration
Saml configuration can be found under the Authentication tab in the Admin Navigation Bar.
#### Service Provider
> We automatically generate the Service Provider Entity ID, single login url and single logout URL when you submit a
> configuration as this is based on the hostname of your server.
- **Enabled**
- This checkbox will enable this configuration and determines wether it will be seen by the users as an option in the login page.
- **Display Name**
- This is the name shown to the users in a login button on the login page. e.g. 'OneLogin', 'Okta'
- **Host Name**
- The URL hostname (e.g kasm.example.com) of the deployment. This SAML config will only function when the deployment
is accessed via this URL host name. This allows for a single deployment to service multiple tenants who may need
different SAML configurations. If **Default** is defined, this config will apply regardless of the host name.
- **Entity ID**
- This is the URL that identifies the Service Provider. It may be called a Provider Issuer or something
similar. The URL is automatically created by Kasm for this configurations sign on.
- **Single Sign On Service**
- This is the URL used for the response from the Idp to login. The URL is automatically created by Kasm to connect to
the specific configuration.
- **Single Logout Service**
- This is the URL provided for the logout of the user. It may be provided by the IDP but is not required
- **Relay State**
- The Relay state must be set to [https://hostname/#/sso](https://hostname/#/sso)
- **Default**
- Used in conjunction with **Host Name**. When checked this config will apply regardless of what Host name the user
is accessing the server with.
- **Auto Login**
- This setting will automatically launch this saml configuration from the default login page. Only one configuration
should be set to auto login. If this is set the normal login page may still be accessed at /#/staticlogin
- **Group Member Attribute**
- This setting maps the attribute from the Idp to the Kasm group. The group must be enabled for kasm and given the
name under the individual group edit.
- **NameID**
- This attribute is used as the identifier for the user. The Idp may specify it is set to
"emailAddress" or something similar but it may also be blank.
- **ADFS**
- if using Active Directory Federation Services select this checkbox
- **x509 Certificate**
- This is an Optional Certificate that can be provided for signature verification of the SP
- **Private Key**
- This will be generated along with the optional x509 certificate above
- **Debug**
- This will enable the response to show the specific saml error that is occuring. It is useful during setup
of the configuration.
#### Identity Provider
- **Entity ID \*Required**
- This is the URL provided by the IDP that identifies the provider. It may be called a Provider Issuer or something
similar. This URL must be configured for the Login to work properly.
- **SingleSignOnService/SAML 2.0 Endpoint \*Required**
- This is the URL provided by the IDP used for the login. This URL must be configured for the Login to work properly.
- **SingleLogoutService/SLO Endpoint**
- This is the URL provided for the logout of the user. It may be provided by the IDP but is not required
- **x509 Certificate**
- This is the certificate used to verify the signature of the application and it is required.
- **Attributes**
- One attribute must be provided by the IDP. It should be a unique identifier like username or email
### Advanced Settings
These options can be configured to meet the security requirements needed.
- **Want Attribute Statement**
- Indicates a requirement for the AttributeStatement element
- **Send Requested Authn Context**
- Send the optional RequestedAuthnContext element in the SAML request. Certain IDPs will not work properly when this field is sent in the request.
- **Name Id Encrypted**
- Indicates that the nameID of the \ sent by this SP will be encrypted.
- **Authn Requests Signed**
- Indicates whether the \ messages sent by this SP will be signed.(Metadata of the SP will offer this info)
- **Logout Request Signed**
- Indicates whether the \ messages sent by this SP will be signed
- **Logout Response Signed**
- Indicates whether the \ messages sent by this SP will be signed.
- **Want Messages Signed**
- Indicates a requirement for the \, \ and \ elements received by this SP to be signed.
- **Want Assertions Signed**
- Indicates a requirement for the \ elements received by this SP to be signed.(Metadata of the SP will offer this info)
- **Want Assertions Encrypted**
- Indicates a requirement for the \ elements received by this SP to be encrypted.
- **Want Name Id**
- Indicates a requirement for the NameID element on the SAMLResponse received by this SP to be present.
- **Want Name Id Encrypted**
- Indicates a requirement for the NameID received by this SP to be encrypted.
- **Signature Algorithm**
- Algorithm that the toolkit will use on signing process.
- **Digest Algorithm**
- Algorithm that the toolkit will use on digest process.
### SAML Setup
For general SAML configuration:
- Copy the Service Provider Entity ID, Single Sign On, (optionally) Single Logout Service to the Identity Provider.
if the single logout service field is left blank then there will be no logout redirection on users logout.
- The Identity Provider must also be given the Relay State provided
- a NameID attribute must be set to return the specific attribute of the user. (e.g. 'emailAddress', 'transient')
A default of Unspecified is used when not present.
The Identity Provider should then return these same settings to be put under the Identity Provider section in the configuration
settings.
- The metadata button should return the Service Provider information.
Some of the specific IDP setups below may help in setting up SAML as they are sometimes similar
A non redirecting login page is at [https://hostname/#/staticlogin](https://hostname/#/staticlogin) when auto login is enabled.
### Group Assignment
Groups for SAML users are automatically assigned if group has a SSO Group Mapping for this saml IDP and SAML group name.
This will allow automatic provisioning of groups to SAML users but will not unassign non-SAML groups.
To automatically assign groups to saml users:
- Navigate to the Access Management -> Groups tab in the admin navigation bar
- Select edit for the desired group using the arrow
- Select the SSO Group Mappings tab and select Add SSO Mapping
- Select the SAML provider to be mapped to this Kasm group
- There are two options for specifying with SAML users to assign to this Kasm group
- Check the Assign All Users checkbox to assign all users from this SAML IDP to this Kasm group irrespective the users IDP groups
- Leave Assign All Users unchecked and enter the group name the IDP has for this group, either preceded by a forward slash (e.g. `/sales_group`) if the IDP has Full Group Path set to On, or without a preceding forward slash (e.g. `sales_group`) if Full Group Path is set to Off

- Navigate to the SAML configuration
- Change the Group Member Attribute to the corresponding group attribute of the IDP
### SAML Attribute Mapping
Additional SAML attributes can be passed with the SAML assertion. Administrators can optionally map those attribute values to fields on the Kasm user. See the documentation for your SAML Identity Provider (IdP) for a listing of attributes and how you can pass them to the Service Provider (SP) in the SAML assertion. The following Kasm User fields can be populated with values from SAML attributes.
- First Name
- Last Name
- Phone
- Organization
- Notes
- City
- State
- Country
- Email
- Custom Attribute 1
- Custom Attribute 2
- Custom Attribute 3
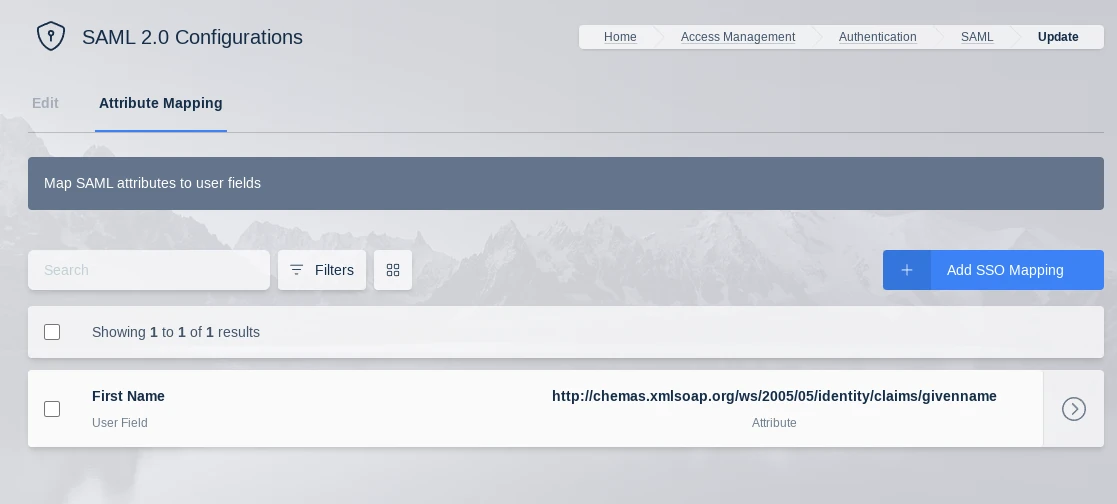
Kasm can log all SAML attributes in the assertions during login, this is helpful for determining the attribute names. Add a SAML Attribute Mapping with an attribute name of 'debug' and target any user field. The next time a user logs in, all SAML attributes and values will be logged by Kasm.
### Known Issues
- [requestedAuthnContext](saml/requestedAuthnContext.mdx)
### Configuration Examples
- [Active Directory Federation Services (ADFS) SAML Setup](saml/adfs.mdx)
- [Azure Active Directory SAML Setup](saml/azure.mdx)
- [Google Workspace SAML Setup](saml/gsuite.mdx)
- [Group Mappings](saml/gsuite.mdx#group-mappings)
- [Keycloak SAML Setup](saml/keycloak.mdx)
- [Okta SAML Setup](saml/okta.mdx)
- [OneLogin SAML Setup](saml/onelogin.mdx)
- [PingOne SAML Setup](saml/pingone.mdx)
- [VMware Workspace ONE SAML Setup](saml/workspaceone.mdx)
- [F5 APM SAML Setup](saml/f5apm.mdx)
- [Testing Access](saml/workspaceone.mdx#testing-access)
---
## Two-Factor Authentication (2FA) Setup
## Two Factor Authentication
Two Factor Authentication requires the user provide an additional piece of evidence beyond their standard password, to
gain access to the system. Kasm implements a Time-based One-Time Password (TOTP) algorithm that can be used with popular
apps such as Google's Authenticator. Physical tokens and WebAuthn devices (e.g. YubiKeys) can also be used.
A user can be required to enroll a second authentication factor upon their next login
by [the admin configuring the "require_2fa" group setting](groups.mdx).
Alternatively, users may also self-enroll a Two Factor device through [the User Profile Page](../../../tutorials/user-guide/profile.mdx) when [the "allow_2fa_self_enrollment" group setting](groups.mdx) is enabled.
### Require Two Factor Authentication
An Admin may require that all members of a group enroll a two factor device upon their next login.
- Navigate to the Access Management -> Groups tab in the Administrators Sidebar and select Edit from the arrow menu for the group
- Select Add Settings from the Settings tab
- Select the "require_2fa" setting and select True to add to all of the users in the group
WebAuthn and TOTP can be disabled individually using the "allow_webauthn_2fa" and "allow_totp_2fa" [group settings](./groups.mdx#group-settings).
### Self Enrollment
A user may self enroll a two factor in their user settings page when the "allow_2fa_self_enrollment" setting is enabled.
Navigate to the user profile settings on your Kasm deployment by logging into your Kasm Workspaces deployment, and clicking on the user icon at the top right.
Scroll down to select "Two Factor" and then select "Add Second Authentication Factor"
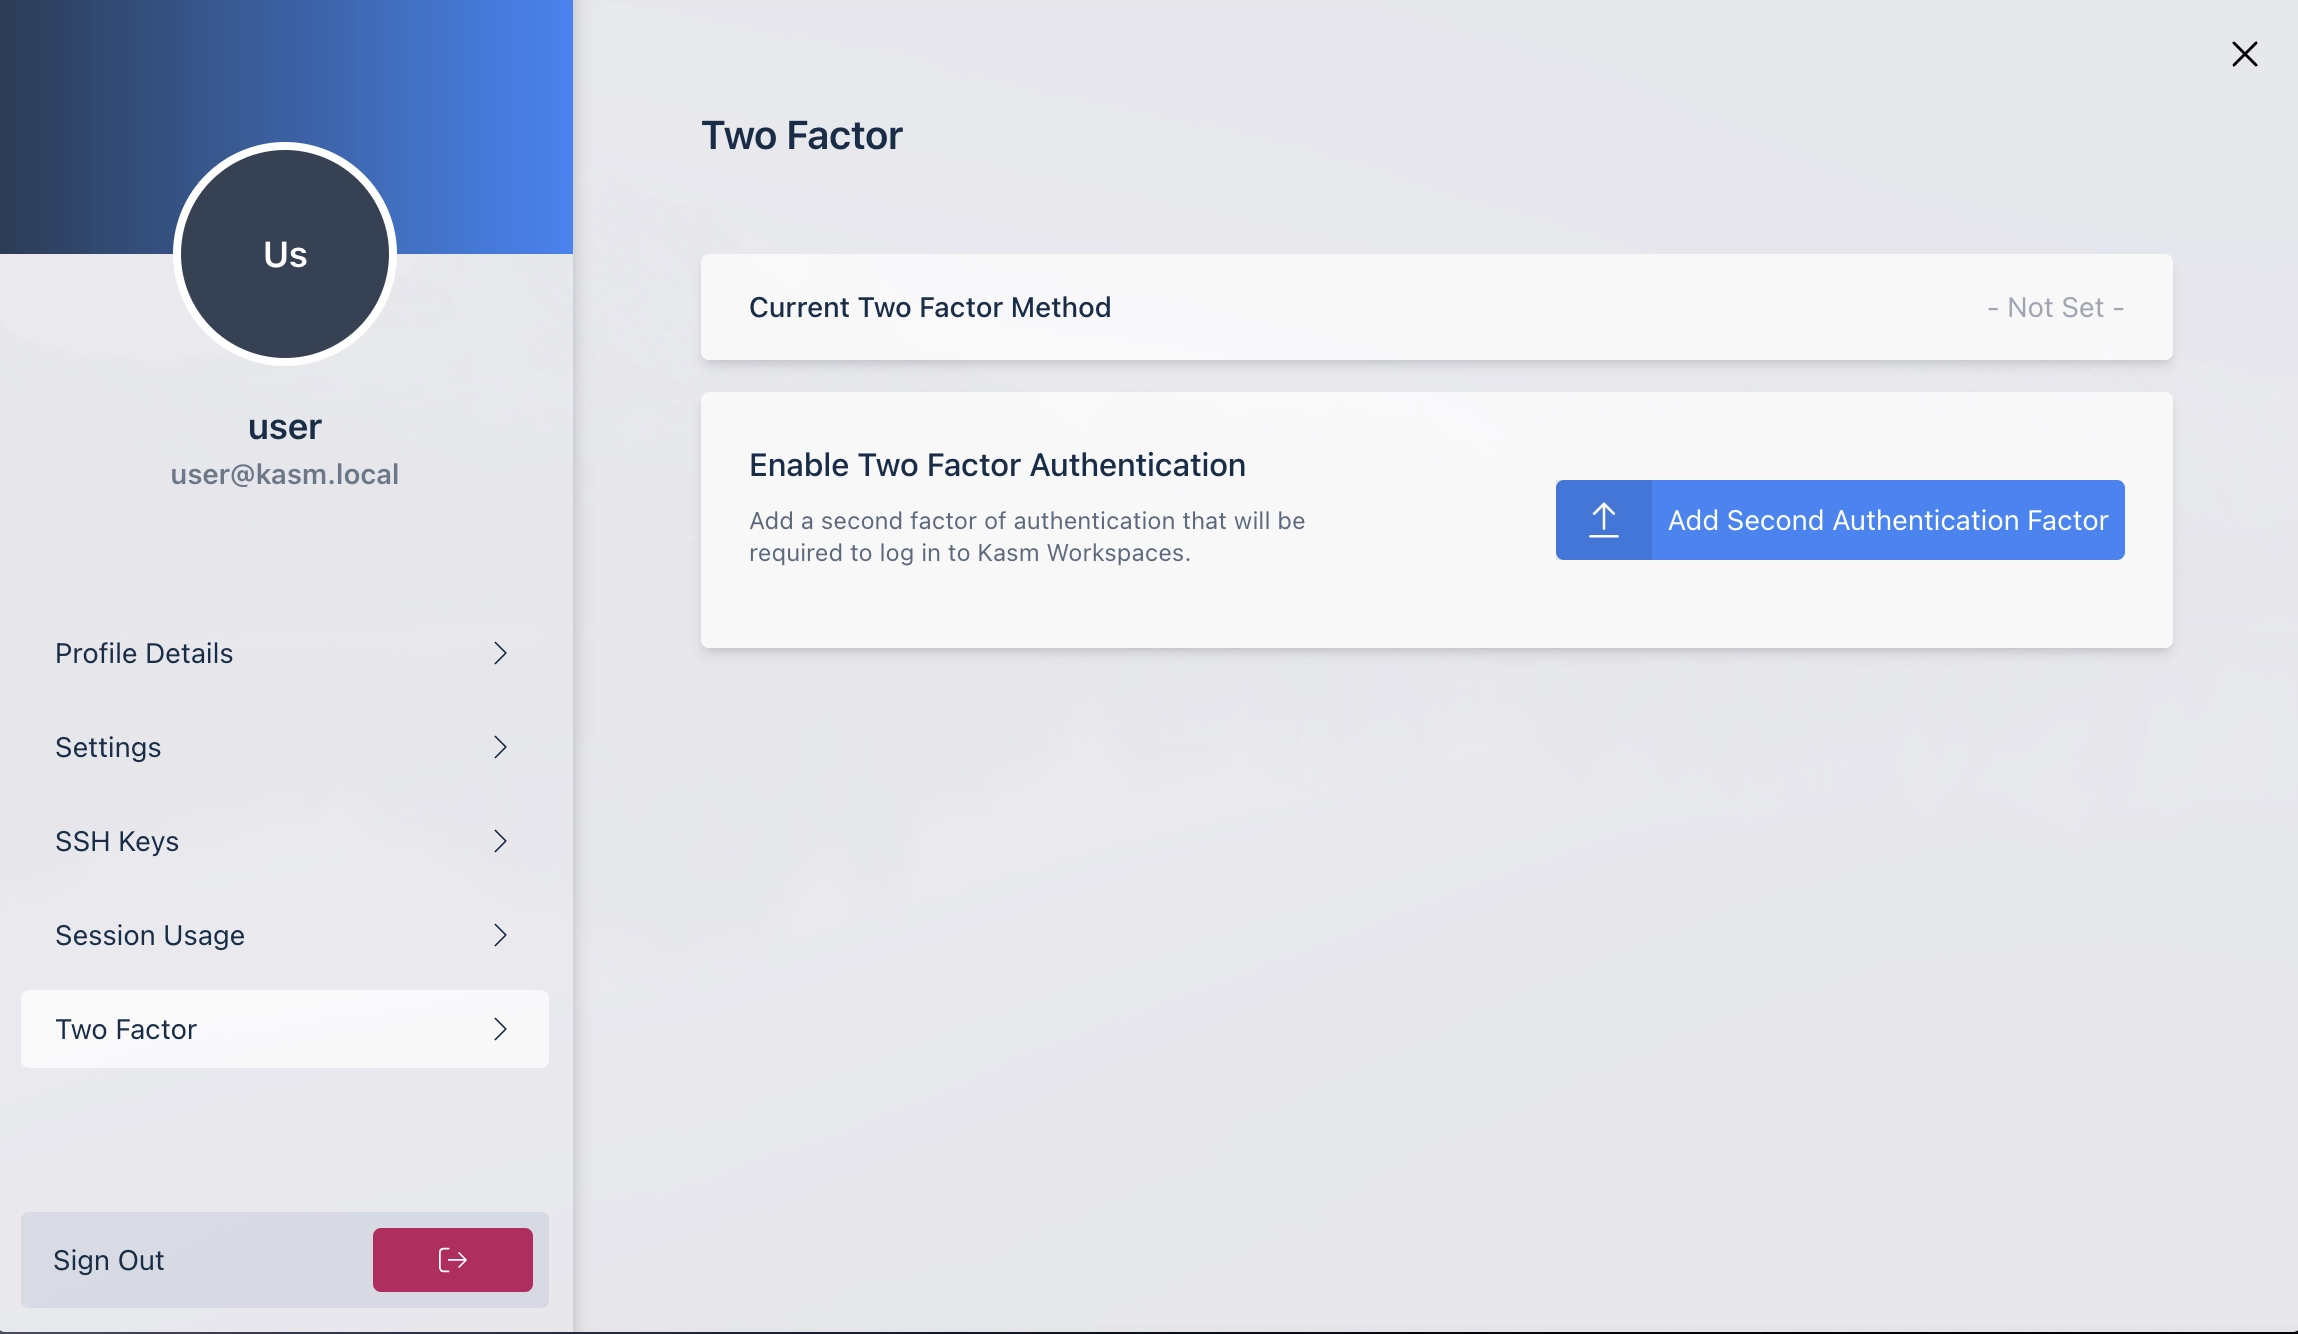
### Two Factor Setup
When a user logs in the first time with "require_2fa" enabled, or they self-enroll, they will be presented with a setup page where they can select the following methods to register a new second factor:
- [Soft TOTP Token (Google Authenticator)](two-factor.mdx#user-authenticator-app-setup)
- [Hard TOTP Token](two-factor.mdx#physical-totp-token-setup)
- [WebAuthn Device (YubiKey, TouchID, FaceID)](two-factor.mdx#webauthn-authentication)
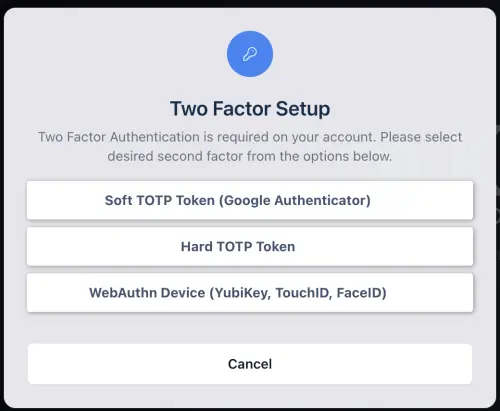
### User Authenticator App Setup
The user will be asked to add the authentication code to their Authenticator App on the first log on after two factor was enabled.
Once the username and password have been verified, a QR code and secret are provided for easy implementation in Google's Authenticator
- The User will select the plus icon in Authenticator and select Scan barcode to use their phone's camera to add the secret or Manual Entry to enter the secret manually
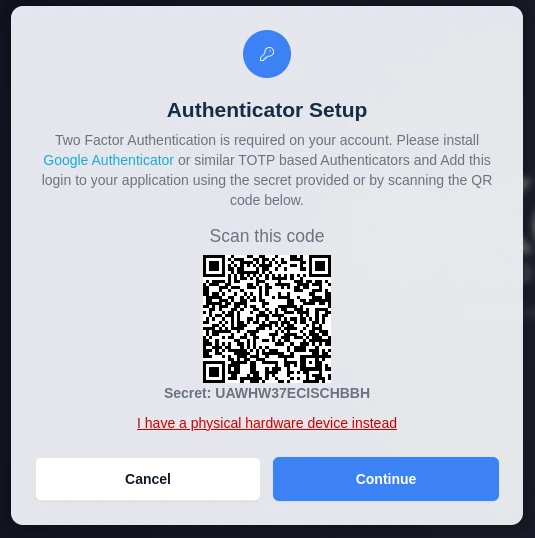
- User must enter one time password provided in the Authenticator App to log in
Download the Apps:
[Apple App Store](https://itunes.apple.com/us/app/google-authenticator/id388497605?mt=8)
[Google Play Store](https://play.google.com/store/apps/details?id=com.google.android.apps.authenticator2&hl=en_US?)
#### Reset Single-User Authentication
The user can reset the authentication code in the reset password section.
- Navigate to the profile tab in the Sidebar and select "Reset Password"
- Enter current password and a new password
- Check the "Reset Two Factor Authenticator" checkbox and then click Submit
The administrator can reset the user's Two Factor TOTP Token or WebAuthn Credential.
- Navigate to the Access Management -> Users tab in the Administrators Sidebar and select edit for the user from the arrow menu
- Check the "Reset Two Factor TOTP Token" or "Reset Two Factor WebAuthn Credential" checkbox and then click Save
### Physical TOTP Token Setup
Kasm Workspaces supports using physical tokens that meet the TOTP specification defined in RFC 6238.
The tokens must use a 30 second token interval and use SHA1. Physical tokens purchased must come with
a seed file, which is a password encrypted zip file containing a list of serial numbers with the
associated base32 secret for each token.
#### Import Physical Tokens
Physical tokens will come with an encrypted zip file containing a list of serial numbers and associated
secrets. In the administrator panel, go to Authenticate, Physical Tokens, and click the Import button.
Provide the file and password associated with the file and click upload.
Physical TOTP vendors will provide the seed file with your order. The file must be a password protected zip
file. The vendor will provide the password for the zip file. The zip file will contain a text file with a
comma separated list of tokens. The first value is the token serial number, which matches the serial number
on the back of the token. The second value in each row is the secret, which is a base32 encoded string. The
following is an example of what the raw uncompressed seed file would look like.
```
1234567891234,JNQXG3JANFZSA5DIMUQGEZLTOQQHG33G
1234567891235,OR3WC4TFEBSXMZLSEBRXEZLBORSWICQG
```
#### Assigning Tokens
##### Administrator Assigned
Tokens can be assigned and unassigned by the administrator by clicking arrow menu icon next to a token
and selecting assign or unassign.
##### User Self Register
If an administrator does not explicitly assign a token to a user, the user can input the serial number on login
to self register the token. A user will only be able to self-register a token if they are required to login with
two factor authentication and they don't currently have a token assigned. Under those conditions, the user will be
prompted to setup a token on login. The user will need to select the "I have a physical hardware device instead"
link, which will then display the following dialog where they can enter the serial number located on the back
of the physical token.
#### Deleting Tokens
Tokens can either be deleted individually or the administrator can delete all tokens that were imported together
as part of the same seed file by clicking the Delete Seed Series button on the Physical Tokens view. Deleting a
token will make it unusable to the currently assigned user.
### Token Time Drift
TOTP requires the physical token or the user's phone to have nearly the same time as the server authenticating the user.
This means that your Kasm backend servers need to have proper time synchronization for TOTP to work. Physical tokens
utilize inexpensive crystal oscillation based timing hardware, which will drift over time. See your manufacturer's
documentation for details. Generally speaking, crystal oscillation based hardware will drift upwards of 2 minutes
every year. By default, Kasm allows for one 1 minute of drift forward or backward, from the server's time. A token
is valid for 30 seconds, providing an overall allowed effective drift of 1 minute and 30 seconds by default.
You may override the default by modifying the `Token Drift` [Server Settings](../../../reference/settings.mdx).
### WebAuthn Authentication
WebAuthn Authentication allows for users to use a supported WebAuthn device, such as a Yubikey, TouchID, or FaceID as a second factor to login to Kasm.
Upon selecting "WebAuthn Device" during the Two Factor registration process the user will be presented with a dialogue to use a passkey, the user may select whatever device is desired.
On their next login they will be prompted to use the WebAuthn device as a second factor.
WebAuthn only functions when the user's browser trusts the connection to Kasm Workspaces. This can be acheived by setting up the deployment with a valid [Custom Certificate](../../networking/replace-certificates.mdx)
or deploying behind a [Reverse Proxy](../../networking/reverse-proxy.mdx) that has a valid server certificate.
---
## User Management: Adding & Configuring Users
## Users
Users must first be added to the server and then added to a group to manage their permissions. User permissions can be set by
updating the group settings found [here.](groups.mdx#group-settings).
By default Anonymous users are hidden, if you wish to see them, click on the dropdown next to Add User and pick between, Hide Anonymous, Show Anonymous and Only Anonymous.
### Create User
- Select **Access Management > Users** from the navigation menu.
- Select **Add User** from the top right of the **Users** table.
- Fill out Users information with User properties below.
### User Properties
| Name | Description |
| --- |-------------------------------------------------------------------------------------------------------------------------------------------------------------------------------------------------------------------------------------------------------------------|
| User Name | Username for login |
| Password | Password for login |
| First Name | User's first name |
| Last Name | User's last name |
| Realm | SSO that the user belongs to (local, LDAP, SAML, OIDC) |
| Notes | Notes about user |
| Locked | Lock account |
| Disabled | The account is disabled. The user cannot login or authenticate until re-enabled by an administrator. |
| Reset Two Factor Authentication Secret | Reset the 2FA secret. The users will be required to re-initialize the 2FA upon next login. |
| Force Password Reset on Login | Force the user to change their password on the next login. This setting applies only to local accounts. |
| Organization | Organization Name |
| Last Session | Last login time |
| Phone | Phone number |
| City | City |
| State | State |
| Country | Country |
| Email | Email address |
| Custom Attribute 1 | Attribute to be used for custom purposes. |
| Custom Attribute 2 | Attribute to be used for custom purposes. |
| Custom Attribute 3 | Attribute to be used for custom purposes. |
| Encryption Key | An encryption key optionally used in Storage Mappings to encrypt and obfuscate files at rest. A key is automatically generated for each user but can be replaced if desired. See [Custom Storage Provider Setup](../../data-storage/storage-mappings/custom.mdx) |
| Encryption Salt | An encryption salt optionally used in Storage Mappings to encrypt and obfuscate files at rest. A key is automatically generated for each user but can be replaced if desired. See [Custom Storage Provider Setup](../../data-storage/storage-mappings/custom.mdx) |
### Add User to Group
- Select **Access Management > Groups** from navigational menu.
- Select **Edit** from the arrow menu of the group you want to add the user.
- Select the **Users** Tab.
- Select **Add User** from Users in Groups table.
- Select the user you wish to add from dropdown menu and click **Submit**.
### User Settings
Users have the ability to change settings by visiting their profile.
- Auto Launch Session.
Automatically launch a session when the user logs in. Kasm Workspaces will use the configured **Default Workspace Image**.
- Chat Sound Effects.
Enable Sound effects for chats during shared sessions.
- Default Workspace Image.
The Default Kasm Image to use. This is the Image that is used for the **/go** URL, clicking the **Launch Now** menu
item, and for **Auto Launch Session**. This item overrides the corresponding group setting if defined.
- Show Tips During Session.
By default the user is shown a Tip that describes how to find and use the control panel. This tip can be suppressed by
setting this item to false.
- Toggle Control Panel.
Open and close the control panel within a Kasm session by pressing the *Ctrl* key twice.
- Theme.
Select the Kasm Workspaces app theme, there is also an *auto* setting that will use the OS setting of the user's local computer.
### User Permissions
The users permissions tab gives a breakdown of the resultant permissions a user has based on the groups they are a part of. If you want to give specific permissions you will need to create a group with those permissions and add the user to that group.
In order to change the permissions:
- Select **Access Management > Groups** from navigational menu.
- Select **Edit** from the arrow menu of the group you want to modify the permissions of (or create a group).
- Select the **Permissions** Tab.
- Click the **Add Permissions** button.
A full list of the options available is [here.](groups.mdx#group-permissions)
### User File Mappings
File Mappings allow the administrator to manage files to be mapped to the inside of a user's container
based Workspace session. File Mappings can be defined on a User, Group, and/or Workspace. See the primary
documentation on [File mappings](../../workspaces-sessions/file-mappings.mdx) for more details.
User defined File Mappings can only be defined by the administrator.
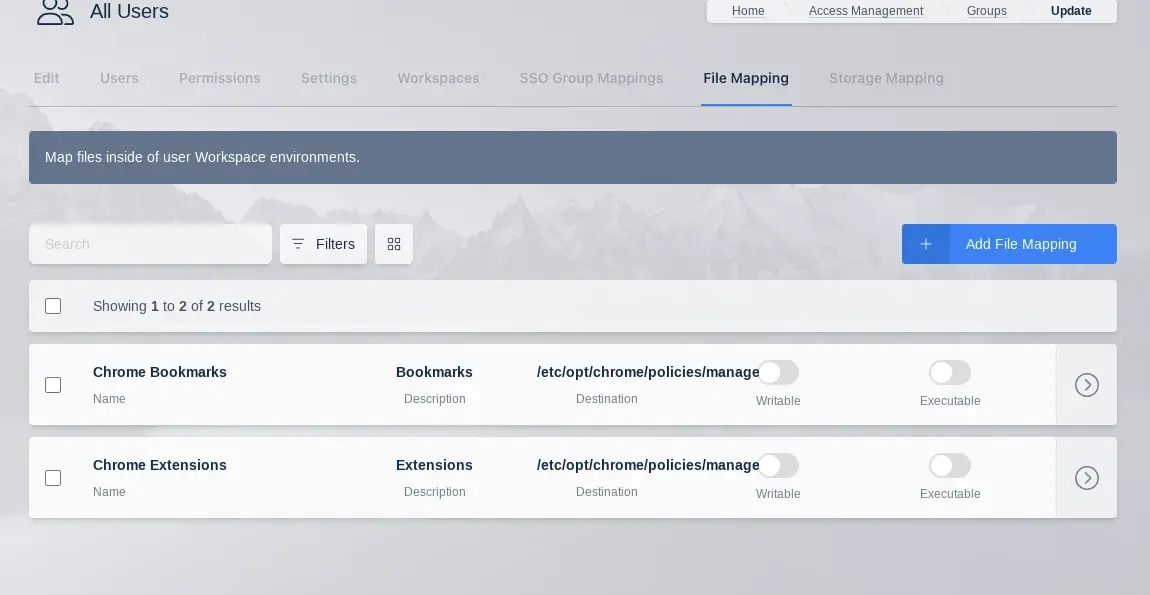
The following is an example File Mapping of a Chrome Managed Policy to define bookmarks in Chrome.
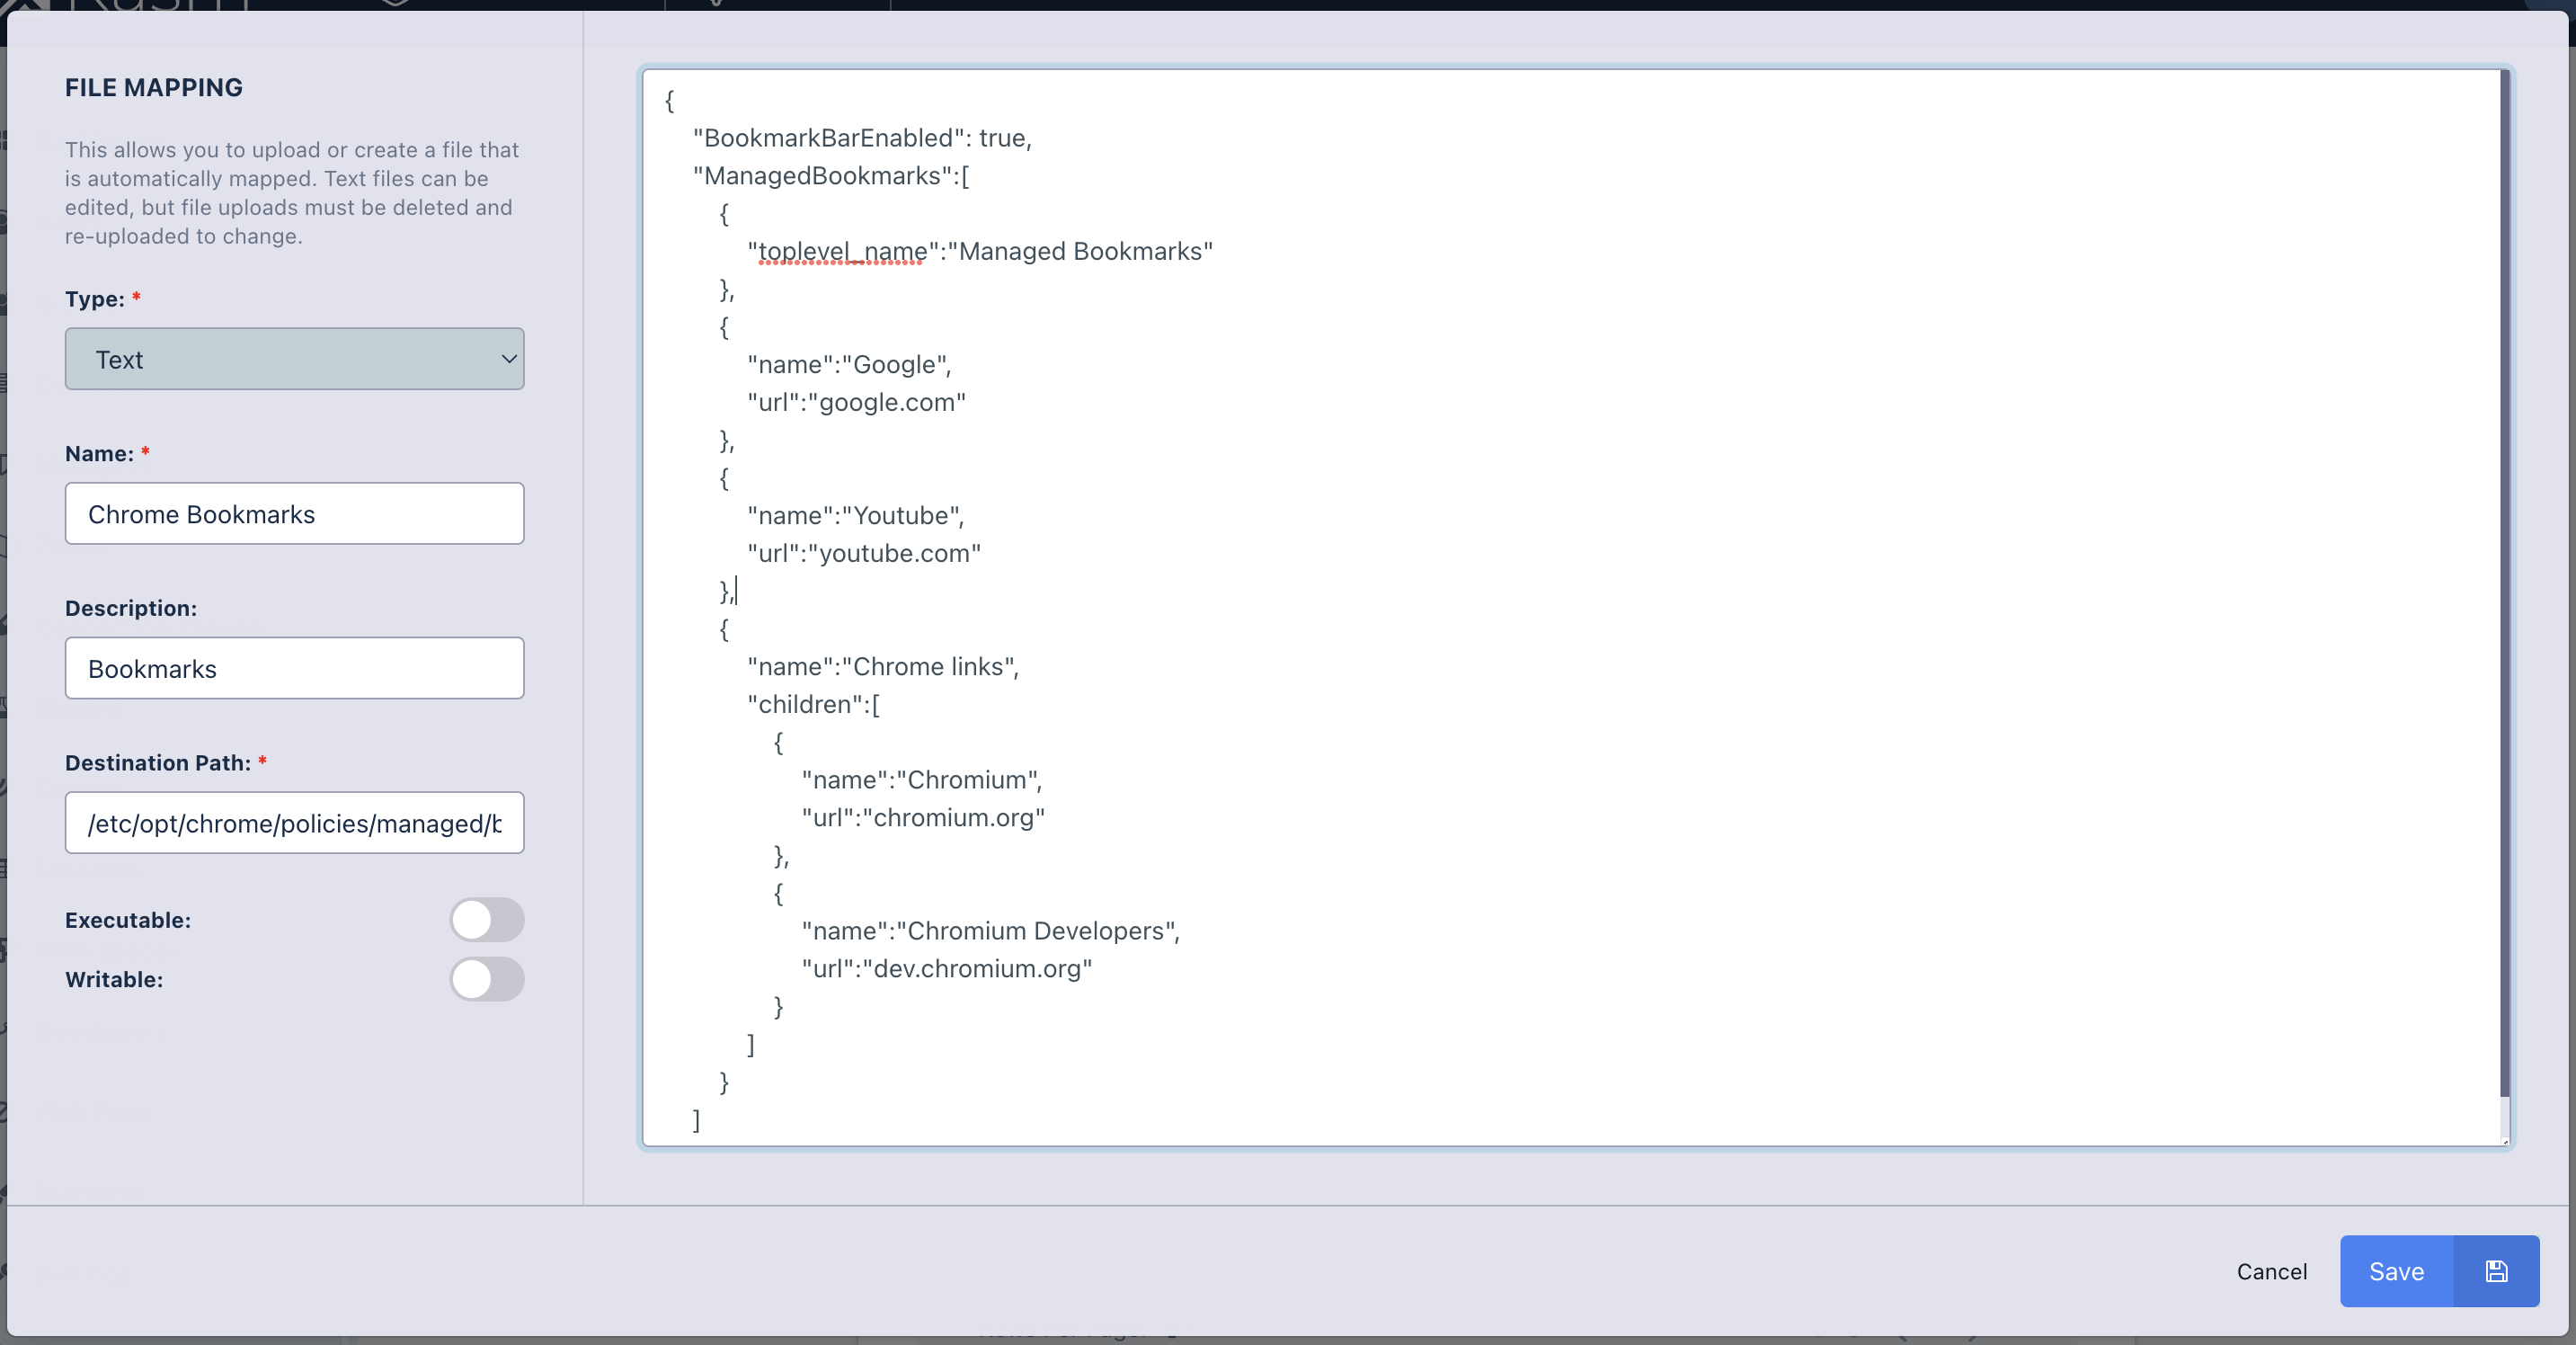
### Bulk Import
Users can be created in bulk through the "Import Users" button on the User administration page.
The ensuing import wizard will expect a utf-8 encoded CSV file, with a size limit of 10,000 records.
Bulk import is an all-or-nothing operation; if any errors are found, none of the CSV data is imported into Kasm.
If there are errors in the file, the interface will present an interactive table that displays the errors alongside the CSV data. The field(s) for each error are enclosed in parentheses `( )`.
Click the information button for a row to inspect the errors:

The import wizard provides the option to download the marked-up data for further inspection. This format adds an "issues" column to the beginning of the data that lists all of the errors for each row. In addition to the localized error messages shown in the import wizard, this data also includes the untranslated error message from the Kasm server for each field. The untranslated message is enclosed by square brackets `[ ]`.
Below is an abridged sample from the exported CSV error report produced by clicking "Export error report" in the image above:
```csv
issues,name,zone_name,connection_type,connection_credential_type,ip_hostname,port,pool_id,assigned_username,windows_service_installed,connection_username,connection_password,sso_username_domain,passphrase,private_key,use_user_private_key,connection_info,max_simultaneous_sessions,max_simultaneous_users,labels
"(name) Wrong data type [Input should be a valid string]; (zone_name) Wrong data type [Input should be a valid string]; (connection_type) Bad value for enum [Input should be 'KasmVNC', 'RDP', 'VNC' or 'SSH']; (connection_credential_type) Bad value for enum [Input should be 'STATIC', 'SSO_CREATE_USER', 'SSO_USERNAME', 'SMARTCARD' or 'PROMPT_USER']; (ip_hostname) Wrong data type [Input should be a valid string]; (port) Wrong data type [Input should be a valid integer]",,,,,,,,,,,,,,,,,,,
"(zone_name) Required resource does not exist [Zone(not a zone) does not exist]; (connection_type) Bad value for enum [Input should be 'KasmVNC', 'RDP', 'VNC' or 'SSH']; (connection_credential_type) Bad value for enum [Input should be 'STATIC', 'SSO_CREATE_USER', 'SSO_USERNAME', 'SMARTCARD' or 'PROMPT_USER']; (port) Value is too small [Input should be greater than or equal to 0]; (connection_info) Invalid JSON [Value is not a valid JSON string]; (max_simultaneous_sessions) Value is too small [Input should be greater than or equal to 1]; (max_simultaneous_users) Value is too small [Input should be greater than or equal to 1]",test_server,not a zone,not a connection type,not a credential type,192.168.0.2,-1,,,,,,,,,,{test,0,0,
"(assigned_username, pool_id) Invalid combination [User assignment requires a Server Pool]",test_server,default,ssh,Static,192.168.0.2,443,,user@kasm.local,,,,,,,,,,,
```
The Developer API also exposes the [`/api/public/batch_create_user`](../../../reference/developer-api.mdx#batch-create-users) endpoint for programmatic use.
#### CSV Formatting
Kasm Workspaces requires that imported CSV files to adhere to the following format specifications.
1. The file must be `utf-8` encoded.
2. Fields are comma-separated (`,`). Commas and linebreaks inside of a double-quoted field value will be interpreted as part of the value and not as a new field or line marker. Example: `a,"b,c",d` would separate into three fields,`a`, `b,c`, and `d`.
3. A header row is required.
4. Empty fields, which includes those whose content is a quoted empty string (`""`), will be interpreted as `null`.
5. Double-quote characters inside of a field can be escaped with duplication. Example: `"12""34"` in a CSV field would produce `12"34`.
6. All rows must have the same number of columns.
#### User CSV Schema
The CSV file for User bulk imports recognizes the following columns. Optional columns may be omitted if they are not needed for any record.
The descriptions from the "User Properties" section above apply to these fields, except where noted.
| Column Header | Required | Default | User Property | Notes |
| --- | --- | --- | --- | --- |
| username | Yes | | User Name | |
| password | No | See note | Password | If omitted or `null`, the server will generate a random default password for the User. Whitespace will be honored for this value. |
| realm | No | `"local"` | Realm | |
| sso_config_id | Conditionally | `null` | | This is the ID (UUID) of the SSO configuration in the Kasm database. Required for OIDC and SAML realms. |
| first_name | No | `null` | First Name | |
| last_name | No | `null` | Last Name | |
| notes | No | `null` | Notes | |
| lock_account | No | `false` | Locked | |
| disable_account | No | `false` | Disabled | |
| force_password_reset | No | `false` | Force Password Reset on Login | |
| organization | No | `null` | Organization | |
| phone_number | No | `null` | Phone | |
| city | No | `null` | City | |
| state | No | `null` | State | |
| country | No | `null` | Country | |
| email | No | `null` | Email | |
| custom_attribute_1 | No | `null` | Custom Attribute 1 | |
| custom_attribute_2 | No | `null` | Custom Attribute 2 | |
| custom_attribute_3 | No | `null` | Custom Attribute 3 | |
| encryption_key | No | `null` | Encryption Key | Whitespace will be honored for this value. |
| encryption_salt | No | `null` | Encryption Salt | Whitespace will be honored for this value. |
| group_... | No | `null` | | The file may contain any number of "group_*" columns, e.g. "group_1", "group_2", etc. Each should contain the name of an existing Kasm User Group that the user will join. Groups that all users join by default, such as the "All Users" system group, do not need to be listed. |
Below is an example of a valid User CSV file. It contains all columns, including several groups. It would generate three users:
1. A local user. Their password is automatically generated, but required to be changed upon login. They are a member of 3 additional specified groups.
2. A user that exists in an OIDC SSO solution. They are a member of 1 additional specified group.
3. A user that exists in the LDAP system configured for use with the Kasm deployment. They are a member of no additional groups.
```csv
username,realm,password,sso_config_id,email,last_name,first_name,organization,phone_number,city,state,country,encryption_key,encryption_salt,lock_account,disable_account,force_password_reset,notes,custom_attribute_1,custom_attribute_2,custom_attribute_3,group_1,group_2,group_3
jane.smith@ourorg.local,local,,,localuser1@ourorg.local,Smith,Jane,Our Organization,+12345678900,London,,UK,,,false,false,true,,,,,Other Admin Group,Finance,Data Managers
alice@ourorg,oidc,,00001111-2222-3333-4444-555566667777,alice@ourorg.local,,Alice,,,,,,,,,,,,,,,Other Admin Group,,
bob,ldap,,88889999aaaabbbbccccddddeeeeffff,,,,,,,,,,,,,,,,,,,,
```
---
## Web Filtering Configuration
## Web Filtering
Administrators can limit access to websites by defining **Web Filter Policies**.
Once a policy is created it can be assigned to any number of groups via [Group Setting](users-groups-mgmt/groups.mdx#group-settings)
or directly to [Workspaces](../workspaces-sessions/container-workspace/workspaces.mdx) . Policies set on the Workspaces take priority over those assigned to Groups.
### Configuration
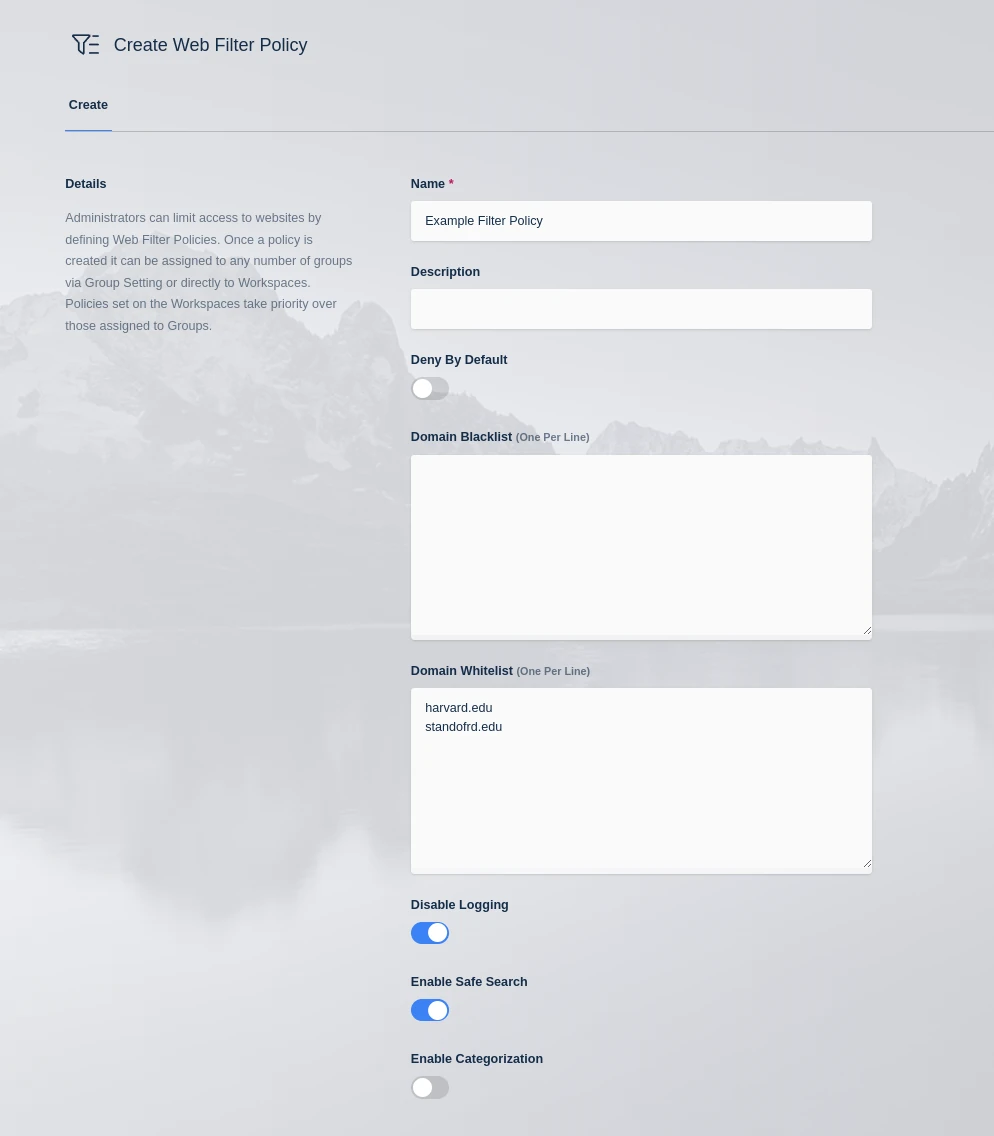
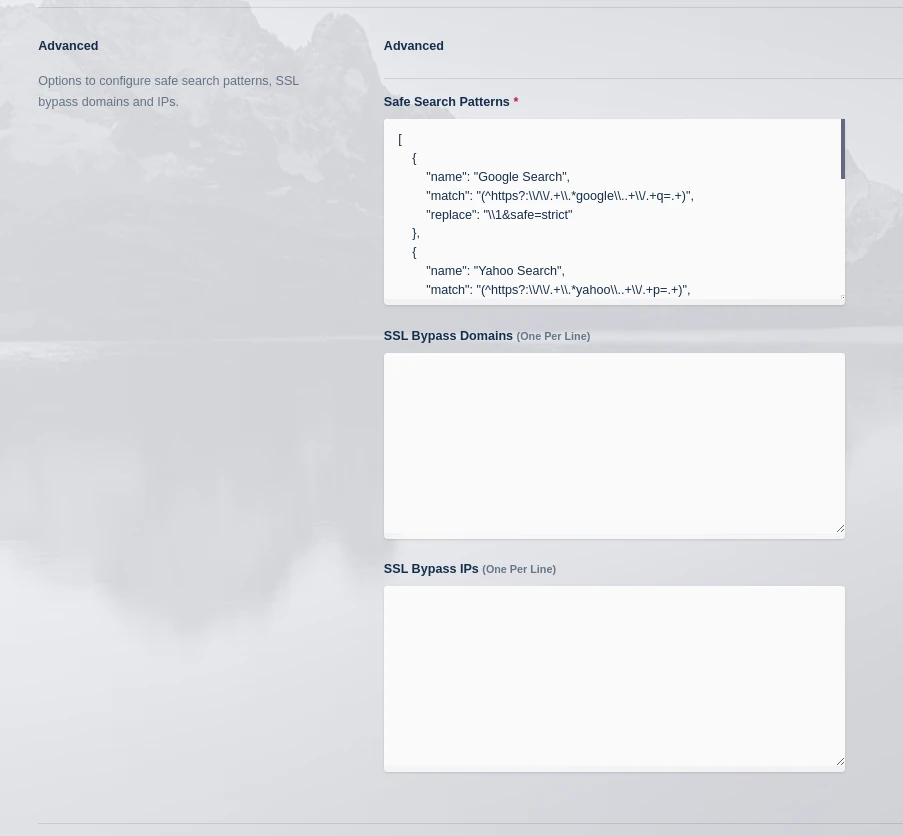
Use of the **Categorization** requires a license. Kasm Workspaces must also have live internet access to communicate with the categorization service.
Please contact your Kasm Technologies representative for details.
| **Property** | **Description** |
| --- | --- |
| Name | A name for the policy |
| Description | A description for the policy |
| Deny By Default | If checked, all requests will be **denied** unless the domain is added to the **Domain Whitelist**, or the category of the domain is set to **allow**. If unchecked, all requests will be **allowed** unless the domain is added to the **Domain Blacklist**, or the category of the domain is set to **deny**. |
| Domain Blacklist | A list of domains to reject. Enter one domain per line. Sub-domains are automatically matched unless explicitly defined elsewhere. |
| Domain Whitelist | A list of domains to allow. Enter one domain per line. In the event of a conflict, the blacklist takes priority. Sub-domains are automatically matched unless explicitly defined elsewehere. |
| Enable Safe Search | When enabled, *Safe Search* for popular search engines will enforced using the **Safe Search Patterns**. Google, Bing, Yandex, DuckDuckGo, and Yahoo are supported by default. |
| Enable Categorization | If checked, requested domains will be checked against Kasm's url categorization service. Each category can be set to **Allow**, **Deny**, or **Inherit**. Inherited categories will utilize the **Deny By Default** setting. Domains specified in the **Domain Whitelist** or **Domain Blacklist** take priority over categorization. |
| URL Categories | Administrators can choose to **Allow**, **Deny** or **Inherit** the default rule for each category. If **Inherit** is selected, the category will be allowed/denied based on the **Deny By Default** setting |
| Disable Logging | When enabled, no access related logs will be produced. |
| Safe Search Patterns | A data structure containing the URL rewrite rules used to apply **Safe Search**. |
| SSL Bypass Domains | Web Filtering uses SSL inspection technology to enforce policy. In some cases, this technology will not be compatible with a website. Administrators can enter a list of domains that will bypass this inspection to restore functionality. Enter one domain per line. To match all subdomains domains, prefix a period before the domain `.google.com` |
| SSL Bypass IPs | Web Filtering uses SSL inspection technology to enforce policy. In some cases, this technology will not be compatible with a website. Administrators can enter a list of IPs that will bypass this inspection to restore functionality. Enter an IP or CIDR notation one per line. |
### URL Categorization Caching
When URL categorization is enabled, categorization data is queried via the **Web Filter Update URL** categorization service defined in the
global settings. For performance reason, these results are cached in the local Kasm deployment for a configurable period
of time. The two settings that govern the expiration of these records are:
- **Web Filter Default Category Expiration (Hours)**
- URL categorization results will be cached for the specified time, defined in hours. This setting applies to domains that have a category other than Uncategorized.
- **Web Filter Uncategorized Expiration (Hours)**
- URL categorization results will be cached for the specified time, defined in hours. This setting only applies to domains that are currently categorized as Uncategorized.
Any session that is launched after the expiration time, will have fresh categorization results fetched from the **Web Filter Update URL**.
---
## General Server Issues
- **Compatible Docker Version**
> Ensure the system is running compatible versions of `docker` and `docker compose`. See
> [System Requirements](../../explanations/system-requirements.mdx) for more details.
- **Cloud Security Groups**
> If the security group rule in the AWS / Azure / OCI console that allows https into the Web App restricts connections by IP address
> (the source IP is not "0.0.0.0/0"), then an additional rule must be added to allow the server to connect to itself.
>
> This is done by creating an additional rule to the security group allowing https connections from the same security group.
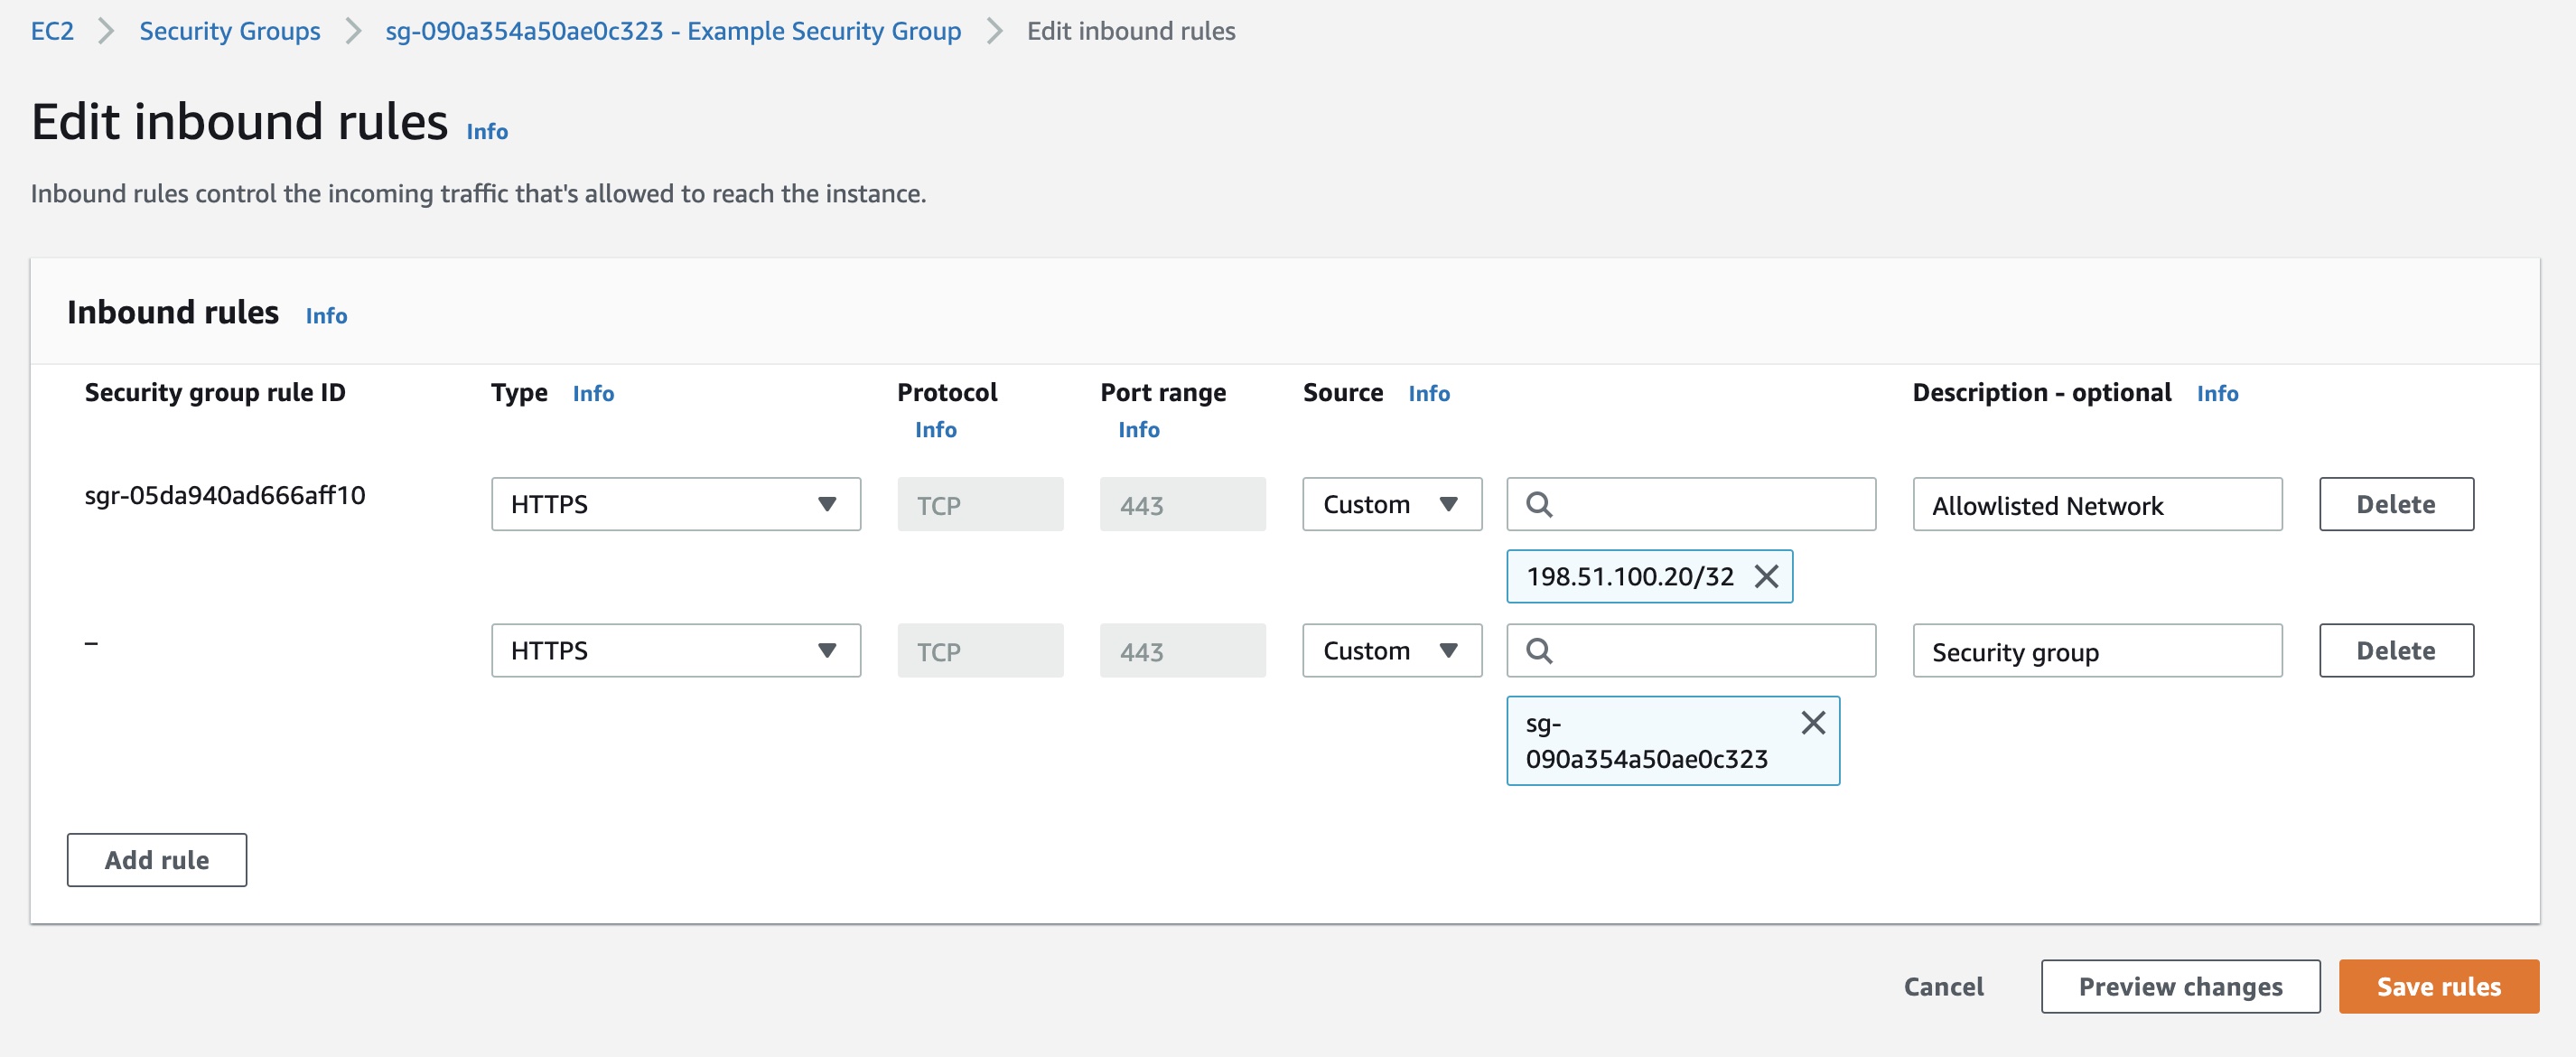
### Linux Server Workspaces
- **No audio in Linux (xrdp) sessions**
> No sound is heard in a session, and `pactl list sinks short` shows only a dummy `auto_null` sink. On Ubuntu 24.04 and later, the `pulseaudio-module-xrdp` package no longer exists, and xrdp audio support has moved to PipeWire (`pipewire-module-xrdp`). If the session is still running the legacy PulseAudio daemon, the PipeWire xrdp sink never loads and audio falls back to `auto_null`. Switch the session to PipeWire:
>
> ```bash
> sudo apt-get install -y pipewire pipewire-pulse wireplumber pipewire-audio alsa-utils
> sudo apt-get remove -y pulseaudio
> sudo systemctl --global enable pipewire.socket pipewire-pulse.socket wireplumber.service
> ```
>
> Disconnect and reconnect the session so that a fresh user session starts under PipeWire, then verify with `pactl info` (which should report `PulseAudio (on PipeWire ...)`) and `pactl list sinks short` (which should show an xrdp sink rather than `auto_null`). Apply this fix in the golden image, or in a session-start or autoscale provisioning script, so that it persists across newly provisioned sessions.
- **Web browser missing or "Input/output error" in a session**
> Clicking the browser icon does nothing, or it returns an `Input/output error`; in some images the browser is not installed by default. Do not rely on the browser being present in the base image. Install it from the autoscale provisioning script or a session-start script instead. On Ubuntu 24.04, the snap-packaged Firefox frequently fails under xrdp, so prefer a `.deb` browser such as Chromium, Chrome, or Firefox from the Mozilla PPA. A stale `~/thinclient_drives` FUSE mount left over from a previous xrdp session can also cause an `Input/output error`; clear it with `fusermount -u ~/thinclient_drives`, or disable drive redirection in `/etc/xrdp/sesman.ini` or `xrdp.ini` if it is not needed.
- **Active Directory domain-join failures on auto-scaled VMs**
> Newly auto-scaled VMs fail to join the domain. SSH into the affected VM that was created by autoscale and review the provisioning log at `/var/log/kasm_install.log` (for example, `sudo less /var/log/kasm_install.log`). The most common cause is that the required ports are not open between the VM and the domain controllers, such as DNS (53), Kerberos (88, 464), LDAP (389, 636), SMB (445), and the Global Catalog (3268). Verify your cloud security lists or NSGs (for example, OCI security lists) and any host firewall rules. When using autoscale to join VMs to Active Directory, also review the [Linux VM startup script README](https://github.com/kasmtech/workspaces-autoscale-startup-scripts/blob/develop/linux_vms/README.md) for the required configuration.
---
## Gpu Issues
## GPUs
- **Agents table shows 0 GPUs**
> The first image below is the Agents list. The GPUs column should show the number of GPUs available on that agent. The second
> image is of the top of the View Agent panel. If the GPU(s) was detected, this view will show details about the GPU. Finally,
> the third image below is the GPU Info details shown on the Agent View Panel.
>
> Kasm uses multiple methods to gather information about GPUs. If the GPU Info json contains some, but not all information about
> your GPUs and the agent is not reporting any GPUs, ensure that the Nvidia Docker toolkit is installed and you restarted the
> docker daemon. Run the command `sudo docker system info | grep Runtimes` and check that `nvidia` is listed.
> To enable GPU support on an agent, the Nvidia GPU acceleration driver must be installed on the agent. Reference the [GPU installation guide](../../tutorials/install/gpu.mdx) for more information.

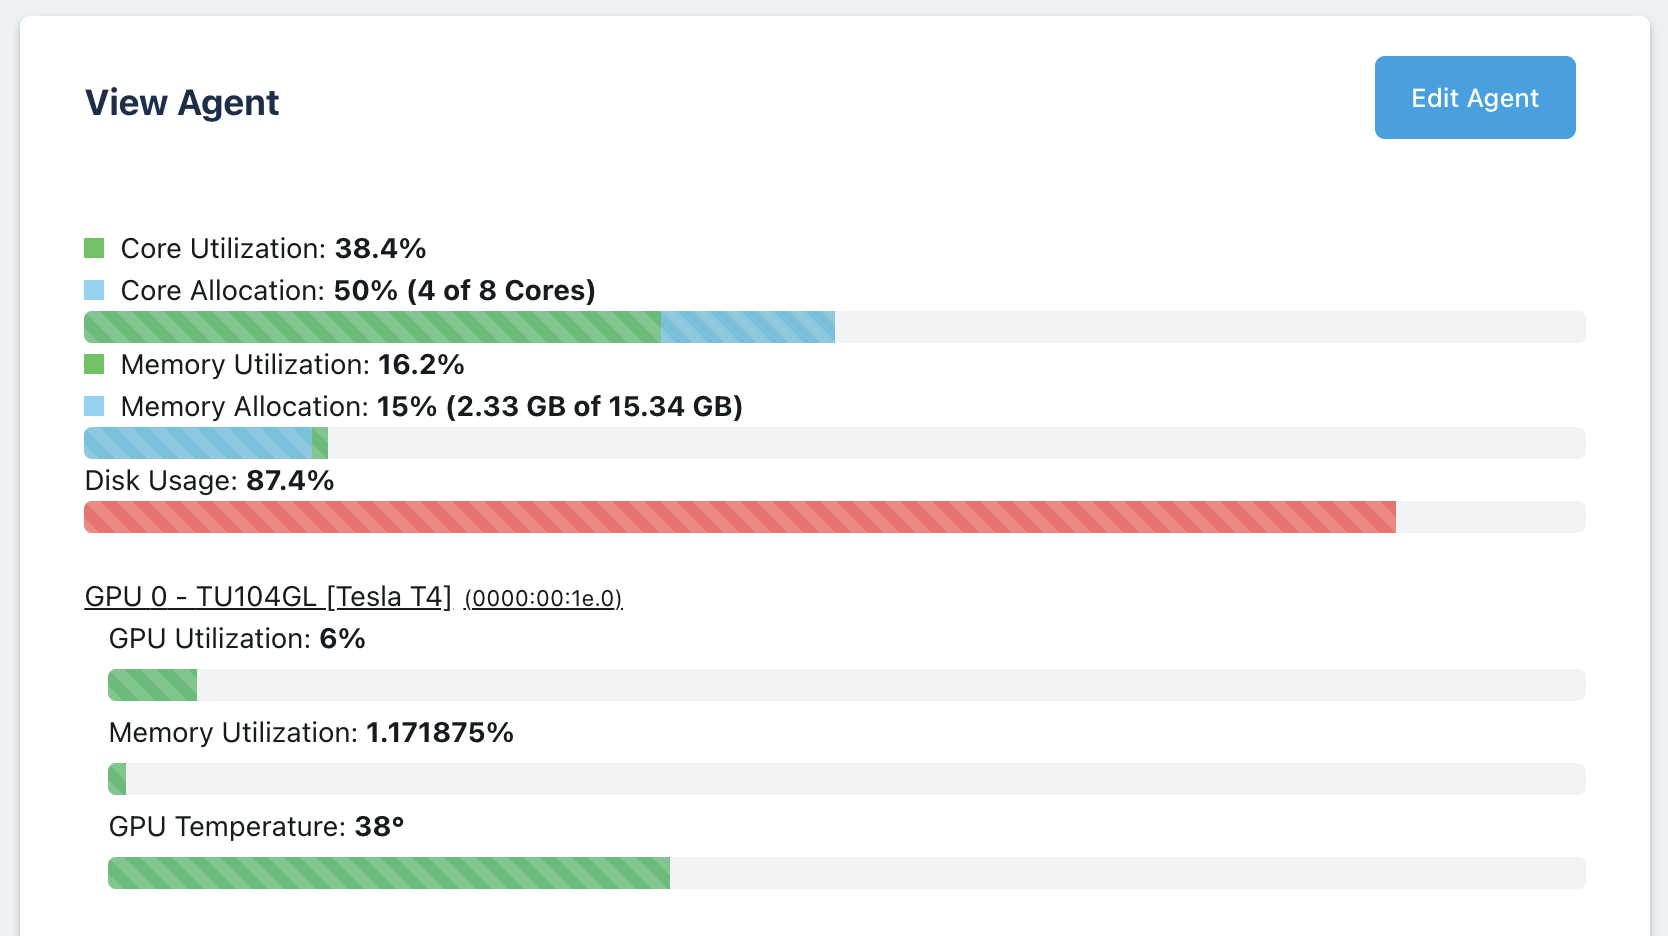
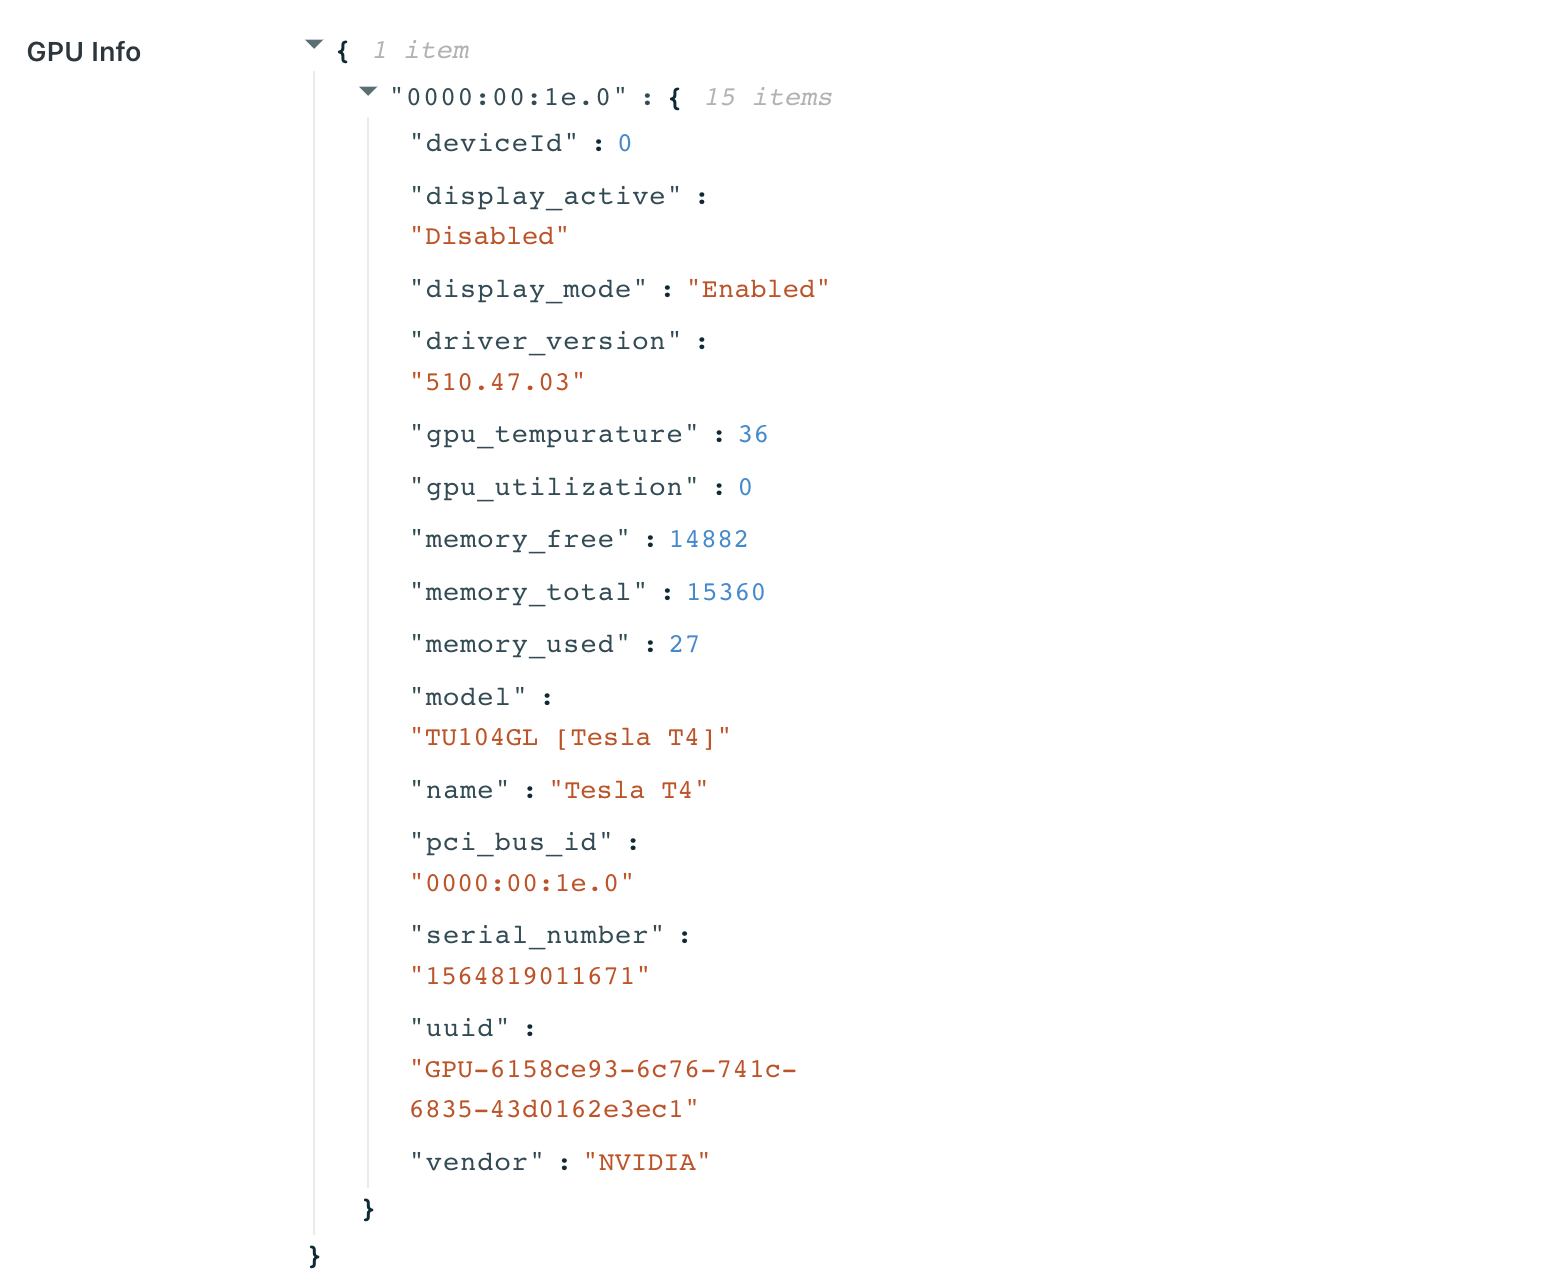
- **No resources are available**
: When users attempt to provision a workspace they get the following error message.

- **nvidia-smi errors**
: The nvidia-smi tool should automatically be available inside the container. Before troubleshooting anything with Workspaces, ensure nvidia-smi works on the host directly. Next, ensure that you can manually run a container on the host with the nvidia runtime set and successfully run the nvidia-smi command from within the container. If you are able to run nvidia-smi from the host directly and when manually running a container, then open a support issue with Kasm.
- **Session With Black Screen**
: When running a session with an NVIDIA GPU enabled, the session may only render a black screen. Viewing the container logs of the sessions may show the following error `libEGL warning: egl: failed to create dri2 screen`. Add the following entry to the [docker-run-config](./gpu-issues.mdx) of the Workspace.
```json
{
"environment": {
"NVIDIA_DRIVER_CAPABILITIES": "all"
}
}
```
---
## Troubleshooting Kasm Workspaces on Kubernetes
## Troubleshooting Kasm on Kubernetes
Recommendations and resources useful when troubleshooting a Kasm Kubernetes deployment.
---
### Confirm All Pods are Running
```bash
kubectl get pods -n {NAMESPACE}
```
All application pods should have a `Running` status. Completed job pods (such as `db-upgrade` or `pre-upgrade-backup`) should show `Completed`.
If any pod shows `Pending`, `CrashLoopBackOff`, `Error`, or `ImagePullBackOff`, proceed to the next section to investigate further.
---
### Check Error with Specific Pod
If a pod is not in a healthy state, inspect it with:
```bash
kubectl describe pod {POD_NAME} -n {NAMESPACE}
```
Check the `Events` section at the bottom of the output for error messages.
To view the pod logs:
```bash
kubectl logs {POD_NAME} -n {NAMESPACE}
```
If the pod has multiple containers, specify the container:
```bash
kubectl logs {POD_NAME} -n {NAMESPACE} -c {CONTAINER_NAME}
```
If the pod has already crashed, retrieve logs from the previous instance:
```bash
kubectl logs {POD_NAME} -n {NAMESPACE} --previous
```
If a pod is stuck in `Init` state, check the init container logs:
```bash
kubectl logs {POD_NAME} -n {NAMESPACE} -c {INIT_CONTAINER_NAME}
```
To list the init containers for a pod:
```bash
kubectl describe pod {POD_NAME} -n {NAMESPACE} | grep -A5 "Init Containers:"
```
---
### Make Sure Your Ingress is Provisioned and Has an Address
```bash
kubectl get ingress -n {NAMESPACE}
```
The `ADDRESS` column should contain an IP address or hostname. If it is empty, your ingress controller may not be running or your cloud provider's load balancer has not finished provisioning.
To investigate further:
```bash
kubectl describe ingress {INGRESS_NAME} -n {NAMESPACE}
```
Check the `Events` section for any errors related to the ingress controller.
---
### Make Sure Your Certificate is Ready (cert-manager)
```bash
kubectl get certificate -n {NAMESPACE}
```
The `READY` column should show `True`. If it shows `False`, pods that depend on the TLS secret may remain in a `Pending` or `ContainerCreating` state until the certificate is issued. Inspect the certificate for more detail:
```bash
kubectl describe certificate {CERTIFICATE_NAME} -n {NAMESPACE}
```
Check the `Events` and `Status.Conditions` sections for error messages.
You can also check the cert-manager logs directly for more detail:
```bash
kubectl logs -n cert-manager -l app=cert-manager
```
---
### Investigate PVC / PV Issues
If a pod is stuck in `Pending` due to an unbound volume, check the status of all PersistentVolumeClaims in the namespace:
```bash
kubectl get pvc -n {NAMESPACE}
```
All PVCs should show a `Bound` status. If a PVC shows `Pending`, it means Kubernetes has not been able to provision the underlying storage. Inspect the PVC for more detail:
```bash
kubectl describe pvc {PVC_NAME} -n {NAMESPACE}
```
Check the `Events` section for errors such as no matching `StorageClass`, insufficient capacity, or a missing provisioner. If your cluster requires a specific storage class, ensure `storageClassName` is set correctly in your values or template files.
:::note
When using the built-in PostgreSQL database, the Kasm Helm chart creates a PersistentVolumeClaim that requires a default StorageClass (or an explicit `storageClassName` in your values). A missing or misconfigured StorageClass is a common cause of the database pod remaining in `Pending` state.
:::
To list available storage classes in your cluster:
```bash
kubectl get storageclass
```
---
### Find Container Image Versions
When troubleshooting, it is often useful to confirm the exact container image and version running in each pod:
```bash
kubectl get pods -n {NAMESPACE} \
-o=custom-columns="NAME:.metadata.name,IMAGE:.spec.containers[*].image,IMAGE_ID:.status.containerStatuses[*].imageID"
```
This shows the image tag and the full image ID (including digest), which is helpful for verifying that the correct version is deployed.
---
### Run Commands Inside a Container
To inspect configuration or debug issues inside a running pod, use `kubectl exec`. For example, to view the Kasm API application configuration:
```bash
kubectl exec {POD_NAME} -n {NAMESPACE} -- cat /opt/kasm/current/conf/app/api/api.app.config.yaml
```
If the pod has multiple containers, specify the container with `-c`:
```bash
kubectl exec {POD_NAME} -n {NAMESPACE} -c {CONTAINER_NAME} -- cat /opt/kasm/current/conf/app/api/api.app.config.yaml
```
You can also open an interactive shell for more in-depth debugging:
```bash
kubectl exec -it {POD_NAME} -n {NAMESPACE} -- /bin/bash
```
---
### General Kasm Troubleshooting
For issues not specific to Kubernetes, see the [Kasm Troubleshooting guides](../troubleshooting).
---
## Reverse Proxies
If running Kasm behind a reverse proxy such as NGINX, please consult the [Reverse Proxy Guide](../networking/reverse-proxy.mdx)
The reverse proxy used, must support WebSockets, and the Zone configuration must also be updated accordingly.
If users can access the Kasm Workspaces UI, but cannot connect to a session, then run through the
[advanced connection troubleshooting](../workspaces-sessions/container-workspace/advanced-connection-troubleshooting.mdx) steps.
If users are not able to access the Kasm Workspaces UI at all, the first step would be to ensure that Kasm Workspaces is
accessible directly, without going through the reverse proxy. Next, ensure that from your reverse proxy you can `curl`
Kasm Workspaces.
```bash
curl -k https://:/api/__healthcheck
{"ok": true}
```
Replace `` with the IP address of one of your Kasm WebApp servers and `` with the port that Kasm Workspaces
is listening on, by default that is 443. Repeat this test for all WebApp servers and on all reverse proxies you have in front
of Kasm Workspaces.
If you are able to access Kasm Workspaces directly and you are able to curl Kasm Workspaces from the reverse proxy, but
you still cannot load the UI at all when navigating to the domain-name or IP address of the reverse proxy, then consult
the documentation of your reverse proxy.
If you are using the [RDP local client workspace option](../workspaces-sessions/container-workspace/workspaces.mdx#servers), make sure the [**Restrict RDP Client IP Address**](../infra-autoscale/deployment-zones.mdx#defining-zone-configurations) setting is disabled in Infrastructure / Zones. If it isn't may not be able to connect, as the IP stored with the request will differ due to the connection being over a reverse proxy. If this is the case it will be reported in the Error Logs with a message such as "Invalid Request. Wrong client IP."
#### RDP Session Disconnects
Reverse proxies and load balancers have settings that will timeout requests after a failing to get a response from the upstream
server in a period of time. This can result in Kasm desktop/app sessions disconnecting if the user is not actively using the
session. Container based sessions send a keep-alive every 5 seconds, therefore, most container based sessions will be unaffected.
This issue primarily affects sessions brokered by the Kasm RDP HTTPS Gateway. By default, RDP does not send a keep-alive, therefore,
RDP connections being proxied can get disconnected if the user is inactive for a time longer than reverse proxies in the path allow.
Kasm NGINX servers use a `proxy_send_timeout` and `proxy_read_timeout` value of 3600 seconds, or 1 hour. The default setting for both
is 60 seconds for NGINX. RDP does support sending keep-alives, with a [registry setting](https://admx.help/?Category=Windows_10_2016&Policy=Microsoft.Policies.TerminalServer::TS_KEEP_ALIVE). Either all proxies in the path need to set a non-default `proxy_send_timeout` and `proxy_read_timeout`
that is long enough to allow for normal inactivity during an RDP Session, or keep-alives needs to be enabled using the registry setting.
The `proxy_send_timeout` and `proxy_read_timeout` are NGINX directives, if you are not using NGINX in front of Kasm, you will need
to consult the documentation for the reverse proxy or load balancer you are using. Each vendor has different defaults and different
terminology. For example, the Azure Application Gateway has a very short default value of 20 seconds for its `request time-out` setting.
---
## Server Tokens
This article explains how to recognize service disruptions caused by auth token desync between Kasm components, as well as how to fix potential issues in a deployed system.
### Background
Starting with version 1.18 of Kasm, a new token refresh workflow has been introduced to enhance security and simplify maintenance.
Under normal conditions tokens automatically refresh without user intervention; however, some scenarios might prevent components from refreshing their tokens in time—such as extended maintenance windows or infrastructure powered down when not in use.
Kasm settings include a grace period option that allows a limited time after token expiration for exchanging it with a new token. During this leeway period the expired token cannot authorize service calls; it can only be exchanged for a new token.
When a token expires the client can re-establish trust with the Admin API by providing the same registration token used during the initial deployment. In a non-Kubernetes environment this registration token should be placed in a file named `registration_token.txt` which is automatically deleted after use. In contrast, in a Kubernetes deployment the registration token can be set as an environment variable from a Secret which allows the service to be fully self-healing.
The following flowchart illustrates the component logic when refreshing a token.
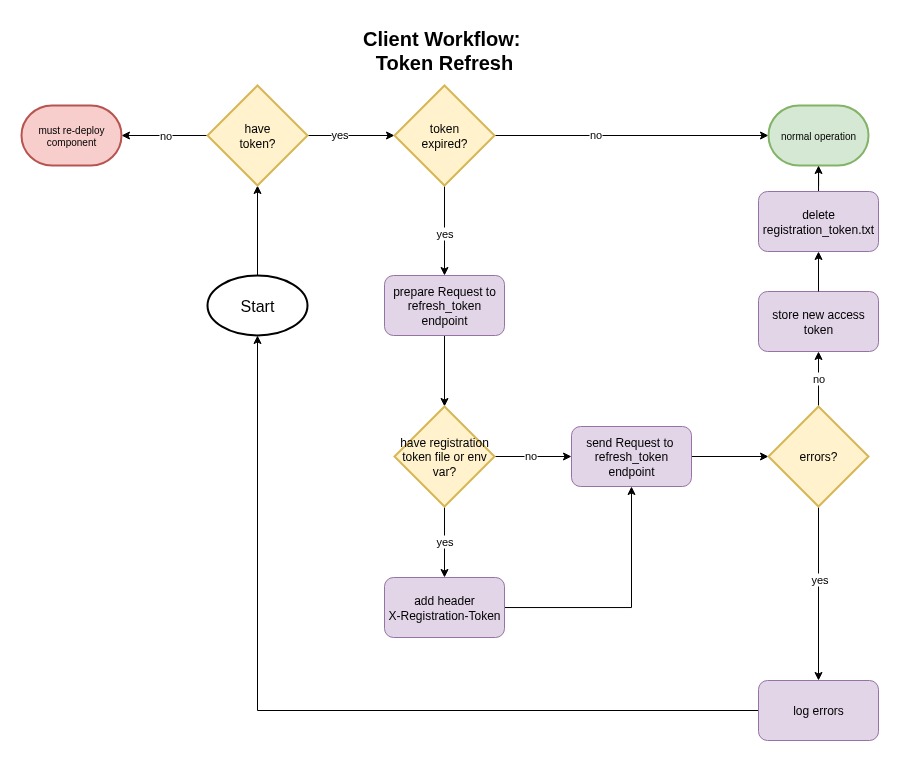
Note that in the case where the client does not have an existing token at all, the service will need to be redeployed as if it is a new component.
### Recognizing authentication token issues
Administrators can determine whether Kasm services have lost authentication with the Admin API by looking either at the [Kasm administrative logs](../../reference/settings.mdx#logging) or by examining console output from the component in question.
Some messages you might see when a component has an expired token include `The JWT token has expired` and `Expired JWT utilized on register_component`.
The following screenshot shows a message indicating the RDP Proxy component of a single server installation has lost authentication:
The following console output comes from that same RDP Proxy which was turned off long enough to miss the token refresh window:
```bash
Jul 23 18:47:04 INFO (7/7) -- ReDemPtion 12.0.11 starting
Jul 23 18:47:04 INFO (7/7) -- create_ip_dual_stack_server: binding socket 4 on [::]:3389
Jul 23 18:47:04 INFO (7/7) -- create_server: listening on socket 4
Jul 23 18:47:04 INFO (7/7) -- Reading font file /usr/local/share/rdpproxy/dejavu_14.rbf2
Jul 23 18:47:04 INFO (7/7) -- Font: version: 1 name: 'DejaVuSans,NotoSansCJK-Regular' size: 14 style: 1 max_ascent: 14 max_descent: 4 nbglyph: 59914 unicode_max = 195102 total_data: 1138296
2025-07-23 18:47:05,188 [INFO] __main__.handler: Refreshing auth token which expires 2025-07-23 18:45:47
2025-07-23 18:47:05,188 [INFO] __main__.handler: Current list of API servers (['proxy', 'dev-kasm'])
2025-07-23 18:47:05,226 [DEBUG] __main__.handler: Health check return: {'ok': True}
2025-07-23 18:47:05,274 [ERROR] __main__.handler: Error from Kasm server for api: https://proxy:443/api/admin/refresh_token status: 403 error: No response
2025-07-23 18:47:05,275 [ERROR] __main__.handler: Failed to refresh auth token
2025-07-23 18:47:05,276 [INFO] __main__.handler: Registering rdp-gateway with configuration: {'target_component': {'type': 'connection_proxy', 'connection_proxy_type': 'RDP-GATEWAY', 'server_address': 'proxy', 'server_port': 443, 'zone_name': 'default', 'proxy_port': 3389, 'status': 'running', 'id': 'd7c9927661a948a692634a96cc323811'}, 'token': 'eyJhbGciOiJSUzI1NiIsInR5cCI6IkpXVCJ9.eyJjb25uZWN0aW9uX3Byb3h5X2lkIjoiZDdjOTkyNzYtNjFhOS00OGE2LTkyNjMtNGE5NmNjMzIzODExIiwiZXhwIjoxNzUzMjk2Mzc3LCJhdXRob3JpemF0aW9ucyI6WzkwXX0.oy9VFBn5ObL2POWD9oC4td5e09hLpsqTqnfR72GaxgOJV0-hmU-ftr4Mxk_Q3vSfWgvg6BVUM_y0raDkhGWYMwoZUwYDhVSgPgvwgXIwucaspLSwlsTT2FJjKQCZknv_MqO9Rk9iobksUWJJAuUWrDRlU8lMQbN_W3SZcc_n8szUMnFGBsgJXfADy0SlEtL9Cuni1tT5n3hh9Cr1zhwnW1ygIfaZuRKODz8wLy0Ev_a93Jm15Ryk2s6dUZwqM3u8RJOMrYKtLmQgcsljMQFmf4DEjMr3x96xk1dHYW975_A8JzgsMqaX6G3aU-vNr51T0BnPBQ8IL5zHqVCBouuGrQ'}
2025-07-23 18:47:05,277 [INFO] __main__.handler: Attempt 1 /10 attempts
2025-07-23 18:47:05,277 [INFO] __main__.handler: Current list of API servers (['proxy', 'dev-kasm'])
2025-07-23 18:47:05,309 [DEBUG] __main__.handler: Health check return: {'ok': True}
2025-07-23 18:47:05,344 [ERROR] __main__.handler: Error from Kasm server for api: https://proxy:443/api/admin/register_component status: 200 error: The JWT token has expired.
2025-07-23 18:47:05,344 [WARNING] __main__.handler: Failed to register component on attempt: 1
2025-07-23 18:47:08,345 [INFO] __main__.handler: Attempt 2 /10 attempts
2025-07-23 18:47:08,346 [INFO] __main__.handler: Current list of API servers (['proxy', 'dev-kasm'])
2025-07-23 18:47:08,377 [DEBUG] __main__.handler: Health check return: {'ok': True}
2025-07-23 18:47:08,418 [ERROR] __main__.handler: Error from Kasm server for api: https://proxy:443/api/admin/register_component status: 200 error: The JWT token has expired.
2025-07-23 18:47:08,420 [WARNING] __main__.handler: Failed to register component on attempt: 2
2025-07-23 18:47:08,420 [INFO] __main__.handler: Attempt 3 /10 attempts
2025-07-23 18:47:08,421 [INFO] __main__.handler: Current list of API servers (['proxy', 'dev-kasm'])
2025-07-23 18:47:08,457 [DEBUG] __main__.handler: Health check return: {'ok': True}
2025-07-23 18:47:08,492 [ERROR] __main__.handler: Error from Kasm server for api: https://proxy:443/api/admin/register_component status: 200 error: The JWT token has expired.
```
### Recovering a component
When a component has an expired token it can be re-registered by placing a text file named `registration_token.txt` into the appropriate directory with contents of the current [Component Registration Token](../../reference/settings.mdx#authentication).
Here is an example of what the text file should contain (trailing newlines are automatically ignored and should not cause issues):
```
MjAyNzk0MmUtZjQzMS00NDZlLWFkODMtOGU2OWVmMzk3MGQx
```
Each component uses a different named file to store configuration, but the `registration_token.txt` file MUST have that exact name, and then be placed alongside the correct config file.
The following list shows standard config file paths for each component on the host machine (mounted into the service containers based on a standard single-server installation):
* Agent: `/opt/kasm/current/conf/app/agent/agent.app.config.yaml`
* Guac: `/opt/kasm/current/conf/app/guac/kasmguac.app.config.yaml`
* RDP Gateway: `/opt/kasm/current/conf/app/rdp_gateway/passthrough.app.config.yaml`
* RDP HTTPS Gateway: `/opt/kasm/current/conf/app/rdp_https_gateway/rdp_https_gateway.app.config.yaml`
* Windows Server: `C:\Program Files\Kasm\config.yaml`
* Linux Server: `/etc/kasm-desktop-service/config.yaml`
In this configuration, you would recover the RDP Gateway by creating the registration token file at `/opt/kasm/current/conf/app/rdp_gateway/registration_token.txt`.
The service does not need to be restarted, as it should automatically detect this new file when it makes another attempt to refresh the expired token (typically within 30 seconds, based upon the default configured heartbeat interval).
When the token is successfully refreshed, you will see the following output:
```bash
2025-07-23 20:09:26,773 [INFO] __main__.handler: Refreshing auth token which expires 2025-07-23 18:45:47
2025-07-23 20:09:26,774 [DEBUG] __main__.handler: Loaded registration token from /usr/local/etc/rdpproxy/conf/registration_token.txt
2025-07-23 20:09:26,775 [INFO] __main__.handler: Current list of API servers (['proxy', 'dev-kasm'])
2025-07-23 20:09:26,809 [DEBUG] __main__.handler: Health check return: {'ok': True}
2025-07-23 20:09:26,886 [INFO] __main__.handler: New auth token expires 2025-07-23 20:11:27
2025-07-23 20:09:26,890 [DEBUG] __main__.handler: Saved configuration changes.
2025-07-23 20:09:26,891 [INFO] __main__.handler: Successfully removed registration token file at /usr/local/etc/rdpproxy/conf/registration_token.txt
2025-07-23 20:09:26,892 [INFO] __main__.handler: Registering rdp-gateway with configuration: {'target_component': {'type': 'connection_proxy', 'connection_proxy_type': 'RDP-GATEWAY', 'server_address': 'proxy', 'server_port': 443, 'zone_name': 'default', 'proxy_port': 3389, 'status': 'running', 'id': 'd7c9927661a948a692634a96cc323811'}, 'token': 'eyJhbGciOiJSUzI1NiIsInR5cCI6IkpXVCJ9.eyJjb25uZWN0aW9uX3Byb3h5X2lkIjoiZDdjOTkyNzYtNjFhOS00OGE2LTkyNjMtNGE5NmNjMzIzODExIiwiZXhwIjoxNzUzMzAxNDg2LCJhdXRob3JpemF0aW9ucyI6WzkwXX0.ZSflAx1_8At2DnJYtbHcClu2CUI4QveJK3h_zzwSIFyGT51BfB7WGiRqDVv_VBkcI4xGd9IHVCUJ4_SCoBIDGMlvjbpxfF7Em7immwqhRxIlyAyhHpjZpMNthLf-OuQJjgebzXjMA3hYlCNOUWK5PWRcR159UYJPVTzVCTTWBfm_QxoFejkgRXHXAYXHQEMBaXjFmBtTK3Hr0LDlkjJ_axKrraRWwyyhOTmmWcpIiiD06TYkDT3HB0UDbz21QEOG0Fw71L3HPb5VZYr4VYnW-Fhswr4pJ3VbILsPpmeOjyHuF1ReNpp35b1qW_vTQxYqggc4bH-zOqiG3W24hTgwTg'}
2025-07-23 20:09:26,892 [INFO] __main__.handler: Attempt 1 /10 attempts
2025-07-23 20:09:26,893 [INFO] __main__.handler: Current list of API servers (['proxy', 'dev-kasm'])
2025-07-23 20:09:26,923 [DEBUG] __main__.handler: Health check return: {'ok': True}
2025-07-23 20:09:27,006 [DEBUG] __main__.handler: Saved configuration changes.
2025-07-23 20:09:27,007 [INFO] __main__.handler: Component registration successful
```
The following lines (from the above snippet) show that the component utilized our registration token and then cleaned up automatically:
```bash
...
2025-07-23 20:09:26,774 [DEBUG] __main__.handler: Loaded registration token from /usr/local/etc/rdpproxy/conf/registration_token.txt
...
2025-07-23 20:09:26,891 [INFO] __main__.handler: Successfully removed registration token file at /usr/local/etc/rdpproxy/conf/registration_token.txt
```
Windows and Linux desktop agents may not automatically recover after creating the `registration_token.txt` file, so you may need to manually restart the service.
---
## Kasm Workspaces: Support Bundle
## Support Bundle
The Support Bundle page in Kasm Workspaces is used to generate a diagnostic archive that can be downloaded and shared for troubleshooting. The page includes bundle generation controls, a jobs table, lifecycle state tracking, and download handling for both small and large bundle files.
### What the Support Bundle page does
Administrators can use the Support Bundle page to:
- Generate a new support bundle.
- Review existing support bundle jobs.
- Track whether a bundle is queued, running, completed, or deleted.
- Download completed bundles.
- Delete bundles that are no longer needed.
### Generating a support bundle
When creating a support bundle, the UI exposes three time-based options:
- **Timeout**: How long the job should spend collecting data before it stops.
- **Expiration**: How long the completed archive should remain available for download.
These values are stored in minutes in the backend, while the UI allows entering them in minutes, hours, or days where appropriate.
The contents of the support bundle will be stored in a password protected AES256 encrypted zip file. You may need to use a utility such as 7zip to decrypt the support bundle.
The password for a support bundle is exposed as a copy action on the assocated support bundle element in the UI. The password will only become available once the system has finished processing the support bundle and it transitions to the **Completed** state.
### Job lifecycle
Support bundle jobs can move through the following states:
- **Queued**: The job has been requested but processing has not started yet.
- **Running**: Collection or processing has started but the bundle is not complete.
- **Completed**: The archive is ready to download.
- **Deleted**: The bundle has been removed and is no longer available.
The jobs table also tracks progress and expiration to make it clear whether a bundle is still active or available.
### Download behavior
Completed bundles can be downloaded directly from the jobs table. Kasm chooses the safest download path based on browser capabilities and the size of the bundle returned by the API.
- Small downloads can use the browser fallback download flow.
- Large downloads are expected to stream directly to disk when supported by the browser.
### Large Downloads
The Support Bundle page checks the `Content-Length` header returned by the download API before deciding which download path to use.
- Downloads smaller than 1 GB can use the browser fallback download path.
- Downloads 1 GB or larger require a secure browser context and support for the `showSaveFilePicker()` API.
- If those requirements are not available, Kasm shows a warning instead of starting a large in-memory download.
#### Requirements for large downloads
To download large support bundles safely, the browser must provide both of the following:
- A secure context, typically HTTPS.
- Support for the `showSaveFilePicker()` API so the file can be streamed directly to disk.
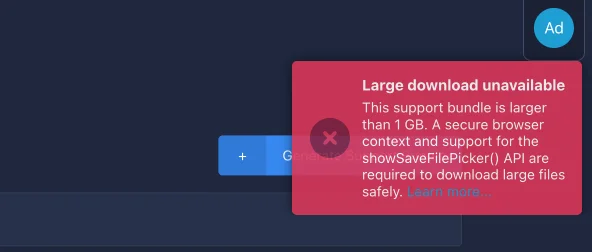
#### Expected user experience
When the browser supports streamed downloads:
1. Select **Download** for a completed support bundle.
2. Choose a destination file in the browser save dialog.
3. The browser writes the archive directly to disk instead of buffering the entire file in memory.
When the browser does not support streamed downloads and the archive is 1 GB or larger:
1. Select **Download** for a completed support bundle.
2. Kasm shows a warning notification explaining that a secure context and `showSaveFilePicker()` support are required.
3. Retry the download from a supported browser or environment.
Large support bundle files should not be downloaded through a browser fallback path that buffers the full archive in memory. That approach can fail or degrade the browser for multi-gigabyte files.
### Troubleshooting
If the large download warning is shown unexpectedly:
- Confirm the site is loaded over HTTPS.
- Check for a secure context.
- Type `window.isSecureContext` in the browser console.
- Check whether `window.showSaveFilePicker` is available.
- Type `typeof window.showSaveFilePicker === "function"` in the browser console.
- Some browsers, like Brave, have the functionality but disable it by default. Check your browser's documentation to see if the feature is available and how to enable it.
- Retry in a browser that supports the File System Access API.
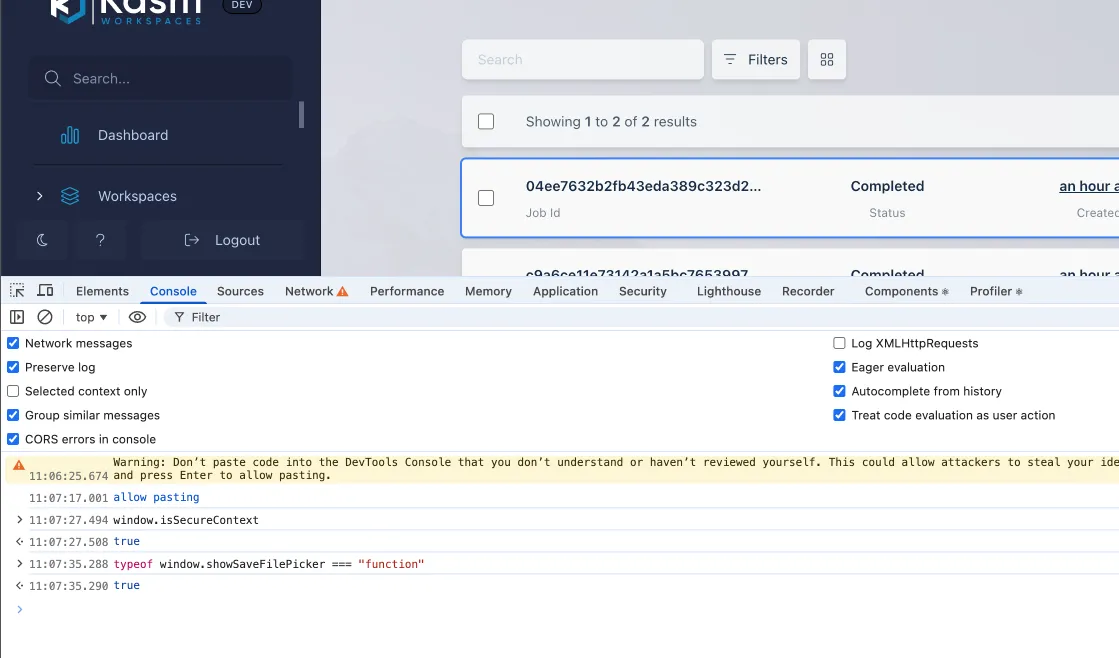
---
## Kasm Workspaces: Configuration File Location Changes (v1.17.0+)
Starting in Kasm Workspaces 1.17.0, the following configuration files have changed locations.
| Old Location | New Location |
| ------------ | ------------ |
| `/opt/kasm/current/conf/app/agent.app.config.yaml` | `/opt/kasm/current/conf/app/agent/agent.app.config.yaml` |
| `/opt/kasm/current/conf/app/api.app.config.yaml` | `/opt/kasm/current/conf/app/api/api.app.config.yaml` |
| `/opt/kasm/current/conf/app/kasmguac.app.config.yaml` | `/opt/kasm/current/conf/app/guac/kasmguac.app.config.yaml` |
| `/opt/kasm/current/conf/app/passthrough.app.config.yaml` | `/opt/kasm/current/conf/app/rdp_gateway/passthrough.app.config.yaml` |
| `/opt/kasm/current/conf/app/rdpproxy.ini` | `/opt/kasm/current/conf/app/rdp_gateway/rdpproxy.ini` |
| `/opt/kasm/current/conf/app/rdp_https_gateway.app.config.yaml` | `/opt/kasm/current/conf/app/rdp_https_gateway/rdp_https_gateway.app.config.yaml` |
| `/opt/kasm/current/conf/app/rdpgw.yaml` | `/opt/kasm/current/conf/app/rdp_https_gateway/rdpgw.yaml` |
---
## Upgrade Legacy Helm Deployment to 1.1181.0
If you are using the legacy `kasm-single-zone` chart, follow the steps below to upgrade your Kasm Helm deployment to 1.1181.0.
:::note
You must upgrade to `1.1181.0` first before you can further upgrade to `1.1190.0`.
:::
#### At a Glance: Upgrade Steps
1. [Backup your Kasm database](#1-backup-your-database-and-secrets)
2. [Update StatefulSet PVC Retention Policy](#2-update-statefulset-pvc-retention-policy)
3. [Delete your old Kasm Helm release](#3-delete-the-old-kasm-helm-release)
4. [Download the 1.1181.0 Helm Chart](#4-download-the-111810-helm-chart)
5. [Configure Helm Chart Values for Upgrade](#5-configure-helm-chart-values-for-upgrade)
6. [Install the 1.1181.0 release](#6-install-the-111810-release)
7. [Verify and log in](#7-verify-and-log-in)
---
#### 1. Backup Your Database and Secrets
- Deploy the [DB backup job template](https://raw.githubusercontent.com/kasmtech/kasm-helm/refs/heads/release/1.1190.0/examples/db-backup.yaml) to your Kasm namespace:
```bash
kubectl apply -f db-backup.yaml -n {NAMESPACE}
kubectl logs backup- -n {NAMESPACE} --follow
```
- **Sample output:**
```
kasm-old-db-backup-container Creating DB Backup...
-rwxr-xr-x. 1 kasm kasm 1.8M Jul 23 18:26 /data/kasm-db-dump/kasm_dump.tar
```
- Backup secrets and store output securely:
```bash
kubectl -n {NAMESPACE} get secrets/kasm-secrets --template='{{ range $key, $value := .data }}{{ printf "%s: %s\n" $key ($value | base64decode) }}{{ end }}'
```
- **Sample output:**
```
admin-password: xxx
db-password: xxx
manager-token: xxx
redis-password: xxx
service-token: xxx
user-password: xxx
```
---
#### 2. Update StatefulSet PVC Retention Policy
This ensures your Persistent Volumes are preserved when the Helm release is deleted.
```bash
helm upgrade --no-hooks {RELEASE_NAME} {old-chart-path} -n {NAMESPACE} --reuse-values --set kasmApp.servicesToDeploy.db.persistentVolumeClaimRetentionPolicy.enabled=true --set kasmApp.servicesToDeploy.db.persistentVolumeClaimRetentionPolicy.whenDeleted=Retain
```
Replace the placeholders:
1. `{RELEASE_NAME}`: The name of your Kasm Helm release. Run `helm list -n {NAMESPACE}` if you are unsure.
2. `{NAMESPACE}`: The Kubernetes namespace where your Kasm deployment is running.
3. `{old-chart-path}`: The file path to your existing chart directory (for example: `/home/user/kasm-helm/kasm-single-zone`).
Verify the retention policy has been updated:
```bash
kubectl -n {NAMESPACE} get statefulset kasm-db-statefulset -o yaml | grep whenDeleted
```
Expected output (if you don't see this, the retention policy isn't applied correctly):
```
whenDeleted: Retain
```
---
#### 3. Delete the Old Kasm Helm Release
:::warning
This step will remove your Kasm deployment. However, because you updated the StatefulSet PVC retention policy in Step 2, your database and persistent volumes will be preserved.
:::
```bash
helm uninstall {RELEASE_NAME} -n {NAMESPACE} --no-hooks
```
---
#### 4. Download the 1.1181.0 Helm Chart
```bash
git clone https://github.com/kasmtech/kasm-helm.git
cd kasm-helm
git checkout release/1.18.1
```
---
#### 5. Configure Helm Chart Values for Upgrade
Refer to the [chart documentation](https://github.com/kasmtech/kasm-helm/tree/release/1.18.1/charts/kasm) to configure your `my-values.yaml` override file. For example:
```yaml
publicAddr: "kasm.contoso.com"
certificate:
secretName: kasm-ingress-cert
proxyService:
type: ClusterIP
ingress:
enabled: true
```
Then add the following `dbManagement` section:
```yaml
dbManagement:
initialize: false
upgrade:
enable: true
```
:::note
Leave other `dbManagement.upgrade` values as default unless you customised your PVC or DB backup file name.
:::
---
#### 6. Install the 1.1181.0 Release
```bash
helm install {RELEASE_NAME} ./charts/kasm -n {NAMESPACE} -f my-values.yaml
```
Notes:
1. The `{NAMESPACE}` must be the same namespace where your old chart and backup job was deployed.
2. Ensure you have already updated your `my-values.yaml` (see Step 5) before running the install.
---
#### 7. Verify and Log In
- Wait several minutes for all services to come online.
- Access your Kasm environment using the `publicAddr` value you set.
- For admin and user credentials, see the helm note via:
```bash
helm get notes {RELEASE_NAME} -n {NAMESPACE}
```
---
### Upgrade to 1.1190.0
To further upgrade to 1.1190.0, follow the [Upgrade Existing Helm Deployment](./upgrade_new_chart).
---
### Upgrade Troubleshooting
See [Kubernetes Troubleshooting](../../troubleshooting/kubernetes) for assistance.
---
## Upgrade Existing Helm Deployment
If you are using the `kasm` chart, follow the steps below to upgrade your Kasm Helm deployment.
:::warning
If you are currently on the legacy `kasm-single-zone` chart, you must first follow the steps in [Upgrade Legacy Helm Deployment](./upgrade_legacy_chart) to upgrade to the `kasm` chart at version `1.1181.0` before proceeding with this guide.
:::
---
### Upgrade Paths
This guide covers the following upgrade paths:
1. **Older version → 1.1181.0** — Follow the [legacy upgrade guide](./upgrade_legacy_chart) to upgrade from the old `kasm-single-zone` chart to the `kasm` chart at version `1.1181.0`.
2. **1.1181.0 → 1.1190.0** — Follow the steps in this guide.
3. **`develop` branch → 1.1190.0** — If you installed the Helm chart from the `develop` branch (between the 1.18.1 and 1.19.0 releases), follow the same 1.1181.0 → 1.1190.0 steps in this guide.
---
### Upgrade from 1.1181.0 to 1.1190.0
#### At a Glance
1. [Retrieve your current values](#1-retrieve-your-current-values)
2. [Review field changes and migrate your values](#2-review-field-changes-and-migrate-your-values)
3. [Run the Helm upgrade](#3-run-the-helm-upgrade)
4. [Upgrade standalone PostgreSQL (if applicable)](#4-upgrade-standalone-postgresql-if-applicable)
5. [Verify the upgrade](#5-verify-the-upgrade)
6. [Kasm log in](#6-kasm-log-in)
---
#### 1. Retrieve Your Current Values
Before upgrading, export your current Helm values so you can migrate them to the new chart format.
- **If you deployed using a custom `my-values.yaml`**, retrieve it with:
```bash
helm get values {RELEASE_NAME} -n {NAMESPACE}
```
Replace the placeholders:
- `{RELEASE_NAME}`: Your Kasm Helm release name. Run `helm list -n {NAMESPACE}` if you are unsure.
- `{NAMESPACE}`: The namespace where your Kasm deployment is running.
- **If you edited `values.yaml` directly**, you will need to diff your changes against the `1.1181.0` defaults to identify what you customised. Follow these steps:
1. Download the `1.1181.0` default values:
```bash
curl -o default-values.yaml https://raw.githubusercontent.com/kasmtech/kasm-helm/release/1.18.1/charts/kasm/values.yaml
```
2. Export your currently deployed values:
```bash
helm -n {NAMESPACE} get values {RELEASE_NAME} --all -o yaml > current-values.yaml
```
3. Compare the two files to identify your customisations. The recommended tool is [`dyff`](https://github.com/homeport/dyff#installation):
```bash
dyff between default-values.yaml current-values.yaml
```
Apply the same customisations to the new `1.1190.0` `values.yaml`, taking into account the field changes described in [Step 2](#2-review-field-changes-and-migrate-your-values).
---
#### 2. Review Field Changes and Migrate Your Values
Version `1.1190.0` introduces several renamed, removed, and restructured fields. Review the tables below and update your `my-values.yaml` accordingly before running the upgrade.
##### Fields Renamed
| Old field (1.1181.0) | New field (1.1190.0) | Notes |
|---|---|---|
| `imagePullSecrets.server` + `imagePullSecrets.type` | `imagePullSecrets.registry` | Both old fields are merged into a single `registry` field |
| `kasmZones[].upstream_auth_addr` | `kasmZones[].proxyAddress` | Renamed to better reflect its purpose |
| `annotations` | `extraAnnotations` | The nested annotation sub-keys (`configMap`, `cron`, `deployment`, etc.) have moved under `extraAnnotations`; a new simple `annotations: {}` top-level key is now used for chart-wide annotations |
##### Fields Removed
| Removed field | Action required |
|---|---|
| `imagePullSecrets.type` | Merged into `imagePullSecrets.registry` — see above |
| `imagePullSecrets.server` | Merged into `imagePullSecrets.registry` — see above |
| `dbManagement.upgrade.oldDbBackupPvc` | Removed; no longer used. Remove from your values. |
| `annotations.certSecret` (previously `extraAnnotations.certSecret`) | Use `certificate.certManager.annotations` instead |
| `extraLabels.certSecret` | Use `certificate.certManager.labels` instead |
##### Fields with Behaviour Changes
| Field | Change |
|---|---|
| `database.hostname` | Previously used as the DB service name. Now empty by default and **only used when `database.standalone: true`**. Remove this value from your custom values if you are not using a standalone DB. |
:::note
Many new fields and features have been added in `1.1190.0`. Refer to the [chart documentation](https://github.com/kasmtech/kasm-helm/tree/release/1.1190.0/charts/kasm-helm) for the full list of available configuration options.
:::
##### Configure Values for the DB Upgrade
The upgrade chart will automatically back up your existing database, apply the schema migration, and upgrade Kasm. To enable this, add the following to your `my-values.yaml`:
```yaml
dbManagement:
initialize: false
upgrade:
enable: true
oldDbHostname: ""
backupStorageClass: ""
oldDbSecretsName: ""
oldDbBackupFileName: kasm_dump.tar
```
Replace the placeholders:
1. `oldDbSecretsName`: Leave empty (`""`) in nearly all cases — the chart will auto-resolve to `{RELEASE_NAME}-secrets`, which is the standard secret name created by 1.1181.0+ deployments. Only set this if you manually renamed the Kasm secrets object before upgrading; if so, the value MUST exactly match the in-cluster secret name. To check the current name, run:
```bash
kubectl -n {NAMESPACE} get secret | grep secrets
```
2. `oldDbHostname`: The database hostname from your previous Helm release. Only required if your old deployment used a non-default DB hostname (i.e. not `database.hostname=kasm-db`). Leave empty (`""`) if using a standalone DB, or if you did not change `database.hostname` from its default value of `kasm-db` in your previous deployment. If you are unsure, you can check your DB service name by running:
```bash
kubectl -n {NAMESPACE} get service
```
3. `backupStorageClass`: The storage class used to create the PersistentVolume for the backup PVC. Leave empty (`""`) to use the cluster default.
4. `oldDbBackupFileName`: Leave as `kasm_dump.tar`.
---
#### 3. Run the Helm Upgrade
Once your `my-values.yaml` is ready, run the upgrade:
##### OCI Registry (Recommended)
```bash
helm upgrade {RELEASE_NAME} oci://registry-1.docker.io/kasmweb/kasm-helm \
--version 1.1190.0 --namespace {NAMESPACE} -f my-values.yaml
```
##### Classic Helm Repository
```bash
helm repo add kasm https://helm.kasm.com
helm repo update
helm upgrade {RELEASE_NAME} kasm/kasm-helm --version 1.1190.0 --namespace {NAMESPACE} -f my-values.yaml
```
:::note
Make sure you are using the same `{RELEASE_NAME}` as your previous installation.
:::
This will:
1. Back up the existing database
2. Apply the schema migration
3. Upgrade the Kasm deployment
You can monitor the backup job with:
```bash
kubectl logs -n {NAMESPACE} -l app.kubernetes.io/component=pre-upgrade-backup
```
Expected backup job pod output when the backup completes successfully:
```
Starting backup to /data/kasm-db-dump/kasm_dump.tar
Backup complete
```
---
#### 4. Upgrade Standalone PostgreSQL (if applicable)
:::warning
Only follow this section if you are using a standalone PostgreSQL database. If you are using the included database, skip to [Step 5](#5-verify-the-upgrade).
:::
:::warning
Do NOT upgrade your database until the backup job has finished.
:::
1. Run the Helm upgrade command from Step 4.
2. Wait until the `pre-upgrade-backup` job completes and all new pods are in the `Init` state:
```bash
kubectl get pods -n {NAMESPACE}
```
3. Once the backup is confirmed complete, upgrade your standalone PostgreSQL instance from version 14 to version 16.
4. The `db-upgrade` job will wait for PostgreSQL 16 to be detected before proceeding. You can monitor this with:
```bash
kubectl -n {NAMESPACE} logs -l app.kubernetes.io/component=db-upgrade -c db-major-version-is-ready
```
You will see output like the following while it waits, then a confirmation once the upgrade is detected:
```
PostgreSQL 14.x detected (need 16.x) ... waiting
...
PostgreSQL 14.x detected (need 16.x) ... waiting
DB not reachable yet... waiting
...
DB not reachable yet... waiting
PostgreSQL 16.x detected (server_version_num=160012)
```
---
#### 5. Verify the Upgrade
```bash
kubectl get pods -n {NAMESPACE}
```
Confirm all pods have a `Running` status (job pods should show `Completed`), then log in to the Kasm web interface to verify the upgrade completed successfully.
#### 6. Kasm Log In
- Add your ingress address to your DNS
- Access your Kasm environment using the `publicAddr` value you set.
- For admin and user credentials, see the helm note via:
```bash
helm get notes {RELEASE_NAME} -n {NAMESPACE}
```
---
### Rollback and Troubleshooting
#### Failure during backup
If the upgrade fails during the backup stage, roll back and clean up the incomplete jobs before retrying:
```bash
helm rollback {RELEASE_NAME} -n {NAMESPACE}
kubectl -n {NAMESPACE} delete jobs {RELEASE_NAME}-db-upgrade {RELEASE_NAME}-pre-upgrade-backup
```
After resolving the underlying issue, re-run the upgrade from [Step 3](#3-run-the-helm-upgrade).
For additional troubleshooting assistance, see [Kubernetes Troubleshooting](../../troubleshooting/kubernetes).
---
## Upgrading Kasm Workspaces on Kubernetes
## Upgrading Kasm on Kubernetes
This guide walks you through safely **upgrading your Kasm deployment on Kubernetes**.
---
### Upgrade Scenarios
| Scenario | Use This Section |
|---|---|
| Upgrade legacy `kasm-single-zone` chart 1.17.0 → 1.1181.0 | [Upgrade Legacy Helm Deployment to 1.1181.0](./upgrade_legacy_chart) |
| Upgrade `kasm` chart 1.1181.0 → 1.1190.0 | [Upgrade Existing Helm Deployment](./upgrade_new_chart) |
| Installed from `develop` branch (between 1.18.1 and 1.19.0) | [Upgrade Existing Helm Deployment](./upgrade_new_chart) |
#### Assumptions
- You have admin access to your Kubernetes cluster
- `kubectl` and `helm` are installed and configured
- You have backup and restore permissions
---
### Determine Your Current Chart Version
To determine which Kasm Helm chart you are currently using, run the following command:
```bash
helm list -n {NAMESPACE}
```
Interpret the output as follows:
- **Legacy chart** (`kasm-single-zone`):
The output contains:
```text
NAME NAMESPACE REVISION UPDATED STATUS CHART APP VERSION
kasm kasm 1 xxx deployed kasm-single-zone-1.17.0-develop 1.17.0
```
- **New chart** (`kasm`):
The output contains:
```text
NAME NAMESPACE REVISION UPDATED STATUS CHART APP VERSION
kasm kasm 1 xxx deployed kasm-1.1181.0 1.18.1
```
---
### Upgrade Troubleshooting
See [Kubernetes Troubleshooting](../../troubleshooting/kubernetes) for assistance.
---
## Kasm Workspaces Multi-Server Upgrade Guide
## Multi Server Upgrade
For long-running systems: this release requires a minimum Docker version of v25.0.5. If necessary prior to Kasm upgrade, please upgrade Docker following their instructions for your distribution. A detailed explanation and instructions are available in [the Kasm support article](https://kasmweb.atlassian.net/servicedesk/customer/kb/view/418611248).
When running any upgrade please ensure there are no active Kasm Workspaces sessions running. On large deployments this will likely require a maintenance window.
While not required, making a backup using a VM snapshot or other method of the servers in the installation is recommended as a precaution to provide a recovery point if something goes wrong.
Starting in 1.19.0, the default installation uses rolling images to deliver ongoing security fixes and updates. For static images with manual update control, pass in the `-f or --use-static-images` arguments during the installation or upgrade process.
```Bash
sudo bash kasm_release/install.sh -f
or
sudo bash kasm_release/upgrade.sh -f
```
Refer to Rolling Image Management for more information about rolling images.
| Contents | URL | SHA256 |
|:-----------------|:-----------------------------------------------|:-------------------|
| Installer Bundle | [[storage_url]]kasm_release_[[release]].tar.gz | [[release_sha256]] |
| Contents | URL | SHA256 |
|:---------------|:------------------------------------------------------------------------------------------|:-------------------------------------|
| Services | [[storage_url]]kasm_release_service_images_amd64_[[release]].tar.gz | [[amd_service_images_sha256]] |
| Workspaces | [[storage_url]]kasm_release_workspace_images_amd64_[[release]].tar.gz | [[amd_workspace_images_sha256]] |
| Network Plugin | [[storage_url]]kasm_release_network_plugin_images_amd64_[[network_plugin_release]].tar.gz | [[amd_network_plugin_images_sha256]] |
| Logging Plugin | [[storage_url]]kasm_release_logging_plugin_images_amd64_[[logging_plugin_release]].tar.gz | [[amd_logging_plugin_images_sha256]] |
| Contents | URL | SHA256 |
|:---------------|:------------------------------------------------------------------------------------------|:-------------------------------------|
| Services | [[storage_url]]kasm_release_service_images_arm64_[[release]].tar.gz | [[arm_service_images_sha256]] |
| Workspaces | [[storage_url]]kasm_release_workspace_images_arm64_[[release]].tar.gz | [[arm_workspace_images_sha256]] |
| Network Plugin | [[storage_url]]kasm_release_network_plugin_images_arm64_[[network_plugin_release]].tar.gz | [[arm_network_plugin_images_sha256]] |
| Logging Plugin | [[storage_url]]kasm_release_logging_plugin_images_arm64_[[logging_plugin_release]].tar.gz | [[arm_logging_plugin_images_sha256]] |
:::caution
Starting in Kasm Workspaces 1.17.0, the following configuration files changed locations.
| Old location | New location |
| ------------ | ------------ |
| `/opt/kasm/current/conf/app/agent.app.config.yaml` | `/opt/kasm/current/conf/app/agent/agent.app.config.yaml` |
| `/opt/kasm/current/conf/app/api.app.config.yaml` | `/opt/kasm/current/conf/app/api/api.app.config.yaml` |
| `/opt/kasm/current/conf/app/kasmguac.app.config.yaml` | `/opt/kasm/current/conf/app/guac/kasmguac.app.config.yaml` |
| `/opt/kasm/current/conf/app/passthrough.app.config.yaml` | `/opt/kasm/current/conf/app/rdp_gateway/passthrough.app.config.yaml` |
| `/opt/kasm/current/conf/app/rdpproxy.ini` | `/opt/kasm/current/conf/app/rdp_gateway/rdpproxy.ini` |
| `/opt/kasm/current/conf/app/rdp_https_gateway.app.config.yaml` | `/opt/kasm/current/conf/app/rdp_https_gateway/rdp_https_gateway.app.config.yaml` |
| `/opt/kasm/current/conf/app/rdpgw.yaml` | `/opt/kasm/current/conf/app/rdp_https_gateway/rdpgw.yaml` |
:::
### Manually
Please read through the entire process before getting started.
Issues can be reported on the [Kasm Workspaces Issues Page](https://github.com/kasmtech/workspaces-issues/issues)
**Component Registration Token**
The **Component Registration Token** is used during the upgrade process to register new components that were not present on earlier versions of Kasm Workspaces.
Login to the Workspaces UI as an administrator. Retrieve the value of **Component Registration Token** from the Global Settings.
:::warning
The Kasm Workspaces [[release]] upgrade optionally installs a new set of [default desktop and application images](../how-to/workspaces-sessions/container-workspace/custom-images.mdx). Ensure 50 GB of free space is available on the Kasm server (or Agent role server for multi-server installations) before upgrading if you select the options to seed new images.
:::
- Stop all Kasm Services on all Servers
```Bash
sudo /opt/kasm/bin/stop
```
#### Upgrade Database Server Role
Create a Database Backup
- Ensure Kasm services are stopped on all hosts. Database corruption can occur if Kasm services are still connected to the database when it goes down.
If the database is a standalone remote database refer here for backup instructions. [Backing up the PostgreSQL Server](../../tutorials/install/remote-database.mdx#backing-up-the-postgresql-server).
```Bash
sudo /opt/kasm/bin/stop
```
- Execute the database backup utility
If there is an existing `/opt/kasm/backups` directory, the permissions on this directory have changed in 1.18.0. Please run:
```bash
sudo chown -R 70:70 /opt/kasm/backups
```
If the directory does not already exist, create the directory then adjust the permissions by running:
```bash
sudo mkdir -p /opt/kasm/backups/
sudo chown -R 70:70 /opt/kasm/backups
```
```bash
sudo bash /opt/kasm/[[previous_release]]/bin/utils/db_backup -f /opt/kasm/backups/kasm_db_backup.tar -p /opt/kasm/[[previous_release]]/
```
- Verify the presence and location of the database backup
```Bash
sudo ls -al /opt/kasm/backups/kasm_db_backup.tar
```
- Remove the kasm_redis container
```Bash
sudo docker container rm kasm_redis
```
- Download and extract the new installation media
```bash
cd /tmp/ \
&& curl --fail-early \
-fO [[storage_url]]kasm_release_[[release]]-latest.tar.gz \
-fO [[storage_url]]kasm_release_[[release]]-latest.tar.gz.sha256sum \
&& sha256sum --check *.sha256sum \
&& tar -xf kasm_release_[[release]]-latest.tar.gz
```
When performing an offline upgrade please ensure that versions of docker and docker compose that meet the updated system requirements have been downloaded and installed see [System Requirements](../../explanations/system-requirements.mdx) for details.
- Get the existing database password for use in the subsequent commands.
```bash
sudo grep " password" /opt/kasm/[[previous_release]]/conf/app/api/api.app.config.yaml
```
**Perform a clean install**
Perform a clean install of the Database Role Services
If the database is a standalone remote database refer here for clean install instructions. [Initializing PostgreSQL Server](../../tutorials/install/remote-database.mdx#initializing-postgresql-server).
- Install kasm from the release media downloaded in the prior steps.
- When performing an offline update add these flags `--offline-workspaces --offline-service `
```Bash
sudo bash kasm_release/install.sh -S db -D -Q
```
#### Restore and upgrade the database
Restore and update the database from the prior version
- Ensure all Kasm services are stopped on all hosts
If the database is a standalone remote database refer here for restoration instructions. [Restoring the PostgreSQL server from a backup](../../tutorials/install/remote-database.mdx#restoring-the-postgresql-server-from-a-backup).
```Bash
sudo systemctl stop kasm
```
- Execute the database restore command
```bash
sudo /opt/kasm/[[release]]/bin/utils/db_restore -f /opt/kasm/backups/kasm_db_backup.tar -p /opt/kasm/[[release]]/
```
- Perform an upgrade of the database schema
If the database is a standalone remote database refer here for upgrade instructions. [Standalone Remote Database](../../tutorials/install/remote-database.mdx).
```bash
sudo /opt/kasm/[[release]]/bin/utils/db_upgrade -p /opt/kasm/[[release]]
```
- **Advanced**: Review the contents of the existing configs to ensure any custom docker settings are migrated to the new configuration.
```bash
diff /opt/kasm/[[previous_release]]/docker/docker-compose.yaml /opt/kasm/[[release]]/docker/docker-compose.yaml
```
- (Optional) Install the Kasm [[release]] default images for the platform
- With Kasm Workspaces 1.13.0 and newer the Kasm team recommends using the Workspaces Registry to install Workspaces rather than seeding the images during the installation.
- Seeding workspaces is still needed when doing an offline Kasm installation as the official Kasm Workspaces Registry will be unavailable.
- If doing an offline upgrade first extract the default image seed data from the workspace images tar.
For x86 (amd64) platforms:
```bash
tar xf --strip-components=1 -C /opt/kasm/[[release]]/conf/database/seed_data/ workspace_images/default_images_amd64.yaml
```
For ARM (arm64) platforms:
```bash
tar xf --strip-components=1 -C /opt/kasm/[[release]]/conf/database/seed_data/ workspace_images/default_images_arm64.yaml
```
For x86 (amd64) platforms:
```bash
sudo /opt/kasm/[[release]]/bin/utils/db_init -s /opt/kasm/[[release]]/conf/database/seed_data/default_images_amd64.yaml
```
For ARM (arm64) platforms:
```bash
sudo /opt/kasm/[[release]]/bin/utils/db_init -s /opt/kasm/[[release]]/conf/database/seed_data/default_images_arm64.yaml
```
- Start the Kasm services
```Bash
sudo systemctl start kasm
```
#### Upgrade Web App Server Role
- Stop existing Kasm Services
```Bash
sudo /opt/kasm/bin/stop
```
- Remove the kasm_share container
```Bash
sudo docker container rm kasm_share
```
- Download and extract the new installation media
```Bash
cd /tmp/ \
&& curl --fail-early \
-fO [[storage_url]]kasm_release_[[release]]-latest.tar.gz \
-fO [[storage_url]]kasm_release_[[release]]-latest.tar.gz.sha256sum \
&& sha256sum --check *.sha256sum \
&& tar -xf kasm_release_*-latest.tar.gz
```
When performing an offline upgrade please ensure that versions of docker and docker compose that meet the updated system requirements have been downloaded and installed see [System Requirements](../../explanations/system-requirements.mdx) for details.
- Install kasm from the release media downloaded in the prior steps.
- When performing an offline update add this flag `--offline-service `
```Bash
sudo bash kasm_release/install.sh -S app -D -q -Q
```
- Copy **manager_id** and **server_hostname** from the old configuration into the new
```bash
sudo /opt/kasm/bin/utils/yq_$(uname -m) -i '.server.server_hostname = load("/opt/kasm/[[previous_release]]/conf/app/api/api.app.config.yaml").server.server_hostname' /opt/kasm/[[release]]/conf/app/api/api.app.config.yaml
sudo /opt/kasm/bin/utils/yq_$(uname -m) -i '.manager.manager_id = load("/opt/kasm/[[previous_release]]/conf/app/api/api.app.config.yaml").manager.manager_id' /opt/kasm/[[release]]/conf/app/api/api.app.config.yaml
```
- **Advanced**: Review the contents of the existing configs to ensure any custom docker settings are migrated to the new configuration.
```bash
diff /opt/kasm/[[previous_release]]/docker/docker-compose.yaml /opt/kasm/[[release]]/docker/docker-compose.yaml
```
- Start the Kasm services
```Bash
sudo systemctl start kasm
```
#### Upgrade Agent Server Role
- Ensure all Kasm services are stopped
```Bash
sudo /opt/kasm/bin/stop
```
- Get the existing manager token for use in the subsequent commands.
```bash
sudo grep "token" /opt/kasm/[[previous_release]]/conf/app/agent/agent.app.config.yaml
```
When performing an offline upgrade please ensure that versions of docker and docker compose that meet the updated system requirements have been downloaded and installed see [System Requirements](../../explanations/system-requirements.mdx) for details.
- Install kasm.
**Standard Upgrade**
**Rolling**
```bash
cd /tmp \
&& curl --fail-early \
-fO [[storage_url]]kasm_release_[[release]]-latest.tar.gz \
-fO [[storage_url]]kasm_release_[[release]]-latest.tar.gz.sha256sum \
&& sha256sum --check *.sha256sum \
&& tar -xf kasm_release_[[release]]-latest.tar.gz \
&& sudo bash kasm_release/install.sh -S agent -D -p -m -M
```
**Initial Build**
```bash
cd /tmp \
&& curl --fail-early \
-fO [[storage_url]]kasm_release_[[release]].tar.gz \
-fO [[storage_url]]kasm_release_[[release]].tar.gz.sha256sum \
&& sha256sum --check *.sha256sum \
&& tar -xf kasm_release_[[release]].tar.gz \
&& sudo bash kasm_release/install.sh --use-static-images -S agent -D -p -m -M
```
**Offline Upgrade x86-64**
**Rolling**
```bash
cd /tmp \
&& curl --fail-early \
-fO [[storage_url]]kasm_release_[[release]]-latest.tar.gz \
-fO [[storage_url]]kasm_release_[[release]]-latest.tar.gz.sha256sum \
-fO [[storage_url]]kasm_release_service_images_amd64_[[release]]-latest.tar.gz \
-fO [[storage_url]]kasm_release_service_images_amd64_[[release]]-latest.tar.gz.sha256sum \
-fO [[storage_url]]kasm_release_network_plugin_images_amd64_[[network_plugin_release]]-latest.tar.gz \
-fO [[storage_url]]kasm_release_network_plugin_images_amd64_[[network_plugin_release]]-latest.tar.gz.sha256sum \
-fO [[storage_url]]kasm_release_logging_plugin_images_amd64_[[logging_plugin_release]]-latest.tar.gz \
-fO [[storage_url]]kasm_release_logging_plugin_images_amd64_[[logging_plugin_release]]-latest.tar.gz.sha256sum \
&& sha256sum --check *.sha256sum \
&& tar -xf kasm_release_[[release]]-latest.tar.gz \
&& sudo bash kasm_release/install.sh -S agent -D -p -m -M --offline-service /tmp/kasm_release_service_images_amd64_[[release]]-latest.tar.gz --offline-network-plugin /tmp/kasm_release_network_plugin_images_amd64_[[network_plugin_release]]-latest.tar.gz --offline-logger-plugin /tmp/kasm_release_logging_plugin_images_amd64_[[logging_plugin_release]]-latest.tar.gz
```
**Initial Build**
```bash
cd /tmp \
&& curl --fail-early \
-fO [[storage_url]]kasm_release_[[release]].tar.gz \
-fO [[storage_url]]kasm_release_[[release]].tar.gz.sha256sum \
-fO [[storage_url]]kasm_release_service_images_amd64_[[release]].tar.gz \
-fO [[storage_url]]kasm_release_service_images_amd64_[[release]].tar.gz.sha256sum \
-fO [[storage_url]]kasm_release_network_plugin_images_amd64_[[network_plugin_release]].tar.gz \
-fO [[storage_url]]kasm_release_network_plugin_images_amd64_[[network_plugin_release]].tar.gz.sha256sum \
-fO [[storage_url]]kasm_release_logging_plugin_images_amd64_[[logging_plugin_release]].tar.gz \
-fO [[storage_url]]kasm_release_logging_plugin_images_amd64_[[logging_plugin_release]].tar.gz.sha256sum \
&& sha256sum --check *.sha256sum \
&& tar -xf kasm_release_[[release]].tar.gz \
&& sudo bash kasm_release/install.sh --use-static-images -S agent -D -p -m -M --offline-service /tmp/kasm_release_service_images_amd64_[[release]].tar.gz --offline-network-plugin /tmp/kasm_release_network_plugin_images_amd64_[[network_plugin_release]].tar.gz --offline-logger-plugin /tmp/kasm_release_logging_plugin_images_amd64_[[logging_plugin_release]].tar.gz
```
**Offline Upgrade arm64**
**Rolling**
```bash
cd /tmp \
&& curl --fail-early \
-fO [[storage_url]]kasm_release_[[release]]-latest.tar.gz \
-fO [[storage_url]]kasm_release_[[release]]-latest.tar.gz.sha256sum \
-fO [[storage_url]]kasm_release_service_images_arm64_[[release]]-latest.tar.gz \
-fO [[storage_url]]kasm_release_service_images_arm64_[[release]]-latest.tar.gz.sha256sum \
-fO [[storage_url]]kasm_release_network_plugin_images_arm64_[[network_plugin_release]]-latest.tar.gz \
-fO [[storage_url]]kasm_release_network_plugin_images_arm64_[[network_plugin_release]]-latest.tar.gz.sha256sum \
-fO [[storage_url]]kasm_release_logging_plugin_images_arm64_[[logging_plugin_release]]-latest.tar.gz \
-fO [[storage_url]]kasm_release_logging_plugin_images_arm64_[[logging_plugin_release]]-latest.tar.gz.sha256sum \
&& sha256sum --check *.sha256sum \
&& tar -xf kasm_release_[[release]]-latest.tar.gz \
&& sudo bash kasm_release/install.sh -S agent -D -p -m -M --offline-service /tmp/kasm_release_service_images_arm64_[[release]]-latest.tar.gz --offline-network-plugin /tmp/kasm_release_network_plugin_images_arm64_[[network_plugin_release]]-latest.tar.gz --offline-logger-plugin /tmp/kasm_release_logging_plugin_images_arm64_[[logging_plugin_release]]-latest.tar.gz
```
**Initial Build**
```bash
cd /tmp \
&& curl --fail-early \
-fO [[storage_url]]kasm_release_[[release]].tar.gz \
-fO [[storage_url]]kasm_release_[[release]].tar.gz.sha256sum \
-fO [[storage_url]]kasm_release_service_images_arm64_[[release]].tar.gz \
-fO [[storage_url]]kasm_release_service_images_arm64_[[release]].tar.gz.sha256sum \
-fO [[storage_url]]kasm_release_network_plugin_images_arm64_[[network_plugin_release]].tar.gz \
-fO [[storage_url]]kasm_release_network_plugin_images_arm64_[[network_plugin_release]].tar.gz.sha256sum \
-fO [[storage_url]]kasm_release_logging_plugin_images_arm64_[[logging_plugin_release]].tar.gz \
-fO [[storage_url]]kasm_release_logging_plugin_images_arm64_[[logging_plugin_release]].tar.gz.sha256sum \
&& sha256sum --check *.sha256sum \
&& tar -xf kasm_release_[[release]].tar.gz \
&& sudo bash kasm_release/install.sh --use-static-images -S agent -D -p -m -M --offline-service /tmp/kasm_release_service_images_arm64_[[release]].tar.gz --offline-network-plugin /tmp/kasm_release_network_plugin_images_arm64_[[network_plugin_release]].tar.gz --offline-logger-plugin /tmp/kasm_release_logging_plugin_images_arm64_[[logging_plugin_release]].tar.gz
```
- Copy the server_id and the public_hostname properties from the old agent to the new
```bash
sudo /opt/kasm/bin/utils/yq_$(uname -m) -i '.agent.server_id = load("/opt/kasm/[[previous_release]]/conf/app/agent/agent.app.config.yaml").agent.server_id' /opt/kasm/[[release]]/conf/app/agent/agent.app.config.yaml
sudo /opt/kasm/bin/utils/yq_$(uname -m) -i '.agent.public_hostname = load("/opt/kasm/[[previous_release]]/conf/app/agent/agent.app.config.yaml").agent.public_hostname' /opt/kasm/[[release]]/conf/app/agent/agent.app.config.yaml
```
- Copy the auto-generated nginx configs for any sessions that may exist on the Agent
```bash
sudo cp /opt/kasm/[[previous_release]]/conf/nginx/containers.d/* /opt/kasm/[[release]]/conf/nginx/containers.d/
```
- **Advanced**: Review the contents of the existing configs to ensure any custom docker settings are migrated to the new configuration.
```bash
diff /opt/kasm/[[previous_release]]/docker/docker-compose.yaml /opt/kasm/[[release]]/docker/docker-compose.yaml
diff /opt/kasm/[[previous_release]]/conf/app/agent/agent.app.config.yaml /opt/kasm/[[release]]/conf/app/agent/agent.app.config.yaml
```
- Start the Kasm services
```Bash
sudo systemctl start kasm
```
- Verify the Agent Service is properly checking into the Manager Service. Log into the UI as an Administrator.
Select **Agents** and verify the Agent is listed with a **Last Reported** time of less than 1 minute.
If the agent has not checked in, it likely can’t resolve or connect to \[AGENT_HOSTNAME\]:443 . Inspect the logs for details.
```bash
sudo tail -f /opt/kasm/current/log/agent.log
```
#### (Optional) Install the Connection Proxy (Guac/rdp-gateway) Role(s)
The Connection Proxy role is new in Workspaces 1.12.0. This service is used to connect to VM/Hardware running RDP, VNC, or SSH.
If these capabilities are not needed, this role does not need to be installed.
Login to the Workspaces UI as an administrator. Retrieve the value of **Component Registration Token** from the Global
Settings.
- Download and extract the new installation media
```bash
cd /tmp/ \
&& curl --fail-early \
-fO [[storage_url]]kasm_release_[[release]]-latest.tar.gz \
-fO [[storage_url]]kasm_release_[[release]]-latest.tar.gz.sha256sum \
&& sha256sum --check *.sha256sum \
&& tar -xf kasm_release_*-latest.tar.gz
```
- Install the Connection Proxy role from the release media downloaded in the prior steps.
- When performing an offline update add these flags `--offline-workspaces --offline-service `
- Replace `` below with the **Component Registration Token**
```Bash
sudo bash kasm_release/install.sh --role guac --api-hostname [MANAGER_HOSTNAME] --public-hostname [CONNECTION_PROXY_HOSTNAME] --registration-token [SERVICE_REGISTRATION_TOKEN] -D
```
- Copy the id and the token properties from the old connection_proxy to the new
- The *token* field of *kasmguac.app.config.yaml* has been renamed to *auth_token* in the Kasm Workspaces 1.13.0 release
```bash
sudo /opt/kasm/bin/utils/yq_$(uname -m) -i '.kasmguac.id = load("/opt/kasm/[[previous_release]]/conf/app/guac/kasmguac.app.config.yaml").kasmguac.id' /opt/kasm/[[release]]/conf/app/guac/kasmguac.app.config.yaml
sudo /opt/kasm/bin/utils/yq_$(uname -m) -i '.api.auth_token = load("/opt/kasm/[[previous_release]]/conf/app/guac/kasmguac.app.config.yaml").api.auth_token' /opt/kasm/[[release]]/conf/app/guac/kasmguac.app.config.yaml
sudo /opt/kasm/bin/utils/yq_$(uname -m) -i '.api.public_jwt_cert = load("/opt/kasm/[[previous_release]]/conf/app/guac/kasmguac.app.config.yaml").api.public_jwt_cert' /opt/kasm/[[release]]/conf/app/guac/kasmguac.app.config.yaml
sudo /opt/kasm/bin/utils/yq_$(uname -m) -i 'del(.kasmguac.registration_token)' /opt/kasm/[[release]]/conf/app/guac/kasmguac.app.config.yaml
```
- Copy the id and the auth_token properties from the old rdp_gateway to the new
```bash
sudo /opt/kasm/bin/utils/yq_$(uname -m) -i '.api.auth_token = load("/opt/kasm/[[previous_release]]/conf/app/rdp_gateway/passthrough.app.config.yaml").api.auth_token' /opt/kasm/[[release]]/conf/app/rdp_gateway/passthrough.app.config.yaml
sudo /opt/kasm/bin/utils/yq_$(uname -m) -i '.rdp-gateway.id = load("/opt/kasm/[[previous_release]]/conf/app/rdp_gateway/passthrough.app.config.yaml").rdp-gateway.id' /opt/kasm/[[release]]/conf/app/rdp_gateway/passthrough.app.config.yaml
```
- Copy the id and the auth_token properties from the old rdp_https_gateway to the new
```bash
sudo /opt/kasm/bin/utils/yq_$(uname -m) -i '.api.auth_token = load("/opt/kasm/[[previous_release]]/conf/app/rdp_https_gateway/rdp_https_gateway.app.config.yaml").api.auth_token' /opt/kasm/[[release]]/conf/app/rdp_https_gateway/rdp_https_gateway.app.config.yaml
sudo /opt/kasm/bin/utils/yq_$(uname -m) -i '.rdp-gateway.id = load("/opt/kasm/[[previous_release]]/conf/app/rdp_https_gateway/rdp_https_gateway.app.config.yaml").rdp-gateway.id' /opt/kasm/[[release]]/conf/app/rdp_https_gateway/rdp_https_gateway.app.config.yaml
```
In Kasm Workspaces version 1.16.0 The Kasm RDP Gateway service was added, when upgrading from any Kasm Workspaces `version <= 1.15.0` to any Kasm Workspaces `version >= 1.16.0` please perform the below steps to register the new services:
- Set the registration_token for the rdp_gateway using the **Component Registration Token** retrieved from the UI earlier.
- Replace `` below with the **Component Registration Token**
```bash
sudo /opt/kasm/bin/utils/yq_$(uname -m) -i '.rdp-gateway.registration_token = ""' /opt/kasm/[[release]]/conf/app/rdp_gateway/passthrough.app.config.yaml
```
- Set the registration_token for the rdp_https_gateway using the **Component Registration Token** retrieved from the UI earlier.
- Replace `` below with the **Component Registration Token**
```bash
sudo /opt/kasm/bin/utils/yq_$(uname -m) -i '.rdp-gateway.registration_token = ""' /opt/kasm/[[release]]/conf/app/rdp_https_gateway/rdp_https_gateway.app.config.yaml
```
```Bash
sudo systemctl start kasm
```
### Upgrade Script
Since Kasm Workspaces version 1.11.0 an upgrade script is included with the installation package under kasm_release/upgrade.sh.
Before starting the upgrade process please ensure that the Web App servers are stopped. If left running there is a chance for database corruption on the Webb App servers
```sudo
sudo /opt/kasm/bin/stop
```
The upgrade script can be found in the installation package under kasm_release/upgrade.sh.
These instructions assume there are 3 servers with the app, db, and agent roles.
Login to the db server and execute:
**Standard Upgrade**
**Rolling**
```bash
cd /tmp \
&& curl --fail-early \
-fO [[storage_url]]kasm_release_[[release]]-latest.tar.gz \
-fO [[storage_url]]kasm_release_[[release]]-latest.tar.gz.sha256sum \
&& sha256sum --check *.sha256sum \
&& tar -xf kasm_release_[[release]]-latest.tar.gz \
&& sudo bash kasm_release/upgrade.sh --role db
```
**Initial Build**
```bash
cd /tmp \
&& curl --fail-early \
-fO [[storage_url]]kasm_release_[[release]].tar.gz \
-fO [[storage_url]]kasm_release_[[release]].tar.gz.sha256sum \
&& sha256sum --check *.sha256sum \
&& tar -xf kasm_release_[[release]].tar.gz \
&& sudo bash kasm_release/upgrade.sh --use-static-images --role db
```
**Offline Upgrade x86-64**
**Rolling**
```bash
cd /tmp \
&& curl --fail-early \
-fO [[storage_url]]kasm_release_[[release]]-latest.tar.gz \
-fO [[storage_url]]kasm_release_[[release]]-latest.tar.gz.sha256sum \
-fO [[storage_url]]kasm_release_service_images_amd64_[[release]]-latest.tar.gz \
-fO [[storage_url]]kasm_release_service_images_amd64_[[release]]-latest.tar.gz.sha256sum \
-fO [[storage_url]]kasm_release_workspace_images_amd64_[[release]]-latest.tar.gz \
-fO [[storage_url]]kasm_release_workspace_images_amd64_[[release]]-latest.tar.gz.sha256sum \
&& sha256sum --check *.sha256sum \
&& tar -xf kasm_release_[[release]]-latest.tar.gz \
&& sudo bash kasm_release/upgrade.sh --role db --offline-service /tmp/{{ amd_service_images_url.split('/') | last }}
```
**Initial Build**
```bash
cd /tmp \
&& curl --fail-early \
-fO [[storage_url]]kasm_release_[[release]].tar.gz \
-fO [[storage_url]]kasm_release_[[release]].tar.gz.sha256sum \
-fO [[storage_url]]kasm_release_service_images_amd64_[[release]].tar.gz \
-fO [[storage_url]]kasm_release_service_images_amd64_[[release]].tar.gz.sha256sum \
-fO [[storage_url]]kasm_release_workspace_images_amd64_[[release]].tar.gz \
-fO [[storage_url]]kasm_release_workspace_images_amd64_[[release]].tar.gz.sha256sum \
&& sha256sum --check *.sha256sum \
&& tar -xf kasm_release_[[release]].tar.gz \
&& sudo bash kasm_release/upgrade.sh --use-static-images --role db --offline-service /tmp/{{ amd_service_images_url.split('/') | last }}
```
**Offline Upgrade arm64**
**Rolling**
```bash
cd /tmp \
&& curl --fail-early \
-fO [[storage_url]]kasm_release_[[release]]-latest.tar.gz \
-fO [[storage_url]]kasm_release_[[release]]-latest.tar.gz.sha256sum \
-fO [[storage_url]]kasm_release_service_images_arm64_[[release]]-latest.tar.gz \
-fO [[storage_url]]kasm_release_service_images_arm64_[[release]]-latest.tar.gz.sha256sum \
-fO [[storage_url]]kasm_release_workspace_images_arm64_[[release]]-latest.tar.gz \
-fO [[storage_url]]kasm_release_workspace_images_arm64_[[release]]-latest.tar.gz.sha256sum \
&& sha256sum --check *.sha256sum \
&& tar -xf kasm_release_[[release]]-latest.tar.gz \
&& sudo bash kasm_release/upgrade.sh --role db --offline-service /tmp/{{ arm_service_images_url.split('/') | last }}
```
**Initial Build**
```bash
cd /tmp \
&& curl --fail-early \
-fO [[storage_url]]kasm_release_[[release]].tar.gz \
-fO [[storage_url]]kasm_release_[[release]].tar.gz.sha256sum \
-fO [[storage_url]]kasm_release_service_images_arm64_[[release]].tar.gz \
-fO [[storage_url]]kasm_release_service_images_arm64_[[release]].tar.gz.sha256sum \
-fO [[storage_url]]kasm_release_workspace_images_arm64_[[release]].tar.gz \
-fO [[storage_url]]kasm_release_workspace_images_arm64_[[release]].tar.gz.sha256sum \
&& sha256sum --check *.sha256sum \
&& tar -xf kasm_release_[[release]].tar.gz \
&& sudo bash kasm_release/upgrade.sh --use-static-images --role db --offline-service /tmp/{{ arm_service_images_url.split('/') | last }}
```
Login to the agent server and execute:
**Standard Upgrade**
**Rolling**
```bash
cd /tmp \
&& curl --fail-early \
-fO [[storage_url]]kasm_release_[[release]]-latest.tar.gz \
-fO [[storage_url]]kasm_release_[[release]]-latest.tar.gz.sha256sum \
&& sha256sum --check *.sha256sum \
&& tar -xf kasm_release_[[release]]-latest.tar.gz \
&& sudo bash kasm_release/upgrade.sh --role agent
```
**Initial Build**
```bash
cd /tmp \
&& curl --fail-early \
-fO [[storage_url]]kasm_release_[[release]].tar.gz \
-fO [[storage_url]]kasm_release_[[release]].tar.gz.sha256sum \
&& sha256sum --check *.sha256sum \
&& tar -xf kasm_release_[[release]].tar.gz \
&& sudo bash kasm_release/upgrade.sh --use-static-images --role agent
```
**Offline Upgrade x86-64**
**Rolling**
```bash
cd /tmp \
&& curl --fail-early \
-fO [[storage_url]]kasm_release_[[release]]-latest.tar.gz \
-fO [[storage_url]]kasm_release_[[release]]-latest.tar.gz.sha256sum \
-fO [[storage_url]]kasm_release_service_images_amd64_[[release]]-latest.tar.gz \
-fO [[storage_url]]kasm_release_service_images_amd64_[[release]]-latest.tar.gz.sha256sum \
-fO [[storage_url]]kasm_release_workspace_images_amd64_[[release]]-latest.tar.gz \
-fO [[storage_url]]kasm_release_workspace_images_amd64_[[release]]-latest.tar.gz.sha256sum \
-fO [[storage_url]]kasm_release_network_plugin_images_amd64_[[network_plugin_release]]-latest.tar.gz \
-fO [[storage_url]]kasm_release_network_plugin_images_amd64_[[network_plugin_release]]-latest.tar.gz.sha256sum \
-fO [[storage_url]]kasm_release_logging_plugin_images_amd64_[[logging_plugin_release]]-latest.tar.gz \
-fO [[storage_url]]kasm_release_logging_plugin_images_amd64_[[logging_plugin_release]]-latest.tar.gz.sha256sum \
&& sha256sum --check *.sha256sum \
&& tar -xf kasm_release_[[release]]-latest.tar.gz \
&& sudo bash kasm_release/upgrade.sh --role agent --offline-service /tmp/{{ amd_service_images_url.split('/') | last }} --offline-network-plugin /tmp/kasm_release_network_plugin_images_amd64_[[network_plugin_release]]-latest.tar.gz --offline-logger-plugin /tmp/kasm_release_logging_plugin_images_amd64_[[logging_plugin_release]]-latest.tar.gz
```
**Initial Build**
```bash
cd /tmp \
&& curl --fail-early \
-fO [[storage_url]]kasm_release_[[release]].tar.gz \
-fO [[storage_url]]kasm_release_[[release]].tar.gz.sha256sum \
-fO [[storage_url]]kasm_release_service_images_amd64_[[release]].tar.gz \
-fO [[storage_url]]kasm_release_service_images_amd64_[[release]].tar.gz.sha256sum \
-fO [[storage_url]]kasm_release_workspace_images_amd64_[[release]].tar.gz \
-fO [[storage_url]]kasm_release_workspace_images_amd64_[[release]].tar.gz.sha256sum \
-fO [[storage_url]]kasm_release_network_plugin_images_amd64_[[network_plugin_release]].tar.gz \
-fO [[storage_url]]kasm_release_network_plugin_images_amd64_[[network_plugin_release]].tar.gz.sha256sum \
-fO [[storage_url]]kasm_release_logging_plugin_images_amd64_[[logging_plugin_release]].tar.gz \
-fO [[storage_url]]kasm_release_logging_plugin_images_amd64_[[logging_plugin_release]].tar.gz.sha256sum \
&& sha256sum --check *.sha256sum \
&& tar -xf kasm_release_[[release]].tar.gz \
&& sudo bash kasm_release/upgrade.sh --use-static-images --role agent --offline-service /tmp/{{ amd_service_images_url.split('/') | last }} --offline-network-plugin /tmp/kasm_release_network_plugin_images_amd64_[[network_plugin_release]].tar.gz --offline-logger-plugin /tmp/kasm_release_logging_plugin_images_amd64_[[logging_plugin_release]].tar.gz
```
**Offline Upgrade arm64**
**Rolling**
```bash
cd /tmp \
&& curl --fail-early \
-fO [[storage_url]]kasm_release_[[release]]-latest.tar.gz \
-fO [[storage_url]]kasm_release_[[release]]-latest.tar.gz.sha256sum \
-fO [[storage_url]]kasm_release_service_images_arm64_[[release]]-latest.tar.gz \
-fO [[storage_url]]kasm_release_service_images_arm64_[[release]]-latest.tar.gz.sha256sum \
-fO [[storage_url]]kasm_release_workspace_images_arm64_[[release]]-latest.tar.gz \
-fO [[storage_url]]kasm_release_workspace_images_arm64_[[release]]-latest.tar.gz.sha256sum \
-fO [[storage_url]]kasm_release_network_plugin_images_arm64_[[network_plugin_release]]-latest.tar.gz \
-fO [[storage_url]]kasm_release_network_plugin_images_arm64_[[network_plugin_release]]-latest.tar.gz.sha256sum \
-fO [[storage_url]]kasm_release_logging_plugin_images_arm64_[[logging_plugin_release]]-latest.tar.gz \
-fO [[storage_url]]kasm_release_logging_plugin_images_arm64_[[logging_plugin_release]]-latest.tar.gz.sha256sum \
&& sha256sum --check *.sha256sum \
&& tar -xf kasm_release_[[release]]-latest.tar.gz \
&& sudo bash kasm_release/upgrade.sh --role agent --offline-service /tmp/{{ arm_service_images_url.split('/') | last }} --offline-network-plugin /tmp/kasm_release_network_plugin_images_arm64_[[network_plugin_release]]-latest.tar.gz --offline-logger-plugin /tmp/kasm_release_logging_plugin_images_arm64_[[logging_plugin_release]]-latest.tar.gz
```
**Initial Build**
```bash
cd /tmp \
&& curl --fail-early \
-fO [[storage_url]]kasm_release_[[release]].tar.gz \
-fO [[storage_url]]kasm_release_[[release]].tar.gz.sha256sum \
-fO [[storage_url]]kasm_release_service_images_arm64_[[release]].tar.gz \
-fO [[storage_url]]kasm_release_service_images_arm64_[[release]].tar.gz.sha256sum \
-fO [[storage_url]]kasm_release_workspace_images_arm64_[[release]].tar.gz \
-fO [[storage_url]]kasm_release_workspace_images_arm64_[[release]].tar.gz.sha256sum \
-fO [[storage_url]]kasm_release_network_plugin_images_arm64_[[network_plugin_release]].tar.gz \
-fO [[storage_url]]kasm_release_network_plugin_images_arm64_[[network_plugin_release]].tar.gz.sha256sum \
-fO [[storage_url]]kasm_release_logging_plugin_images_arm64_[[logging_plugin_release]].tar.gz \
-fO [[storage_url]]kasm_release_logging_plugin_images_arm64_[[logging_plugin_release]].tar.gz.sha256sum \
&& sha256sum --check *.sha256sum \
&& tar -xf kasm_release_[[release]].tar.gz \
&& sudo bash kasm_release/upgrade.sh --use-static-images --role agent --offline-service /tmp/{{ arm_service_images_url.split('/') | last }} --offline-network-plugin /tmp/kasm_release_network_plugin_images_arm64_[[network_plugin_release]].tar.gz --offline-logger-plugin /tmp/kasm_release_logging_plugin_images_arm64_[[logging_plugin_release]].tar.gz
```
Login to the Web App server and execute:
**Standard Upgrade**
**Rolling**
```bash
cd /tmp \
&& curl --fail-early \
-fO [[storage_url]]kasm_release_[[release]]-latest.tar.gz \
-fO [[storage_url]]kasm_release_[[release]]-latest.tar.gz.sha256sum \
&& sha256sum --check *.sha256sum \
&& tar -xf kasm_release_[[release]]-latest.tar.gz \
&& sudo bash kasm_release/upgrade.sh --role app
```
**Initial Build**
```bash
cd /tmp \
&& curl --fail-early \
-fO [[storage_url]]kasm_release_[[release]].tar.gz \
-fO [[storage_url]]kasm_release_[[release]].tar.gz.sha256sum \
&& sha256sum --check *.sha256sum \
&& tar -xf kasm_release_[[release]].tar.gz \
&& sudo bash kasm_release/upgrade.sh --use-static-images --role app
```
**Offline Upgrade x86-64**
**Rolling**
```bash
cd /tmp \
&& curl --fail-early \
-fO [[storage_url]]kasm_release_[[release]]-latest.tar.gz \
-fO [[storage_url]]kasm_release_[[release]]-latest.tar.gz.sha256sum \
-fO [[storage_url]]kasm_release_service_images_amd64_[[release]]-latest.tar.gz \
-fO [[storage_url]]kasm_release_service_images_amd64_[[release]]-latest.tar.gz.sha256sum \
&& sha256sum --check *.sha256sum \
&& tar -xf kasm_release_[[release]]-latest.tar.gz \
&& sudo bash kasm_release/upgrade.sh --role app --offline-service /tmp/{{ amd_service_images_url.split('/') | last }}
```
**Initial Build**
```bash
cd /tmp \
&& curl --fail-early \
-fO [[storage_url]]kasm_release_[[release]].tar.gz \
-fO [[storage_url]]kasm_release_[[release]].tar.gz.sha256sum \
-fO [[storage_url]]kasm_release_service_images_amd64_[[release]].tar.gz \
-fO [[storage_url]]kasm_release_service_images_amd64_[[release]].tar.gz.sha256sum \
&& sha256sum --check *.sha256sum \
&& tar -xf kasm_release_[[release]].tar.gz \
&& sudo bash kasm_release/upgrade.sh --use-static-images --role app --offline-service /tmp/{{ amd_service_images_url.split('/') | last }}
```
**Offline Upgrade arm64**
**Rolling**
```bash
cd /tmp \
&& curl --fail-early \
-fO [[storage_url]]kasm_release_[[release]]-latest.tar.gz \
-fO [[storage_url]]kasm_release_[[release]]-latest.tar.gz.sha256sum \
-fO [[storage_url]]kasm_release_service_images_arm64_[[release]]-latest.tar.gz \
-fO [[storage_url]]kasm_release_service_images_arm64_[[release]]-latest.tar.gz.sha256sum \
&& sha256sum --check *.sha256sum \
&& tar -xf kasm_release_[[release]]-latest.tar.gz \
&& sudo bash kasm_release/upgrade.sh --role app --offline-service /tmp/{{ arm_service_images_url.split('/') | last }}
```
**Initial Build**
```bash
cd /tmp \
&& curl --fail-early \
-fO [[storage_url]]kasm_release_[[release]].tar.gz \
-fO [[storage_url]]kasm_release_[[release]].tar.gz.sha256sum \
-fO [[storage_url]]kasm_release_service_images_arm64_[[release]].tar.gz \
-fO [[storage_url]]kasm_release_service_images_arm64_[[release]].tar.gz.sha256sum \
&& sha256sum --check *.sha256sum \
&& tar -xf kasm_release_[[release]].tar.gz \
&& sudo bash kasm_release/upgrade.sh --use-static-images --role app --offline-service /tmp/{{ arm_service_images_url.split('/') | last }}
```
Login to the connection proxy server and execute:
The **Component Registration Token** can be obtained by viewing its field in the Kasm Workspaces Deployment's [Global Server Settings](../../reference/settings.mdx#authentication)
**Standard Upgrade**
**Rolling**
```bash
cd /tmp \
&& curl --fail-early \
-fO [[storage_url]]kasm_release_[[release]]-latest.tar.gz \
-fO [[storage_url]]kasm_release_[[release]]-latest.tar.gz.sha256sum \
&& sha256sum --check *.sha256sum \
&& tar -xf kasm_release_[[release]]-latest.tar.gz \
&& sudo bash kasm_release/upgrade.sh --role guac --registration-token [COMPONENT_REGISTRATION_TOKEN]
```
**Initial Build**
```bash
cd /tmp \
&& curl --fail-early \
-fO [[storage_url]]kasm_release_[[release]].tar.gz \
-fO [[storage_url]]kasm_release_[[release]].tar.gz.sha256sum \
&& sha256sum --check *.sha256sum \
&& tar -xf kasm_release_[[release]].tar.gz \
&& sudo bash kasm_release/upgrade.sh --use-static-images --role guac --registration-token [COMPONENT_REGISTRATION_TOKEN]
```
**Offline Upgrade x86-64**
**Rolling**
```bash
cd /tmp \
&& curl --fail-early \
-fO [[storage_url]]kasm_release_[[release]]-latest.tar.gz \
-fO [[storage_url]]kasm_release_[[release]]-latest.tar.gz.sha256sum \
-fO [[storage_url]]kasm_release_service_images_amd64_[[release]]-latest.tar.gz \
-fO [[storage_url]]kasm_release_service_images_amd64_[[release]]-latest.tar.gz.sha256sum \
&& sha256sum --check *.sha256sum \
&& tar -xf kasm_release_[[release]]-latest.tar.gz \
&& sudo bash kasm_release/upgrade.sh --role guac --registration-token [COMPONENT_REGISTRATION_TOKEN] --offline-service /tmp/{{ amd_service_images_url.split('/') | last }}
```
**Initial Build**
```bash
cd /tmp \
&& curl --fail-early \
-fO [[storage_url]]kasm_release_[[release]].tar.gz \
-fO [[storage_url]]kasm_release_[[release]].tar.gz.sha256sum \
-fO [[storage_url]]kasm_release_service_images_amd64_[[release]].tar.gz \
-fO [[storage_url]]kasm_release_service_images_amd64_[[release]].tar.gz.sha256sum \
&& sha256sum --check *.sha256sum \
&& tar -xf kasm_release_[[release]].tar.gz \
&& sudo bash kasm_release/upgrade.sh --use-static-images --role guac --registration-token [COMPONENT_REGISTRATION_TOKEN] --offline-service /tmp/{{ amd_service_images_url.split('/') | last }}
```
**Offline Upgrade arm64**
**Rolling**
```bash
cd /tmp \
&& curl --fail-early \
-fO [[storage_url]]kasm_release_[[release]]-latest.tar.gz \
-fO [[storage_url]]kasm_release_[[release]]-latest.tar.gz.sha256sum \
-fO [[storage_url]]kasm_release_service_images_arm64_[[release]]-latest.tar.gz \
-fO [[storage_url]]kasm_release_service_images_arm64_[[release]]-latest.tar.gz.sha256sum \
&& sha256sum --check *.sha256sum \
&& tar -xf kasm_release_[[release]]-latest.tar.gz \
&& sudo bash kasm_release/upgrade.sh --role guac --registration-token [COMPONENT_REGISTRATION_TOKEN] --offline-service /tmp/{{ amd_service_images_url.split('/') | last }}
```
**Initial Build**
```bash
cd /tmp \
&& curl --fail-early \
-fO [[storage_url]]kasm_release_[[release]].tar.gz \
-fO [[storage_url]]kasm_release_[[release]].tar.gz.sha256sum \
-fO [[storage_url]]kasm_release_service_images_arm64_[[release]].tar.gz \
-fO [[storage_url]]kasm_release_service_images_arm64_[[release]].tar.gz.sha256sum \
&& sha256sum --check *.sha256sum \
&& tar -xf kasm_release_[[release]].tar.gz \
&& sudo bash kasm_release/upgrade.sh --use-static-images --role guac --registration-token [COMPONENT_REGISTRATION_TOKEN] --offline-service /tmp/{{ amd_service_images_url.split('/') | last }}
```
Login to the dedicated proxy server and execute:
In this example we assume the proxy domain is proxy.example.com and the Web App hosting the API server is located at workspaces.example.com.
**Standard Upgrade**
**Rolling**
```bash
cd /tmp \
&& curl --fail-early \
-fO [[storage_url]]kasm_release_[[release]]-latest.tar.gz \
-fO [[storage_url]]kasm_release_[[release]]-latest.tar.gz.sha256sum \
&& sha256sum --check *.sha256sum \
&& tar -xf kasm_release_[[release]]-latest.tar.gz \
&& sudo bash kasm_release/upgrade.sh --role proxy --api-hostname workspaces.kasmweb.com
```
**Initial Build**
```bash
cd /tmp \
&& curl --fail-early \
-fO [[storage_url]]kasm_release_[[release]].tar.gz \
-fO [[storage_url]]kasm_release_[[release]].tar.gz.sha256sum \
&& sha256sum --check *.sha256sum \
&& tar -xf kasm_release_[[release]].tar.gz \
&& sudo bash kasm_release/upgrade.sh --use-static-images --role proxy --api-hostname workspaces.kasmweb.com
```
**Offline Upgrade x86-64**
**Rolling**
```bash
cd /tmp \
&& curl --fail-early \
-fO [[storage_url]]kasm_release_[[release]]-latest.tar.gz \
-fO [[storage_url]]kasm_release_[[release]]-latest.tar.gz.sha256sum \
-fO [[storage_url]]kasm_release_service_images_amd64_[[release]]-latest.tar.gz \
-fO [[storage_url]]kasm_release_service_images_amd64_[[release]]-latest.tar.gz.sha256sum \
&& sha256sum --check *.sha256sum \
&& tar -xf kasm_release_[[release]]-latest.tar.gz \
&& sudo bash kasm_release/upgrade.sh --role proxy --api-hostname workspaces.kasmweb.com --offline-service /tmp/{{ amd_service_images_url.split('/') | last }}
```
**Initial Build**
```bash
cd /tmp \
&& curl --fail-early \
-fO [[storage_url]]kasm_release_[[release]].tar.gz \
-fO [[storage_url]]kasm_release_[[release]].tar.gz.sha256sum \
-fO [[storage_url]]kasm_release_service_images_amd64_[[release]].tar.gz \
-fO [[storage_url]]kasm_release_service_images_amd64_[[release]].tar.gz.sha256sum \
&& sha256sum --check *.sha256sum \
&& tar -xf kasm_release_[[release]].tar.gz \
&& sudo bash kasm_release/upgrade.sh --use-static-images --role proxy --api-hostname workspaces.kasmweb.com --offline-service /tmp/{{ amd_service_images_url.split('/') | last }}
```
**Offline Upgrade arm64**
**Rolling**
```bash
cd /tmp \
&& curl --fail-early \
-fO [[storage_url]]kasm_release_[[release]]-latest.tar.gz \
-fO [[storage_url]]kasm_release_[[release]]-latest.tar.gz.sha256sum \
-fO [[storage_url]]kasm_release_service_images_arm64_[[release]]-latest.tar.gz \
-fO [[storage_url]]kasm_release_service_images_arm64_[[release]]-latest.tar.gz.sha256sum \
&& sha256sum --check *.sha256sum \
&& tar -xf kasm_release_[[release]]-latest.tar.gz \
&& sudo bash kasm_release/upgrade.sh --role proxy --api-hostname workspaces.kasmweb.com --offline-service /tmp/{{ arm_service_images_url.split('/') | last }}
```
**Initial Build**
```bash
cd /tmp \
&& curl --fail-early \
-fO [[storage_url]]kasm_release_[[release]].tar.gz \
-fO [[storage_url]]kasm_release_[[release]].tar.gz.sha256sum \
-fO [[storage_url]]kasm_release_service_images_arm64_[[release]].tar.gz \
-fO [[storage_url]]kasm_release_service_images_arm64_[[release]].tar.gz.sha256sum \
&& sha256sum --check *.sha256sum \
&& tar -xf kasm_release_[[release]].tar.gz \
&& sudo bash kasm_release/upgrade.sh --use-static-images --role proxy --api-hostname workspaces.kasmweb.com --offline-service /tmp/{{ arm_service_images_url.split('/') | last }}
```
Here are the available helper flags for the upgrade.sh script:
| Flag | Description |
|:-------------------------------------|:----------------------------------------------------------------------------|
| `-h` or `--help` | Display this help menu |
| `-L` or `--proxy-port` | Default Proxy Listening Port |
| `-s` or `--offline-service` | Path to the tar.gz service images offline installer |
| `-x` or `--offline-network-plugin` | Path to the tar.gz plugin images offline installer |
| `-S` or `--role` | Role to Upgrade: `[app|db|agent|remote_db|guac|proxy]` |
| `-p` or `--public-hostname` | Agent/Component `