Banners
Overview
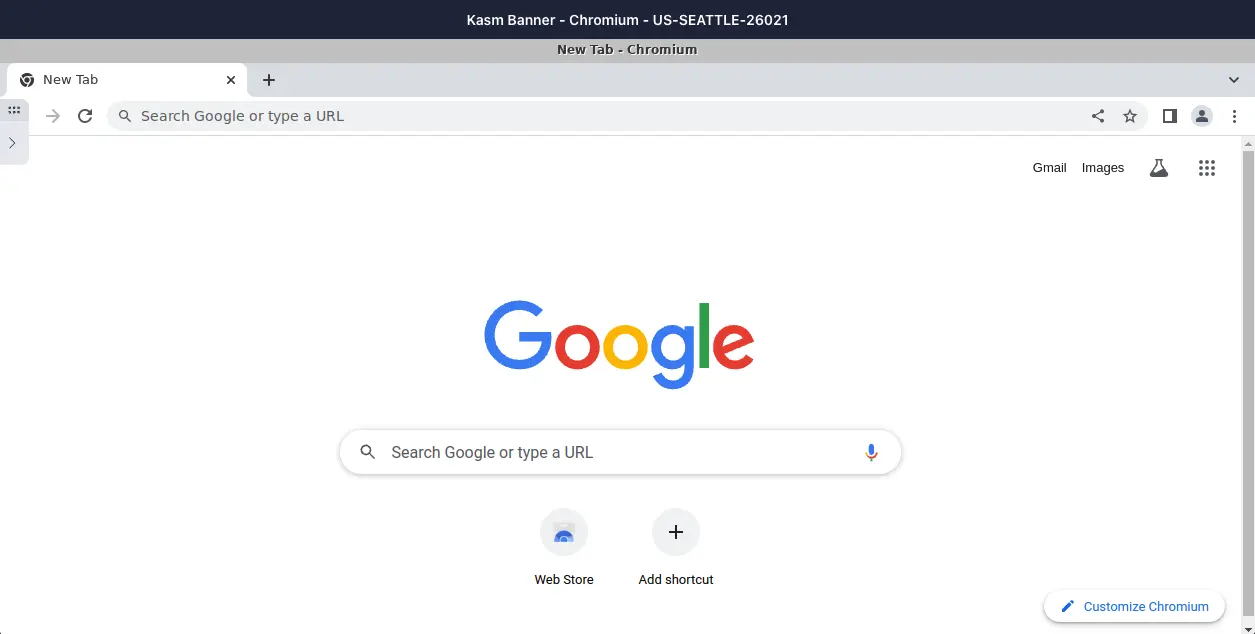
Users who work across many workspaces can lose track of where they are or what egress path a session uses. This guide configures session banners that place an overt visual marker on each workspace. You create a banner, customize its borders and text, and apply it through group or workspace settings. As a result, users immediately recognize their context, and your organization can enforce classification markings such as restricted-handling labels.
Prerequisites
Before you begin, confirm the following:
- Administrator access to the Kasm Workspaces deployment, with permission to manage banners, groups, and workspace settings.
- A clear idea of the banner appearance and text your organization requires, including any classification or egress information to display.
- For egress variables, an existing egress configuration. For details, see the egress documentation.
Solution approach
This guide progresses through the following phases:
- Create a banner in the visual editor.
- Configure the border and text.
- Set close and edit behavior.
- Apply the banner to a group or workspace.
Detailed steps
Create a banner
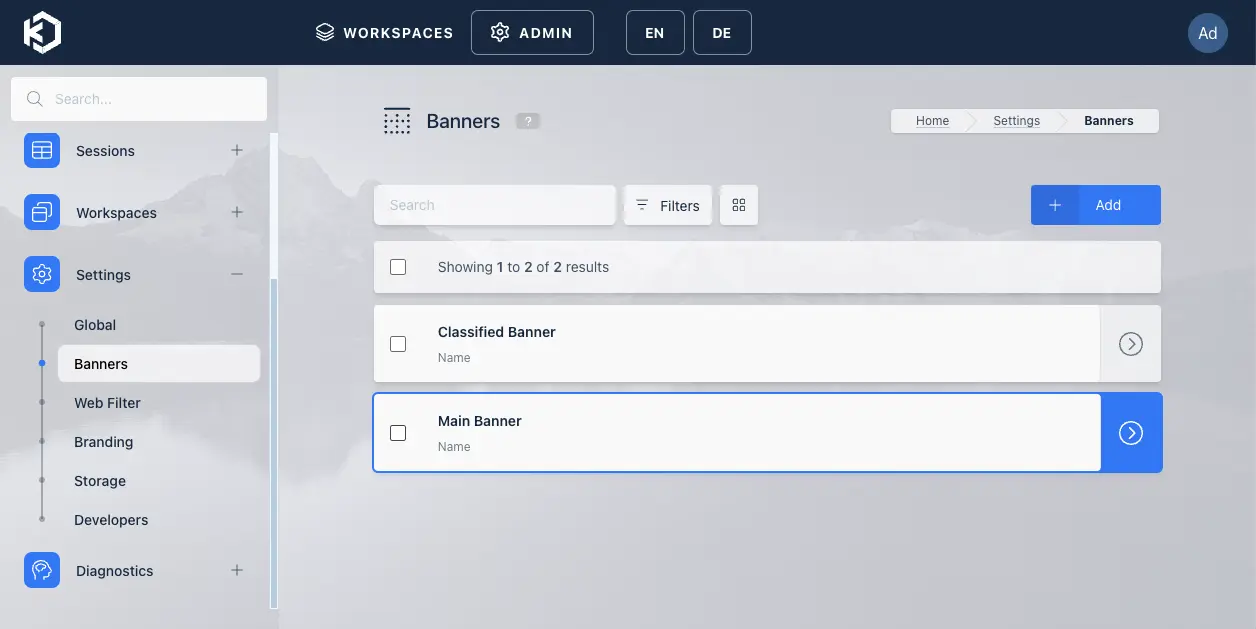
- In the Kasm Workspaces UI, go to Settings > Banners.
- Click to create a new banner, or select an existing banner to edit it.
The banner list shows every banner defined in the deployment.
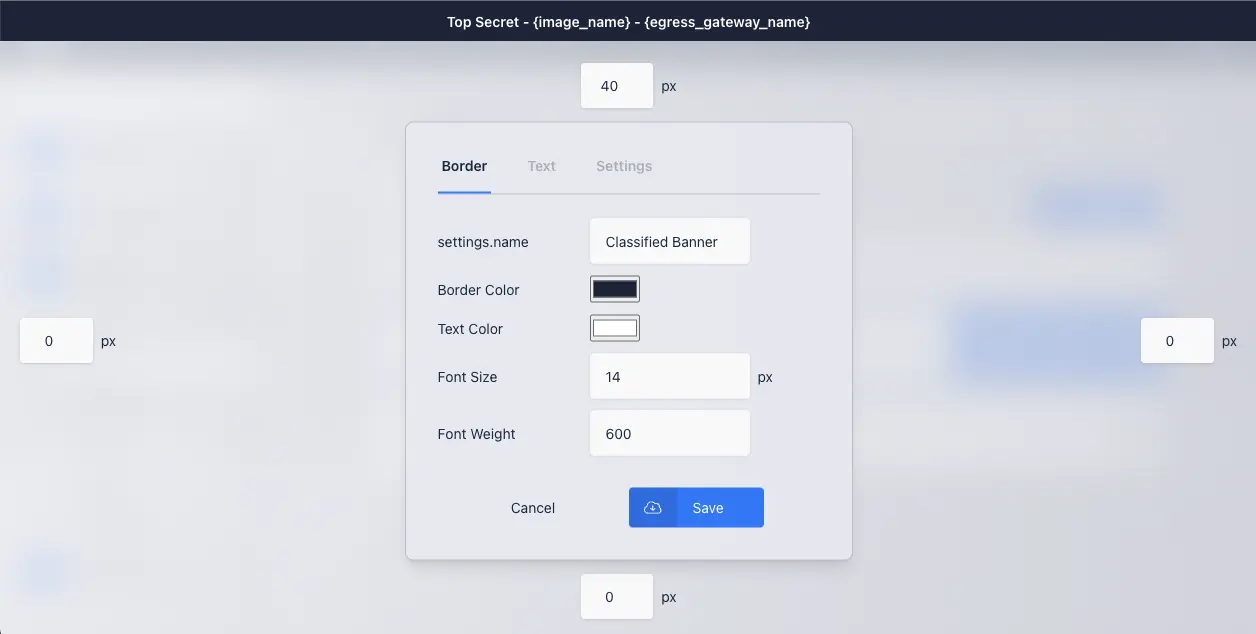
Creating or editing a banner opens a visual editor. The editor previews how the banner looks as you configure it. The boxes around the outside set the border width for each side individually. When the top or bottom border is greater than 0, Kasm displays the banner text in that area. When the left or right border is greater than 0, Kasm displays a plain border on that side.
Configure the border
Use the following properties to name the banner and define its appearance.
| Property | Description |
|---|---|
| Name | The name of the banner. This name appears when you select a banner on workspaces and group settings. |
| Border Color | This opens a color picker to select the border color. Enter hex values by clicking on the arrows next to the RGB value. |
| Text Color | This opens a color picker to select the text color. Enter hex values by clicking on the arrows next to the RGB value. |
| Font Size | The size of the text in pixels. |
| Font Weight | An integer for the HTML font weight. Valid values are 100 through 900 in 100 increments, where 100 is the thinnest and 900 the thickest. |
Configure the text
The text section defines what Kasm displays in the top border, the bottom border, or both. Built-in variables appear under the text area. Clicking a variable inserts it at the end of the current text.
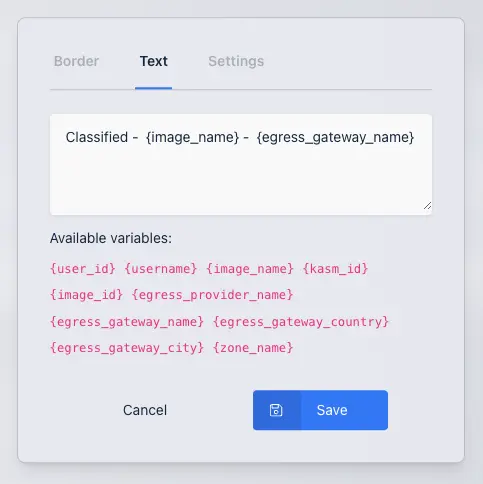
The following variables resolve to live session values when the banner displays.
| Variable | Description |
|---|---|
{user_id} | The currently logged-in user's unique UUID. |
{username} | The currently logged-in user's username. |
{image_name} | The workspace's display name, for example Chromium. |
{image_id} | The workspace's UUID. |
{kasm_id} | The UUID that identifies the specific session. |
{egress_provider_name} | The name of the egress provider used in the session, if any, for example PureVPN. |
{egress_gateway_name} | The name of the specific gateway used, if any, for example US-ATLANTA-16158. |
{egress_gateway_country} | The country egress is routed through. This is usually the country's 2-character code, such as US or CA, but reflects whatever is set in the country field for the gateway. |
{egress_gateway_city} | The city egress is routed through, such as New York. |
{zone_name} | The name of the zone used, for example default. |
Configure close and edit behavior
The following settings control how much control end users have over the banner.
| Property | Description |
|---|---|
| Allow close | This allows end users to close the banner. Closing the banner is remembered for the life of the session. |
| Allow edit | This allows an end user to change what information the banner displays by clicking on the text. An option resets the text back to the default. The text the user chooses is also remembered for the life of the session. |
Apply the banner to a group
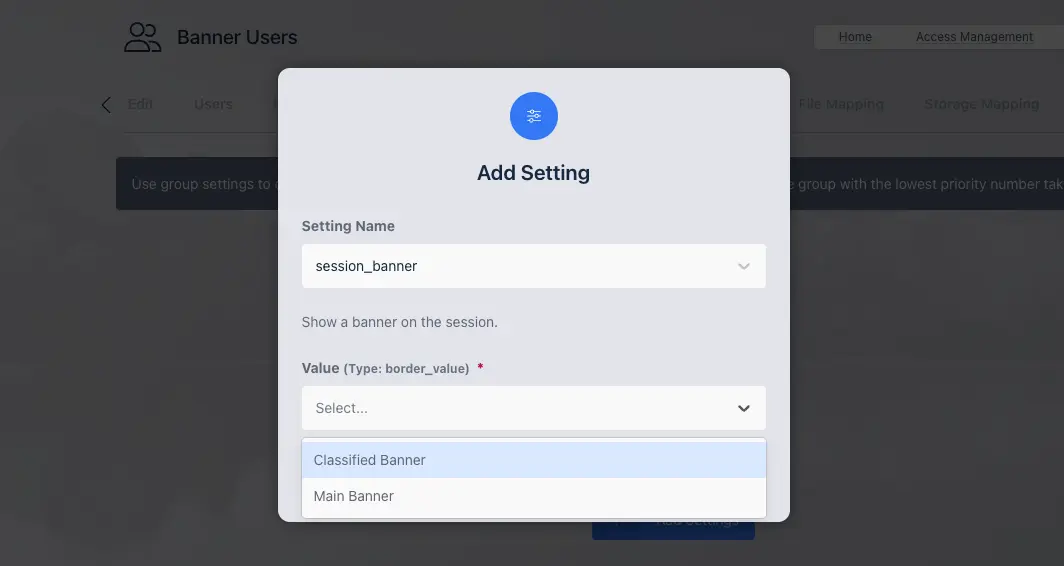
Apply a banner to a group by adding a group setting:
- Go to the group you want to add a banner to, or create a new group.
- Open Settings and click Add Settings.
- Enter session_banner into the setting name.
- Select the name of the banner you wish to apply.
Apply the banner to a workspace
Workspace settings take precedence over group settings. The option is under the Other Options category and is set to Inherit by default. With Inherit, the workspace applies a banner only when a group sets one. The other options are Force Disabled, which ensures no banner displays, or selecting a specific banner from the list.

Common troubleshooting steps
- The banner text does not appear. Confirm that the top or bottom border width is greater than 0. Kasm displays text only in a top or bottom border that has a nonzero width.
- No banner displays on the workspace. Check the workspace setting under Other Options. A setting of Force Disabled suppresses any banner, and Inherit displays a banner only when a group sets one.
- A group banner is not applied. Confirm that the workspace setting is Inherit rather than Force Disabled or a different specific banner. Workspace settings take precedence over group settings.
- An egress variable resolves to an empty value. Egress variables such as
{egress_provider_name}and{egress_gateway_name}resolve only when the session uses an egress configuration. Confirm that egress is configured for the session. - The group setting has no effect. Confirm that the setting name is exactly session_banner and that a banner is selected for the value.