VPN sidecar containers
Overview
Some Kasm Workspaces sessions need to reach a remote network or change their egress location through a VPN. Installing VPN tooling into each desktop image requires broad network permissions and becomes hard to maintain. The recommended approach runs a separate VPN container alongside Kasm Workspaces and forces selected Workspace traffic through it with a Docker Exec Config. This guide deploys that sidecar three ways, routes Workspace traffic through it, and verifies the connection. Each approach takes about 10 minutes.
Prerequisites
Before you begin, confirm the following:
- Administrator access to the Kasm Workspaces deployment, with permission to create and clone Workspaces.
- Shell access to the Docker host running Kasm Workspaces, or to the Agent Server in a multi-server deployment.
- The connection material for your chosen approach: an OpenVPN endpoint, a vendor VPN token, or a Tailscale account.
Solution approach
This guide presents three independent approaches to the sidecar. Choose the one that matches your VPN:
- A standalone OpenVPN setup with a self-hosted server and a custom client container.
- A vendor VPN container, shown with NordVPN.
- Tailscale for zero-configuration mesh networking.
Each approach follows the same pattern: deploy the sidecar container, route Workspace traffic through it, then test the connection.
Detailed steps
Option 1: create a standalone OpenVPN setup
This approach uses an off-the-shelf OpenVPN container for the server, on the assumption that most users already have an OpenVPN endpoint available. The example then builds a custom client container to act as the sidecar.
The OpenVPN server
This example uses kylemanna/openvpn to spin up an endpoint quickly on a remote server. Run the following commands to deploy the server and write a usable client config file:
sudo docker volume create --name Kasm_vpn
sudo docker run -v Kasm_vpn:/etc/openvpn --rm kylemanna/openvpn ovpn_genconfig -u udp://IP_OR_HOSTNAME
sudo docker run -v Kasm_vpn:/etc/openvpn --rm -it kylemanna/openvpn ovpn_initpki
sudo docker run -v Kasm_vpn:/etc/openvpn -d -p 1194:1194/udp --cap-add=NET_ADMIN kylemanna/openvpn
sudo docker run -v Kasm_vpn:/etc/openvpn --rm -it kylemanna/openvpn easyrsa build-client-full Kasm nopass
sudo docker run -v Kasm_vpn:/etc/openvpn --rm kylemanna/openvpn ovpn_getclient Kasm > Kasm.ovpn
Substitute IP_OR_HOSTNAME with the actual IP or hostname of the server. After you fill out the prompts to password-protect the certificates, the Kasm.ovpn configuration file is written to disk. The VPN sidecar client uses this file to connect.
The OpenVPN sidecar container
Build a custom Docker container to act as the VPN sidecar on the Kasm Workspaces host.
mkdir openvpn-client
cd openvpn-client
mkdir root
Create the Dockerfile:
FROM debian:latest

RUN apt update && \
    apt install -y \
    iptables \
    openvpn && \
    apt clean

# add local files
COPY /root /

VOLUME [ "/vpn/config"]
ENTRYPOINT [ "/entrypoint.sh"]
Create the custom root/entrypoint.sh:
#! /bin/sh

# create tun device
if [ ! -c /dev/net/tun ]; then
  mkdir -p /dev/net
  mknod /dev/net/tun c 10 200
fi

# Enable devices MASQUERADE mode
iptables -t nat -A POSTROUTING -o tun+ -j MASQUERADE

# start vpn client
openvpn --config /vpn/config/${VPN_CONFIG}
Make the entrypoint executable:
chmod +x root/entrypoint.sh
The directory structure should look like this:
openvpn-client/
├─ root/
│  ├─ entrypoint.sh
├─ Dockerfile
Build the container:
sudo docker build -t openvpn-client .
On the Docker host running Kasm Workspaces, or the Agent Server in a multi-server deployment, create a custom Docker network:
sudo docker network create \
  --driver=bridge \
  --opt icc=true \
  --subnet=172.20.0.0/16 \
  vpn-1
Navigate to the folder containing the Kasm.ovpn config file and run the container:
sudo docker run -d \
  --cap-add NET_ADMIN \
  --name open-vpn \
  --net vpn-1 \
  --ip 172.20.0.2 \
  -e VPN_CONFIG=Kasm.ovpn \
  -v $(pwd):/vpn/config \
  --restart unless-stopped \
  openvpn-client
Route Workspace traffic through the sidecar
Login to the Workspaces web interface and click on "Workspaces -> Workspaces" from the Admin tab:

Now select the arrow button next to the Workspace to be modified to use this network and select "Clone":
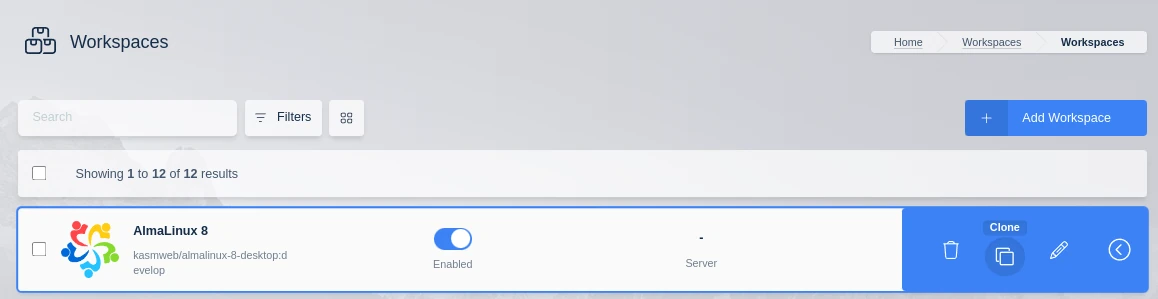
This example will be modifying a AlmaLinux 8 desktop Workspace.
First rename the Friendly Name to append that this is a special VPN enabled container AlmaLinux 8 - VPN.
For some configurations it may be necessary to populate the DNS server addresses of the container. This will be indicated by DNS resolution failure inside the container.
This can be done by modifying the Docker Run Config Override (JSON) and adding DNS server entries (This workspace already had the "hostname": "kasm" populated in this field):
{
  "dns": [
    "8.8.8.8",
    "8.8.4.4"
  ]
}
Here the public Google DNS servers are used, but these can be any DNS servers.
Next change the Docker Exec Config (JSON) to:
{
  "first_launch":{
    "user":"root",
    "privileged":true,
    "cmd":"bash -c 'ip route delete default && ip route add default via 172.20.0.2'"
  }
}
Then select "Restrict Image to Docker Network" and choose the network created in the previous step (vpn-1).
Once finished the Workspace settings should look something like this:
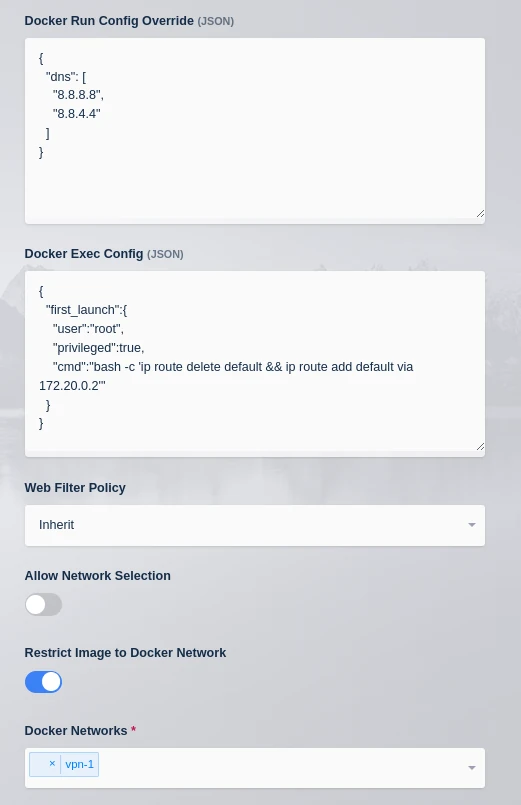
Click on Save and hop back over to the Workspaces tab. The new AlmaLinux 8 - VPN workspace should be present:

OK the Workspace is ready to deploy, the same process can be followed for any of the Kasm Workspaces to pipe their network traffic through the VPN container.
Test the connection
Testing varies by provider and use case. The examples below use the AlmaLinux 8 - VPN Workspace configured in the previous step.
Find the public IP
Open Applications > Terminal Emulator and run:
curl icanhazip.com
Confirm that the returned IP is not the current public IP of the Kasm Workspaces Agent that hosts the container.
Option 2: using a popular VPN vendor container
This approach uses an off-the-shelf VPN container, shown here for NordVPN. The steps are similar for other providers and configurations.
Setting up a VPN container
On the Docker host running Kasm Workspaces, or the Agent Server in a multi-server deployment, create a custom Docker network:
docker network create \
  --driver=bridge \
  --opt icc=true \
  --subnet=172.20.0.0/16 \
  vpn-1
Spin up a NordVPN Docker container. A NordVPN token is required and can be obtained from the NordVPN token instructions:
docker run -d \
  --cap-add NET_ADMIN \
  --cap-add NET_RAW \
  --name nord-vpn \
  --net vpn-1 \
  --ip 172.20.0.2 \
  -e TOKEN=NORDVPNTOKEN \
  -e TECHNOLOGY=NordLynx \
  --restart unless-stopped \
  ghcr.io/bubuntux/nordvpn
Route Workspace traffic through the sidecar
Login to the Workspaces web interface and click on "Workspaces -> Workspaces" from the Admin tab:
Now select the arrow button next to the Workspace to be modified to use this network and select "Clone":
This example will be modifying a AlmaLinux 8 desktop Workspace.
First rename the Friendly Name to append that this is a special VPN enabled container AlmaLinux 8 - VPN.
For some configurations it may be necessary to populate the DNS server addresses of the container. This will be indicated by DNS resolution failure inside the container.
This can be done by modifying the Docker Run Config Override (JSON) and adding DNS server entries (This workspace already had the "hostname": "kasm" populated in this field):
{
  "dns": [
    "8.8.8.8",
    "8.8.4.4"
  ]
}
Here the public Google DNS servers are used, but these can be any DNS servers.
Next change the Docker Exec Config (JSON) to:
{
  "first_launch":{
    "user":"root",
    "privileged":true,
    "cmd":"bash -c 'ip route delete default && ip route add default via 172.20.0.2'"
  }
}
Then select "Restrict Image to Docker Network" and choose the network created in the previous step (vpn-1).
Once finished the Workspace settings should look something like this:
Click on Save and hop back over to the Workspaces tab. The new AlmaLinux 8 - VPN workspace should be present:
OK the Workspace is ready to deploy, the same process can be followed for any of the Kasm Workspaces to pipe their network traffic through the VPN container.
Test the NordVPN connection
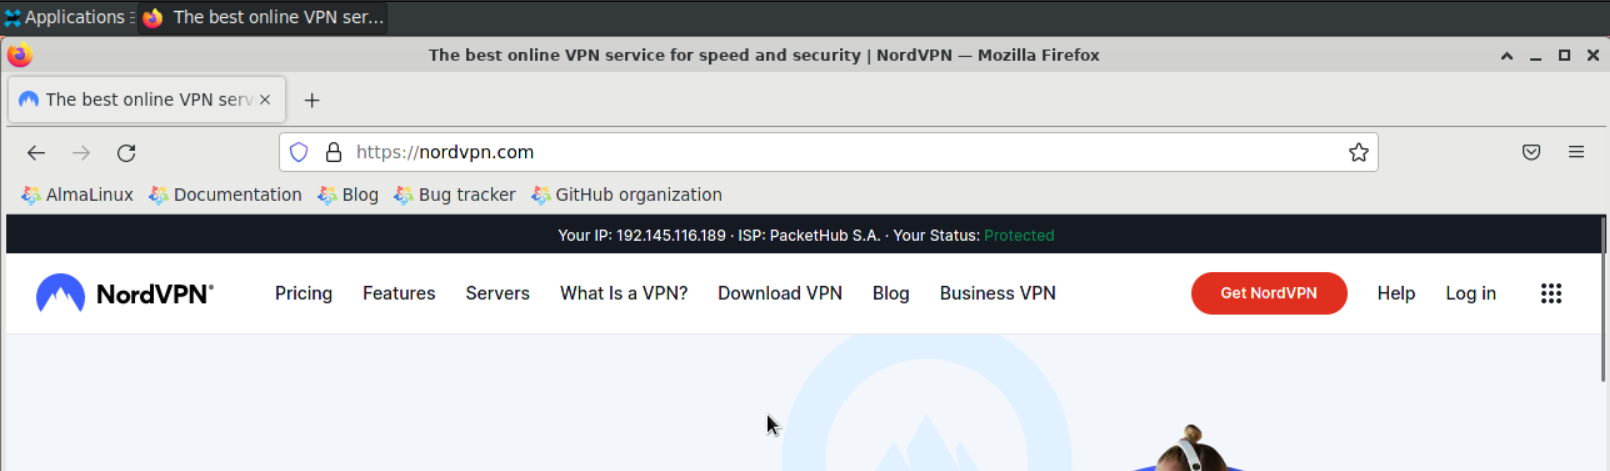
Most VPN providers indicate a protected browsing session on their home page. This example uses NordVPN. Open Firefox from the desktop and navigate to https://nordvpn.com. The page should display a Protected status.
Option 3: Tailscale
Tailscale is a zero-configuration VPN that connects users to a network of remote computers by their Tailscale IP addresses. This example configures a sidecar container to route traffic to machines on the Tailscale network. The example does not configure an exit node. It allows configured VPN containers to route traffic out to the Tailscale network.
Getting the Tailscale auth key
Skip this step when connecting Workspace containers to existing Tailscale infrastructure. For users new to Tailscale, sign up for an account at login.tailscale.com/start.
After sign-up, a login screen appears:
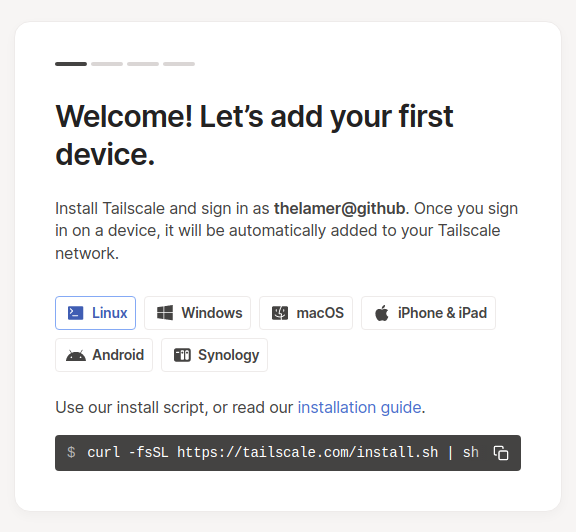
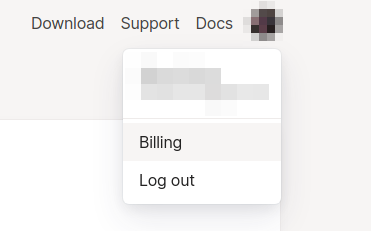
Ignore the setup wizard, click the avatar at the top right, and select Billing:
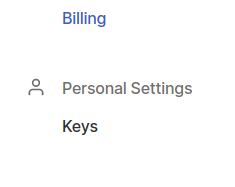
Click Keys under Personal Settings:
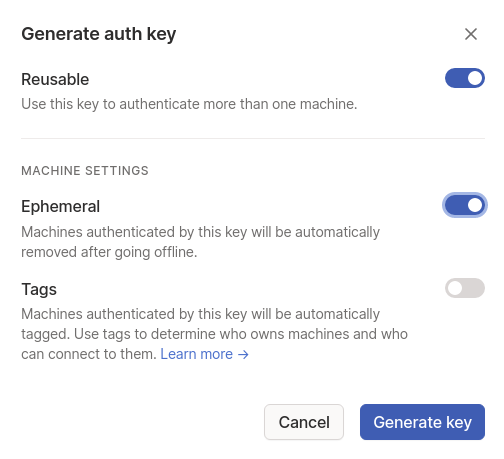
Click Generate auth key:

The Kasm team recommends setting Reusable and Ephemeral. Review the settings and choose what fits your environment:
Copy the generated key and continue to the next step.
Setting up a Tailscale Docker container
On the Kasm Workspaces host, build a custom Docker container to act as the VPN sidecar.
mkdir tailscale
cd tailscale
mkdir root
Create the Dockerfile:
FROM alpine:3.15

RUN \
  apk add --no-cache \
    bind-tools \
    tailscale

# add local files
COPY /root /

ENTRYPOINT [ "/entrypoint.sh"]
Create the custom root/entrypoint.sh:
#! /bin/sh

# create tun device
if [ ! -c /dev/net/tun ]; then
  mkdir -p /dev/net
  mknod /dev/net/tun c 10 200
fi

# Enable devices MASQUERADE mode
iptables -t nat -A POSTROUTING -o eth+ -j MASQUERADE
iptables -t nat -A POSTROUTING -o tailscale+ -j MASQUERADE

# start vpn client
tailscaled
Make the entrypoint executable:
chmod +x root/entrypoint.sh
The directory structure should look like this:
tailscale/
├─ root/
│  ├─ entrypoint.sh
├─ Dockerfile
Build the container:
sudo docker build -t tailscaled .
On the Docker host running Kasm Workspaces, or the Agent Server in a multi-server deployment, create a custom Docker network:
sudo docker network create \
  --driver=bridge \
  --opt icc=true \
  --subnet=172.20.0.0/16 \
  vpn-1
Spin up a Tailscale Docker container:
sudo docker run -d \
  --cap-add NET_ADMIN \
  --name tailscaled \
  --net vpn-1 \
  --ip 172.20.0.2 \
  --restart unless-stopped \
  tailscaled
Log in using the auth key:
sudo docker exec tailscaled tailscale up --authkey=<AUTH KEY FROM PREVIOUS STEP>
Navigate to the Tailscale machines dashboard and confirm the machine is listed:

Route Workspace traffic through the sidecar
Login to the Workspaces web interface and click on "Workspaces -> Workspaces" from the Admin tab:
Now select the arrow button next to the Workspace to be modified to use this network and select "Clone":
This example will be modifying a AlmaLinux 8 desktop Workspace.
First rename the Friendly Name to append that this is a special VPN enabled container AlmaLinux 8 - VPN.
For some configurations it may be necessary to populate the DNS server addresses of the container. This will be indicated by DNS resolution failure inside the container.
This can be done by modifying the Docker Run Config Override (JSON) and adding DNS server entries (This workspace already had the "hostname": "kasm" populated in this field):
{
  "dns": [
    "8.8.8.8",
    "8.8.4.4"
  ]
}
Here the public Google DNS servers are used, but these can be any DNS servers.
Next change the Docker Exec Config (JSON) to:
{
  "first_launch":{
    "user":"root",
    "privileged":true,
    "cmd":"bash -c 'ip route delete default && ip route add default via 172.20.0.2'"
  }
}
Then select "Restrict Image to Docker Network" and choose the network created in the previous step (vpn-1).
Once finished the Workspace settings should look something like this:
Click on Save and hop back over to the Workspaces tab. The new AlmaLinux 8 - VPN workspace should be present:
OK the Workspace is ready to deploy, the same process can be followed for any of the Kasm Workspaces to pipe their network traffic through the VPN container.
Test the Tailscale connection
An easy test is to ping another device on the Tailscale network from the workspace. At least one other device must be connected to the Tailscale network. The Tailscale machines dashboard lists the IPs of connected devices. This example uses 100.86.224.182.
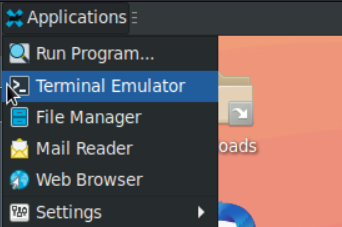
This example assumes a modified desktop Workspace using the AlmaLinux 8 example above. Launch the session and open a terminal from Applications > Terminal Emulator:
Run a ping command:
ping 100.86.224.182
Acknowledgements should print to the screen:
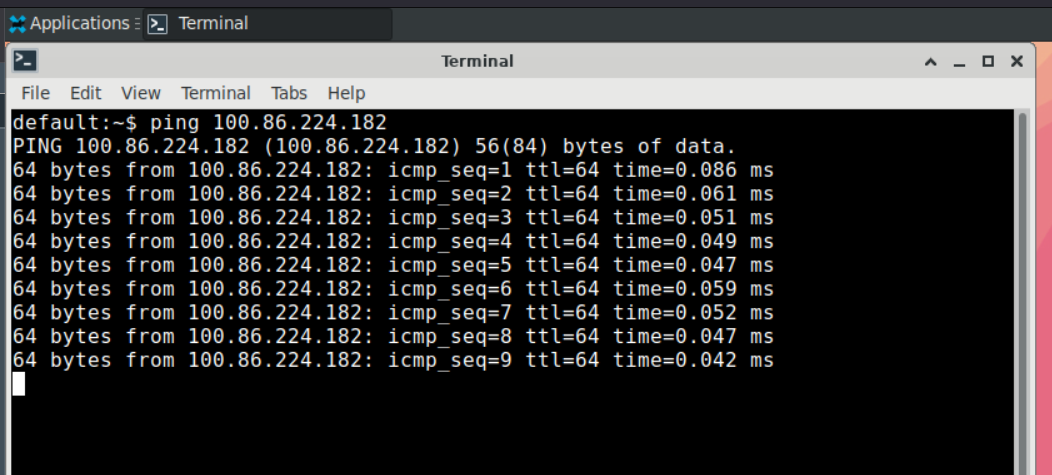
Any container with this configuration can reach other machines on the connected Tailscale network.
Common troubleshooting steps
- DNS resolution fails inside the container. Populate the DNS server addresses in the Docker Run Config Override for the Workspace, as shown in the routing step.
- Traffic does not route through the VPN. Confirm the Workspace uses the Restrict Image to Docker Network option set to the
vpn-1network, and that the Docker Exec Config sets the default route to the sidecar IP172.20.0.2. - The public IP still matches the Agent. Confirm the sidecar container is running and connected. For OpenVPN, run
curl icanhazip.comin the session and compare the result to the Agent public IP.