Bring your own VPN containers (BYOVPN)
Overview
The Kasm Workspaces BYOVPN images let users route container traffic through their own VPN accounts without custom image builds. This guide configures the pre-built VPN image to connect through Tailscale, WireGuard, or OpenVPN. You choose between two models: end users supply their own connection details through a launch form, or an administrator pre-configures the connection so the workspace connects with no user input. As a result, each session establishes a VPN tunnel automatically and reports its connection status to the user.
The images support the following VPN services:
Prerequisites
Before you begin, confirm the following:
- Administrator access to the Kasm Workspaces deployment, with permission to install Workspaces and edit Workspace settings.
- A VPN account and the matching connection material for your chosen service: a Tailscale auth key, a WireGuard configuration file, or an OpenVPN configuration file.
- The BYOVPN image installed from the Kasm Workspaces Registry. The following image is available:
| Docker image | DockerHub path | AMD64 | ARM64 | GPU | |
|---|---|---|---|---|---|
 | kasmweb/ubuntu-jammy-desktop-vpn:1.19.0 | DockerHub | X | X | X |
Solution approach
This guide progresses through the following phases:
- Install the BYOVPN Workspace from the registry.
- Choose a configuration model: end-user-provided or admin-provided.
- Configure the VPN connection for your chosen service.
- Control the VPN and public IP status notifications.
Detailed steps
Install the BYOVPN Workspace
- Install the
kasmweb/ubuntu-jammy-desktop-vpnimage from the Kasm Workspaces Registry. - Publish the Workspace to the users or groups who need VPN access.
Configure end-user-provided VPN details
By default, the BYOVPN images present a custom Workspace Launch Form that collects VPN details from the user, such as a Tailscale auth key. The form renders when the user selects the VPN Workspace from the dashboard. After launch, the workspace shows notifications for the state of the VPN connection. Many consumer VPN services offer OpenVPN or WireGuard connection options, so users can bring their own accounts into Kasm.
For this model, no further action is needed. Install the Workspace and publish it to users.
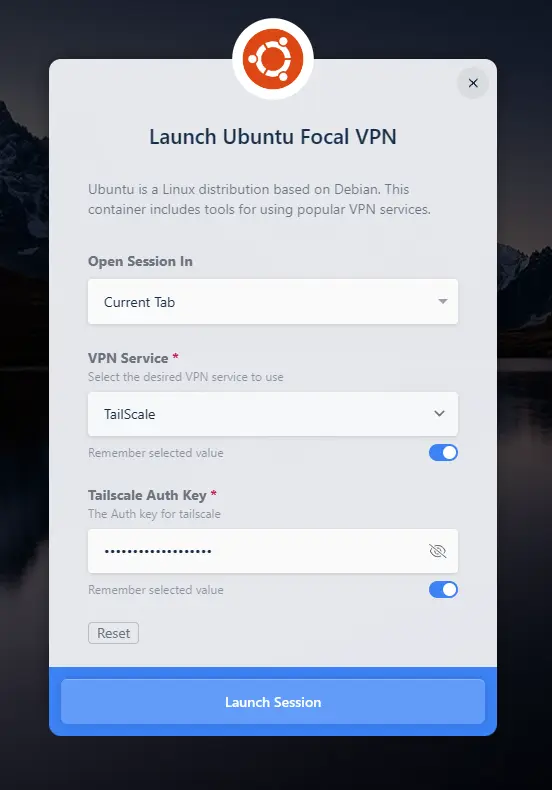
Details
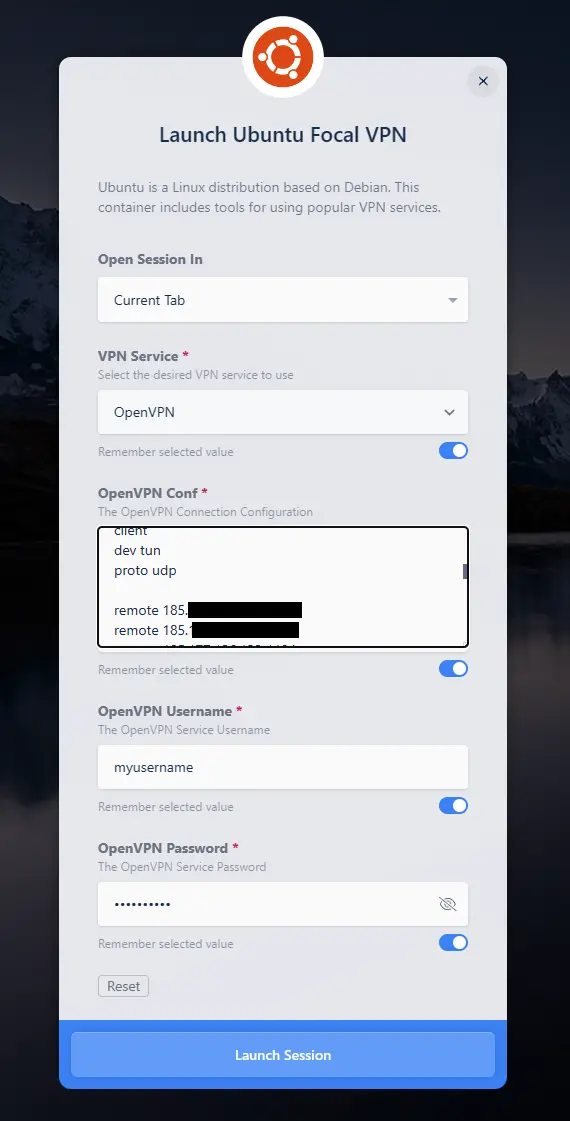
Details
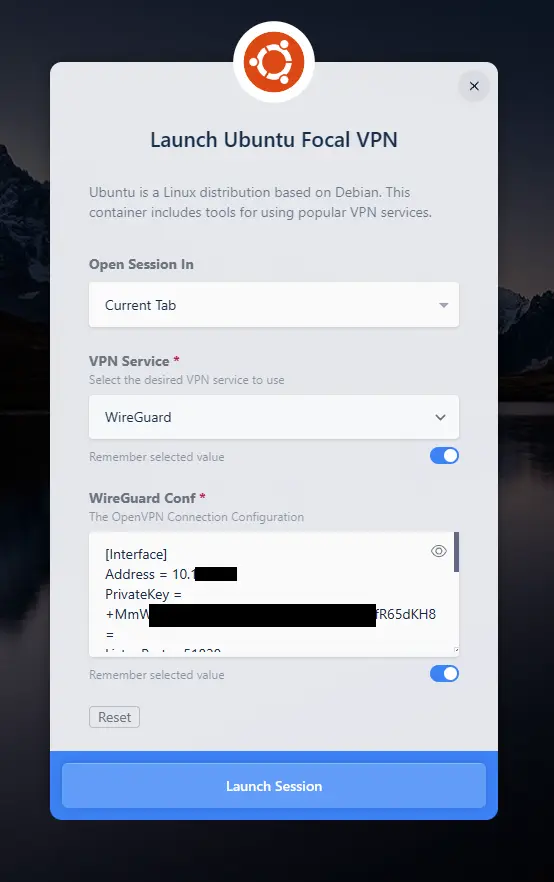
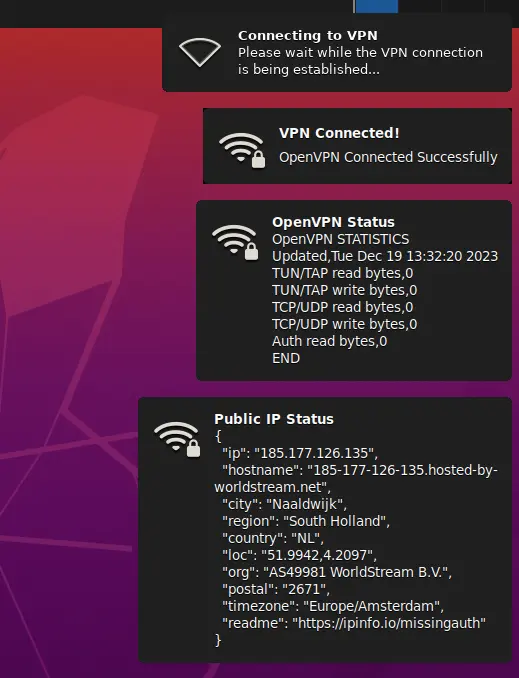
Configure admin-provided VPN details
The BYOVPN images can also pre-configure the VPN connection so the user provides nothing. To use admin-provided settings, remove the Launch Config entries from the Workspace. This removes the custom launch form and lets the container use the admin-provided options.
VPN configurations or credentials supplied by the administrator may be visible to the end user inside the running container. If this is not acceptable, use a VPN Sidecar instead.
Tailscale
Tailscale is not a full VPN isolation solution by default. It connects the workspace to the shared machines on the account. All other internet traffic still leaves over the local network.
Generate an auth key from the Tailscale admin dashboard. For the steps, see Getting the Tailscale auth key.
By default, Tailscale does not require manual device approval for machines that join automatically, even with pre-generated keys. When device approval is enabled, the Tailscale connection does not succeed for new Kasm sessions until a Tailscale administrator approves them. For more information, see Device Approval.
With an auth key, edit the Docker Run Config Override for the Workspace to set the TAILSCALE_KEY value:
{
  "environment": {
    "TAILSCALE_KEY": "tskey-auth-XXXXXXXXXXXX-XXXXXXXXXXXXXXXXXXXXXXXXXXXXXXXXX",
    "SHOW_VPN_STATUS": "1",
    "SHOW_IP_STATUS": "1"
  },
  "sysctls": {
    "net.ipv4.conf.all.src_valid_mark": 1
  },
  "dns": [
    "8.8.8.8",
    "8.8.4.4"
  ]
}
WireGuard
- Go to Administrator Dashboard > Workspaces > Workspaces, click the arrow next to the Workspace, click Edit (pencil icon), open the File Mapping tab, and click Add File Mapping.
- Set Type to Text.
- Set the Name (for example,
VPN Config). - Set the Description (for example,
VPN Configuration File). - Set the destination path to
/dockerstartup/wireguard.conf. - Paste the contents of your WireGuard configuration file into the text area.
- Click Save.
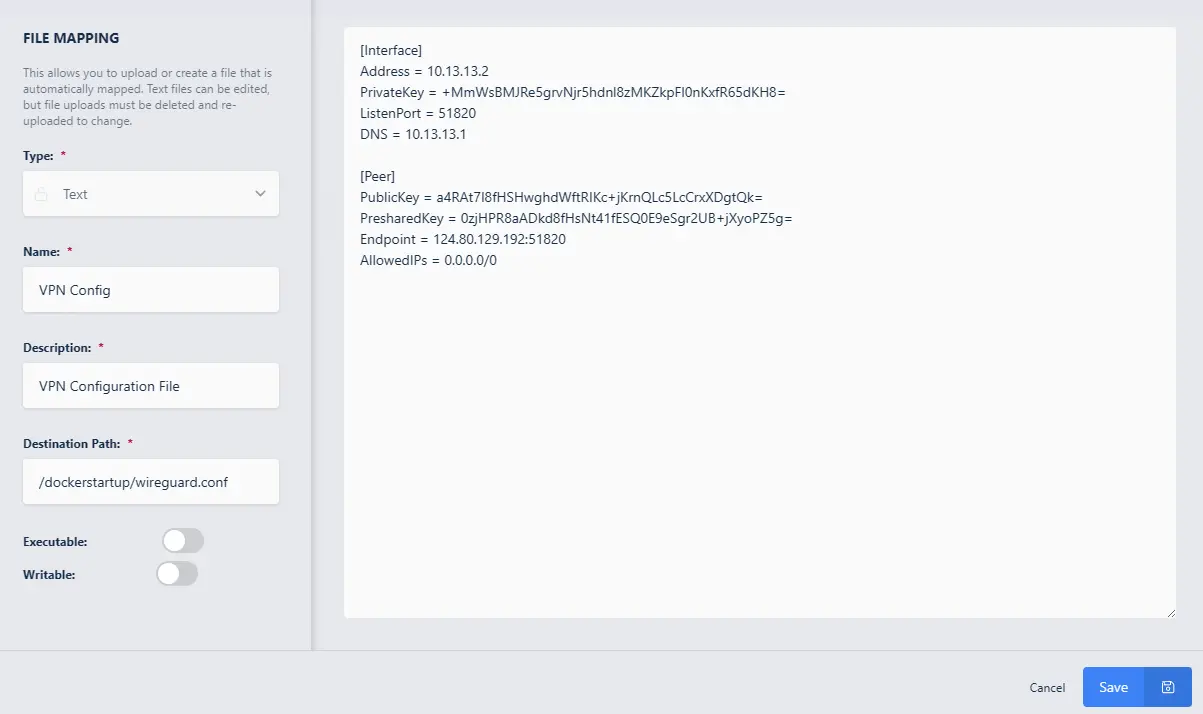
WireGuard configures workspace DNS from its own configuration file. The default Google DNS servers in the Docker Run Config Override can stay or be removed, because WireGuard overrides them once the connection initializes.
OpenVPN
- Go to Administrator Dashboard > Workspaces > Workspaces, click the arrow next to the Workspace, click Edit (pencil icon), open the File Mapping tab, and click Add File Mapping.
- Set Type to Text.
- Set the Name (for example,
VPN Config). - Set the Description (for example,
VPN Configuration File). - Set the destination path to
/dockerstartup/openvpn.conf. - Paste the contents of your OpenVPN configuration file into the text area.
- Click Save.
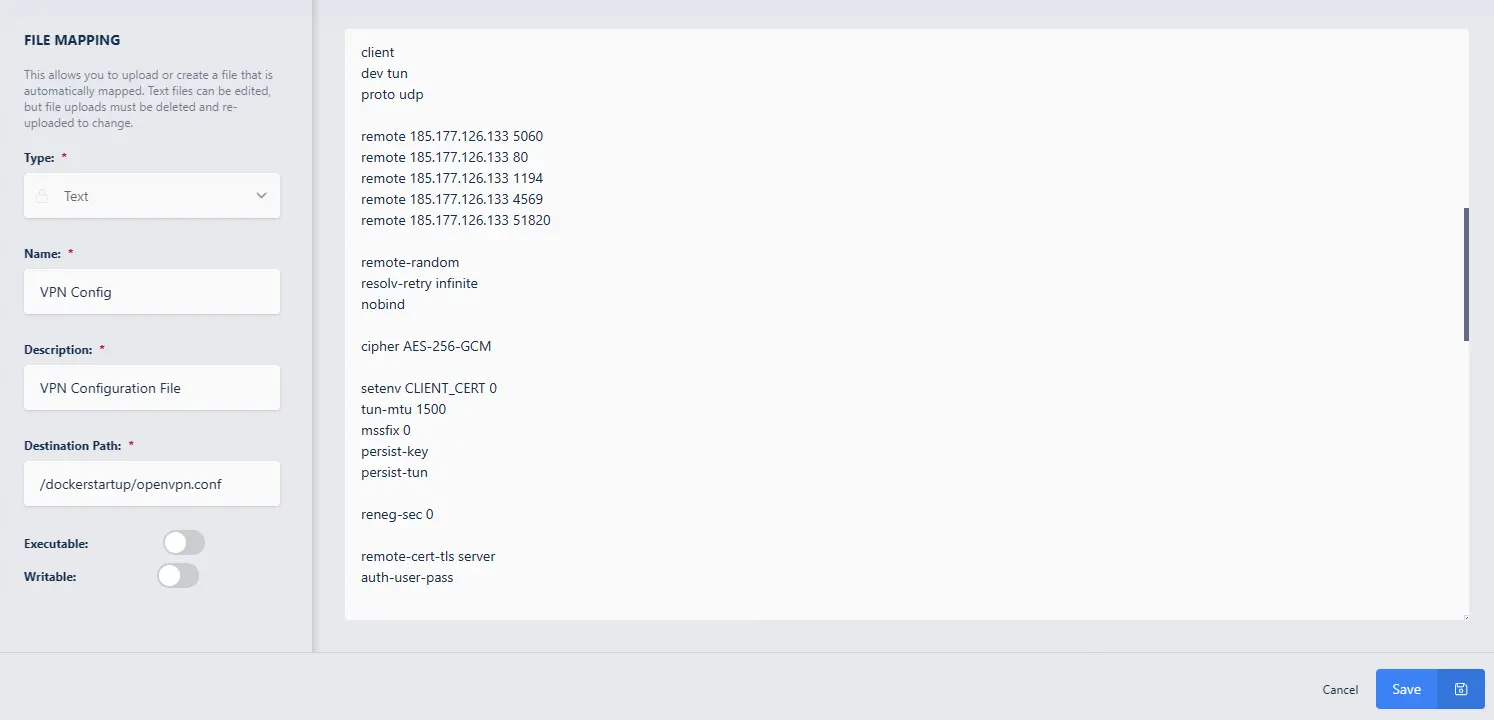
The default DNS settings point to Google public DNS servers. Private DNS servers that only the client can reach do not function over an OpenVPN tunnel. Use either public DNS servers or DNS servers reachable on the server side of the tunnel.
OpenVPN authentication
OpenVPN may require a username and password in addition to the mapped configuration file. This requirement depends entirely on the server-side configuration. The VPN-enabled Workspace detects it automatically and prompts the user for credentials when the container launches.
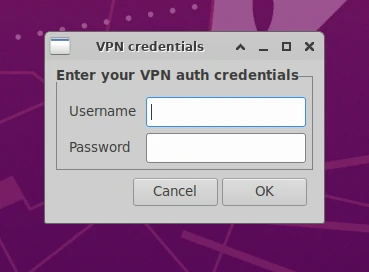
After the user enters the credentials, the workspace reports when the VPN connects or if an error occurs.
Automate OpenVPN username and password authentication
To log in automatically when the OpenVPN server requires username and password authentication, map an additional file with the login details into the container.
- Go to Administrator Dashboard > Workspaces > Workspaces, click the arrow next to the Workspace, click Edit (pencil icon), open the File Mapping tab, and click Add File Mapping.
- Set Type to Text.
- Set the Name (for example,
Auth). - Set the Description (for example,
OpenVPN Authentication file). - Set the destination path to
/dockerstartup/openvpn-auth. - In the text area, enter the username on the first line and the password on the second line.
- Click Save.
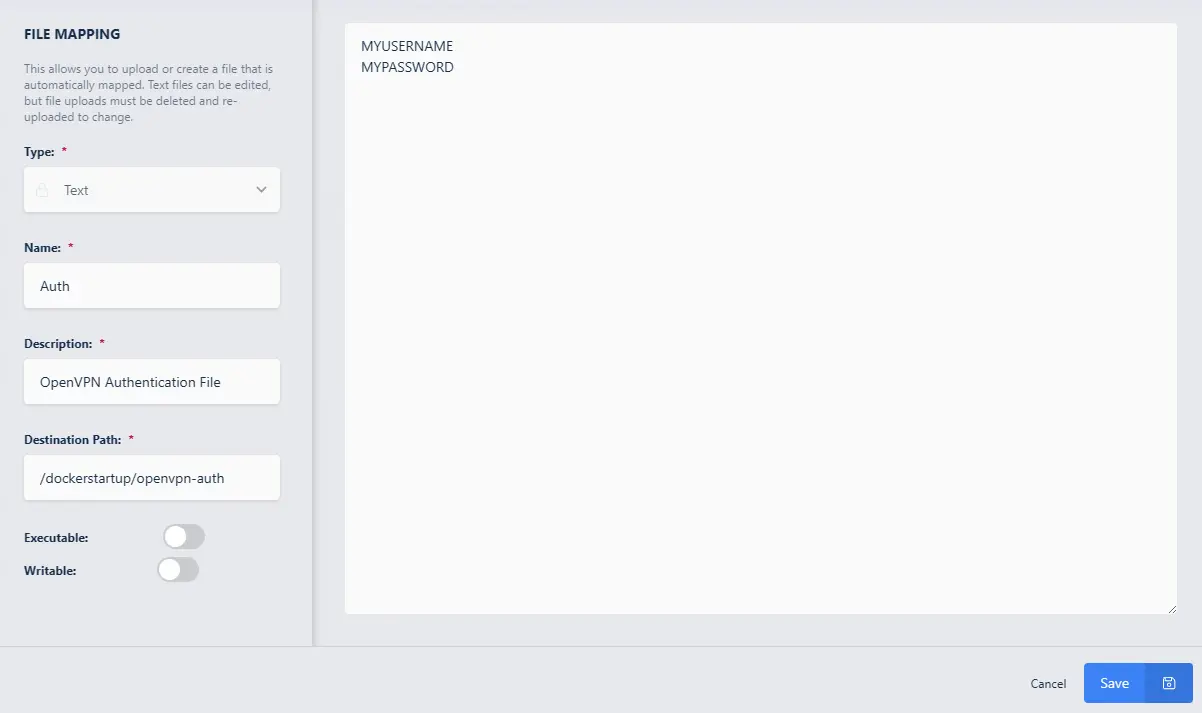
Reference this file in the main OpenVPN configuration. Change the auth-user-pass line to:
auth-user-pass /dockerstartup/openvpn-auth
Control VPN and public IP status notifications
By default, the VPN containers display VPN status and public IP status messages when the connection is established. These messages help users verify connectivity. To remove the notifications, set the SHOW_VPN_STATUS and SHOW_IP_STATUS environment variables to 0 in the Docker Run Config Override.
{
  "environment": {
    "TAILSCALE_KEY": "",
    "SHOW_VPN_STATUS": "0",
    "SHOW_IP_STATUS": "0"
  },
  "sysctls": {
    "net.ipv4.conf.all.src_valid_mark": 1
  },
  "dns": [
    "8.8.8.8",
    "8.8.4.4"
  ]
}
Common troubleshooting steps
- The VPN connection fails. The workspace notifies the user with a pop-up on any connection error. Review the logic-flow logs stored inside the workspace at
/dockerstartup/vpn_start.log. Read the log in a terminal withcat /dockerstartup/vpn_start.log, or open it in any GUI text editor in the workspace. - A private DNS name does not resolve over OpenVPN. Private DNS servers reachable only by the client do not work over the tunnel. Use public DNS servers or servers reachable on the server side of the tunnel.
- Tailscale connects but new sessions are blocked. Confirm whether device approval is enabled on the Tailscale account. When it is, a Tailscale administrator must approve each new session. See Device Approval.