Auto-open Kasm Workspaces RDP files on each client OS
Overview
When a user launches an RDP workspace, Kasm Workspaces delivers a signed RDP file or an rdp:// URL to the client. By default, the operating system or browser prompts the user before opening it. This guide configures Windows, ChromeOS, and macOS clients to open the RDP connection automatically, and it shows how to trust the Kasm RDP signing certificate on Windows so the file opens without an unknown-publisher warning.
Prerequisites
- A working Kasm Workspaces deployment with at least one RDP-enabled Workspace.
- Administrator access to the client machines or to the relevant management policy, such as Group Policy or Google Workspace.
- An RDP client installed on each client OS. On macOS, the client must support the
rdp://URL scheme, such as Microsoft Remote Desktop.
Solution approach
This guide progresses through the following phases:
- Configure Windows clients.
- Configure ChromeOS clients.
- Configure macOS clients.
Detailed steps
Configure Windows clients
Windows queries Group Policy to decide whether to prompt the user before opening an RDP connection. Individual browsers also offer settings that open the RDP connection immediately after the download completes.
Kasm generates a signed RDP file using the certificate and private key in Server Settings. To avoid a warning that the Kasm RDP file comes from an untrusted or unknown publisher, complete the following:
- Install the certificate generated by Kasm, or an applicable CA certificate, in the trusted certificate store on the client machine.
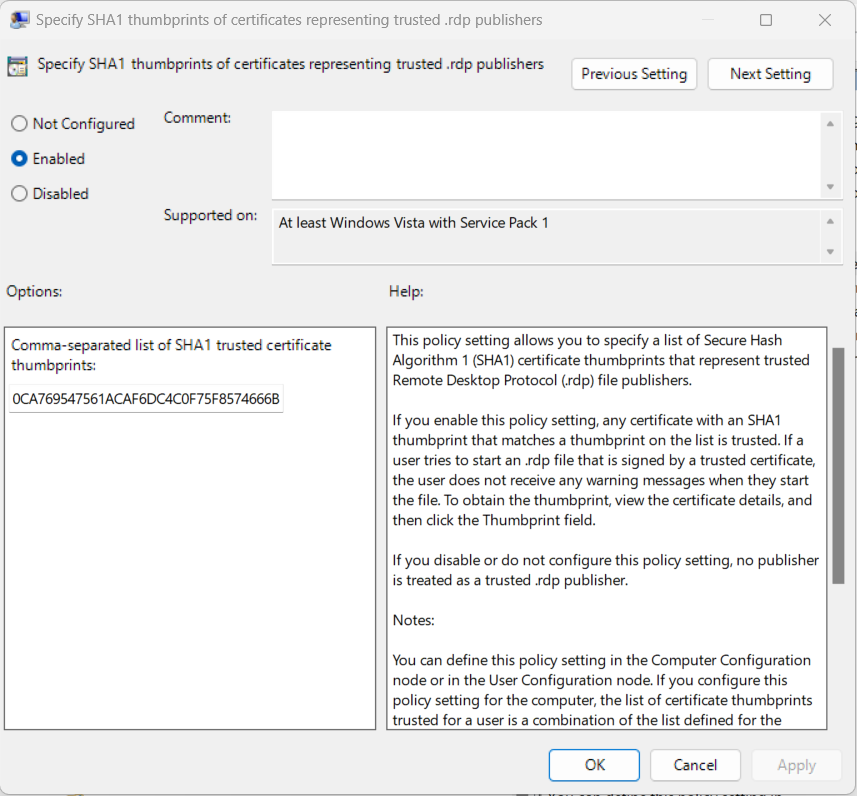
- Add the SHA1 thumbprint of the certificate as a trusted RDP publisher in Group Policy.
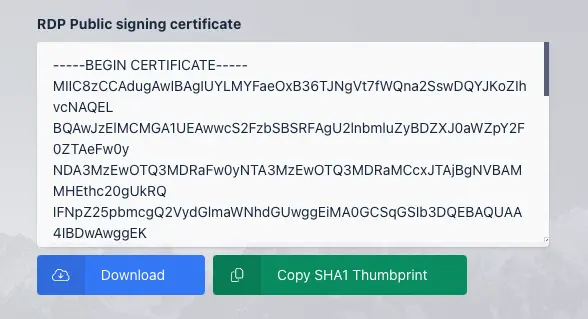
Kasm provides a button to download the certificate and a button to copy the SHA1 thumbprint for Group Policy. To find these controls, click Settings, then Global in the left menu, and scroll to the Connections section.
Install the certificate
- Download the RDP certificate using the button shown above.
- Double-click the downloaded
.cerfile to open it. - Click Install Certificate.
- Select Local Machine, which requires administrator privileges, or Current User.
- Select Place all certificates in the following store.
- Click Browse.
- Choose Trusted Root Certification Authorities.
- Click OK.
- Click Next.
- Click Finish.
- Wait for the import to finish, indicated by the message The import was successful.
Alternatively, push the certificate to the trust store of a domain-joined machine using Group Policy at this location:
Computer Configuration -> Windows Settings -> Security Settings -> Public Key Policies -> Trusted Root Certification Authorities
Add the SHA1 thumbprint as a trusted RDP publisher
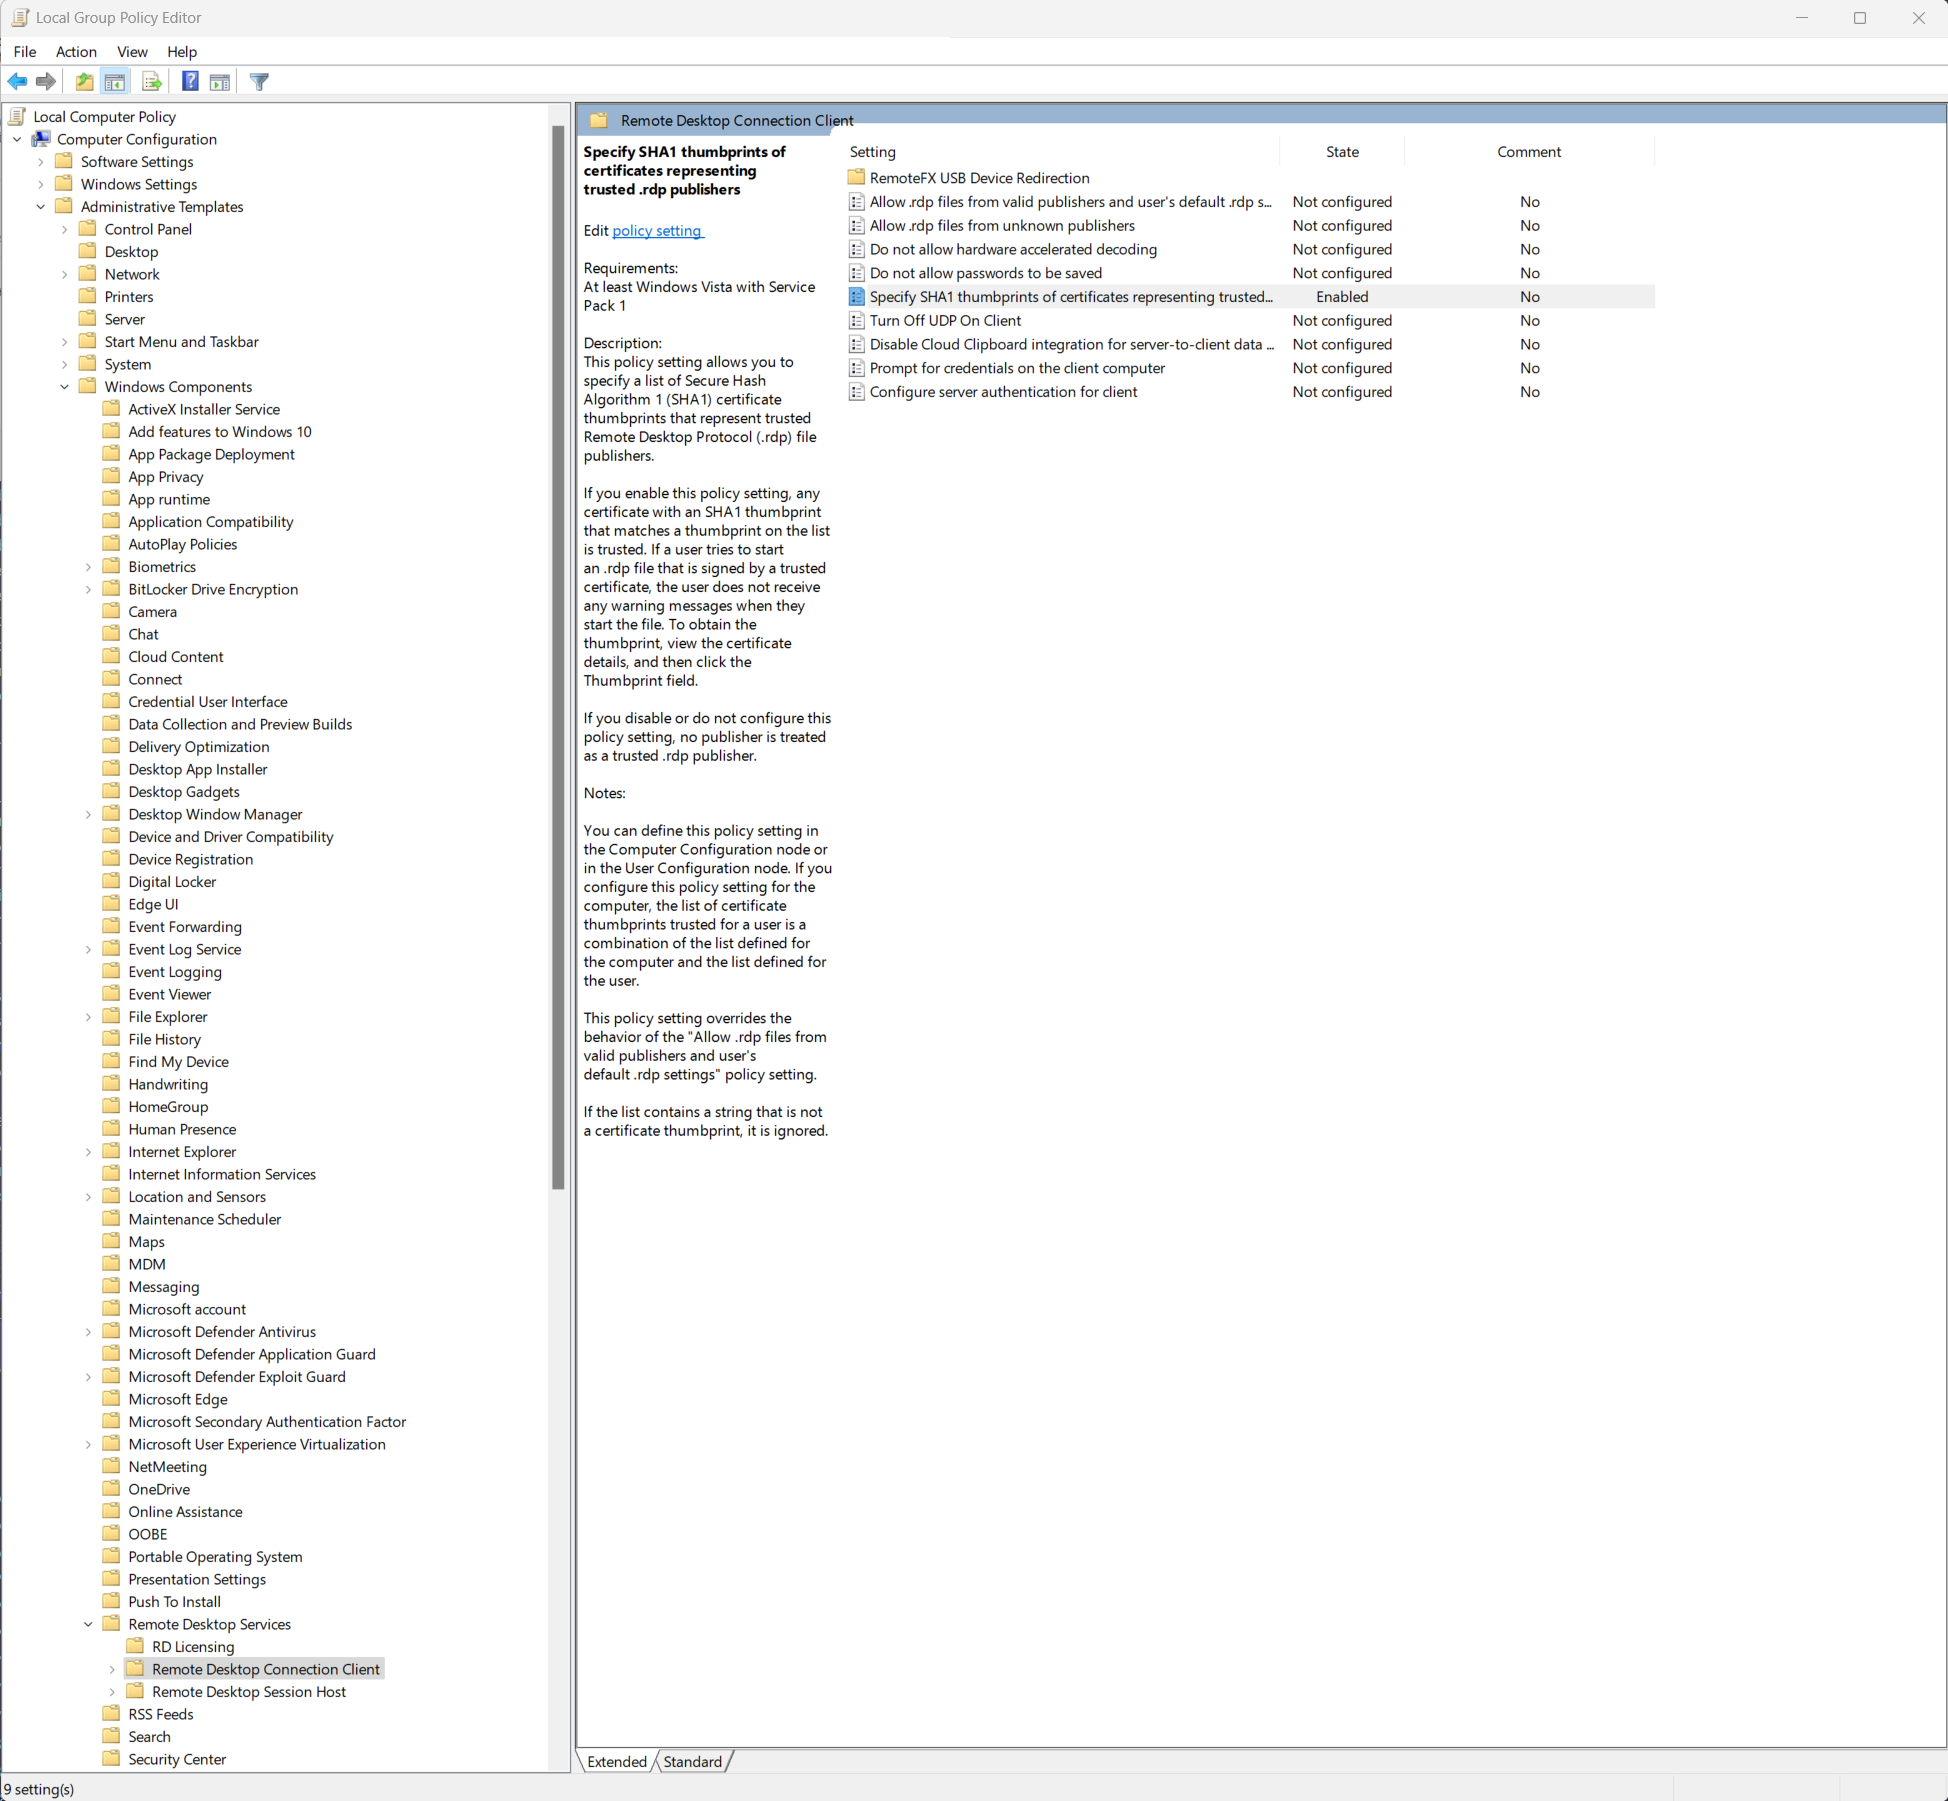
Set the thumbprint at this Group Policy location:
Computer Configuration -> Administrative Templates -> Windows Components -> Remote Desktop Services -> Remote Desktop Connection Client -> Specify SHA1 thumbprints of certificates representing trusted .rdp publishers
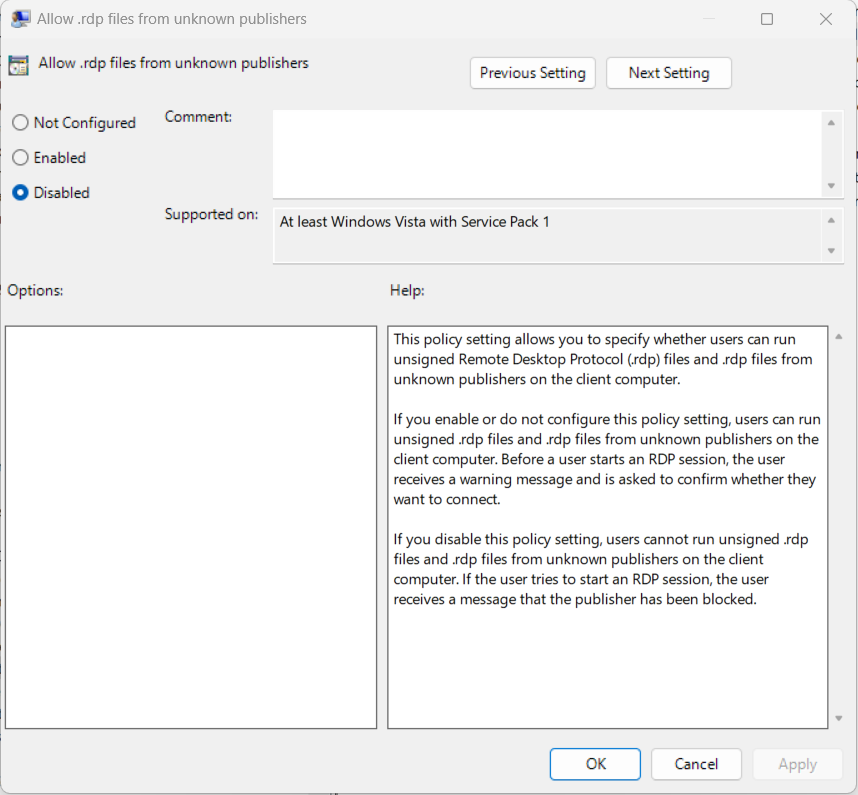
To prevent a user from modifying a signed RDP file and then connecting to the RDP target, enable this Group Policy setting:
Computer Configuration -> Administrative Templates -> Windows Components -> Remote Desktop Services -> Remote Desktop Connection Client -> Allow .rdp files from unknown publishers
This setting also prevents a user from opening any RDP file that a verified publisher did not sign, including files the user creates.
Google Chrome on Windows
Use one of the following options.
Option 1: the user right-clicks the RDP file in the download list and selects Always open files of this type.
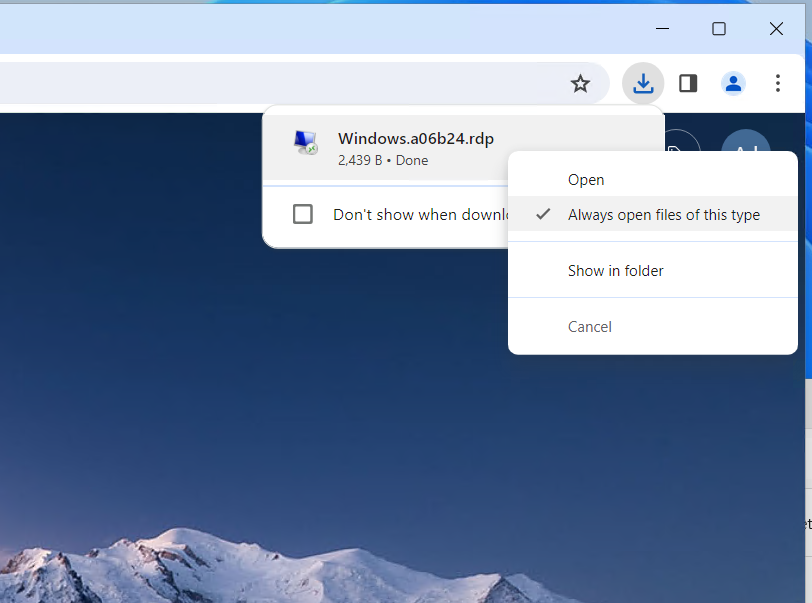
Option 2: the user or an administrator sets a registry entry.
- Registry key:
Software\Policies\Google\Chrome\AutoOpenFileTypes - Registry subkey: an index number
- Registry value: a file extension
For example: Software\Policies\Google\Chrome\AutoOpenFileTypes\1 = rdp.
Firefox on Windows
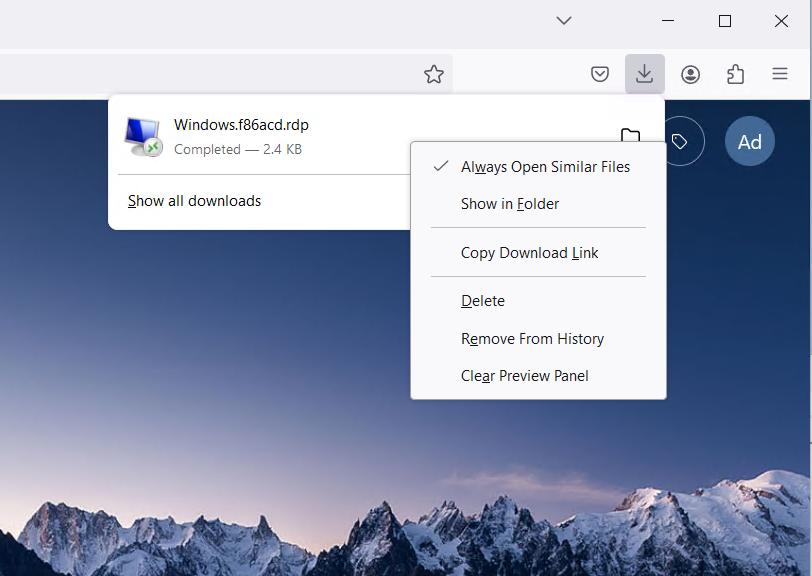
When right-clicking the RDP file download, the option Always Open Similar Files sets Firefox to open RDP files automatically in the default client.
Configure ChromeOS clients
The Chromebook, or other ChromeOS host, must be joined to a Google Workspace Enterprise account. The administrator sets Chrome managed policies so that Chrome opens the RDP file automatically on download.
Install separate RDP client software on the ChromeOS host so the user can make the RDP connection. Without it, these instructions only open the .rdp file automatically in the text editor.
- Log in to the Google Workspace account at
admin.google.com. - Navigate to Devices, then Chrome, then Settings.
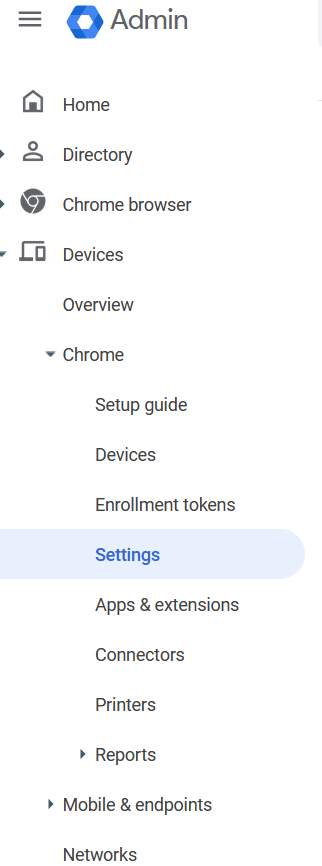
- Select the User & browser settings tab.
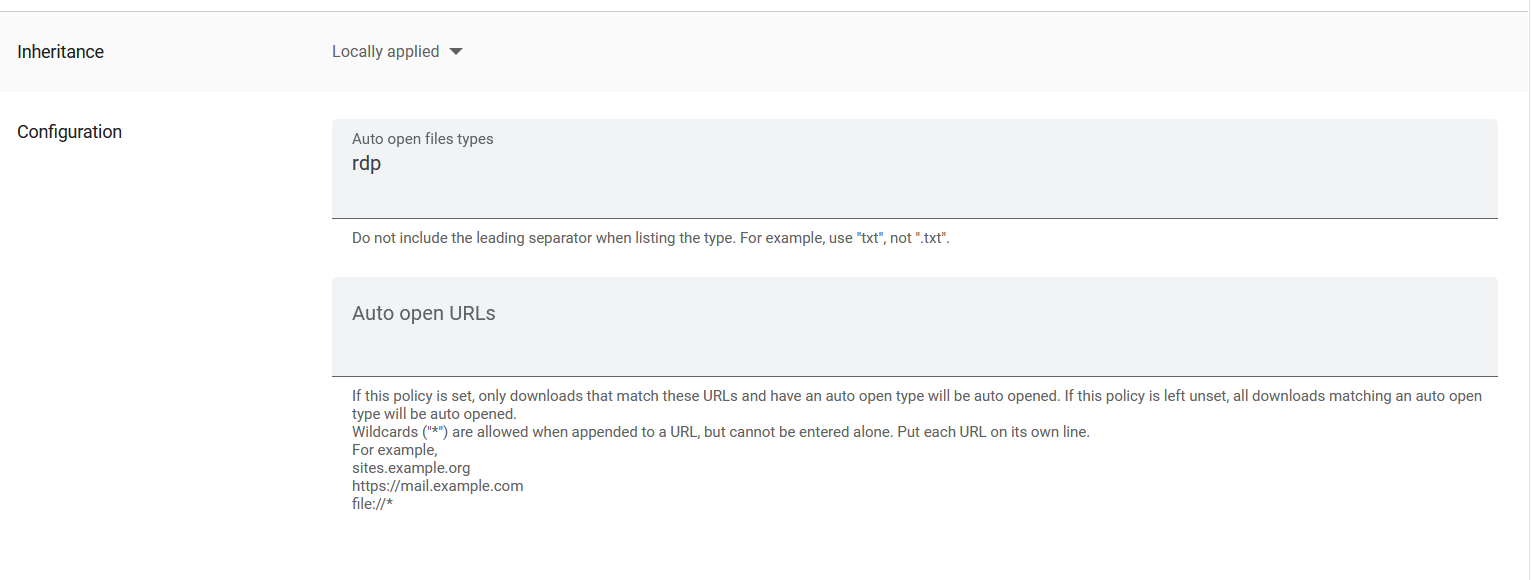
- Scroll to the Content section and select Auto open downloaded files.
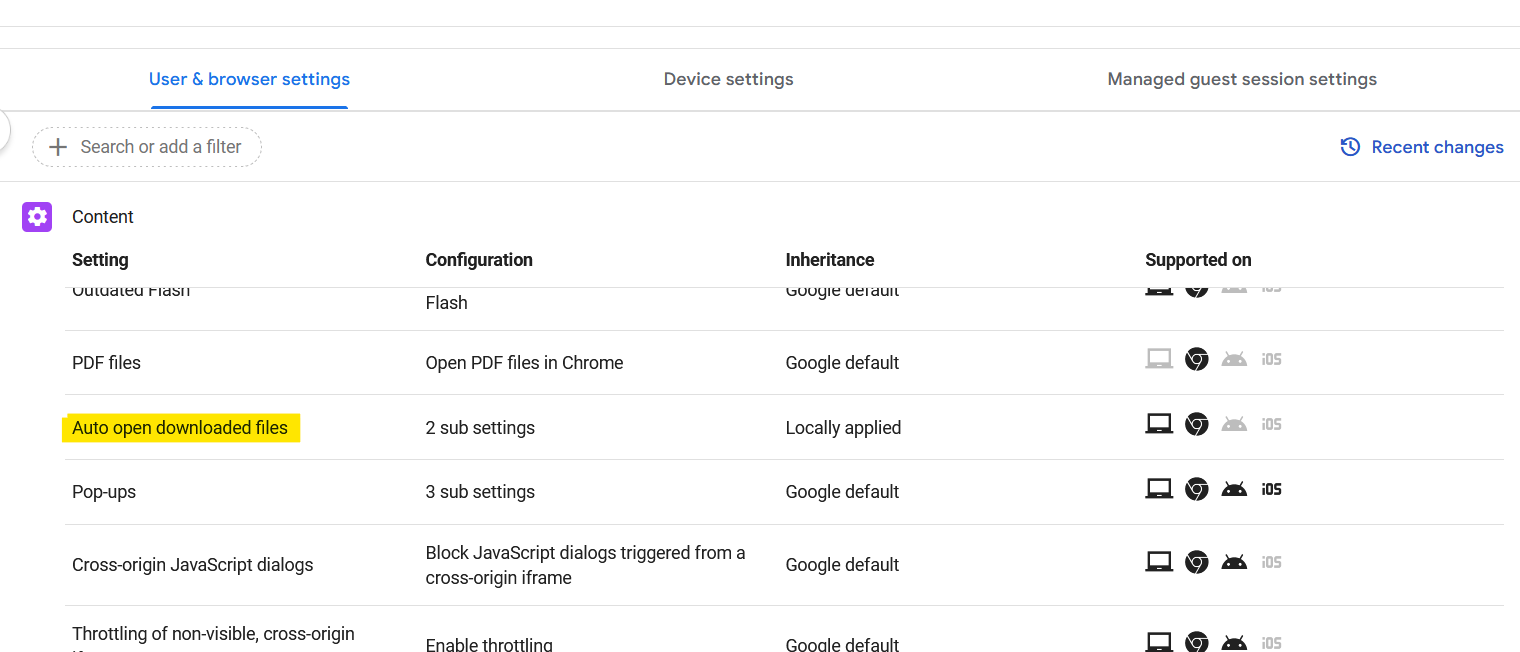
- Add RDP to the Auto open file types. The administrator can also restrict this setting to the URL of the Kasm deployment, for example
https://kasm.example.com/*.
Configure macOS clients
On macOS, the RDP connection loads as a URL rather than a downloadable file. Install an RDP client that supports the rdp:// URL scheme, such as Microsoft Remote Desktop.
Google Chrome on macOS
By default, Chrome shows a confirmation dialog each time an rdp:// URL is opened. To have Chrome launch the RDP client without the dialog, set the AutoLaunchProtocolsFromOrigins policy. Replace https://kasm.example.com with your Kasm deployment URL:
defaults write com.google.Chrome AutoLaunchProtocolsFromOrigins -array '{ protocol = rdp; allowed_origins = ("https://kasm.example.com"); }'
Restart Chrome fully, not only the tab, for the policy to take effect. To verify the policy is active, go to chrome://policy in Chrome.
Firefox on macOS
Create the distribution directory and policies file at /Applications/Firefox.app/Contents/Resources/distribution/policies.json. The file must be owned by root. Replace https://kasm.example.com with your Kasm deployment URL:
sudo mkdir -p "/Applications/Firefox.app/Contents/Resources/distribution"
sudo tee "/Applications/Firefox.app/Contents/Resources/distribution/policies.json" << 'EOF'
{
  "policies": {
    "AutoLaunchProtocolsFromOrigins": [
      {
        "protocol": "rdp",
        "allowed_origins": [
          "https://kasm.example.com"
        ]
      }
    ]
  }
}
EOF
sudo chown -R root:wheel "/Applications/Firefox.app/Contents/Resources/distribution"
Restart Firefox fully for the policy to take effect. To verify the policy is active, go to about:policies in Firefox.
Safari on macOS
Safari does not provide an enterprise policy or command-line setting to suppress the external protocol confirmation dialog. On the first rdp:// URL launch, Safari prompts the user to allow the RDP client to open. For MDM-managed devices, deploy a configuration profile to allowlist the rdp:// URL scheme.