Webcam passthrough
Overview
Many video applications inside a containerized workspace expect a local camera that a remote container cannot reach. This guide enables webcam passthrough in Kasm Workspaces so a user's physical webcam streams into the session as a virtual device. The browser captures the camera feed and directs it to a virtual webcam mapped inside the container. As a result, applications that read /dev/video0 access the live feed, which supports video conferencing, identity verification, and recording from a workspace.
Prerequisites
Before you begin, confirm the following:
- Administrator access to the Kasm Workspaces deployment, with permission to manage Group Settings.
- The
v4l2loopbackkernel module installed and running on each Kasm Agent host. The Kasm installer adds this module on Ubuntu 24.04, Ubuntu 22.04, Debian 10, Debian 11, and Debian 12. Other distributions require a manual installation before the Kasm installation. - A workspace image that includes an application capable of reading from
/dev/video0. - A user device with a webcam and a browser that grants camera permissions.
Solution approach
This guide progresses through the following phases:
- Confirm host-level requirements.
- Enable the webcam Group Setting.
- Use the webcam in a session.
Detailed steps
Confirm host-level requirements
Webcam passthrough depends on the v4l2loopback kernel module on the Kasm Agent host. The module creates virtual V4L2 loopback devices. The browser feed is intercepted and redirected into one of these virtual devices inside the container.
- Confirm the host distribution. The Kasm installer adds the module automatically on Ubuntu 24.04, Ubuntu 22.04, Debian 10, Debian 11, and Debian 12.
- On any other distribution, install the
v4l2loopbackmodule before installing Kasm, using the distribution's documentation or community resources. - If the module is already present, skip its installation during the Kasm installation with the
--skip-v4l2loopbackparameter.
If the host already has webcam devices, the Kasm installation does not create new virtual devices. The v4l2loopback module recognizes the existing devices and does not duplicate them. An absence of new devices after installation usually indicates pre-existing devices.
Enable the webcam Group Setting
- In the Kasm Workspaces UI, set the
allow_kasm_webcamGroup Setting totruefor the target group. - Apply the setting before any affected user launches a session, because the setting takes effect at session launch.
Use the webcam in a session
- Launch a Kasm session.
- Open the control panel on the left side of the session.
- Select Webcam. Grant browser permission to access the webcam when prompted.
To select the webcam device and adjust its settings, open Webcam Settings in the control panel.
Performance considerations
System resource consumption scales with the number of sessions that use virtual webcam devices and with the selected frame rate and quality. As an example, a single session at default settings might use around 3% of CPU capacity. Five concurrent sessions might use up to 20%. These figures are estimates. Actual usage varies with hardware specifications, other system loads, and application demands.
The selected frame rate correlates directly with internet bandwidth use. A higher frame rate transfers more images each second, which demands more bandwidth.
Common troubleshooting steps
-
No new virtual devices appear after installation. The host likely had pre-existing webcam devices, so
v4l2loopbackdid not create new ones. Review the Kasm Agent logs for a full list of virtual devices, their statuses, and any anomalies. -
The kernel lacks the
videodevmodule. Many cloud providers ship custom Linux kernels that remove modules considered superfluous for a server. Thevideodevmodule is critical for webcam passthrough. The error resembles the following:modprobe: FATAL: Module videodev not found in directory /lib/modules/Kernel-VersionInstall the extra modules package for the distribution:
- Debian or Ubuntu:
sudo apt-get install -y linux-modules-extra-$(uname -r) - RHEL based:
sudo dnf install -y kernel-modules-extra
Confirm functionality afterward:
sudo modprobe videodevNo output from the command means the module loaded successfully.
- Debian or Ubuntu:
-
UEFI Secure Boot rejects the module. On dedicated hardware or Azure Linux Virtual Machines, Secure Boot prevents the module from loading. The error resembles the following:
modprobe: ERROR: could not insert 'v4l2loopback': Key was rejected by serviceOn dedicated hardware, disable Secure Boot in the BIOS. On Azure Linux Virtual Machines, Secure Boot is enabled by default and must be disabled at launch time or on a running virtual machine, which reboots the machine. Go to Services > Virtual machines > Add > Virtual machine > Instance details > Security type > Configure security features, then clear the Enable secure boot checkbox.
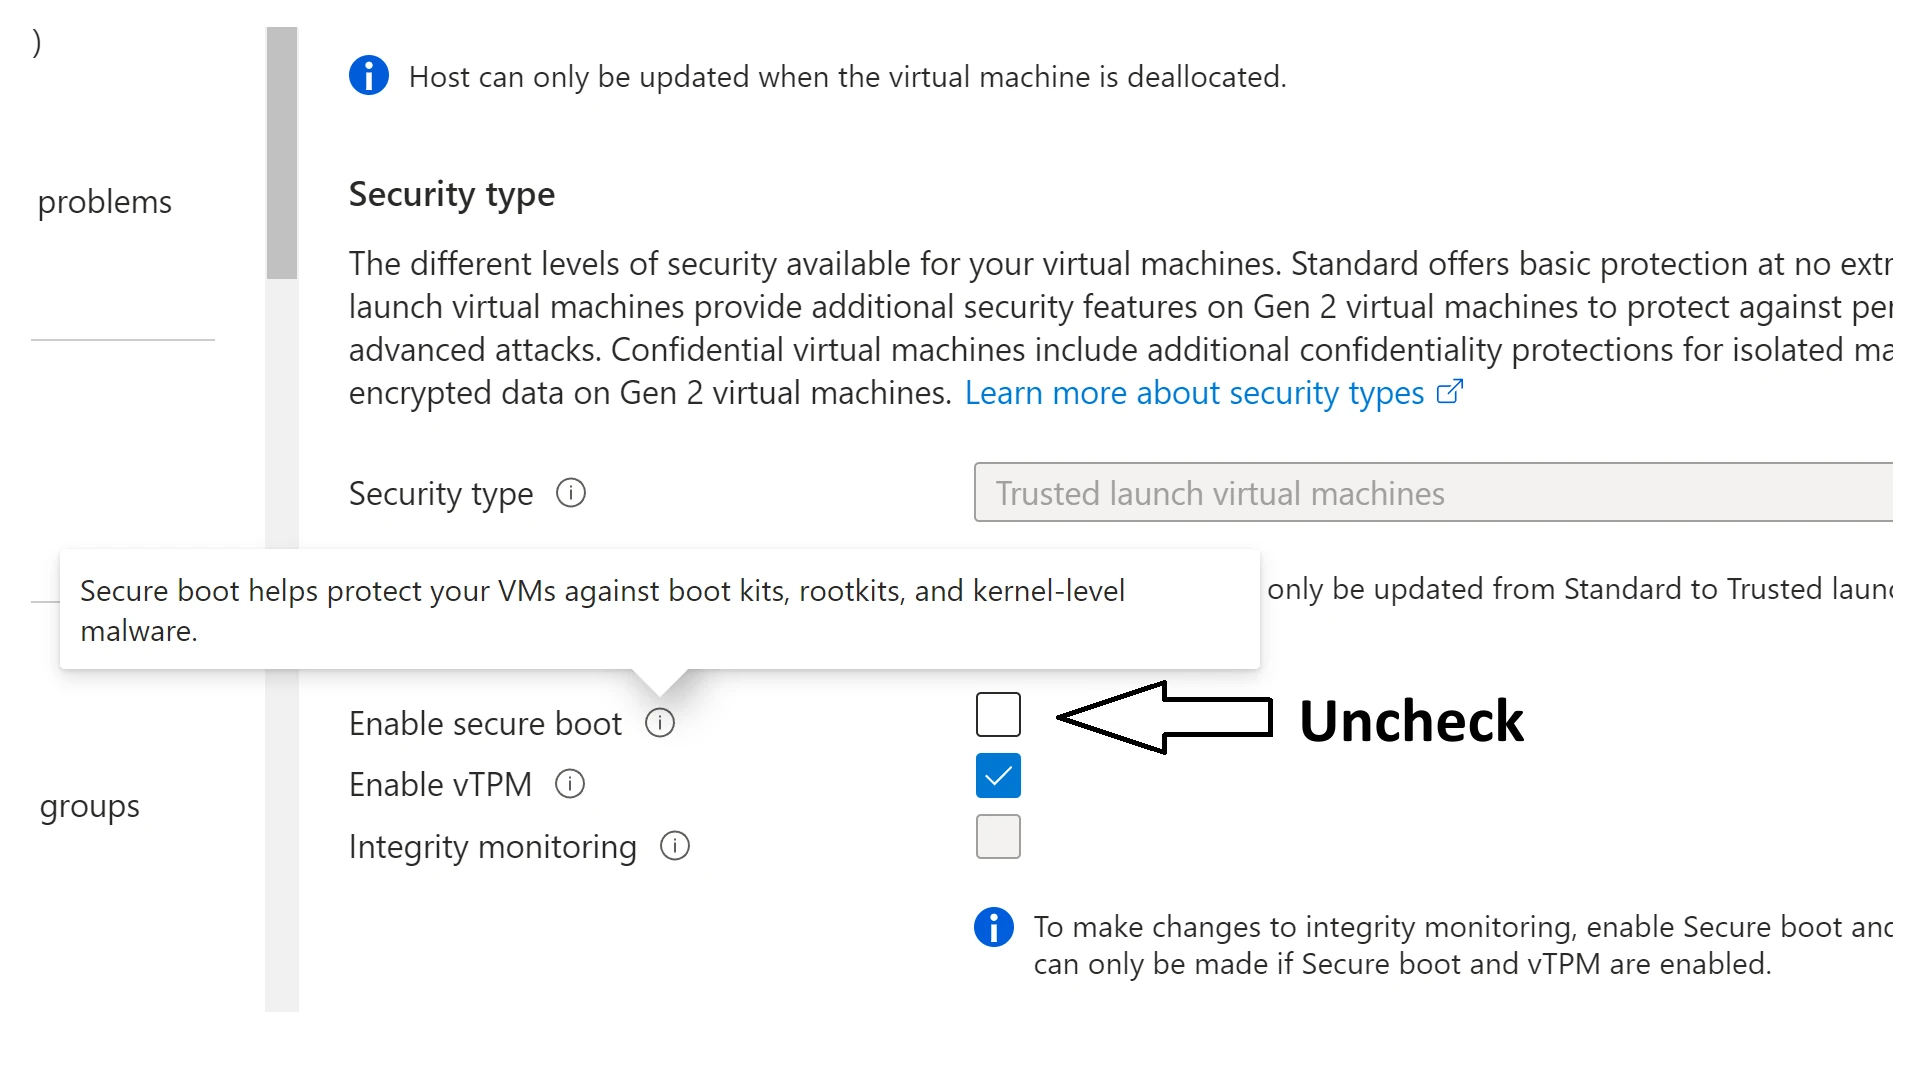
Disabling Secure Boot in Azure for webcam passthrough